How to customize the Jira Service Management Customer Portal?
This post was originally published on May 27, 2019, and has been updated for accuracy on March 29, 2024.
People tend to stick to first impressions. Especially when it comes to Customer Portals and Help Centers where look and feel is crucial. Unfortunately, they usually come across a generic layout. This is your opportunity to stand out! But how to customize the Jira Service Management portal? Don’t worry, we will tell you about it in the present article.
Table of contents
- How to configure the Jira Service Management portal? 10-step checklist.
- Native customization possibilities of Jira Service Management
- 5 best practices that make customizing your Help Center important
- How do I customize my Jira Service Desk portal?
- Customize Jira Service Management templates
- Key takeaway
How to configure the Jira Service Management portal? 10-step checklist.
Jira Service Management portal configuration takes a few steps. We described it in detail in the article about how to set up Jira Service Management. Here you have the checklist of 10 most important things that help you get started:
- Log in to your Jira instance. Remember that to configure it you need Jira Admin permissions.
- Go to Jira Service Management settings in the administration panel.
- Set up request types that your users will be able to submit. Customize them with specific fields and workflows.
- Create request forms. Include relevant fields to gather all necessary information.
- Organize incoming requests into queues based on their type or responsible team.
- Set up SLAs to define response and resolution times for each request type.
- Design the layout of the Customer Portal to match your organization’s branding.
- Add helpful content such as knowledge base, FAQs, and announcements.
- Automate repetitive tasks by creating automation rules.
- Define when and how users and agents receive notifications about their requests.
You’re almost done! Now, it’s time for some extra points. They will help you make sure you’re making the most of your Jira Service Management.
- Test each element to ensure everything functions well. Gather feedback from stakeholders to improve the portal’s usability.
- Train agents and users. Provide documentation to introduce them to the portal’s features.
- Track the performance of the portal. It includes metrics such as response times, resolution rates, and customer satisfaction scores.
- Don’t ignore your observations! Use data to identify areas for improvement.
Native customization possibilities of Jira Service Management
In native Jira service management, you’re able to set up your Customer Portal to match your brand style more. You can add a basic background and a text banner to it. But what if someone wants to make advanced changes to the look and feel? On Data Center, with the 4.2 version of Jira Service Management, you get access to the software’s source code. It allowed for implementing the most advanced in-house modifications. However, this wasn’t exactly what the users needed. Even though you got the chance to make some more adjustments, it’s still necessary to involve developers in the procedure.
5 best practices that make customizing your Help Center important
Customer Portal should match your business needs.
Customization helps tailor the support portal to fit your organization’s unique needs.
Visual consistency makes your brand recognizable.
Incorporating logos, colors, images, and style results in a consistent look and feel. Thanks to this customers are sure they are in the right place to get support.
Transparency helps users find answers.
When a Customer Portal is intuitive, users can find the information they need quickly. If you provide them with the knowledge base, they can solve problems on their own. It reduces the workload for support teams.
Flexible Help Center grows with you.
Flexibility makes it possible to adjust your Help Center as your organization changes.
Engaging Customer Portal provides insights.
Customer Portal offers data on what users are searching for and what’s working best. This can help you improve your Support team efficiency over time.
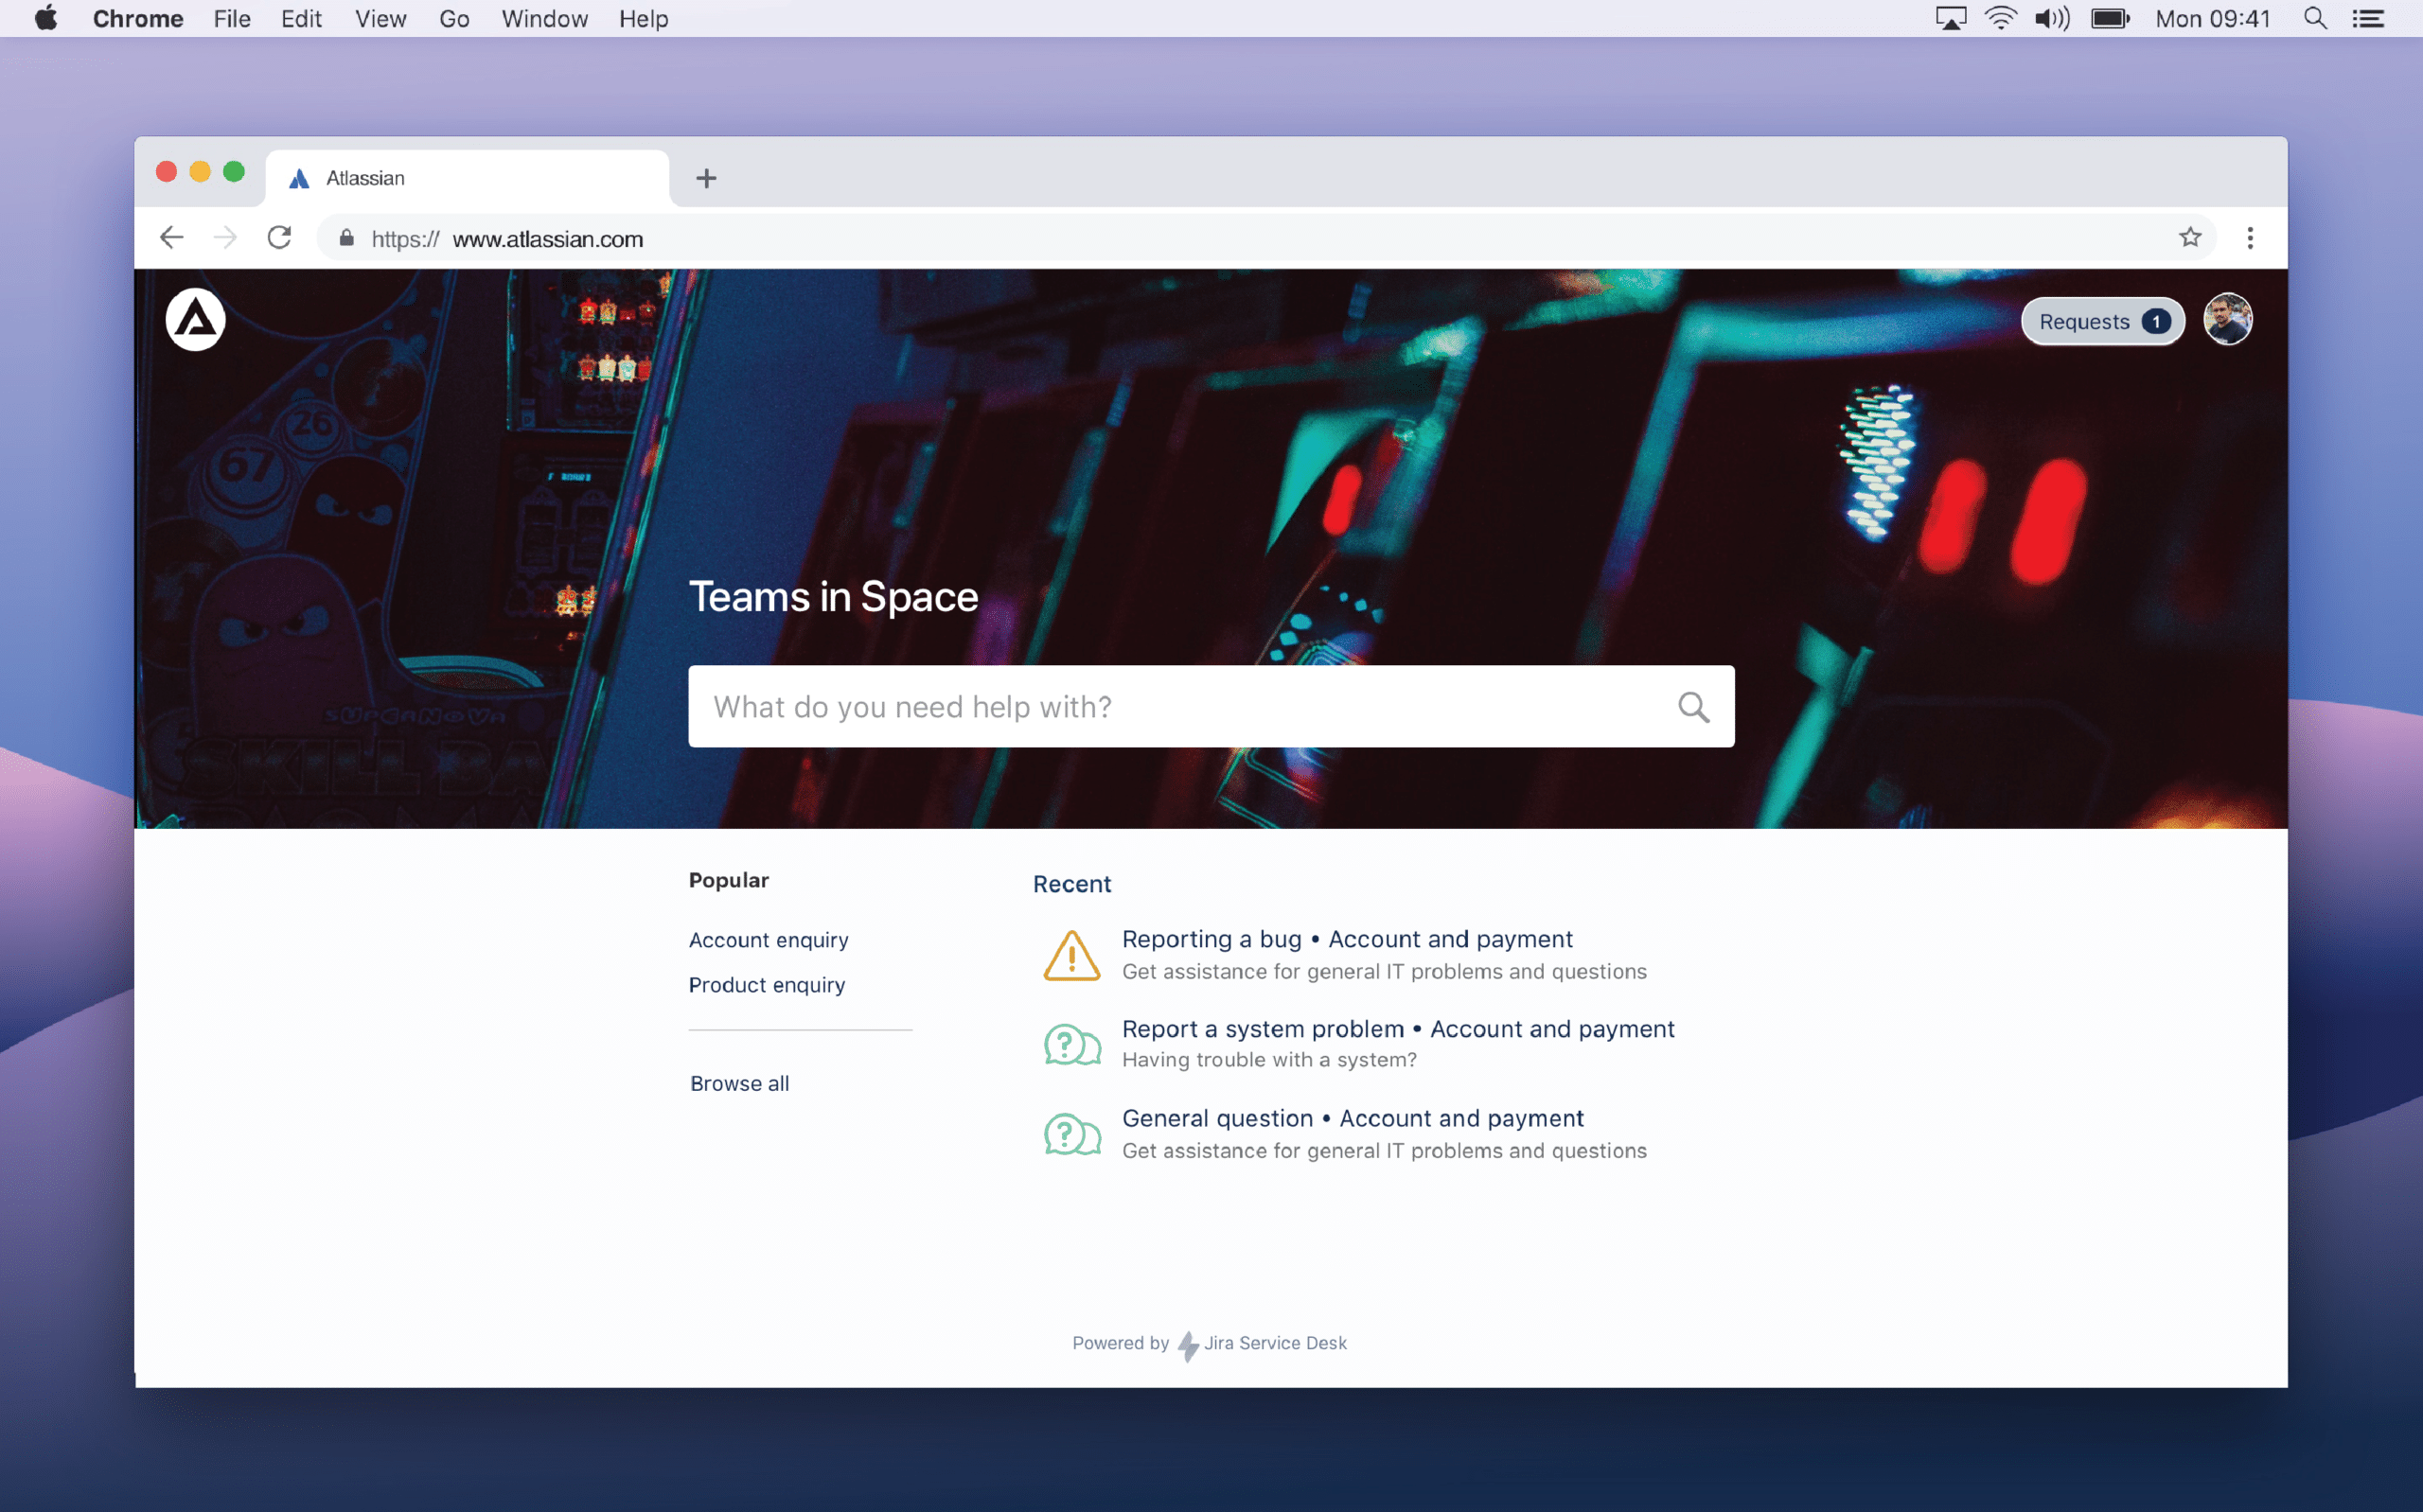
How do I customize my Jira Service Desk portal?
In the native Jira Service Management Customer Portal, you can change the login message and the language. Teams can also add names, logos, and announcements to their service desks. This helps customers make sure they are in the right place.
How do I change the name of a Jira service management portal?
To brand your portal you must be logged in as a Jira Admin. From your service project, navigate to Project settings and then Portal settings. At this point, you can edit the name, introduction text, and logo fields.
Your portal’s header, URL, and button colors are automatically copied from the main help center.
How do I change the logo in Jira Service Desk?
Keep in mind that the picture for your project called the project avatar, isn’t the same as the logo for your portal. The project avatar appears within your service project for your team. On the other hand, the portal logo shows up in your customer-facing help center and portal. You’ll need to set them up separately.
You set up the logo in the same Portal settings as the name. To change the avatar, go to the Project settings and then navigate to Details. Next, pick the new avatar in the proper field. You can select one from the default icons or upload your image.
How do I add a custom field in Jira Service Management?
You might need to add new custom fields to collect more details from your customers. It can be a field for their number, the request purpose, or location. Everything that could assist your agents in resolving an issue. Here’s an instruction on how to add custom fields on Cloud hosting:
- Go to Settings and then Issues.
- Choose the Custom field from the navigation bar on the left.
- Click on the Create custom field.
- Select All, and choose a custom field type. Then click Next.
- Submit a name and description of your new field.
- Click Create.
After you’re done, take a look at the box next to your project key. Pick screens where you want your new custom field to appear.
In the Atlassian documentation, you can find an explanation of how to update custom fields in the Data Center.
Customize Jira Service Management templates
You still can get a more advanced setup without digging into JSM’s source code. The apps on the Atlassian Marketplace extend the native design customization options. One of them is Theme Extension for Jira Service Management. The plugin enables us to change several UI elements on the Customer Portal.
How do I change the layout of my Jira service desk?
To customize Jira Help Center design with Theme Extension you don’t need any technical skills. The plugin is available on Cloud and Data Center. The features differ between the two hostings. First, let’s see what we can do on Cloud when it comes to customizing help center design.
Theme Extension for Jira Service Management Cloud
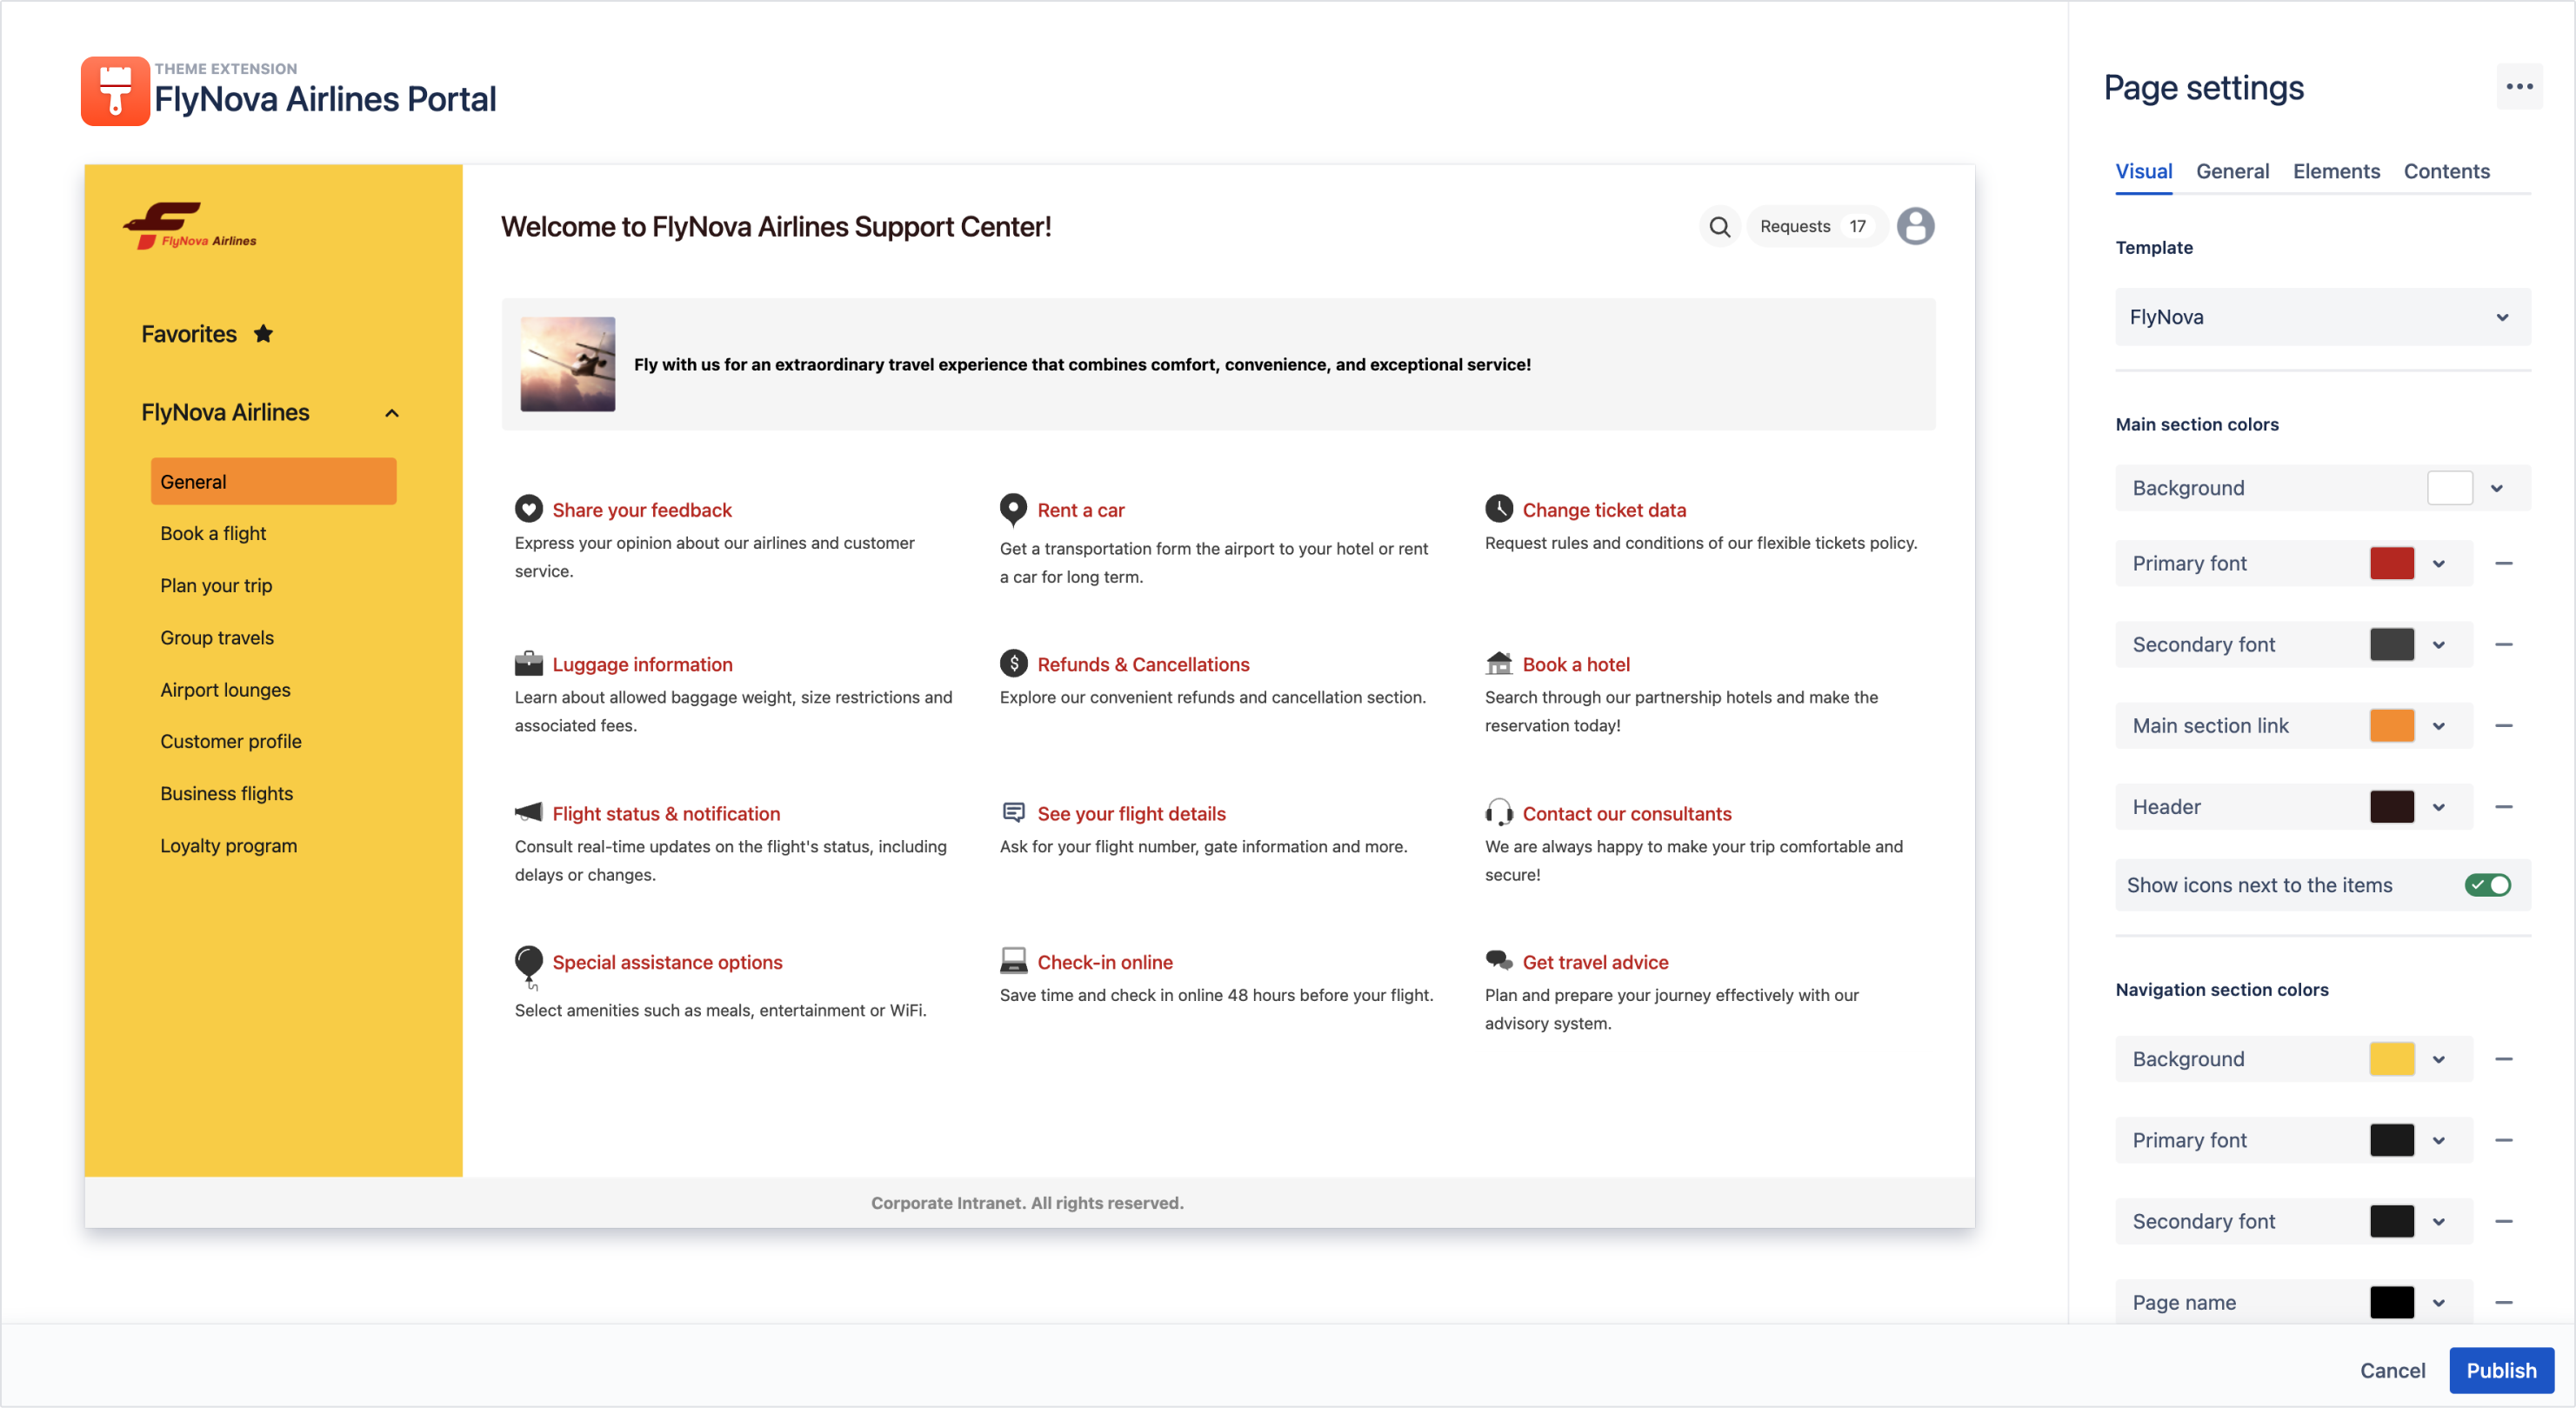
Pages
In Theme Extension, Pages replace a traditional Customer Portal experience. They allow you to have a customizable space for each project you manage. Even if there are multiple at once.
Using Pages you can edit:
- Visual – allows you to change the current template and choose the colors, fonts, and headers for the two main sections.
- General – here you can change the Page name for your customers.
- Elements – in this section there are six configurable elements: logo/home link, top menu links, searcher, header, announcement banner, and footer.
- Contents – this is the place where you add projects that will be displayed in the Navigation section later on.
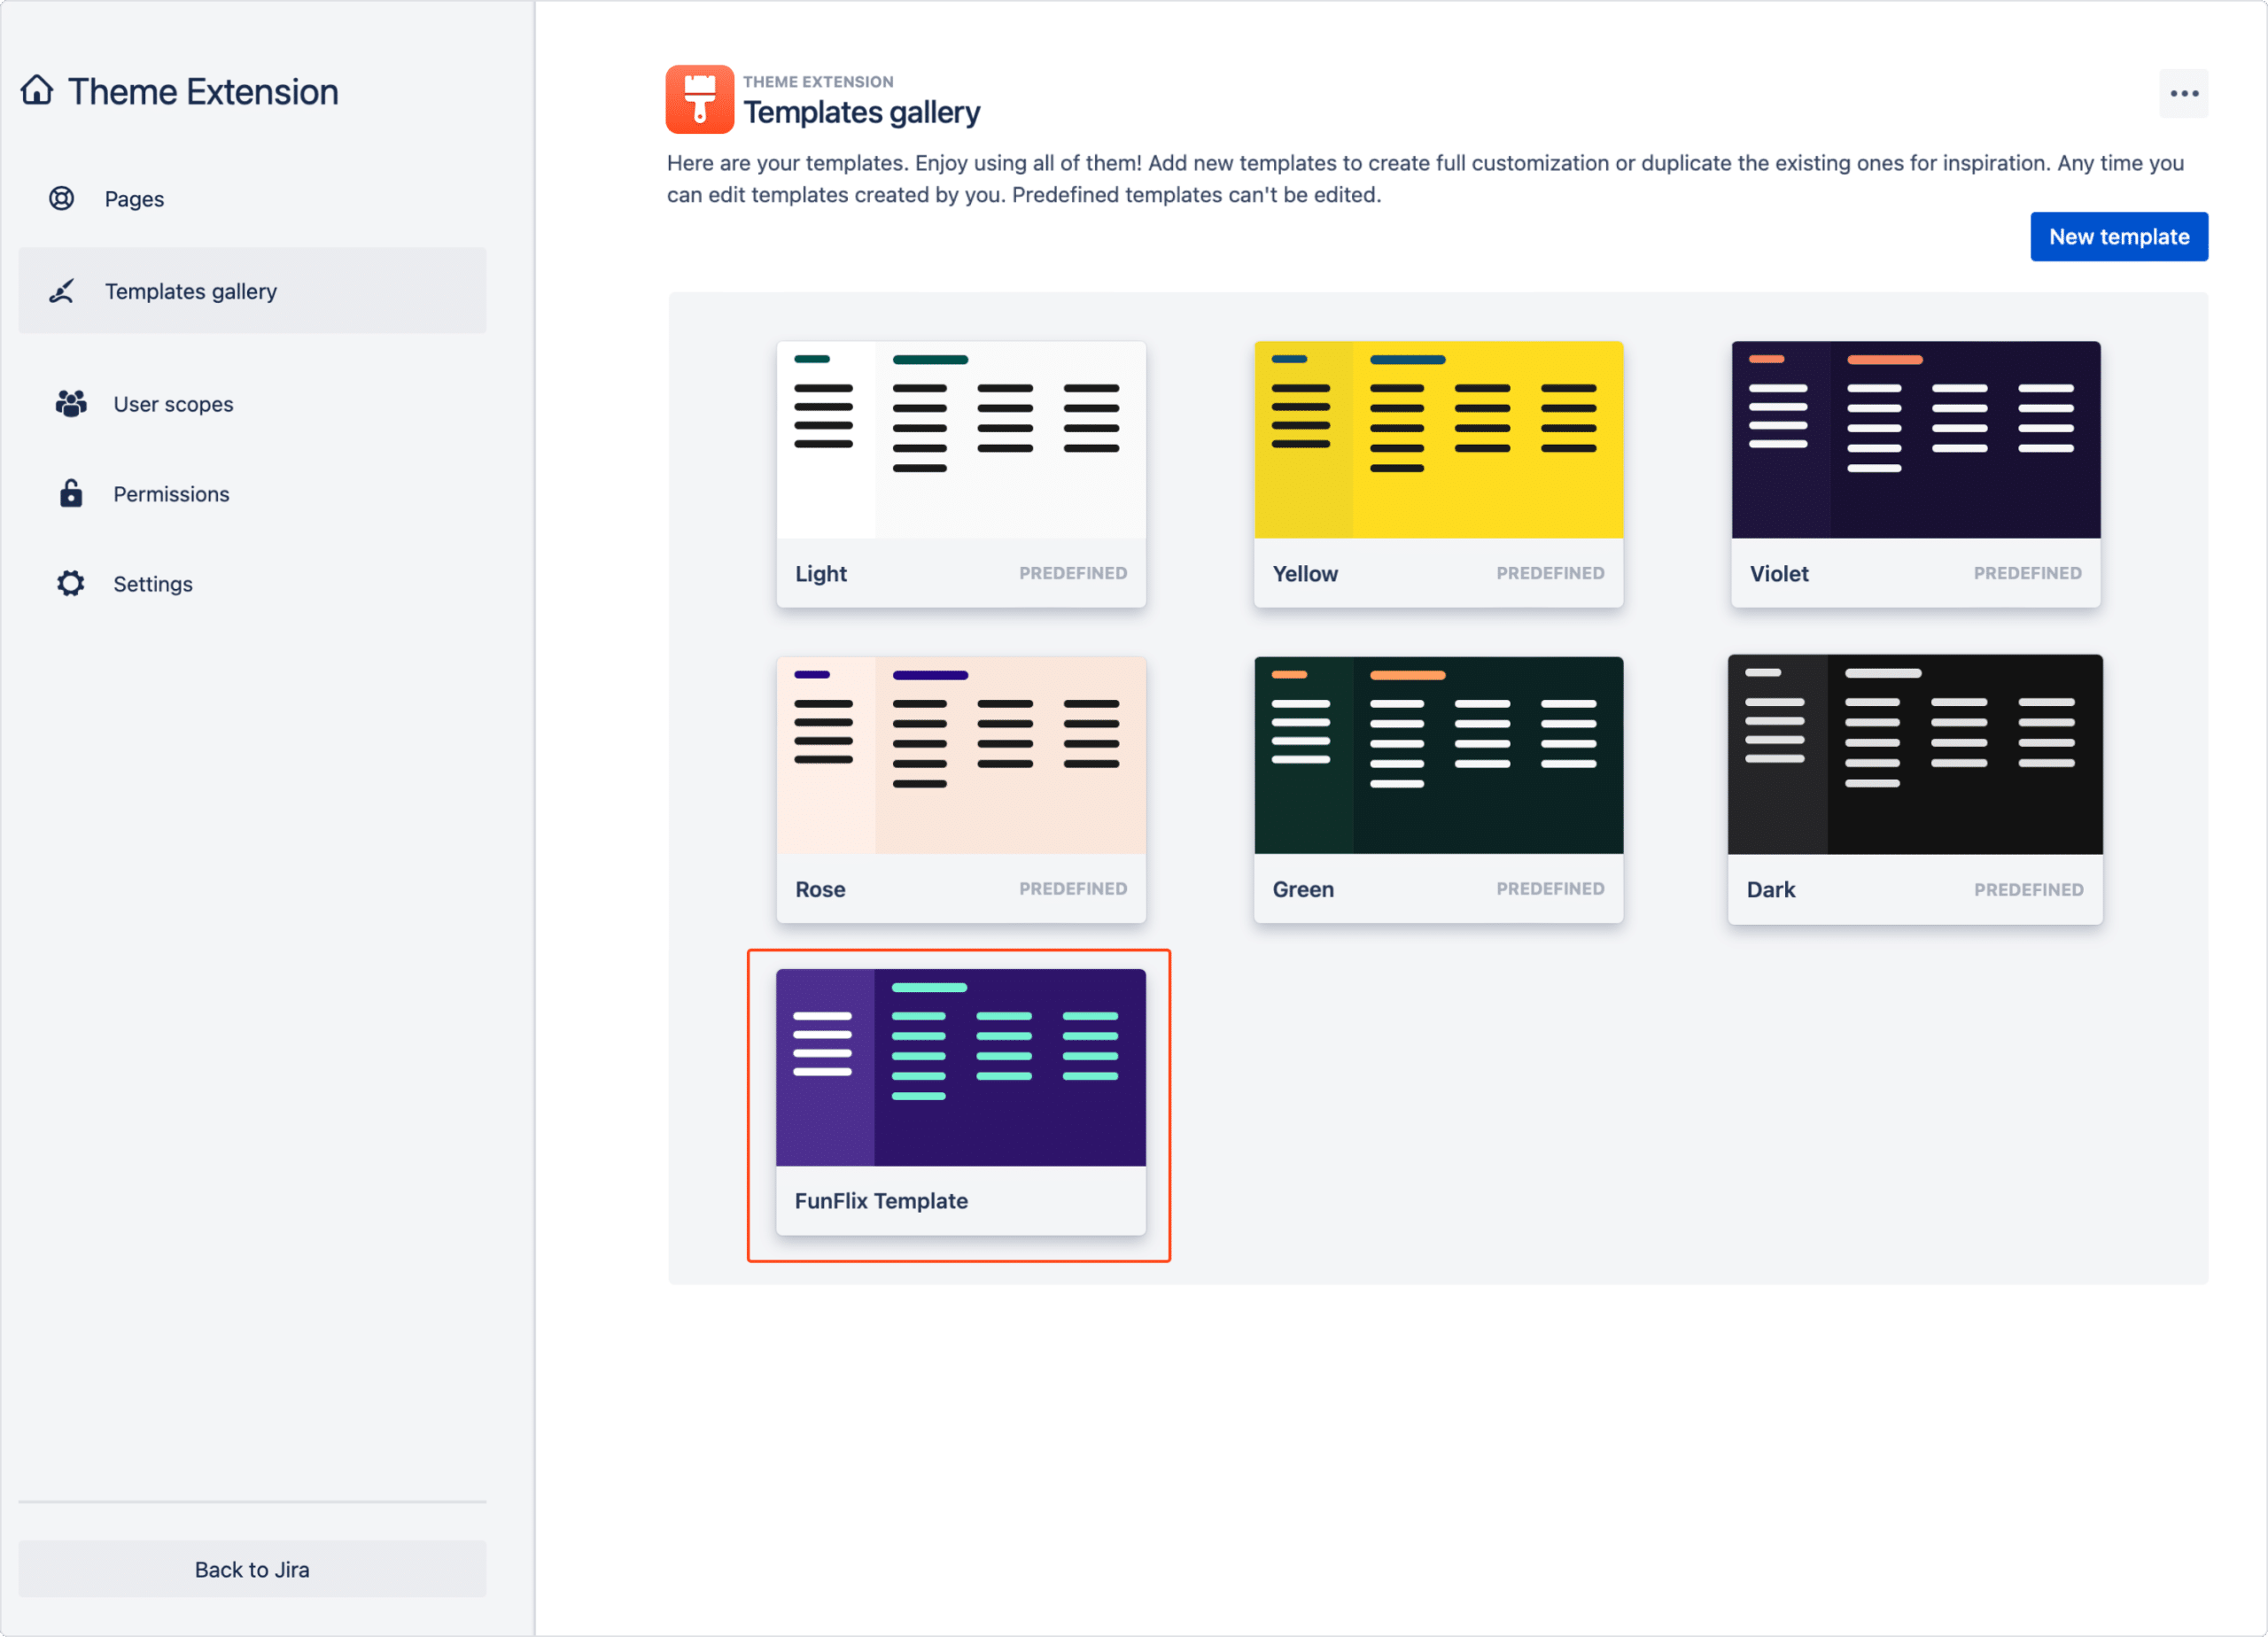
Customer Portal Templates
In Templates Gallery, you can use the premade Customer Portal templates, and configure them to match your needs. You can also create your own.
Predefined templates include:
- Light
- Yellow
- Violet
- Rose
- Green
- Dark
Theme Extension for Jira Service Management Data Center
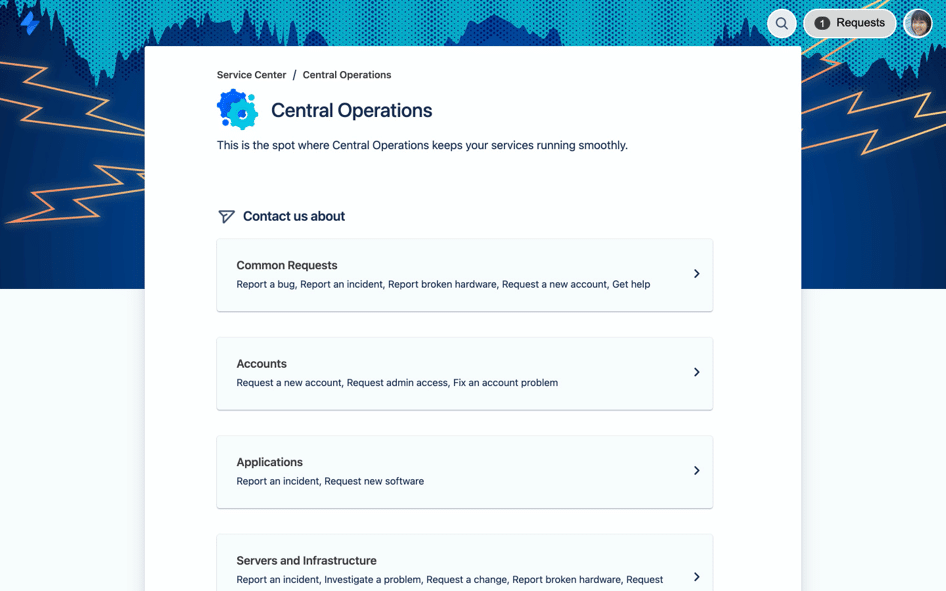
If you use Data Center hosting, you get to choose between Cards and List themes for your Customer Portal. The best news is you can set up each one of them in no more than 4 easy steps.
Cards theme
Theme Extension for Jira Service Management enables you to edit the Customer Portal by adding the Cards theme to the default Jira Service Management setup. To make some changes in the UI design of the portal, you need to go to the Project Settings of the selected Service Management project. From there, you:
- Go to Theme Extension Configuration and select Cards theme.
- Apply one of the ready-made theme styles or create a new one.
- On the live preview, click on both the top and bottom background, welcome text, search and navigation bar, and one of the cards to edit these elements. You can also choose a footer or an Announcement banner.
- Change the default card style by clicking the icon on the left, under the request types group view, and choose one out of the six styles. You can also customize each card separately by clicking on them and changing the background and font colors. To change the size of the cards, use the slider on the right.
You can also create custom cards with company details, invitations for an event, links to external documentation, or social media channels. This is the only place where you need to use a few lines of HTML code. Once you’re all set and done, save your theme and publish it.
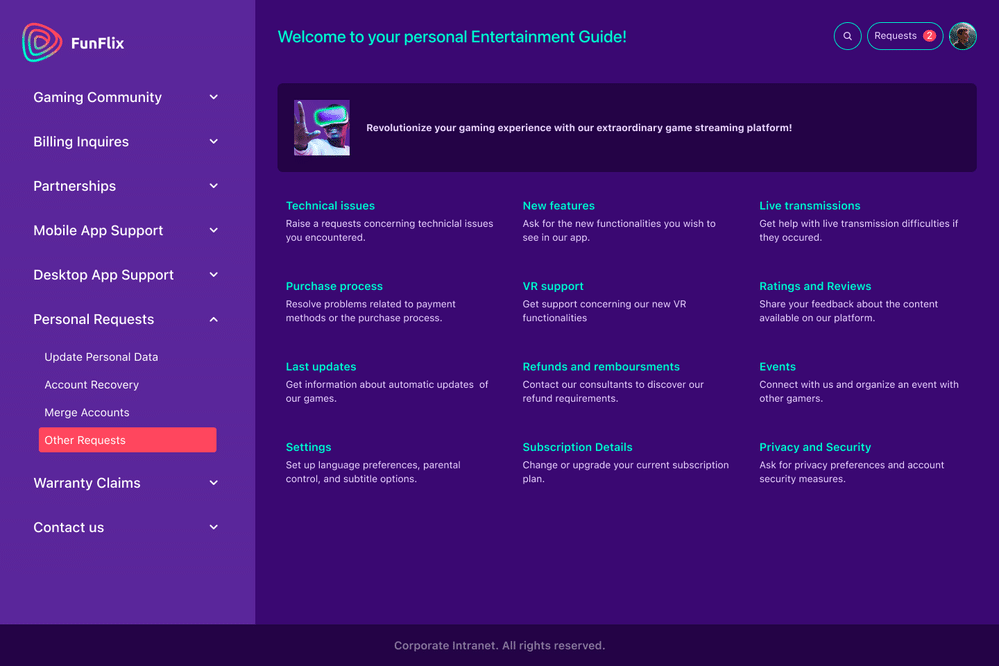
List Theme
Cards are not the only option to personalize your Help Center. Theme Extension for Jira Service Management enables you to add List Theme and customize them in different ways.
To edit a List Theme, open the theme editor and follow these steps:
- Choose one of the ready-made themes or create a new one.
- In the case of the new theme, choose from 1 up to 3 colors.
- Additionally, you can add a footer and an Announcement banner.
- Click Publish and enjoy your new List Theme.
Key takeaway
Jira Service Management has some native customization options but they’re limited. Modern businesses usually need more flexibility. This is why, apps like Theme Extension for Jira Service Management allow you to aim higher. Thanks to plugins, you can transform your company’s Customer Portal. You can get a unique Help Center that reflects your brand visual identity. There’s no doubt an intuitive user interface changes how people interact with the platform. It becomes truly helpful, not just functional enough. Thanks to this, a company gains trust and brand recognition among its clients.
FAQ
-
How to do customization in Jira?
Here’s a general guide on how to customize Jira:
- Log in to Jira with an account that has administrative access.
- In Jira, customization options are usually found in the “Settings” or “Administration” section. This might be accessible through the gear icon or directly from the sidebar. It depends on your Jira version.
- If you want to customize settings for a specific project, find its settings section.
You can configure issue types, workflows, permissions, screens, etc. Some common customizations include:
- Issue Types: Define different types of issues based on your project needs. For example, you might have “Bug,” “Task,” “Feature,” etc.
- Workflows: Create or modify workflows to define the lifecycle of an issue. Workflows mark the status an issue can have and the transitions between them.
- Fields: Add or customize fields to capture relevant information about your issues. You can create custom fields to track specific information unique to your project.
- Permissions: Manage who can perform certain actions within the project.
- User Management: Manage user accounts, groups, and permissions.
- System Configuration: Configure general settings such as email notifications, time zones, and design.
- Apps: Atlassian Marketplace offers a choice of plugins that can extend Jira functionality.
-
How do I edit a Jira Service Desk form?
First, log in to Jira and find the Service Desk project you want to edit. Then, locate the specific request type. Navigate to the form configuration settings for that request type. Customize the form by adding, removing, or rearranging fields as needed. Remember to save your modifications. Next, verify that the form works correctly by testing it or using the preview feature. Once you’re satisfied, make your changes live for users.