Displaying Azure AD data in a custom field
Learn more about displaying and updating Azure AD attributes
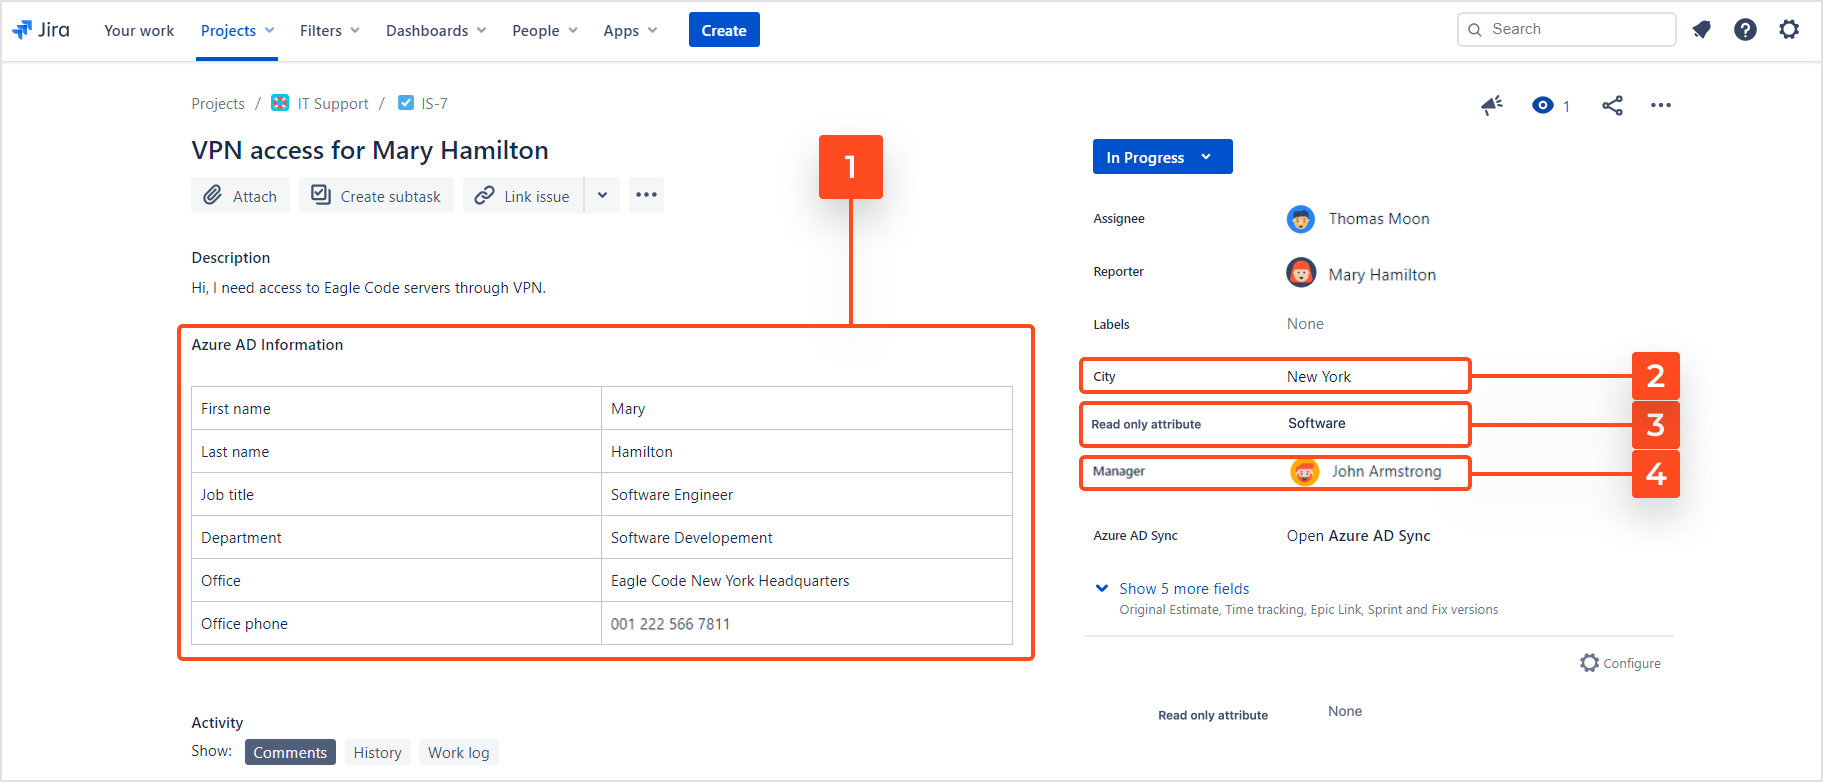
Azure AD Attributes Sync displays user Azure AD data in several formats, depending on your synchronization settings. Here is what they look like in the issue view (scroll down to read the descriptions):

- Text Field (multi-line) generates a table with all mapped Azure AD attributes. We recommend it for displaying multiple attributes in one data set.
- Text Field (single-line) displays the data in a one-line field where different attributes are divided with semicolons. We recommend it only for displaying single attributes.
- Text Field (read only) displays the data that won’t be editable manually.
- User Picker (single user) displays the line manager of the issue assignee or reporter, depending on your configuration. You can also set it up as a classic User Picker (single user) that lets you choose whose data to display.
In order to display the data in a proper table you need to change the field’s format to Wiki Style Renderer. Here is a short guide on how to change it:
- Navigate to the global Settings > Issues > Field configurations.
- Select the text field and go to Renderers.
- Select the Wiki Style Renderer from the list and click Update.
Remember to always add the custom field to both the Create issue and the Edit issue screen. Otherwise, the synchronization won’t work.
Manage data updates
The data from Azure AD is getting synchronized after following events:
- Issue Creation - every newly created issue contains the latest Azure AD information
- Issue Update - in order to update an existing issue, change the value of any field within it, like summary, description, and other fields.
- Status change - by setting up the post function in your project’s workflow you can define upon which status change the data should be synchronized. Learn more about it in the next chapter, Updating Azure AD data in the workflow.
Refresh the browser session to make sure that the synchronization took place.
Not every change made to an issue results in Azure AD synchronization. For example, there will be no data updates after adding comments or attachments. Only changing values of the fields triggers an update.
If you can’t find the answer you need in our documentation, raise a support request.