Mapping Azure AD data to a custom field
Learn how to configure a custom field in order to display information from Azure AD
Remember to always add the custom field to both the Create issue and the Edit issue screen. Otherwise, the synchronization won’t work.
Start mapping
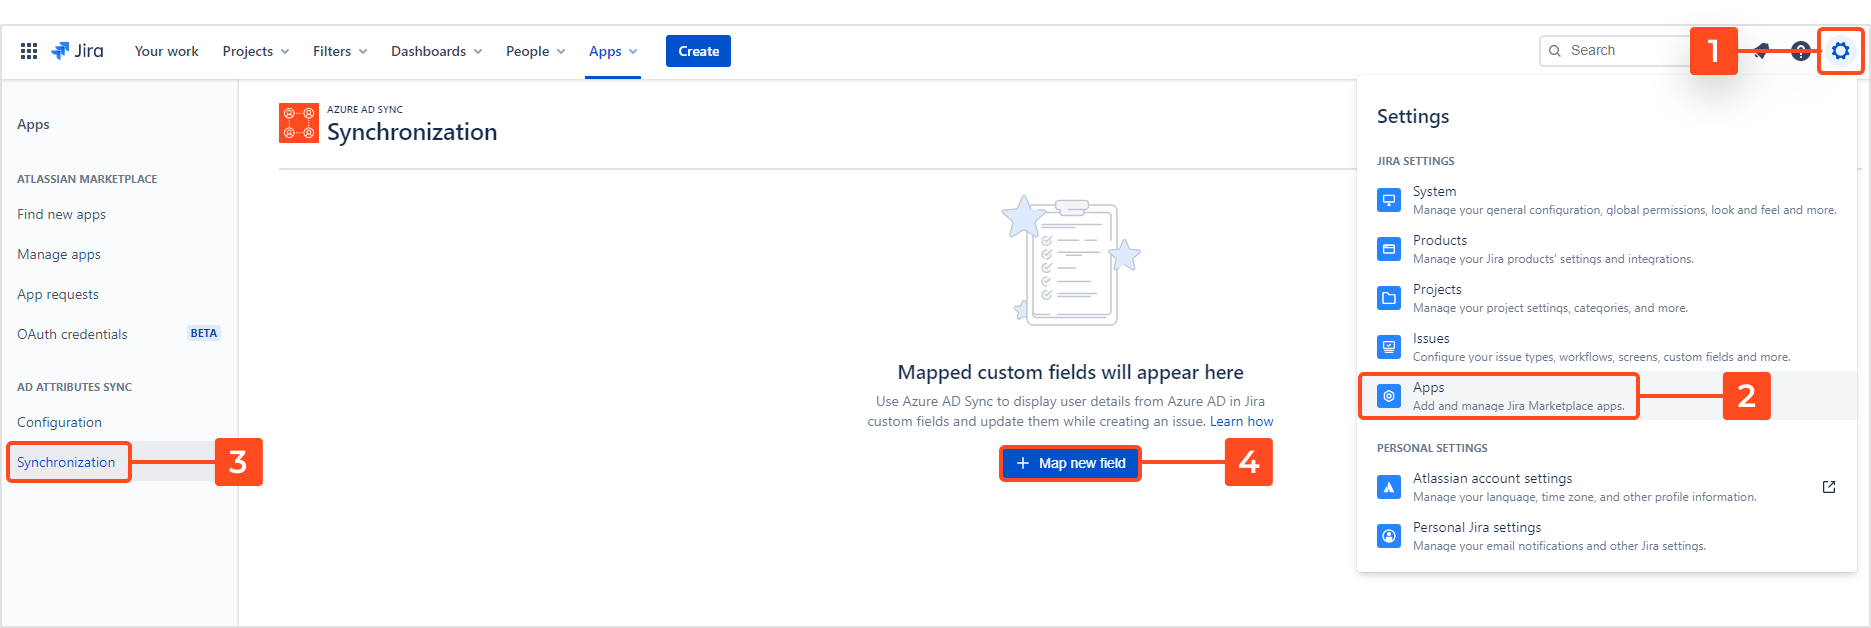
Here is how to start mapping a custom field:
Steps
- Open the global Settings from the top right menu.
- Select Apps from the drop down list.
- Select Synchronization from the left hand side menu.
- Click Map new field.
Result
You will be brought to a configuration screen where you can choose the custom field type, select Azure AD attributes to be mapped, and decide whose data should be displayed.
Select field
First drop down lets you choose a custom field to be used for displaying Azure AD information. You can either select an existing custom field or create a new one.
Use an existing custom field
Existing custom fields of the types listed below will work with Azure AD Sync:
- Text Field (multi-line)
- Text Field (single-line)
- Text Field (read-only)
- User Picker (single user)
Steps
To choose an existing custom field:
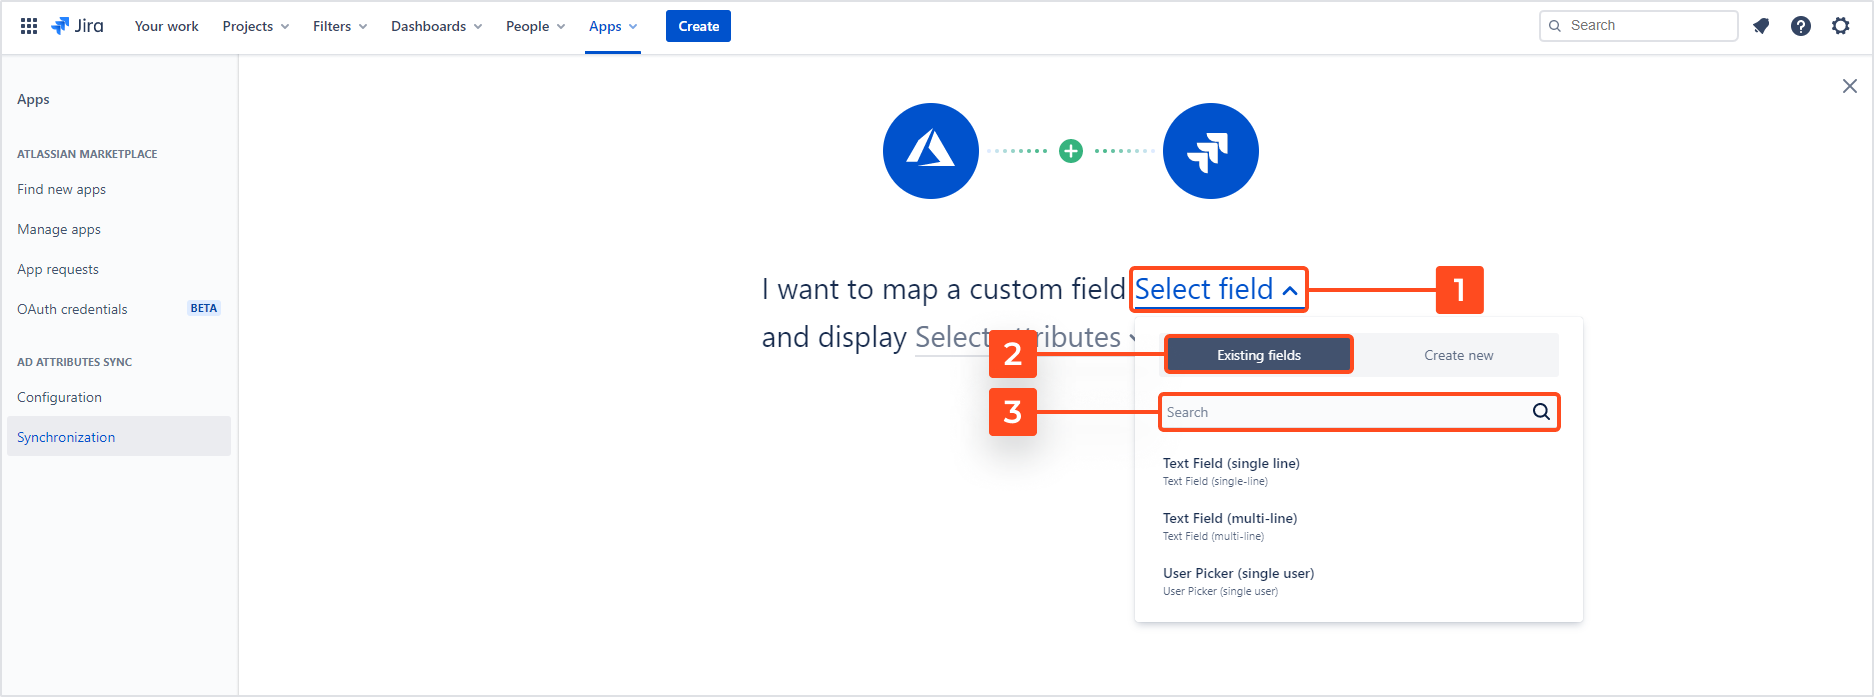
- Expand the Select field options.
- Select the first tab Existing fields.
- Search for the custom field you’d like to use.
Clicking on the selected custom field will save your choice.
Create a new field
You can create a new custom field directly from the mapping screen.
Steps
To create a new custom field:
-
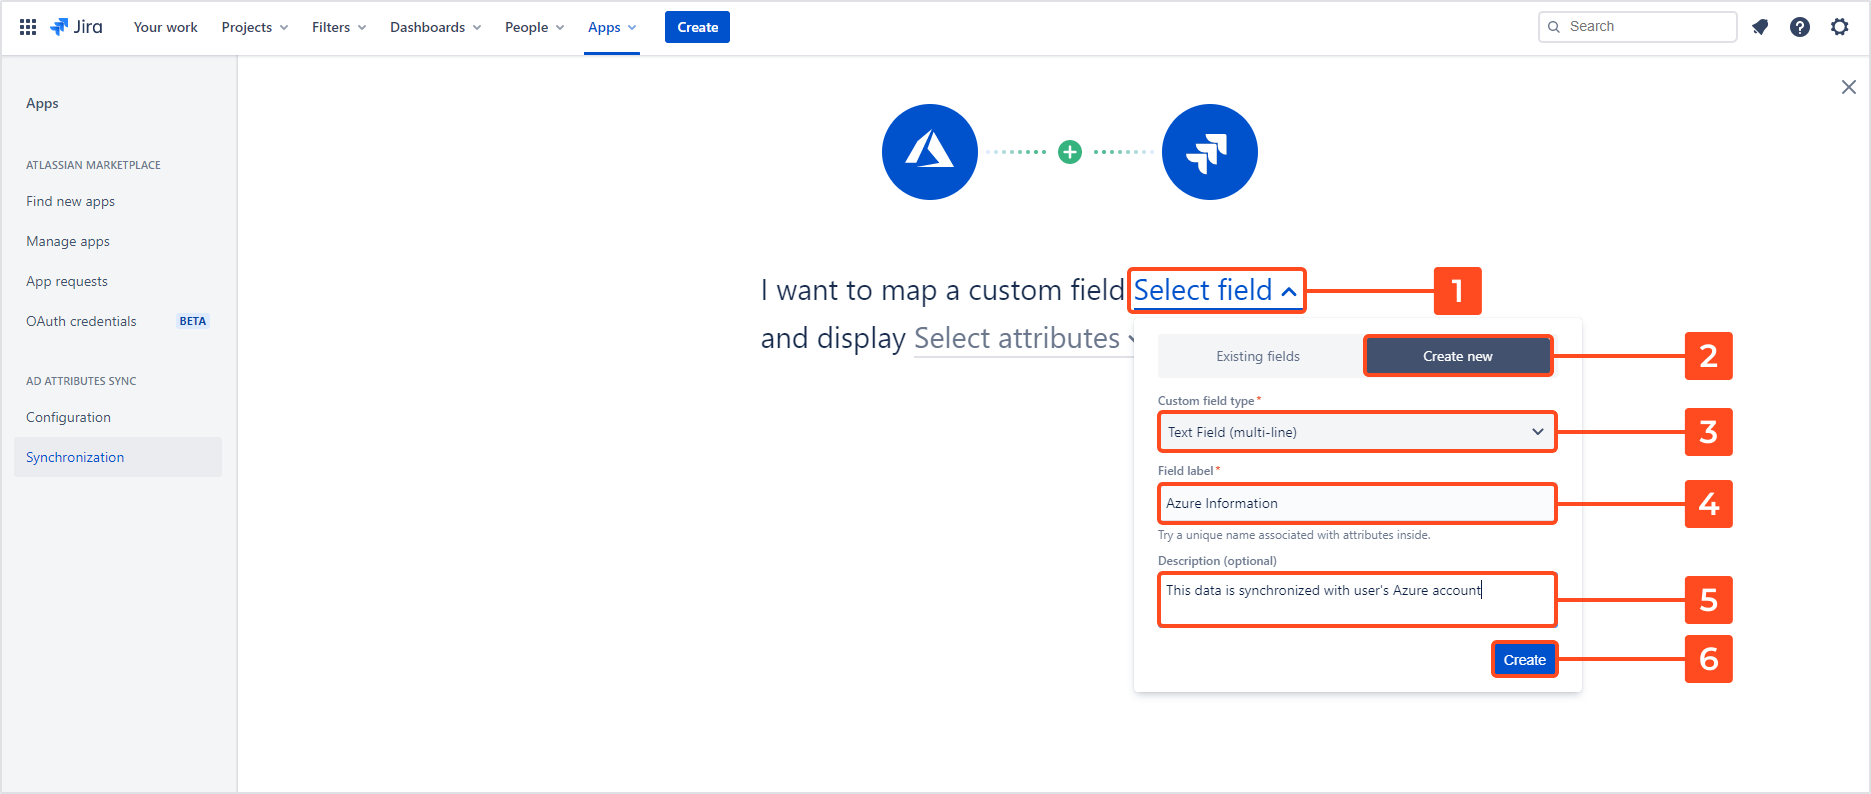
Expand the Select field options.
-
Go to the second tab Create new.
-
Select the Custom field type. There are four types available:
- Text Field (multi-line)
- Text Field (single-line)
- Text Field (read-only)
- User Picker (single user)
-
Give the custom field a name under the Field label.
-
Add a description (optional).
-
Click Create.
Select attributes
In the next step you can choose the Azure AD attributes that should be displayed in the custom field. You may select as many as you need.
If you’d like to display many attributes in one field, we recommend Text Field (multi-line) fields, since they offer a possibility to render the data into an easy-to-read table.
Text Field (single-line) displays the data in one long line and separates different attributes with semicolons. This is why we only recommend this field type for displaying single attributes.
Learn more about Displaying Azure AD data in a custom field in the next chapter.
Steps
To select Azure AD attributes:
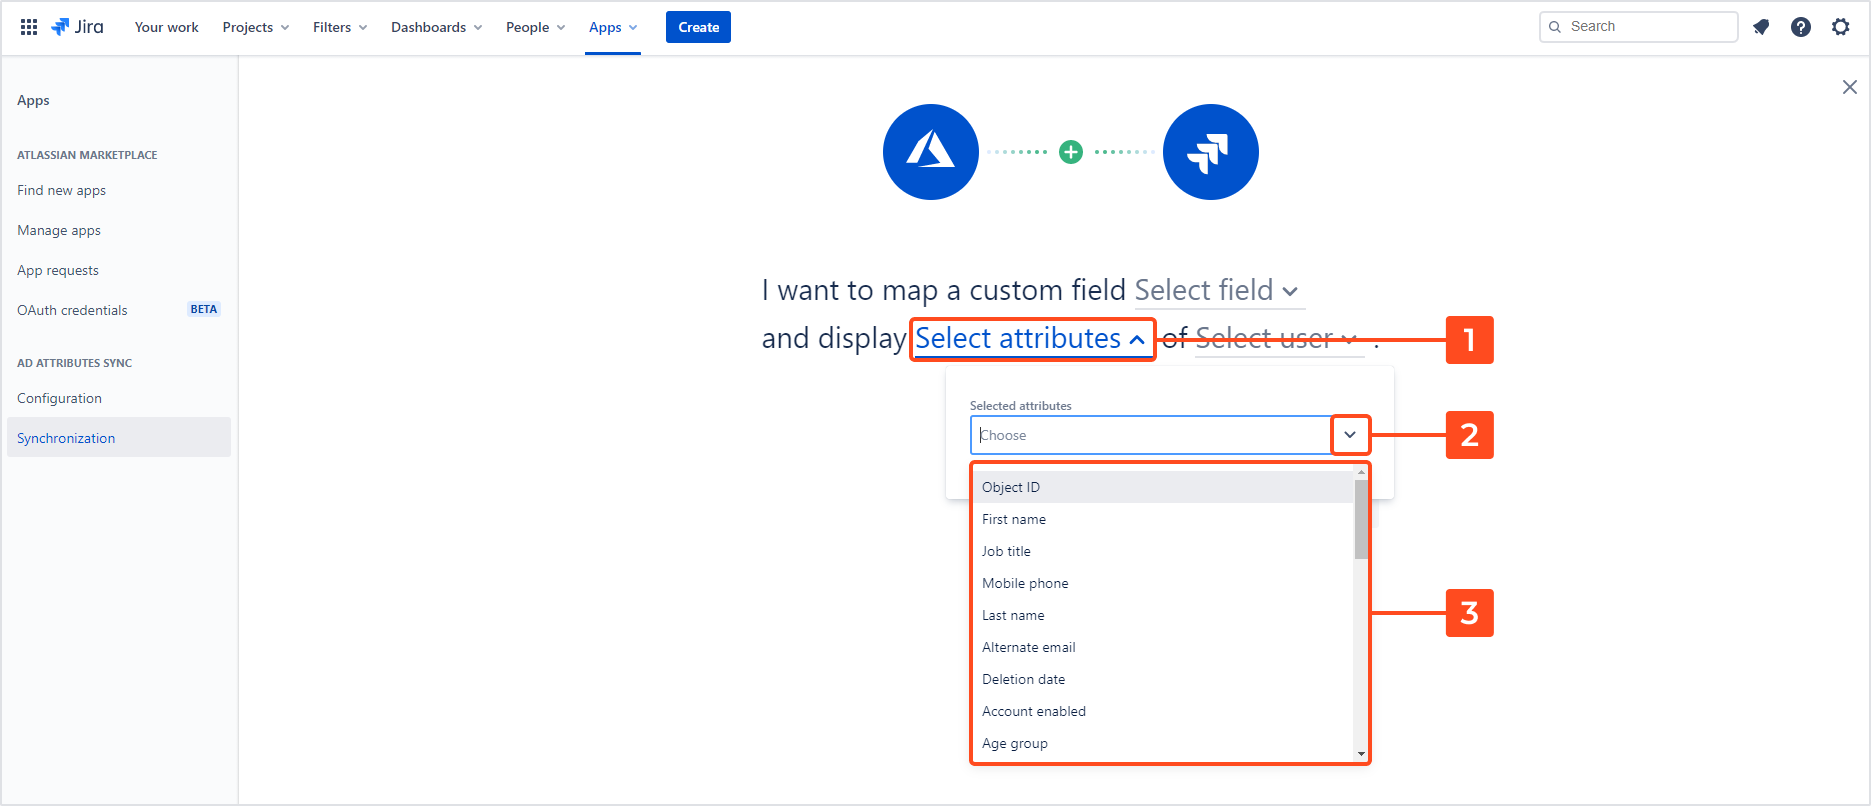
- Click Select attributes.
- Click on the arrow to expand the drop-down list.
- Select the attributes to be displayed in the custom field.
The Manager attribute will only work with custom fields of the User Picker (single user) type.
Select user
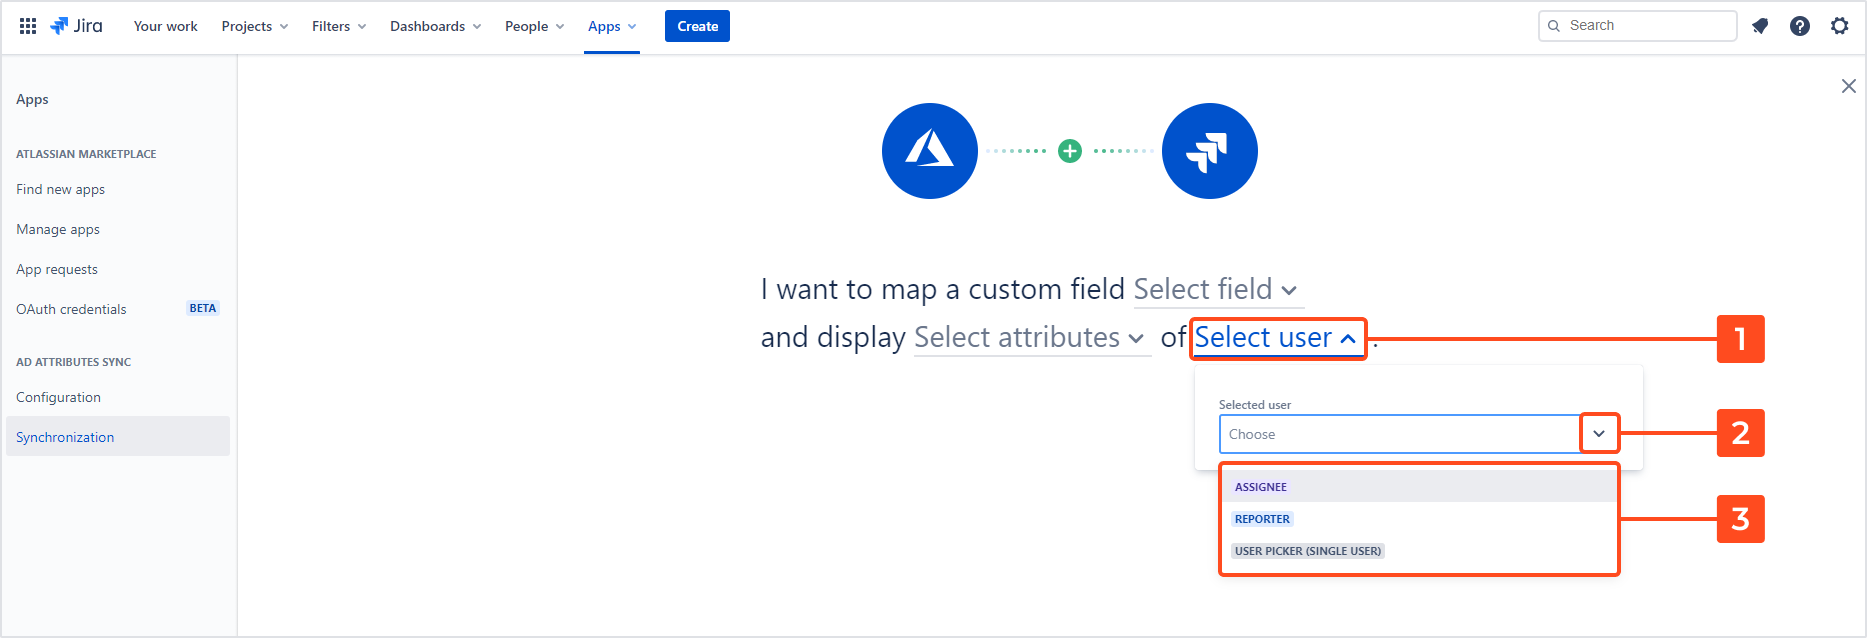
In the last configuration step you can choose whose data will be displayed in the issue. For one custom field you can only choose one user.
Steps
To select user whose attributes will be displayed in the custom field:
- Click Select user.
- Click on the arrow to expand the drop-down list.
- Select one of those three options:
- Assignee
- Reporter
- User Picker (single user)
Remember to save the settings:

If you can’t find the answer you need in our documentation, raise a support request.