Matching users
Learn how to match users between Jira and Azure Active Directory
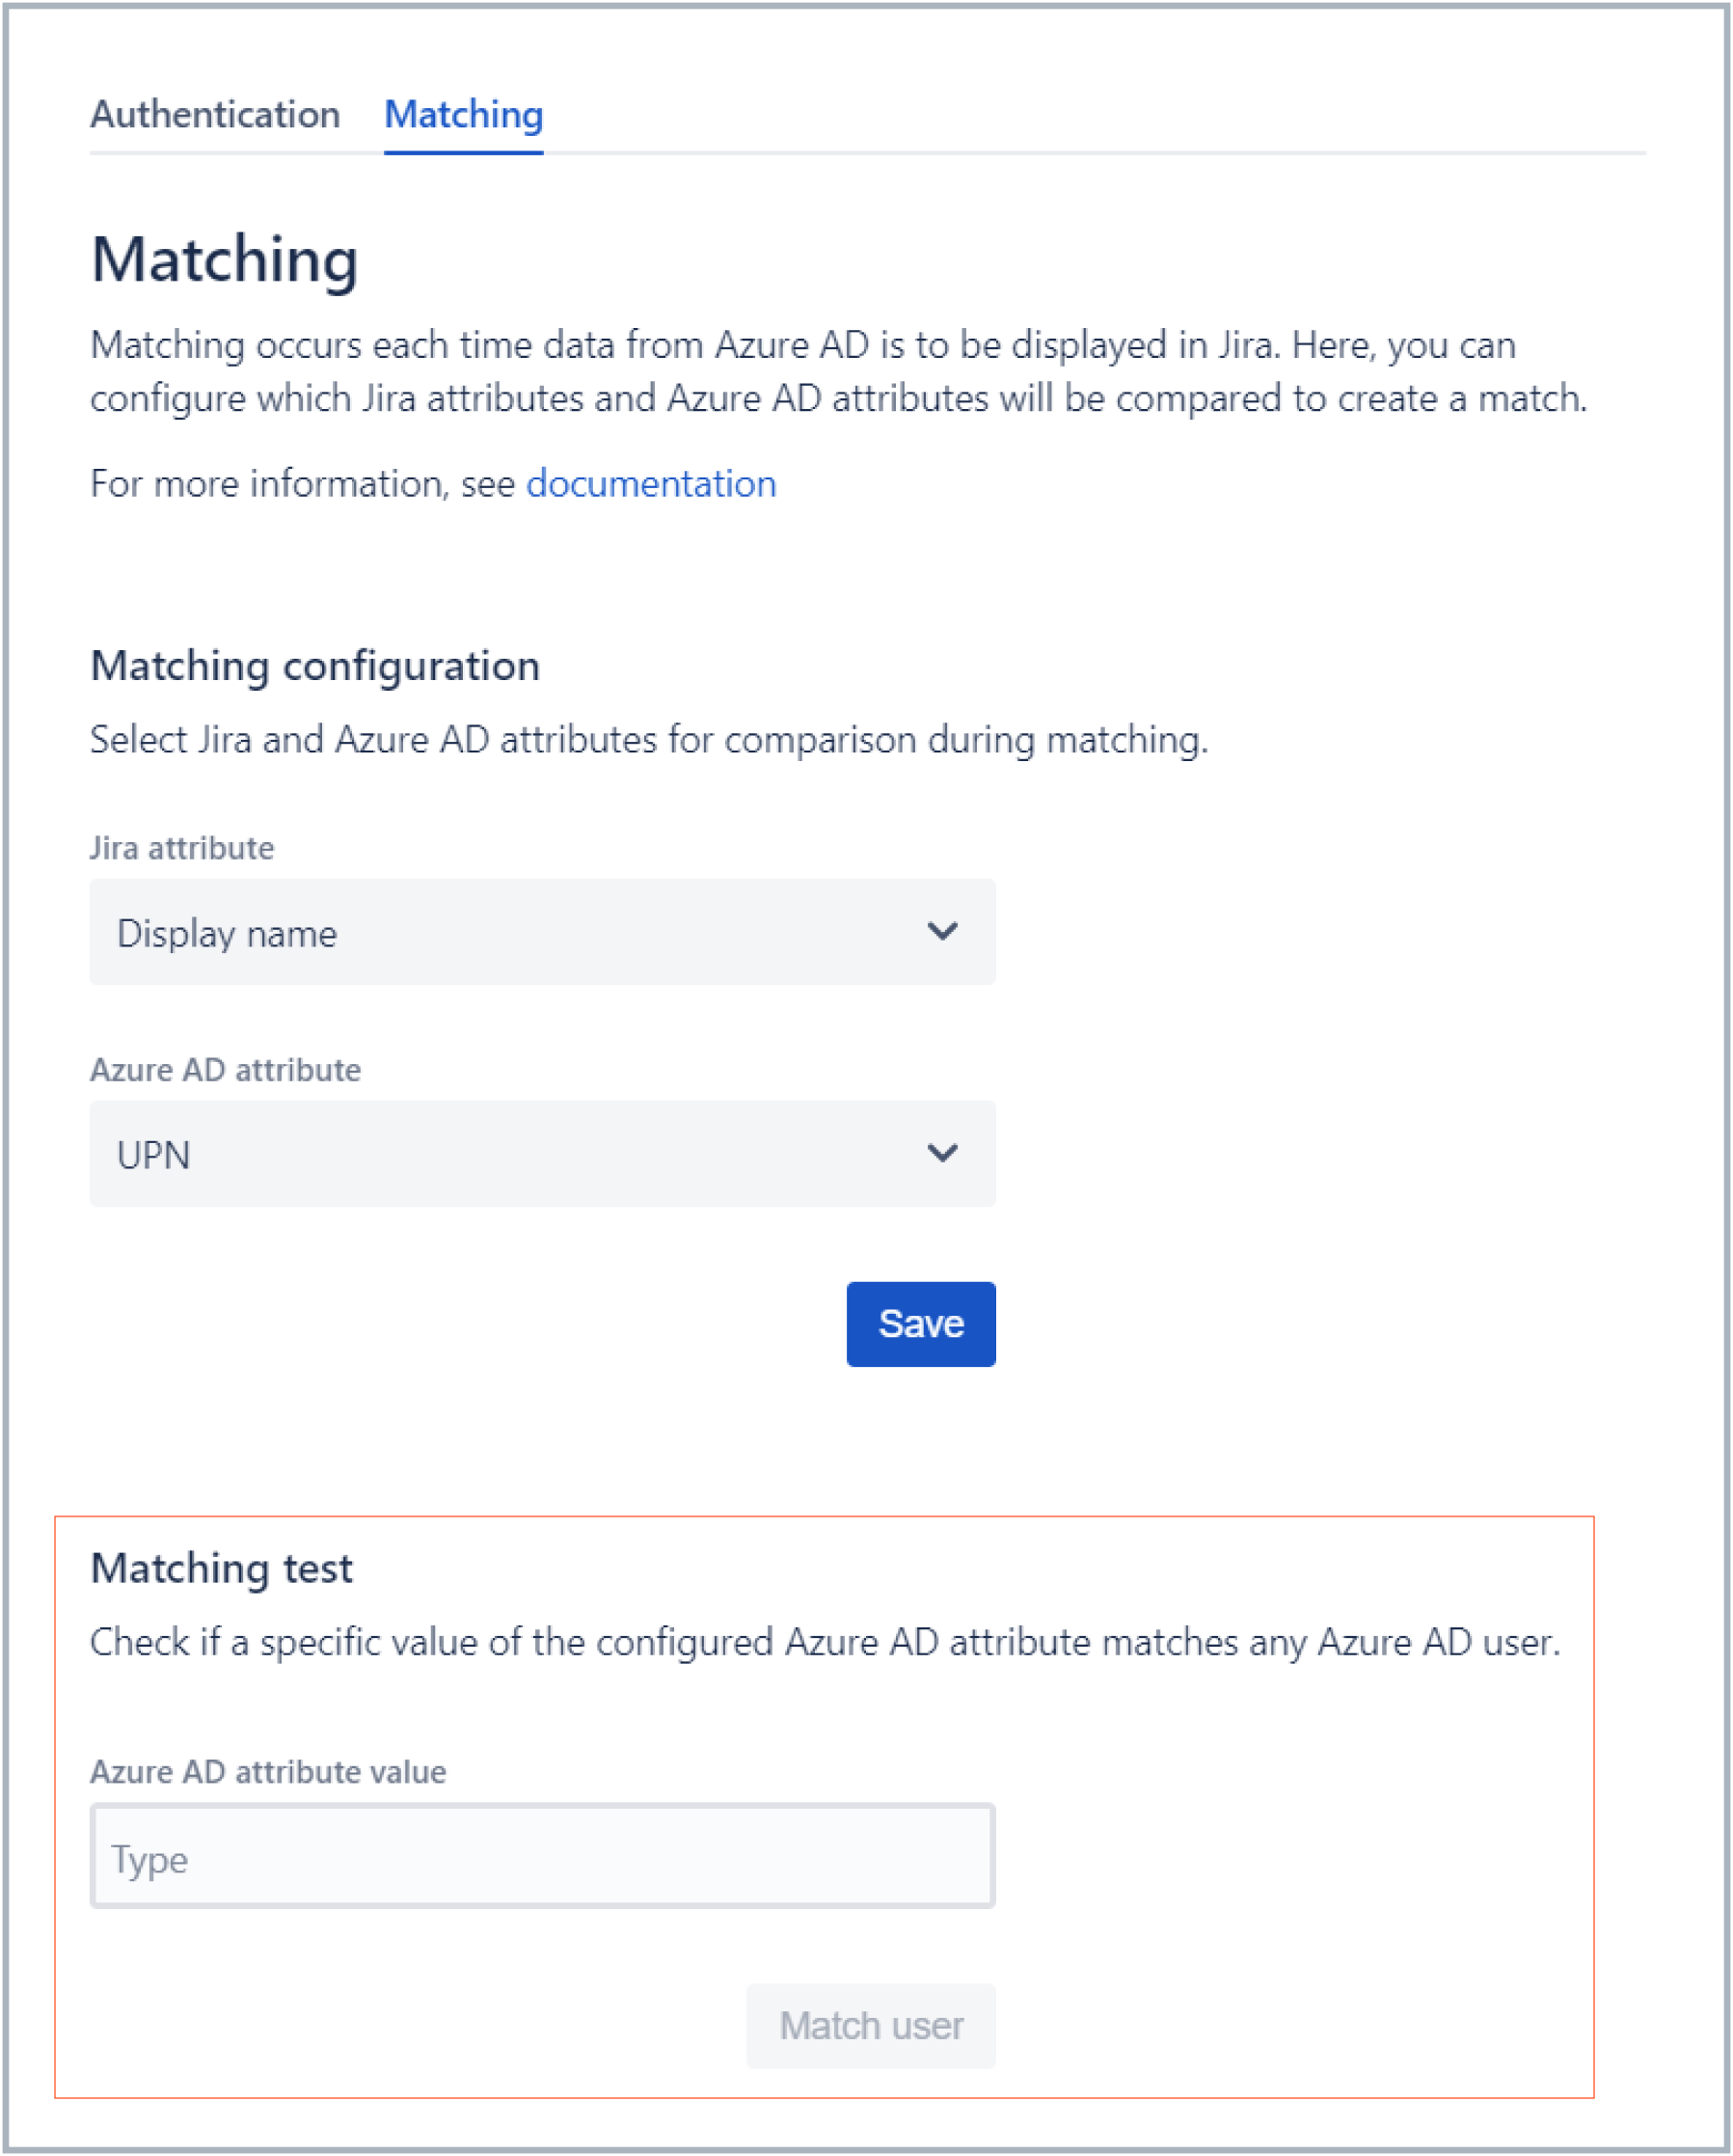
Matching occurs automatically each time data from Azure AD is to be displayed in Jira. Azure AD Attributes Sync for Jira lets you select Jira and Azure AD attributes as bases for creating a match.
To display Azure AD data for a Jira user, the value of their selected Jira attribute needs to be the same as the value of their selected Azure AD attribute. A match is created, and data from their Azure AD account is displayed in Jira.
Available attributes
Jira attributes
You can select the following Jira attributes:
- Display name
- Email address
Azure AD attributes
You can select the following Azure AD attributes:
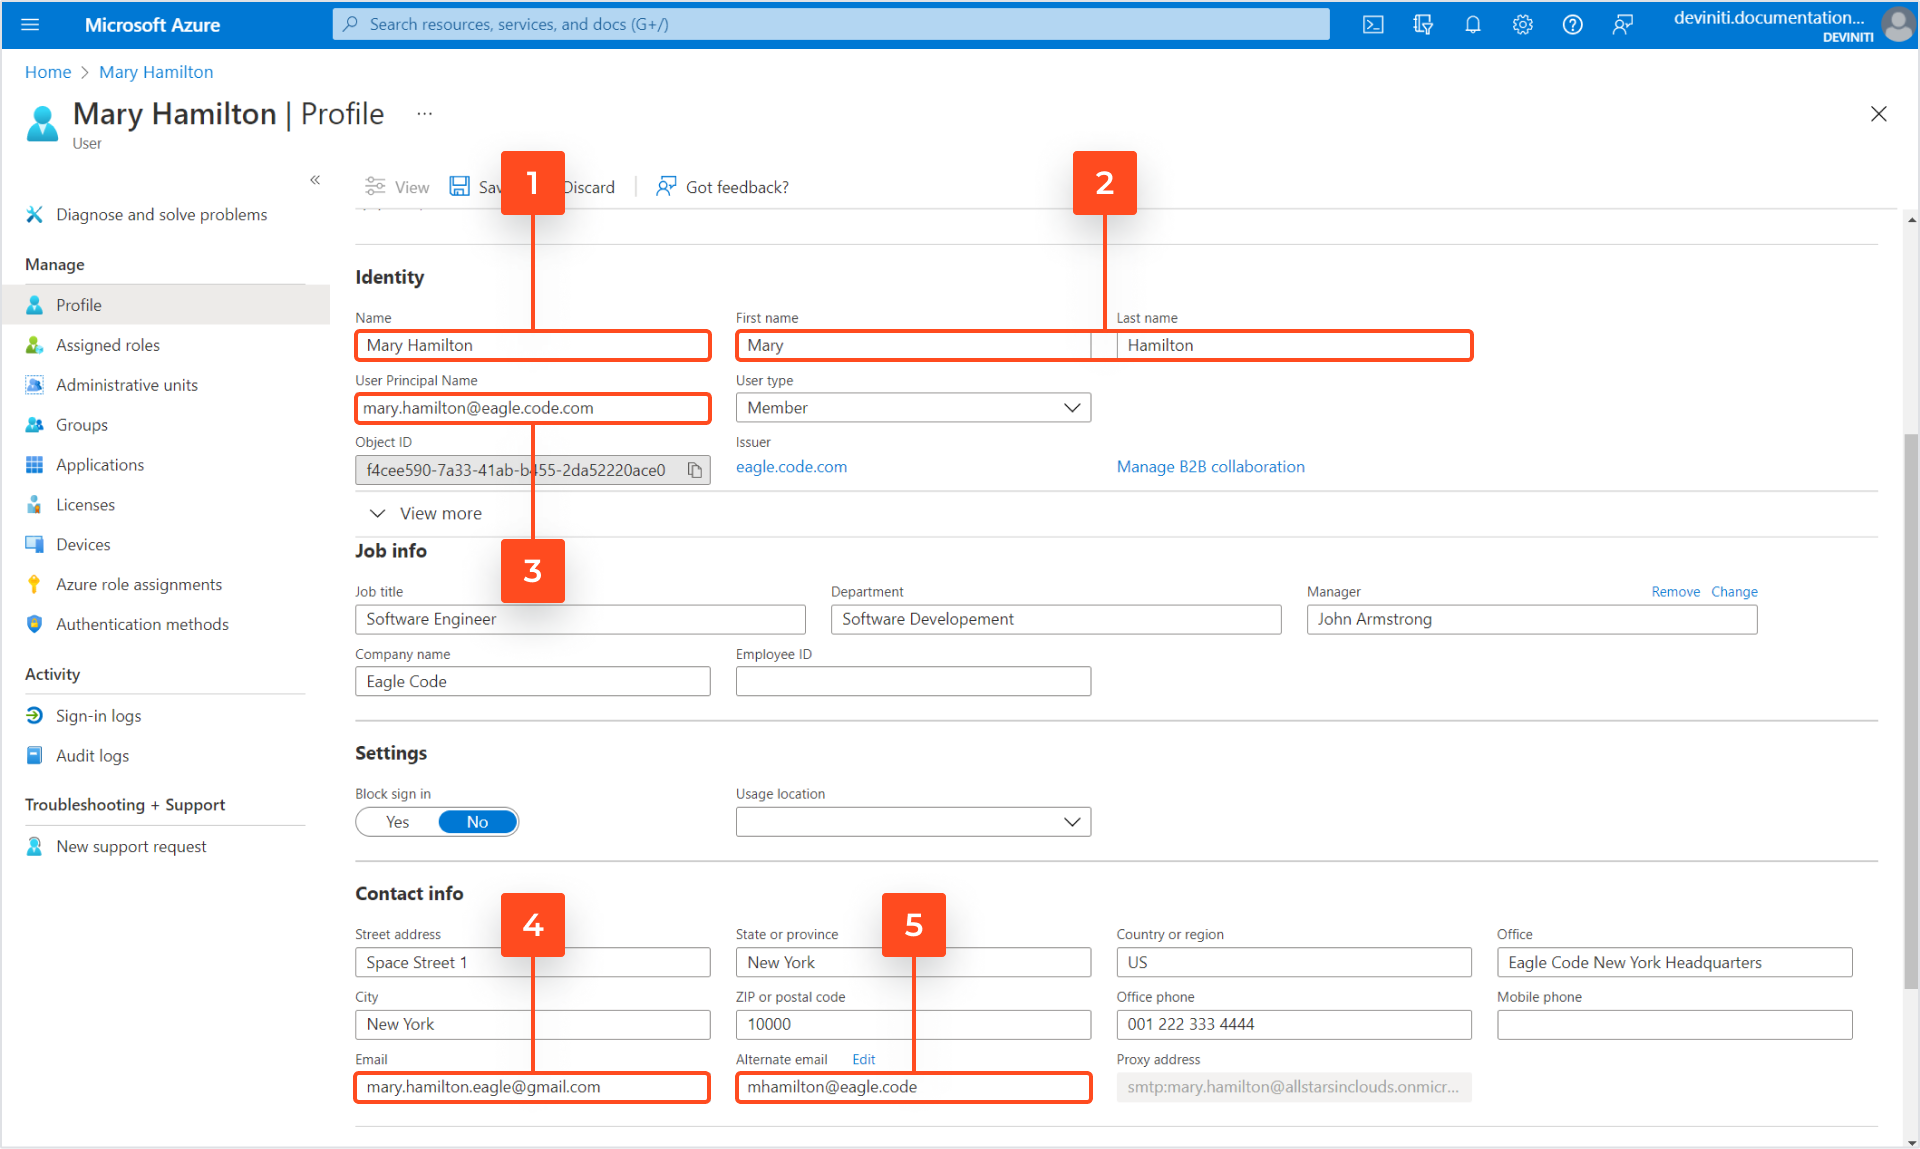
- Name
- Full name (consisting of concatenated first name and last name)
- User name (UPN)
- Email address
- Other email
Matching users by email in Azure AD
Steps
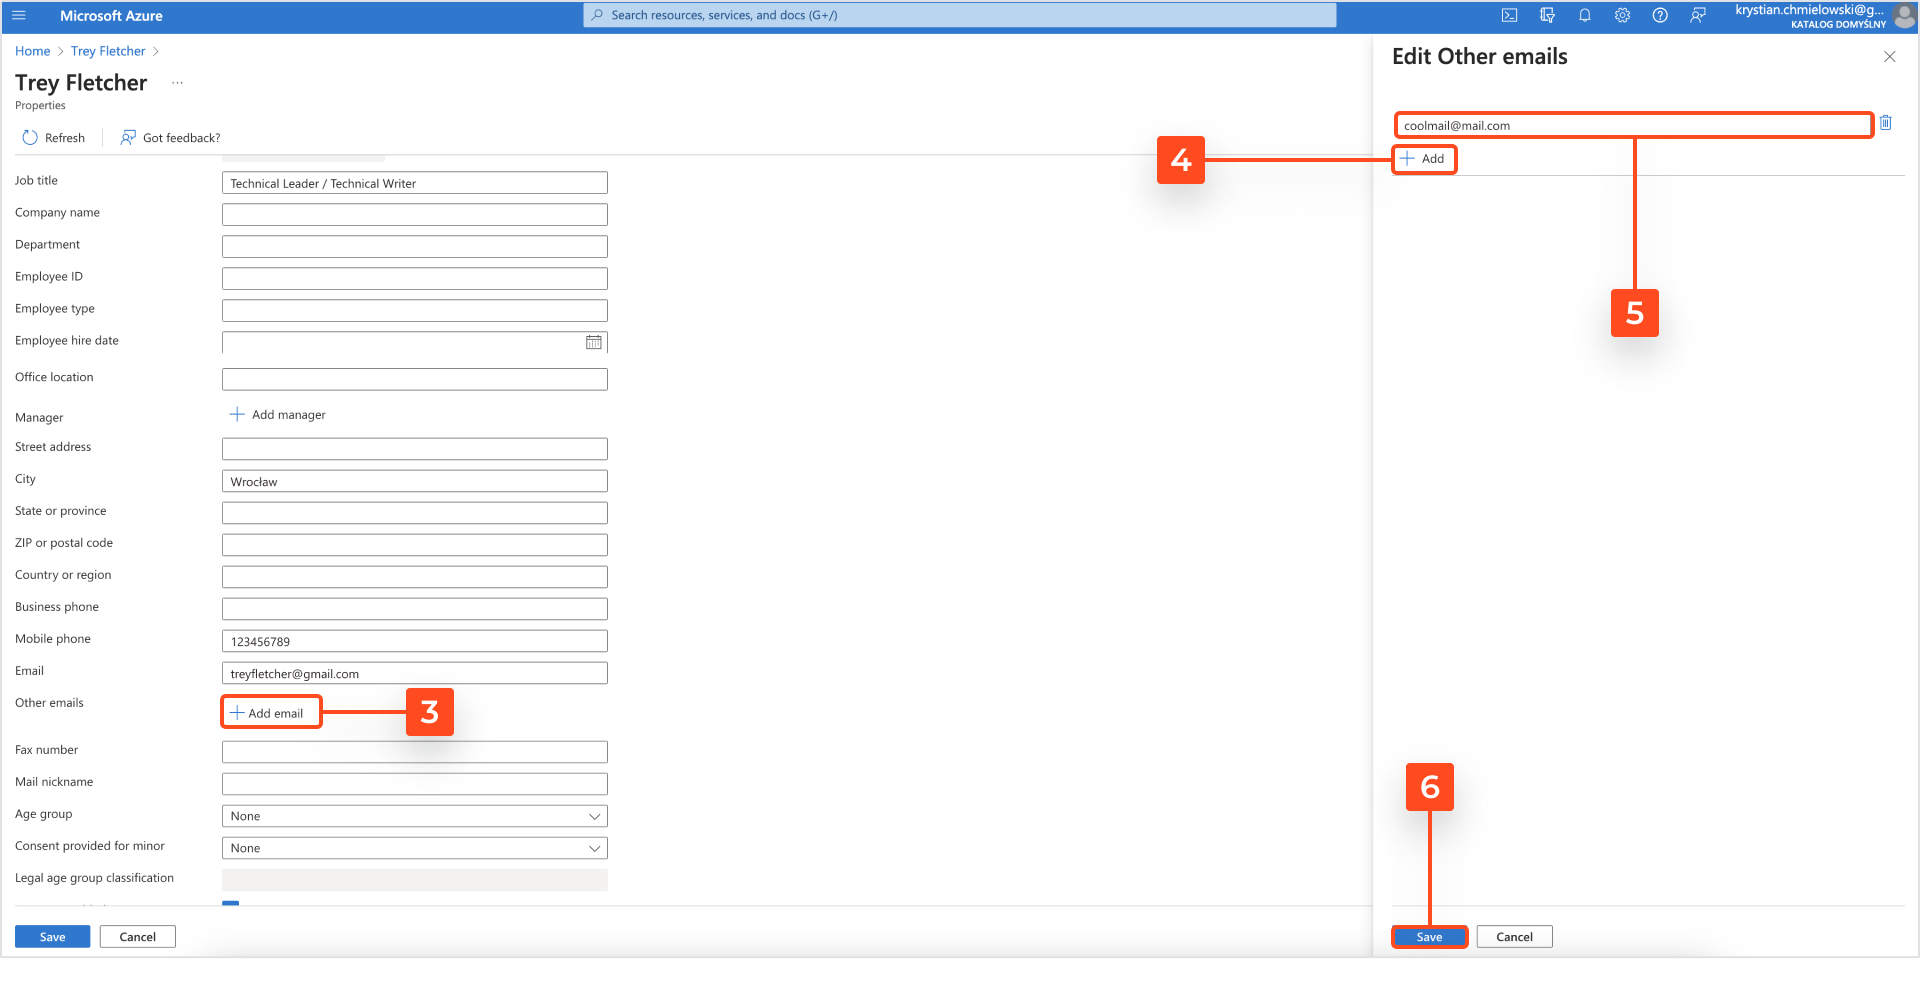
To match a user’s Jira email with their Azure AD other email:
-
In Azure, navigate to Azure Active Directory > Users.
-
Scroll down to reach the Other emails field and click Add email.
-
Click Add.
-
Type in the user’s Jira email as Other email.
-
Click Save.
Result
The user’s Jira email is set as Azure other email attribute.
During matching of a Jira attribute with Azure AD Full name, the Jira attribute is split into two strings at the first space. Then, the fist string is compared with Azure AD First name, and the second string is compared with Azure AD Last name. To create a match, both strings need to be the same as their respective Azure AD attributes.
Matching users in Jira
Steps
To configure matching of users:
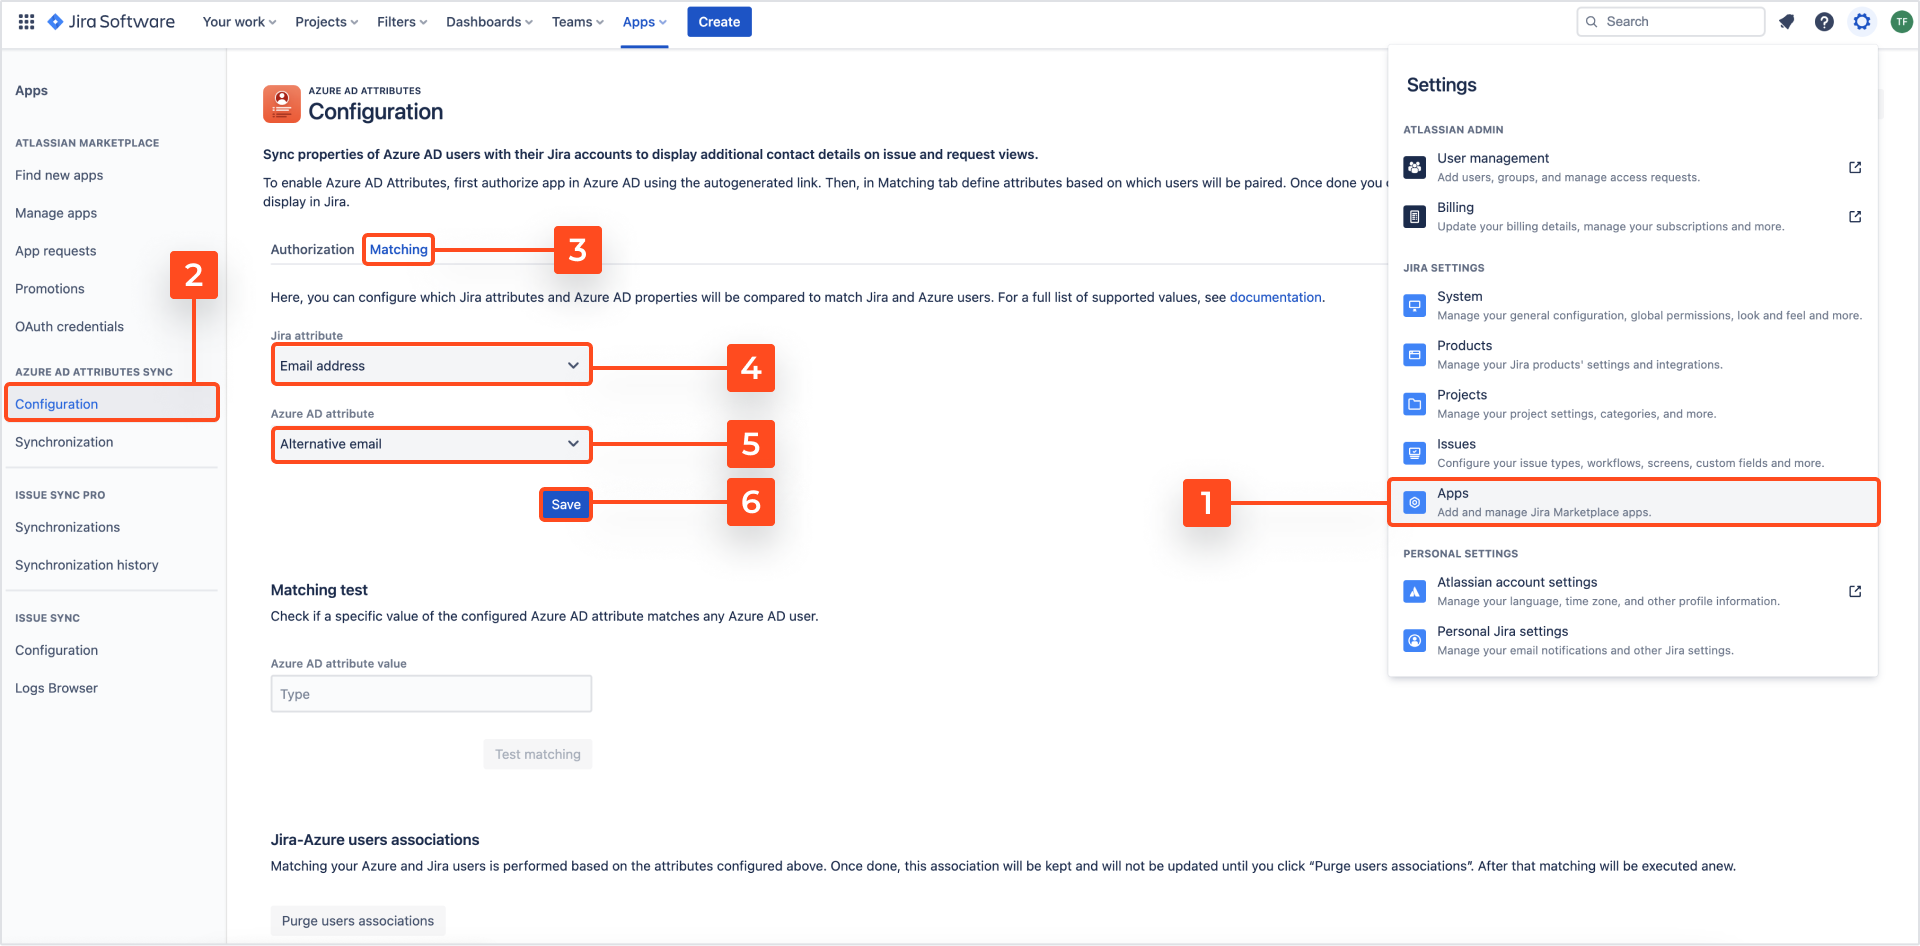
- In Jira, navigate to Jira settings > Apps.
- In the Azure AD Attributes section, click Configuration.
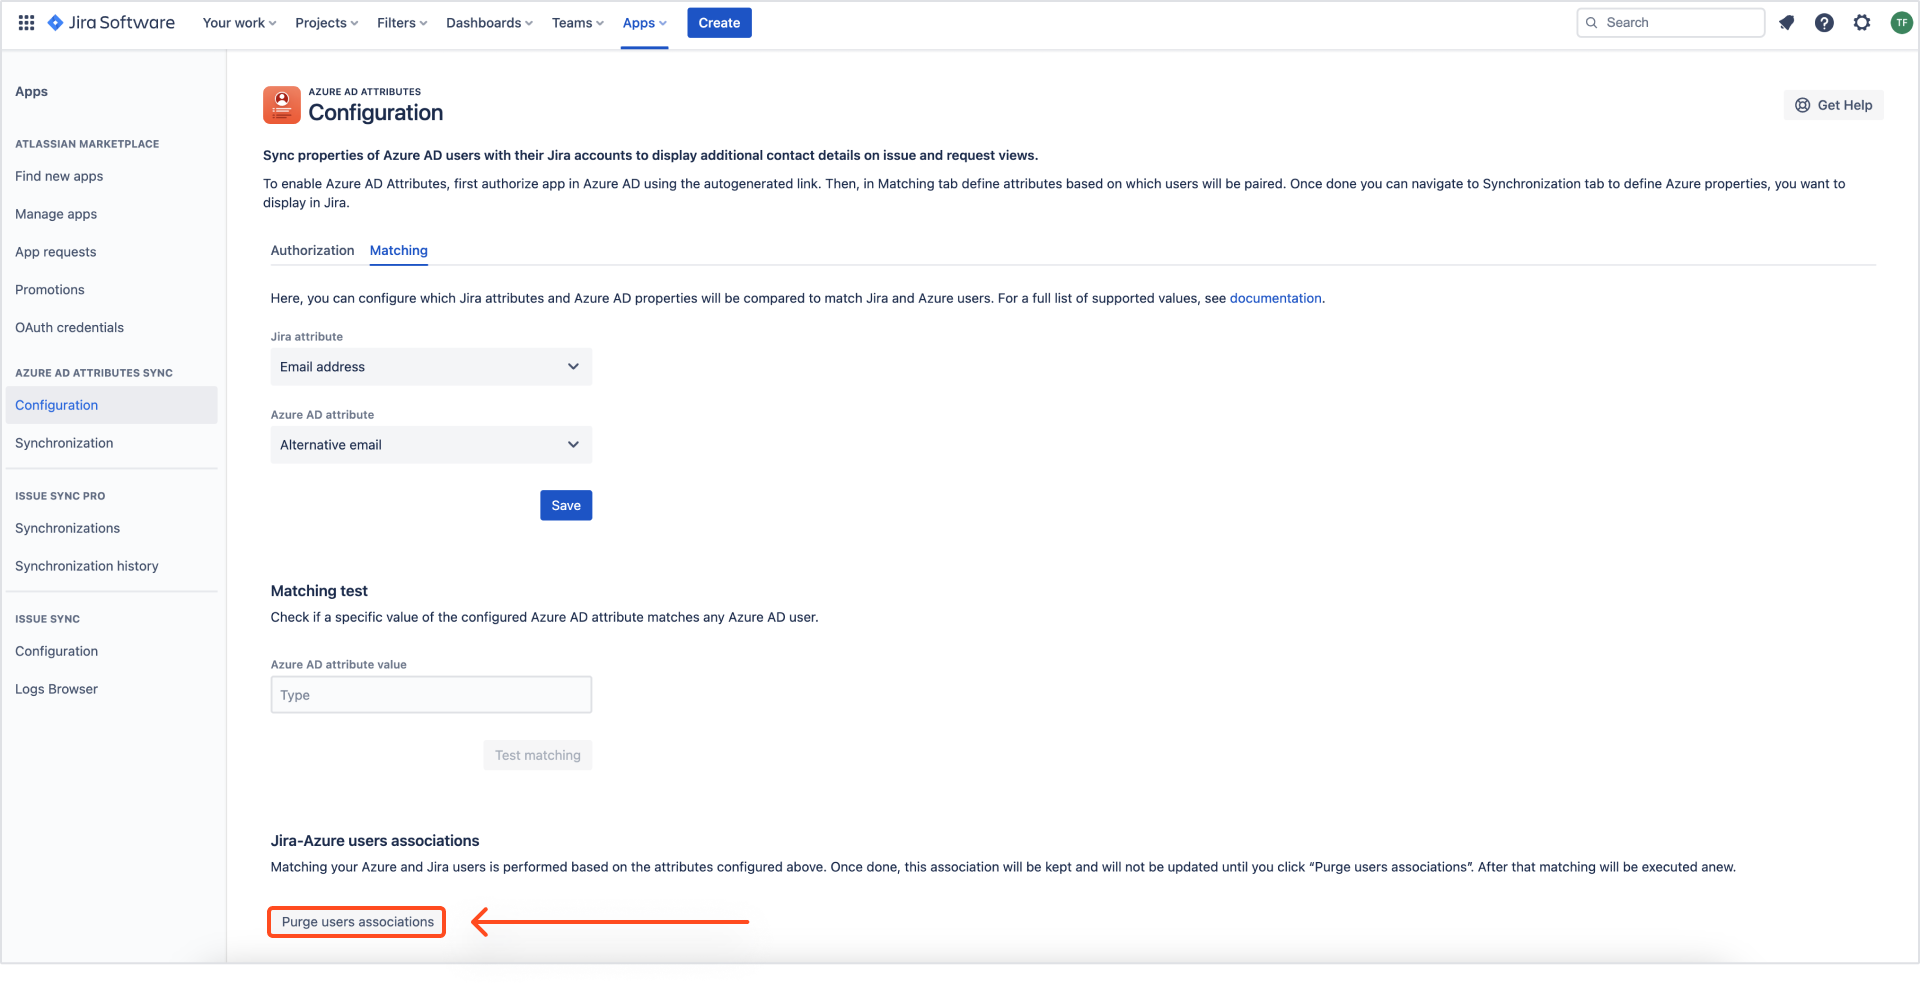
- Go to the Matching tab.
- Select Jira attribute.
- Select Azure AD attribute you want to be compared with the selected Jira attribute during matching.
- Click Save
Result
During matching, the selected Jira attribute of a user will be compared with the selected Azure AD attribute. If they are the same, a match will be created and the user’s Azure AD data will be displayed in Jira.
Purge user associations
Azure AD users are matched with Jira users by their email addresses. If you make changes to user emails, click Purge user associations to clear current associations.
If you can’t find the answer you need in our documentation, raise a support request.

