- Get started
- About
- First steps
- Glossary
- Migration
- Configuration
- Global configuration
- Repository
- Template configuration
- Template scope
- Manage templates
- Supported fields
- Permissions
- Using templates
- Create issue from template
- Create issue structures
- Apply template to existing issue
- Recreate issue
- Use template custom field on issue create screen
- Default templates
- Direct link
- JQL searchers
- Variables
- Static variables
- Dynamic variables
- Smart defaults
- Basics
- Smart issues
- Smart users
- Smart dates
- Smart project
- How to use smart defaults
- App Integrations
- Team-managed projects
- Jira Software
- Jira Service Management
- Advanced Roadmaps
- Issue Checklist for Jira
- Advanced
- Automation
- Legacy automation action
- REST API
- Create issue and apply template with Jira REST API
- Security
- Security statement
- App permissions
Automation
This chapter provides information on how to use Automation and Issue Templates together.
Combining Jira Automation and Issue Template for Jira requires using Automation’s Create Issue action and a custom issue.templates.automation property. You can delegate the job of creating the issue with Automation and apply a template right after the issue has been created with Issue Templates for Jira.
See Atlassian documentation to learn how to Create an issue with Automation.
Steps
- Configure the action to create an issue with all the required fields for the particular issue type you want to use.
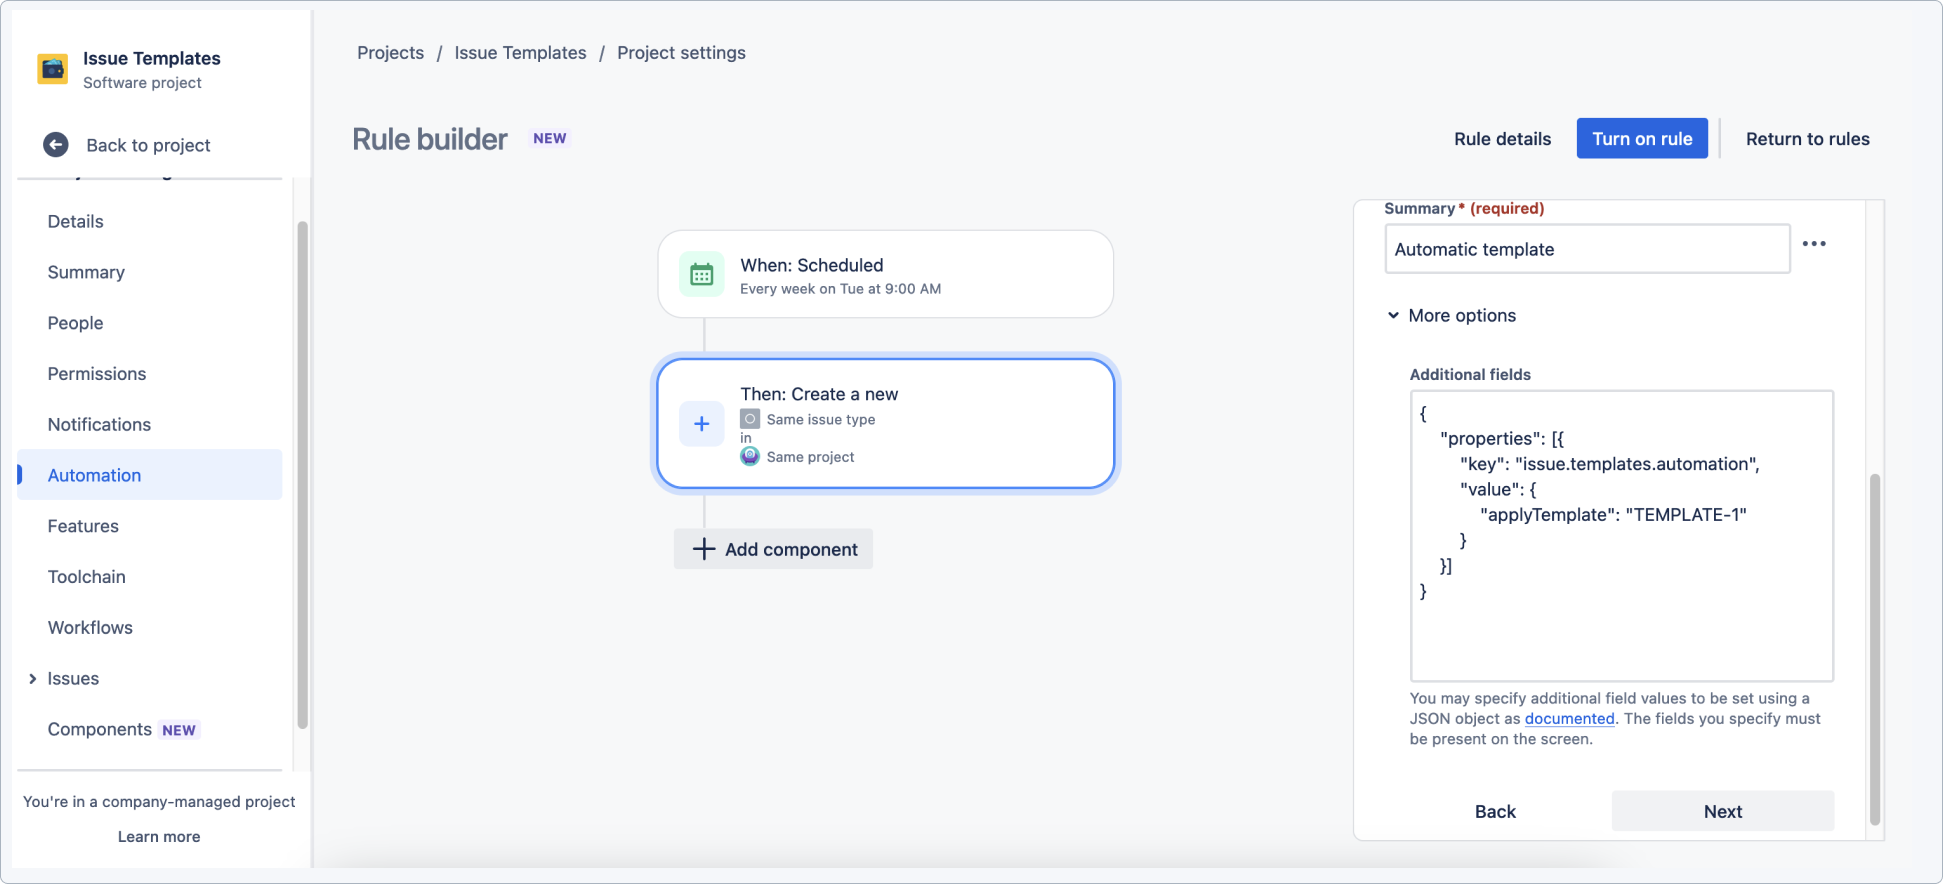
- Expand More options, paste the function below and change TEMPLATE-1 to your template key:
{
    "properties": [{
        "key": "issue.templates.automation",
        "value": {
            "applyTemplate": "TEMPLATE-1"
        }
    }]
}
Result
This function instructs Issue Templates for Jira to applyTemplate with the issue key equal to TEMPLATE-1.
There are numerous triggers that you can use with the Create issue action and apply the template property. You can see some examples in the videos below.
How to schedule creation of issues from templates using Jira Automation?
One of available options to create an issue from a template is to use Automation’s Scheduled trigger with Create issue action. Applying a template to a newly created issue is possible only if you change Create issue action’s properties, as shown in the example below:
{
    "properties": [{
        "key": "issue.templates.automation",
        "value": {
            "applyTemplate": "TEMPLATE-1"
        }
    }]
}
TEMPLATE-1 is a template key.
How to trigger creating issues from template from external tool?
The following example presents required steps in Jira Automation and an external tool (Postman in this case) to create issues from a template.
Jira Automation steps
- Create a template in Template Repository. Use
{{ }}to set variables.NoteBy default, variables use[ ]. Read more about variables. - Navigate to Project settings > Automation.
- Click Create rule.
- In New trigger, select Incoming webhook.
- In Execute this automation rule with select No issue from the webhook.
- Click Save.
- In Add component, click New action > Create issue.
- Select:
- Project
- Issue type
- Choose fields to set (for example: Epic Name).
- Type the Summary and complete fields selected in Choose fields to set….
- Expand the More list, and in Additional fields type the following formula:
{
    "properties": [{
        "key": "issue.templates.automation",
        "value": {
            "applyTemplate": "{{webhookData.templateKey}}",
            "variables" : "{{webhookData.variables}}"
        }
    }]
}
- Complete the Rule details and click Save.
- Turn on the rule.
- Copy the URL from Incoming webhook rule.
Postman steps
- Click New and select Request.
- Type in data.
- Click Save to Automation.
- Select the POST command from the list and enter copied Webhook URL.
- In the Body section, paste the following formula, where the TemplateKey is the key of your Jira Template and Variables are taken from the Postman:
{
  "templateKey": "PMT-602",
  "variables": "{\"externalSystemName\":\"Postman\",\"externalSystemDescription\":\"Great tool to test REST API, cheers!\"}"
}
- Click Send.
- Refresh your Jira Project page.
Result
The issue has been created.
How to pass variables from external system to Automation?
You can pass variables from the webhook using smart values - inside {{ }}. Use a webhookData object, which has access to the body of the webhook.
Dot can be used to extract nested properties, however, the last element has to be a string or a number.
See the two following examples:
- Names of variables are constant
Webhook body:
{
	"templateKey": "PMT-602",
	"variables": {
		"externalSystemName":"Postman",
		"externalSystemDescription":"Great tool to test REST API, cheers!"
	}
}
Additional fields in Automation:
{
    "properties": [{
        "key": "issue.templates.automation",
        "value": {
            "applyTemplate": "{{webhookData.templateKey}}",
            "variables" : {
              "externalSystemName": "{{webhookData.variables.externalSystemName}}",
              "externalSystemDescription": "{{webhookData.variables.externalSystemDescription}}"
            }
        }
    }]
}
- Names of variables can differ
Remember that all variables inside {{ }} need to be basic, for example, a string or a number. You can’t pass an object, therefore it will pass stringified JSON. Issue Templates for Jira will decode such a string.
{
    "properties": [{
        "key": "issue.templates.automation",
        "value": {
            "applyTemplate": "{{webhookData.templateKey}}",
            "variables" : "{{webhookData.variables}}"
        }
    }]
}
Additional fields in Automation:
{
    "templateKey": "PMT-602",
    "variables": "{\"externalSystemName\":\"Postman\",\"externalSystemDescription\":\"Great tool to test REST API, cheers!\"}"
}
For date variables use the supported ISO 8601 format.
Example:
2023-11-10
2023-11-10T11:00
2023-11-10T11:00+0100
If you’re interested in Advanced field editing in Automation, read the official Atlassian documentation.
