- Get started
- About
- First steps
- Glossary
- Migration
- Configuration
- Global configuration
- Repository
- Template configuration
- Template scope
- Manage templates
- Supported fields
- Permissions
- Using templates
- Create issue from template
- Create issue structures
- Apply template to existing issue
- Recreate issue
- Use template custom field on issue create screen
- Default templates
- Direct link
- JQL searchers
- Variables
- Static variables
- Dynamic variables
- Smart defaults
- Basics
- Smart issues
- Smart users
- Smart dates
- Smart project
- How to use smart defaults
- App Integrations
- Team-managed projects
- Jira Software
- Jira Service Management
- Advanced Roadmaps
- Issue Checklist for Jira
- Advanced
- Automation
- Legacy automation action
- REST API
- Create issue and apply template with Jira REST API
- Security
- Security statement
- App permissions
Default templates
This chapter provides information on default templates.
With Issue Templates for Jira you can set a default template for a specific project, issue type or request type.
This feature allows you to apply a template automatically every time an issue is created in Jira. The template is applied right after an issue is created. Due to Atlassian limitations that prevent making any changes to the Create issue dialog or the Create request page in Jira Cloud, the autocomplete of the fields can’t be implemented.
You can configure this:
- using a post-function
- setting a default value for a Template field using the Customer portal form configuration
The post-function is configurable per workflow, but you can configure different workflows for different issue types. Therefore, you can have different templates for different issue types. Configure template’s scope carefully because by default all values are copied from the template. For this particular use case you may want to exclude from scope some fields like Summary and Description, to keep the values provided by users in original issues.
For more information about our solution for the server version, see the Default template chapter in the respective documentation.
Setting a default template in a request type
By setting a default template in a request type the template will be automatically applied after creating each new request. Due to technical limitations it won’t be applied to the customer portal, but applied to the response sent by a customer. You can use this feature to automatically create jira tasks based on the customers’ input using smart defaults.
To enable this feature in a request type you need to set a preset value in the Template field, which will be added to the request type. The steps below will guide you through the process.
Steps
-
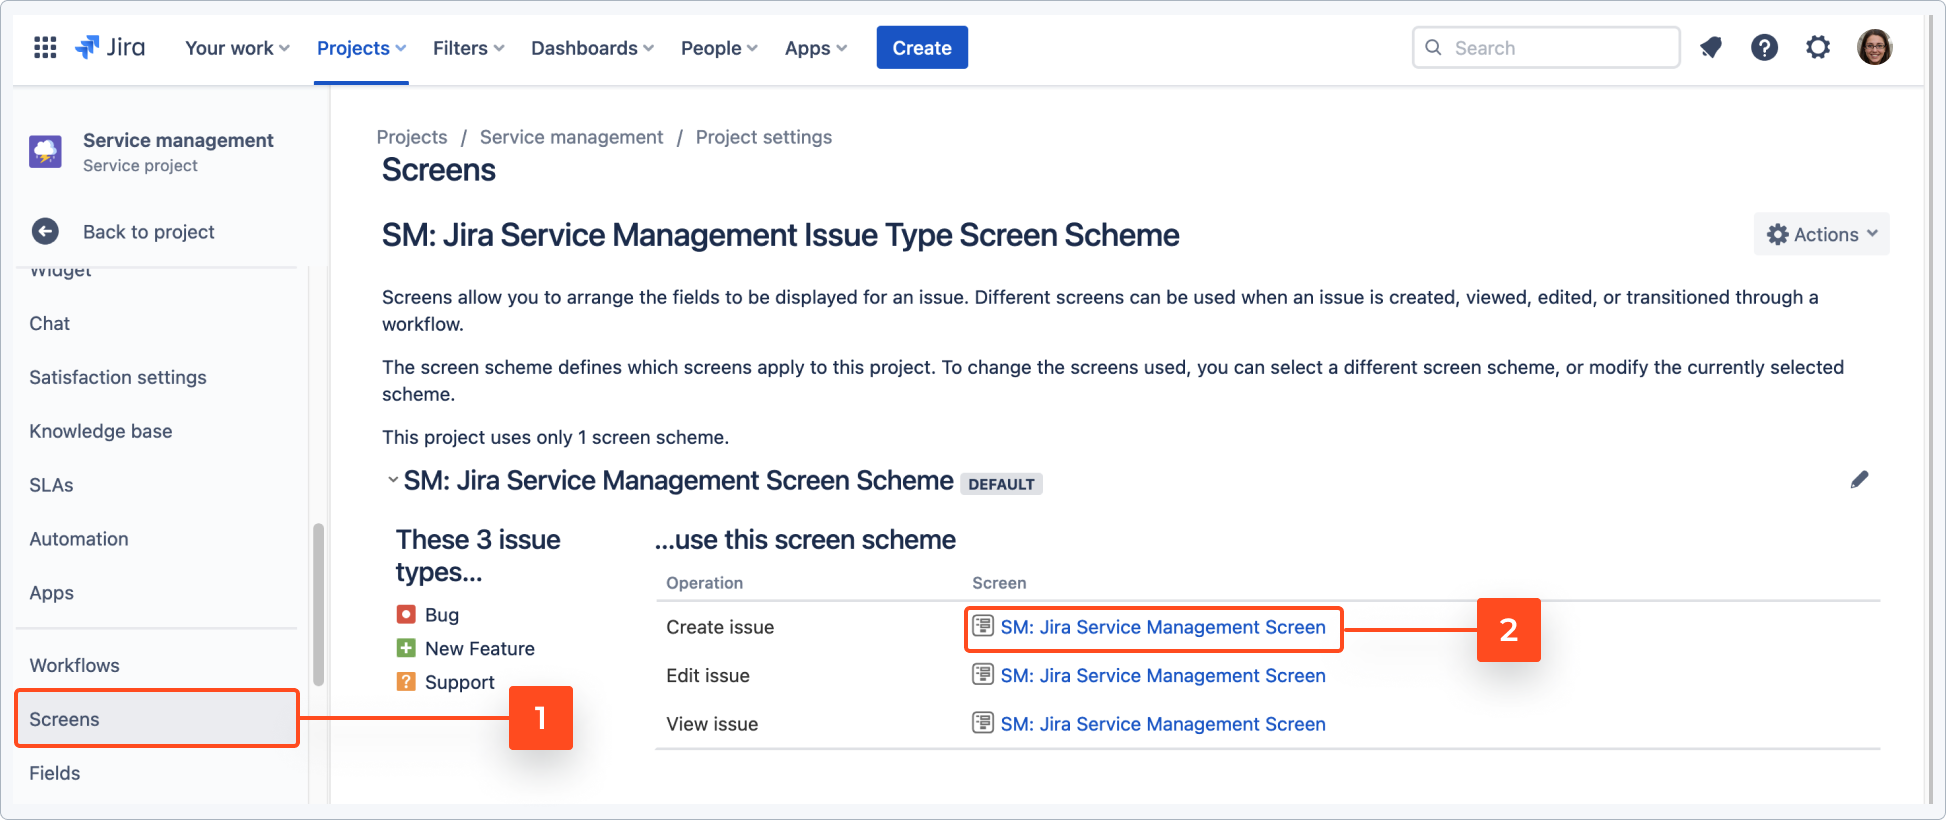
Go to Project settings > Screens.
-
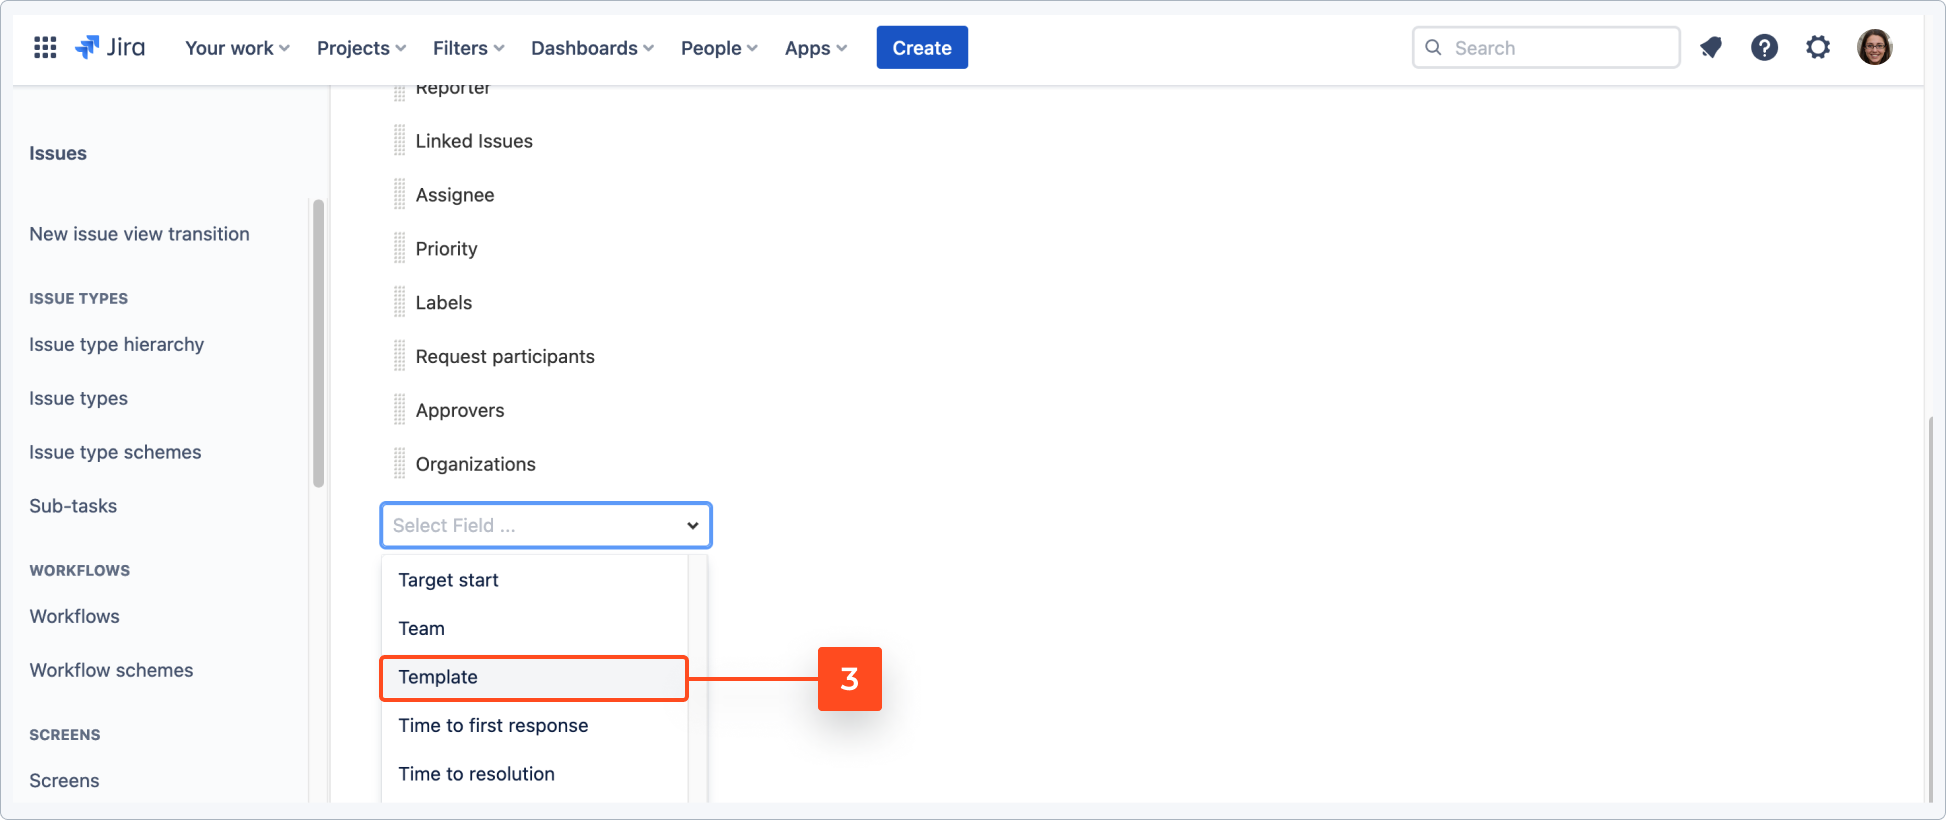
Edit the create screen of the issue type corresponding with the request type you want to apply a template on.

-
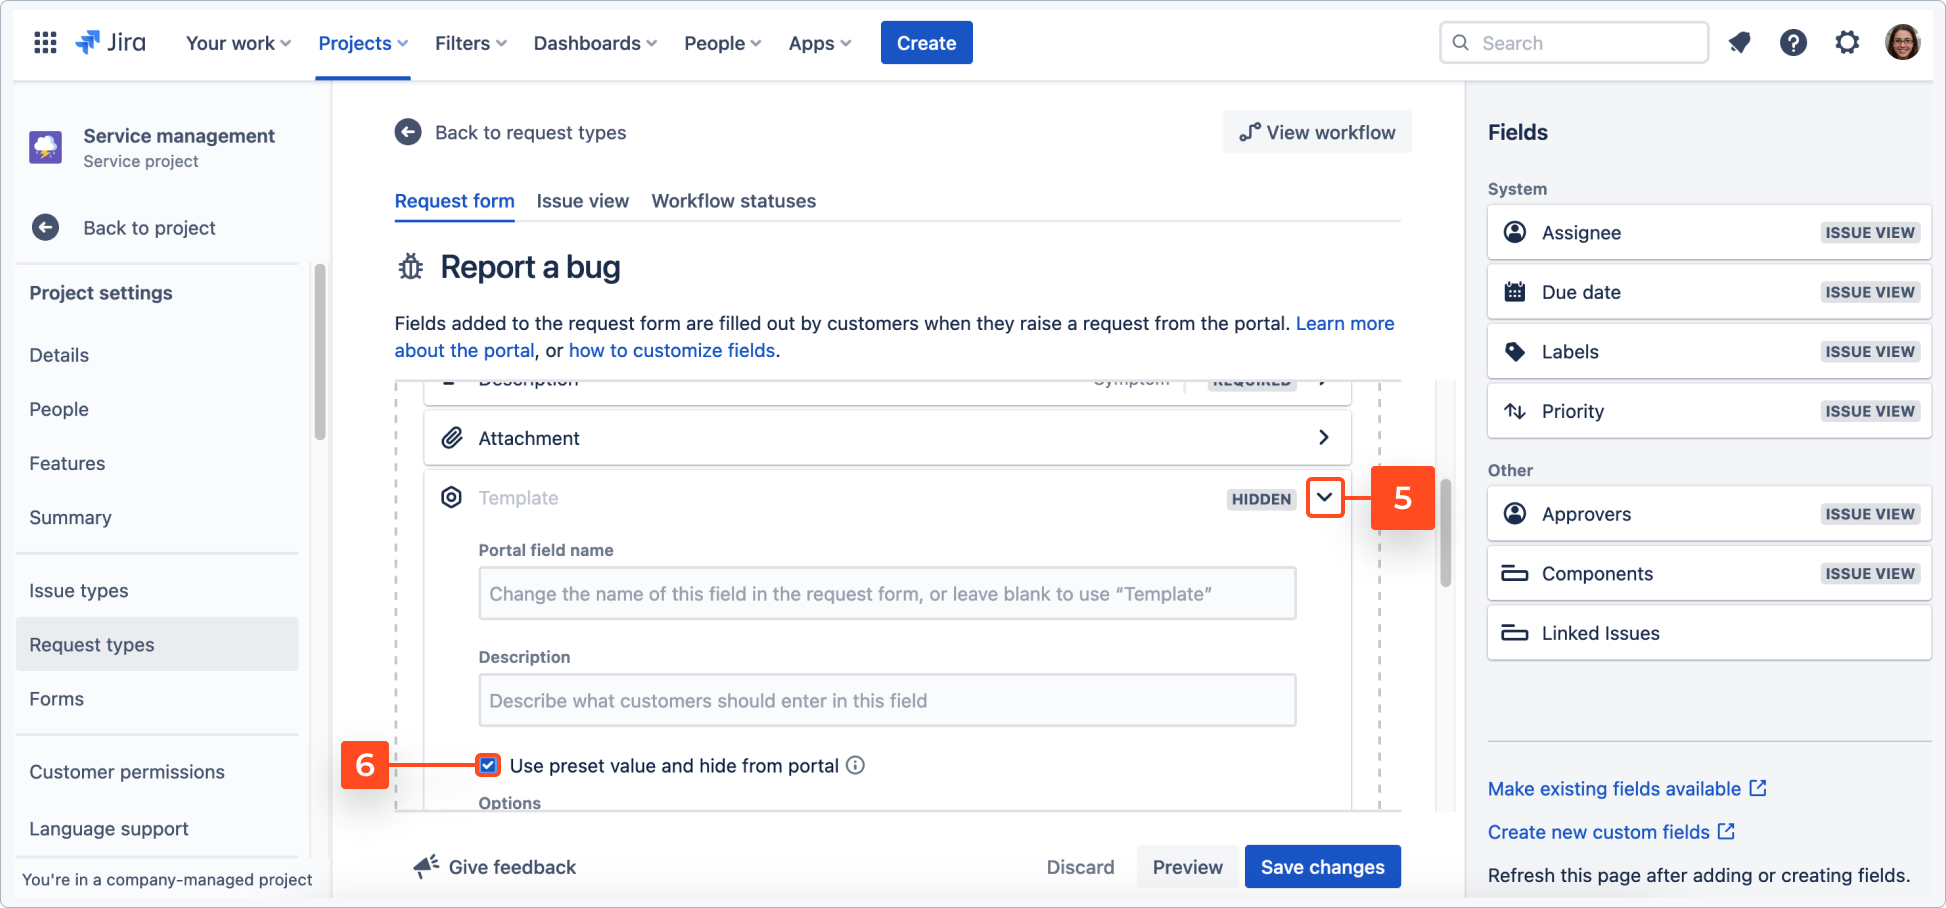
To apply a default template go to Project settings > Request types and click on a type you want to have a template for. Add Template field and fields covered by the template to the request form.

-
Expand options.
-
Scroll down and find your template, set it as default. Save changes.

-
Navigate to Apps > Manage Apps > Issue Templates for Jira > Configuration.
-
Switch to the Advanced tab and turn the Allow Customers to use templates via customer portal. Issues will be created and edited by user: Issue Templates for Jira toggle on. By default, it’s turned off.

Result
With the created template you are able to automatically:
-
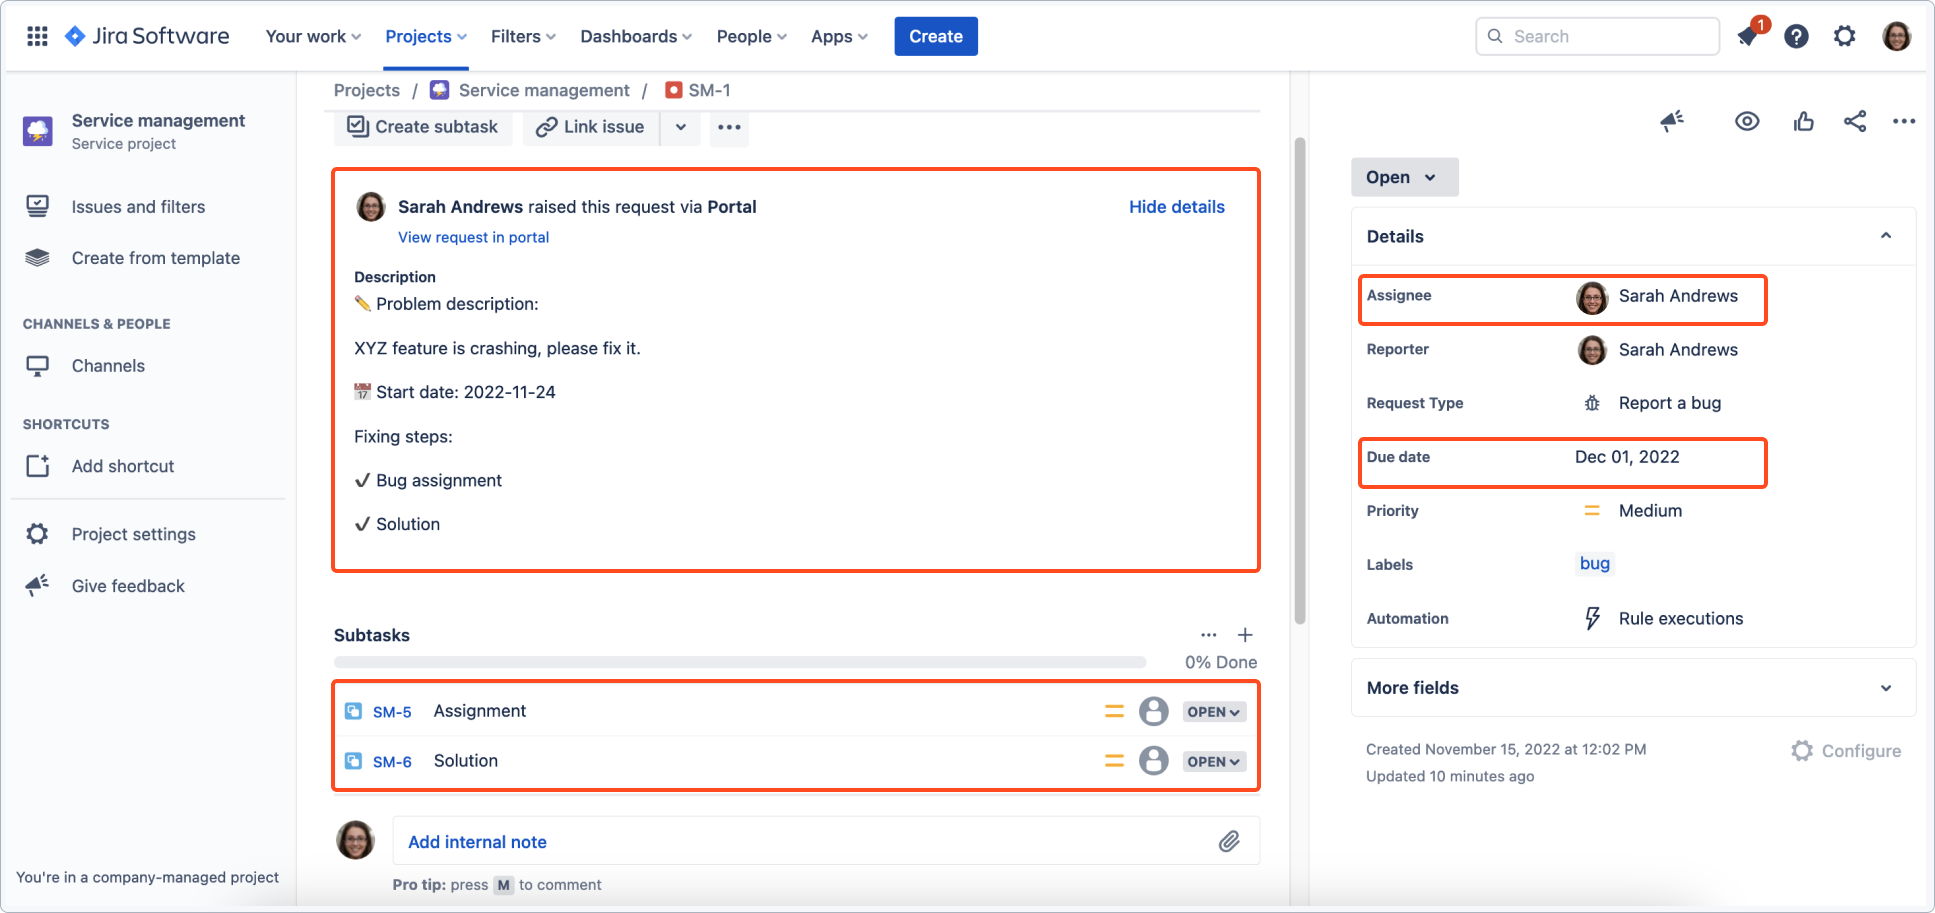
Add a template to your description
-
Set dates, deadlines and assign issues to specific roles or people
-
Create sub-tasks
NoteKeep in mind that fields such as summary or description will be overwritten unless you use Variables.
You can automate your process easily with Smart defaults.

The template won’t be visible to customers in the portal, it will be applied after the request has been created.


