- User guide
- Customer's view
- Search
- Filters
- Administrator guide
- Settings
- View as
- User scopes
- Fields configuration
- Filters management
Settings
Learn about the app functionalities which can be configured in Settings.
In the Settings section you can customize the basic aspects of your Requests page. The view consist of five tabs:
- Requests availability where you can restrict access to requests and decide about displaying their total numbers.
- Export where you can set the maximum limit of the exported requests.
- Banner which allows for customizing the redirection banner.
- Security Level which enables you to determine the visibility of requests with Issue Security Level.
- Assets API which allows you to establish the app connection and use Assets.
Before you start, log in as a user with the Jira Administrators global permission.
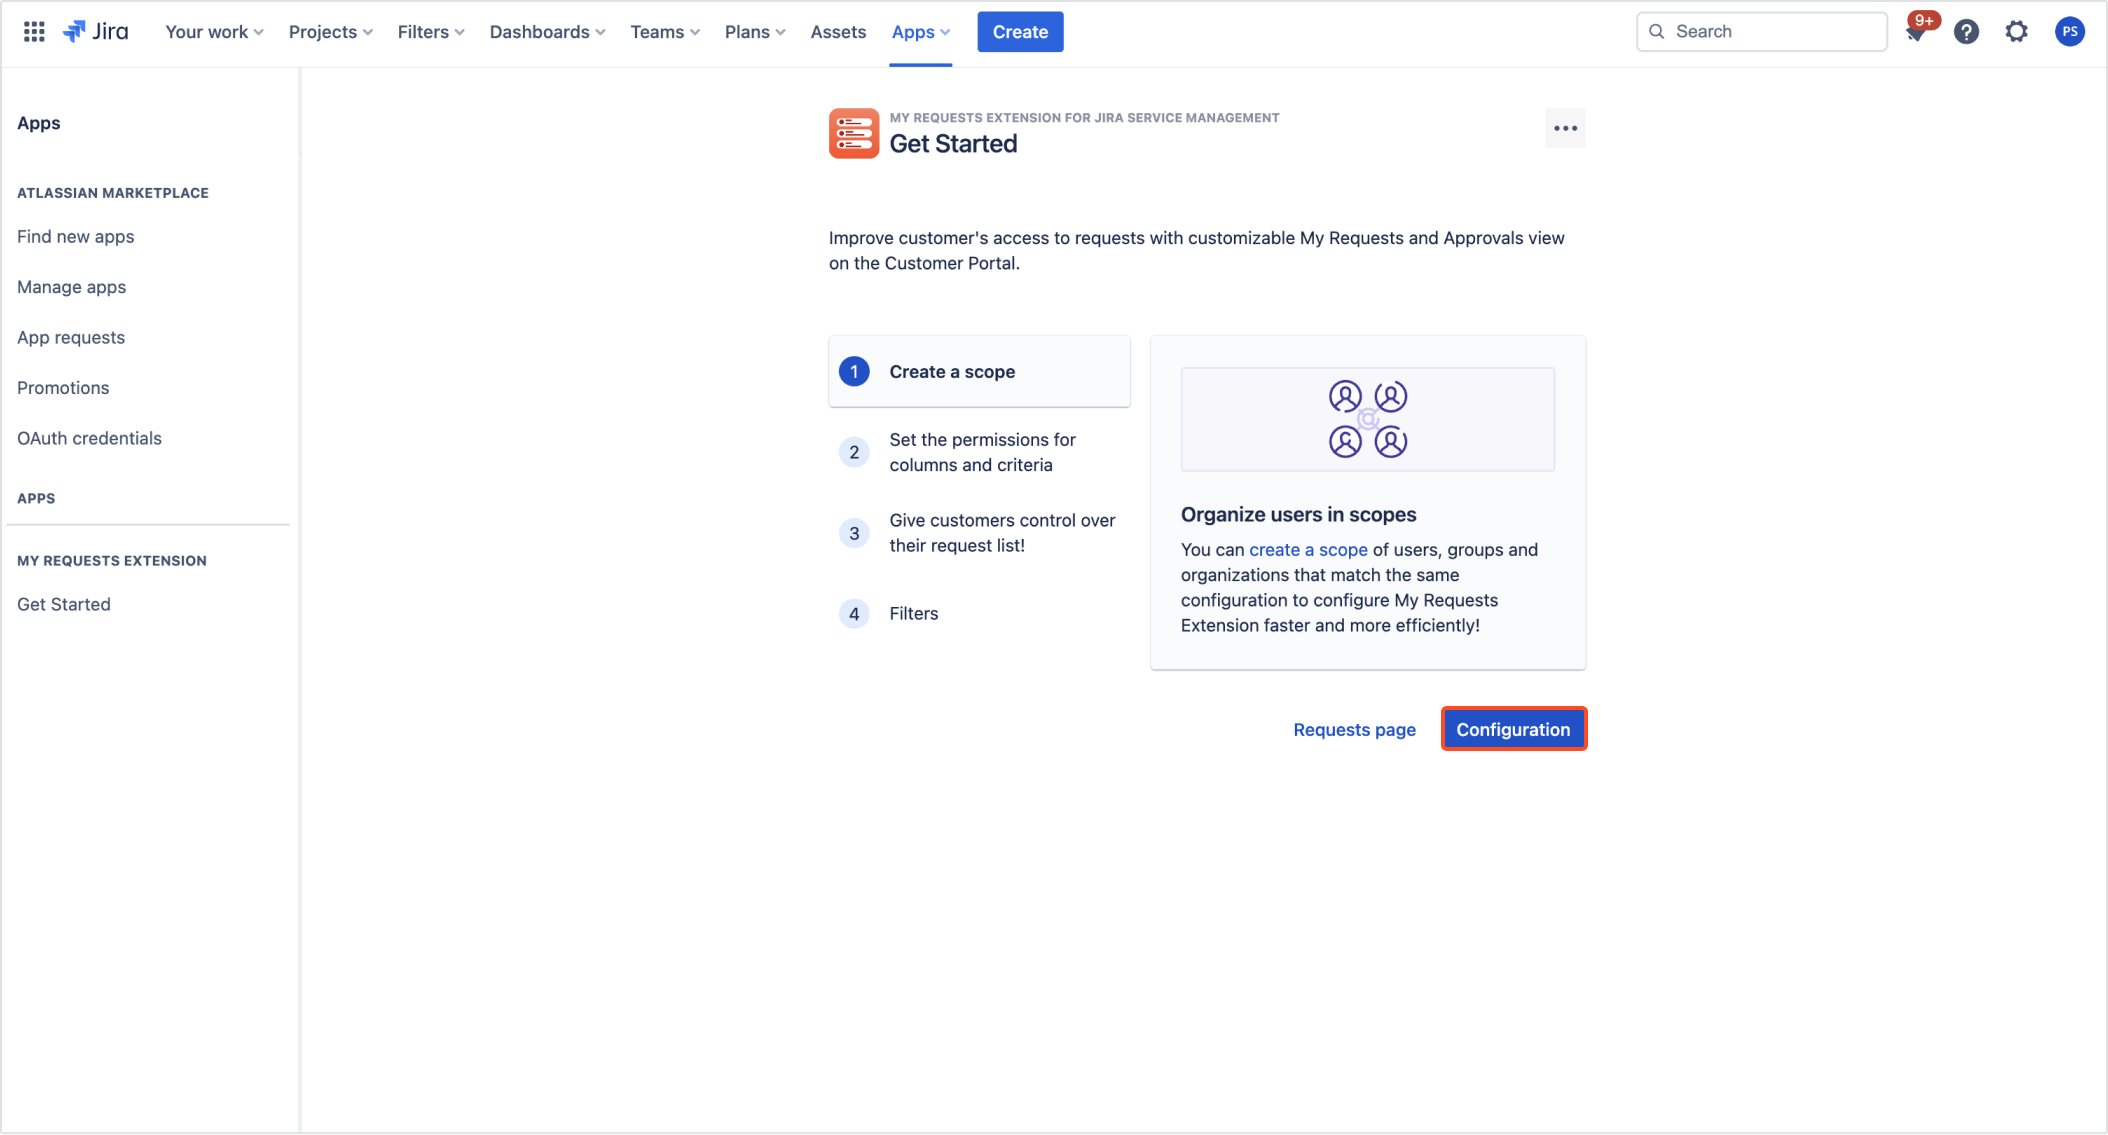
To start configuring settings available in particular tabs, access Configuration first.
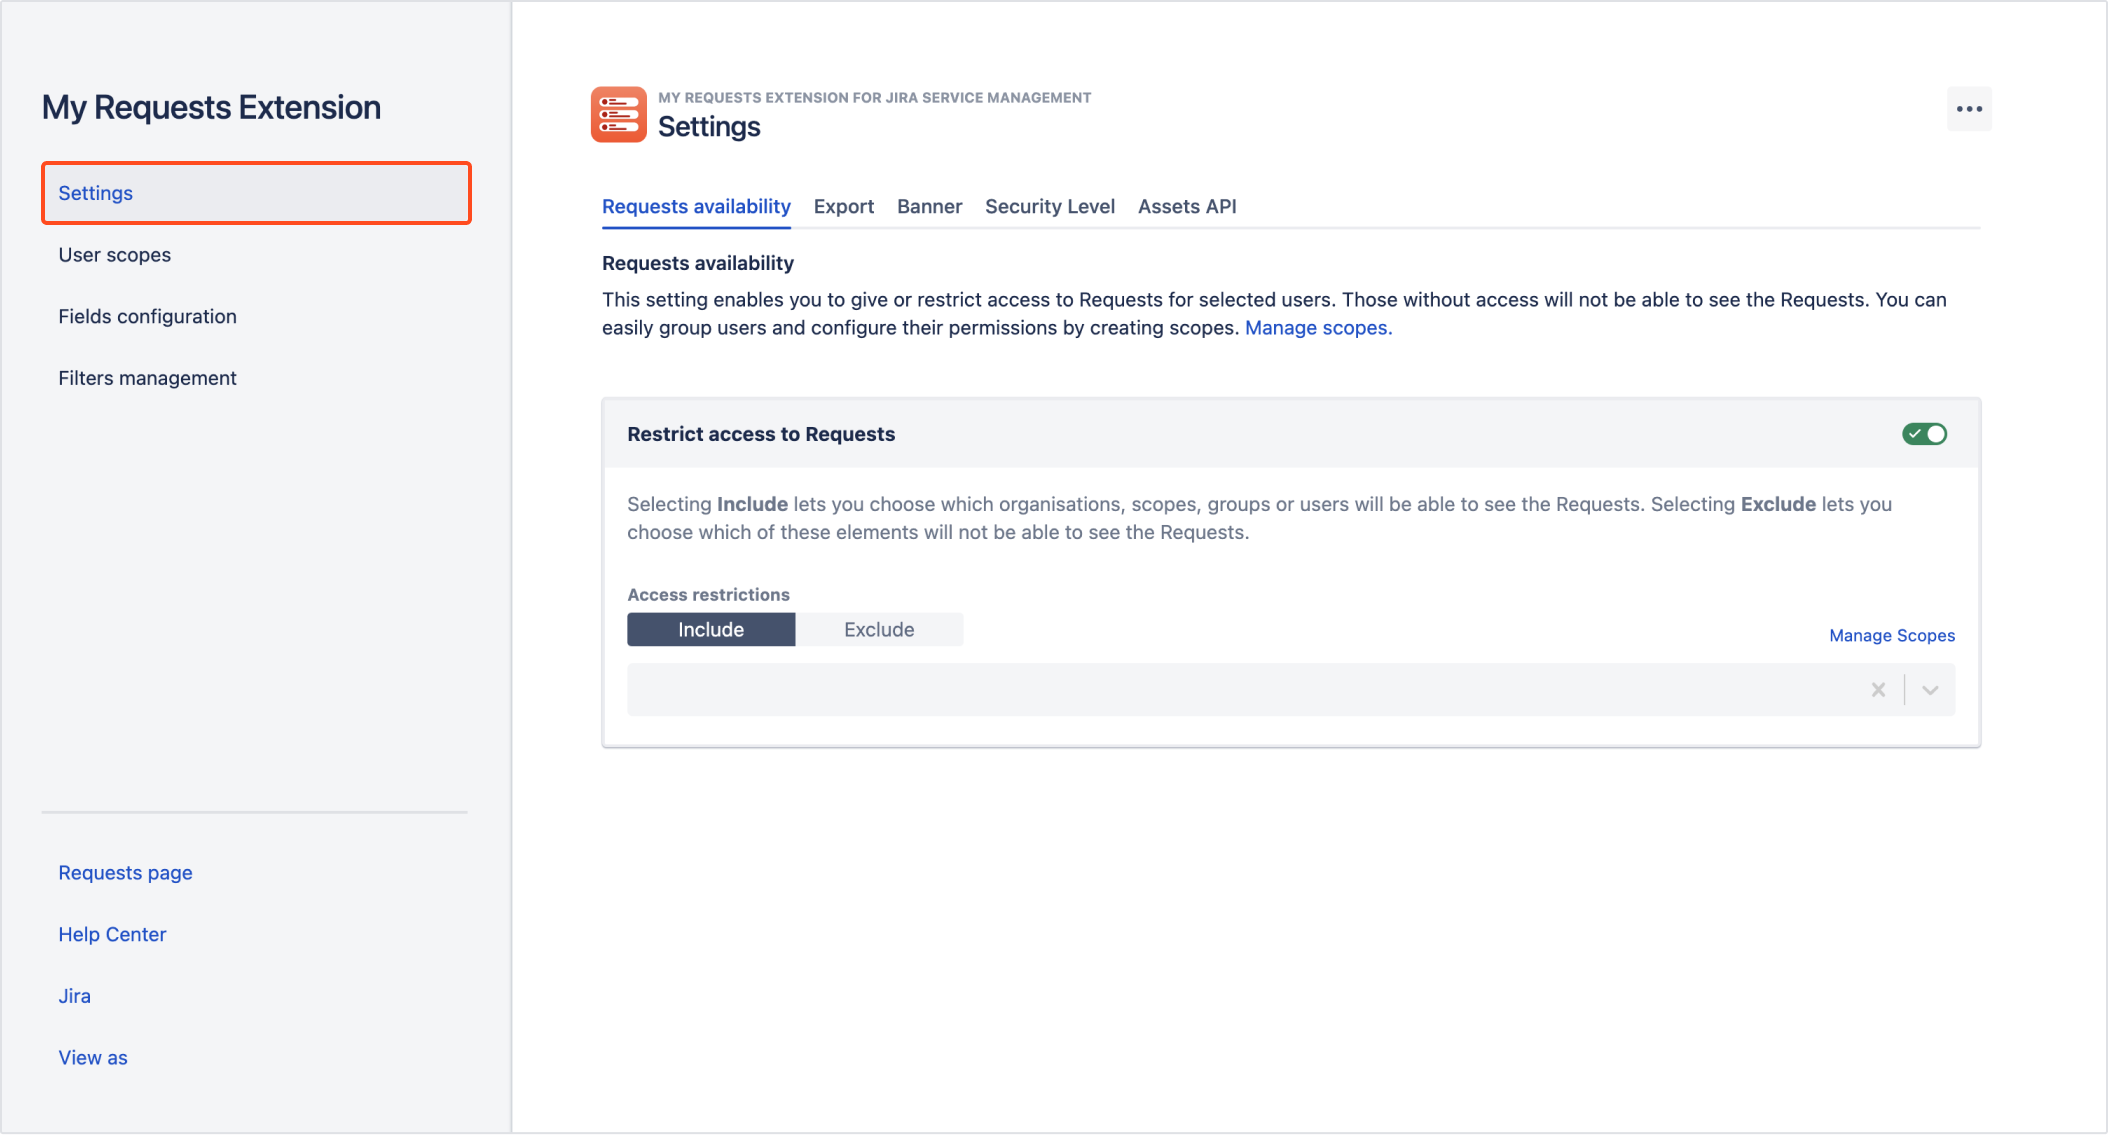
Once you’ve accessed the Configuration view, navigate to Settings.
Requests availability
The Requests availability tab enables you to manage the customer’s access to the Requests page as well as to decide about displaying the total number of requests in filters and on the list with requests.
Access to requests
Giving access
There are two ways in which you can give access to requests:
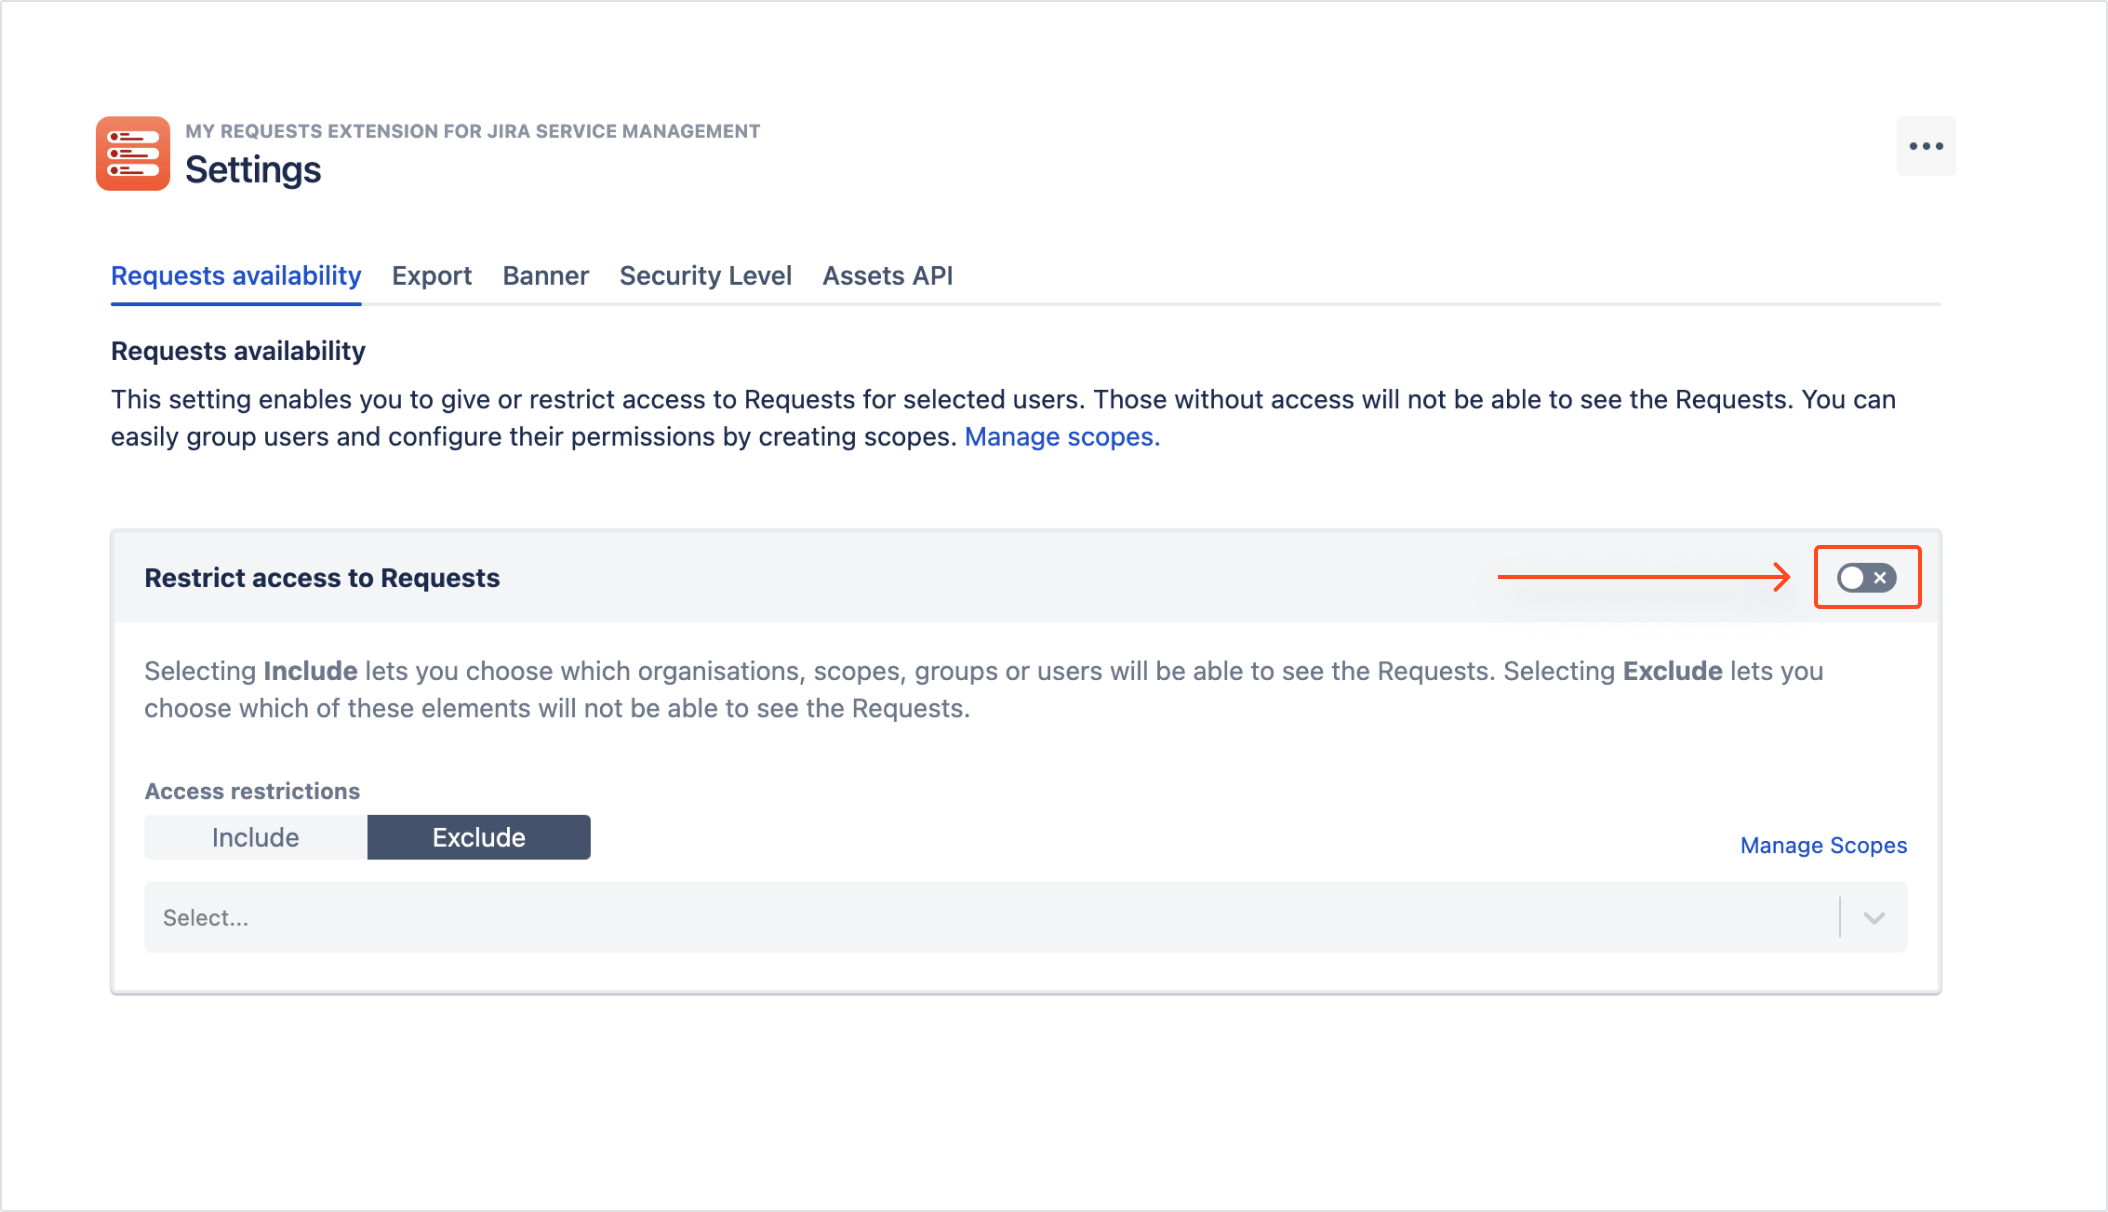
You can switch off the toggle next to Restrict access to Requests. This action disables all restrictions and gives your customers unlimited access to Requests page.
Alternatively
- Switch on the toggle next to Restrict access to Requests.
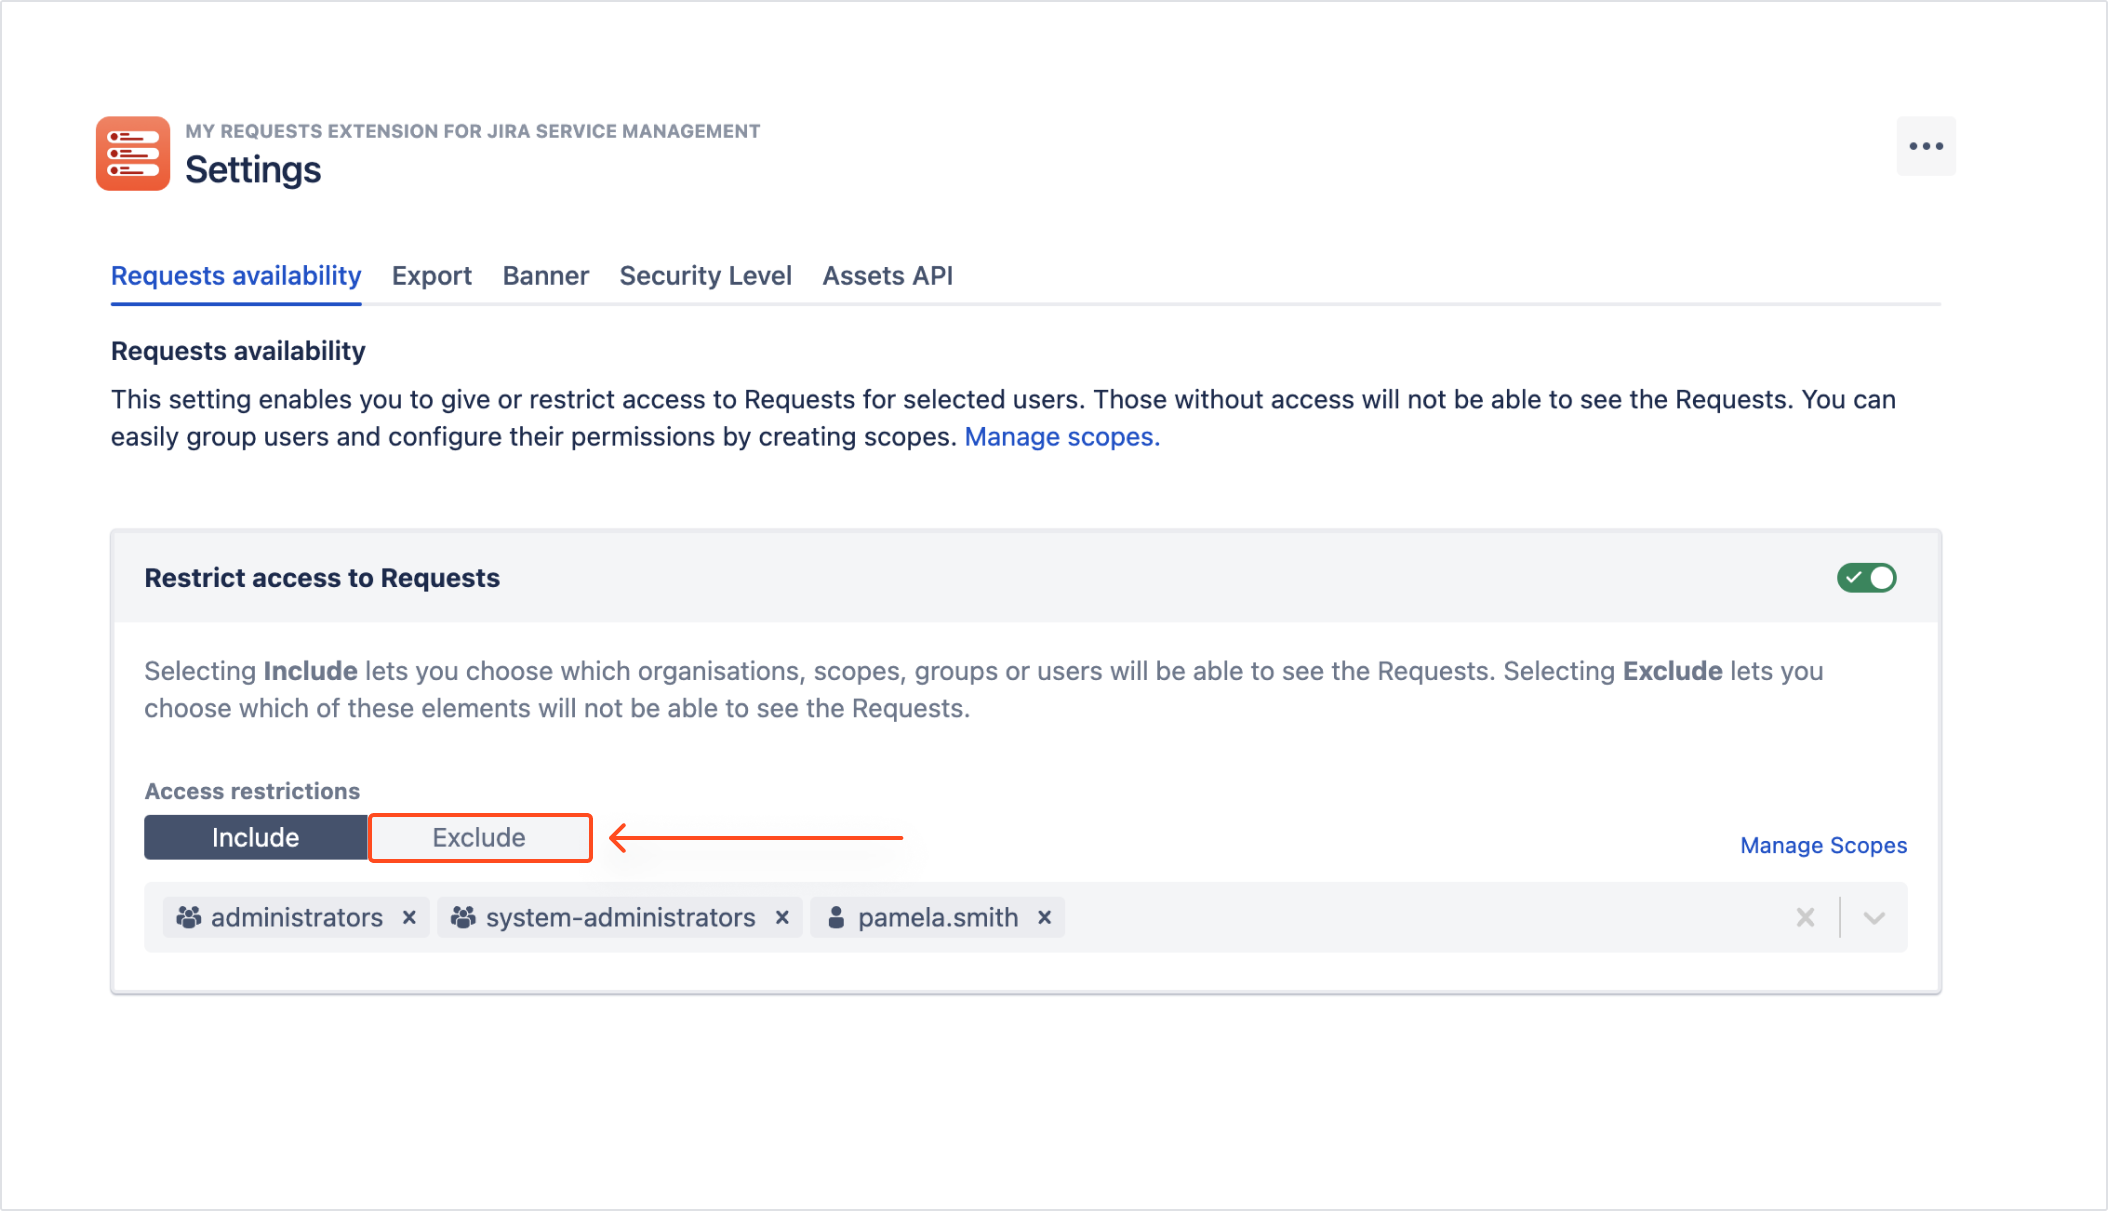
- Click on the Include tab and select your preferred users, User scopes, and Jira groups which will be able to see requests.
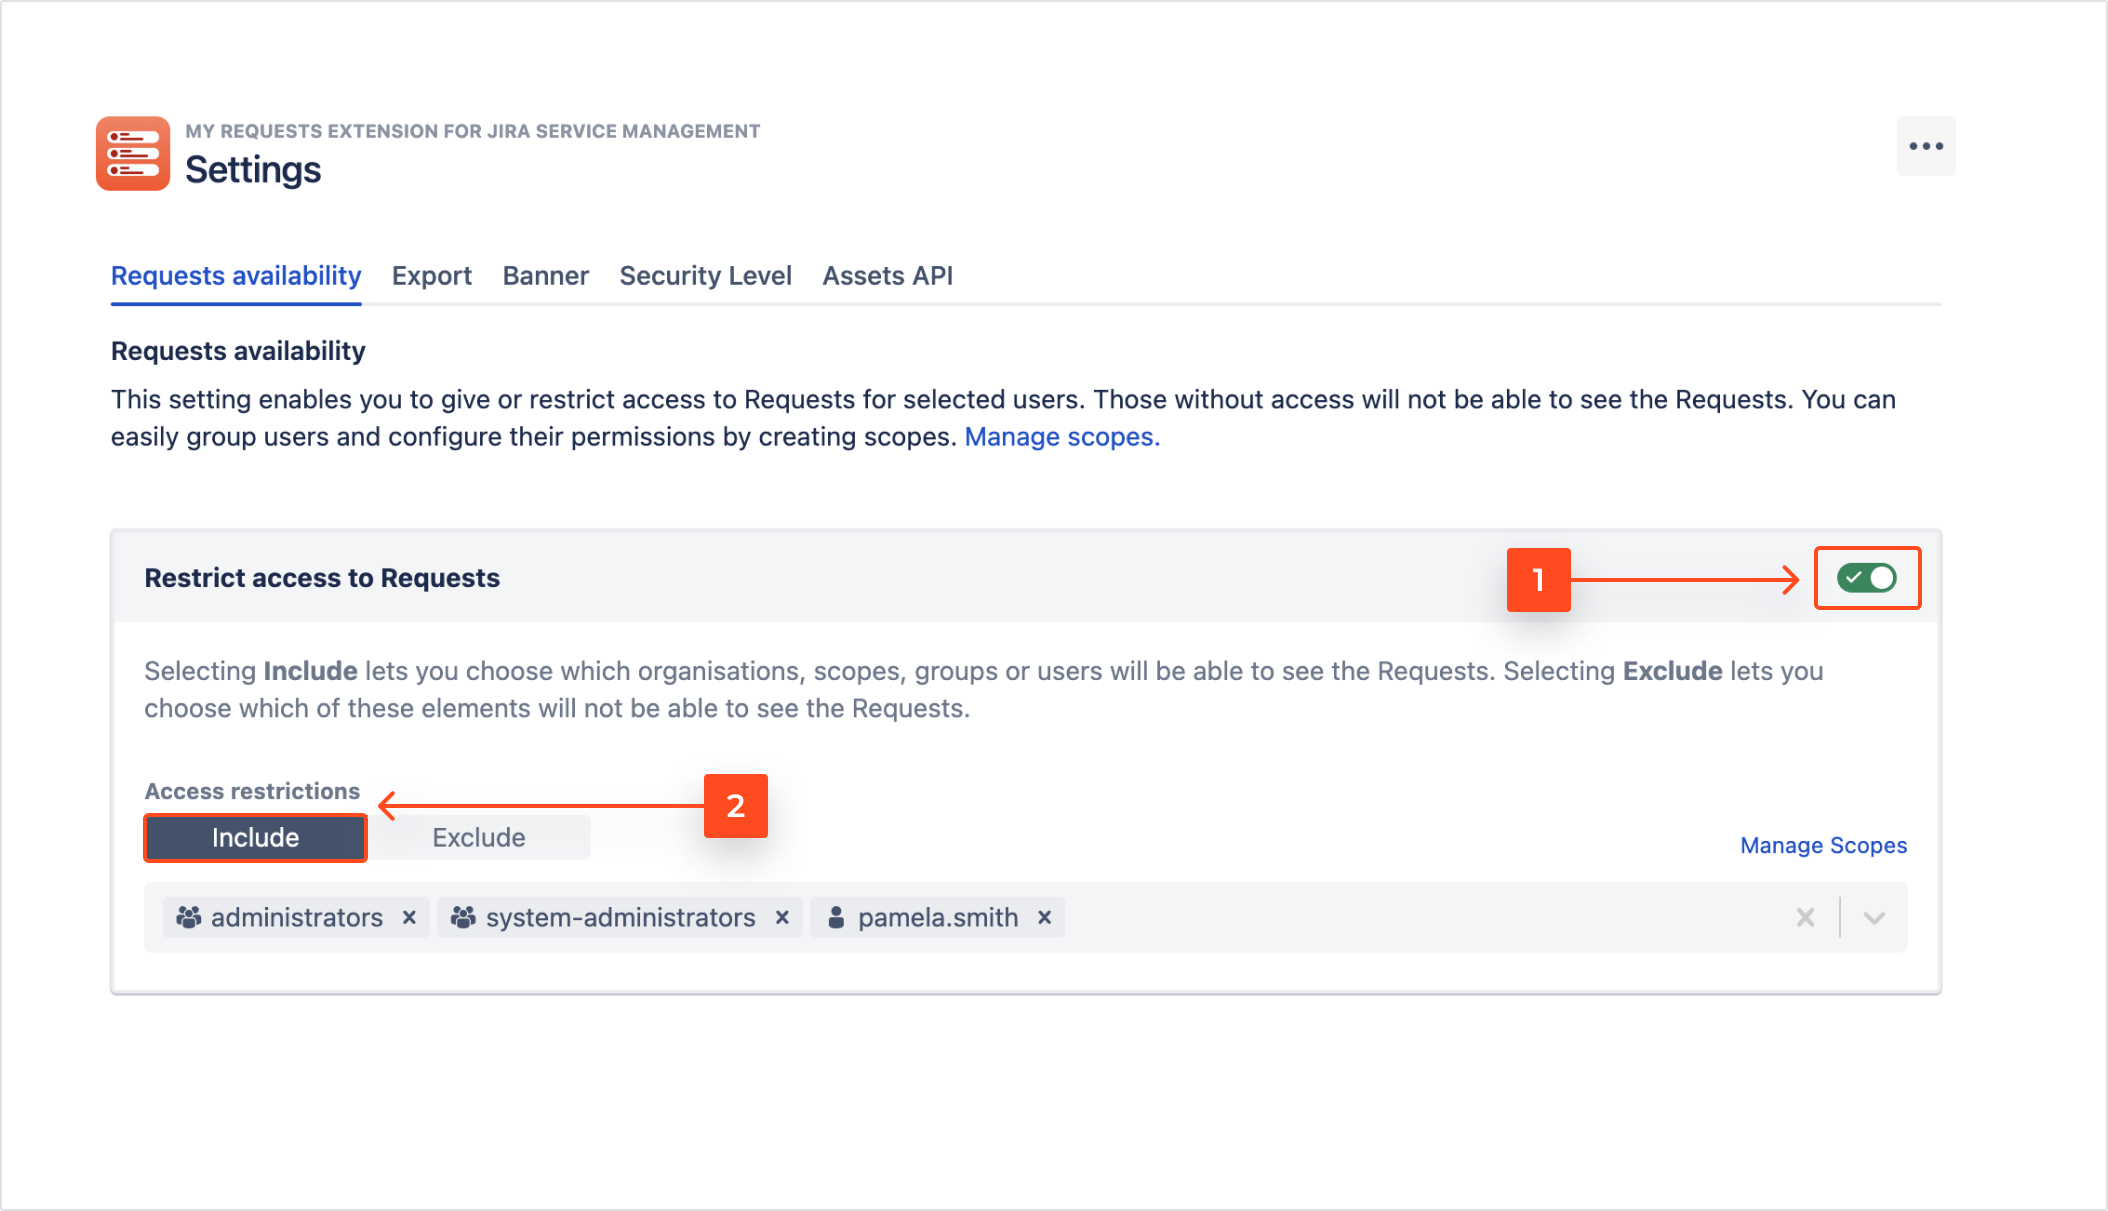
The users, User scopes, and Jira groups which aren’t selected in the Include tab won’t see Requests page.
Restricting access
In order to restrict access to Requests page, click on Exclude tab and select Users, User scopes, and Jira groups which shouldn’t see requests.
Displaying total number of requests
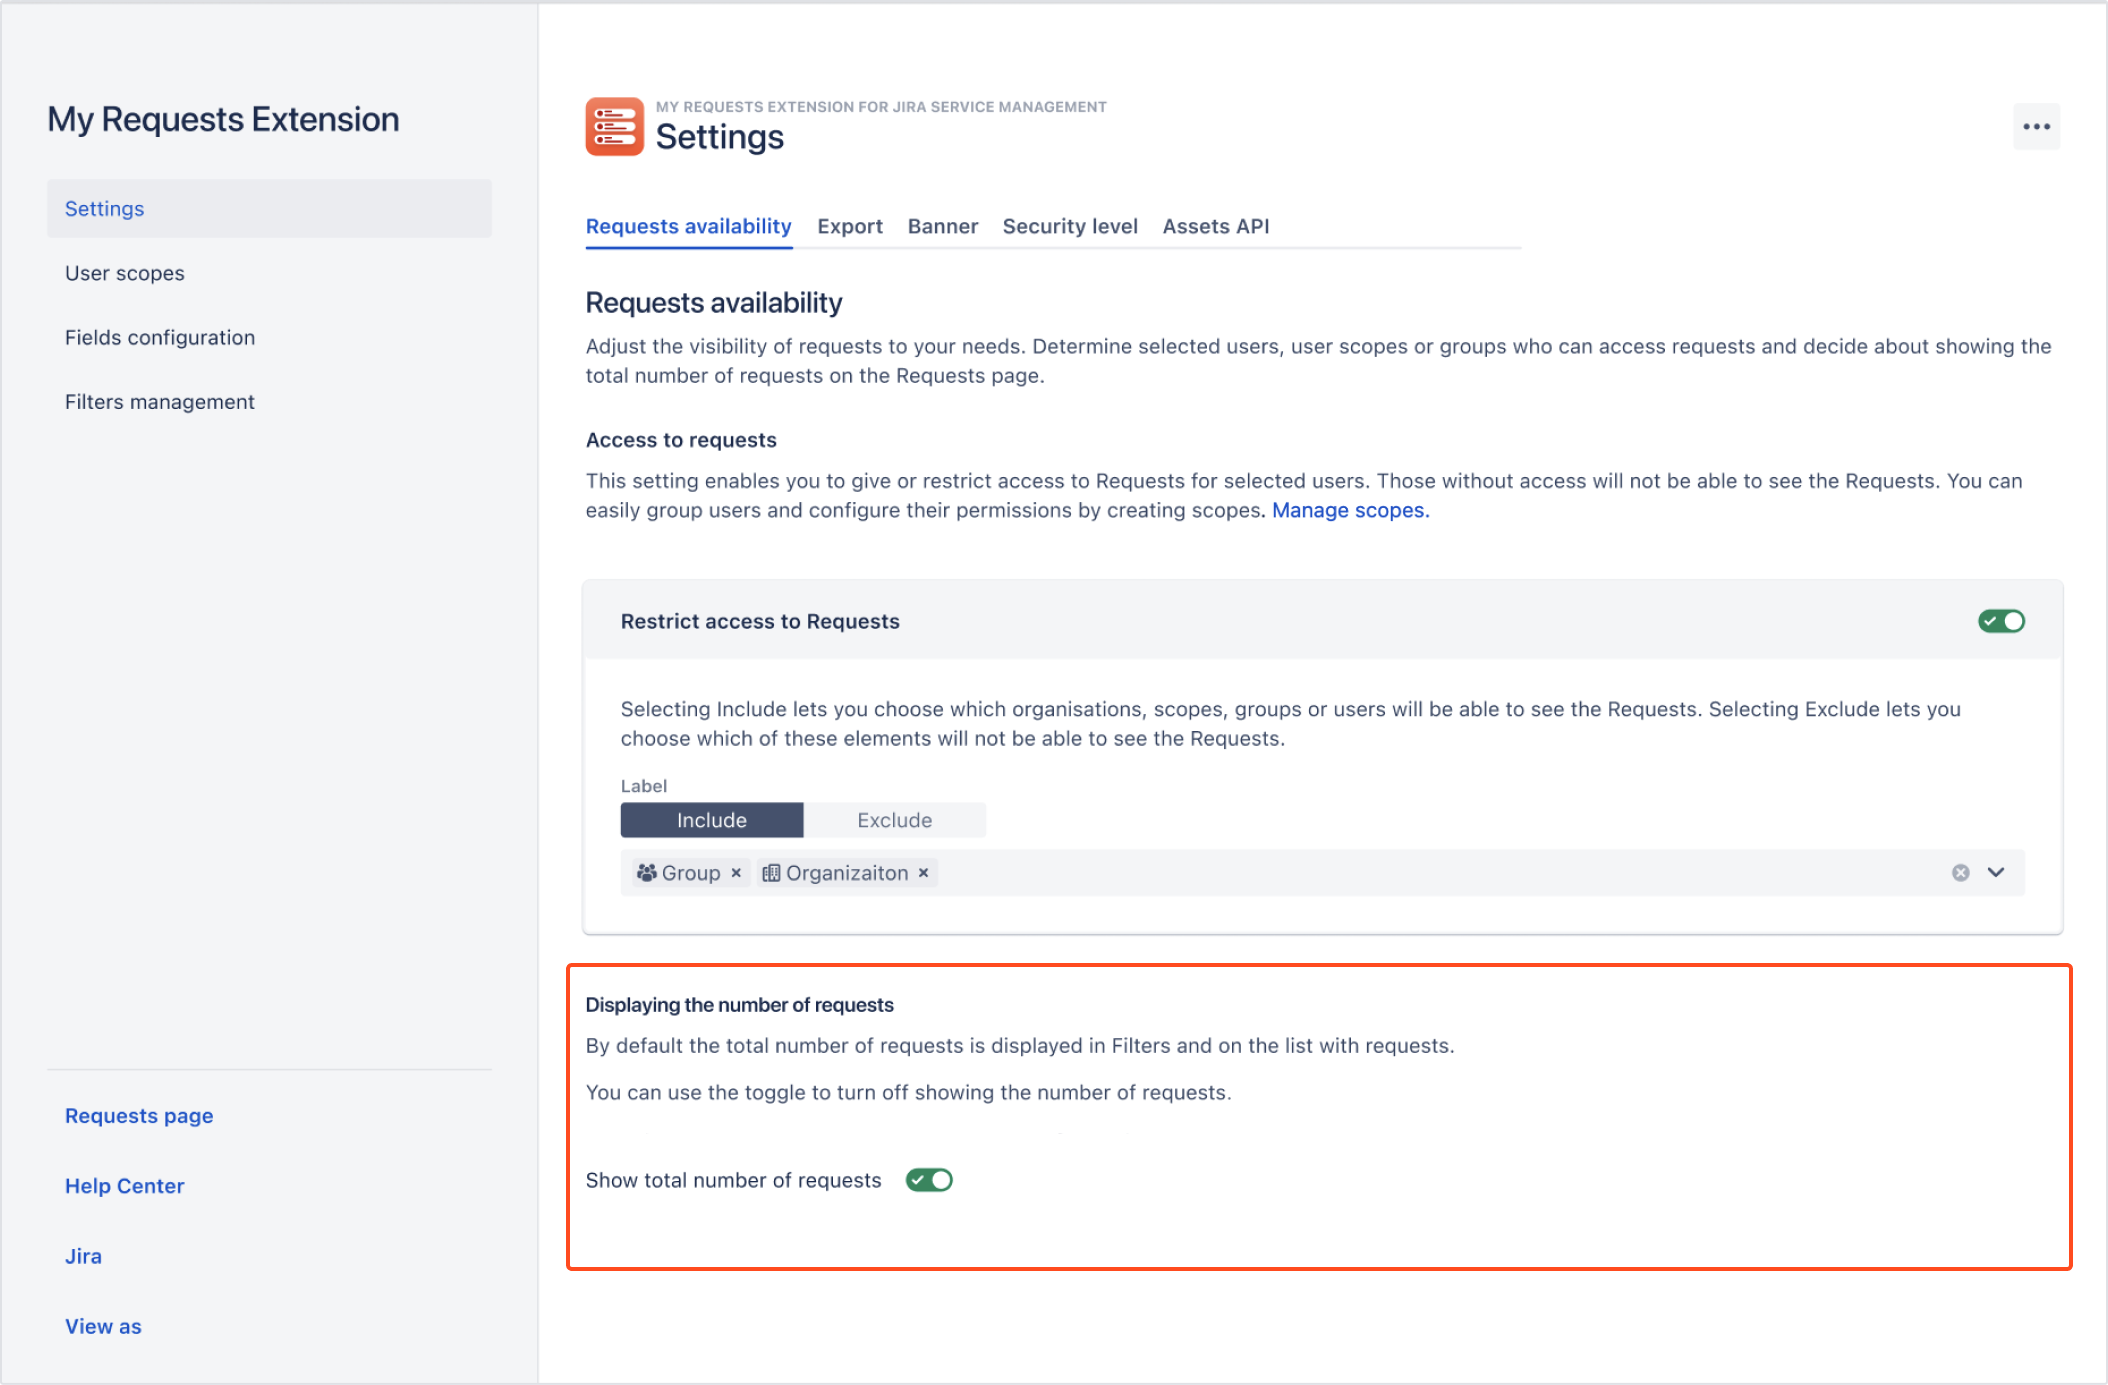
By default, the users of Requests page can see the total number of requests in filters and on the list with requests.
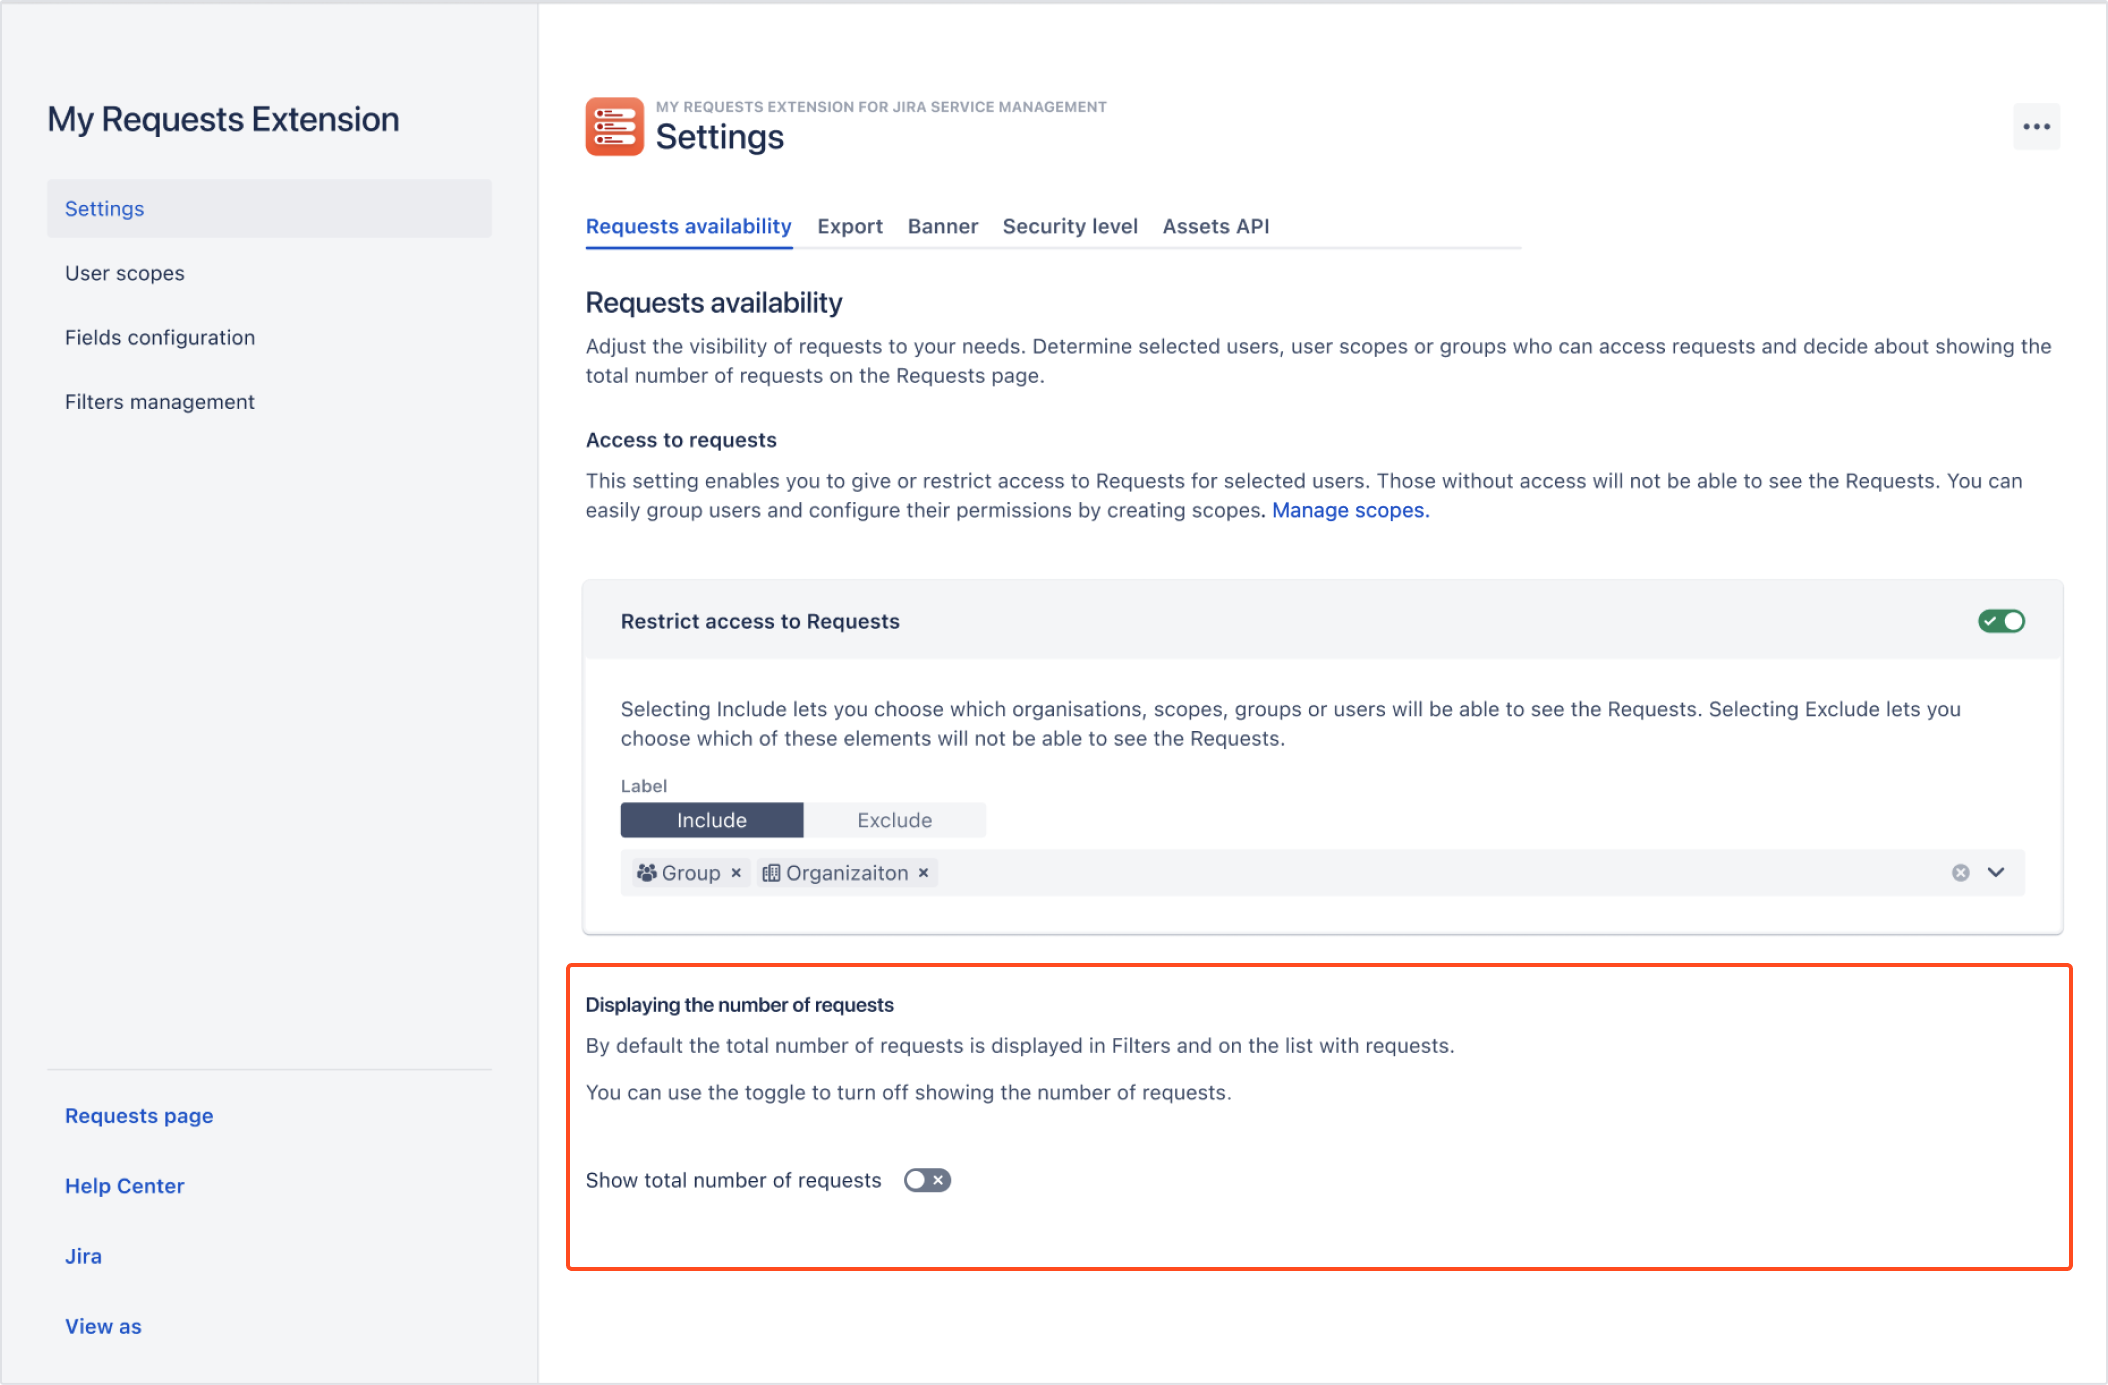
It’s possible to disable the option for showing the total number of requests with the toggle. Thanks to this possibility you can easily hide requests’ numbers from customers.
Turning off the requests’ counting also automatically boosts loading of your requests. That’s why disabling Show total number of requests is also recommended for the users who experience performance problems while working with Customer Portal.
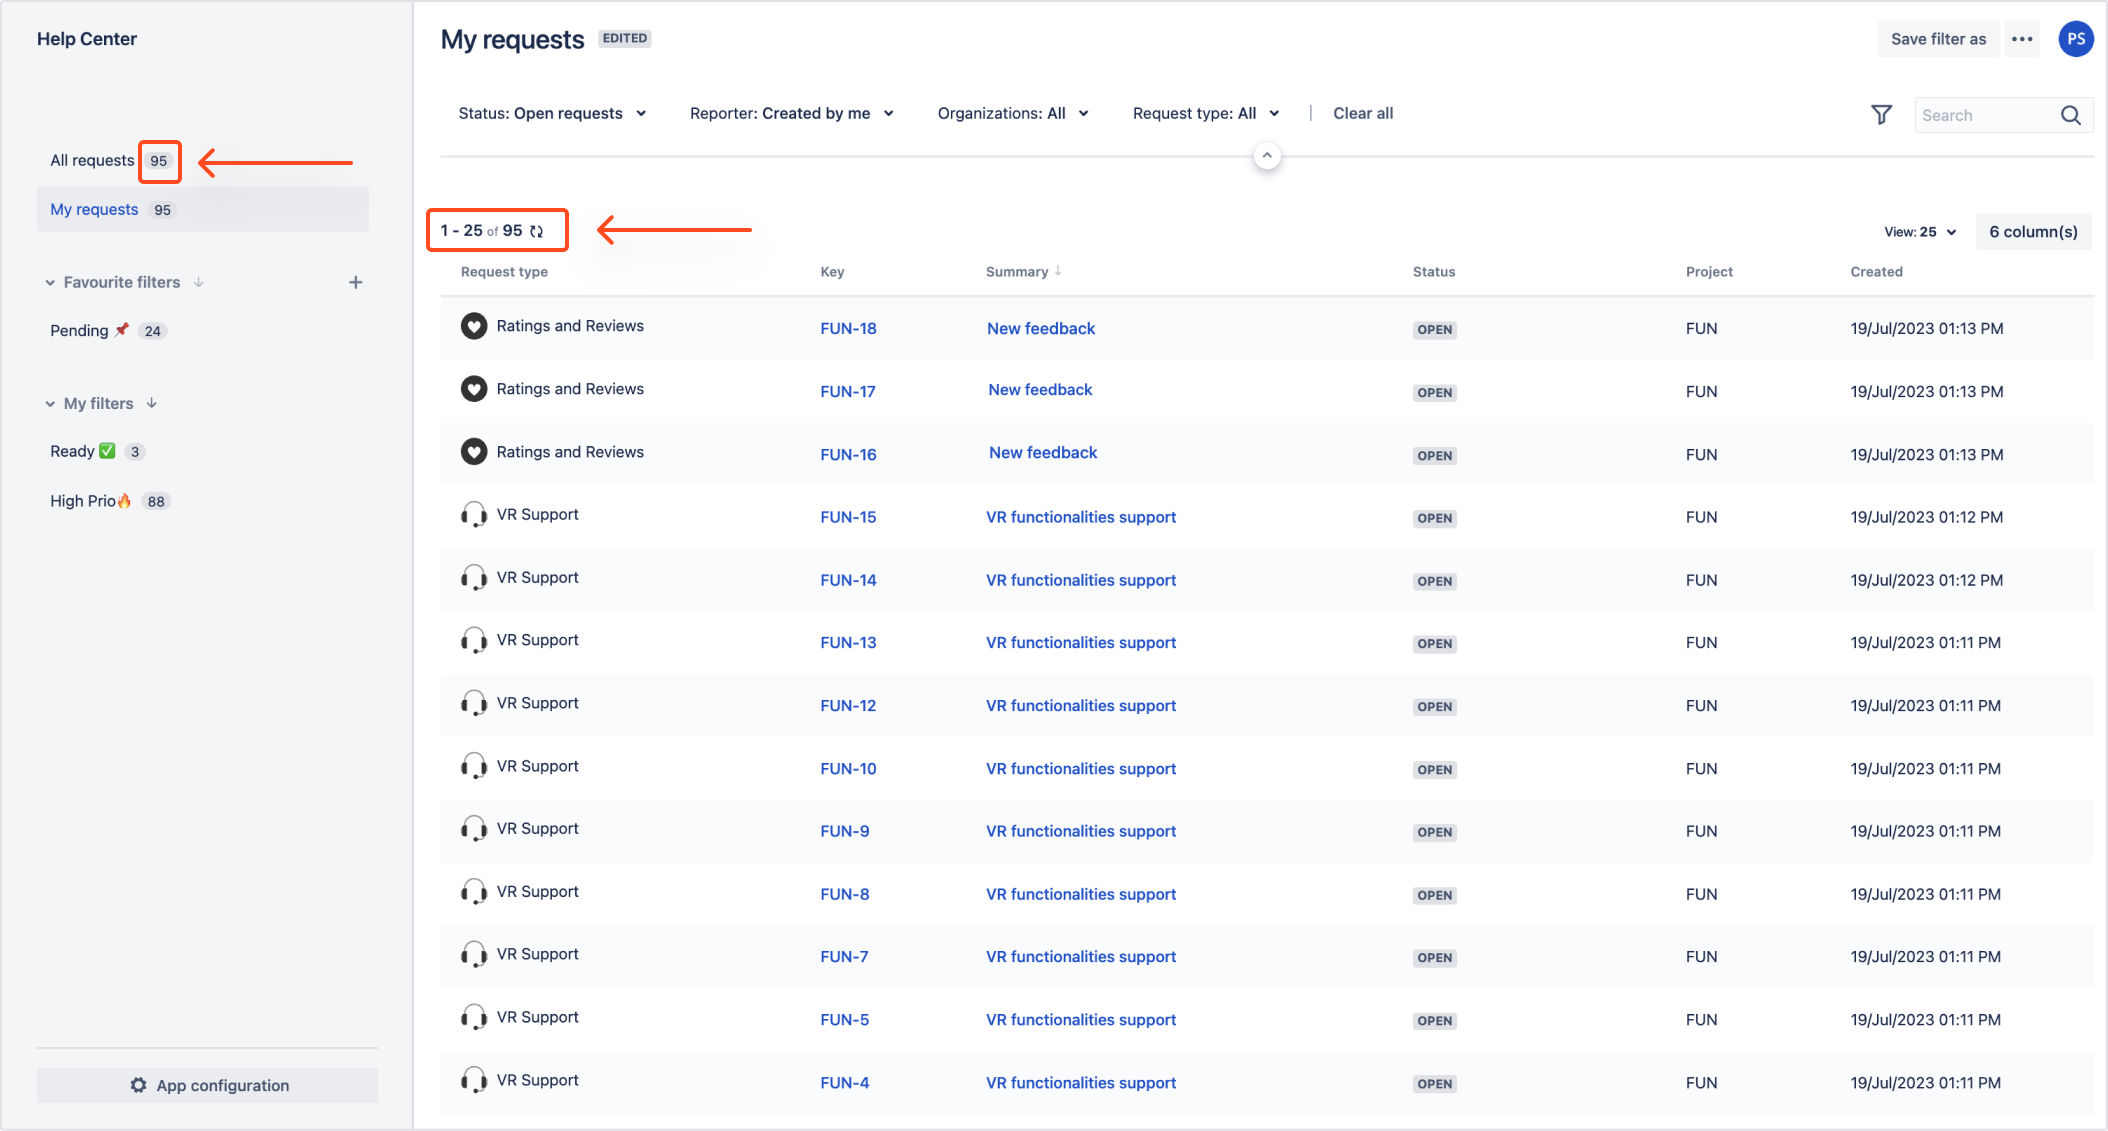
When the toggle next to Show total number of requests is turned on, the users of the Requests page can see the number of requests which is displayed in filters and on the list with requests.
When the toggle next to Show total number of requests is turned off, the total number of requests isn’t displayed on Requests page.
Export
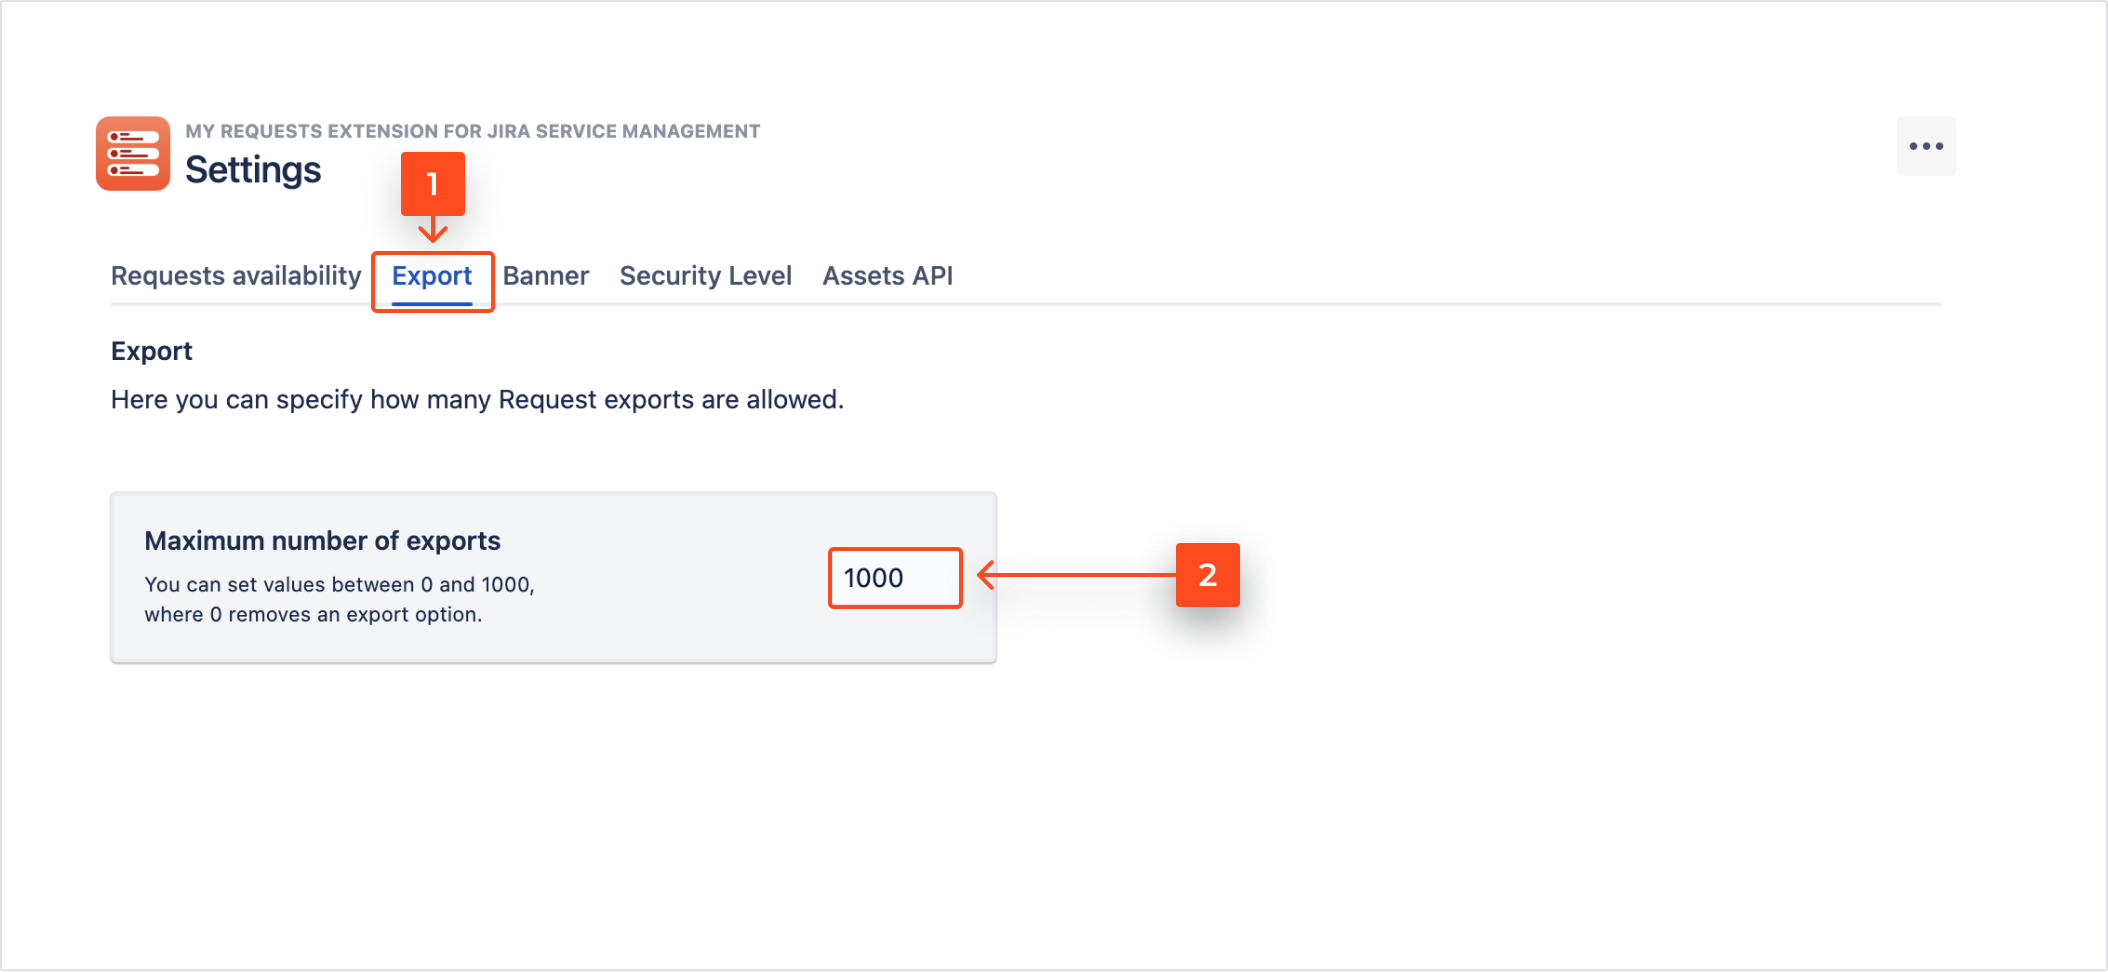
The Export tab enables you to set the maximum number of exports each customer can make by entering a number from 0 to 1000. Number 1000 is set by default whilst number 0 means that exporting option isn’t available to customers.
Steps
- In order to change the exporting preferences, click on the Export tab.
- Enter the number between 0 and 1000.
Result
Changes are applied instantly.
The exported CSV file contains columns and field values which were visible on the requests screen.
Banner
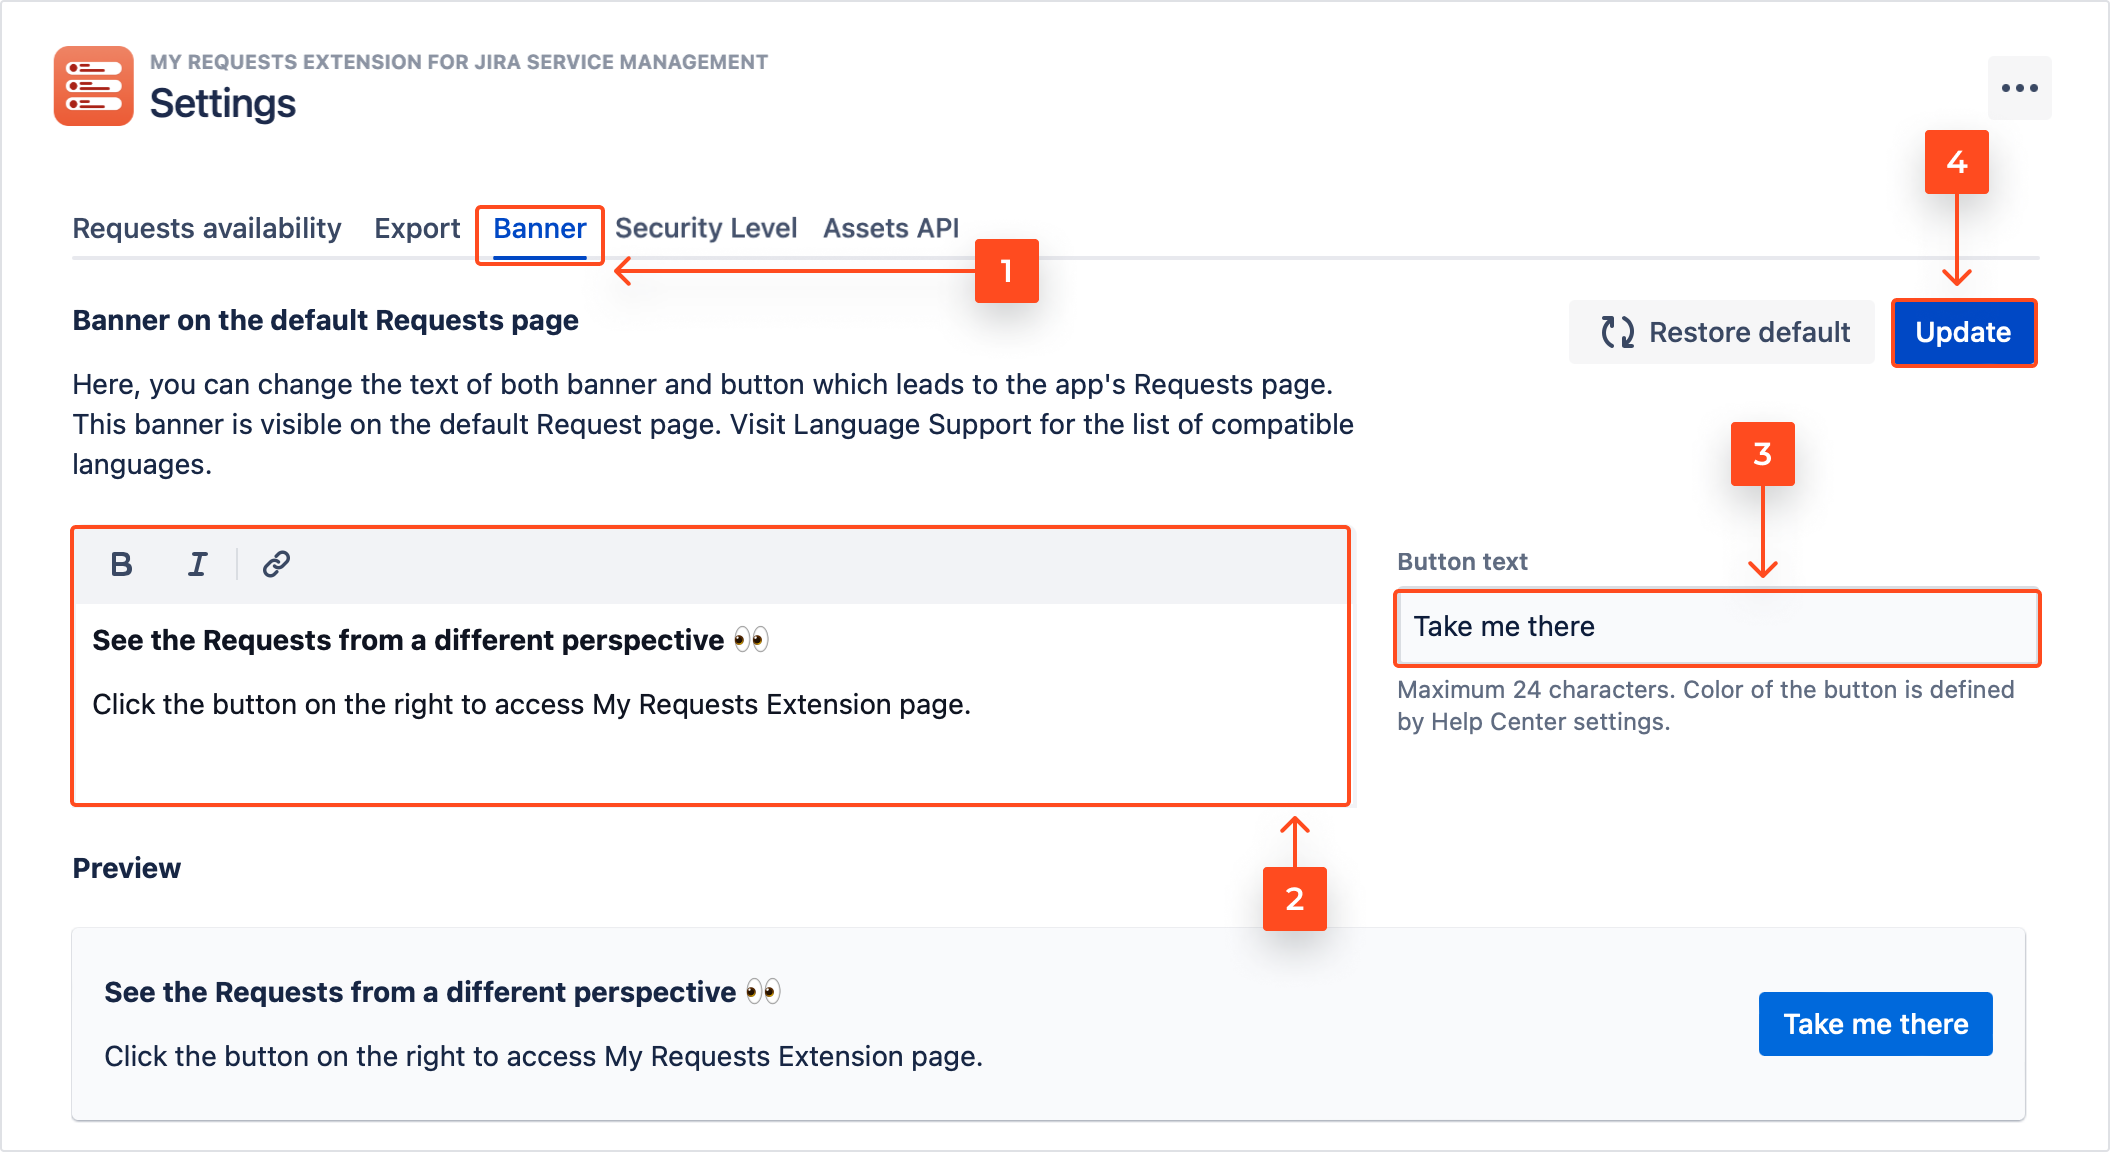
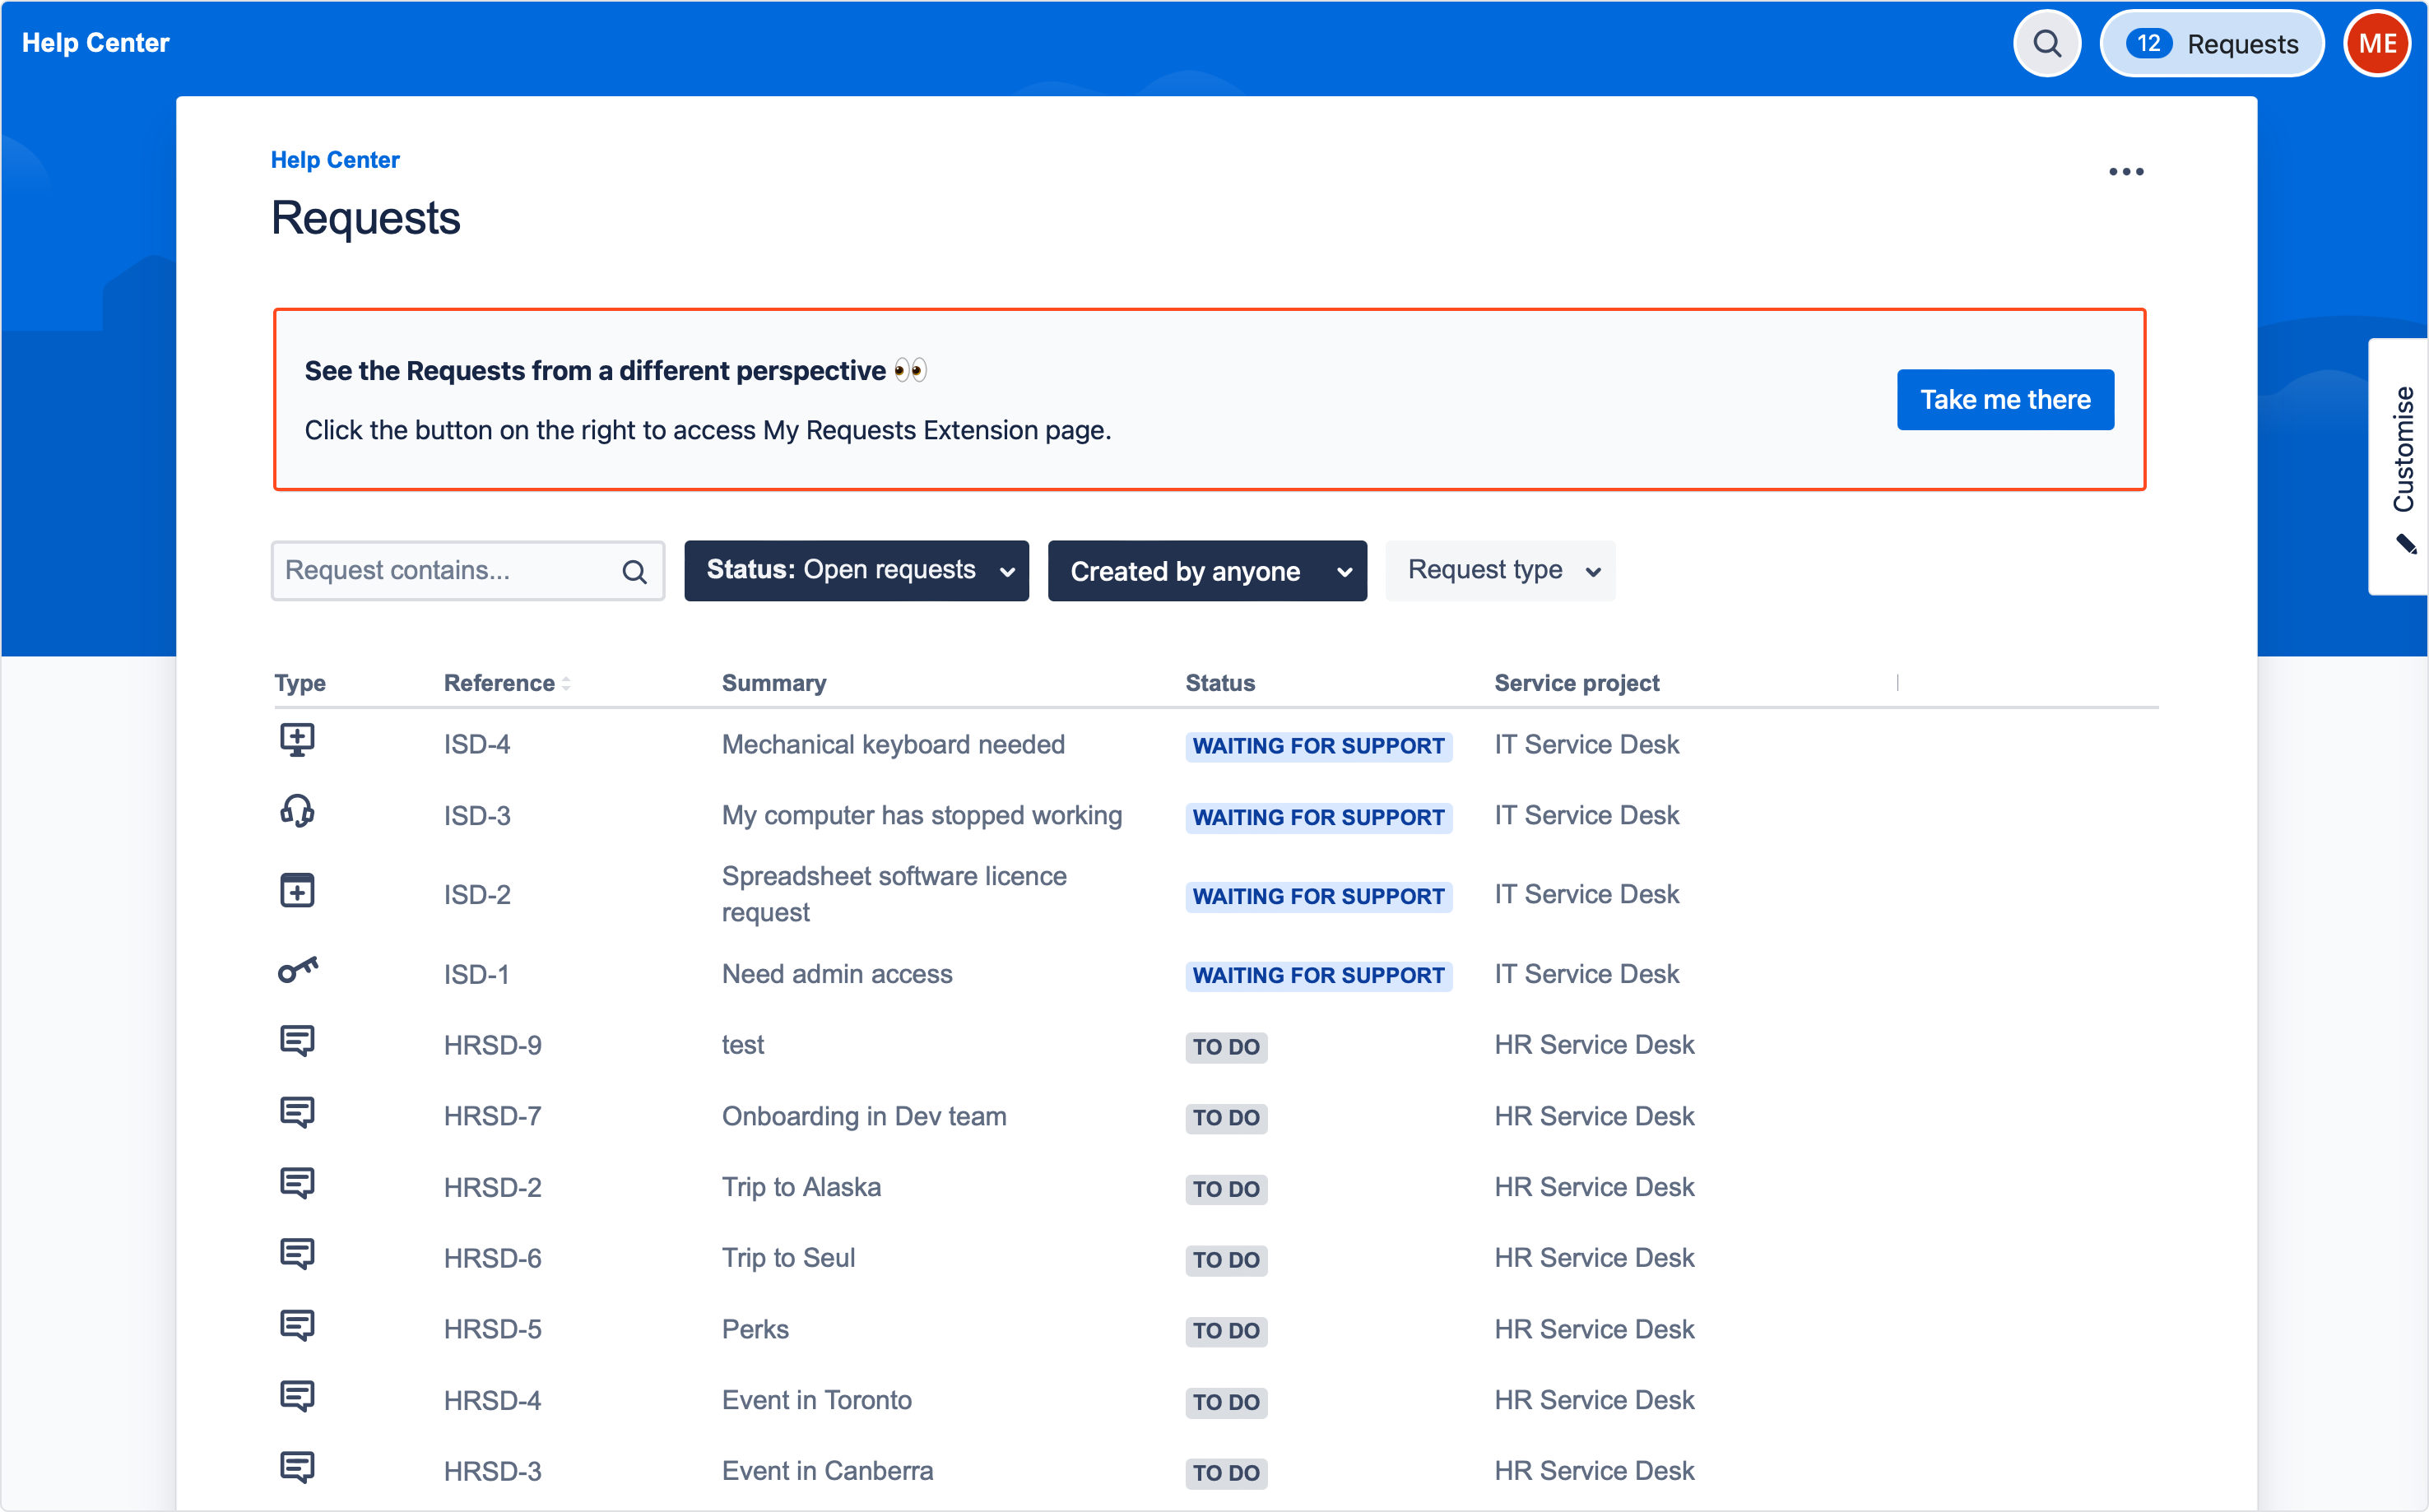
The Banner tab serves for customization. You can change the text of the redirection banner along with the button leading to the app’s Requests page. The banner appears above the native Jira Requests page.
Steps
- To change the banner text, click on the Banner tab.
- Enter your text.
Note
- You can use the Rich text formatting and add bolded text, italics, and links.
- Below the editor you can see Preview of your banner.
- Change Button text.
The text of the button can be maximum 24 characters long.
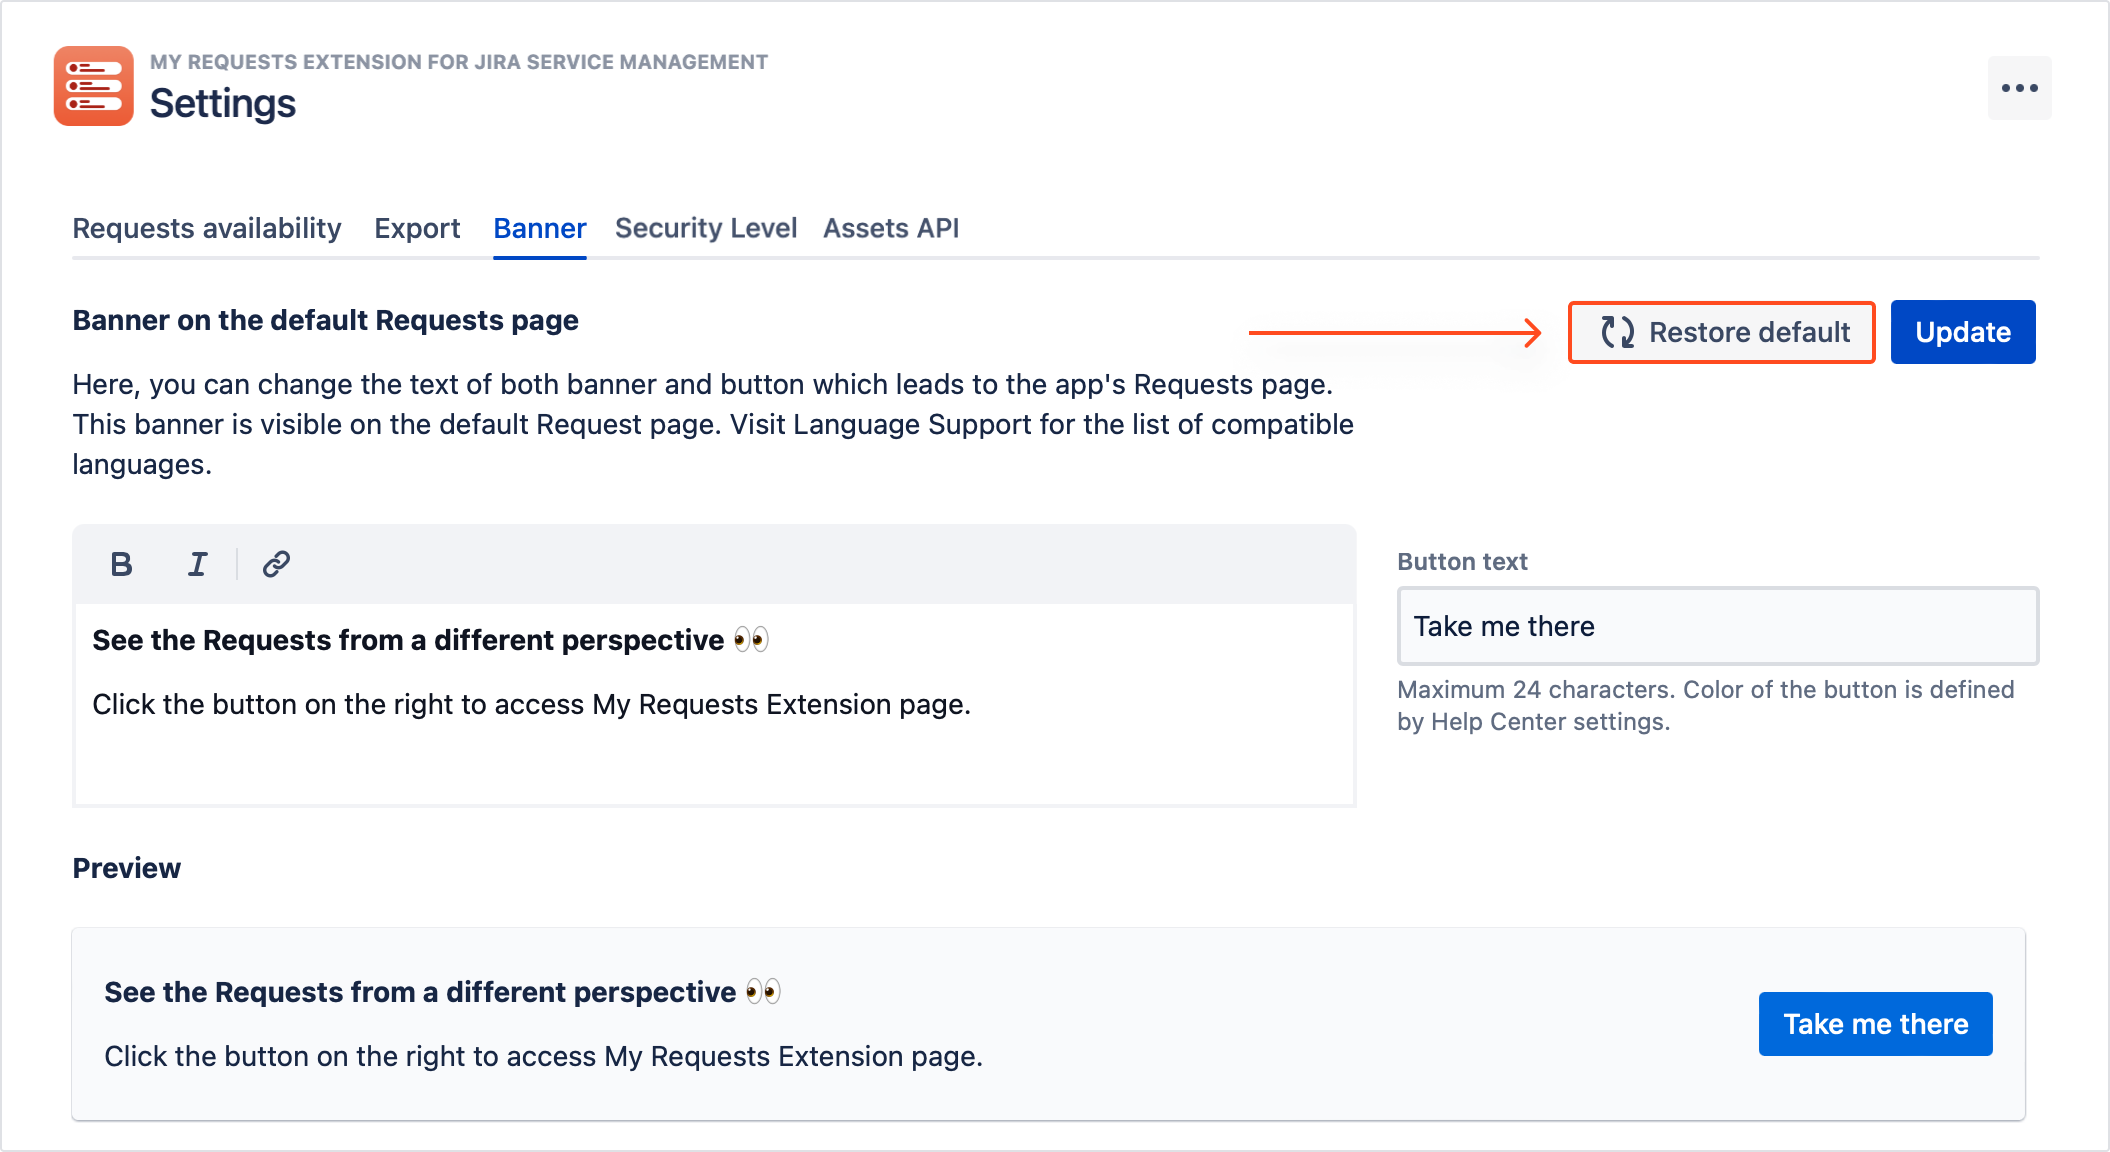
Each time by introducing changes to the already active banner text, click the Update button to save your configuration.
Result
Your custom banner is visible on the native Requests page.
Security Level
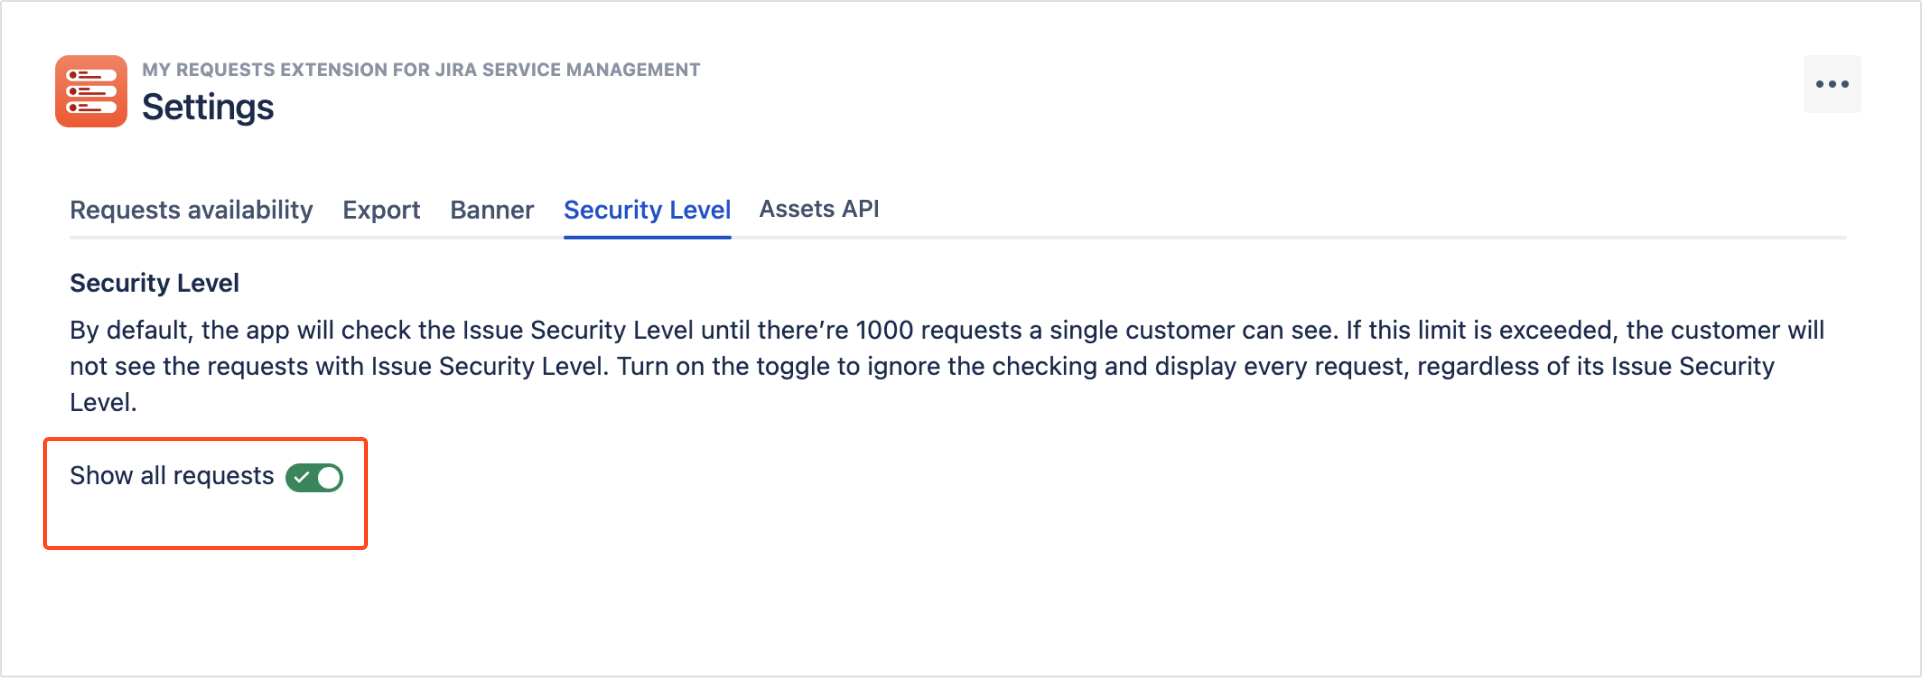
The Security Level tab allows you to configure the visibility of requests with Issue Security Level.
Thanks to the My Requests app, global Jira administrators can decide whether the application should verify the Issue Security Level of displayed requests, or ignore the checking and display all requests to the customer.
By default, the customer sees up to 1000 requests that have a configured Issue Security Level. If the limit of displayed requests is exceeded, the customer won’t see the requests with Issue Security Level in order to avoid timeouts.
The toggle next to Show all requests is by default turned off and it allows the app for checking the Issue Security Level of requests.
To enable the Issue Security Level verification and display up to 1000 requests that have a configured Issue Security Level, the toggle next to Show all requests should remain turned off.
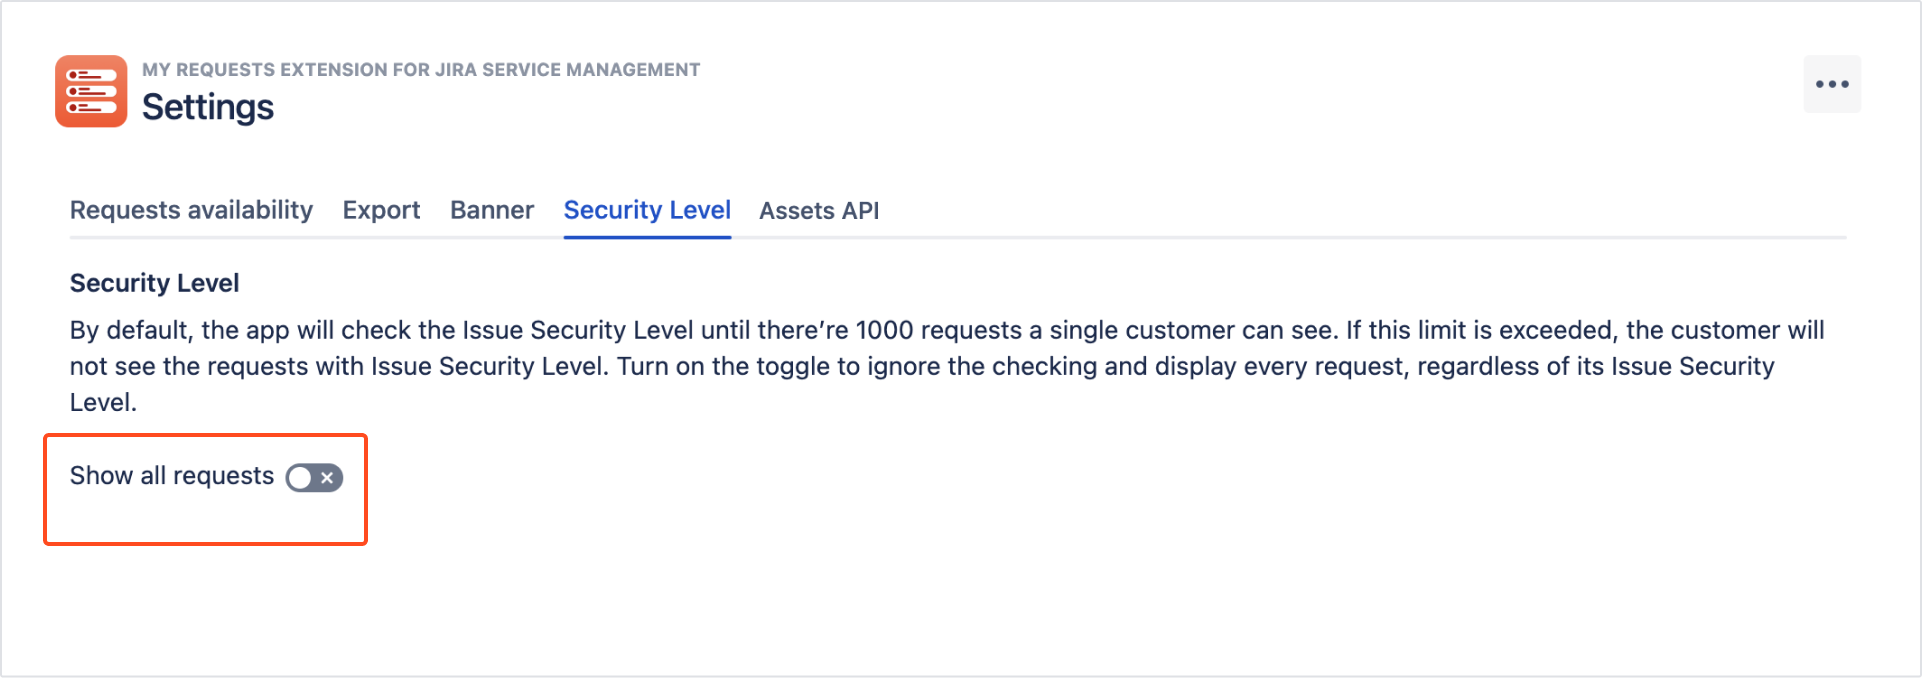
To ignore the verification and display every request, regardless of its Issue Security Level, turn on the toggle next to Show all requests.
Assets API
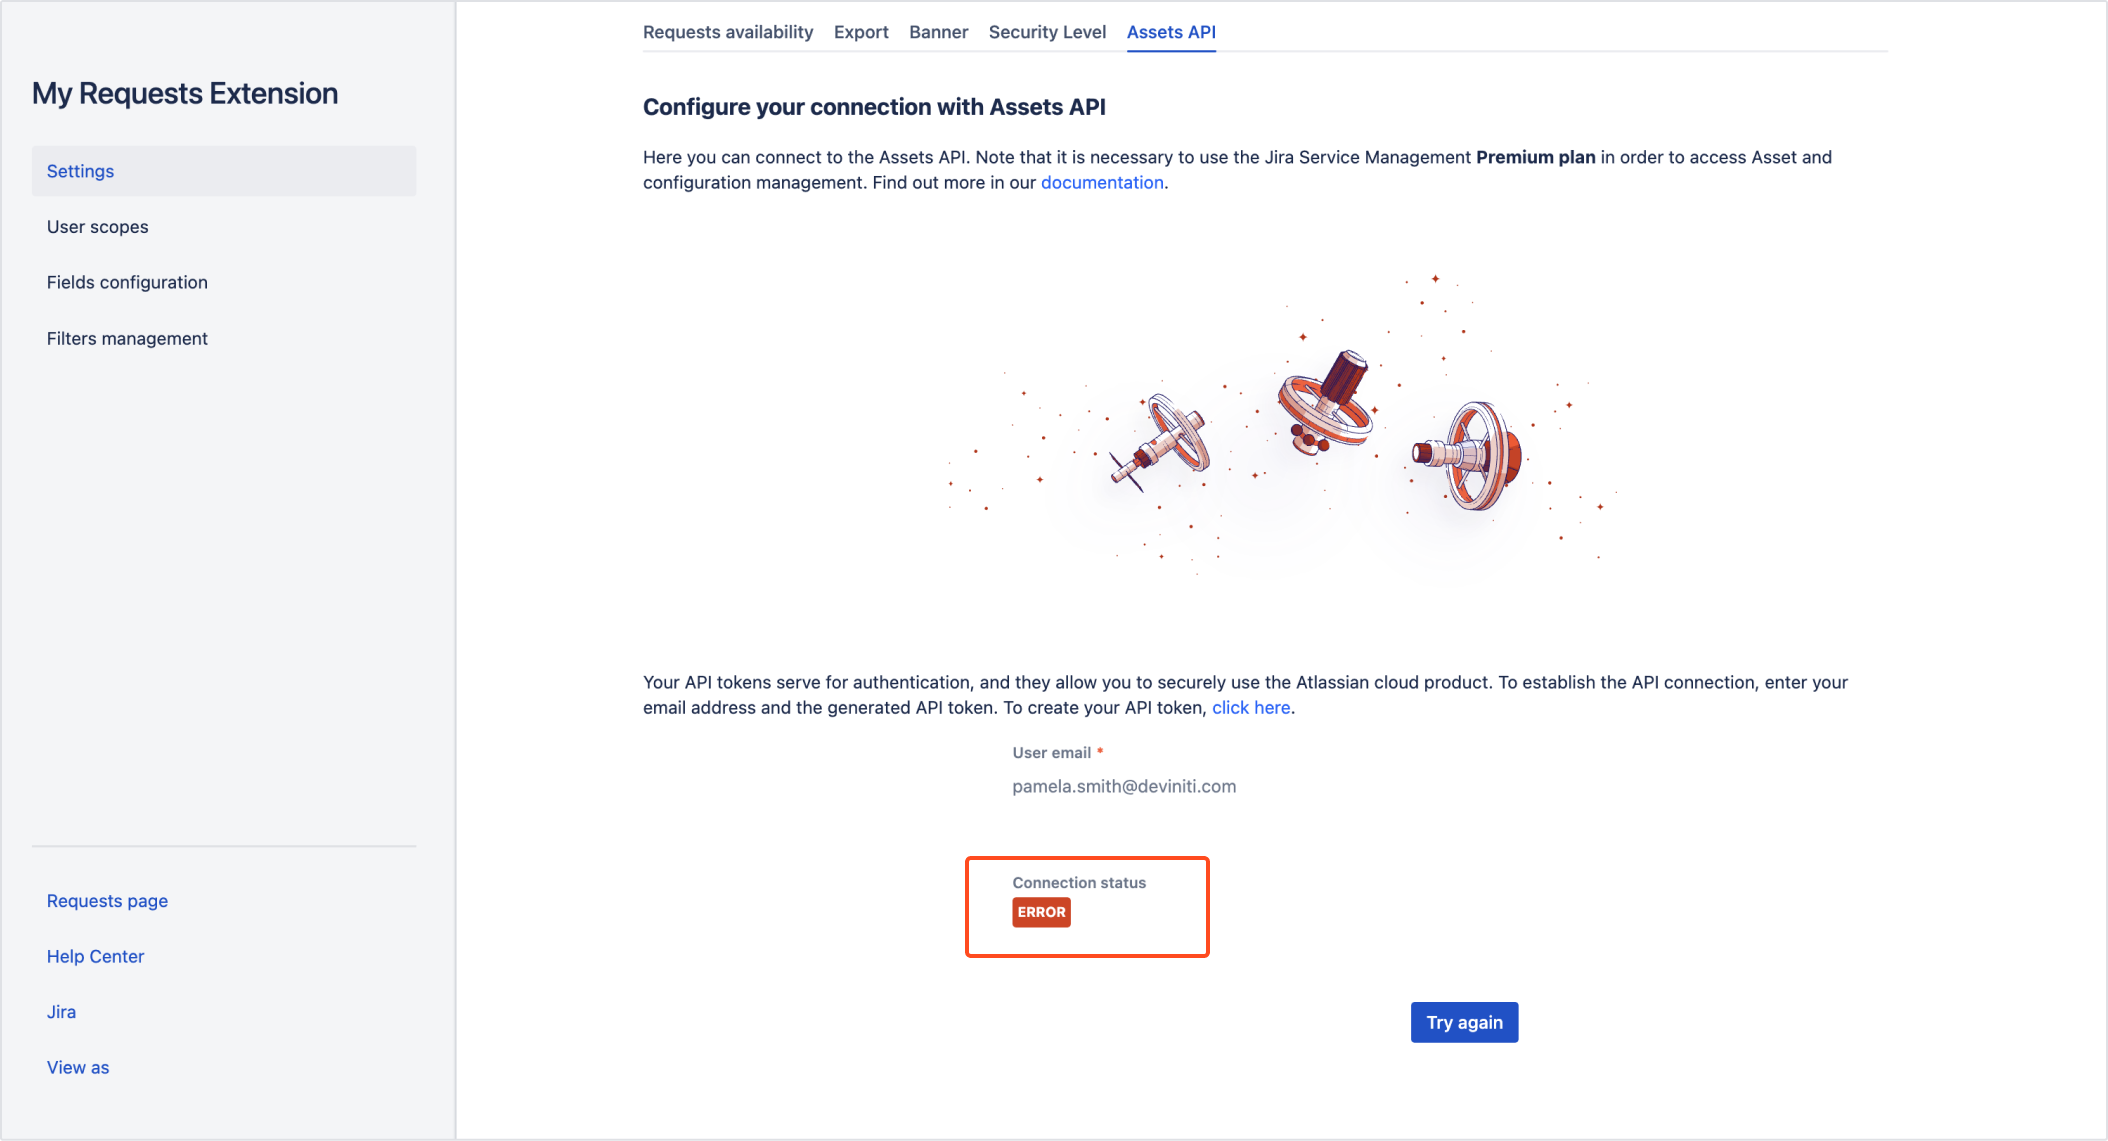
The Assets API tab enables you to configure your connection with the app. The connection is necessary to use Assets together with My Requests Extension when setting Assets custom field as Criteria.
To access Assets in Jira Service Management it’s required to upgrade to the Premium plan. Learn about upgrading your plan to Premium.
Establishing connection
You can establish the connection with the app by using your Atlassian account credentials:
- email address
- API token
API tokens serve for authentication and they allow you to securely work with the app. The tokens can be generated from your Atlassian account. You can use your generated token by applying the copy and paste options.
To find out how to create and manage API tokens, see Atlassian documentation.
Steps
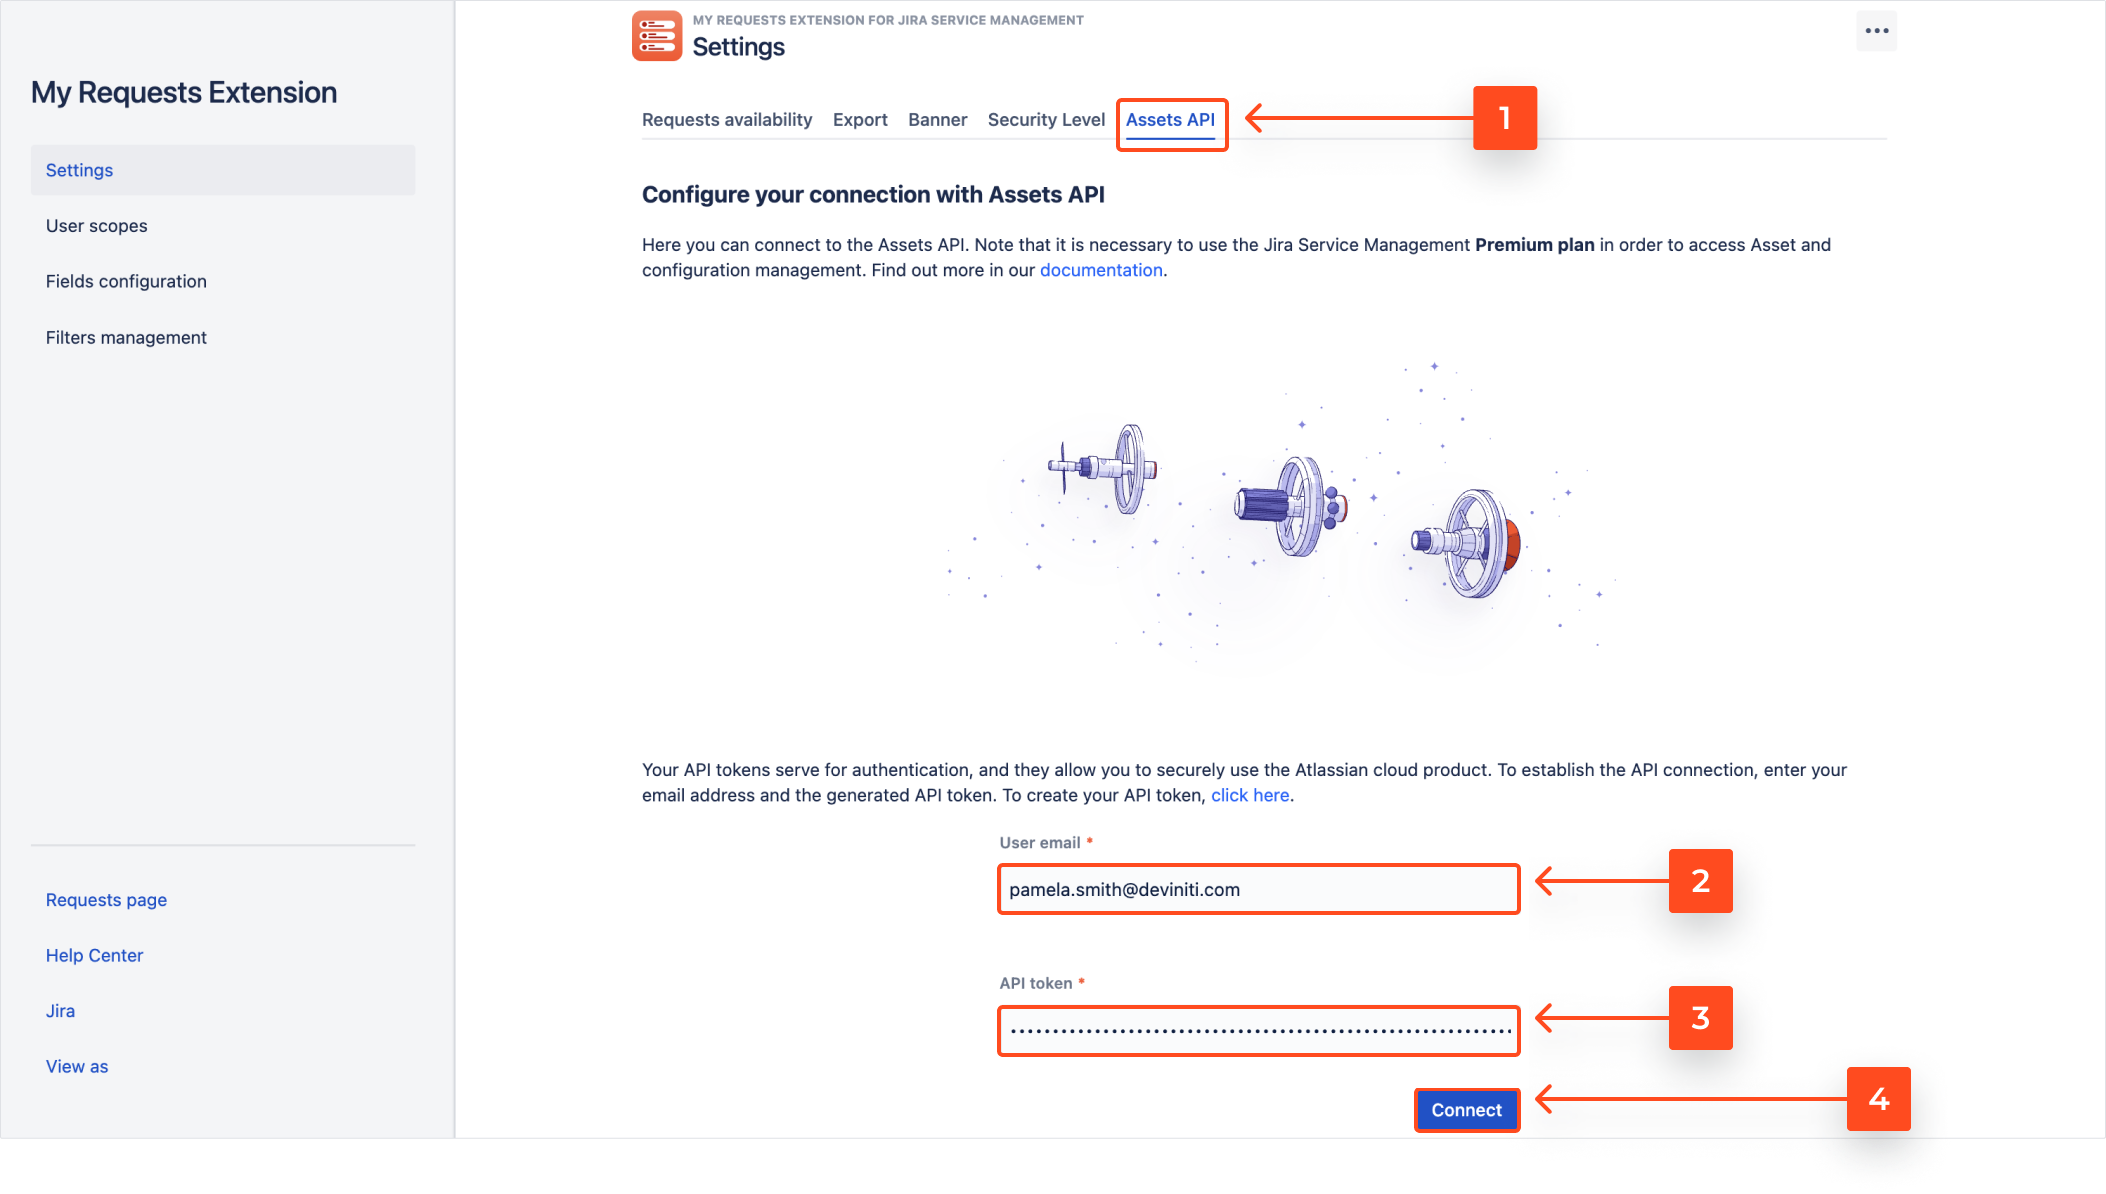
- Access the Assets API tab.
- Enter your email address.
- Provide your API token which can be created by using the Atlassian account view.
- Click Connect.
Result
The introduced email and API token are verified. If your credentials are correct, the connection is established and you can use Assets together with My Requests.
Disconnecting Assets API
You can terminate the connection with the app by disconnecting the API token.
By terminating your connection with the Assets API you won’t be able to use the My Requests Extension app with Assets.
Steps
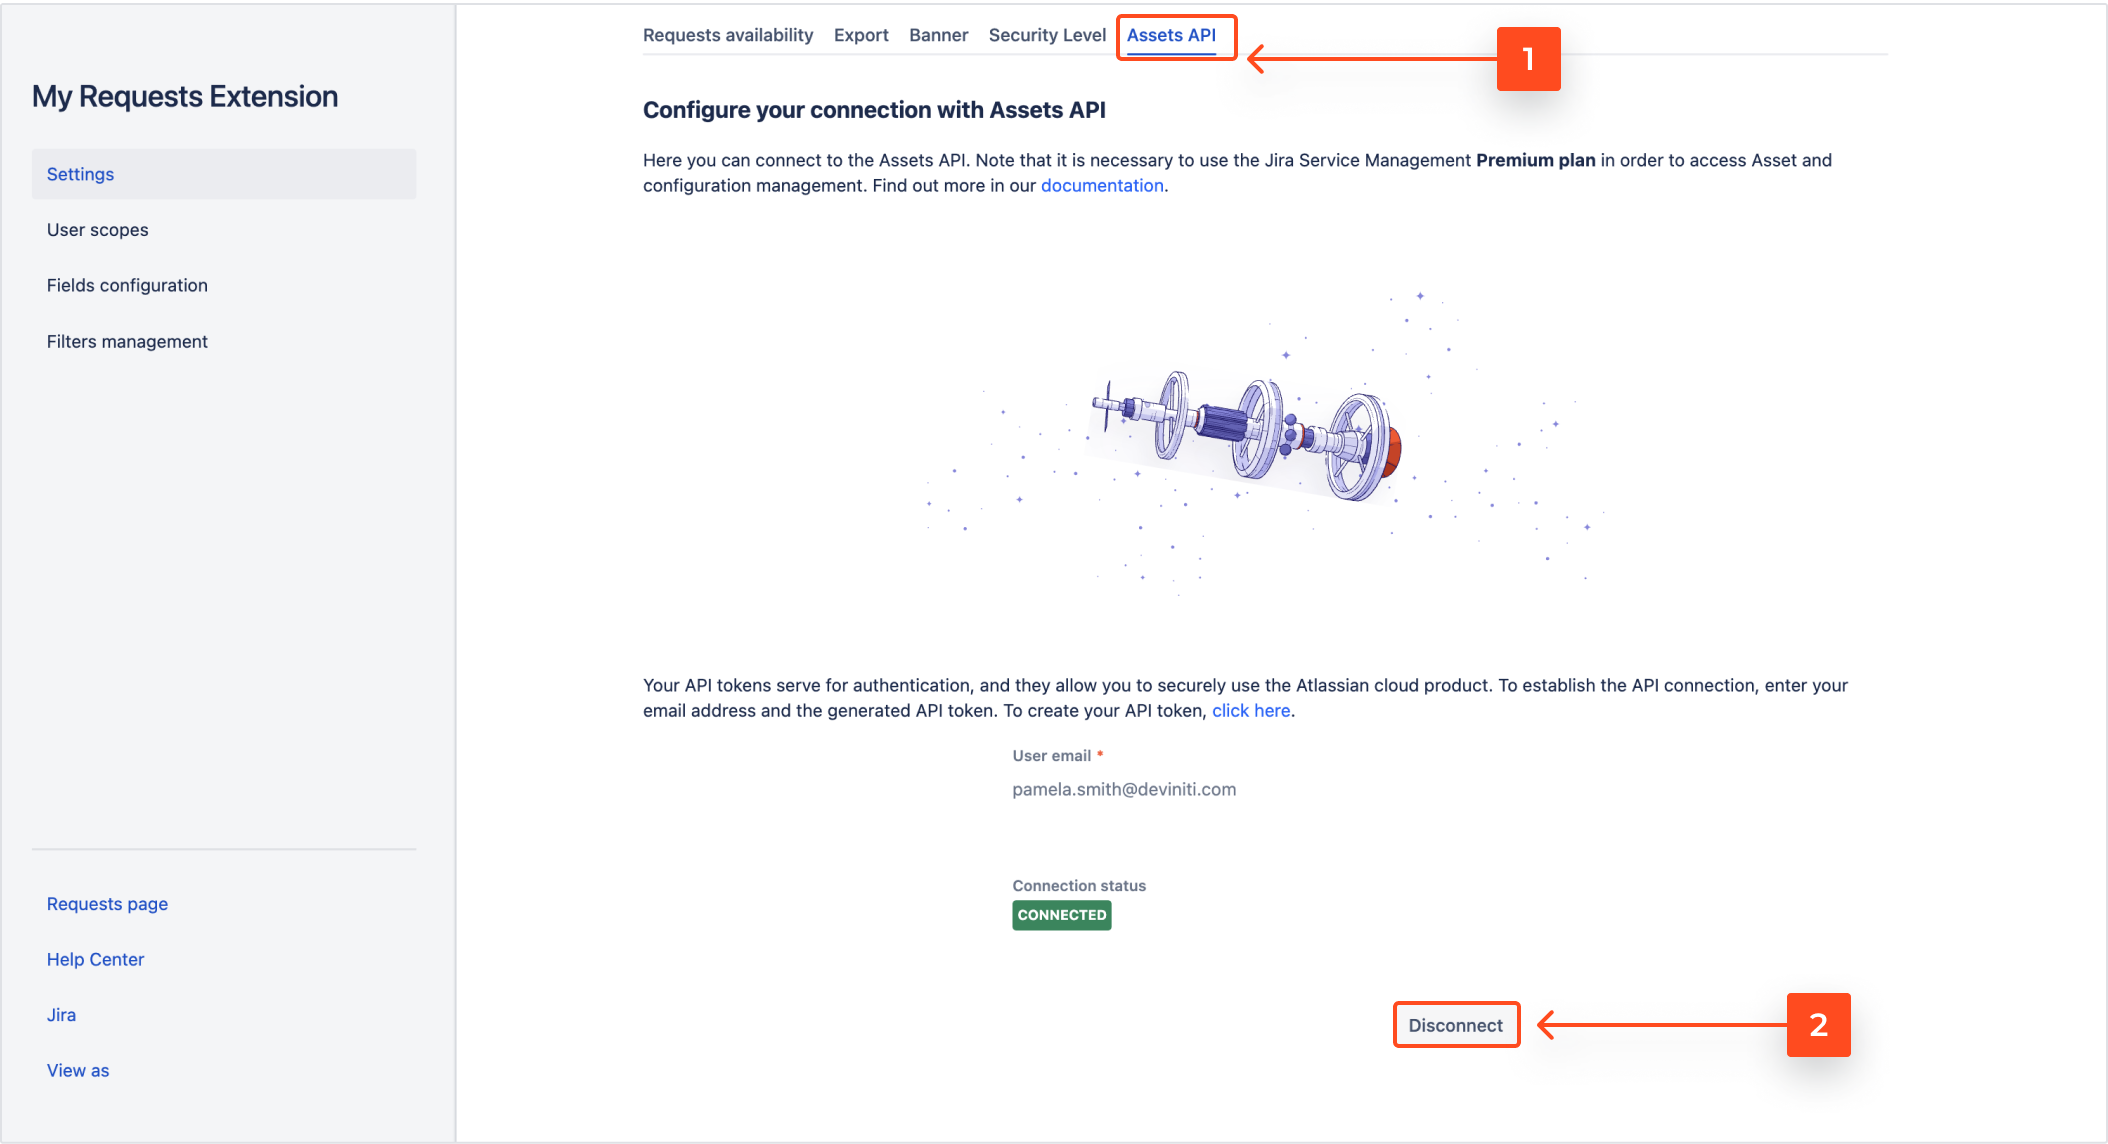
- Access the Assets API configuration view.
- Click Disconnect.
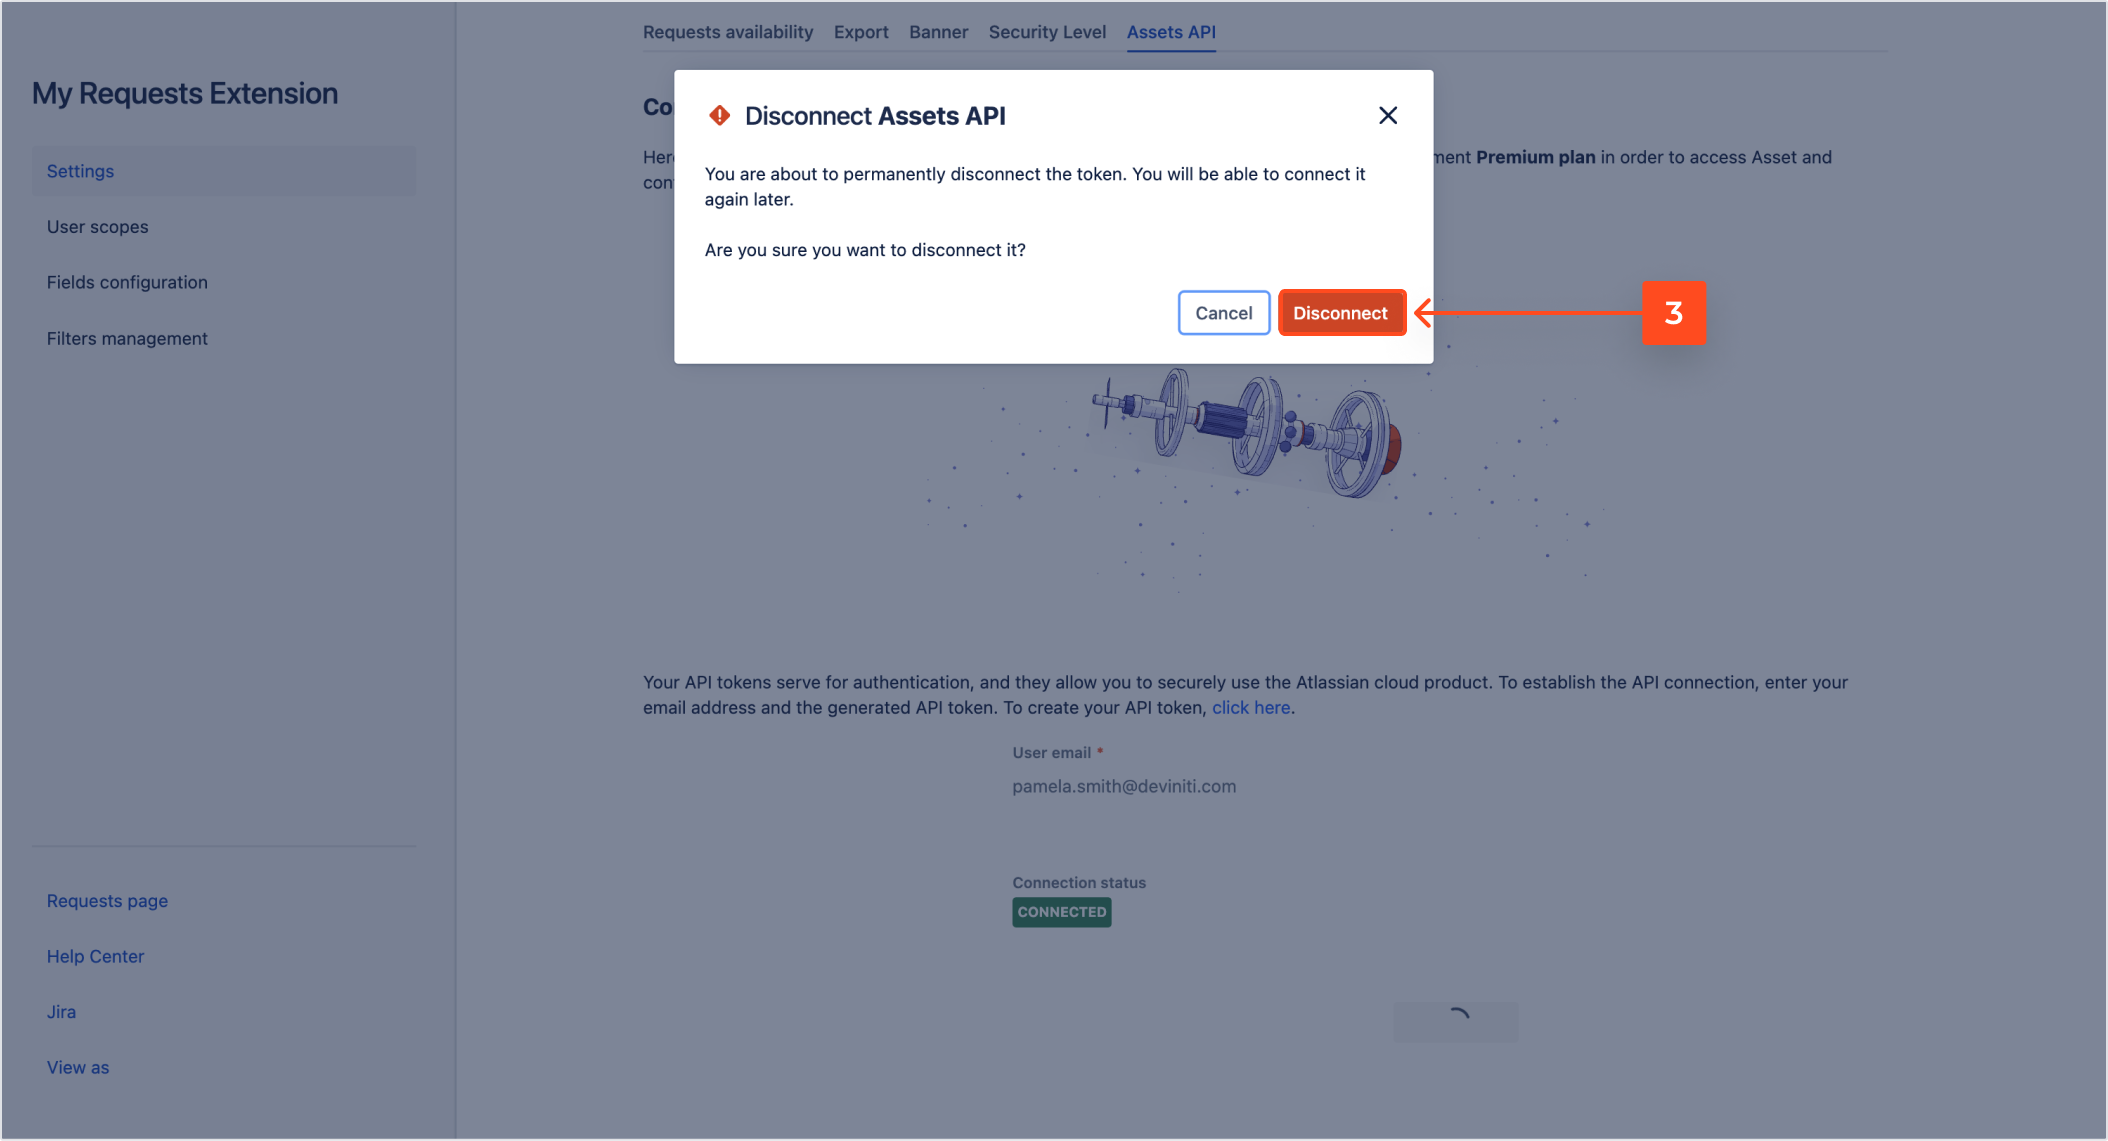
- Confirm that you wish to permanently disconnect the API token.
Result
Your app connection is terminated. You can establish a new connection by providing your API token and email address later.
If you can’t find the answer you need in our documentation, raise a support request. Include as much information as possible to help our support team resolve your issue faster.
