- User's guide
- Project view
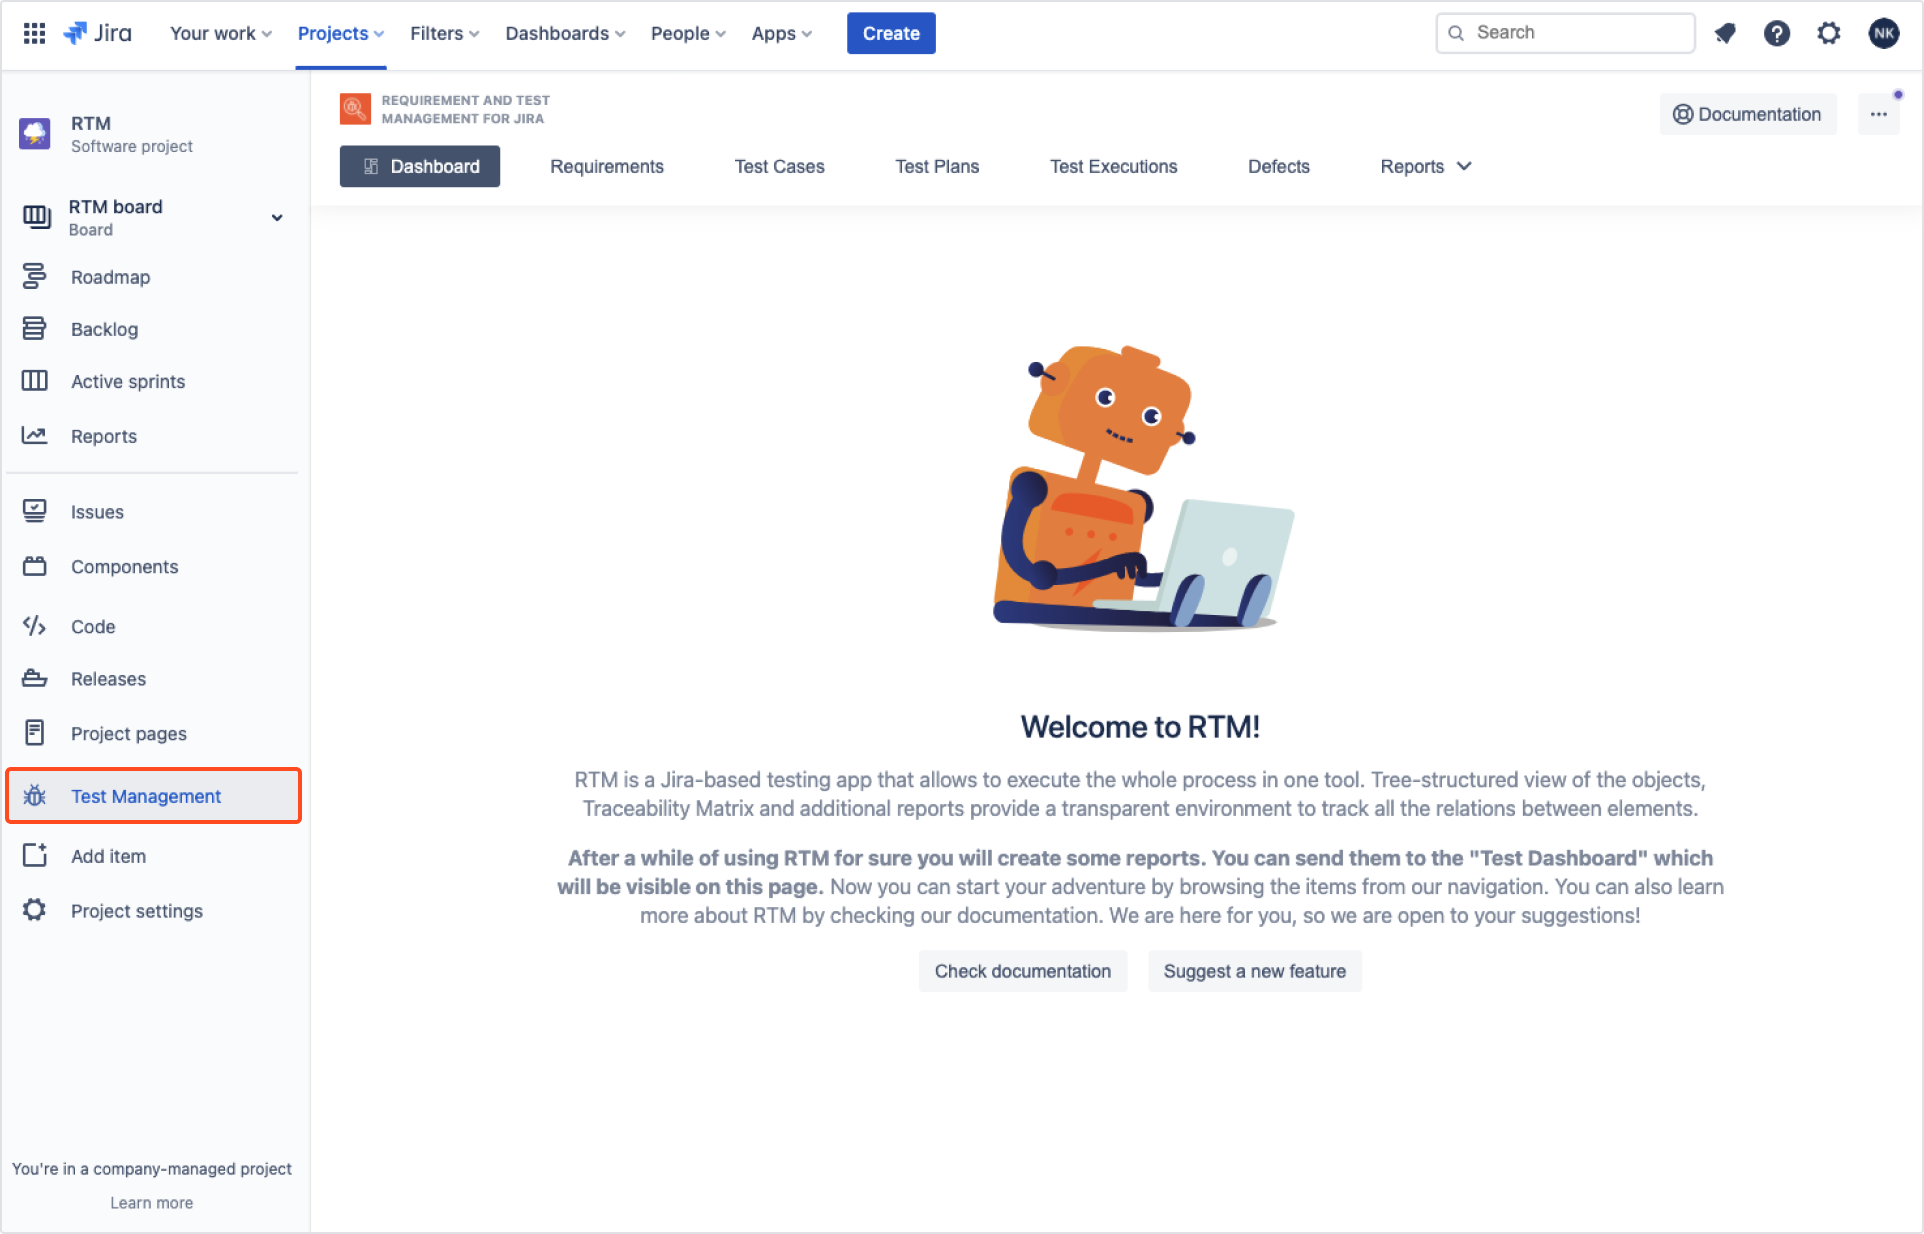
- Navigation
- Relations
- Requirement
- Test Case
- Test Plan
- Test Execution
- Defect
- REST API
- REST API
- Authentication
- Test Key
- Jira REST API
- Requirements
- Test Case
- Test Plan
- Test Execution
- Test Case Execution
- Defects
- Tree Structure
- Example of use
Administrator
This section provides information on how to use RTM app from Administrator’s perspecitve.
Enabling Requirements and Test Managements for Jira app
To get started with RTM app, administrator needs to enable it in relevant project. Simply navigate to Jira settings > Apps. On the left sidebar, in RTM section, click Get started.
Right after choosing project, RTM app will be enabled and you will be moved to RTM configuration settings.

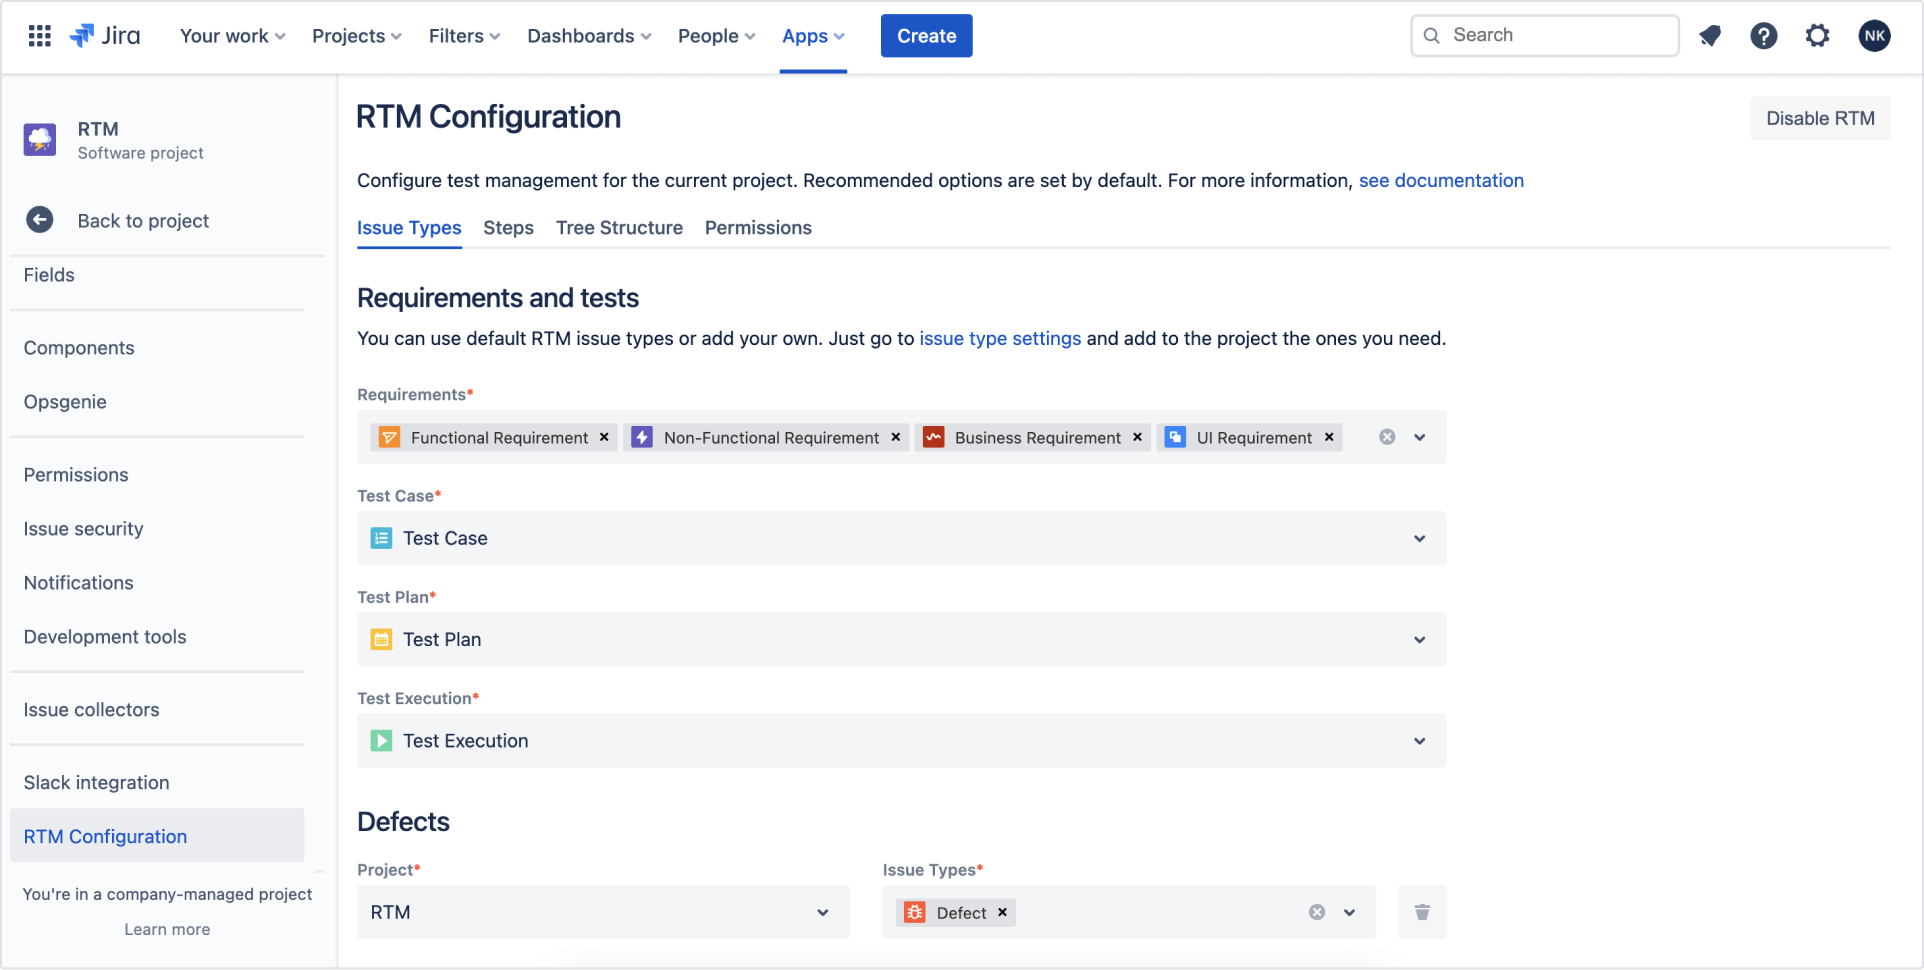
Now it’s time to set RTM issue types. Click the Issue type settings and edit the Issue Type Scheme.
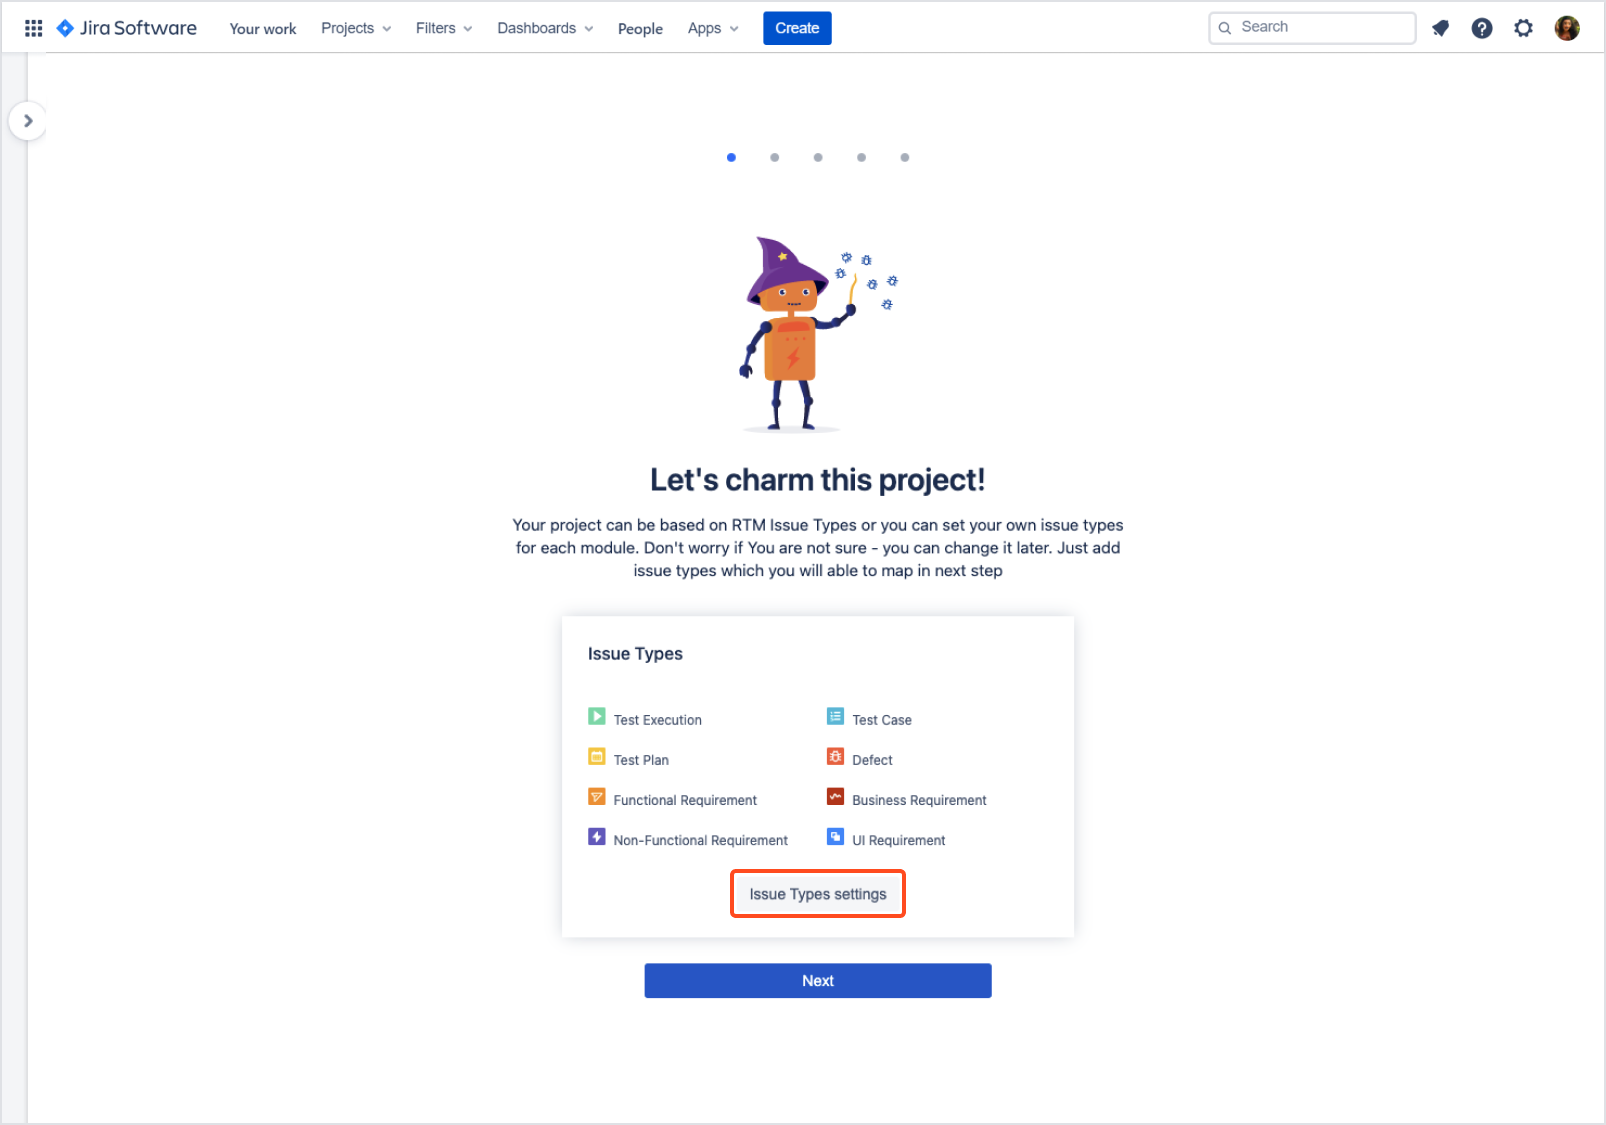

Add all RTM issue types to the Scheme.

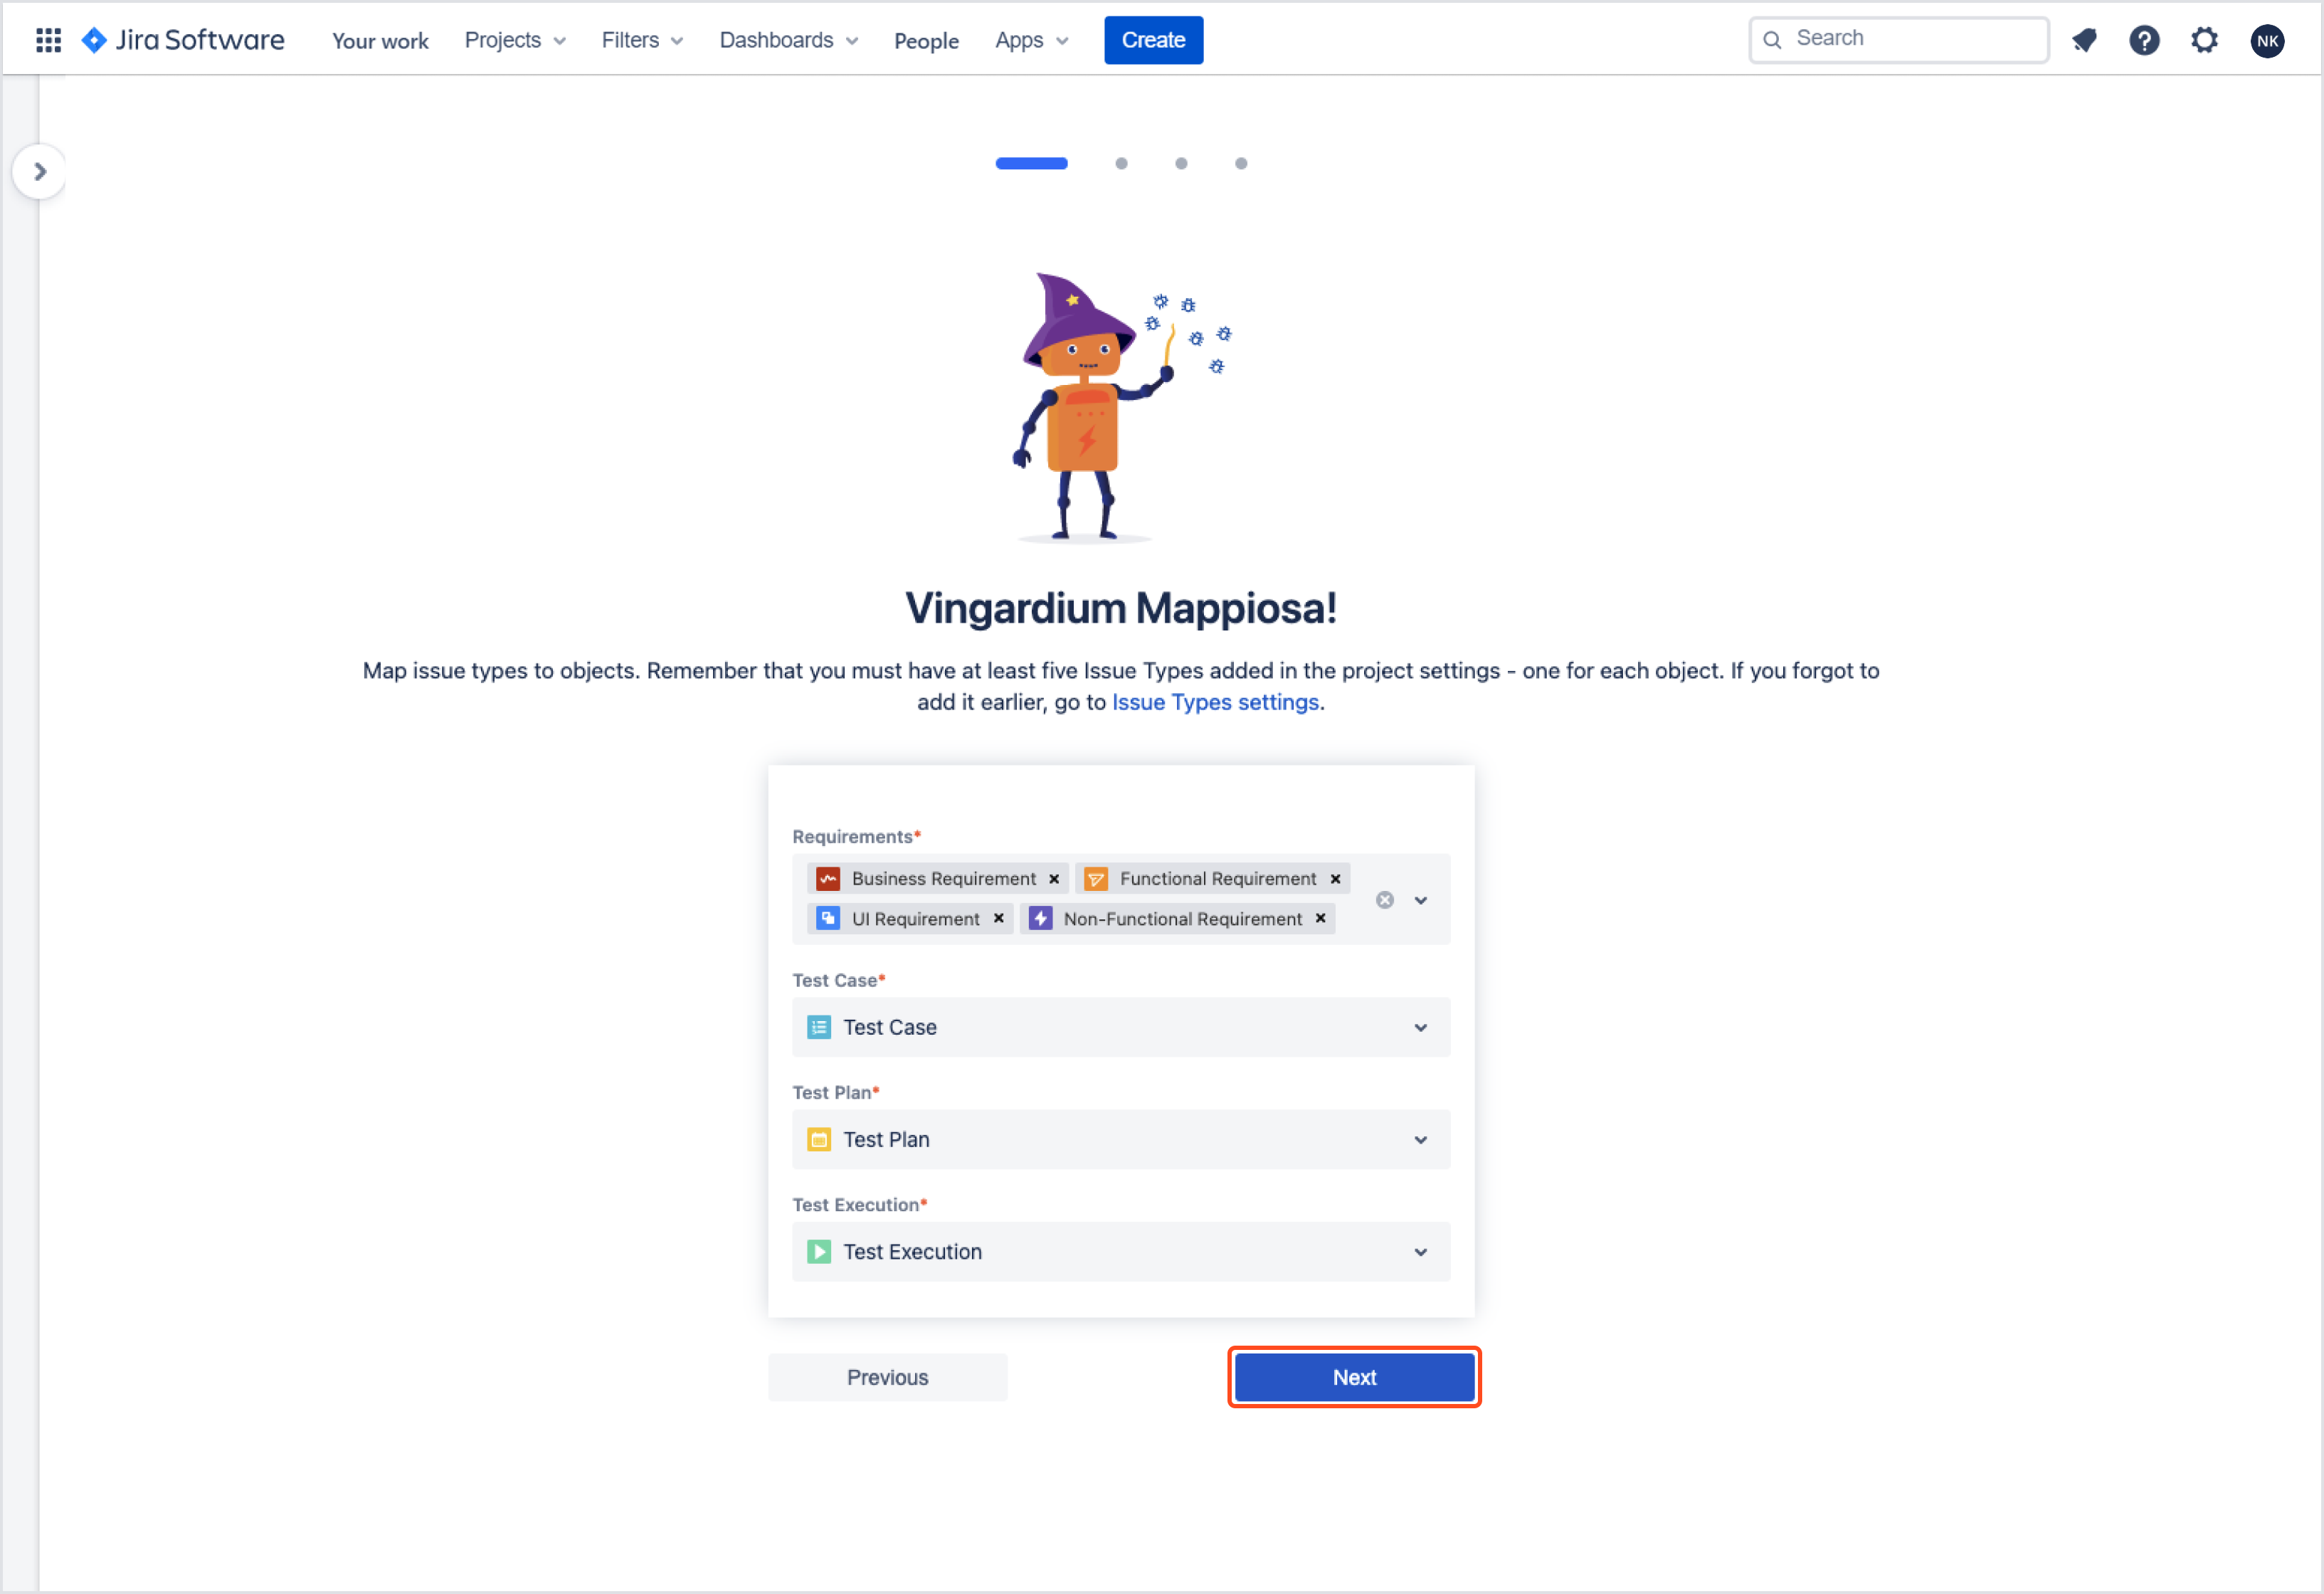
Go back to the RTM Configuration page. Map issue types to objects as below. There must be at least five Issue Types added in the project settings, one for each object.
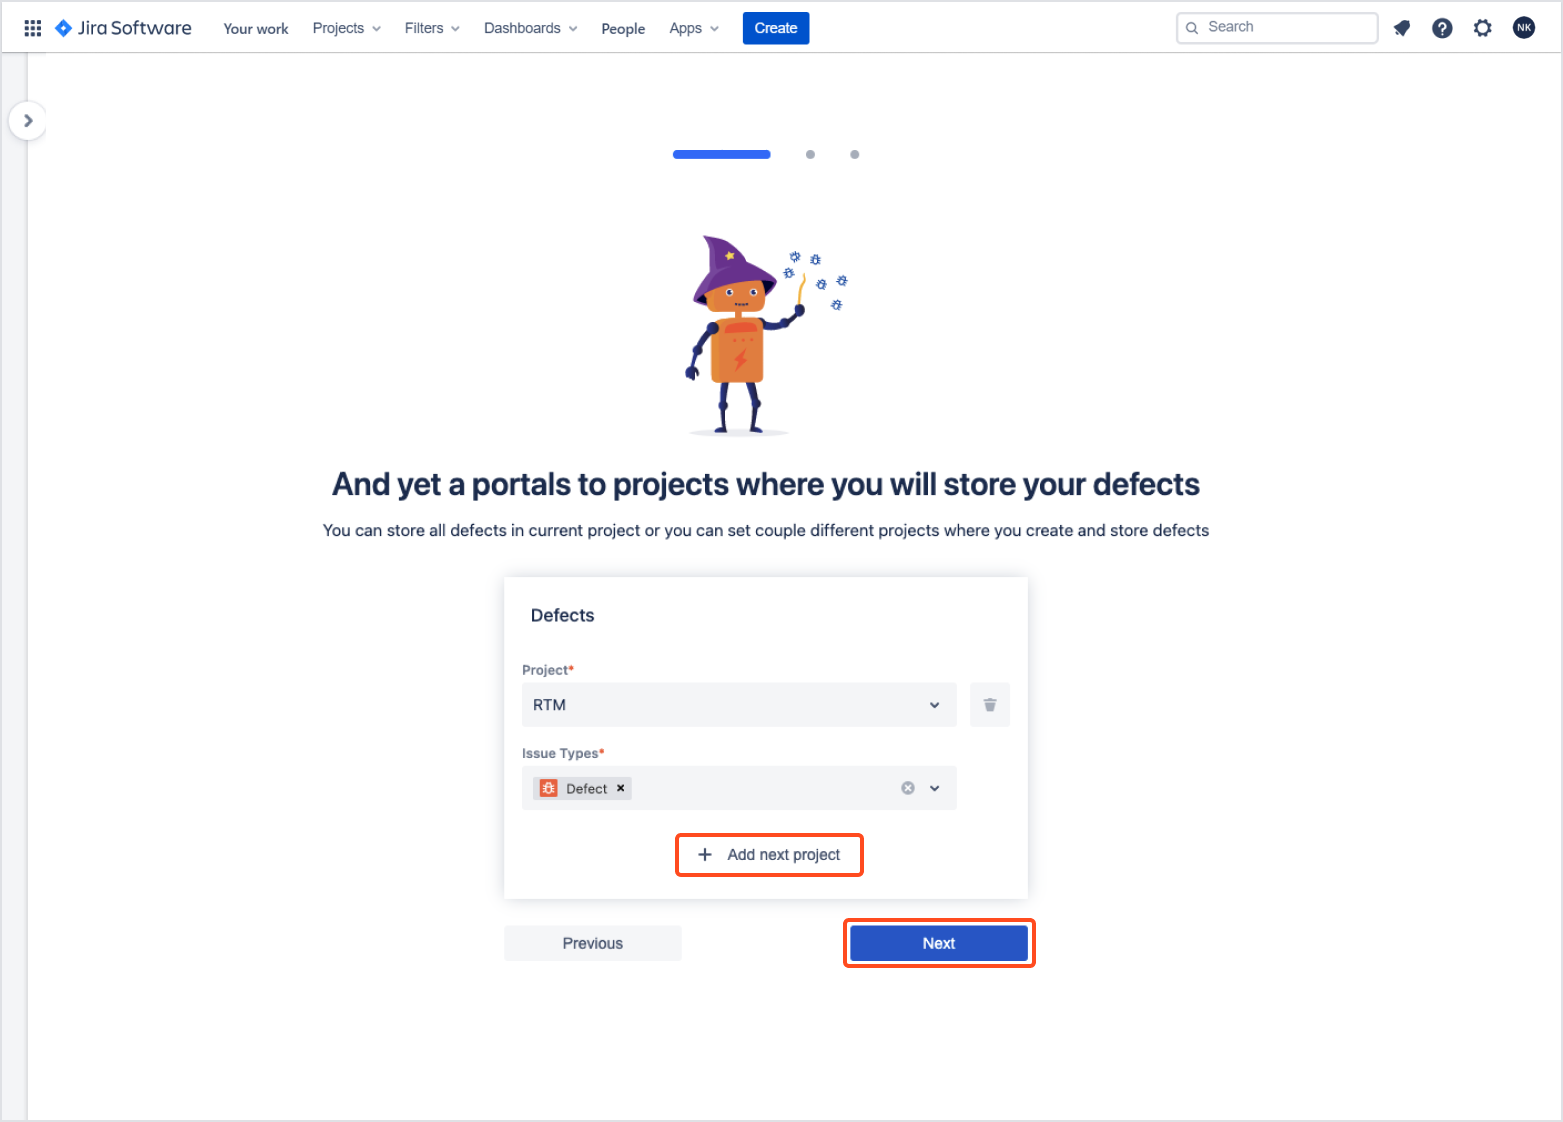
Choose a project where Defects will be stored. Select Issue Types that will match the Defect. You can use the issue type provided by RTM or select your own.
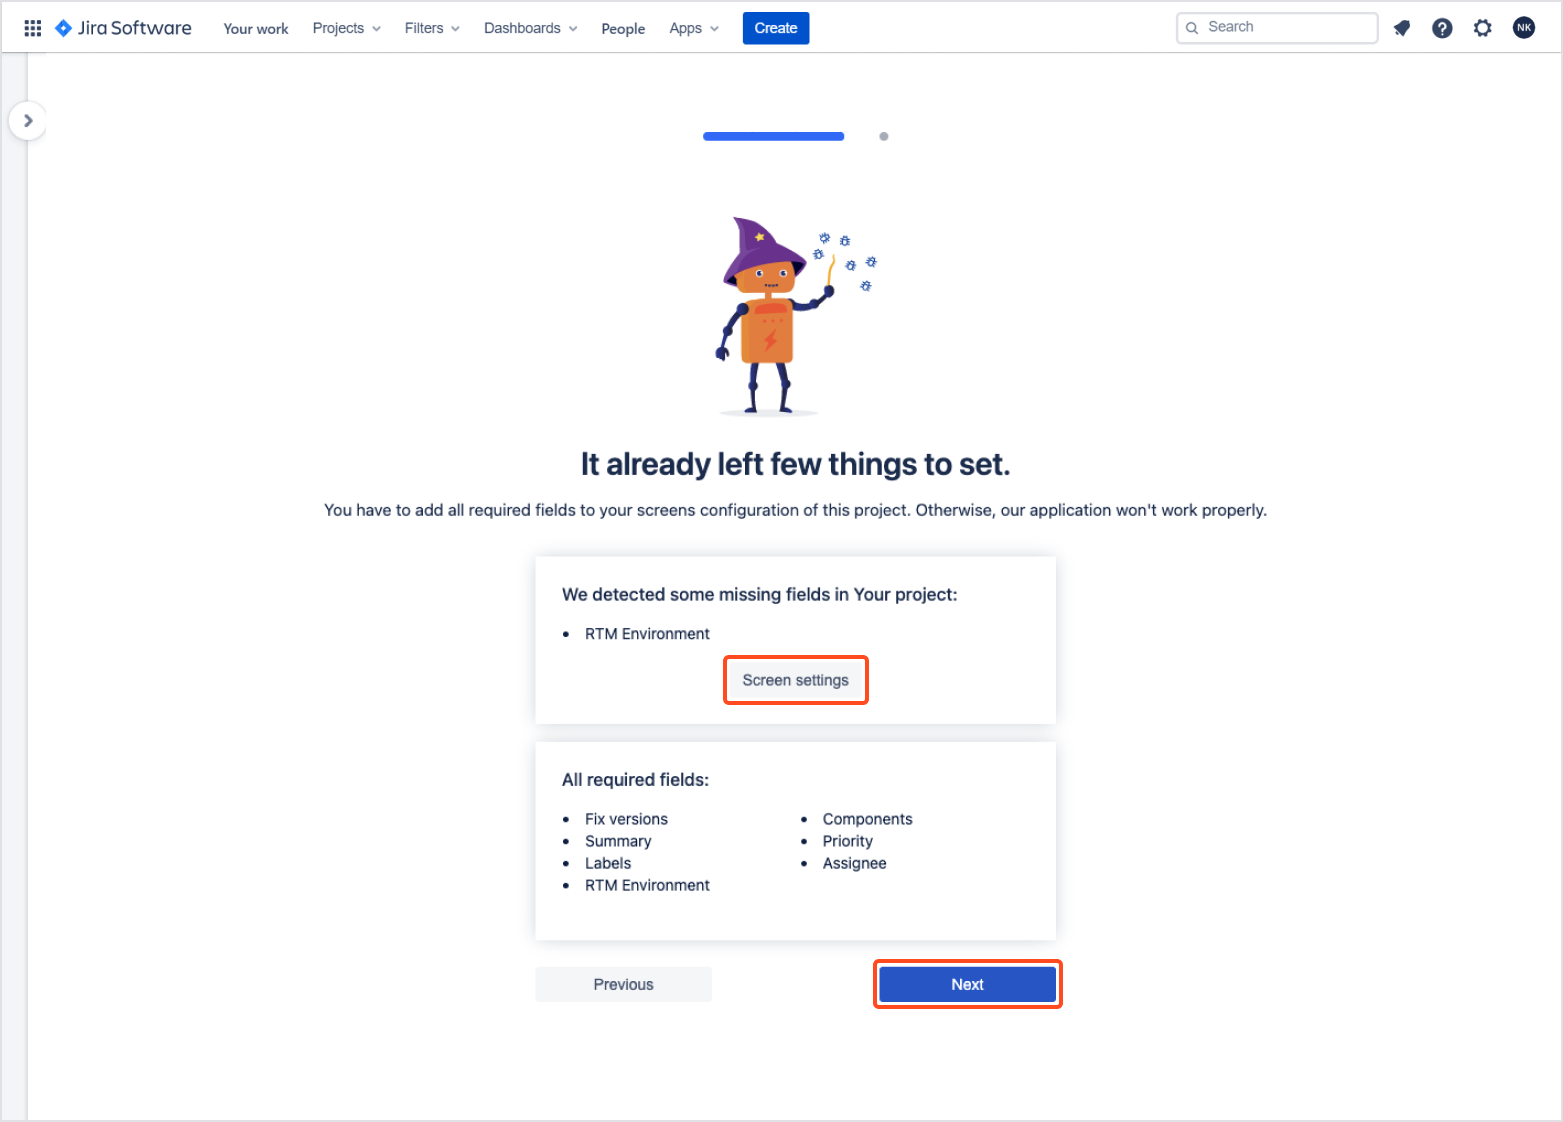
Now, add all required fields to your screens configuration for this project. Otherwise, our application may not work properly.

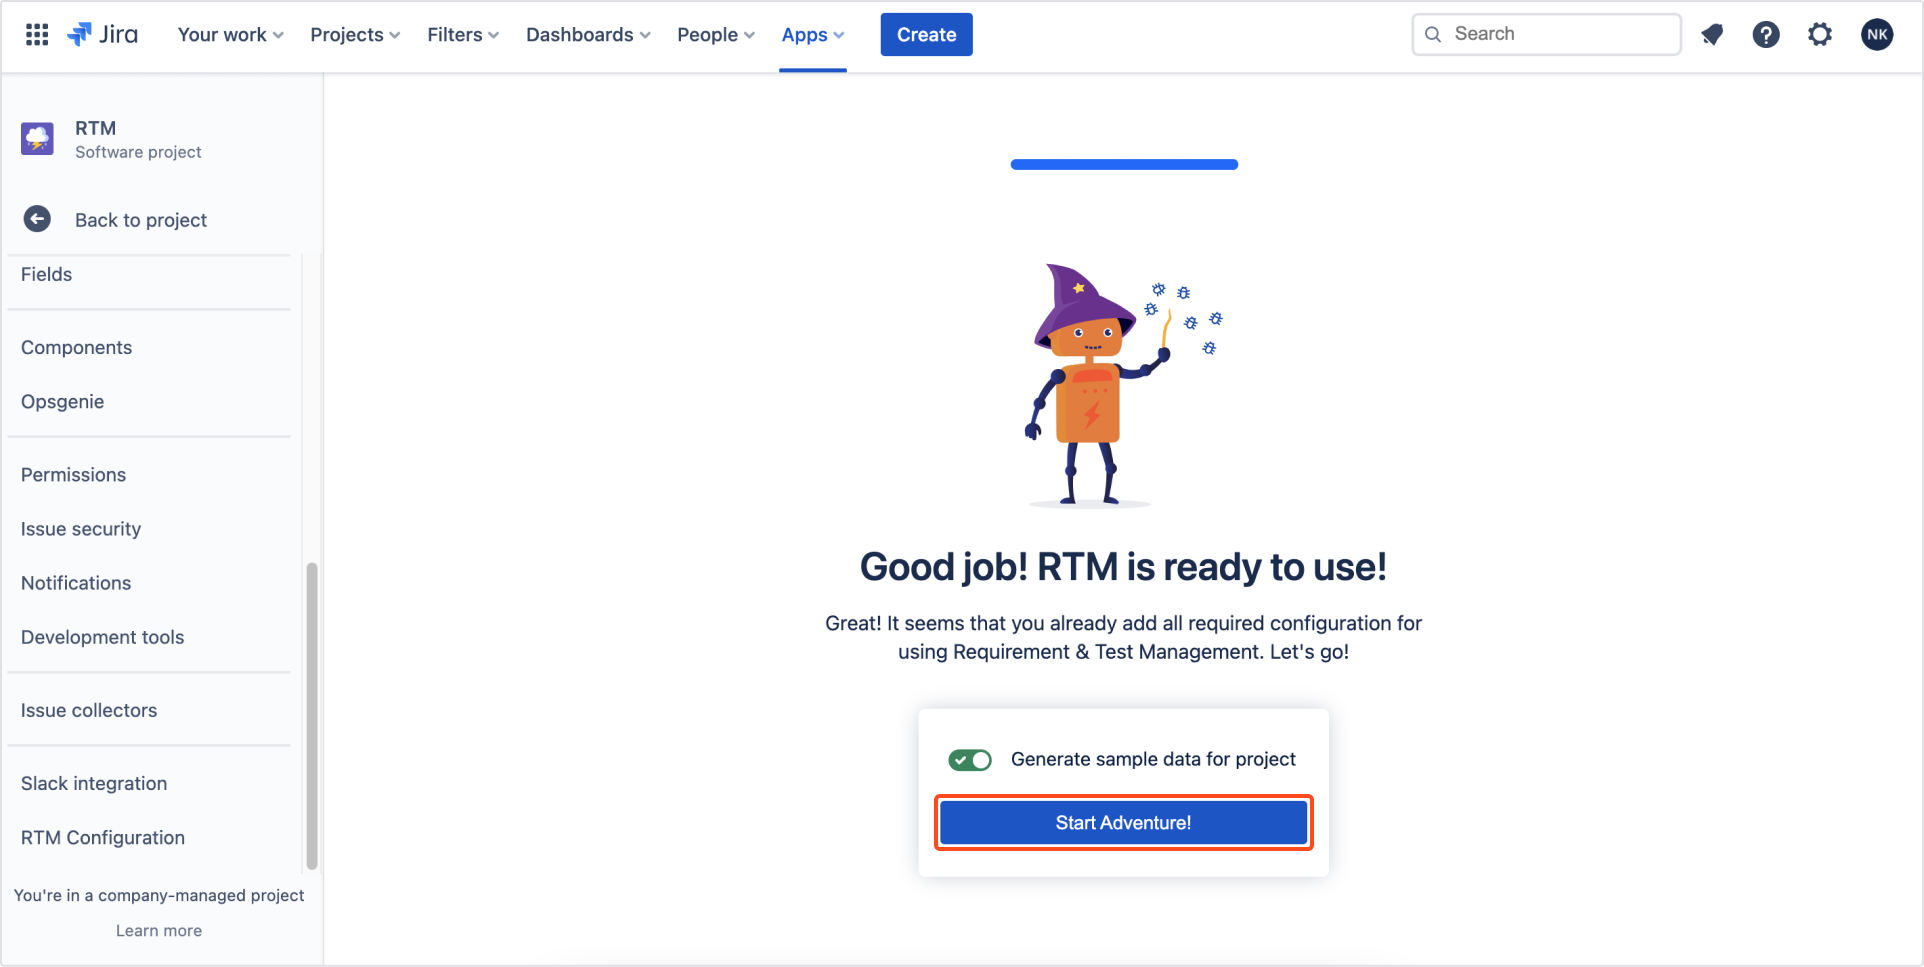
Go back to RTM configuration page. If you click Generate sample data for project, an exemplary issues will be created. Switch the toggle to on if you wish to generate them.
Generating sample data is only our suggestion. If you’d like to start with an empty project, follow our documentation. Thanks to that, you will be able to try all RTM features.
Click Start Adventure. RTM app is ready to use in your project.
Configuration
RTM app project configuration also rests upon Administrator. Therefore, administrator is responsible for steps configuration, final shape of tree structure and additional Test Plan’s and Test Execution’s permissions.
To start test management configuration in project, navigate to Project settings > RTM Configuration.
Issue types section presents settings from the initial stage. Administrator can change it if necessary.
Next section provides steps settings. Thanks to that, testers can efficiently manage Test Cases. You can set up the name of step’s columns and their order. In Results for steps nad TCE section Add result with custom name and color. Choose which step result is the final one.
The Default result option allows you to select step status displayed right after creation.

In Tree structure section, administrator can Create links based on tree structure. It allows to automatically set the parent/child relation between issues on the tree. Users can simply drag and drop issues one under another to create linking between them.
With Show Issue Keys on tree toggle, you can enable issue key visibility on the tree. Next option in turn enables Autonumbering of RTM issues.

In Permissions section, you can block editing Test Case Execution (from editing and changing the final status). Thanks to that, it’s easier to control this part of the process.

Permissions
As an administrator, you can grant an access to different operations within RTM app using project permissions. For example, with Assign issues permission user is able to assign issues to other people. Create issues permission guarantees that particular group will have an access to create RTM features (Requirements, Test Cases, Test Plans etc.). Edit and delete issues permission works the same as in simple Jira issues.
RTM app is based on relations between features. It is noteworthy that without Link issues permission users won’t be able to perform activities such as:
- adding Test Cases to Test Plan,
- covering Requirement by Test Case
- create Test Plan Execution and Defects.
Changing statuses, Worklogs, Attachment, Comment permissions are also worth mentioning. Some features may not work without them, for example adding attachments to steps in Test Cases.
Navigate to Project settings > Permissions. In Actions, select Edit permissions.

For more complex information about project permissions, click here.