- REST API
- REST API
- Authentication
- Test Key
- Jira REST API
- Requirements
- Test Case
- Test Plan
- Test Execution
- Test Case Execution
- Defects
- Tree Structure
- Example of use
Execute Test Case
This chapter provides information on how to execute Test Cases in Jira using RTM.
- Test Cases are executed only as a part of Test Plan. Test Cases are visible in Test Execution as a list, where you can monitor results or assign each of them to a tester.
- Even if you have one Test Case, it’s mandatory to add it to the Test Plan before execution.
- Test Case Execution is not a regular Jira issue. It means TCEs are not visible in issue navigator and can’t be linked with any issues.
To start Test Case Execution:
- Navigate to Project > Test Management > Test Executions.
- Click on the target Test Execution.
- Choose Test Case Execution.

Each TCE has three tabs: Steps, Details and Relations.
Steps
In Steps tab, there are three ways to change steps result:
- by Change steps status: tick step’s checkbox to change steps status
- by Change status of selected group
- by changing step’s status

You can also:
- Fill in Actual result column
- Report a new Defect or link TCE with existing one
InfoHere you can add a Defect to particular step in TCE. Thanks to this, you can specify the place where the bug occurred. It’s also possible to add a Defect to TCE, if the problem refers to whole Test Case Execution. Read more about it here
- Upload an Evidence

- Check Attachments
NoteIn TCE, Attachment field is a read-only section. You can add Attachments to Test Case before executing Test Plan.
- Comment TCE
Details
In Details tab you can view or configure the following:
- Execution Details: edit the basic information about the Test Case (Assignee, RTM Environment, Result, Priority)
- Test Case information (non-editable): information which is based on Test Case from which executions were performed
- Description (non-editable)

Relations
Navigate to Relations tab and view the dependencies between Test Case Execution and Requirements, Test Case, Test Plan, Test Executions and detected Defects. These dependencies are generated automatically from previously configured relations.

Result
The Test Case Execution has been configured.
At the bottom of every TCE, there’s a floating panel that helps with:
- Setting the Result of TCE
- Adding and linking Defect
- Navigating to previous or next TCE

Bulk edit of TCE
Some fields in the Test Case Execution module can be modified with bulk edit functionality. Because TCE objects aren’t native Jira issues (not like the rest of RTM testing elements), there is a dedicated panel that makes multiple editing of Test Casse Executions possible.
Thanks to this, a user is able to change following fields:
- Assignee
- Priority
- RTM Environment
- Actual Time
- Result
The rest of the fields visible on the Test Case Execution view are blocked for editing and result directly from Test Cases included in a specific Execution.
Steps
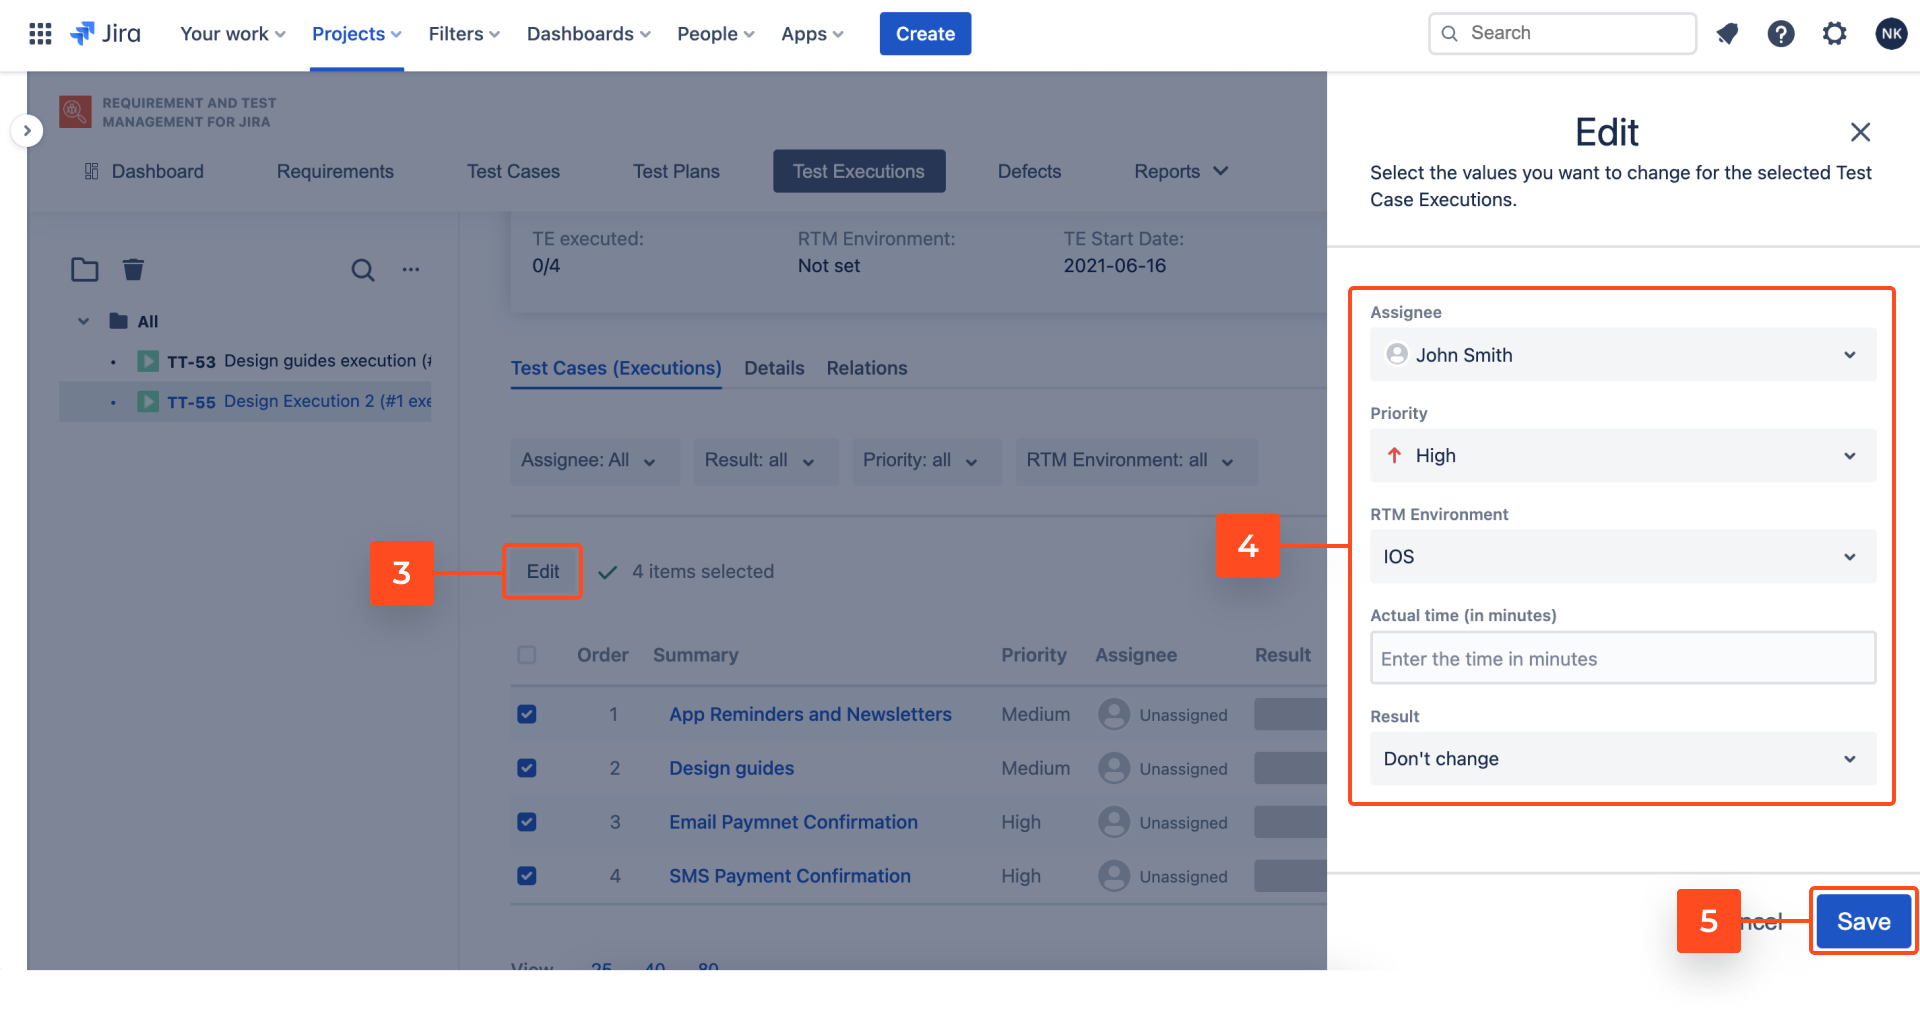
To edit TCE fields:
- Navigate to RTM project > Test Management > Test Execution.
- Select Test Execution in which you wish to change the fields of included TCE.
- Select Test Cases and click Edit.
- Change values in selected fields. The ones you prefer not to modify you can leave in Don’t change status.
- Click Save.
Need help?
If you can’t find the answer you need in our documentation, raise a support request*.
*Include as much information as possible to help our support team resolve your issue faster.