- User's guide
- Project view
- Navigation
- Relations
- Requirement
- Test Case
- Test Plan
- Test Execution
- Defect
- REST API
- REST API
- Authentication
- Test Key
- Jira REST API
- Requirements
- Test Case
- Test Plan
- Test Execution
- Test Case Execution
- Defects
- Tree Structure
- Example of use
Navigation
This chapter provides information about navigation tools in RTM app.
Each feature has similar settings on the tree view and in folders.
Top navigation
In the RTM app, it’s possible to navigate using the menu bar anchored to the top of the screen. Except for the reports, the order of links is related to the order of processes executed inside the tool.
- The navigation menu includes the main modules and links to the reports.
- A button that opens the Documentation page.
- Information about improvements implemented to the app in the newest version.
- Link to our public roadmap in Trello, where users can vote for new functionalities.
- In case you encounter any problem with the extension or have questions related to its functioning, you can ask our Support team for help.
- A button that opens a progress widget that shows the current status of creating reports and executions.

Native issue view
Each issue configured in RTM has the dedicated panel at the native Jira Issue view. You can easily jump into the RTM app using the section visible in the right issue panel.
- Click Open RTM in order to see the panel preview.
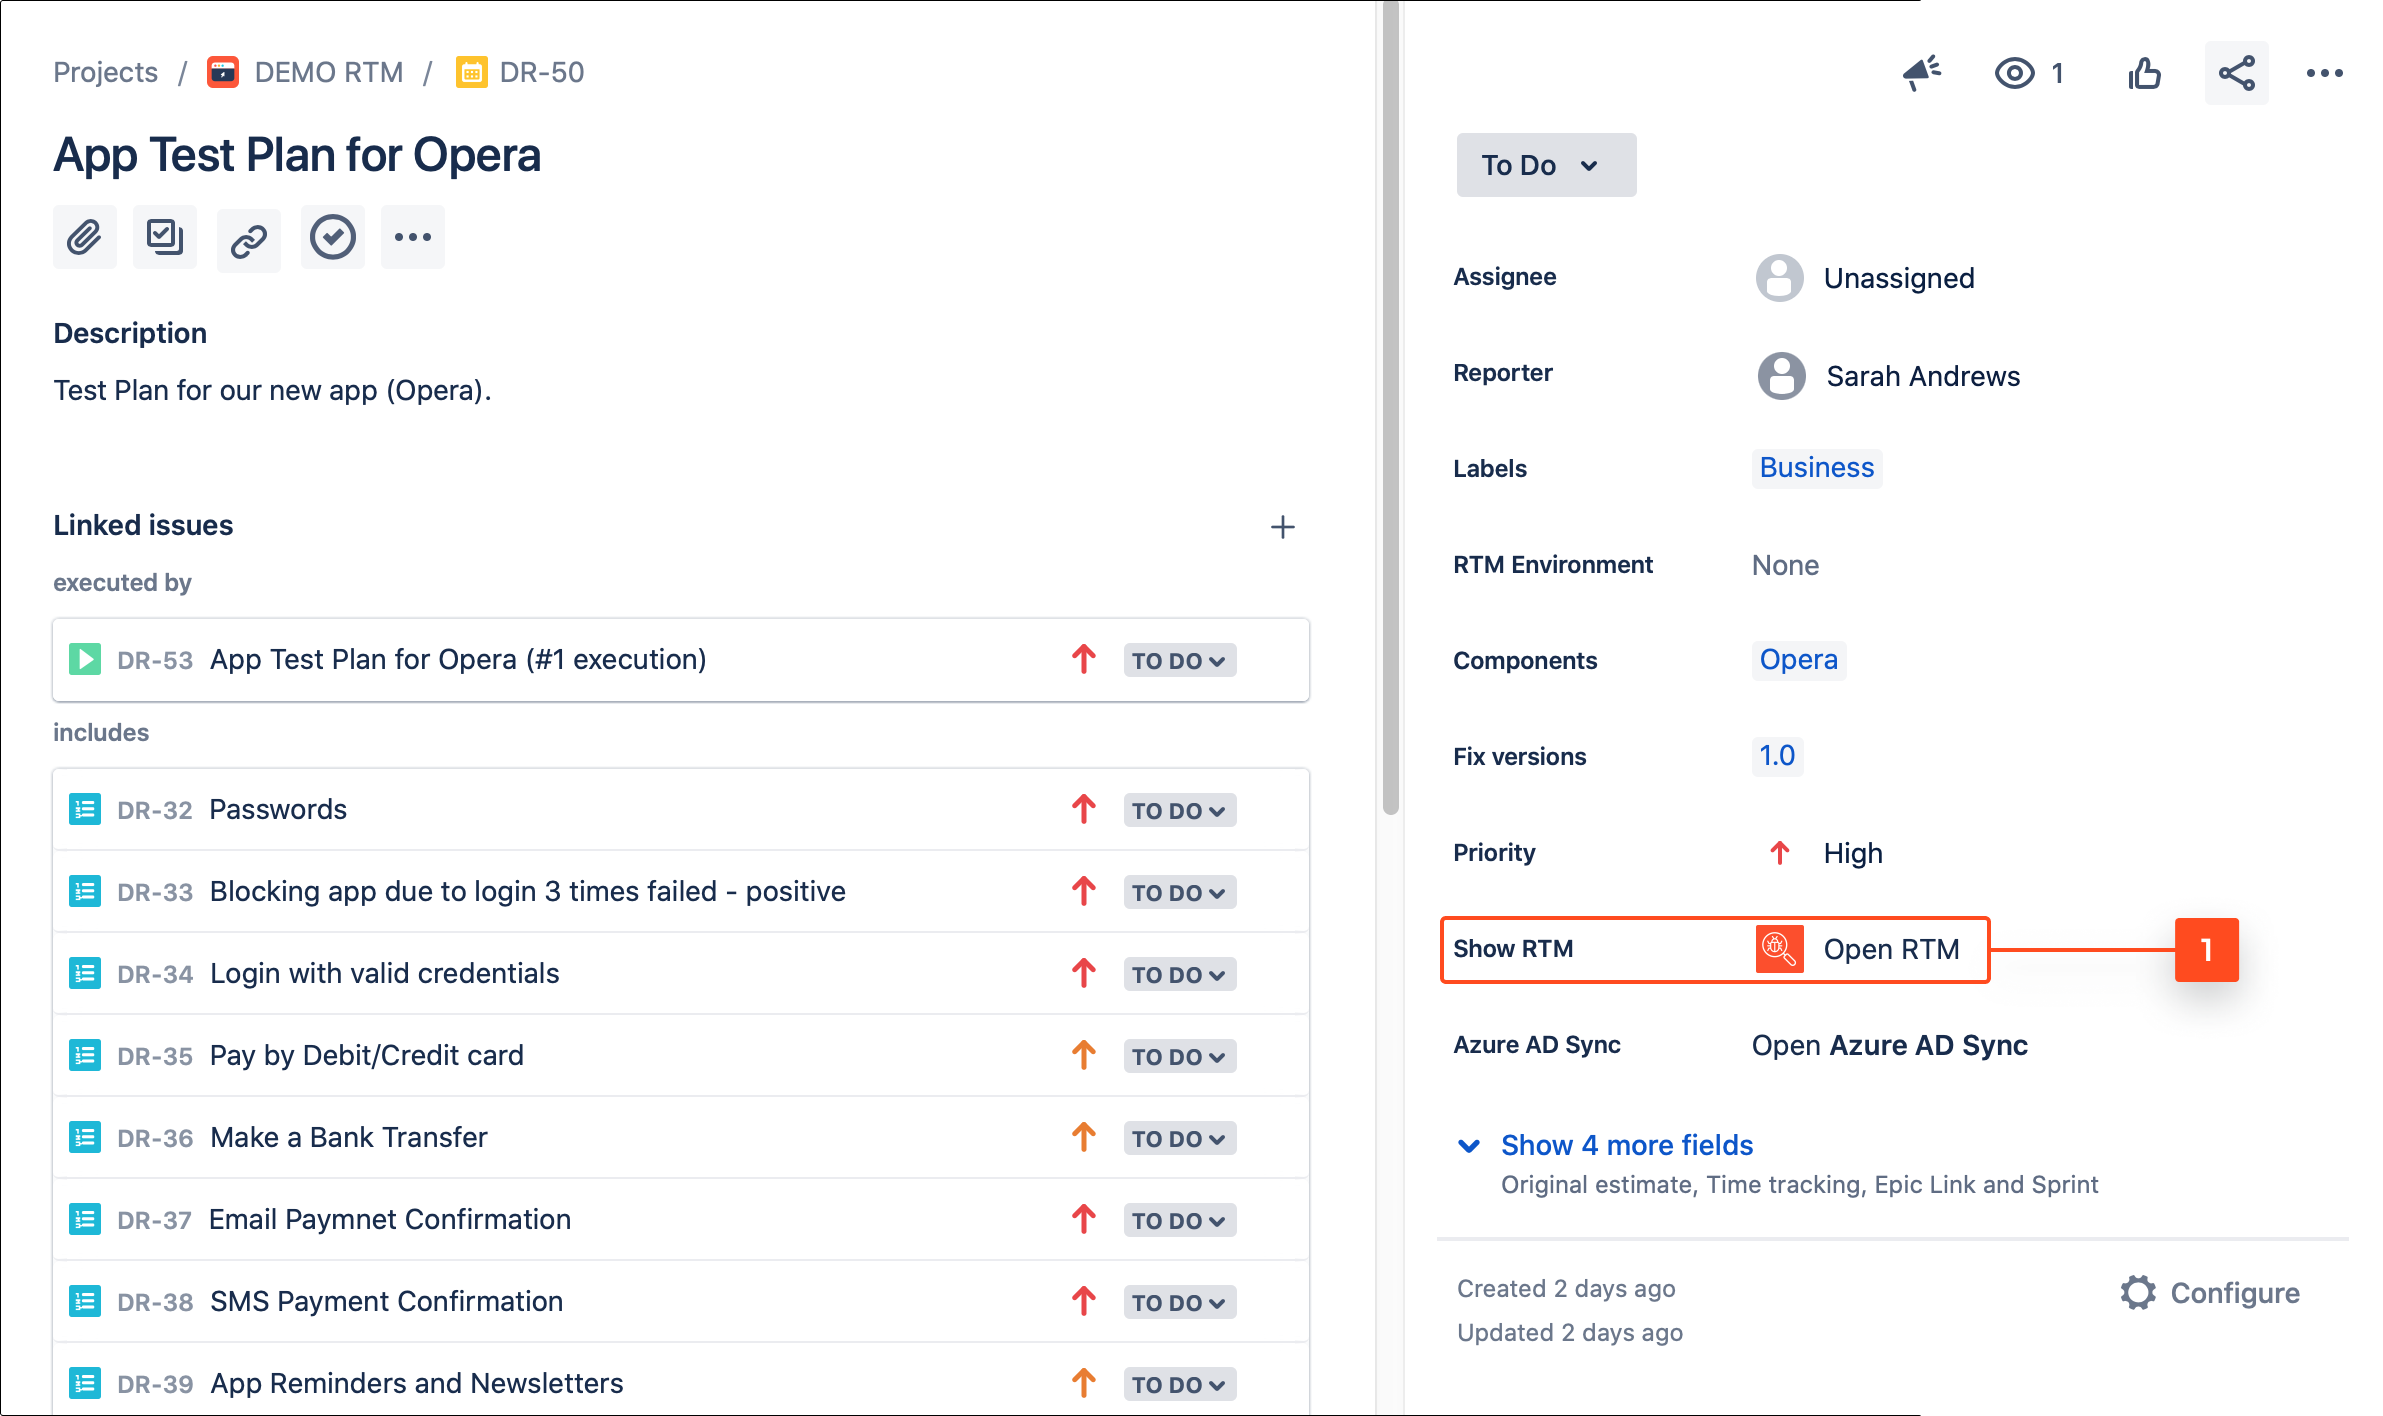
- Once you open the panel, click Open in RTM, so that you move on to the view of the chosen issue inside the RTM app.

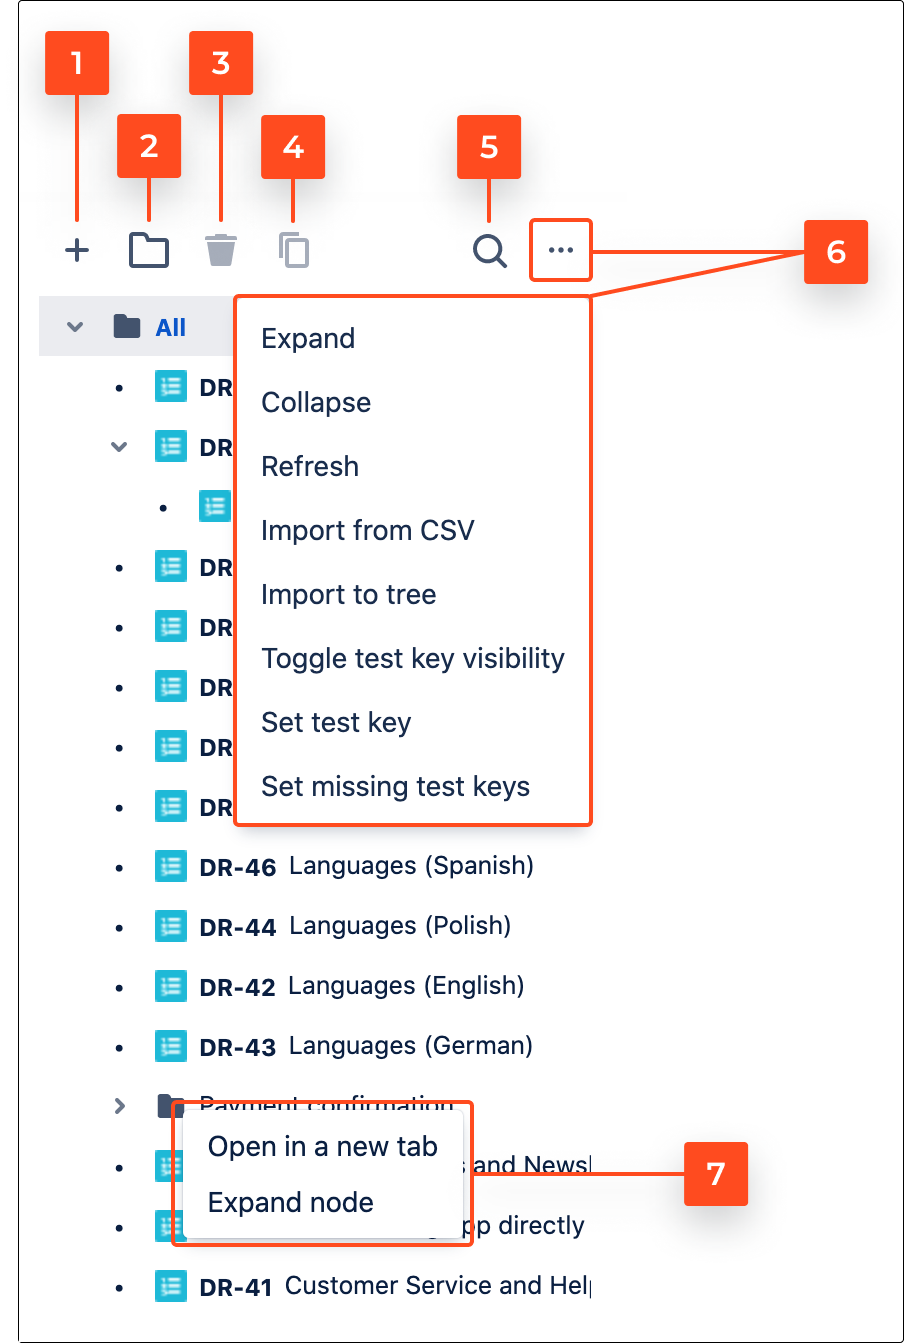
Tree options
- + - add element.
- Folder icon - add folder
- Bin - delete object from Jira permanently or remove it from the tree
- Clone - clone target elements on the tree
- Search - use search to find particular element
- …
- Expand - display all elements within the tree
- Collapse - hide all elements within the tree
- Refresh - refresh the tree view
- Import to tree - import issues to tree
NoteYou can only import issues which are not added to the tree. Depending on issue types which are set in project configuration for specific module, these issue types will be available for import.
- Toggle test key visibility - show or hide the Test Keys by which you can identify objects when using application REST API
- Set test key - set or edit Test Key for a selected object at the tree structure
- Set missing test keys - automatically set Test Key for all object at tree structure where they are currently missing
- Object context menu - right-click on object to expand list with open an issue in a new tab and expand the selected node options
Folder view
RTM app provides a default All folder that summarises all elements within the tree. Each RTM object has its own tree structure:
- Requirements
- Test Cases
- Test Plans
- Test Executions
- Defects
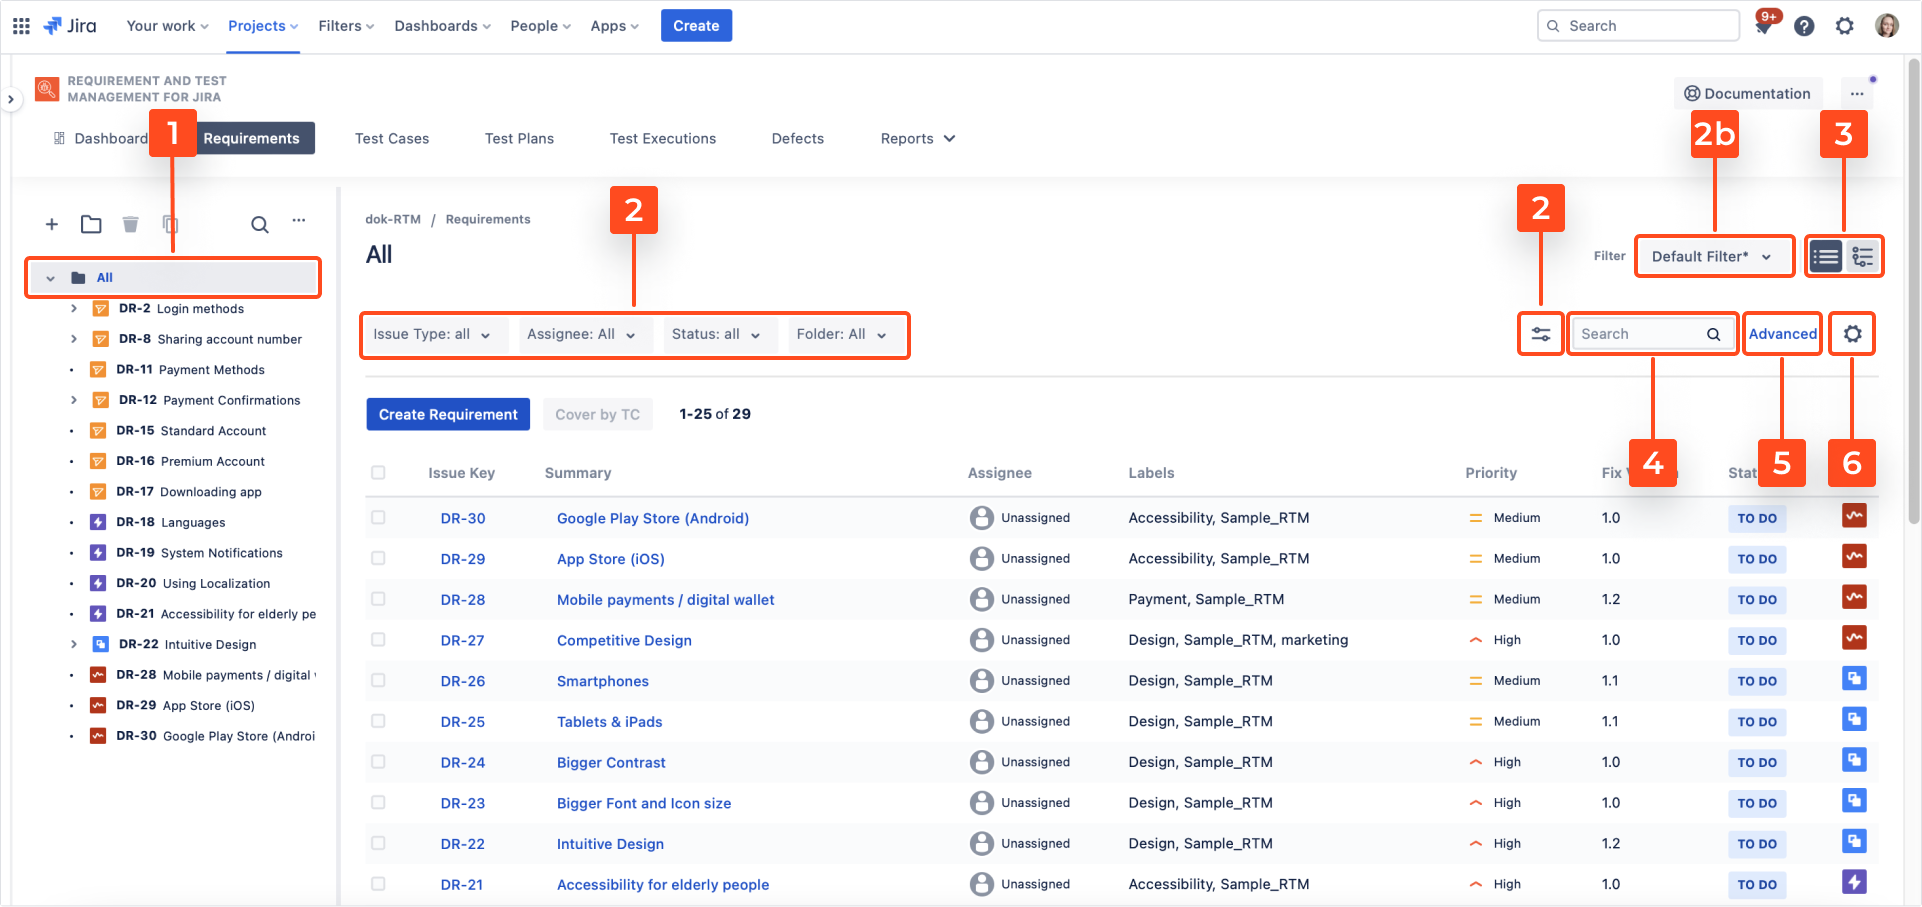
After clicking on All folder, section is visible near the tree, on the right side.
Most folders allows to:
- View all - elements are displayed as a list.
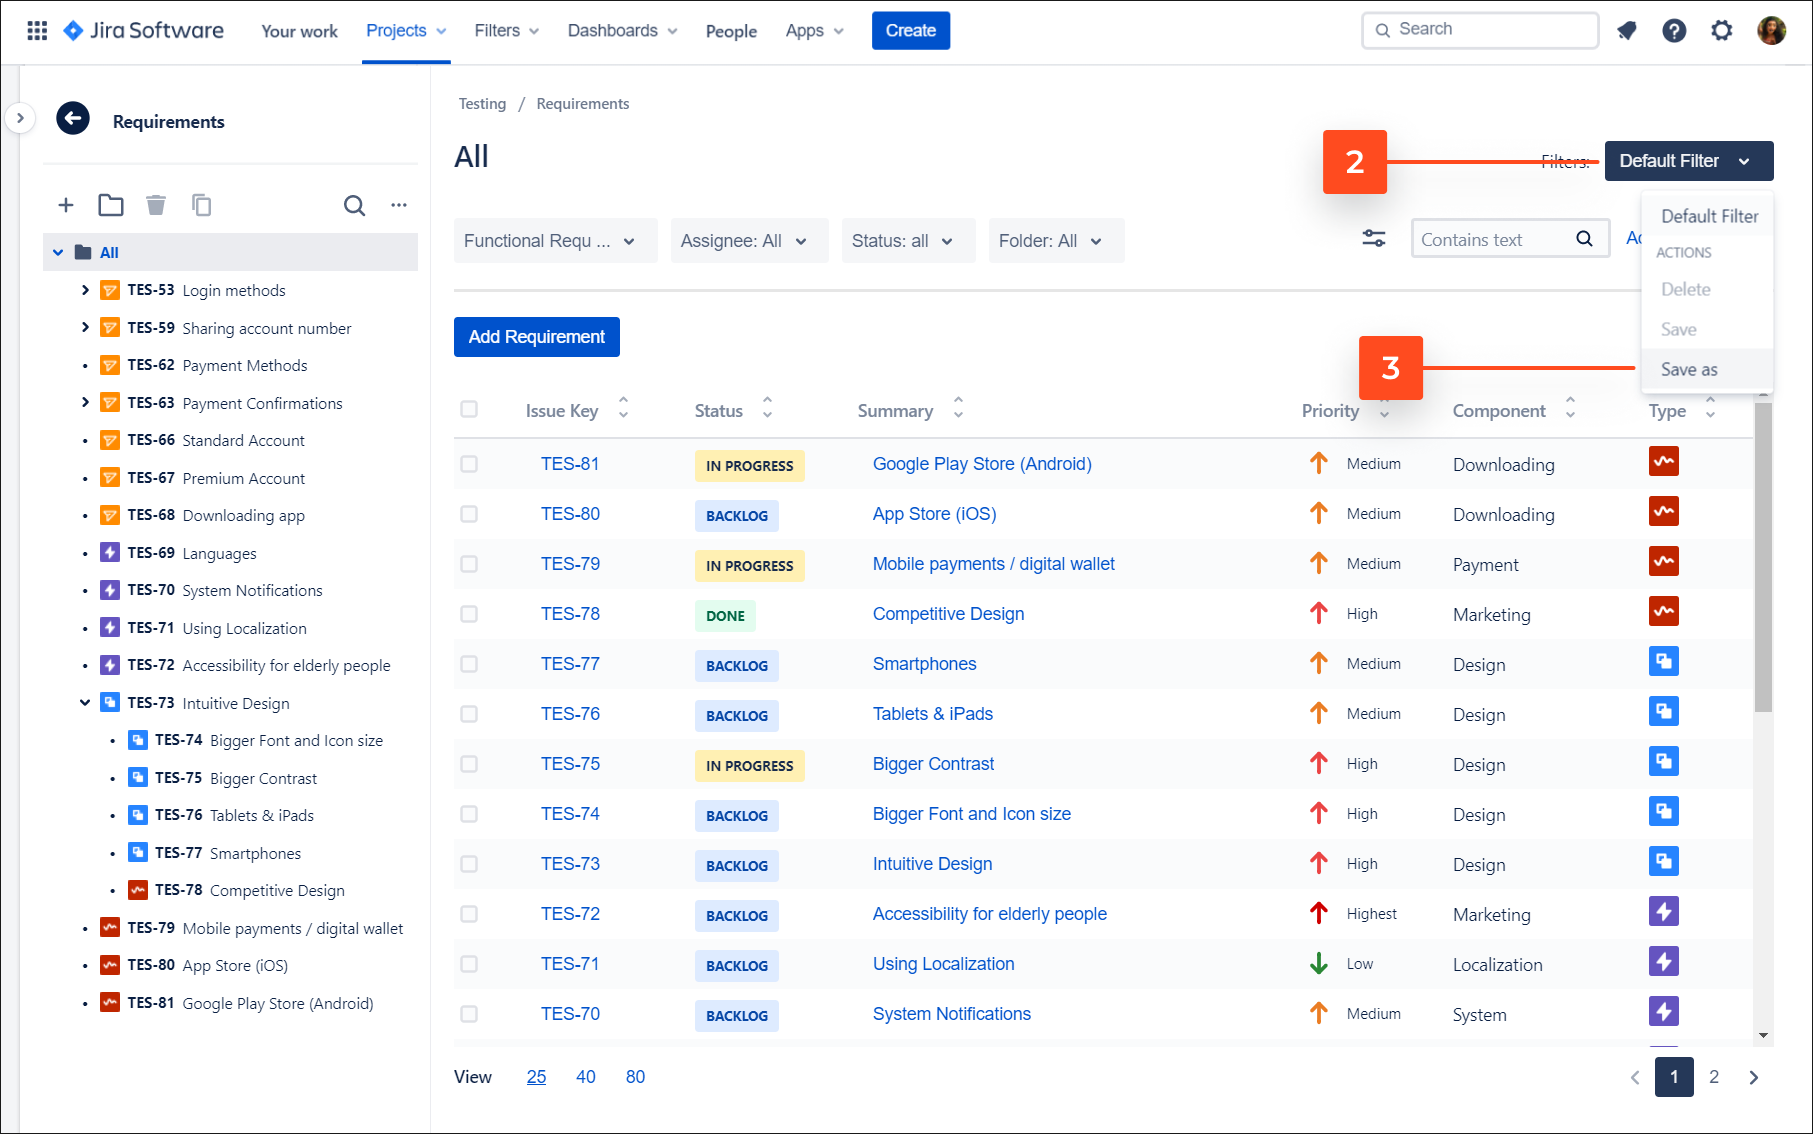
- Filter - filter selected elements and save/delete created filter [2b].
- Default view, List view - choose a convenient way to browse issues and folders (available only in the Requirements module).
- Search - find elements on the list.
- Advanced - use JQL to search elements.
- Add/Remove Columns - decide which fields will be visible as columns on the list.
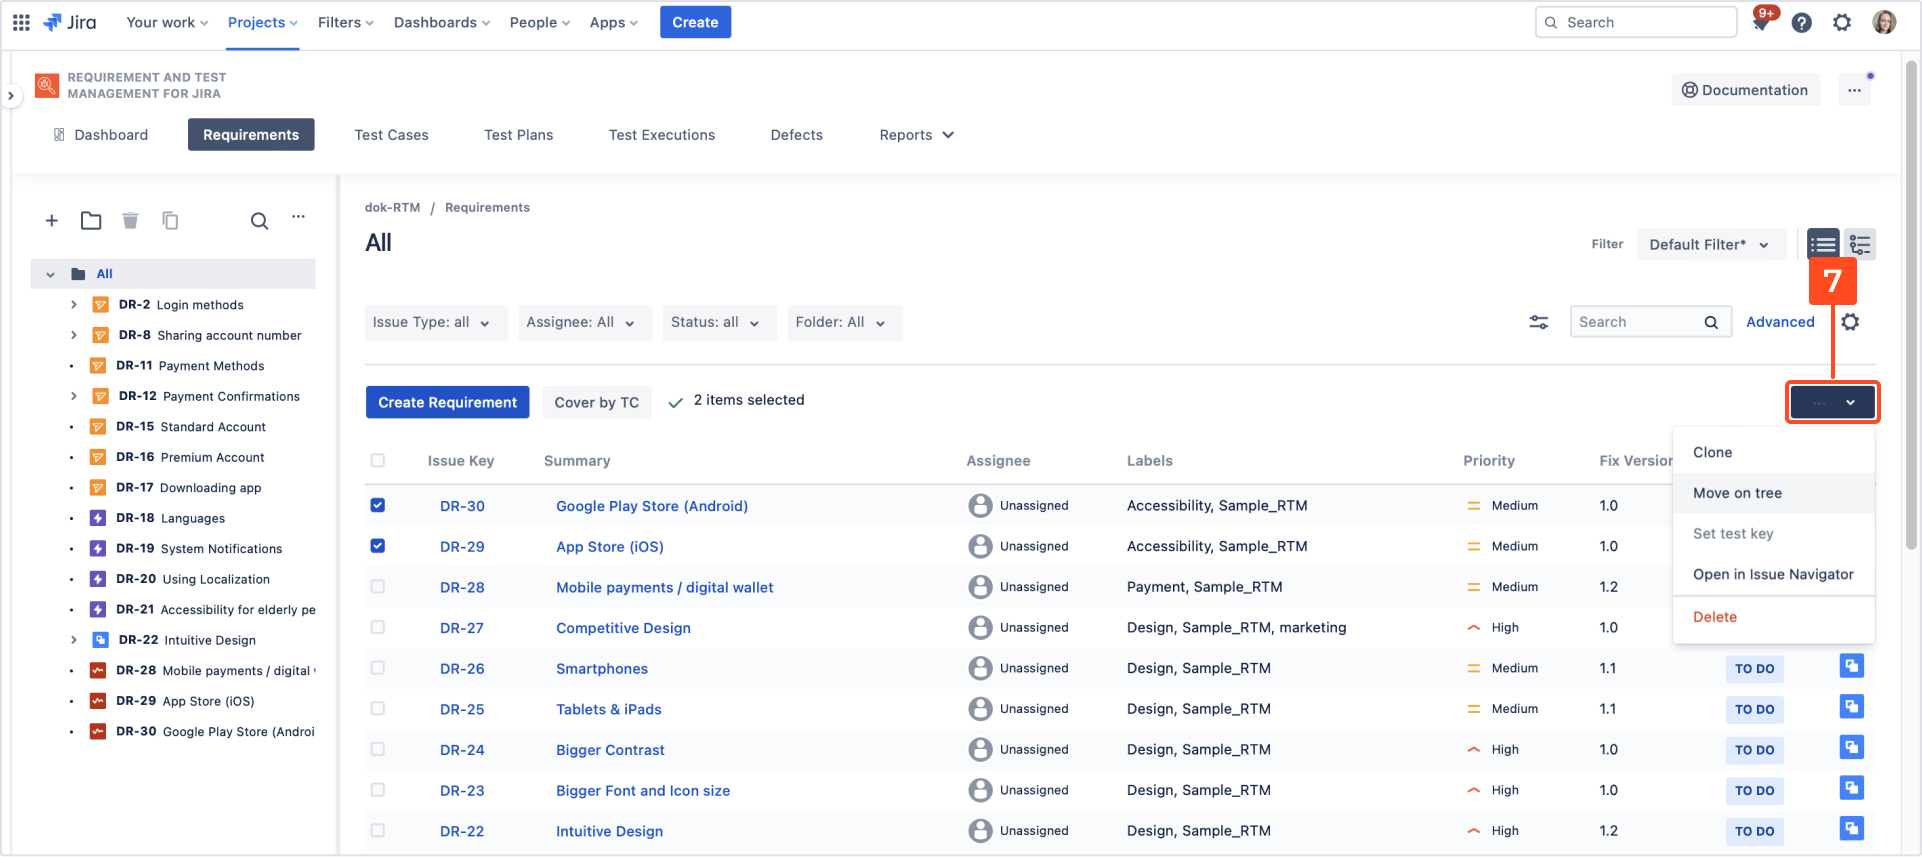
- … - perform more actions (available after choosing at least one issue from the list).
- Clone - clone marked elements.
- Move on tree - move issues to a folder or under other issues.
- Set test key - set a test key (one at the time).
- Open in Issue Navigator - select issues to open them in the Issue Navigator.
- Delete - remove checked elements from a folder and from the Jira.
Filters
This section provides information on saving filters.
- You can save filters in following sections: Requirements, Test Cases, Test Plans, Test Executions and Defects.
- Created filters are available in all sections mentioned above.
Steps
To create a new filter:
- Edit default filter settings, for example: change columns order or displayed criteria.
- Go to Default Filter.
- Click Save as.
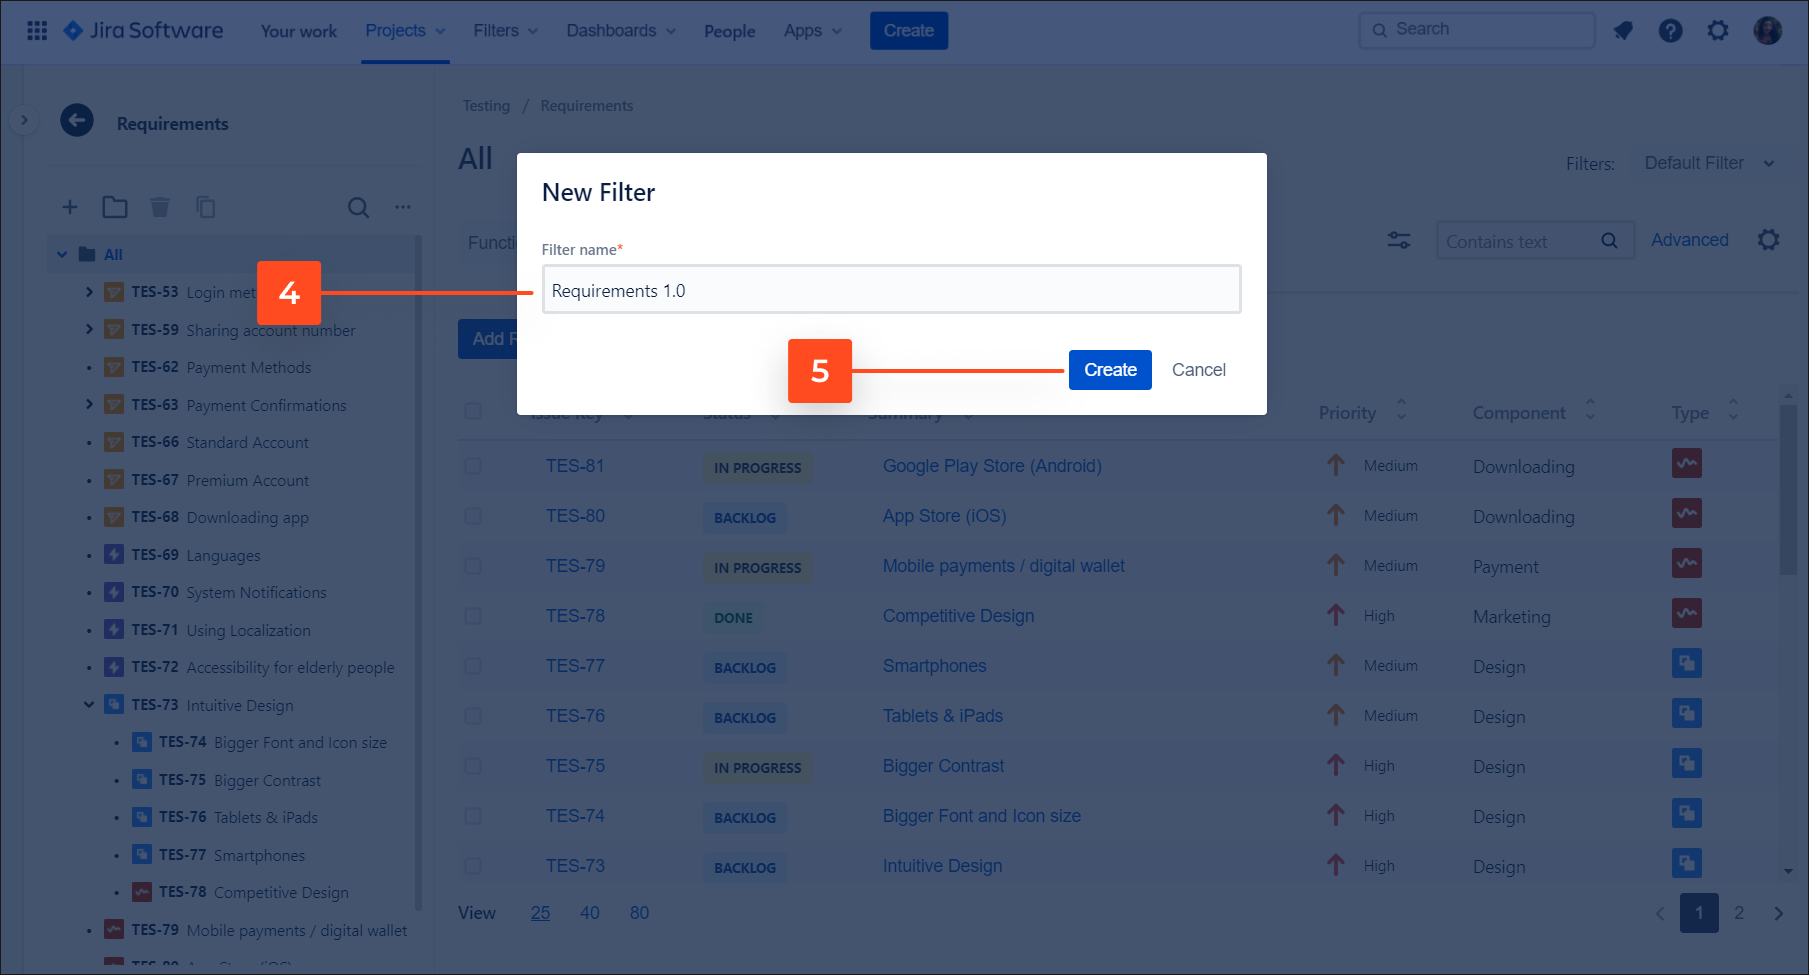
The New Filter dialog box appears. - Enter a new filter name.
- Click Create.
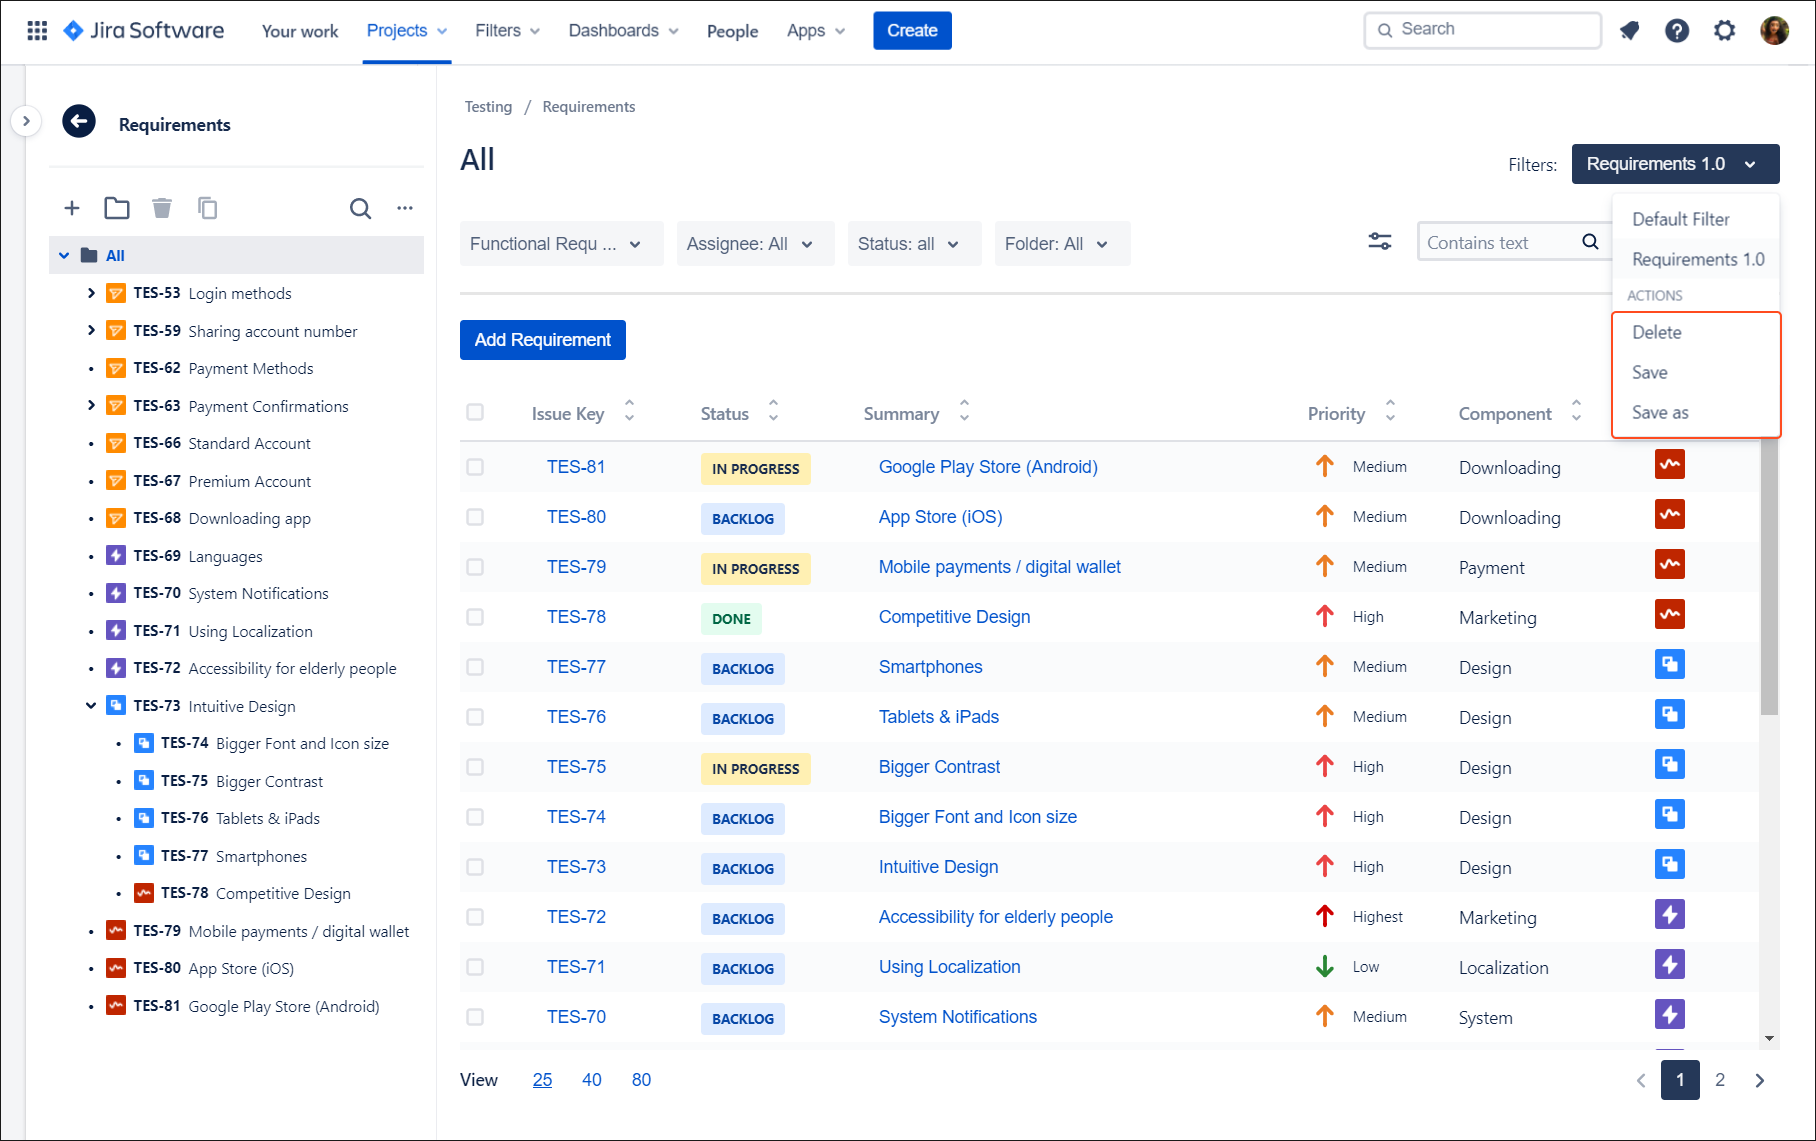
Result
- You can edit your filter and save changes by clicking Save or click Save as, if you want to create a new one.
- If you want to remove a filter, click Delete.
- You can’t change default filter settings.
Issue view
Details
RTM features provide Details section, where you can view or edit fields:
- Description
- Attachments
- Reporter (read-only)
- Type of requirement
- Labels
- Created (read-only)
- Assignee
- Last updated (read-only)
- Status
- Priority
- Components
- Fix version
- Test Key

Relations
This tab consists of two sections, where direct and indirect relations are displayed. Thanks to that, you can check the connection between RTM elements and monitor their statuses. In Relations you can also create direct links between issues or link to an external Web sources.
Click the icon in the upper right corner to switch relations view.

Expand the list to check the structure of linked issues for each object.
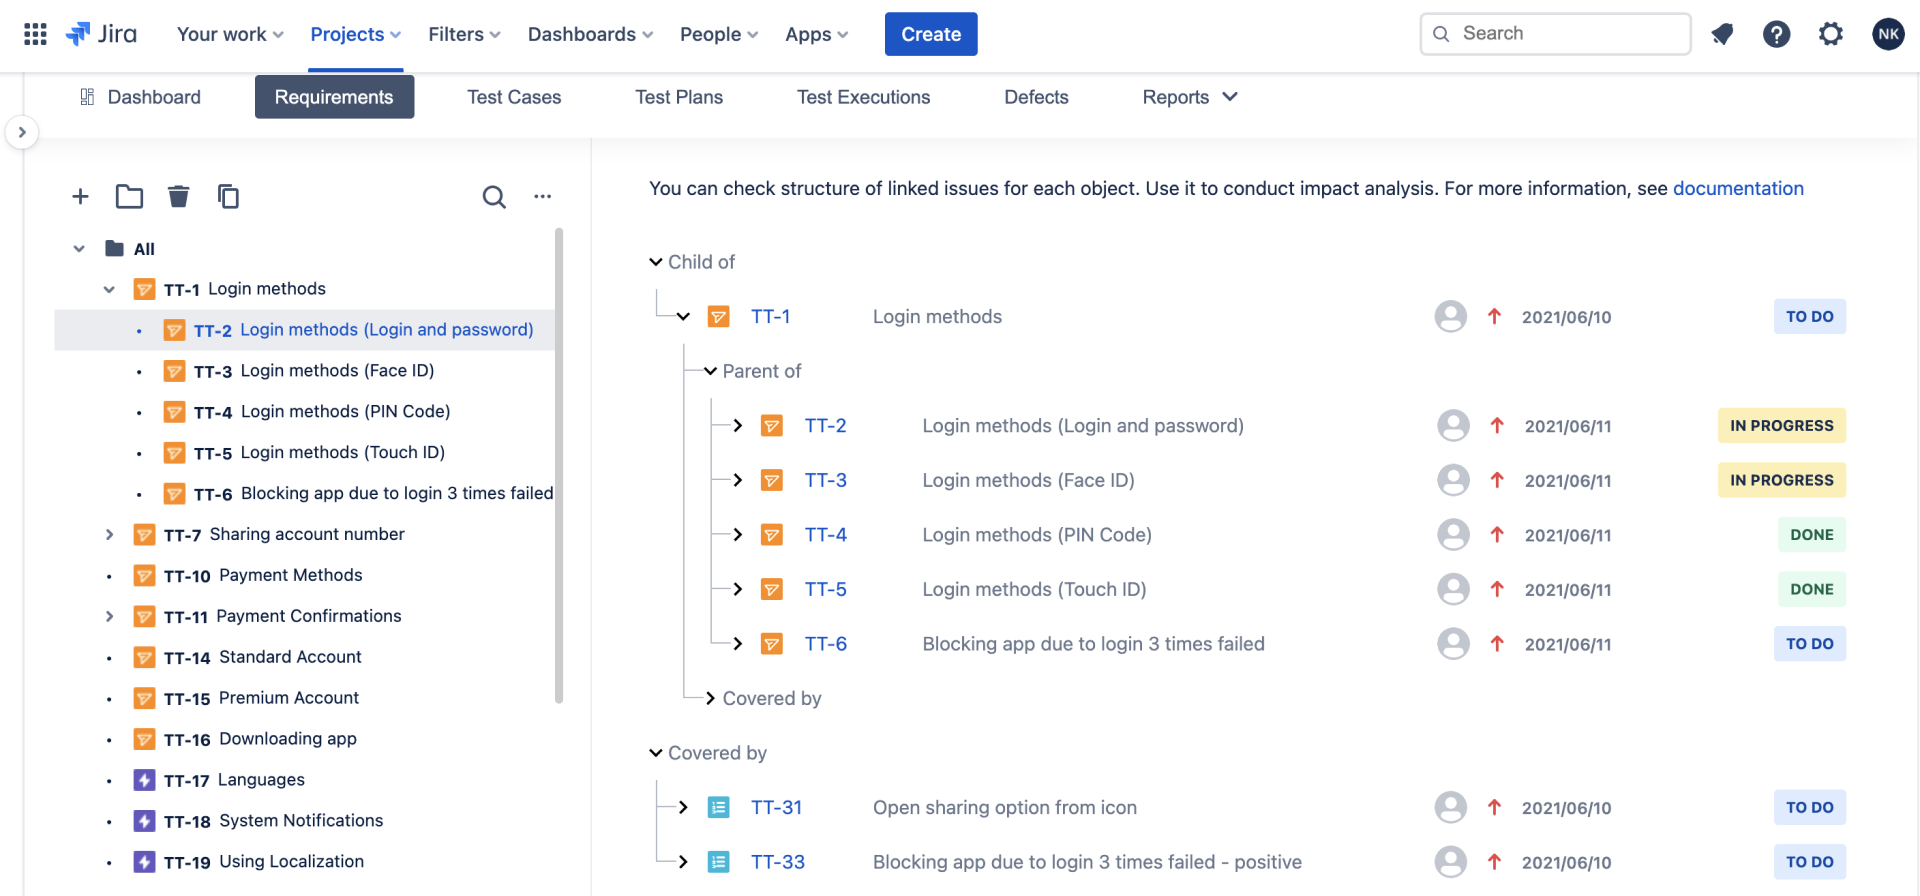
For more information about Impact Analysis click here.
Need help?
If you can’t find the answer you need in our documentation, raise a support request*.
*Include as much information as possible to help our support team resolve your issue faster.
