- User's guide
- Project view
- Navigation
- Relations
- Requirement
- Test Case
- Test Plan
- Test Execution
- Defect
- REST API
- REST API
- Authentication
- Test Key
- Jira REST API
- Requirements
- Test Case
- Test Plan
- Test Execution
- Test Case Execution
- Defects
- Tree Structure
- Example of use
Tree structure
In this section you can decide how your objects will be displayed on the tree.
Before you start, log in as a user with the Jira Project Administrators project permissions.
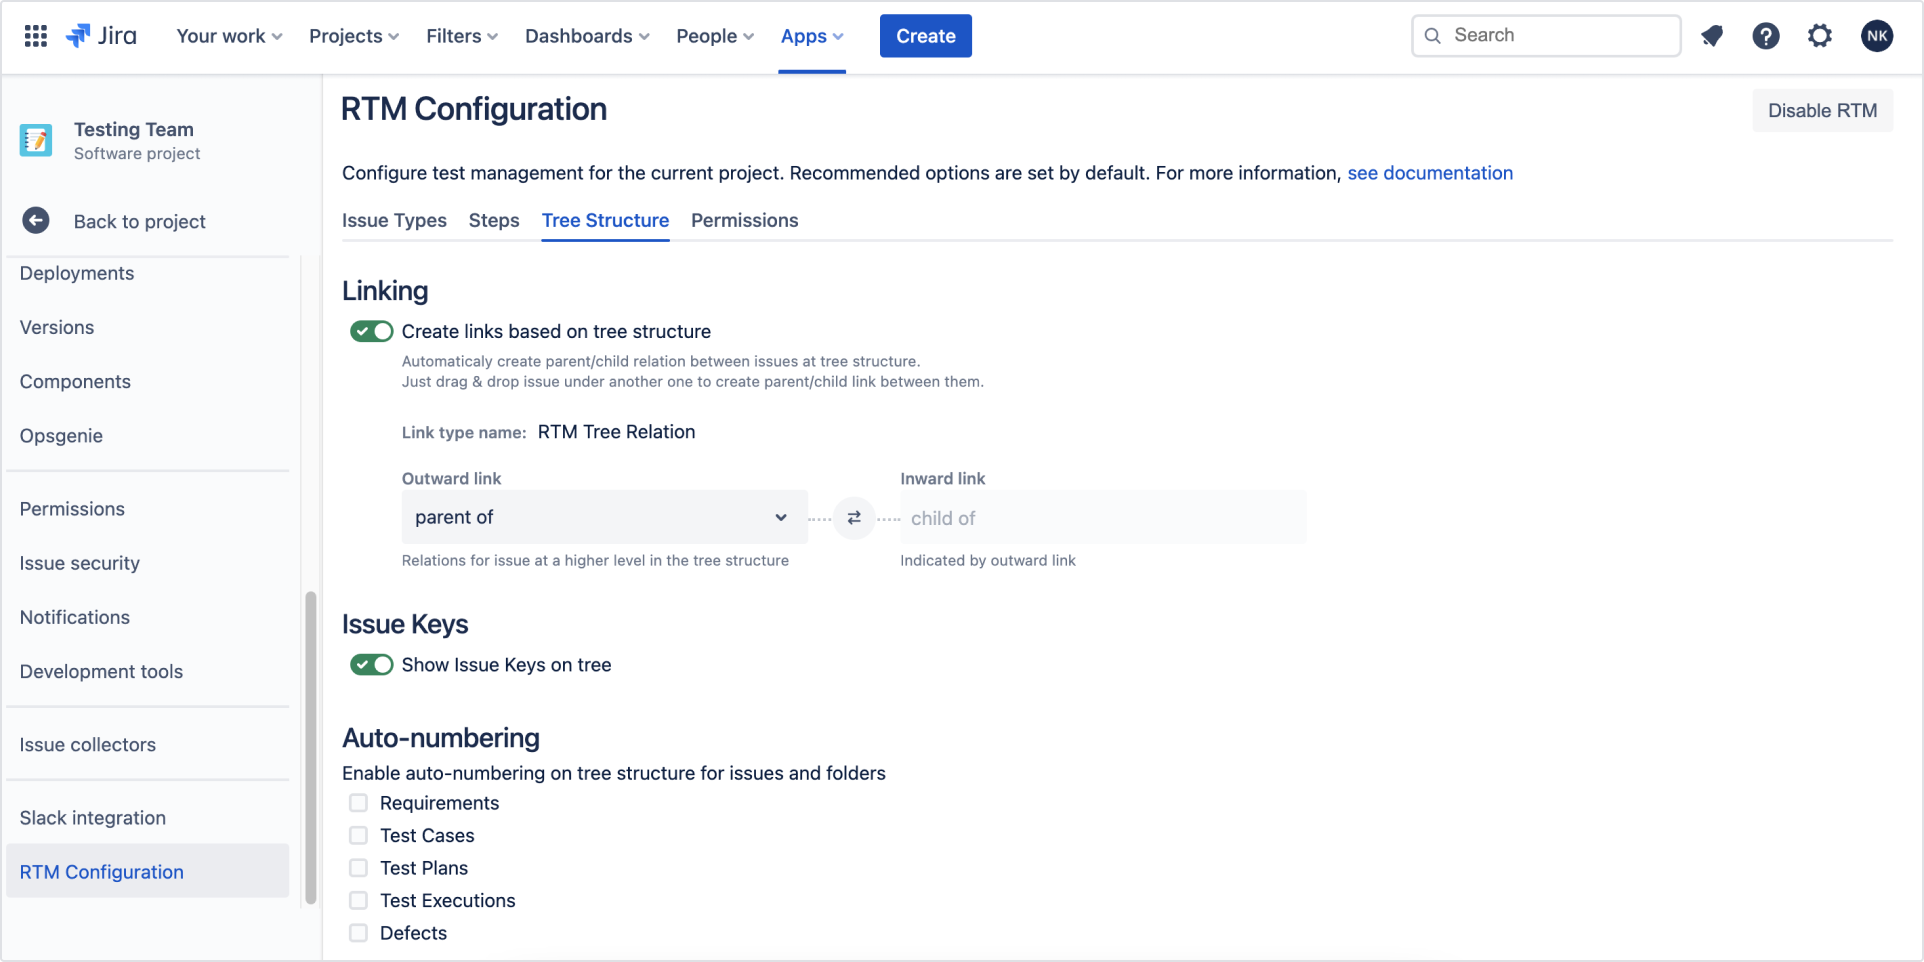
To start configuring tree structure navigate to Project settings > RTM Configuration > Tree structure.

Linking based on the tree structure
Linking based on the tree structure is implemented to support tracking relations between the objects. If one issue is placed under another by drag and drop on the folders list, the connection between them is automatically created. The default relation between the issues is the ‘Parent/Child’ type. Connections are set up only between the closest issues, which means that a link for a Folder → Issue line won’t be created.
Steps
In order to activate the feature:
- Choose the project with running RTM for Jira app, where you wish to activate linking based on the tree structure.
- Navigate to Project Settings > RTM Configuration.
- Open Tree structure tab.
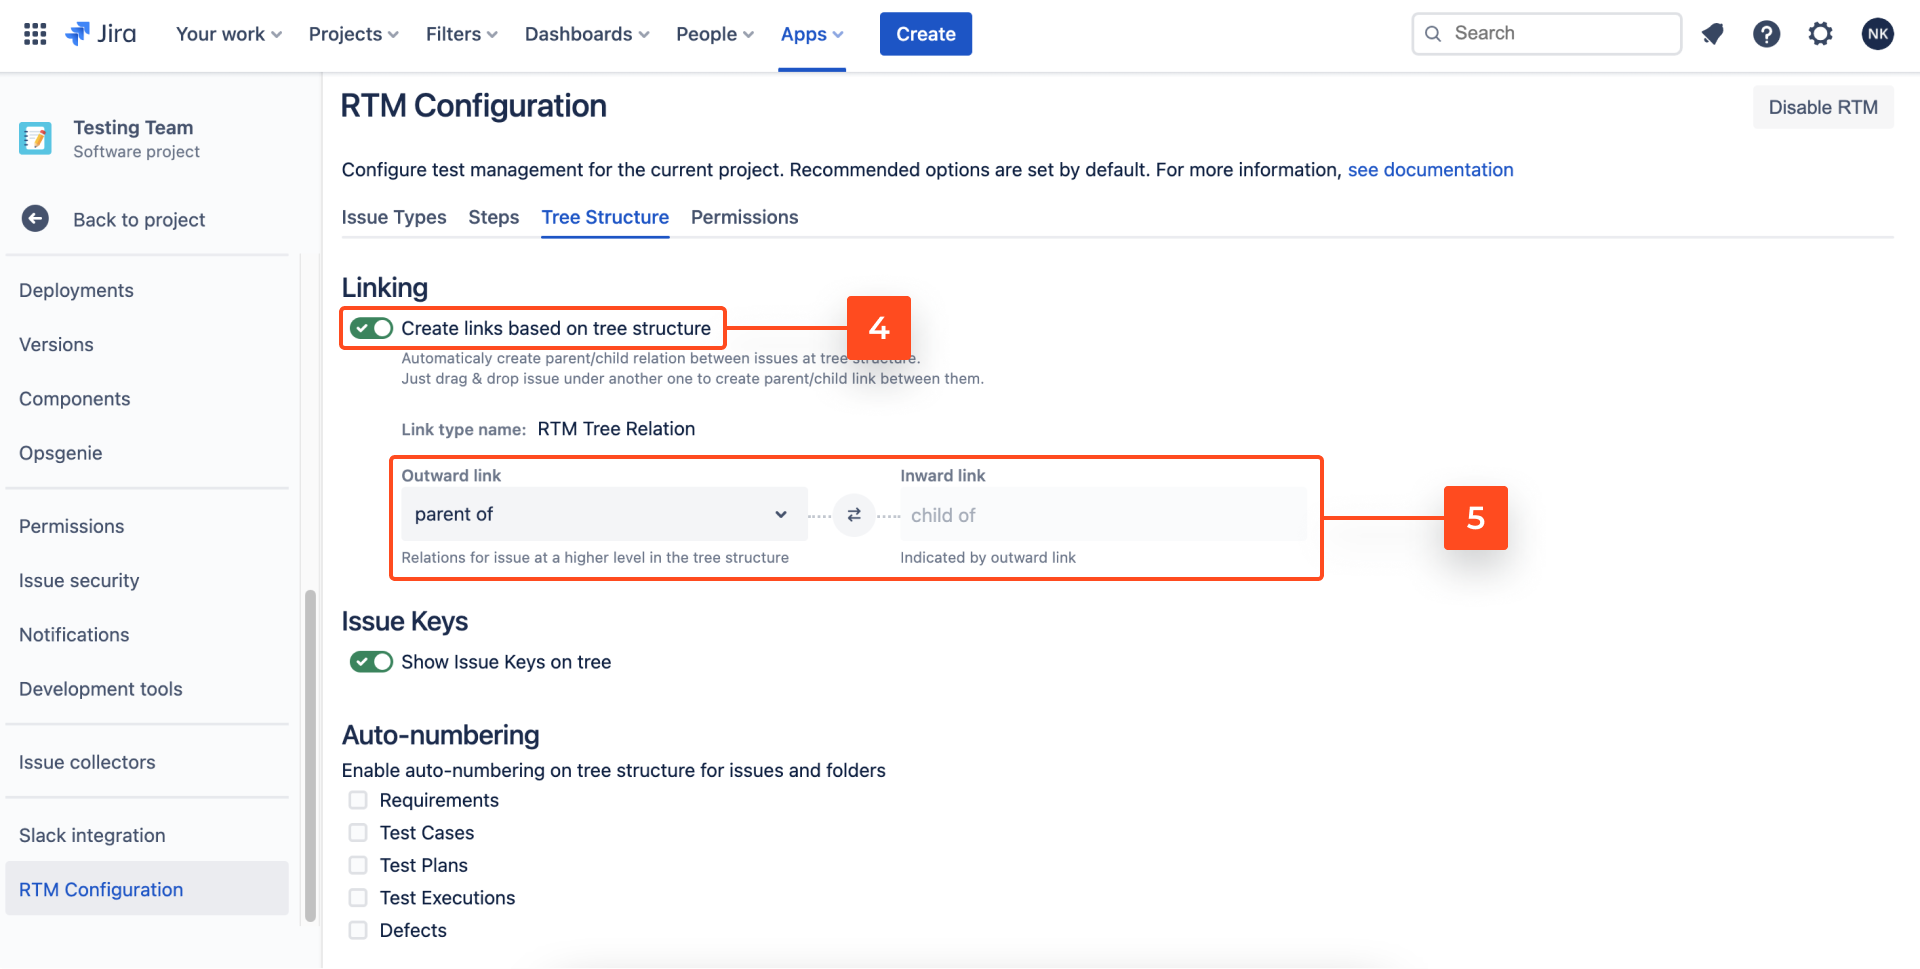
- Switch the Create links based on the tree structure toggle to on.
- Optionally, you can change the type of links that will be created between two objects. By default, it’s RTM Tree Relation.

Issue Keys
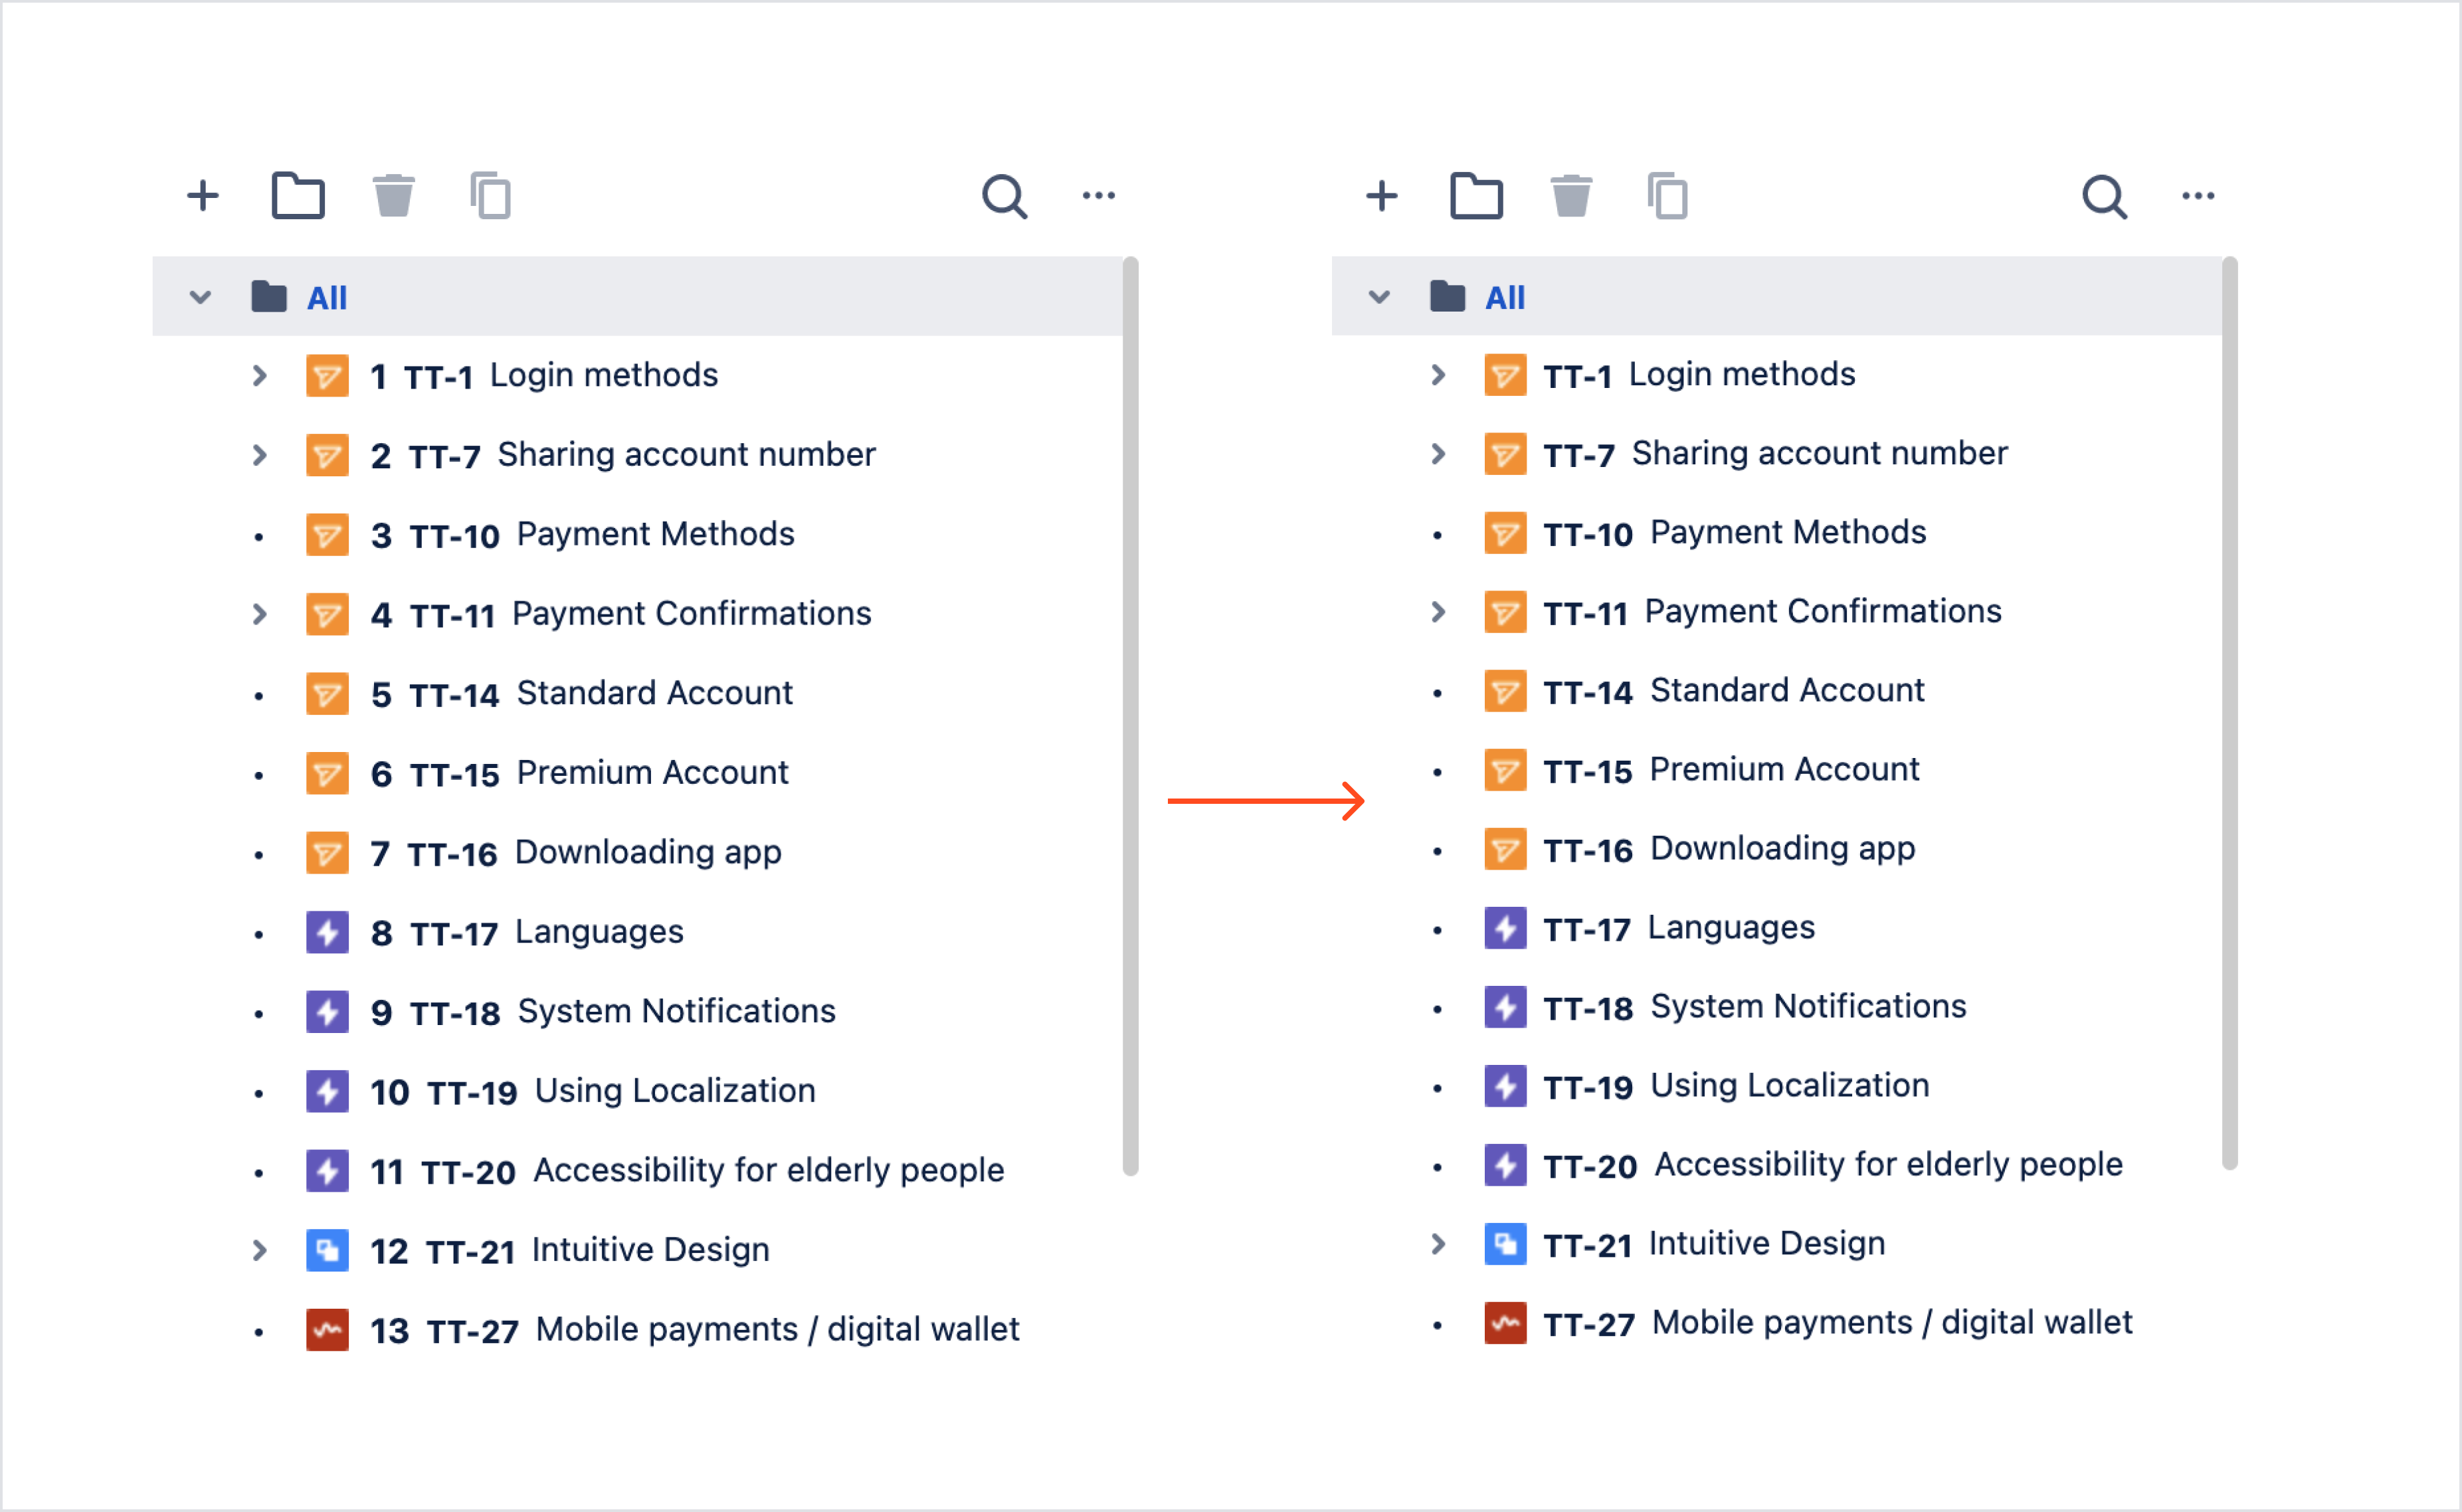
Switch the Issue Keys toggle to on, to show issue keys on the tree.

Auto-numbering
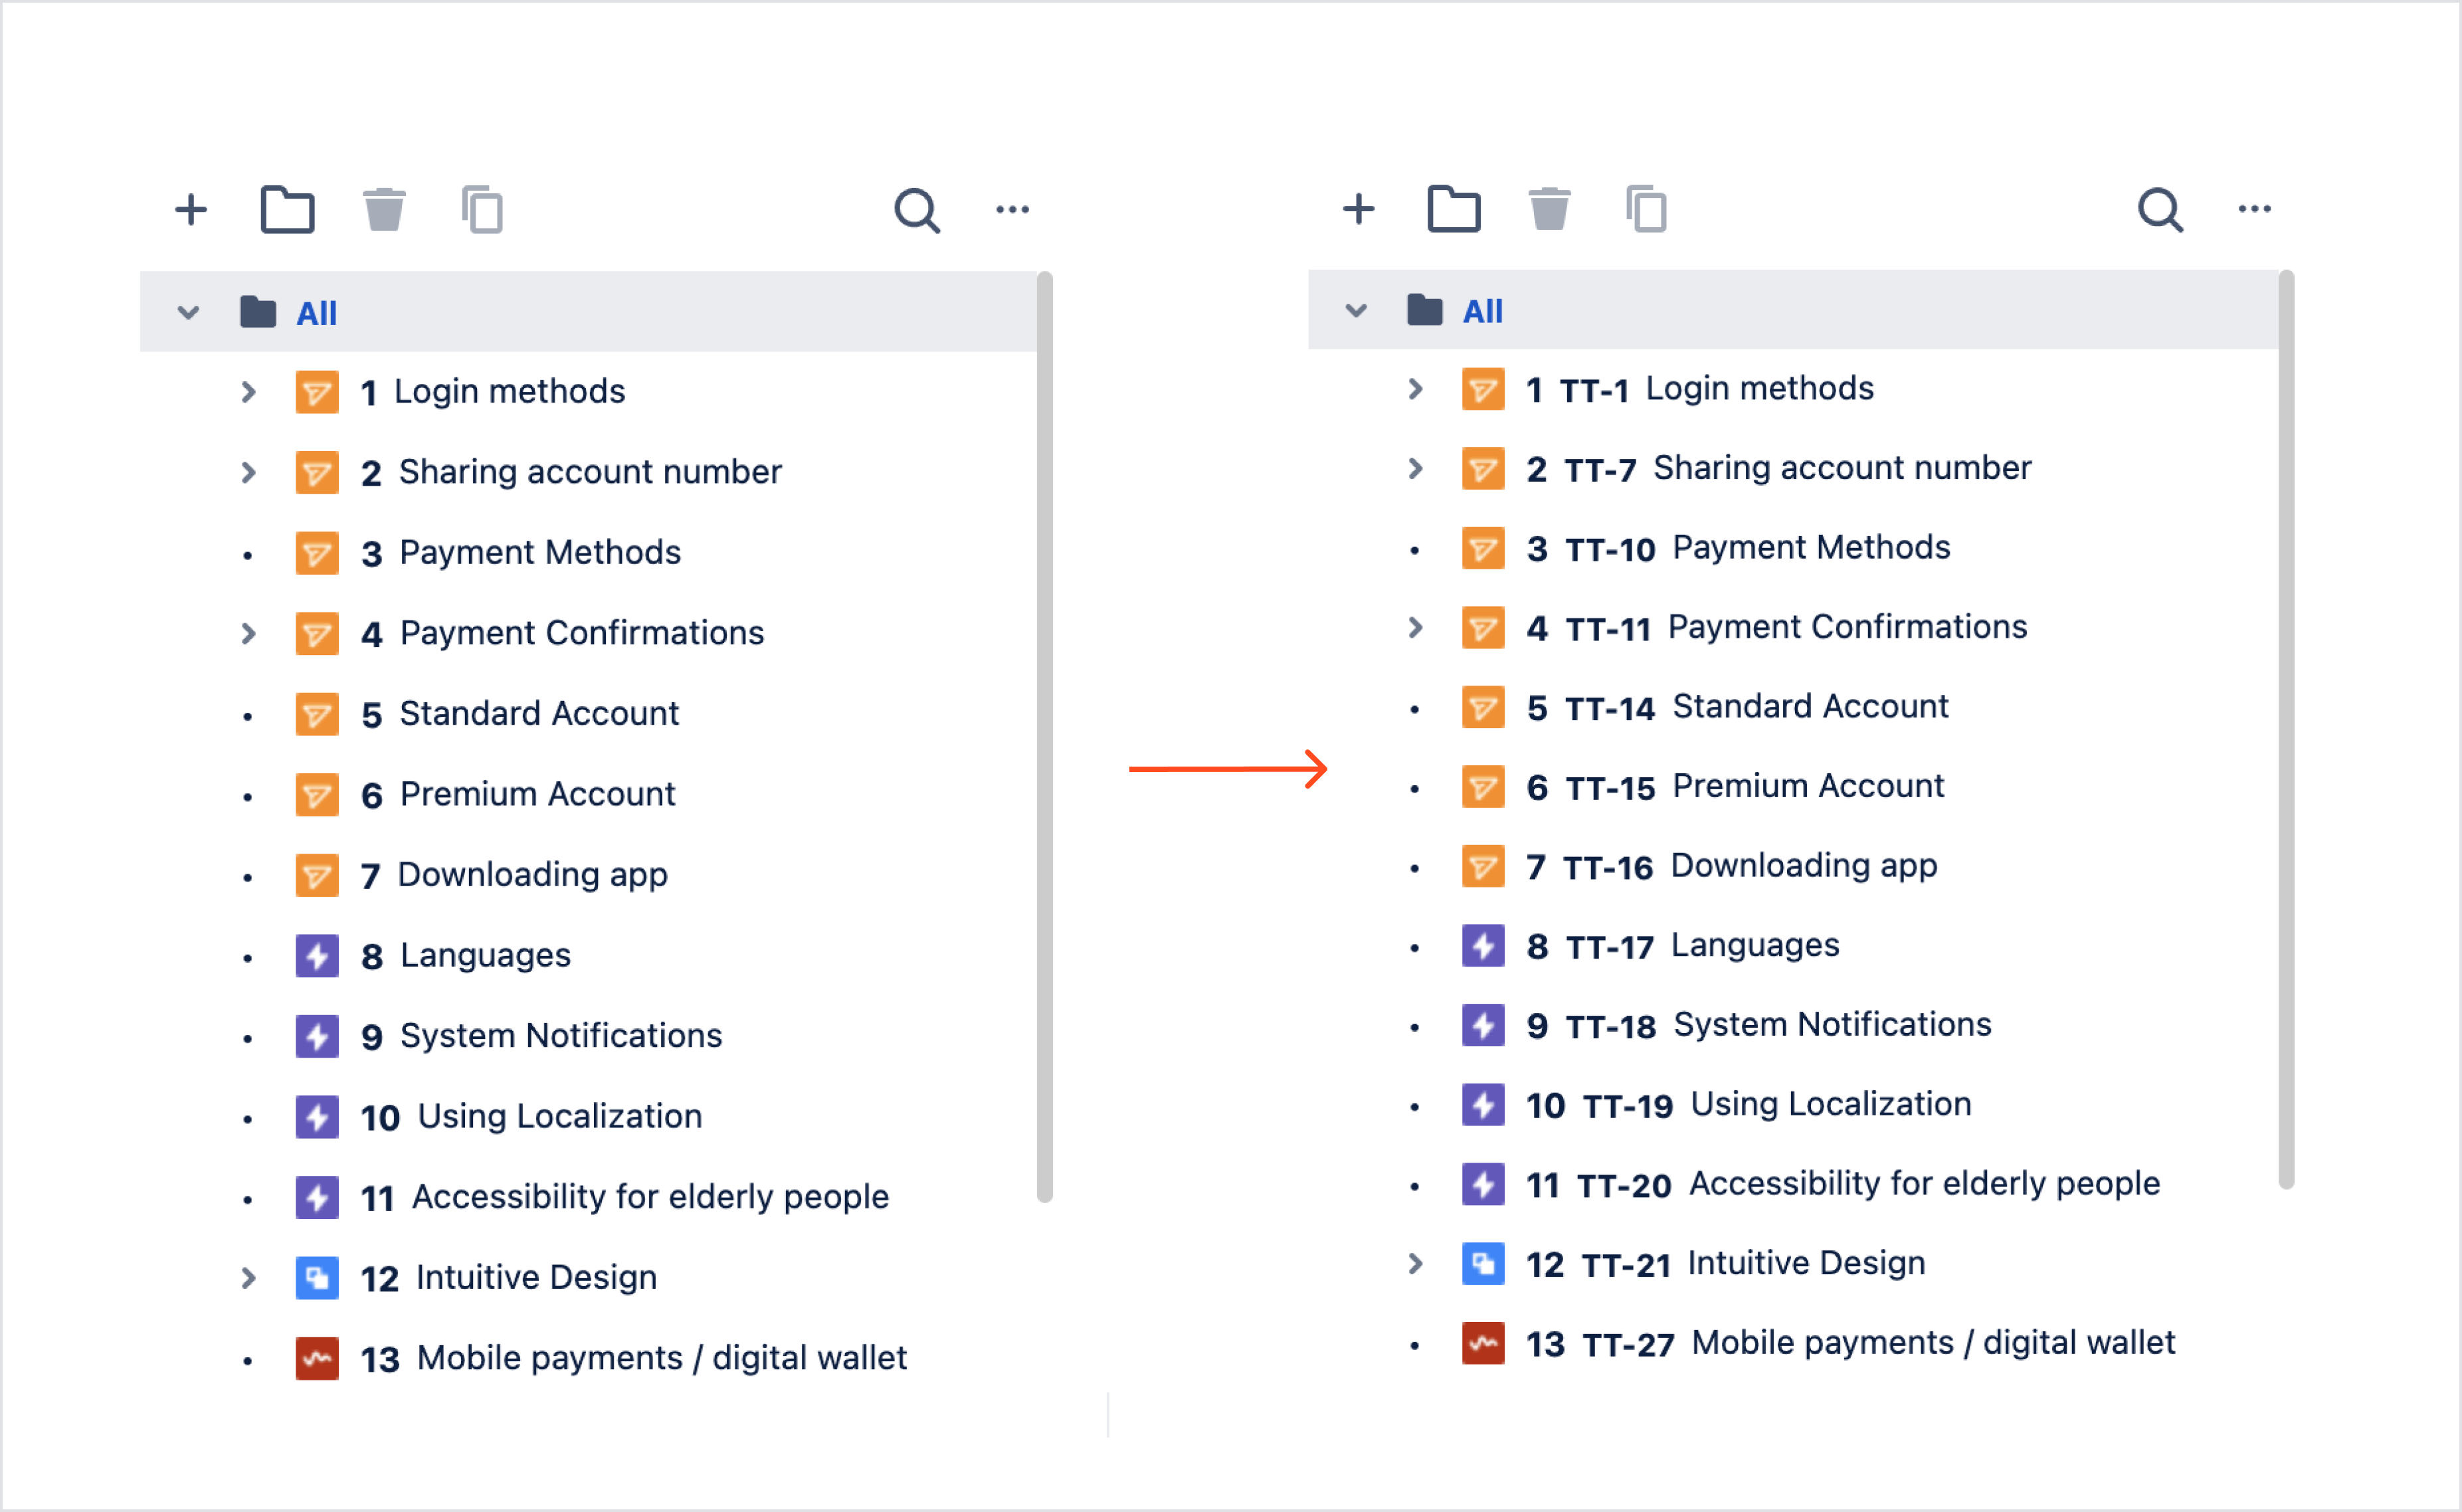
Check the target object to enable Auto-numbering on the tree for issues and folders:
- Requirements
- Test Cases
- Test Plans
- Test Executions
- Defects.

Need help?
If you can’t find the answer you need in our documentation, raise a support request*.
*Include as much information as possible to help our support team resolve your issue faster.