- Introduction
- About
- Get started
- Functionalities
- Fields Visibility
- Translations
- Tabs Visibility
- Mapper
- Secured Fields
- Supported fields
- Bundled Fields
- Overview
- Add Bundled Field
- Bundled Fields Configuration
- Using Bundled Fields
- JQL Searcher
- Java API (ScriptRunner)
- Data Sources
- Email notifications
Mapper
This page provides information on configuring Select Options Mapper.
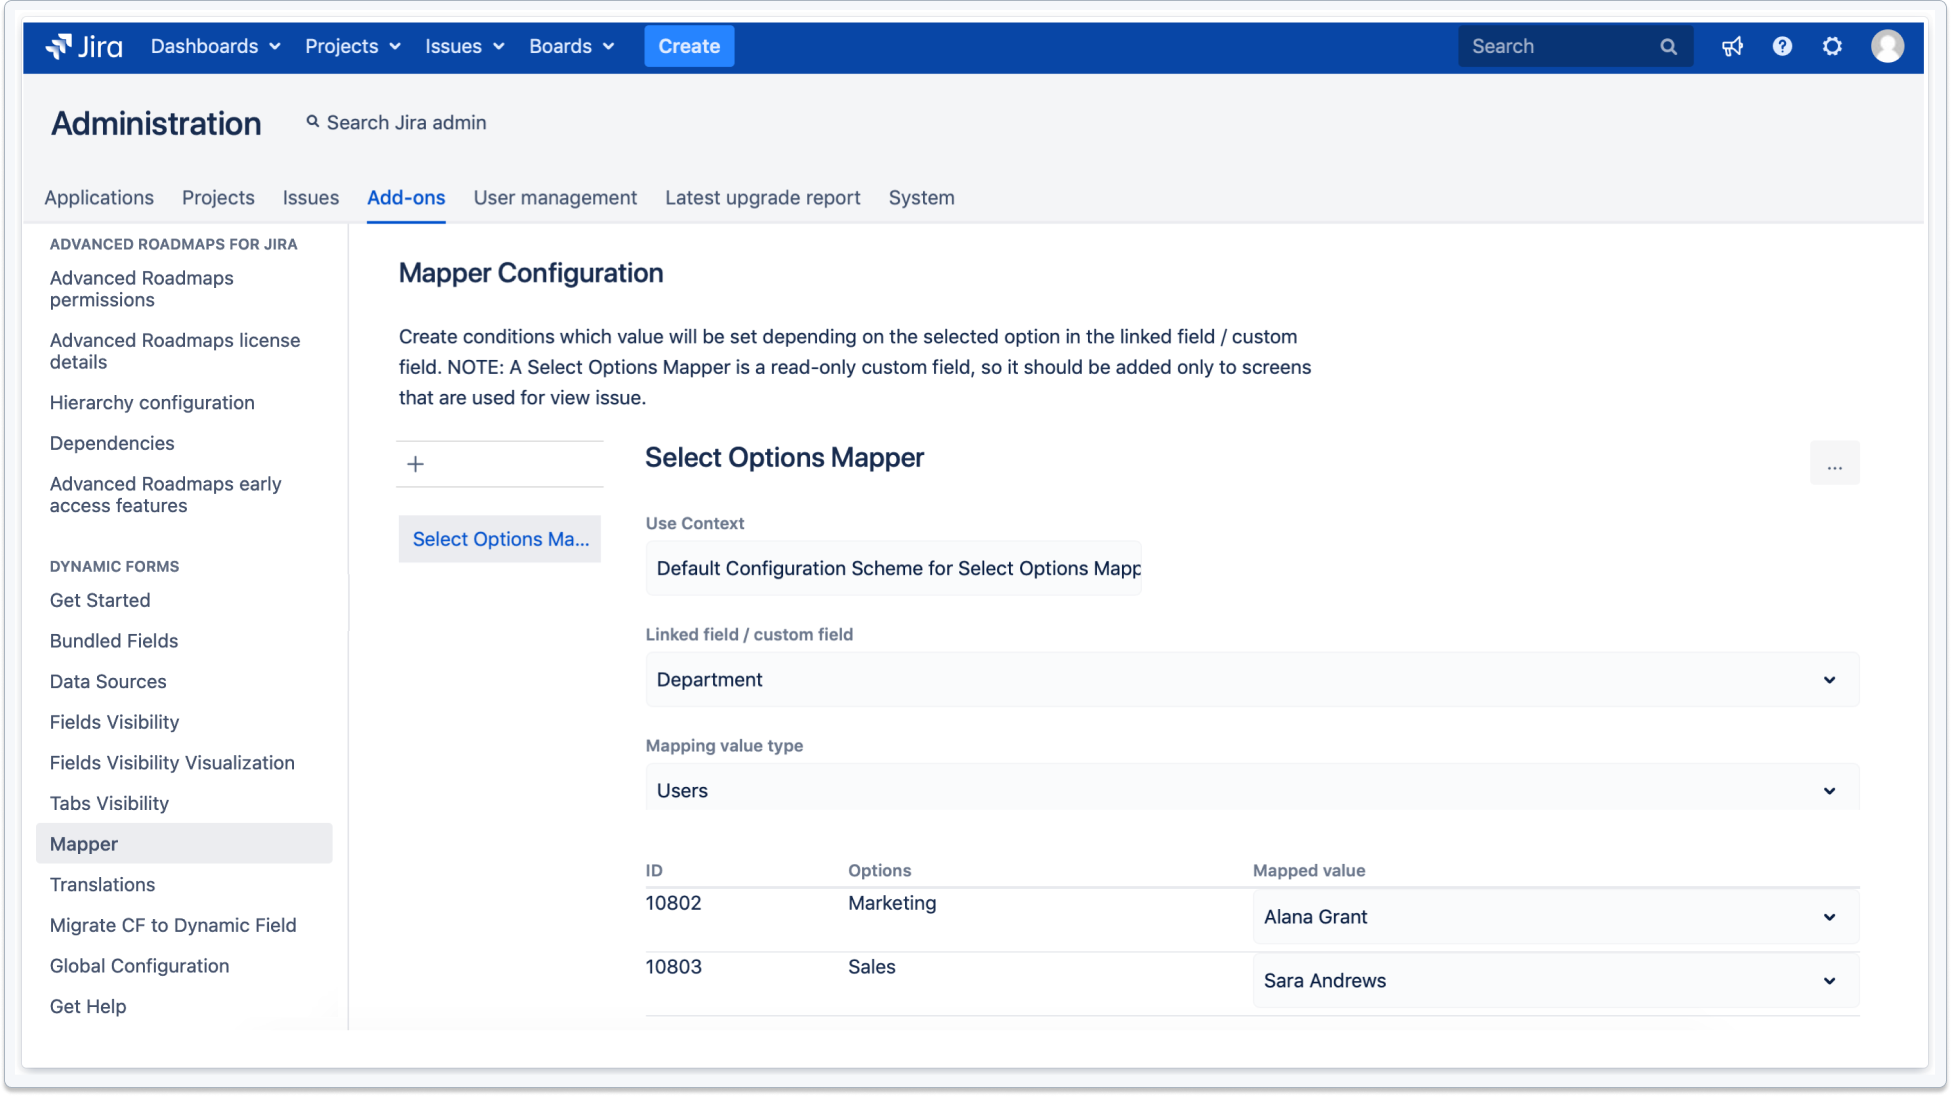
A Select Options Mapper custom field allows to create mapping between other custom field’s value and text or group, user, project (all provided from dictionary). It supports select, cascade select and Dynamic Select. For example, show a responsible person based on the selected department.
Select Options Mapper is a read-only custom field, so it should be added only to screens that are used for view issue. It won’t be visible on the Create screen.
To set a configuration, log in as a user with Jira Administrators global permission.
Prerequisites
Add new custom field to Jira which is provided by Dynamic Forms app: Deviniti [Dynamic Forms for Jira] - Select Options Mapper.
Steps
- Go to Jira Administration > Issues.
- Select Custom fields from the menu in the Fields section.
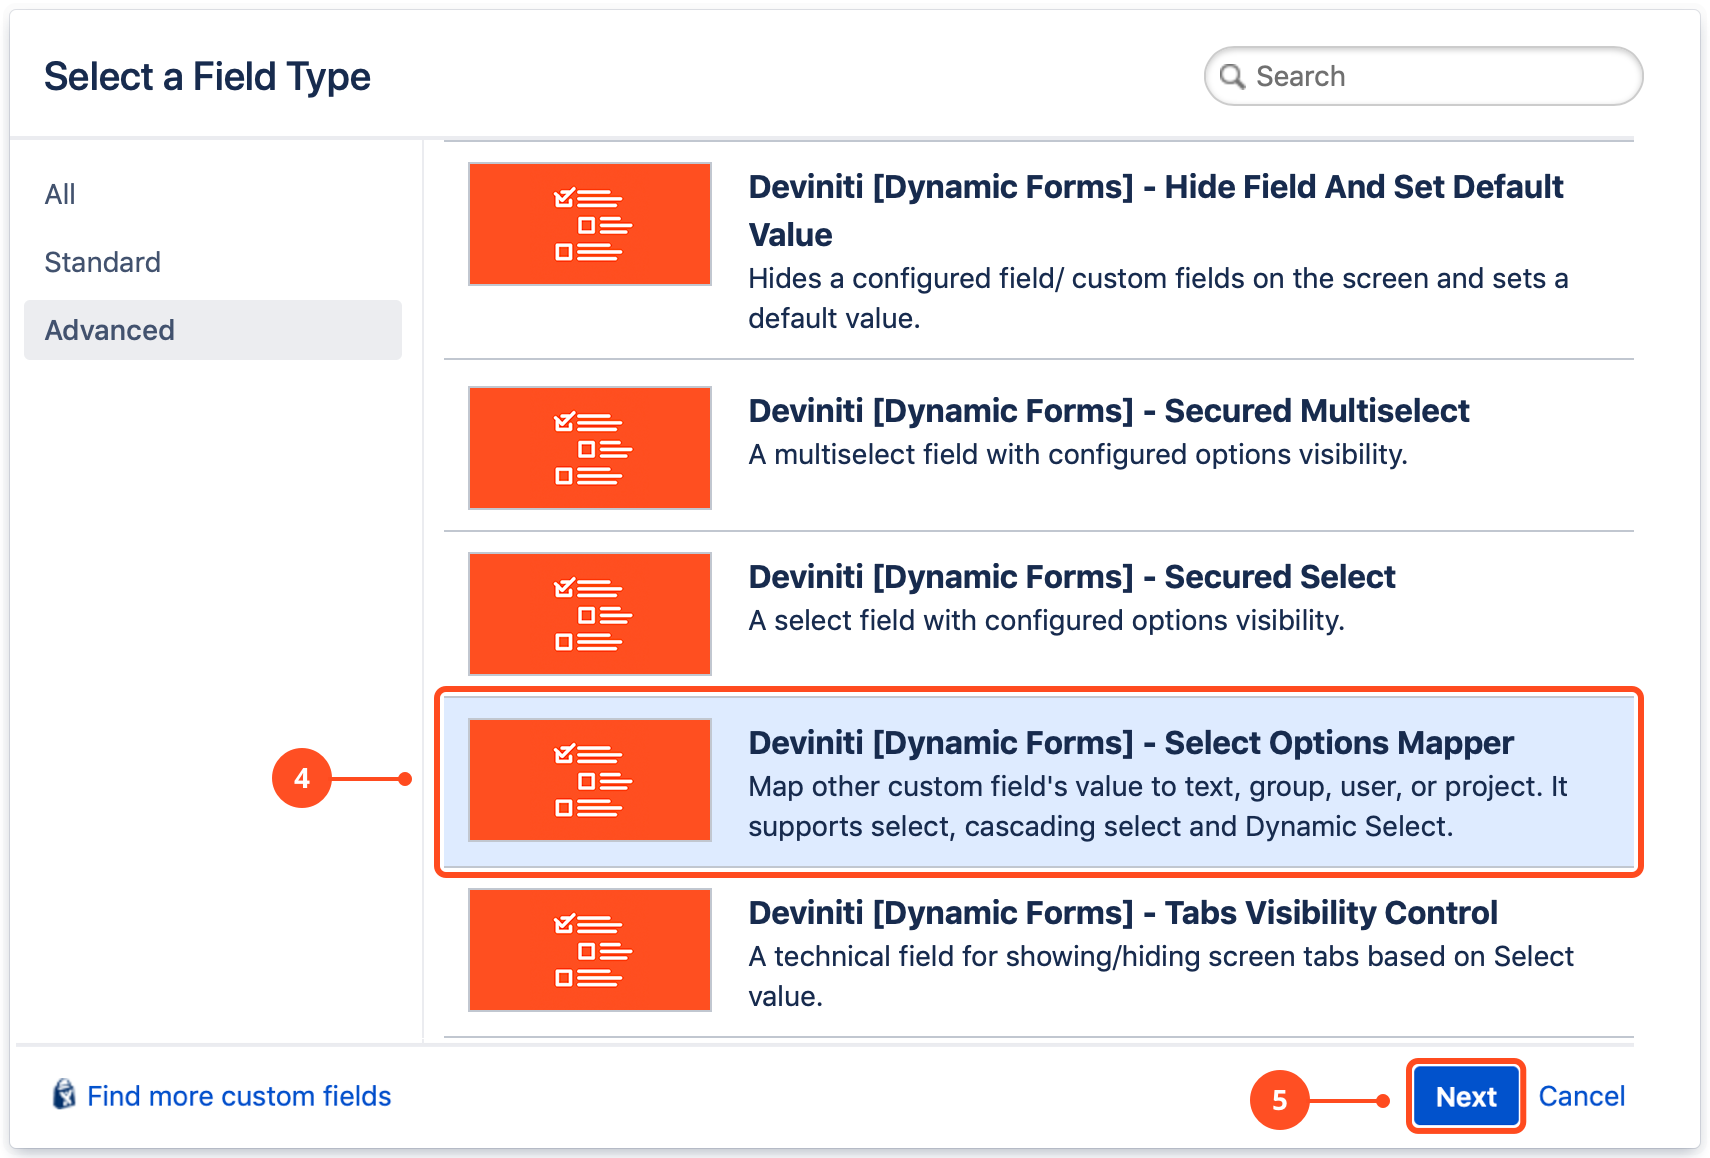
- Click Add custom field.
- Select Deviniti [Dynamic Forms for Jira] - Select Options Mapper from the list (in the advanced section).
- Click Next.

- Configure the selection criteria for the field: Name and Description (optional).
- Click Create.
- Select the checkboxes of the screens on which this custom field will be displayed.
- Click Update.
Result
A new custom field Deviniti [Dynamic Forms for Jira] - Select Options Mapper is added to Jira.
Configure a Select Options Mapper
Steps
-
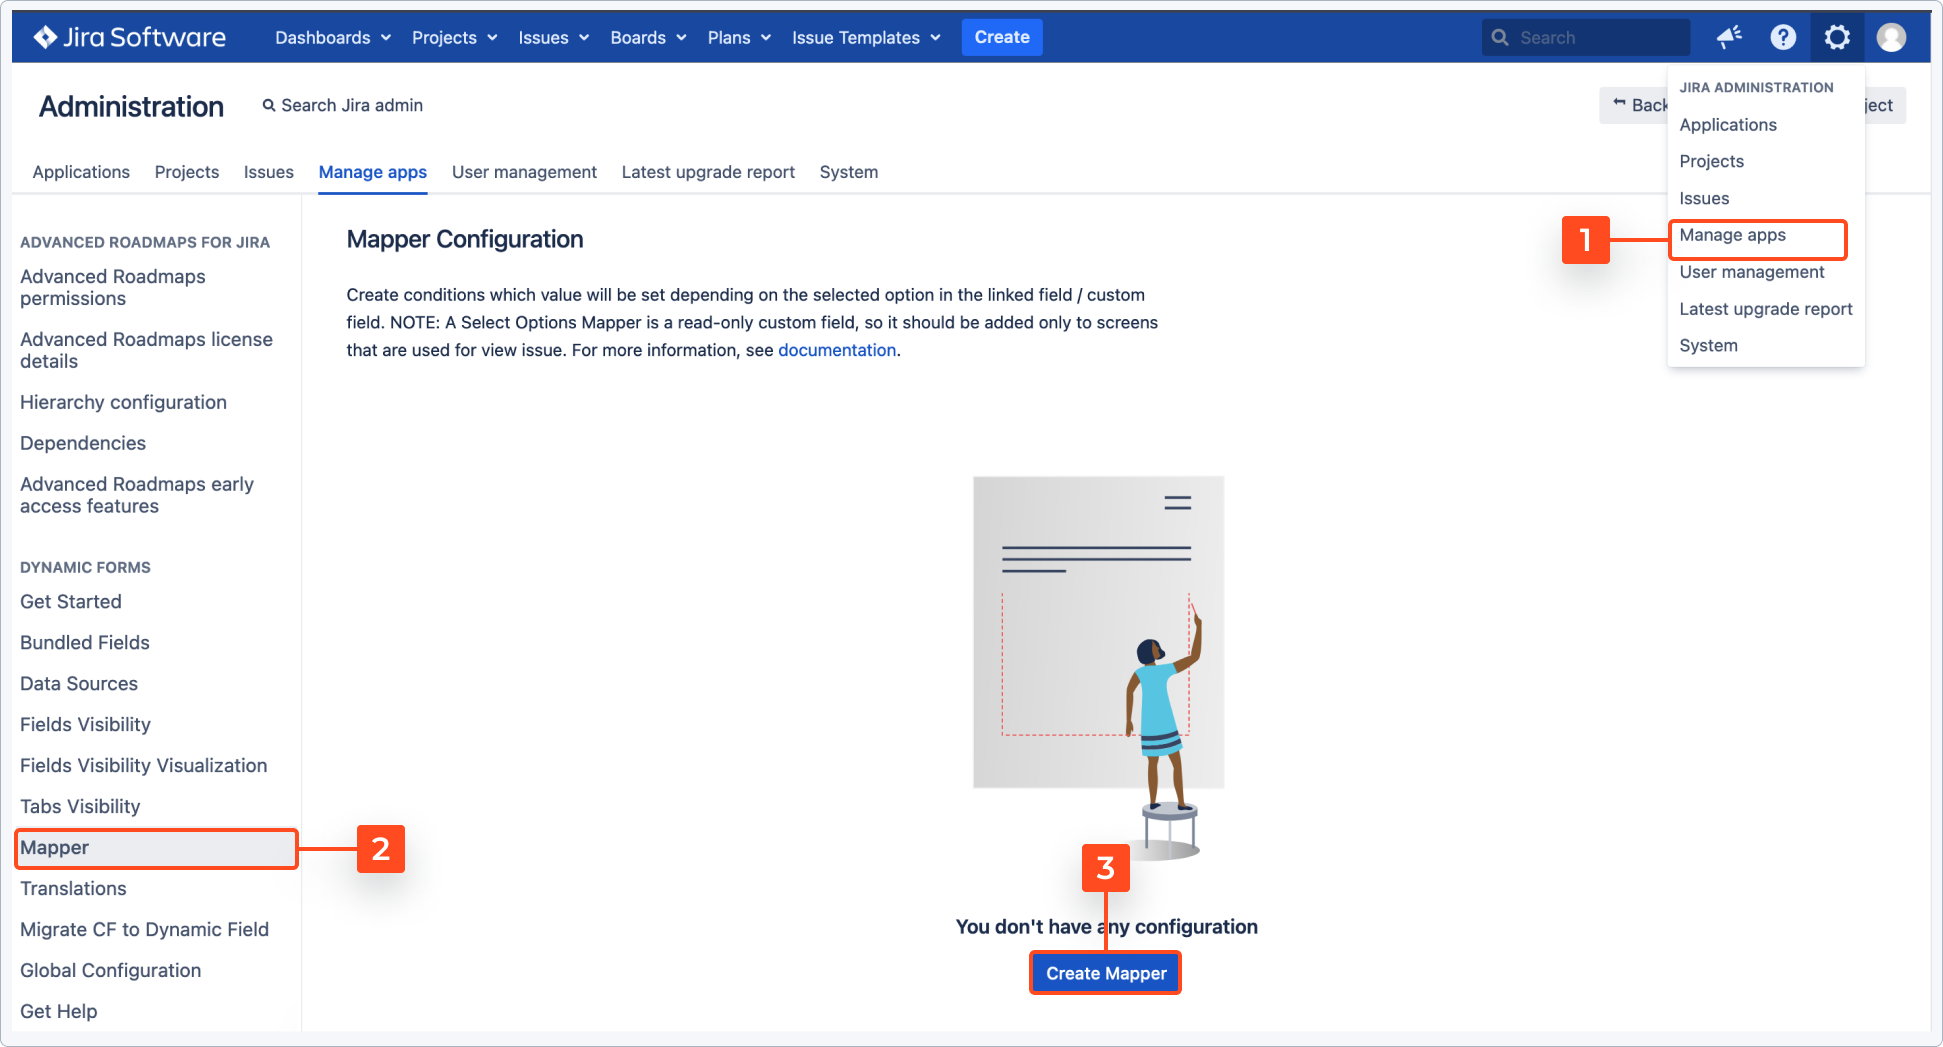
Go to Jira Administration > Add-ons.
-
Select Mapper Configuration from the menu in the Dynamic Forms section.
-
A dialog box appears.
-
Select a linked custom field.
-
Select one of the mapping value type: Projects, Text, Groups, Users.
See Set Assignee from Mapping Select for details.
Result
Select Options Mapper is configured in Jira.
Next steps
To make sure that everything works properly, go to the Create Issue screen, choose an option you configured and check if a related field shows up.
If you can’t find the answer you need in our documentation, raise a support request.


