- Introduction
- About
- Get started
- Migration to Cloud
- Bundled Fields
- Overview
- Add Bundled Field
- Bundled Fields Configuration
- Format and validation
- Using Bundled Fields
- Advanced settings
- Bundled Fields Searcher
- Java API (ScriptRunner)
- Data Sources
- Email notifications
- Bundled Fields v.6.8.x - 6.9.x
- Bundled Fields v.6.7.x
- Dynamic Forms
- Dynamic Forms
- Supported fields
- Visibility
- Request Types visibility
- Fields visibility
- Customer Portal visibility
- Options visibility
- Requirements visibility
- SLAs visibility
- Java API
- Multilevel Structure
- Configuration
- Using a multilevel structure on the Customer Portal
- User Synchronization
- Organizations and Groups Synchronization
- Issue View
- Issue View
- Add user's IP address post function
- Restart SLA post function
- Update SLA to date post function
- Customer Portal
- Links
- Export list
- Split column
- Request details view
- Additional fields
- Additional options
- Compatibility
- Configuration Manager
Remove None
Learn how to remove the None option from selected fields on the Customer Portal.
- The Remove none feature supports three types of custom fields: select, cascading select and radio buttons.
- Remember to add the fields to the issue screen and to the request type.
- To check your settings, go to: Project Settings > Request Types > Edit fields > Add a field.
If you want to use the Remove None feature, the added fields must be optional. You can set it in the Request Types configuration.
Steps
To set configuration:
- Choose Projects at the top of the screen.
- Choose the service project you want to configure.
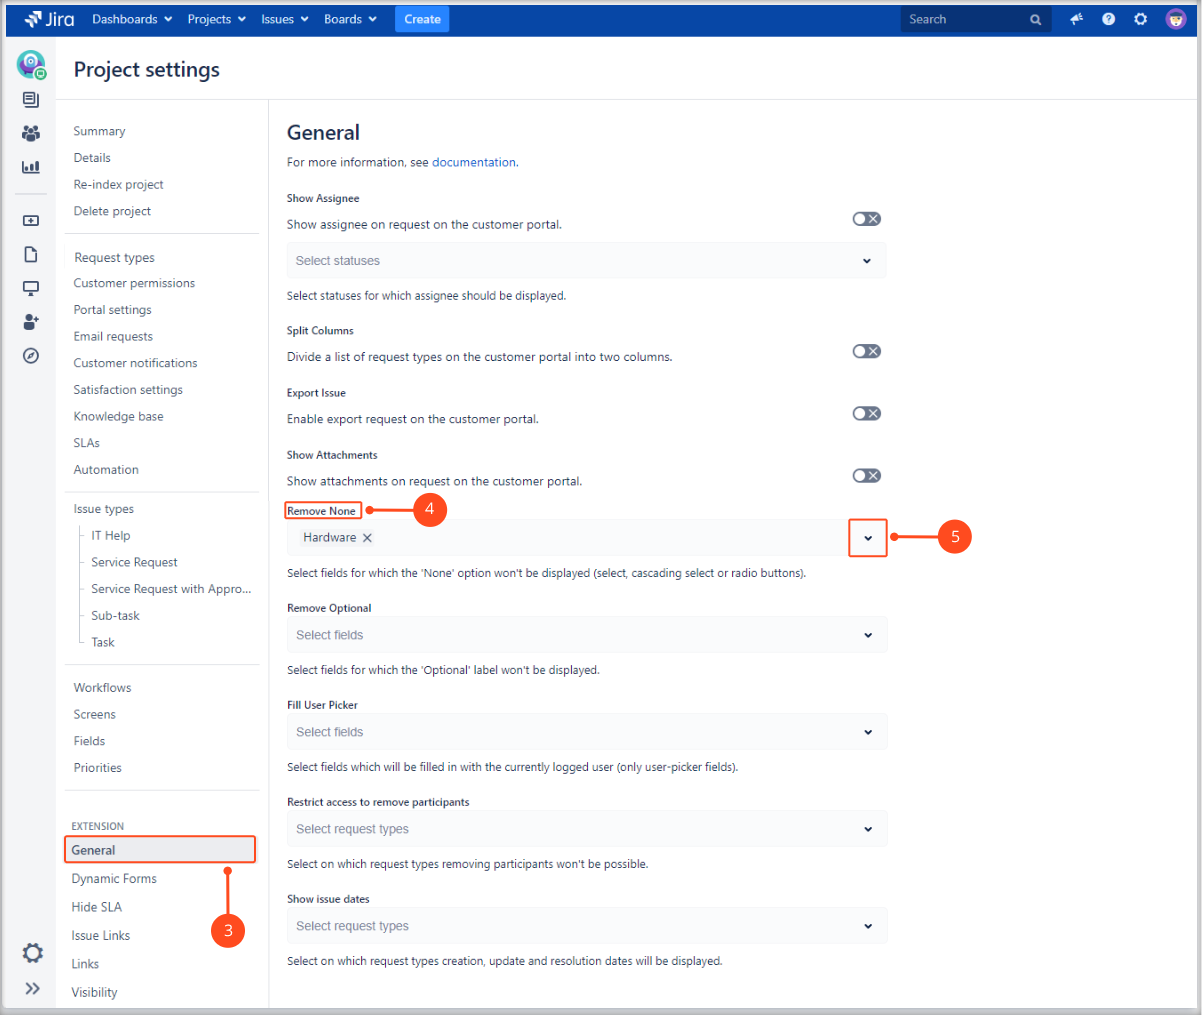
- From service project sidebar, select Project settings > General in the Extension for Jira Service Management section.
- Go to the Remove None section.
- Select fields for which the None option will not be displayed (select, cascading select or radio buttons).

Result
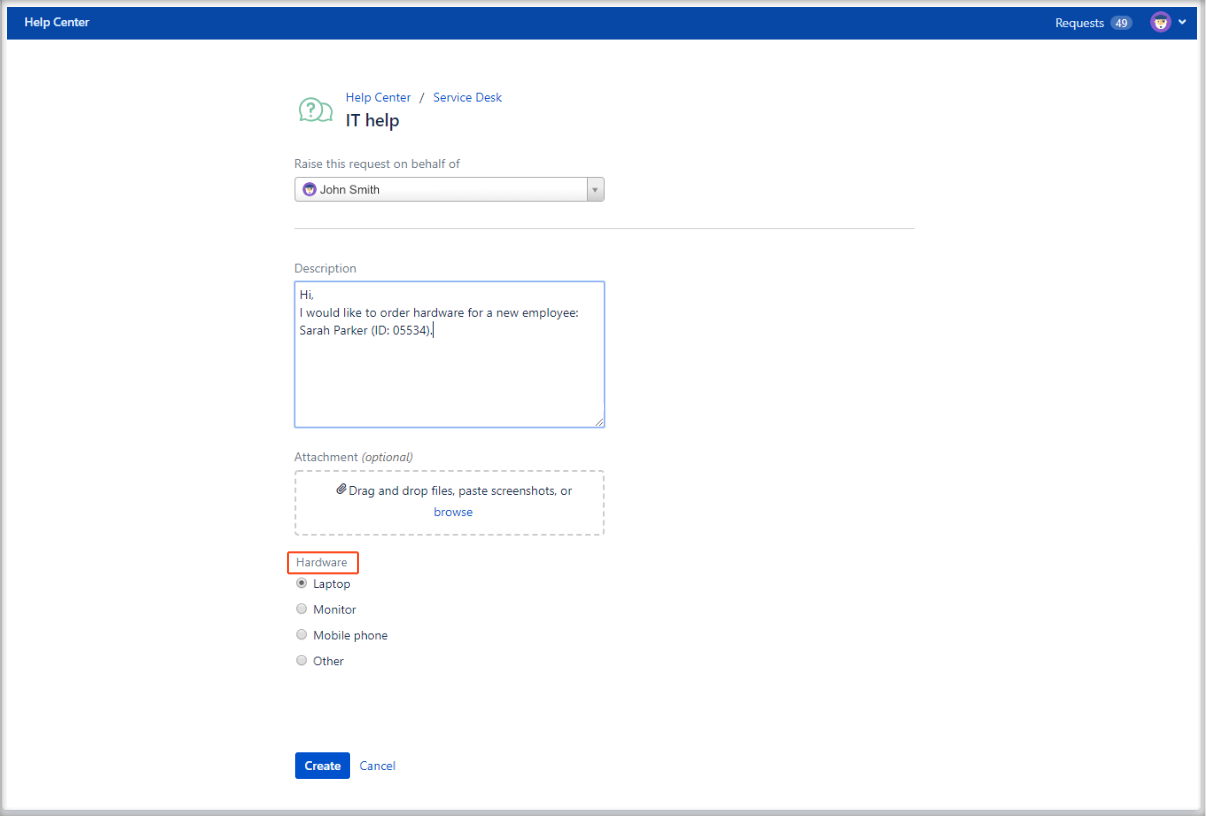
A None option is removed from selected field. A label "(optional)" next to this field is also removed.
Fields with the None option removed will automatically select the first option from the top. It’s not recommended when the field is set as required.
Example
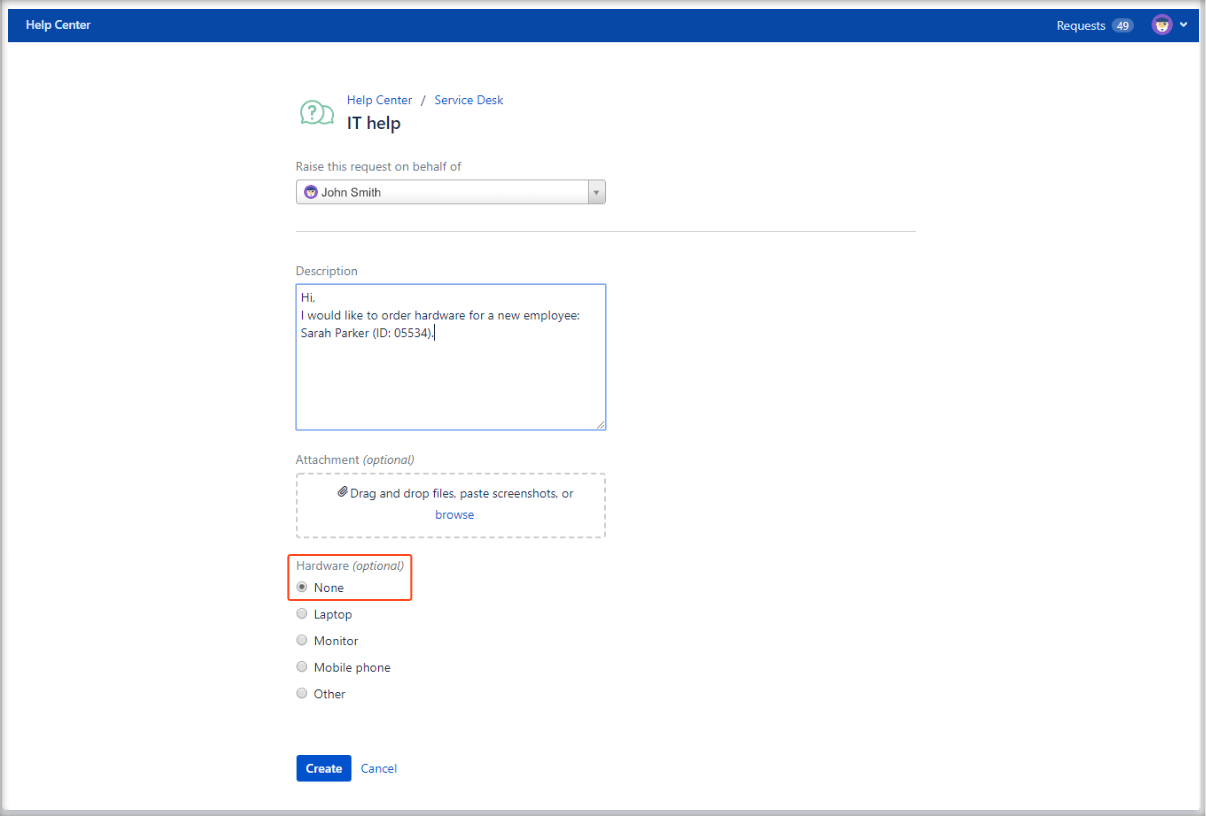
If you select the Remove None option in your settings, the None option will not be displayed on the list on the Customer Portal.
To check how Remove None option works, create a new request.
Example with no Remove None option:

Example with Remove None option:

If you can’t find the answer you need in our documentation, raise a support request*.
- Include as much information as possible to help our support team resolve your issue faster.