- Introduction
- About
- Get started
- Migration to Cloud
- Bundled Fields
- Overview
- Add Bundled Field
- Bundled Fields Configuration
- Format and validation
- Using Bundled Fields
- Advanced settings
- Bundled Fields Searcher
- Java API (ScriptRunner)
- Data Sources
- Email notifications
- Bundled Fields v.6.8.x - 6.9.x
- Bundled Fields v.6.7.x
- Dynamic Forms
- Dynamic Forms
- Supported fields
- Visibility
- Request Types visibility
- Fields visibility
- Customer Portal visibility
- Options visibility
- Requirements visibility
- SLAs visibility
- Java API
- Multilevel Structure
- Configuration
- Using a multilevel structure on the Customer Portal
- User Synchronization
- Organizations and Groups Synchronization
- Issue View
- Issue View
- Add user's IP address post function
- Restart SLA post function
- Update SLA to date post function
- Customer Portal
- Links
- Export list
- Split column
- Request details view
- Additional fields
- Additional options
- Compatibility
- Configuration Manager
Show Assignee
Learn how to display assignee in Request Details View visible on the Customer Portal.
To configure the functionality which allows for showing assignee in Request Details View, follow the below steps.
Steps
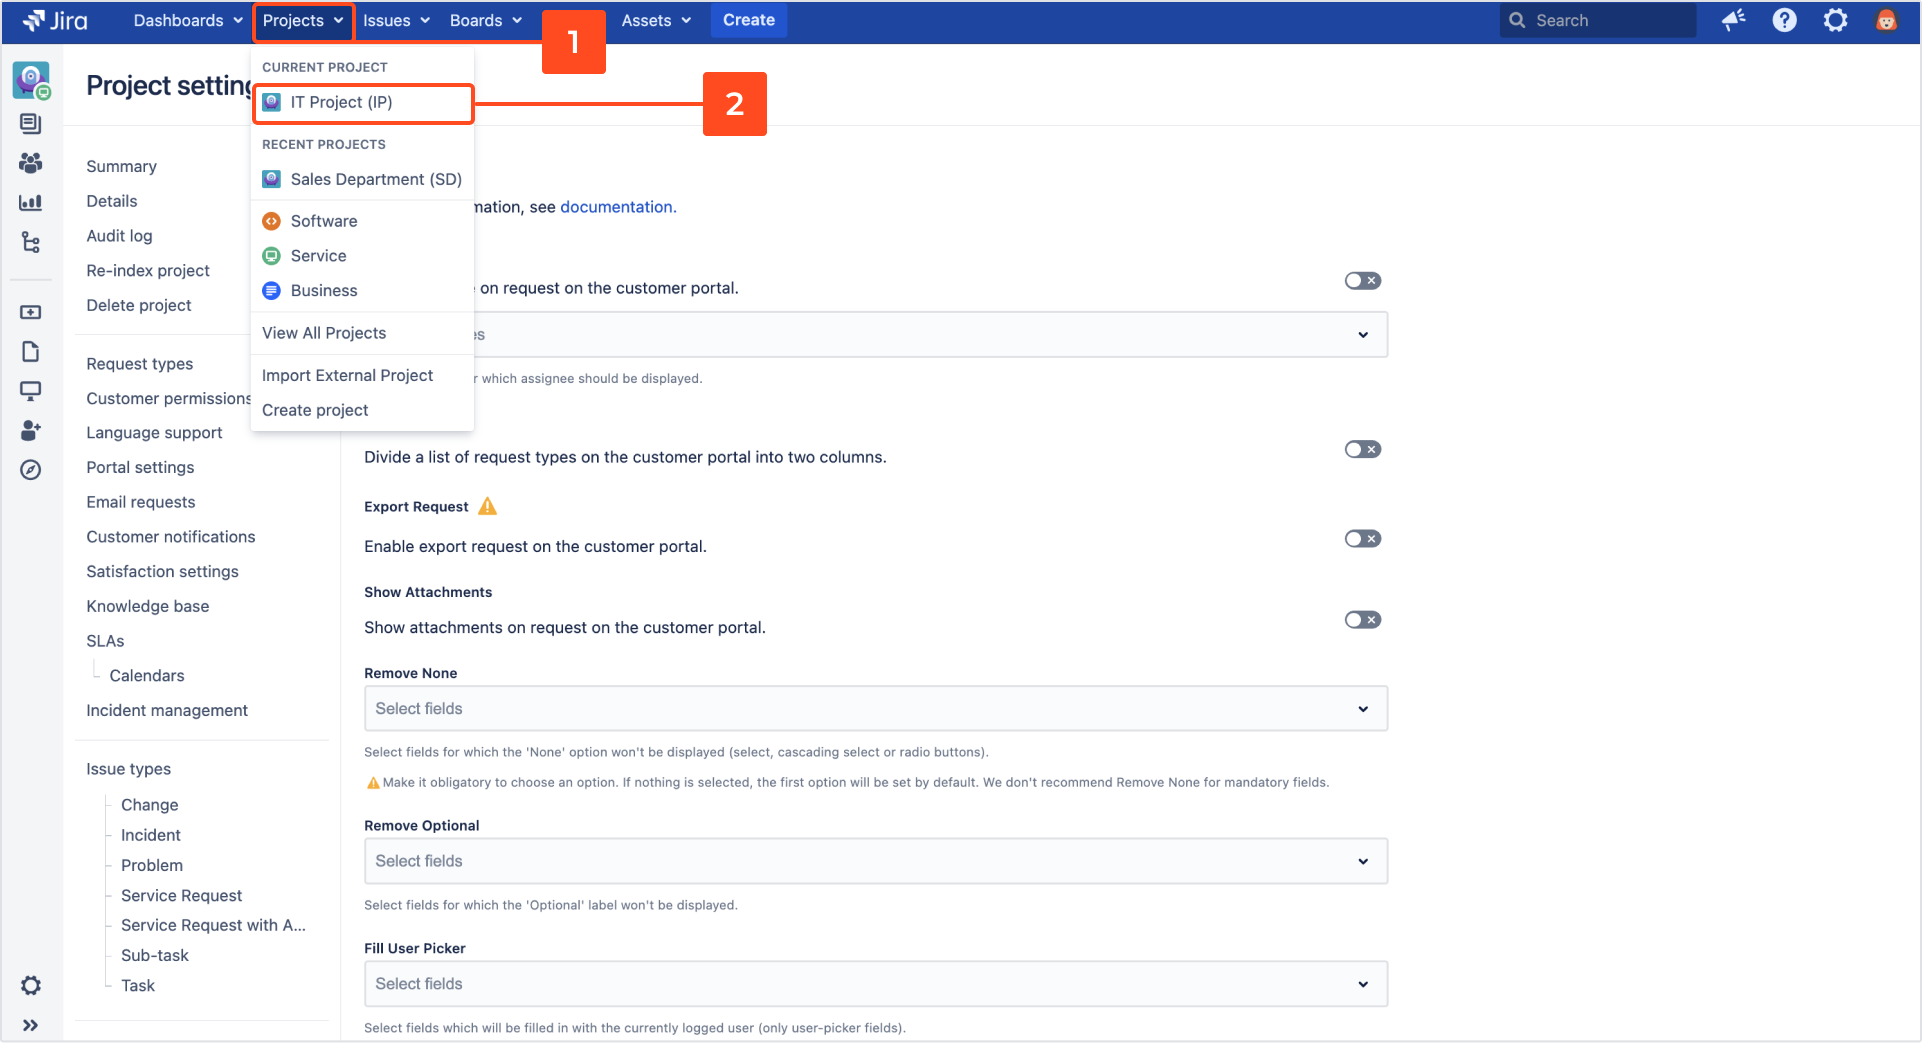
- Choose Projects from the main navigation bar.
- Select the service project you want to configure.

- From the service project sidebar, select Project settings > General in the Extension for Jira Service Management section.
- Go to the Show Assignee section and turn on the toggle next to Show assignee.
- Select statuses for which assignee should be displayed.
If you don’t select any status, the Assignee will be shown in every request on the Customer Portal.

Result
The Assignee section is shown in Request Details View displayed on the Customer Portal for the requests with selected statuses.
Next steps
You can check the Show Assignee functionality by visiting the Customer Portal.
When the toggle next to Show Assignee is turned off, Assignee won’t be visible in Request Details View.

When the Show Assignee section is configured, by accessing Request Details View you can see Assignee for the requests with selected statuses.

If you can’t find the answer you need in our documentation, raise a support request. Include as much information as possible to help our support team resolve your issue faster.