- Introduction
- About
- Get started
- Migration to Cloud
- Bundled Fields
- Overview
- Add Bundled Field
- Bundled Fields Configuration
- Format and validation
- Using Bundled Fields
- Advanced settings
- Bundled Fields Searcher
- Java API (ScriptRunner)
- Data Sources
- Email notifications
- Bundled Fields v.6.8.x - 6.9.x
- Bundled Fields v.6.7.x
- Dynamic Forms
- Dynamic Forms
- Supported fields
- Visibility
- Request Types visibility
- Fields visibility
- Customer Portal visibility
- Options visibility
- Requirements visibility
- SLAs visibility
- Java API
- Multilevel Structure
- Configuration
- Using a multilevel structure on the Customer Portal
- User Synchronization
- Organizations and Groups Synchronization
- Issue View
- Issue View
- Add user's IP address post function
- Restart SLA post function
- Update SLA to date post function
- Customer Portal
- Links
- Export list
- Split column
- Request details view
- Additional fields
- Additional options
- Compatibility
- Configuration Manager
Update SLA to date post function
This page provides information on Update SLA to date post function which allows to manage SLAs value.
The Extension for Jira Service Management app extends the Jira workflow capabilities with the following aspect of a transition’s behavior: Update SLA. It allows to change value of SLA, according to the date provided by Due Date and Satisfaction date fields and custom fields (types: date picker and date time picker).
The Update SLA to date post function generates hidden SLA goals which are automatically added with every update of the SLA metric. By selecting the number of minutes the SLA metric should be rounded up to, bear in mind that a detailed SLA Round-Up will result in generating numerous hidden SLA goals that affect your project’s SLA goals report.
Add post function
Before you start, log in as a user with the Jira Administrators global permission.
Steps
To add the Update SLA to date post function:
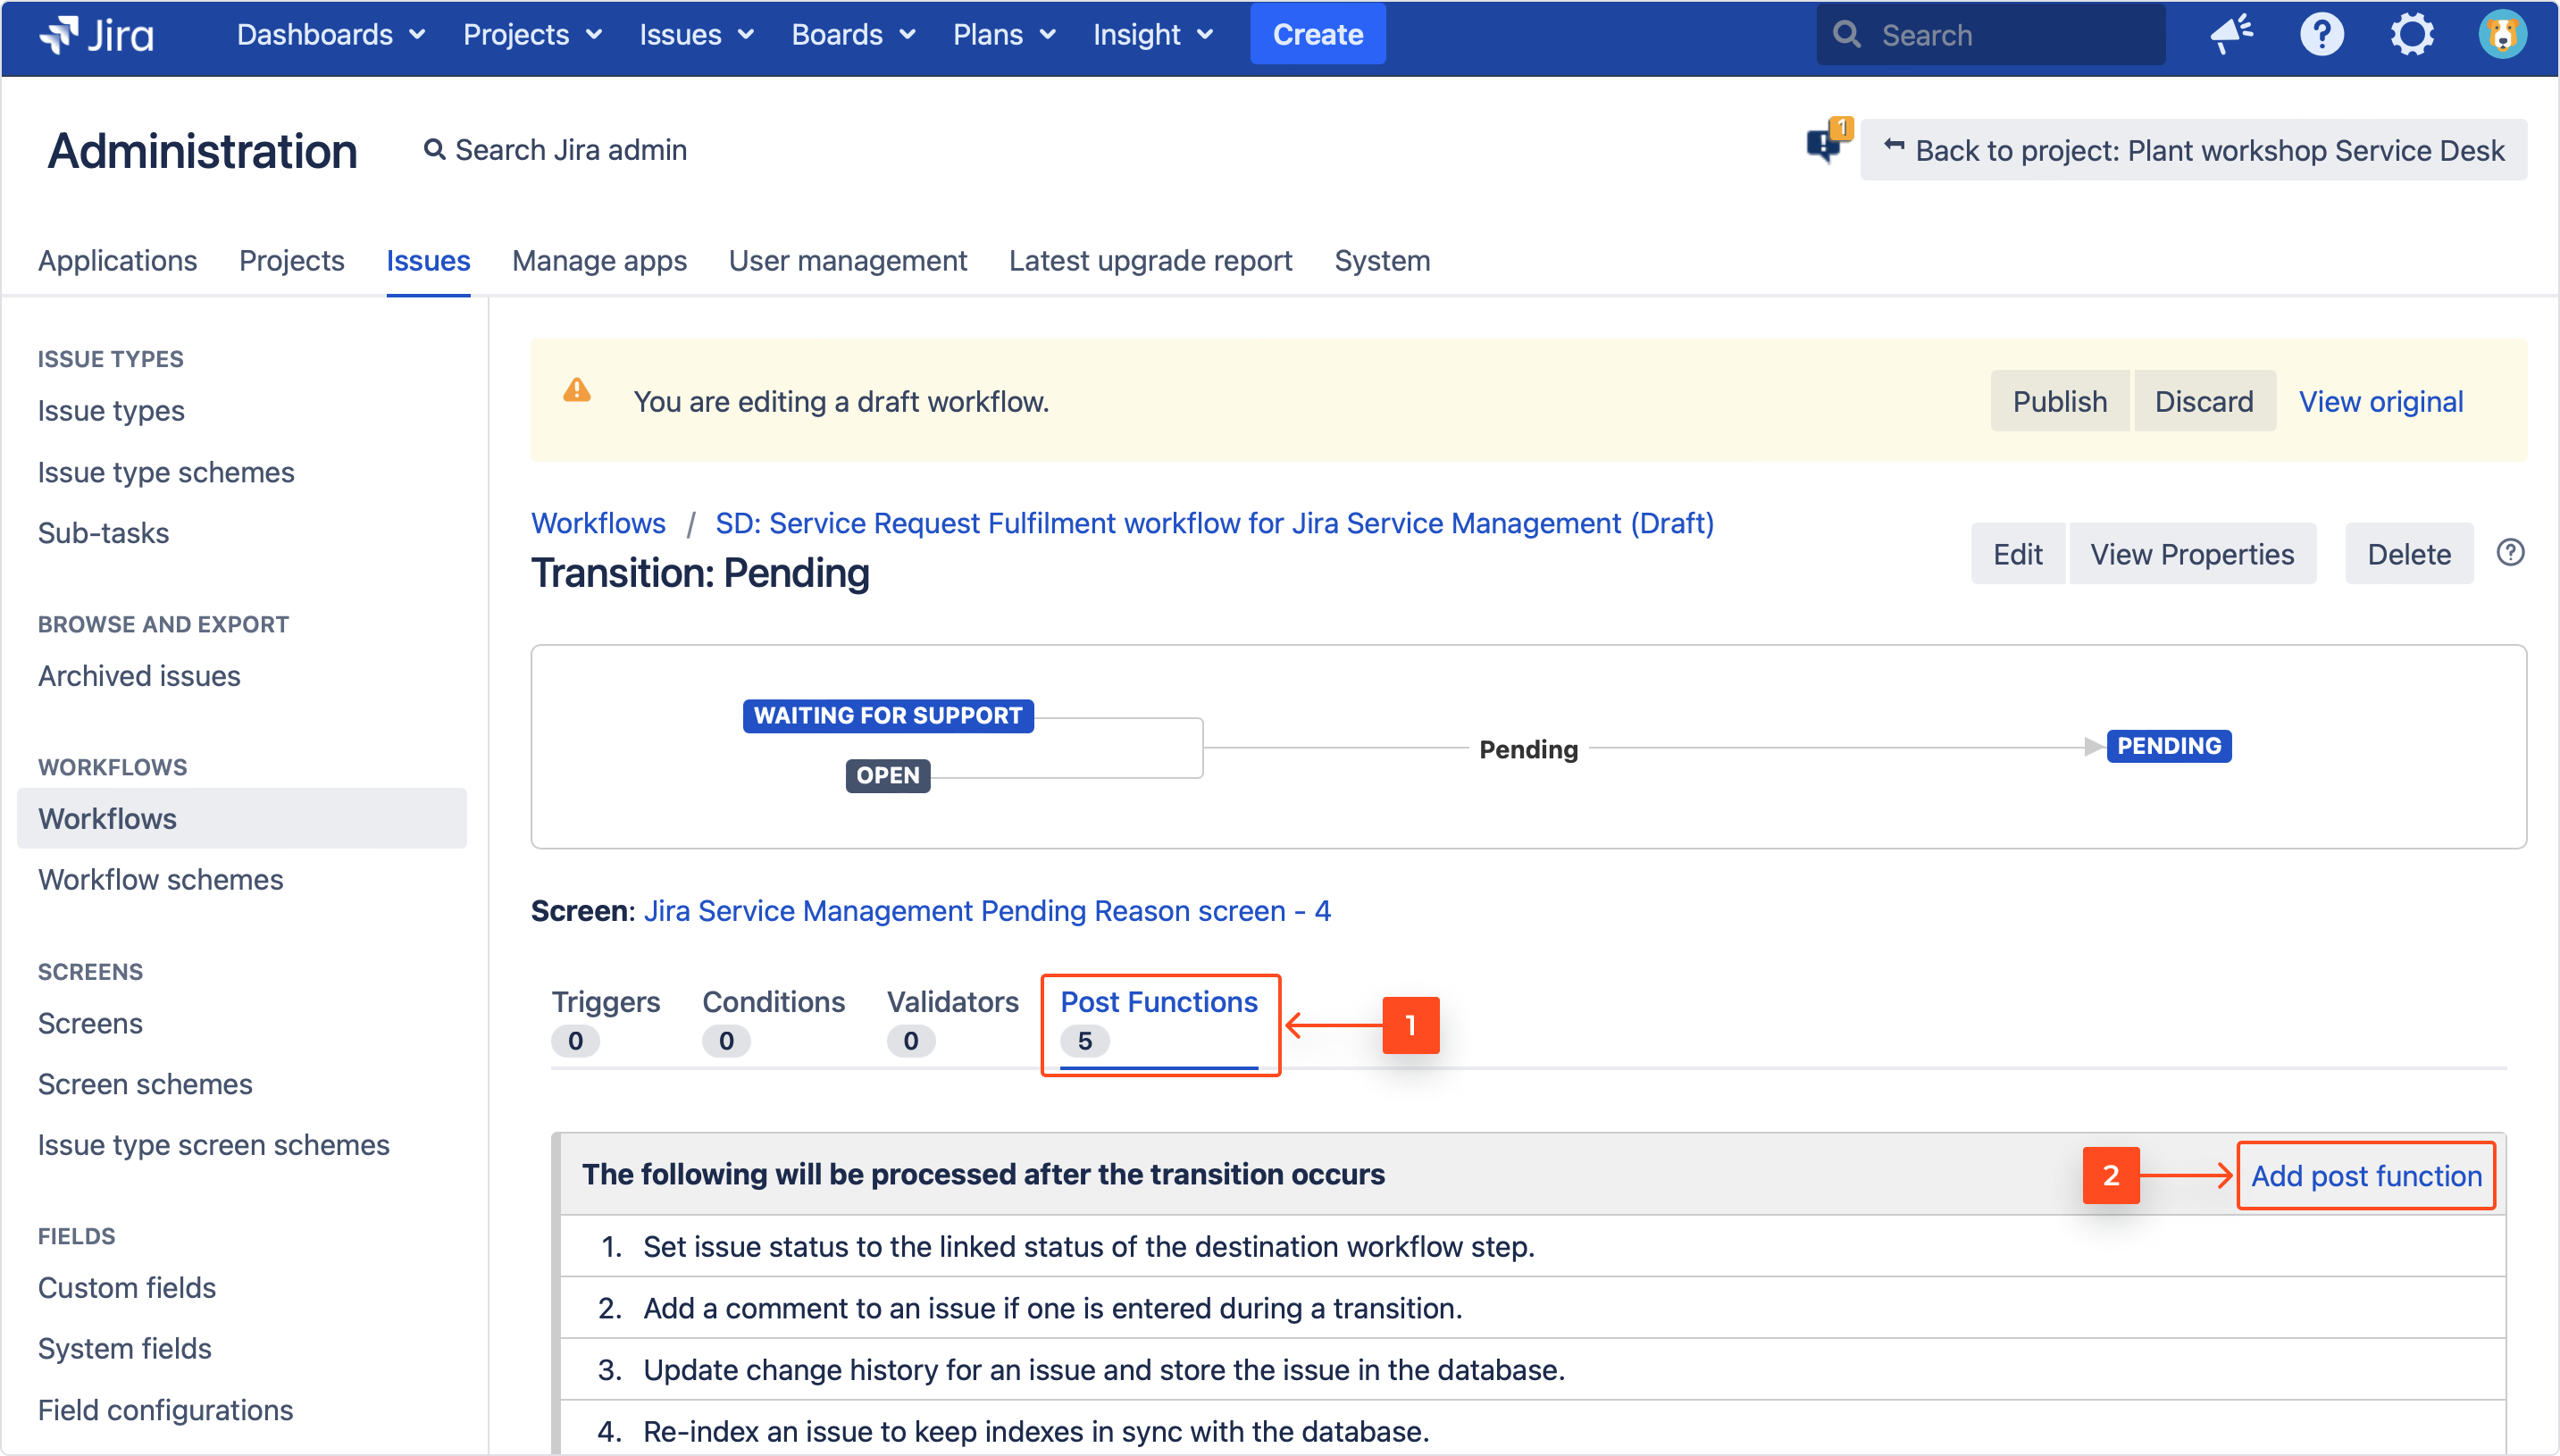
- Go to the Post Functions section.
- Click Add post function.
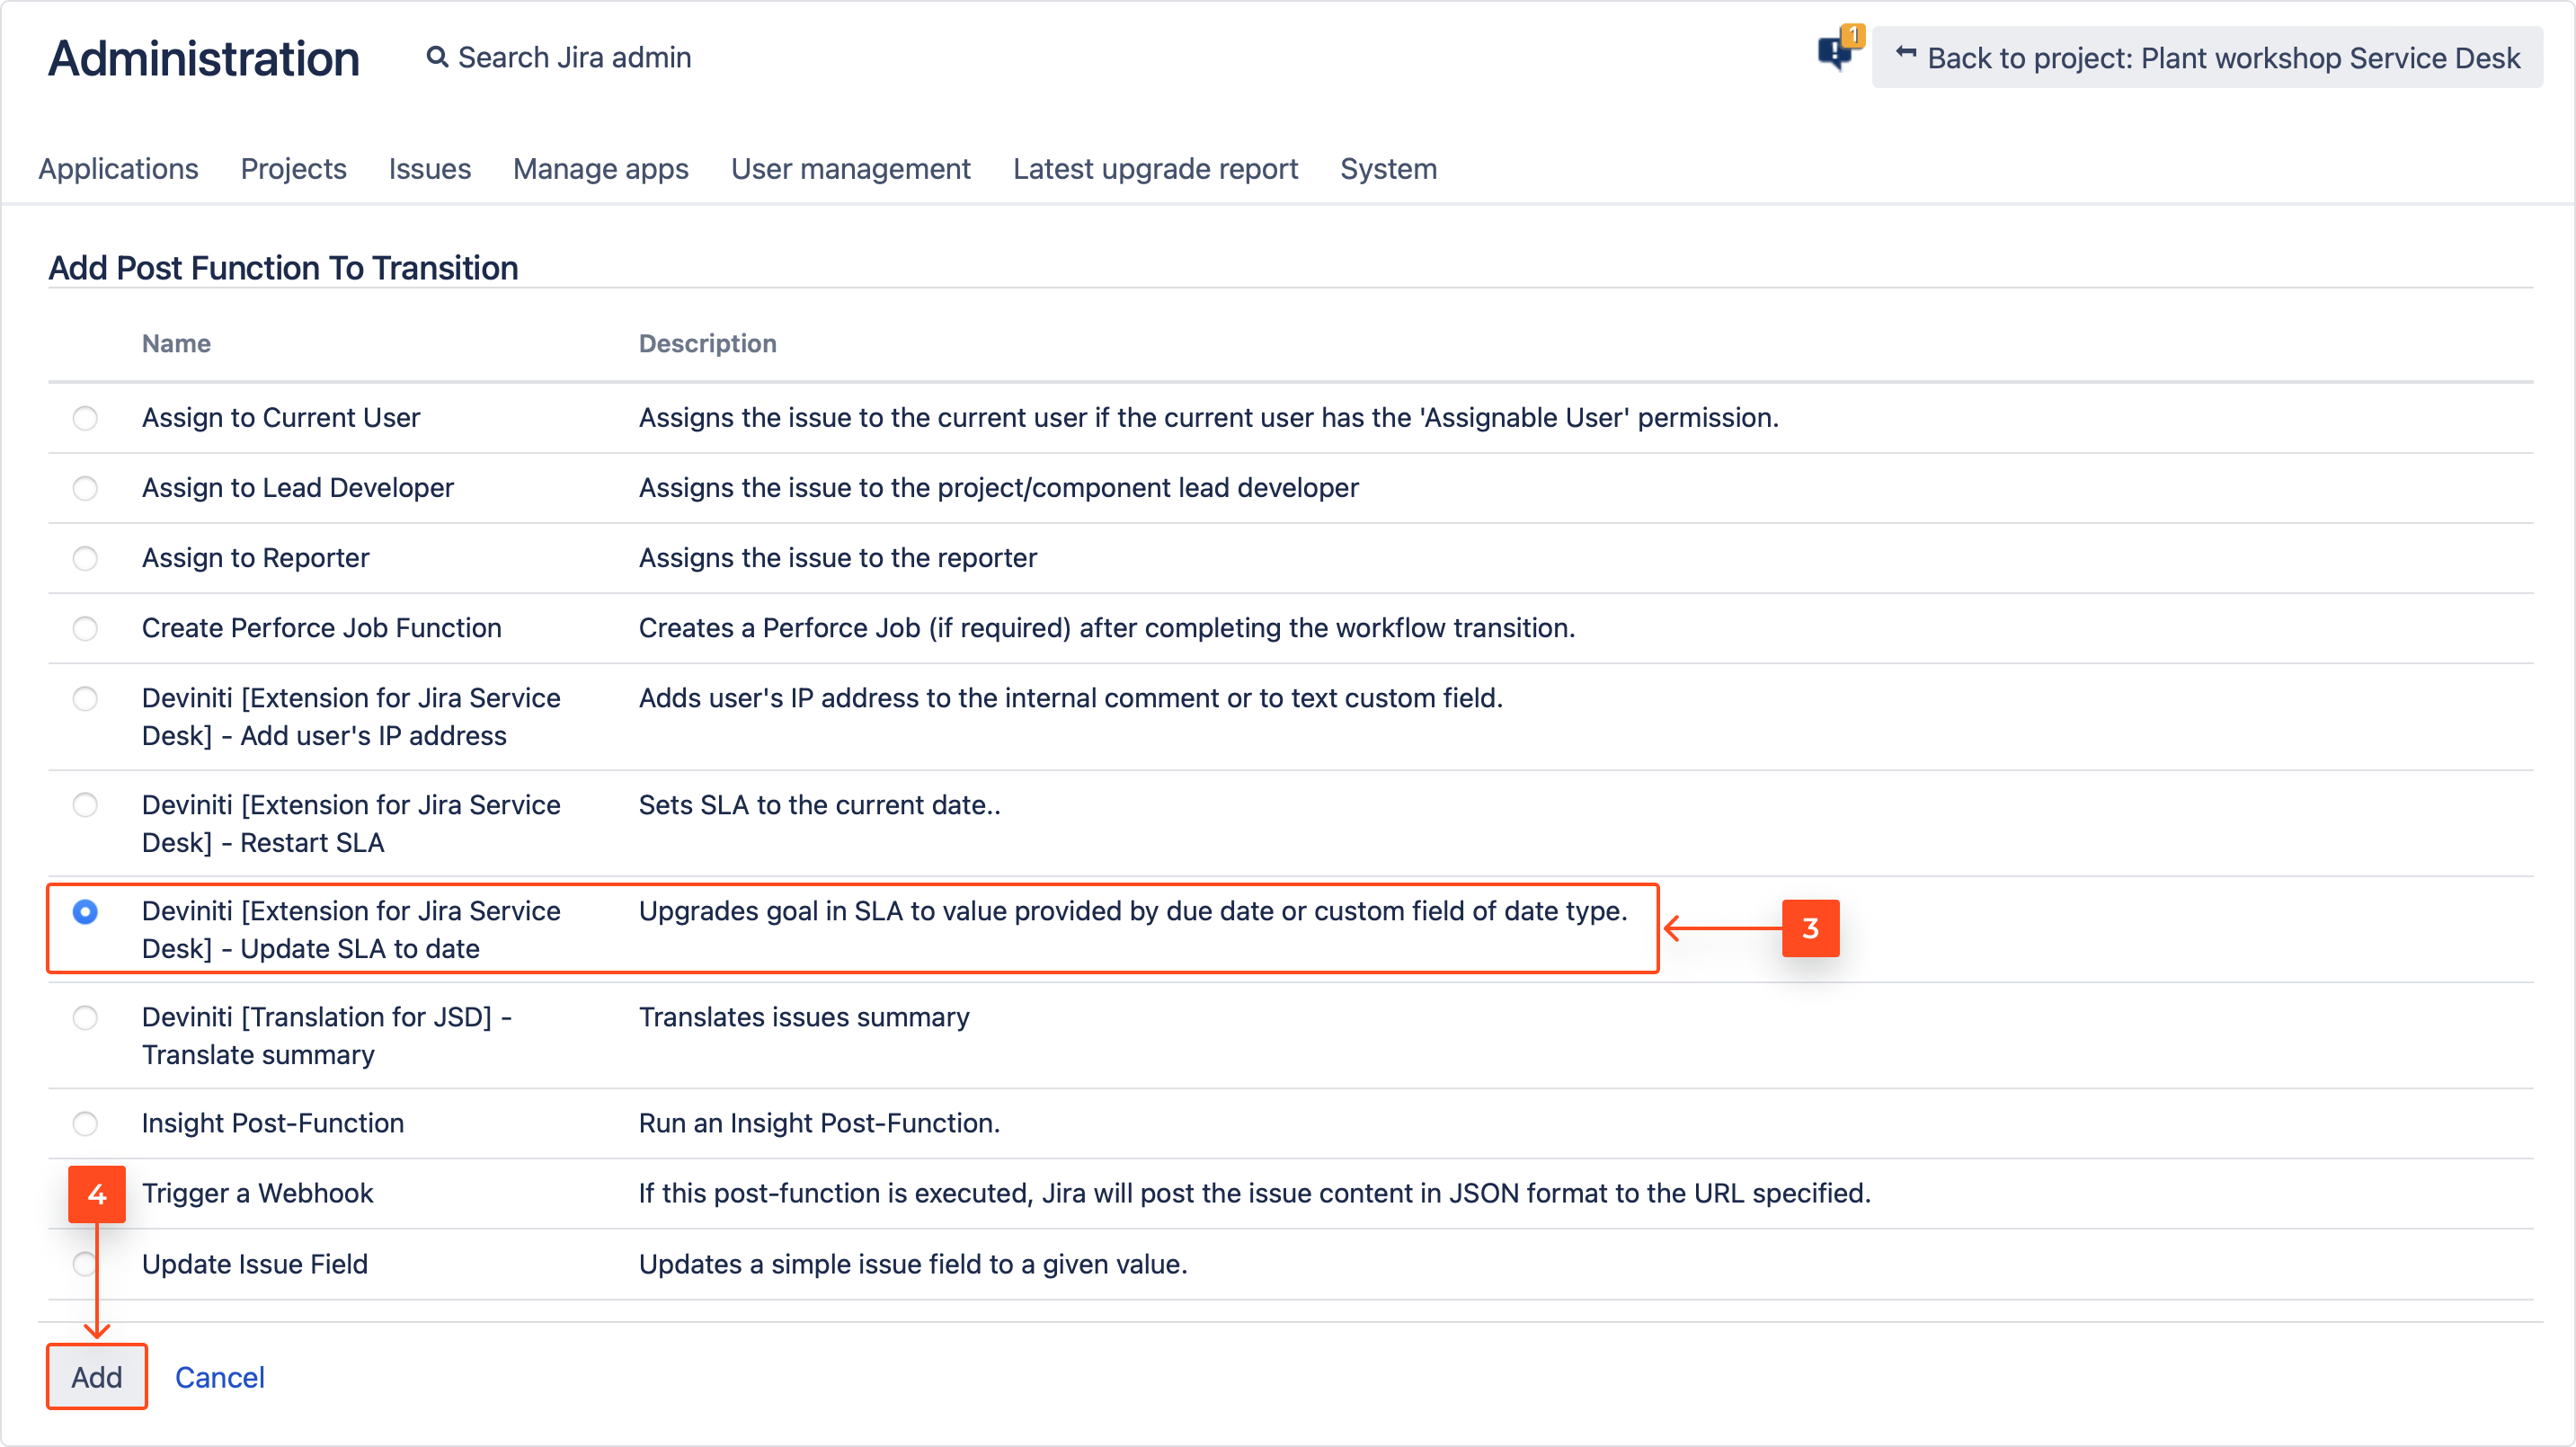
- Select Deviniti [Extension for Jira Service Management] - Update SLA to date post function.
- Click Add.
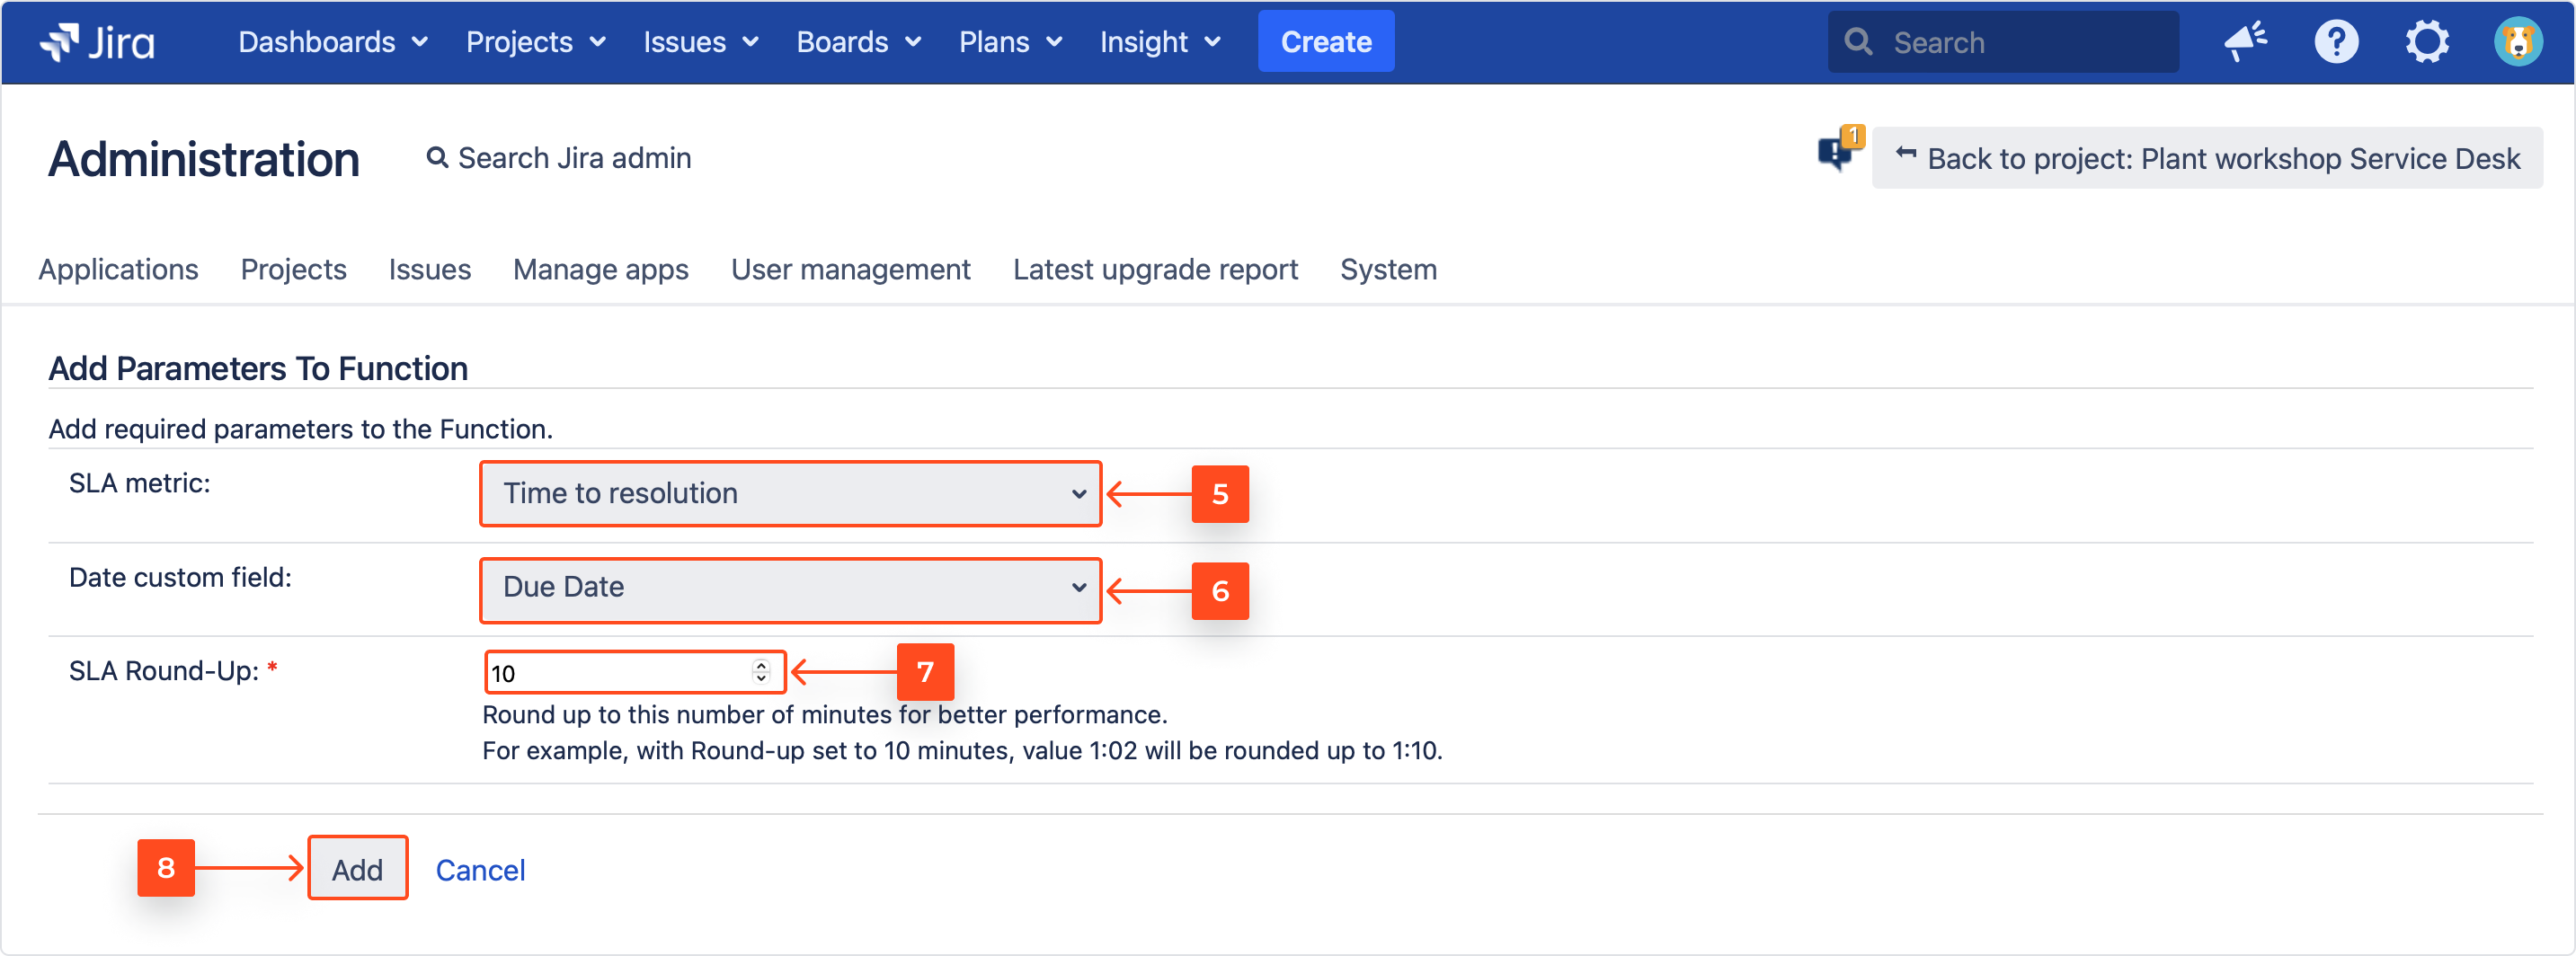
- Select SLA metric. Remember to check if the selected SLA is added to your project.
- Select the Date custom field. Available types are date picker and date time picker.
- Select the amount of minutes the metrics should be rounded up to. For example, the value 1:02 will be rounded up to 1:10.
- Click Add.
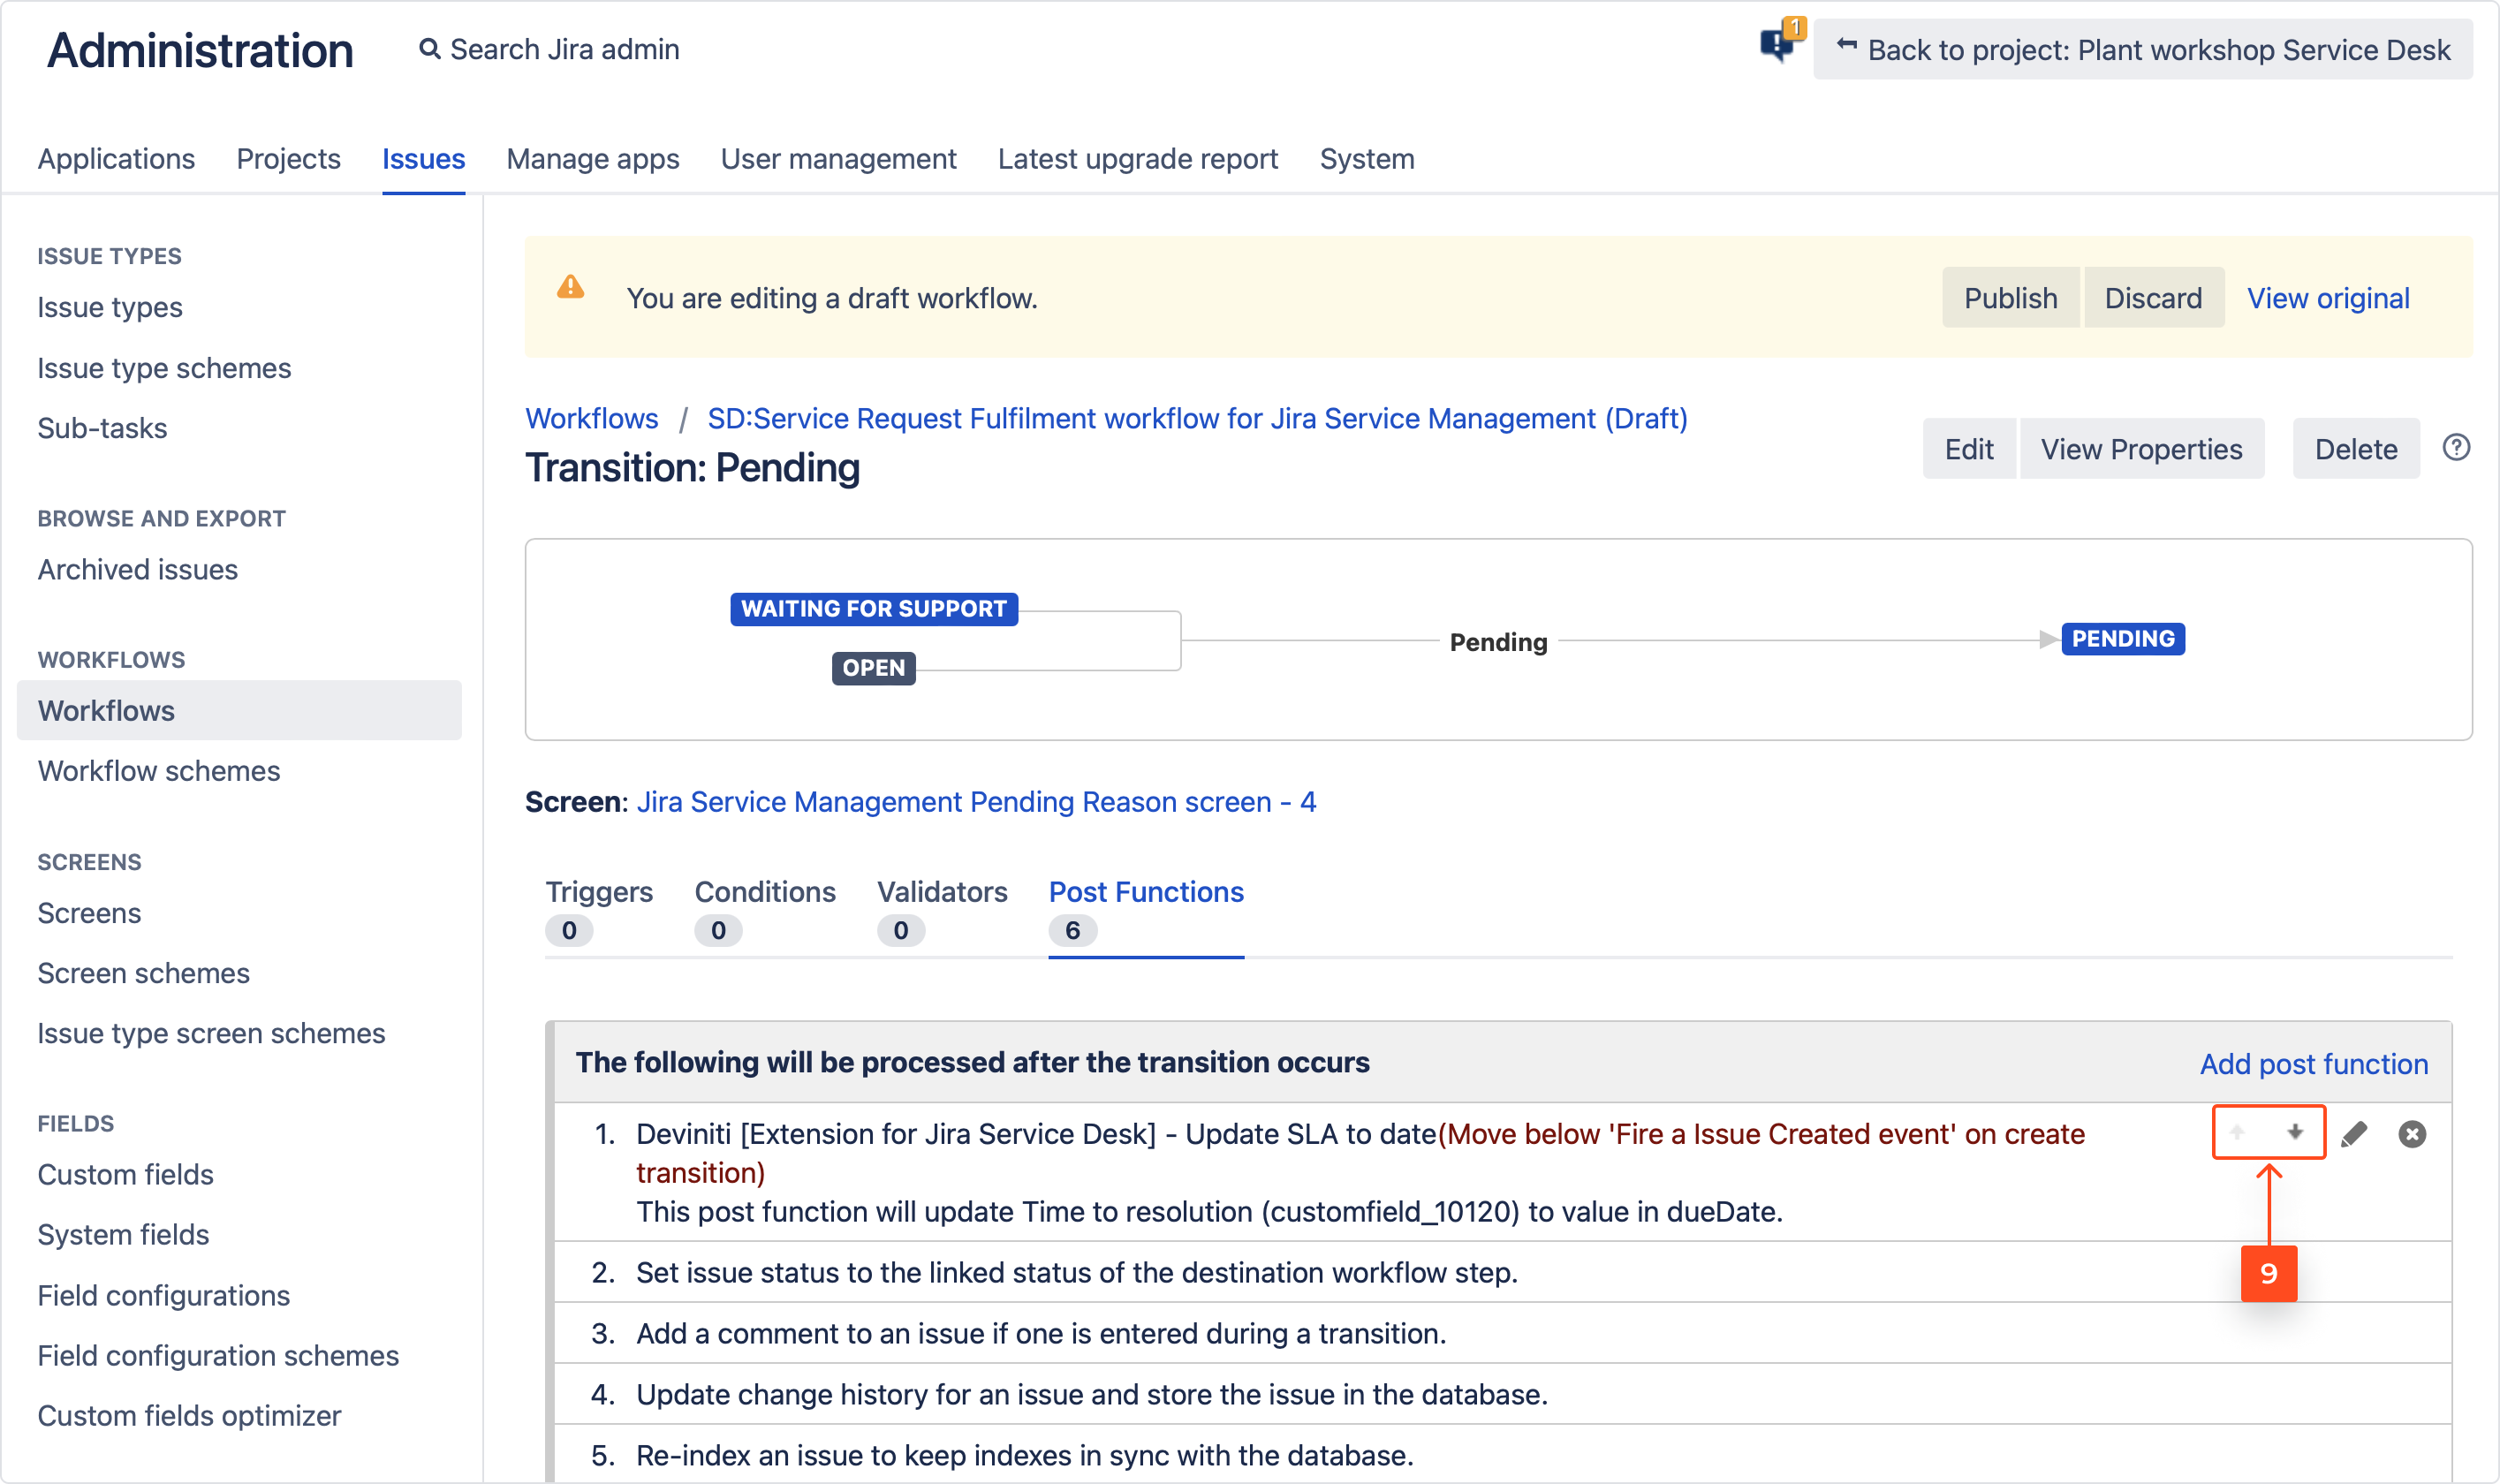
Note- Options for editing or deleting configuration are at the right of the table.
- The default SLA rounding is 10 minutes.
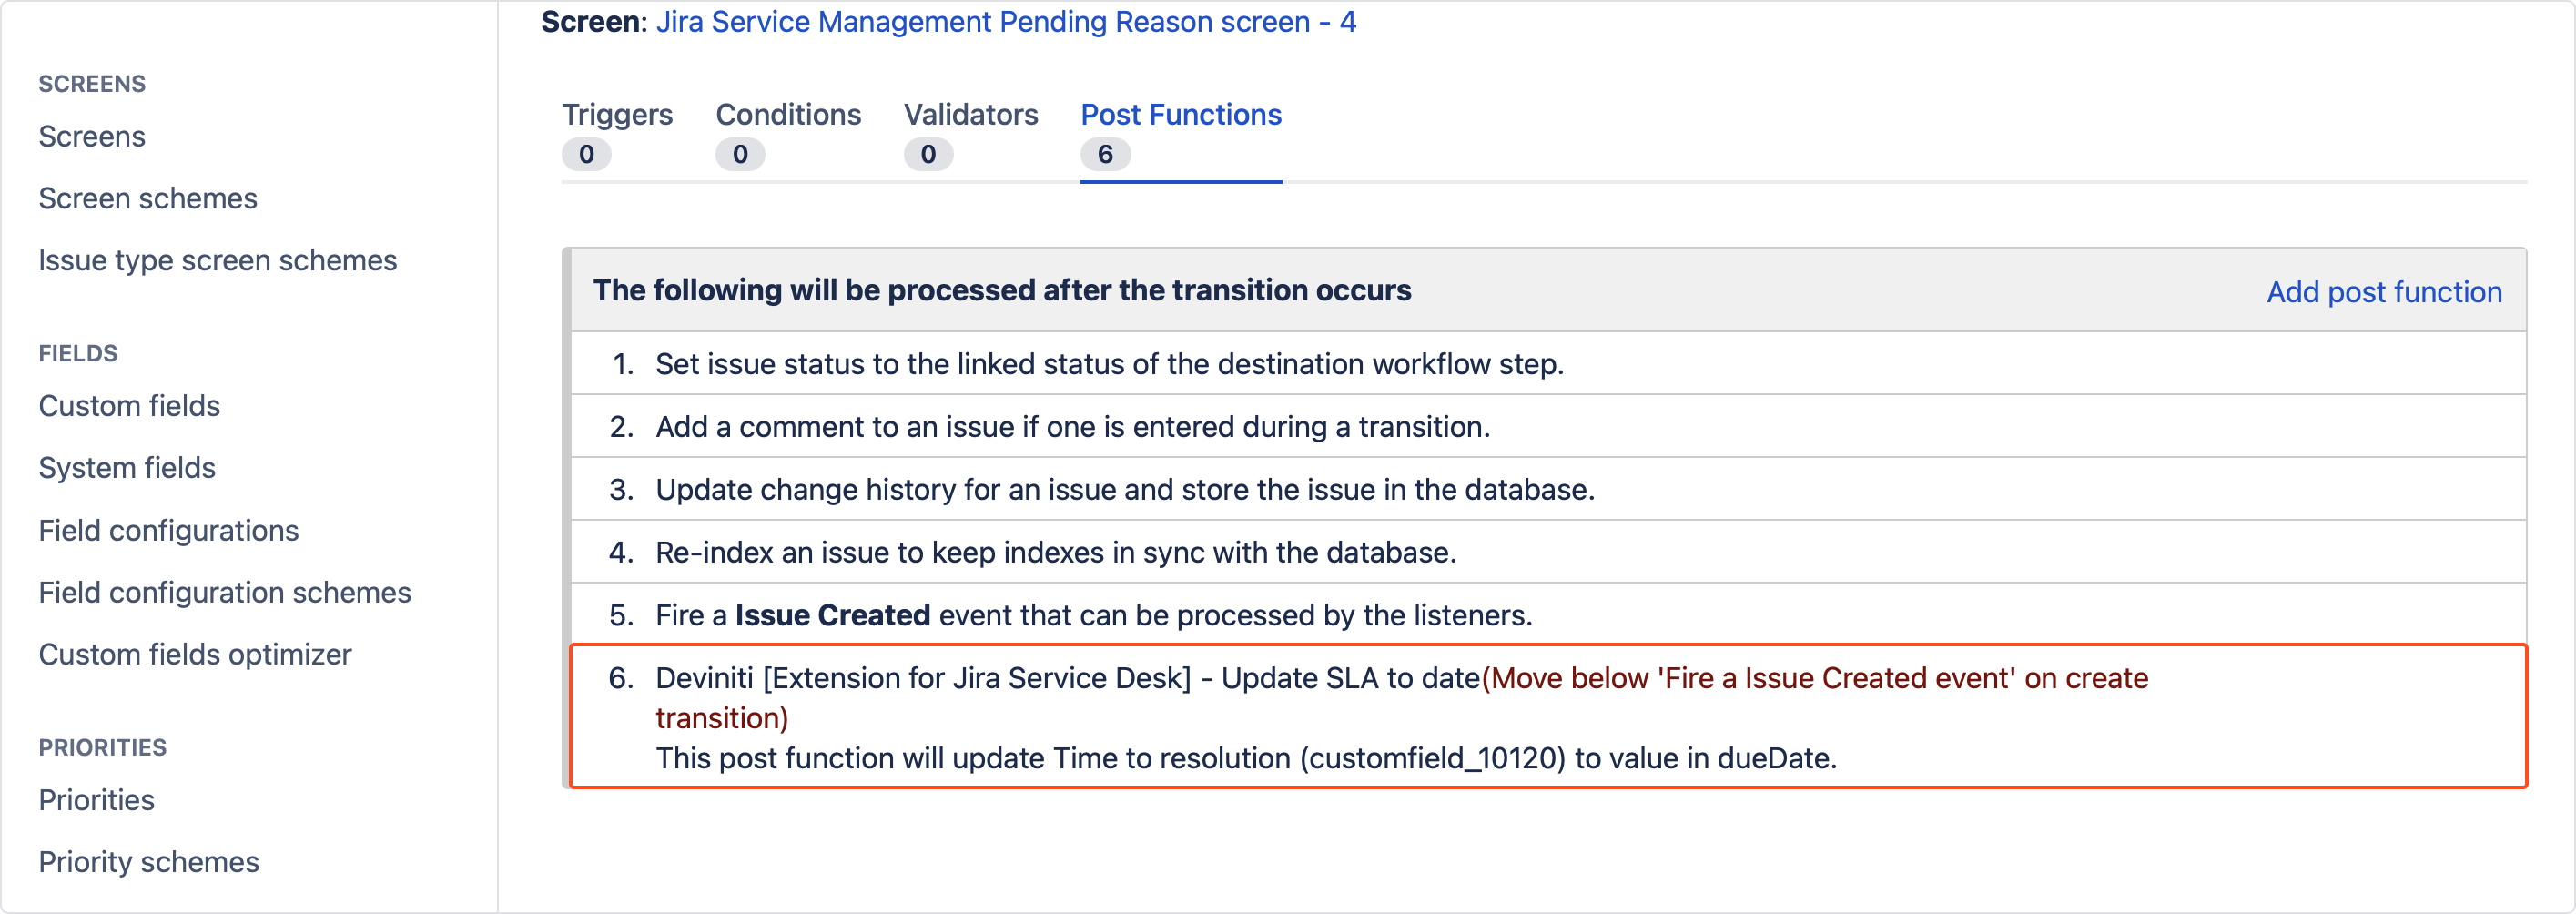
- Hover over and use the arrow to move the post function to the bottom of the list.
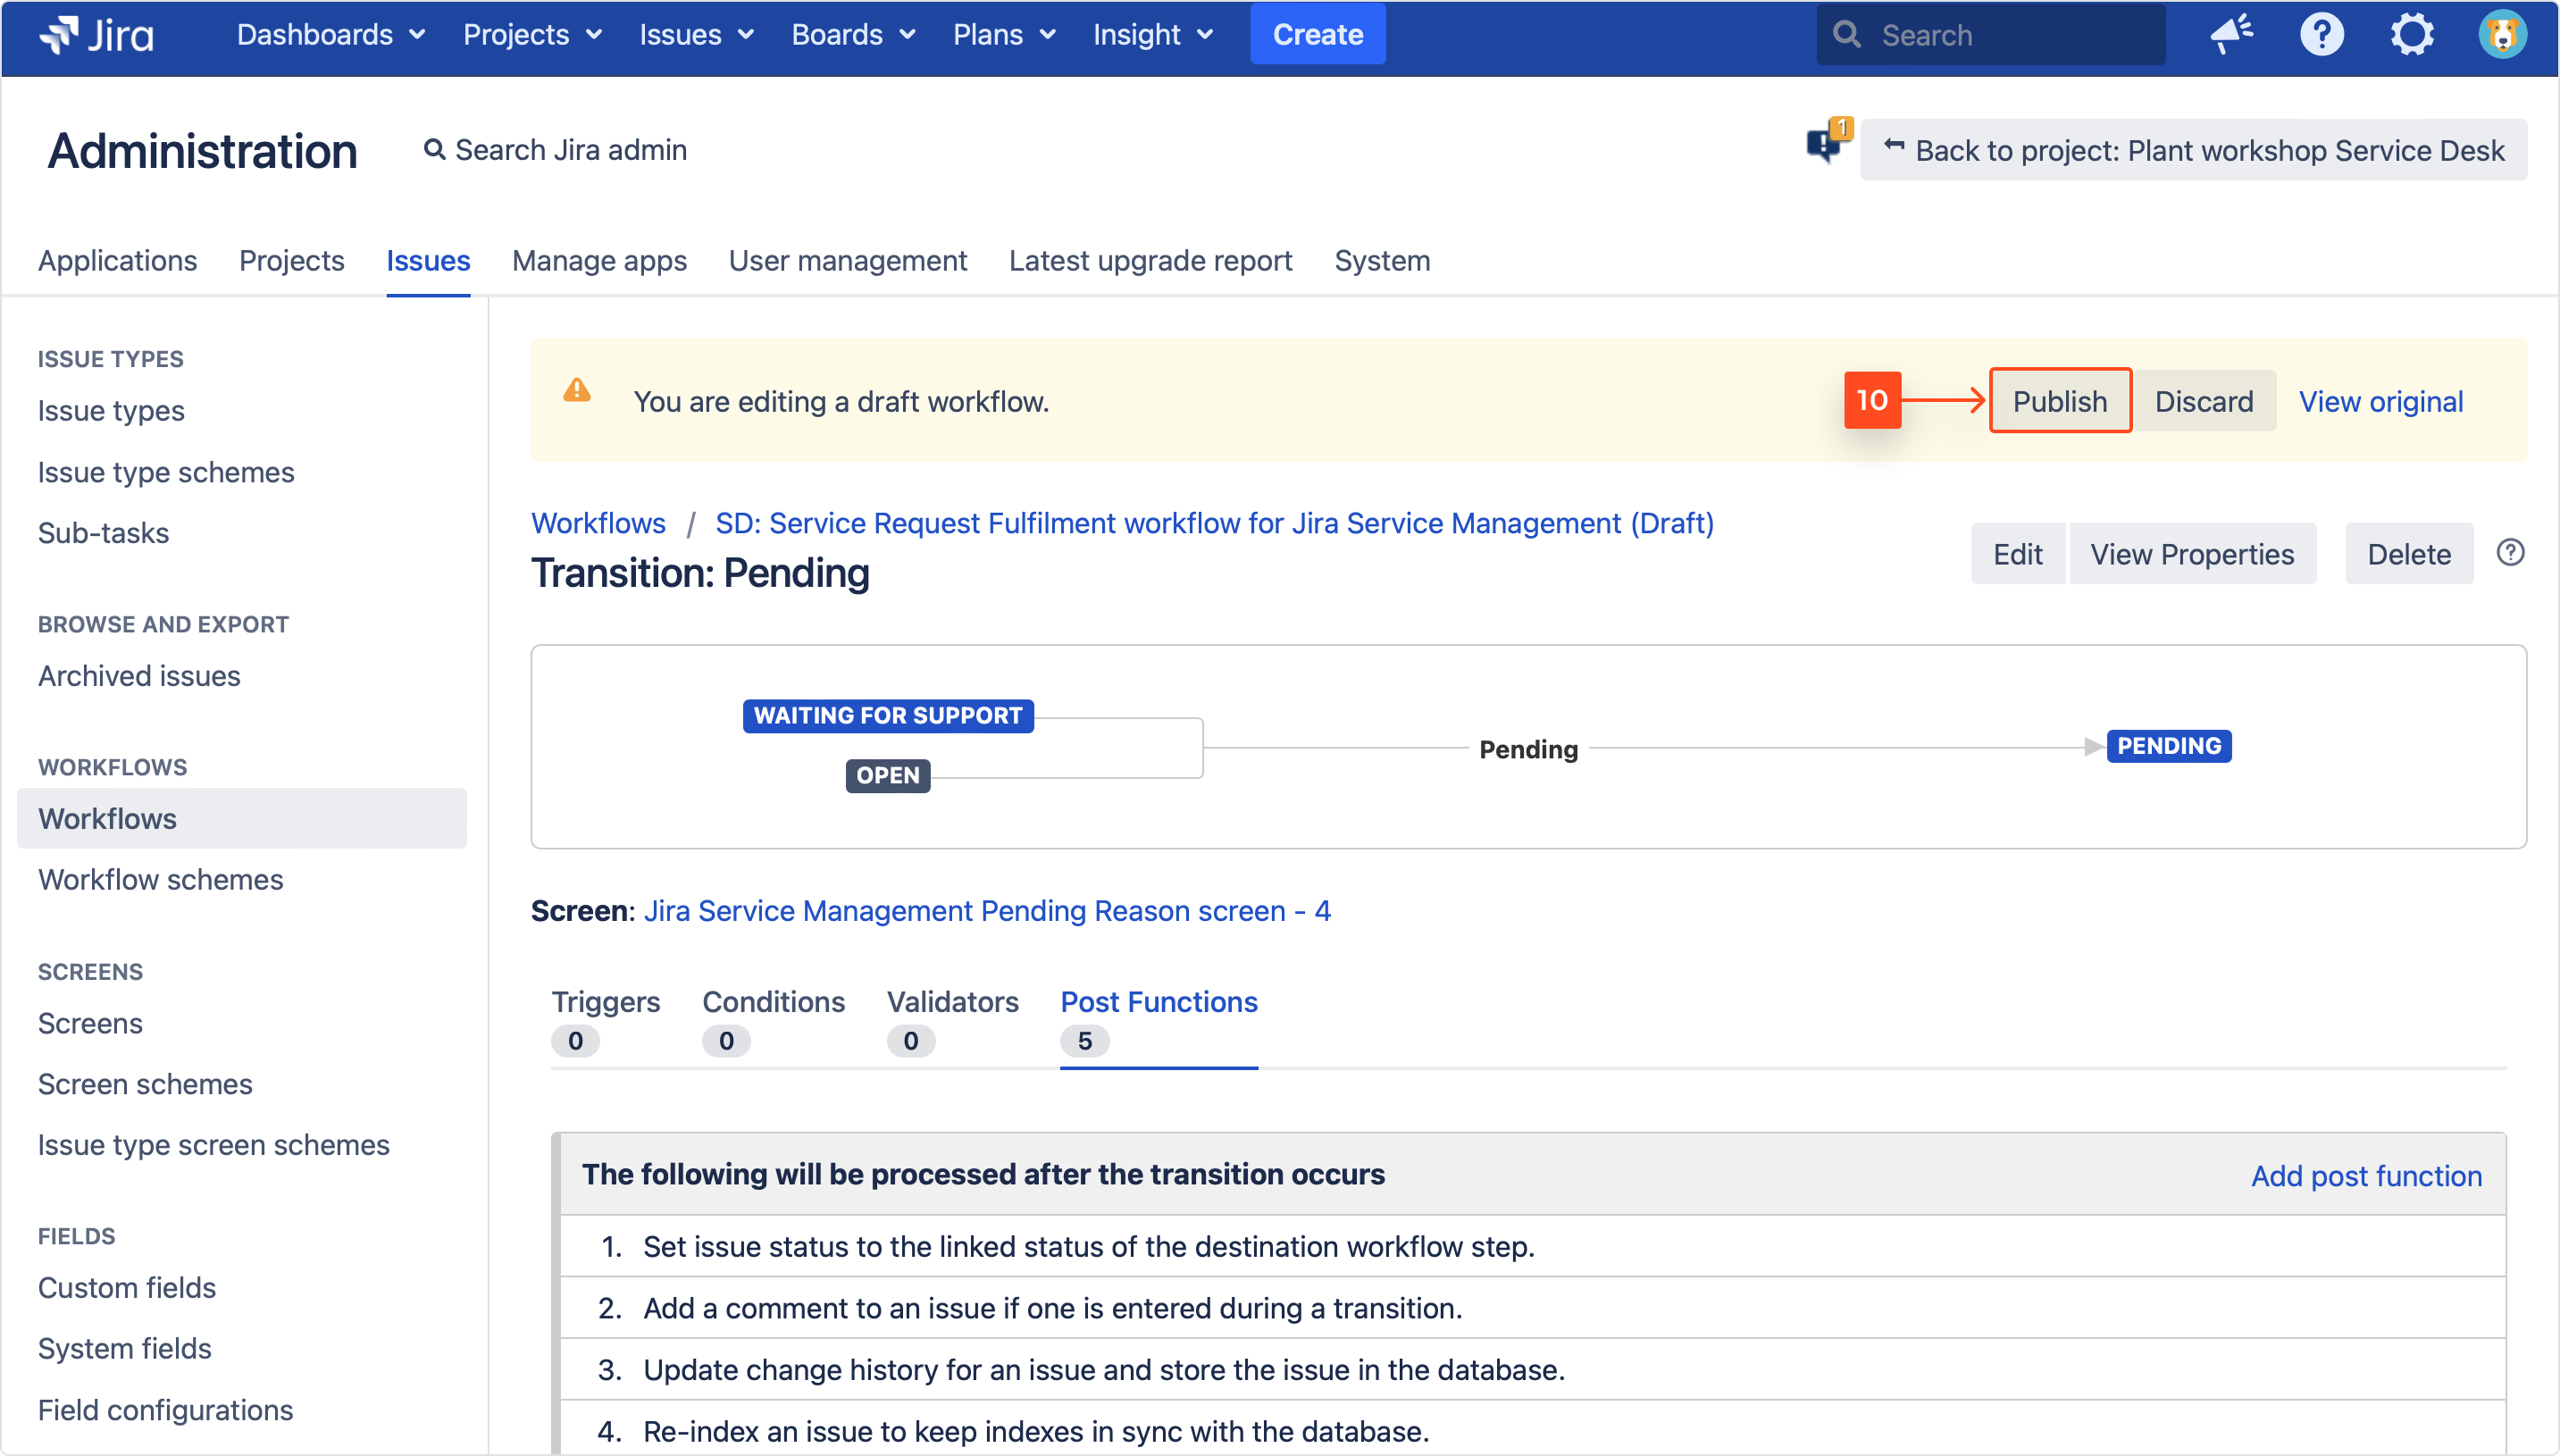
- Click Publish.
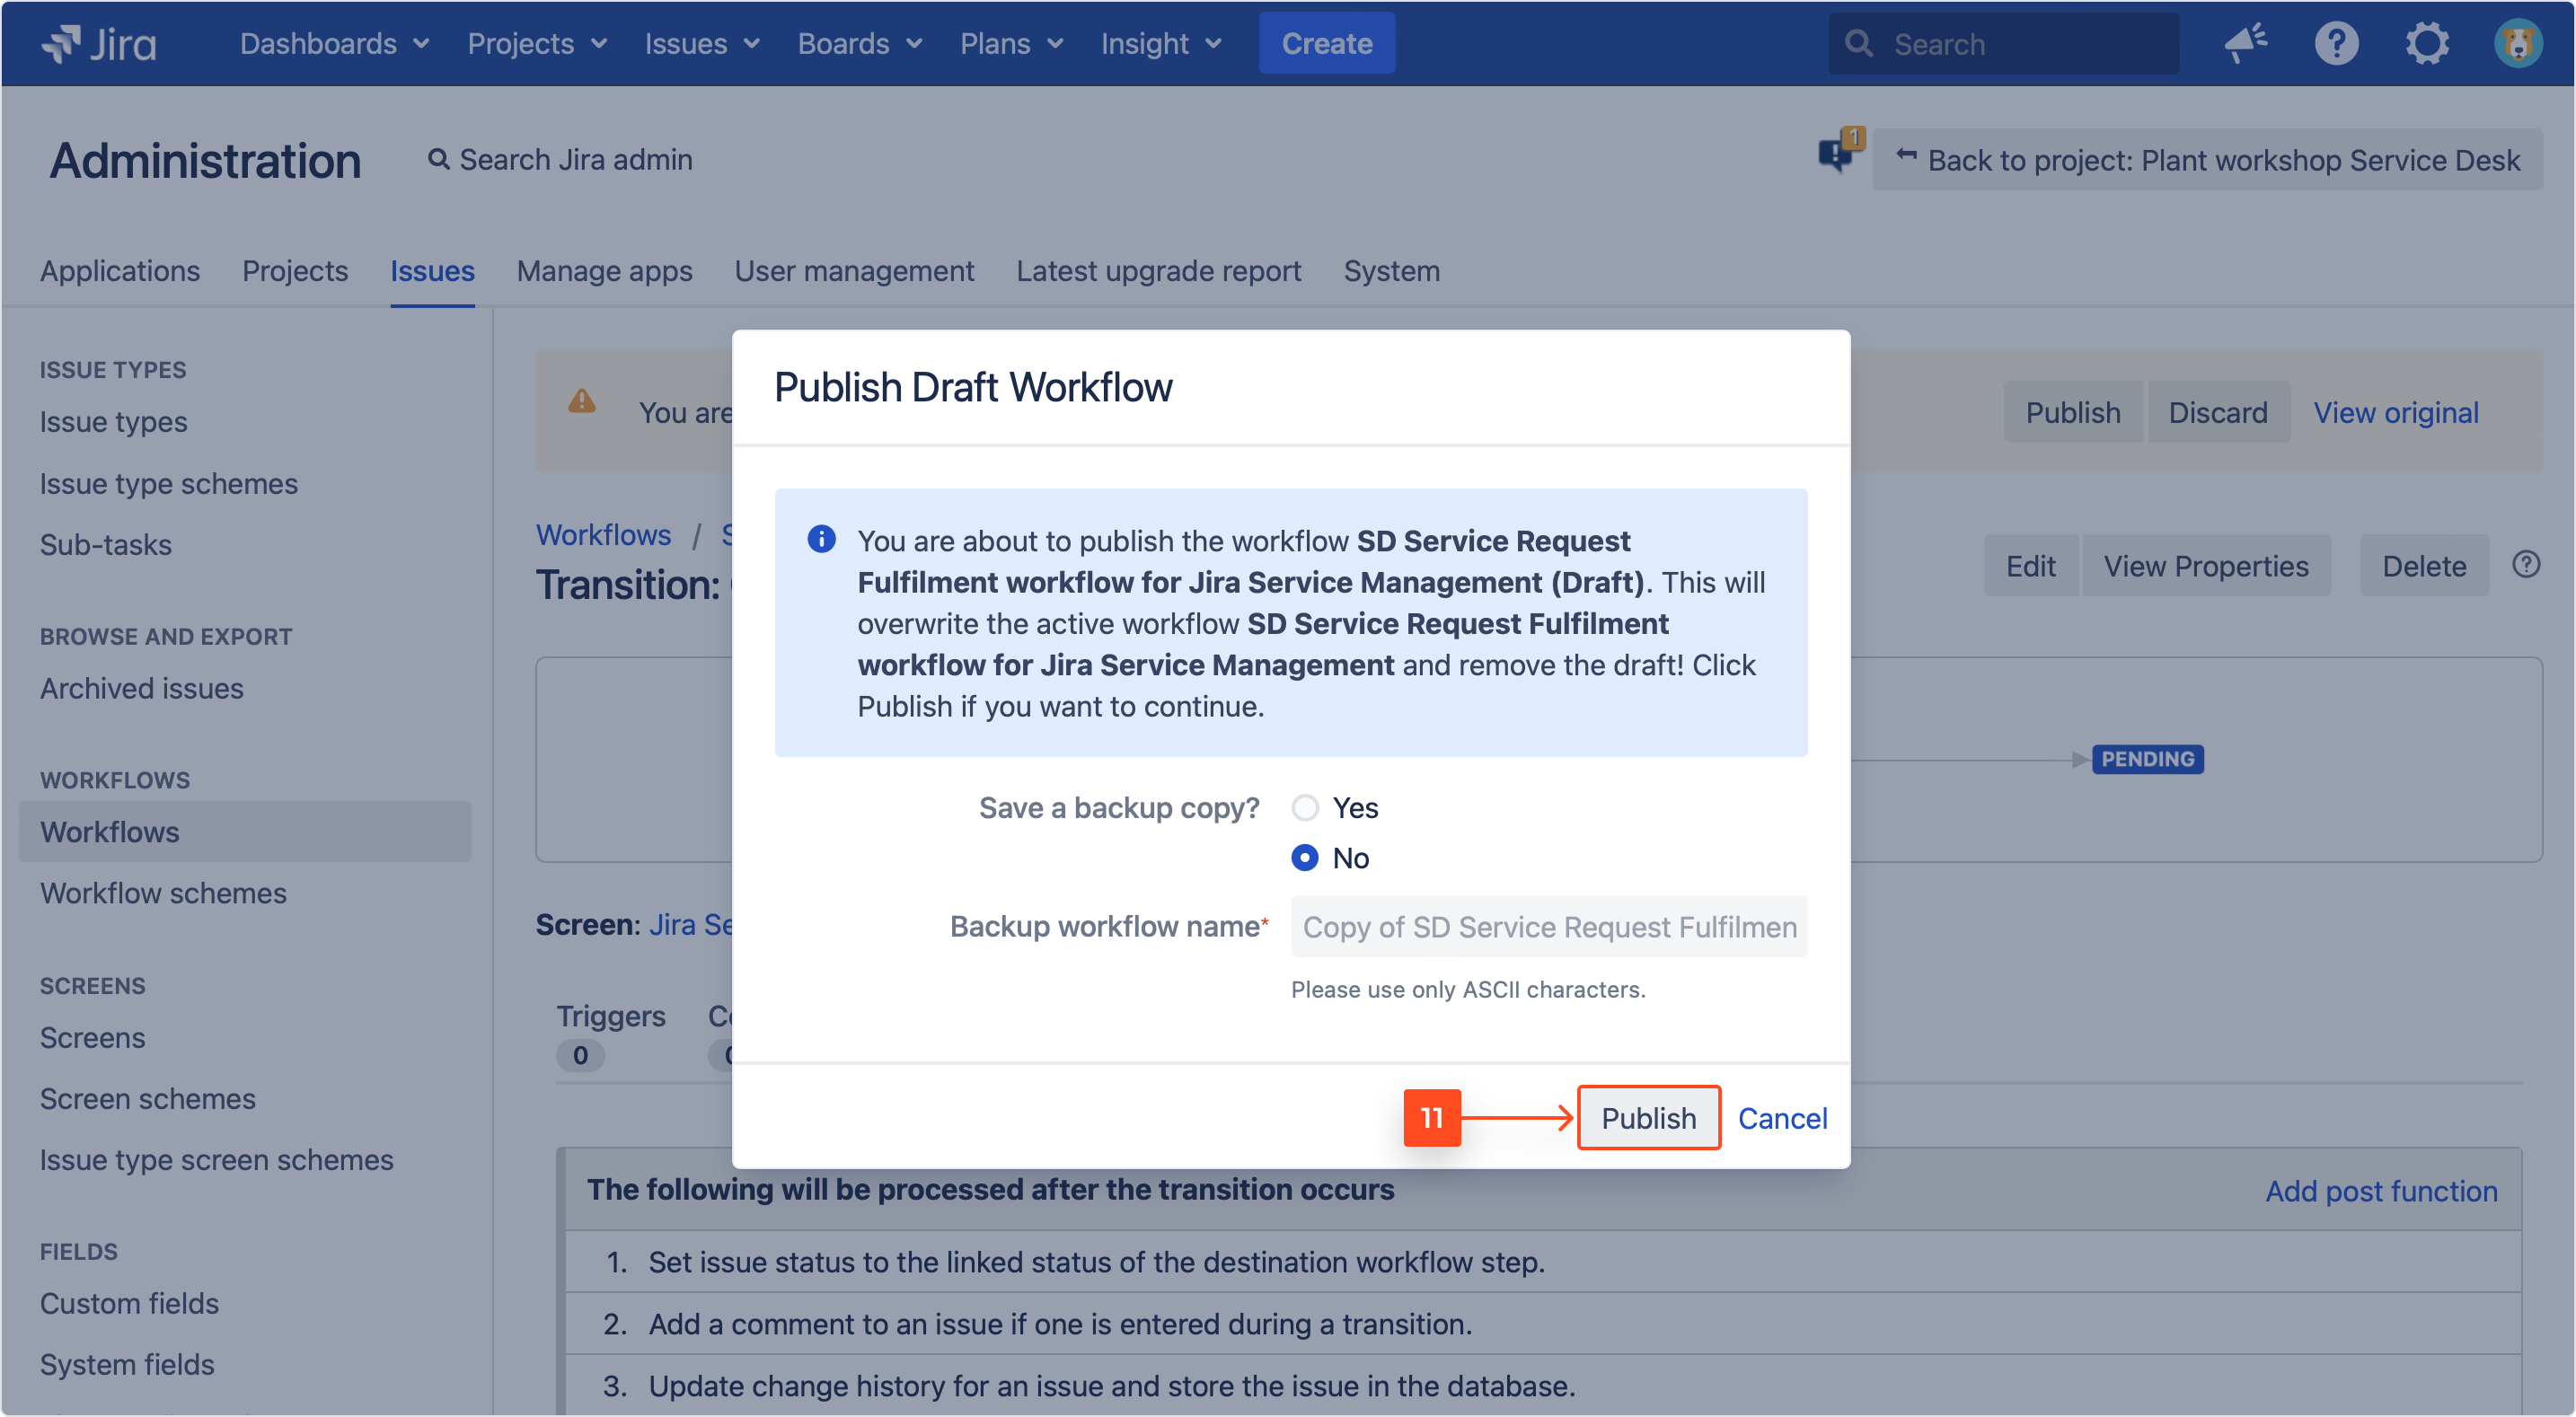
- Confirm by clicking Publish once again. The dialog allows you to publish your draft and, optionally, save your original workflow as an inactive backup.
Result
The Update SLA to date post function is added.
For information on adding a post function to a workflow’s transition, see Adding a post function.
Use Update SLA to date post function
To check if post function works:
- Create a new issue with filled Due Date field (for example: 22/Jan/19).
Counting from the day of creating issue to time to resolution: 4d 13h.NoteRemember to select issue type defined in the workflow created above.
- Change the status from In Progress to Pending.
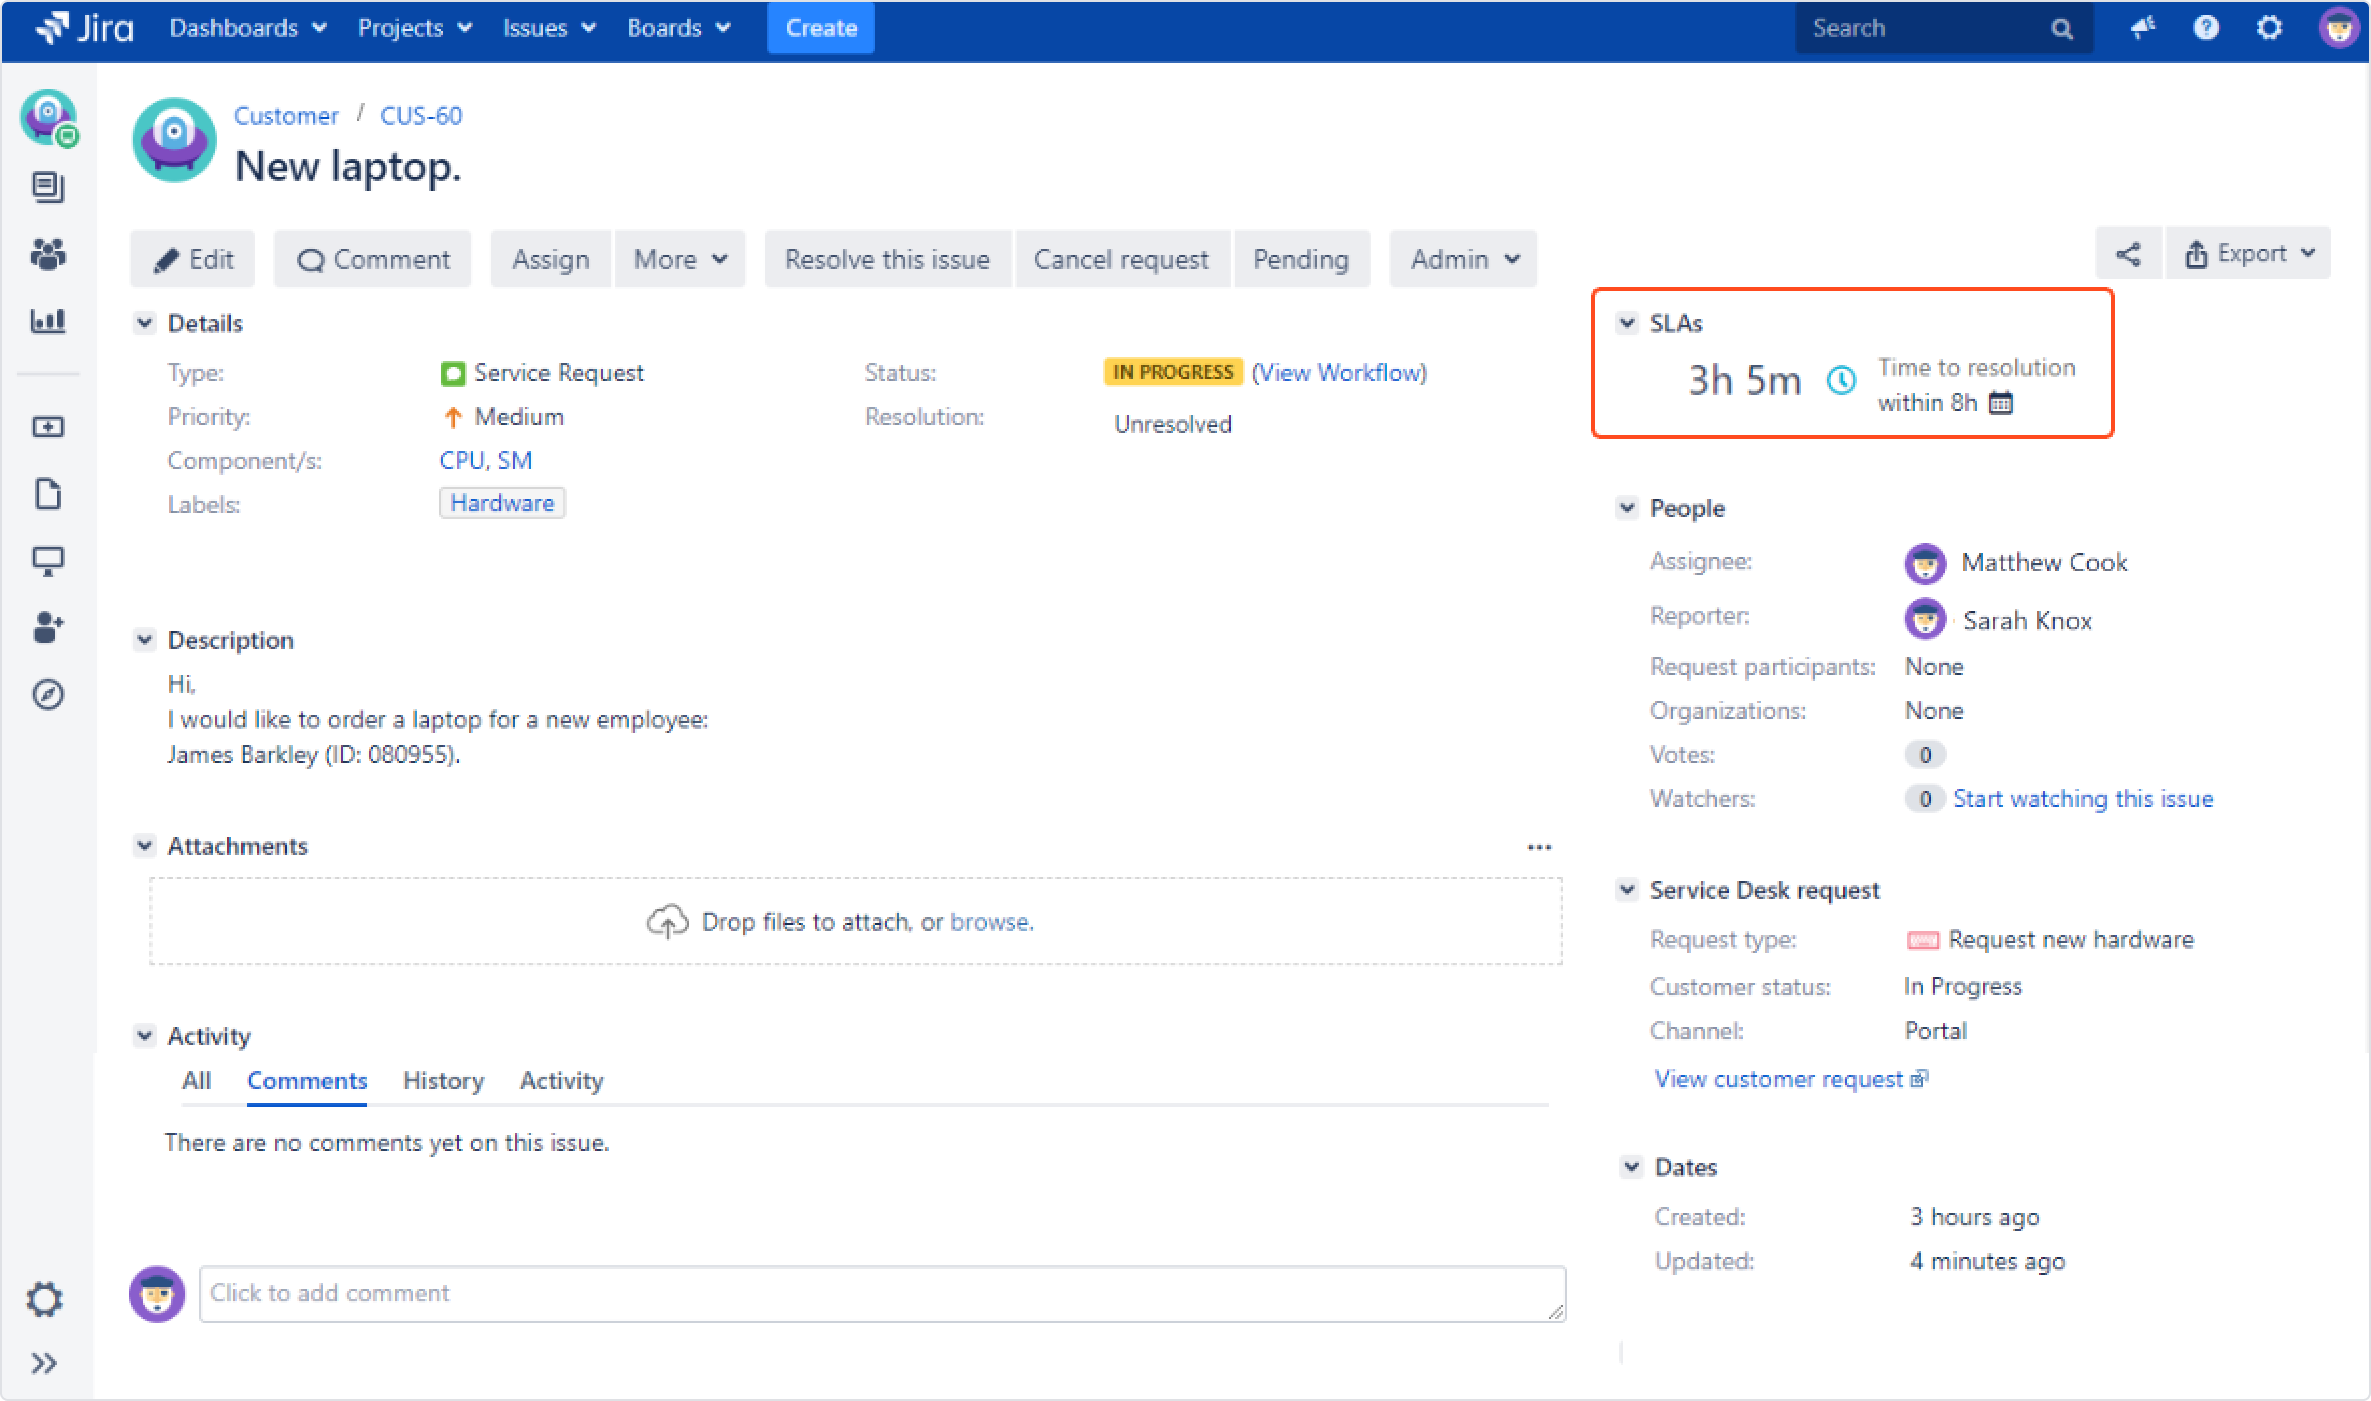
- Check the status of Time to resolution SLA.
As you can see, the goal for this SLA is 8h, but due to using the post function, this value has been changed to 4d 13h (according to date from the Due Date field).

If you can’t find the answer you need in our documentation, raise a support request*.
* Include as much information as possible to help our support team resolve your issue faster.