- Configuration
- First steps
- Project setup
- Sample templates
- Migration to Cloud
- Supported fields
- Permissions
- Jira Service Management
- Template management
- Create a template
- Template configuration
- Variables
- Template Navigator
- Delete a template
- Use as a template
- Set of Fields - advanced features
- Using template
- Autocomplete
- Default Template
- Apply template
- Use Template in Jira Automation
- Automatic create and close
- JQL Searchers
- Direct links
- Create Structure post function
- About Create Structure
- Create Structure configuration
- App integrations
- REST API
- ScriptRunner and Groovy scripts
Project setup
Prepare your target project for using templates.
Issue Templates can be used in any kind of Jira project. Depending on the project type there are different steps to be taken in order to prepare it for the use of templates. Here we describe all the basics but you’ll find many more configuration ideas in the further chapters.
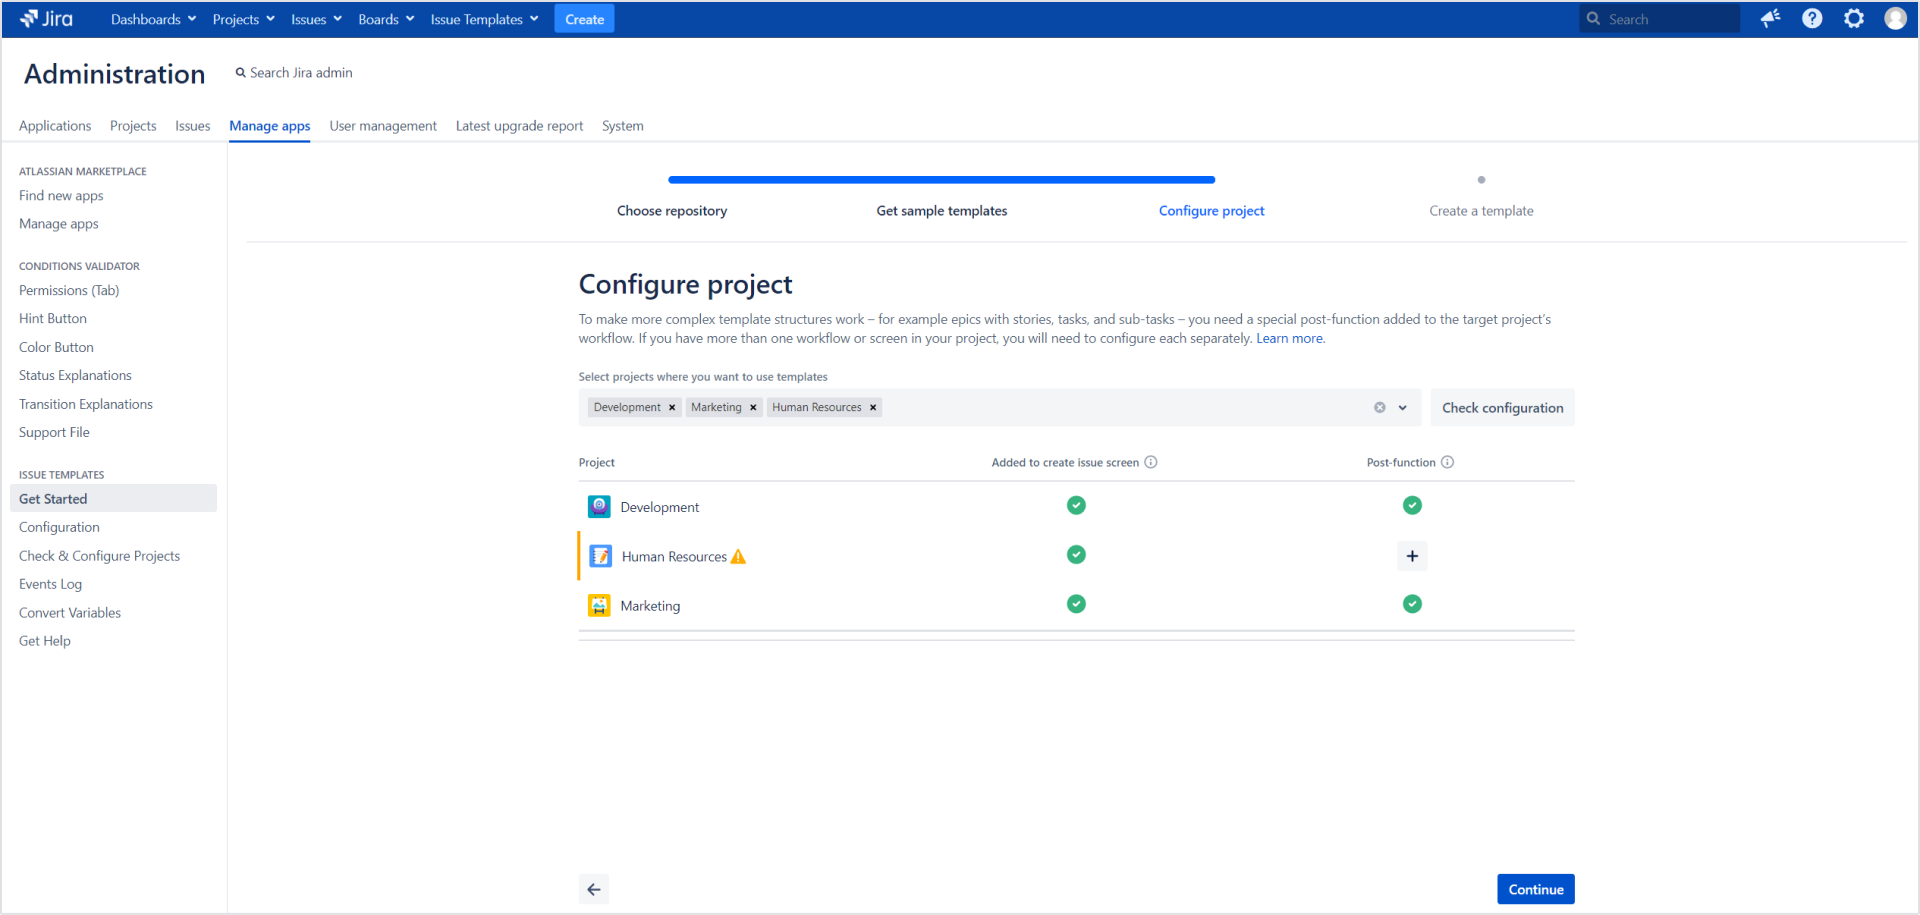
Configure project
There are two basic requirements for a template to work:
- Adding the Template custom field to an issue screen (in most cases it will be the Create issue screen).
- Adding the Create Structure post function to the project’s workflow. The post function is necessary for:
- creating subtasks
- creating epics with stories
- creating complex structures of linked issues
- using the Attachment and Issue Link fields in your templates
We’ve made it easy for you, allowing you to add both in a single step on this onboarding screen.
Kep in mind that adding a post function to an existing workflow might interfere with some more complex configurations. If you are not sure how it would affect a particular project, we advise you to configure it separately later on. You’ll find it all explained in the next sections.

About the Template field
Issue Templates provides a dedicated field called Template. It is a Select List (single choice) custom field containing all the templates available in a given context (learn more in the Availability chapter). It allows users to select a template that will be applied on the screen.

The Template field can be added to:
- Create issue screen
- Edit issue screen
- Transition screen
Adding the Template field to a screen
You’ll need to add the Template field to all the screens where you wish to apply a template.
Steps
To add the Template field to a screen:
-
Go to your target project > Project settings.
-
Open the Screens configuration page.
-
Expand the Screen Scheme section.
-
Start typing and select Template (Deviniti [Issue Templates] - Template Selection).
We advise to place the Template field to near to the top of the screen, as it often autofills the upper issue fields, such Summary and Description. When the Template field is near to the top, the users will instantly see what changed after applying the template.
Result
The Template custom field is added to chosen screens. Users can select a template to be applied on the screen.

Changing the name of the Template field
You can change the name of the Template custom field and add a description, just as you would do with any other custom field.
This change will affect all the projects where templates are used.
Steps
-
Go to Jira Administration > Issues.
-
Open the Custom fields configuration page.
-
Search for the Template custom field.
-
Provide a new Field Name.
-
Provide a Description (optional).
Result
The name of the custom field has changed.

If you can’t find the answer you need in our documentation, raise a support request.


