Templates use fields or/and custom fields, defined by user. You can decide which fields should be auto-filled or copied into your target issues.
Once you create a set of fields, you can re-use it in other templates.
Info
In order to access this area you need administrative permissions. Read more about permissions here.
Find more information about available fields here.
Steps
To create set of fields:
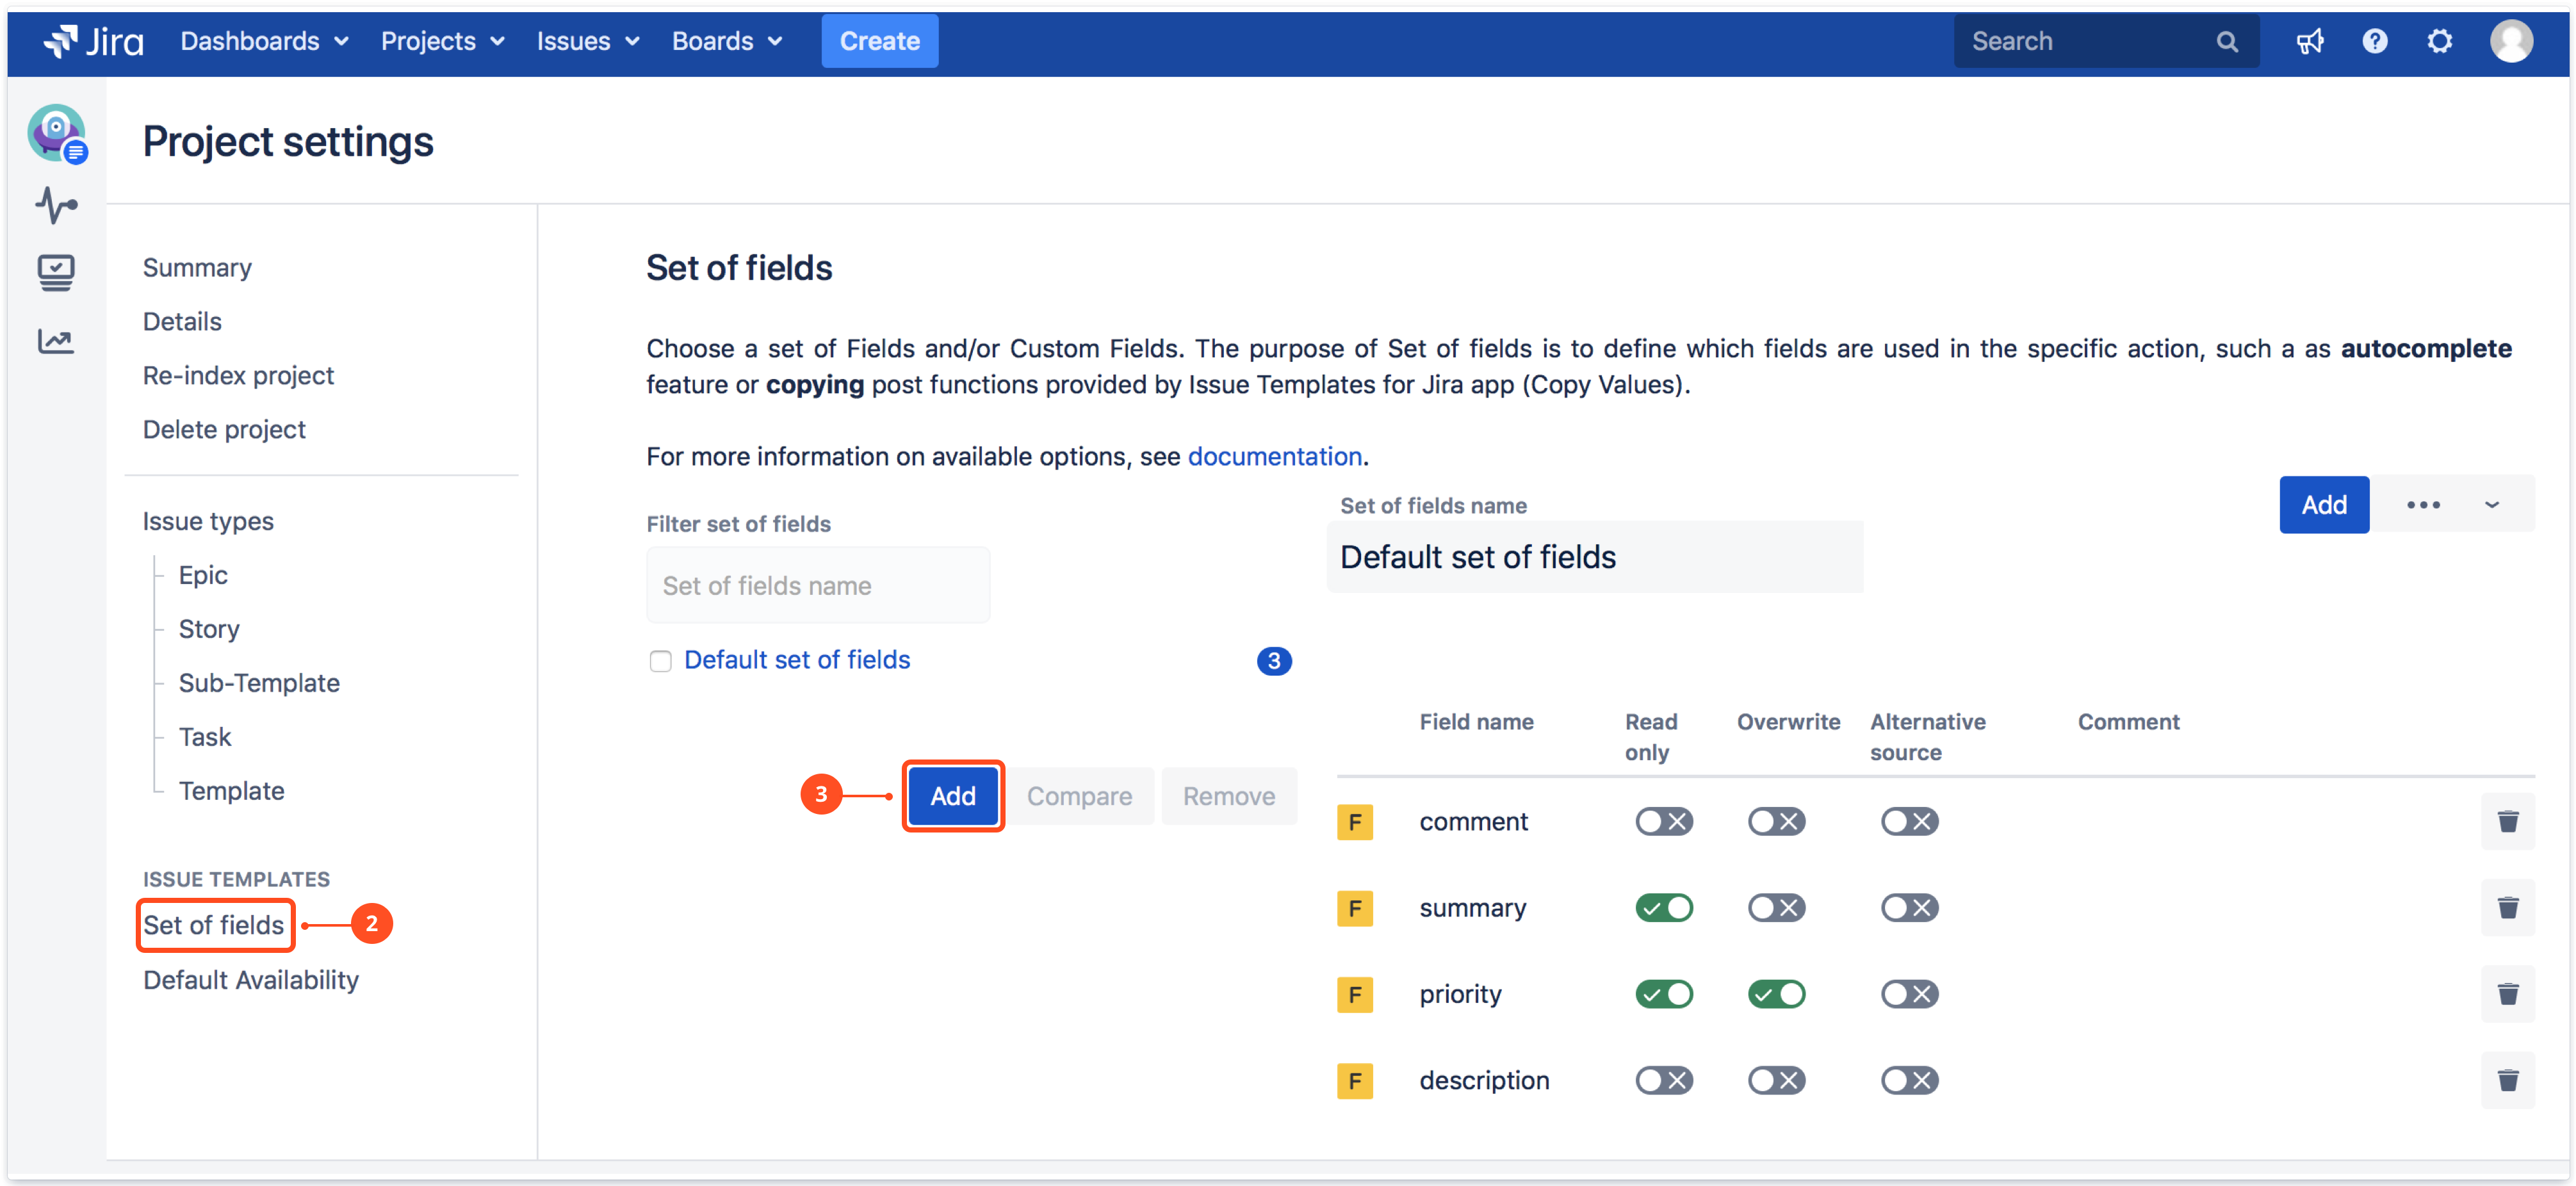
Open your global administration settings.
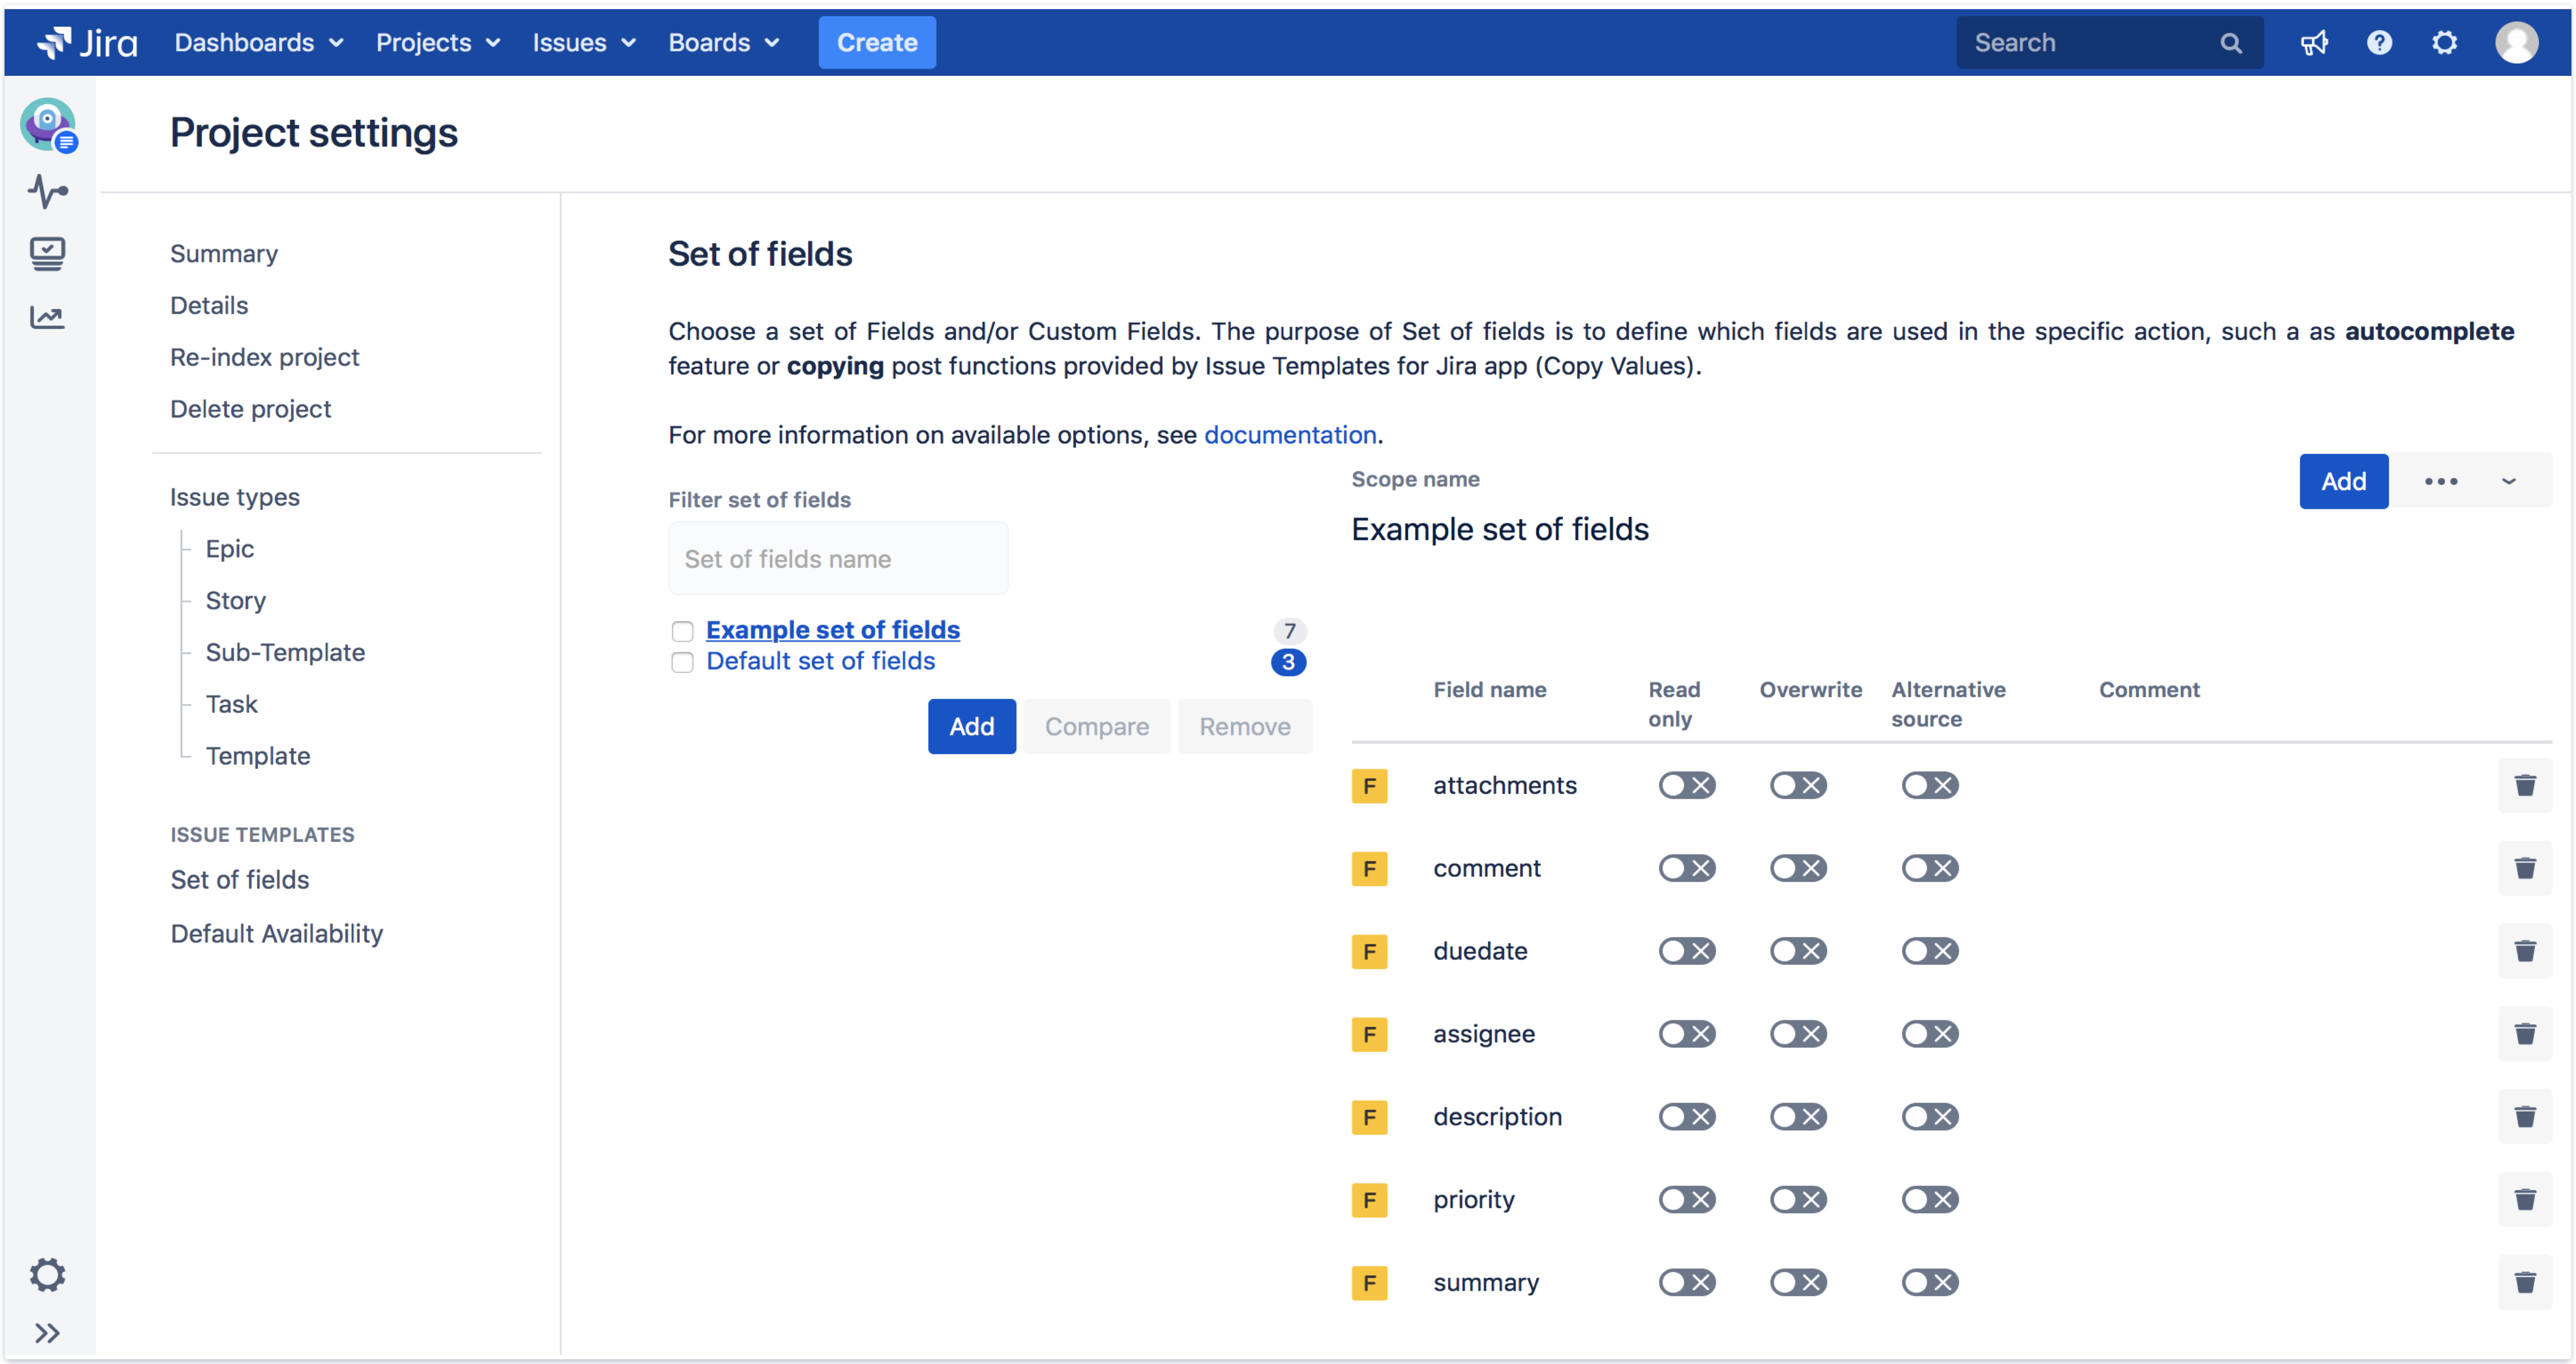
Click Set of fields in Issue Templates section on the left sidebar.
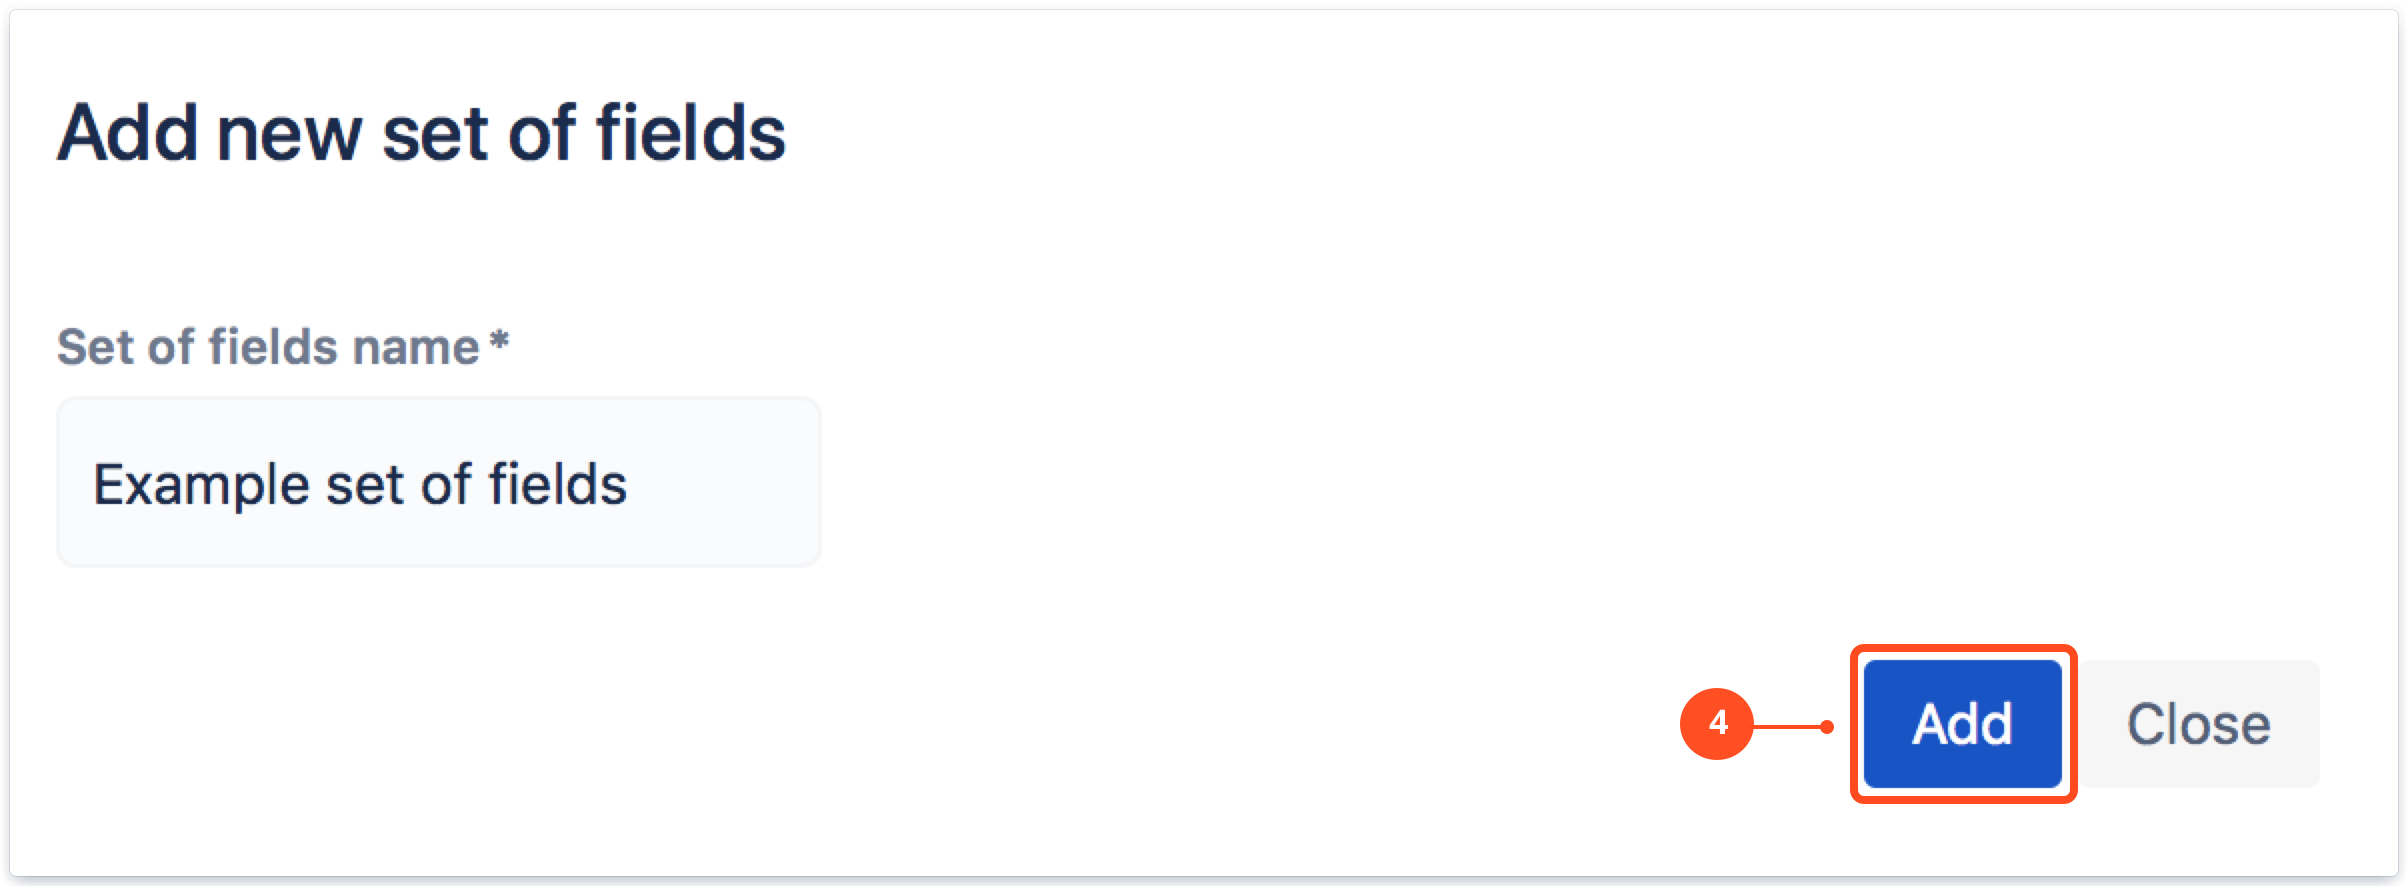
Click Add below the list of fields.
Add a name for your new Set of fields.
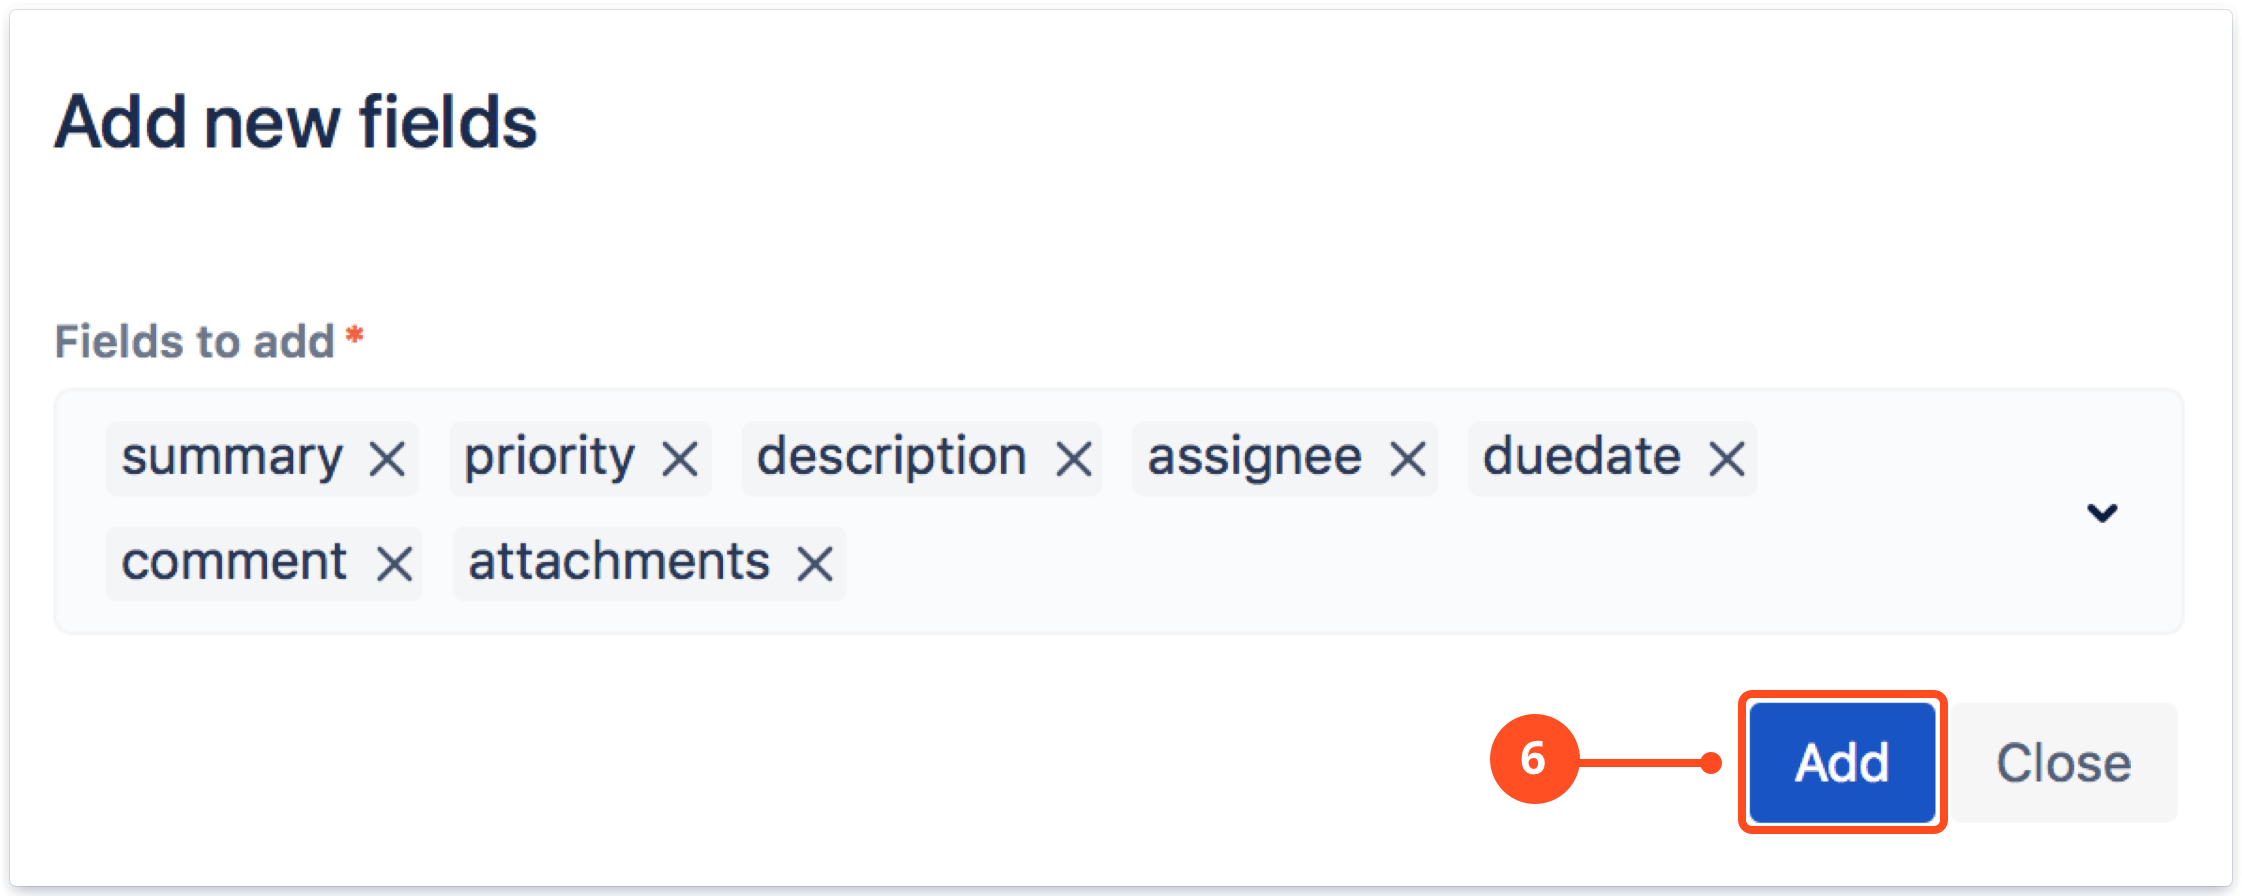
Add fields to the list.
Choose fields from the multiselect list and click Add.
Warning
Add Epic link to Scope only if you create an issue (story or task) that should be linked to an existing epic.
Don’t add it to scope if you are creating a structure of issues using the Create Structure post function. (The connection between story and epic will be reproduced automatically in this case, so adding Epic link to your Set of Fields might only cause configuration problems).
Please remember that the epic you’re linking to must be an actual issue (not a template).
Info
If you’d like to use either the Component or the Fix version field, please keep in mind that their values must be identical in both projects (in the Template Repository project and in your target project where the template is applied).
Configuration
Here is how you can further configure your set of fields:
By switching on Read-only, you disable editing specific field after autocomplete.
While applying template, Overwrite will automatically replace the field’s value in an issue with a value from a template. Turn on the toggle, if you want to use Overwrite for a concrete field.
With Alternative source feature, you are able to modify source (template) value by using values from parent or another issue. With Alternative Source you are able to modify source field’s value also by adding postfixes and prefixes.
Overwrite values
You can choose to overwrite the field contents with values defined in a template. It is particularly useful when you want to apply a different template on the Edit screen or upon a workflow transition. This way, different fields from different templates can be available for users on different stages of the issue lifecycle.
Overwriting values also means that when users type in anything else in those fields, it will be replaced by values provided in the template. As it might seem confusing for users, a special warning is displayed on screens where such a template is applied:
Example
Exemplary Create issue screen when the Overwrite function is enabled:
Issue Templates for Jira - Set of fields: Overwrite values
Troubleshooting
If you don’t want a template to overwrite field values but it does replace them anyway, you may try following configurations:
Disable Overwrite
To disable overwriting values entirely:
In the Set of fields configuration, turn off the toggle under Overwrite for all fields.
In the Fields tab, turn off the toggle next to Different set of fields for post function.
Overwrite only selected fields
If you only want some fields to be autofilled in the background, you may use a separate set of fields for that:
In the Fields tab, create a separate set of fields.
Add only the fields that should be overwritten to the new set.
In the Set of fields configuration, select the newly created set of fields and enable Overwrite for the selected fields.
Alternative Source
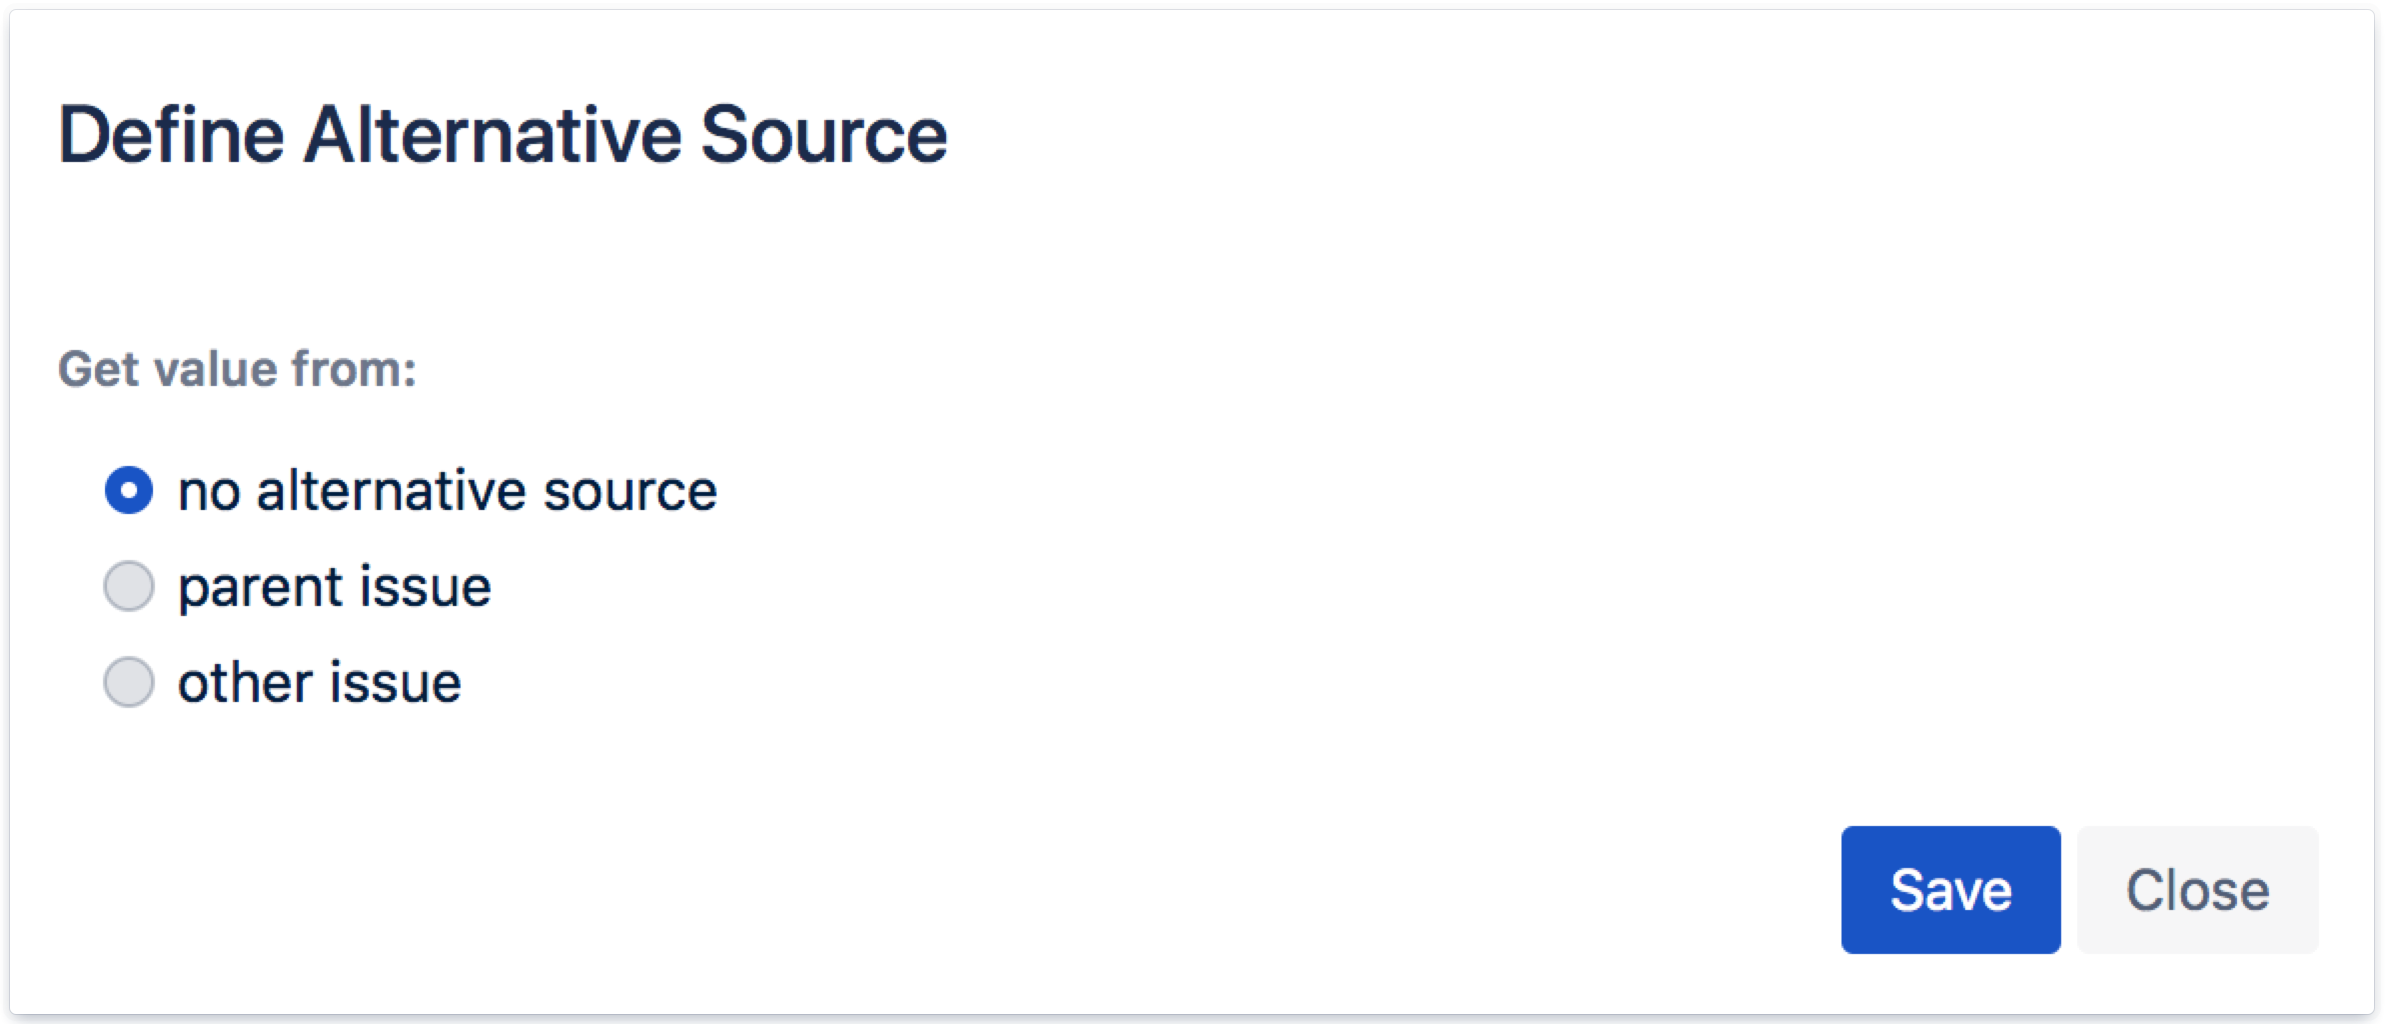
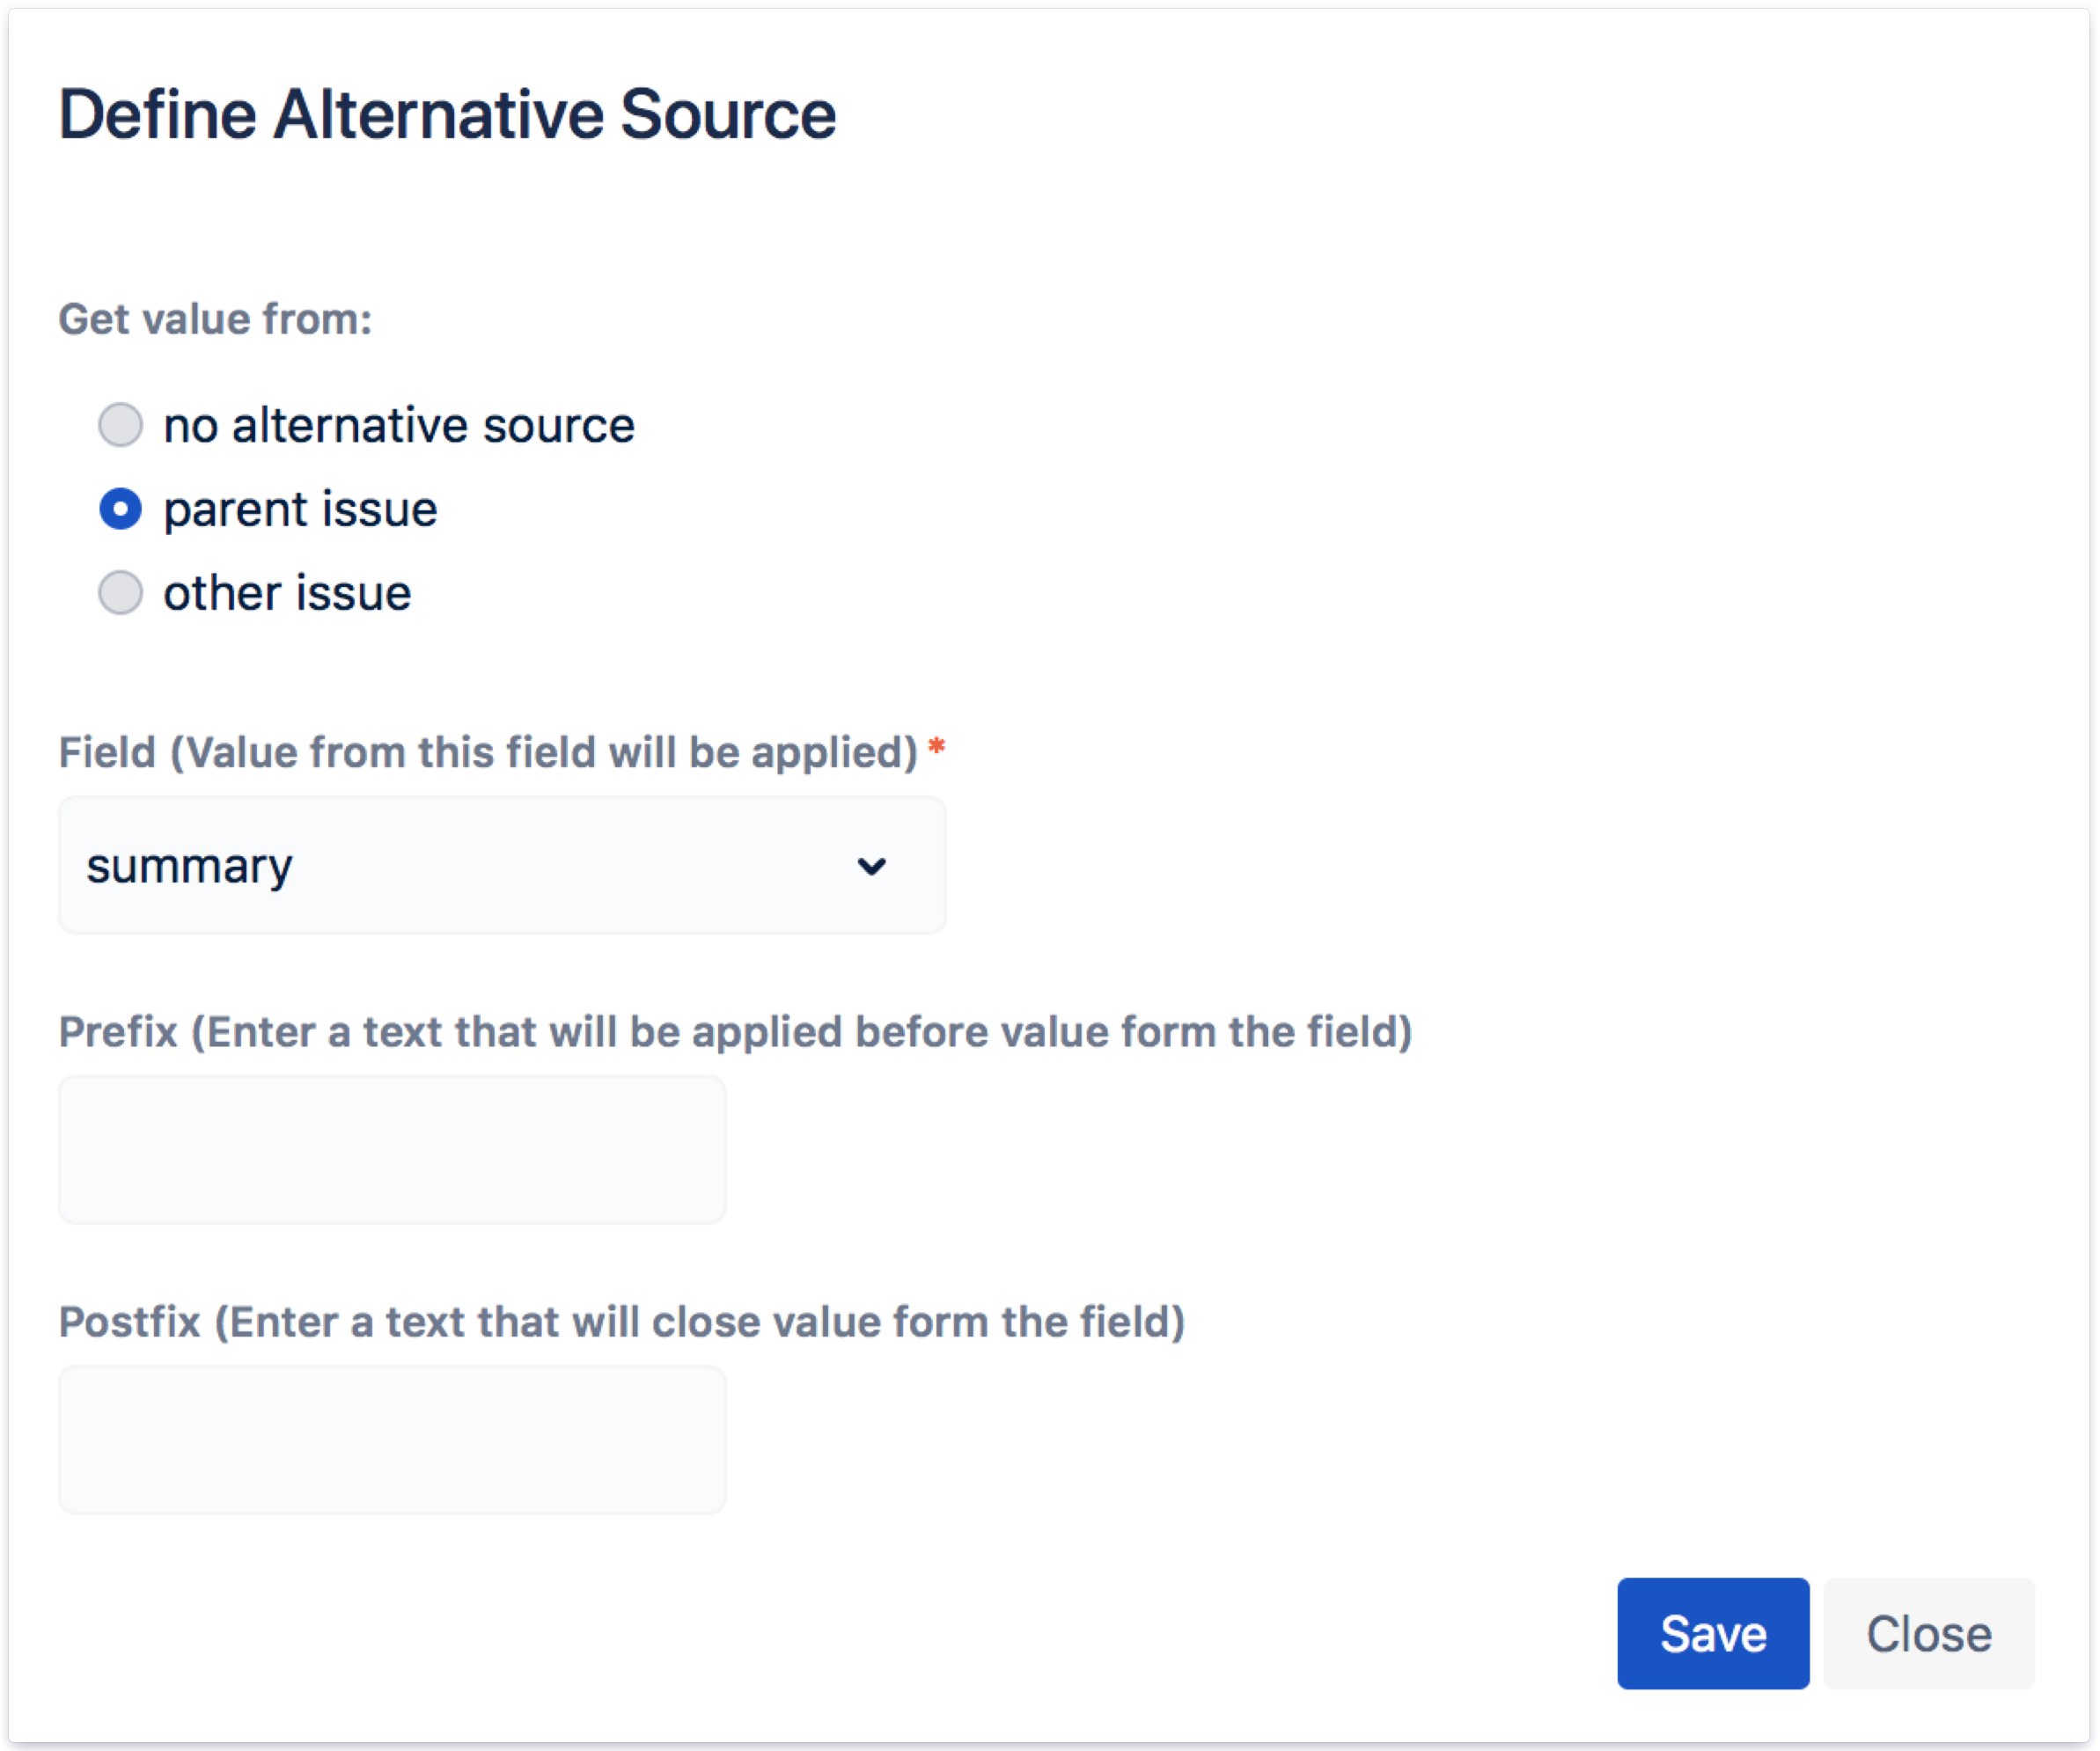
Switch on an Alternative source to start configuring each field. A pop-up window appears.
Select no alternative source if you don’t want to change value. Fields will remain the same as in template.
Choose a parent issue, if you’d like to implement values from the parent template.
Note
Parent issue option is dedicated for sets of fields used in subtasks.
Select a parent issue from which the value will be applied. Add a prefix, in case you want to enter a text before the copied value. Add a postfix, in order to enter a text closing the value.
Note
If you’d like to add prefixes and postfixes also to subtasks or to stories under an epic, you need to add the Create Structure post function to your workflow.
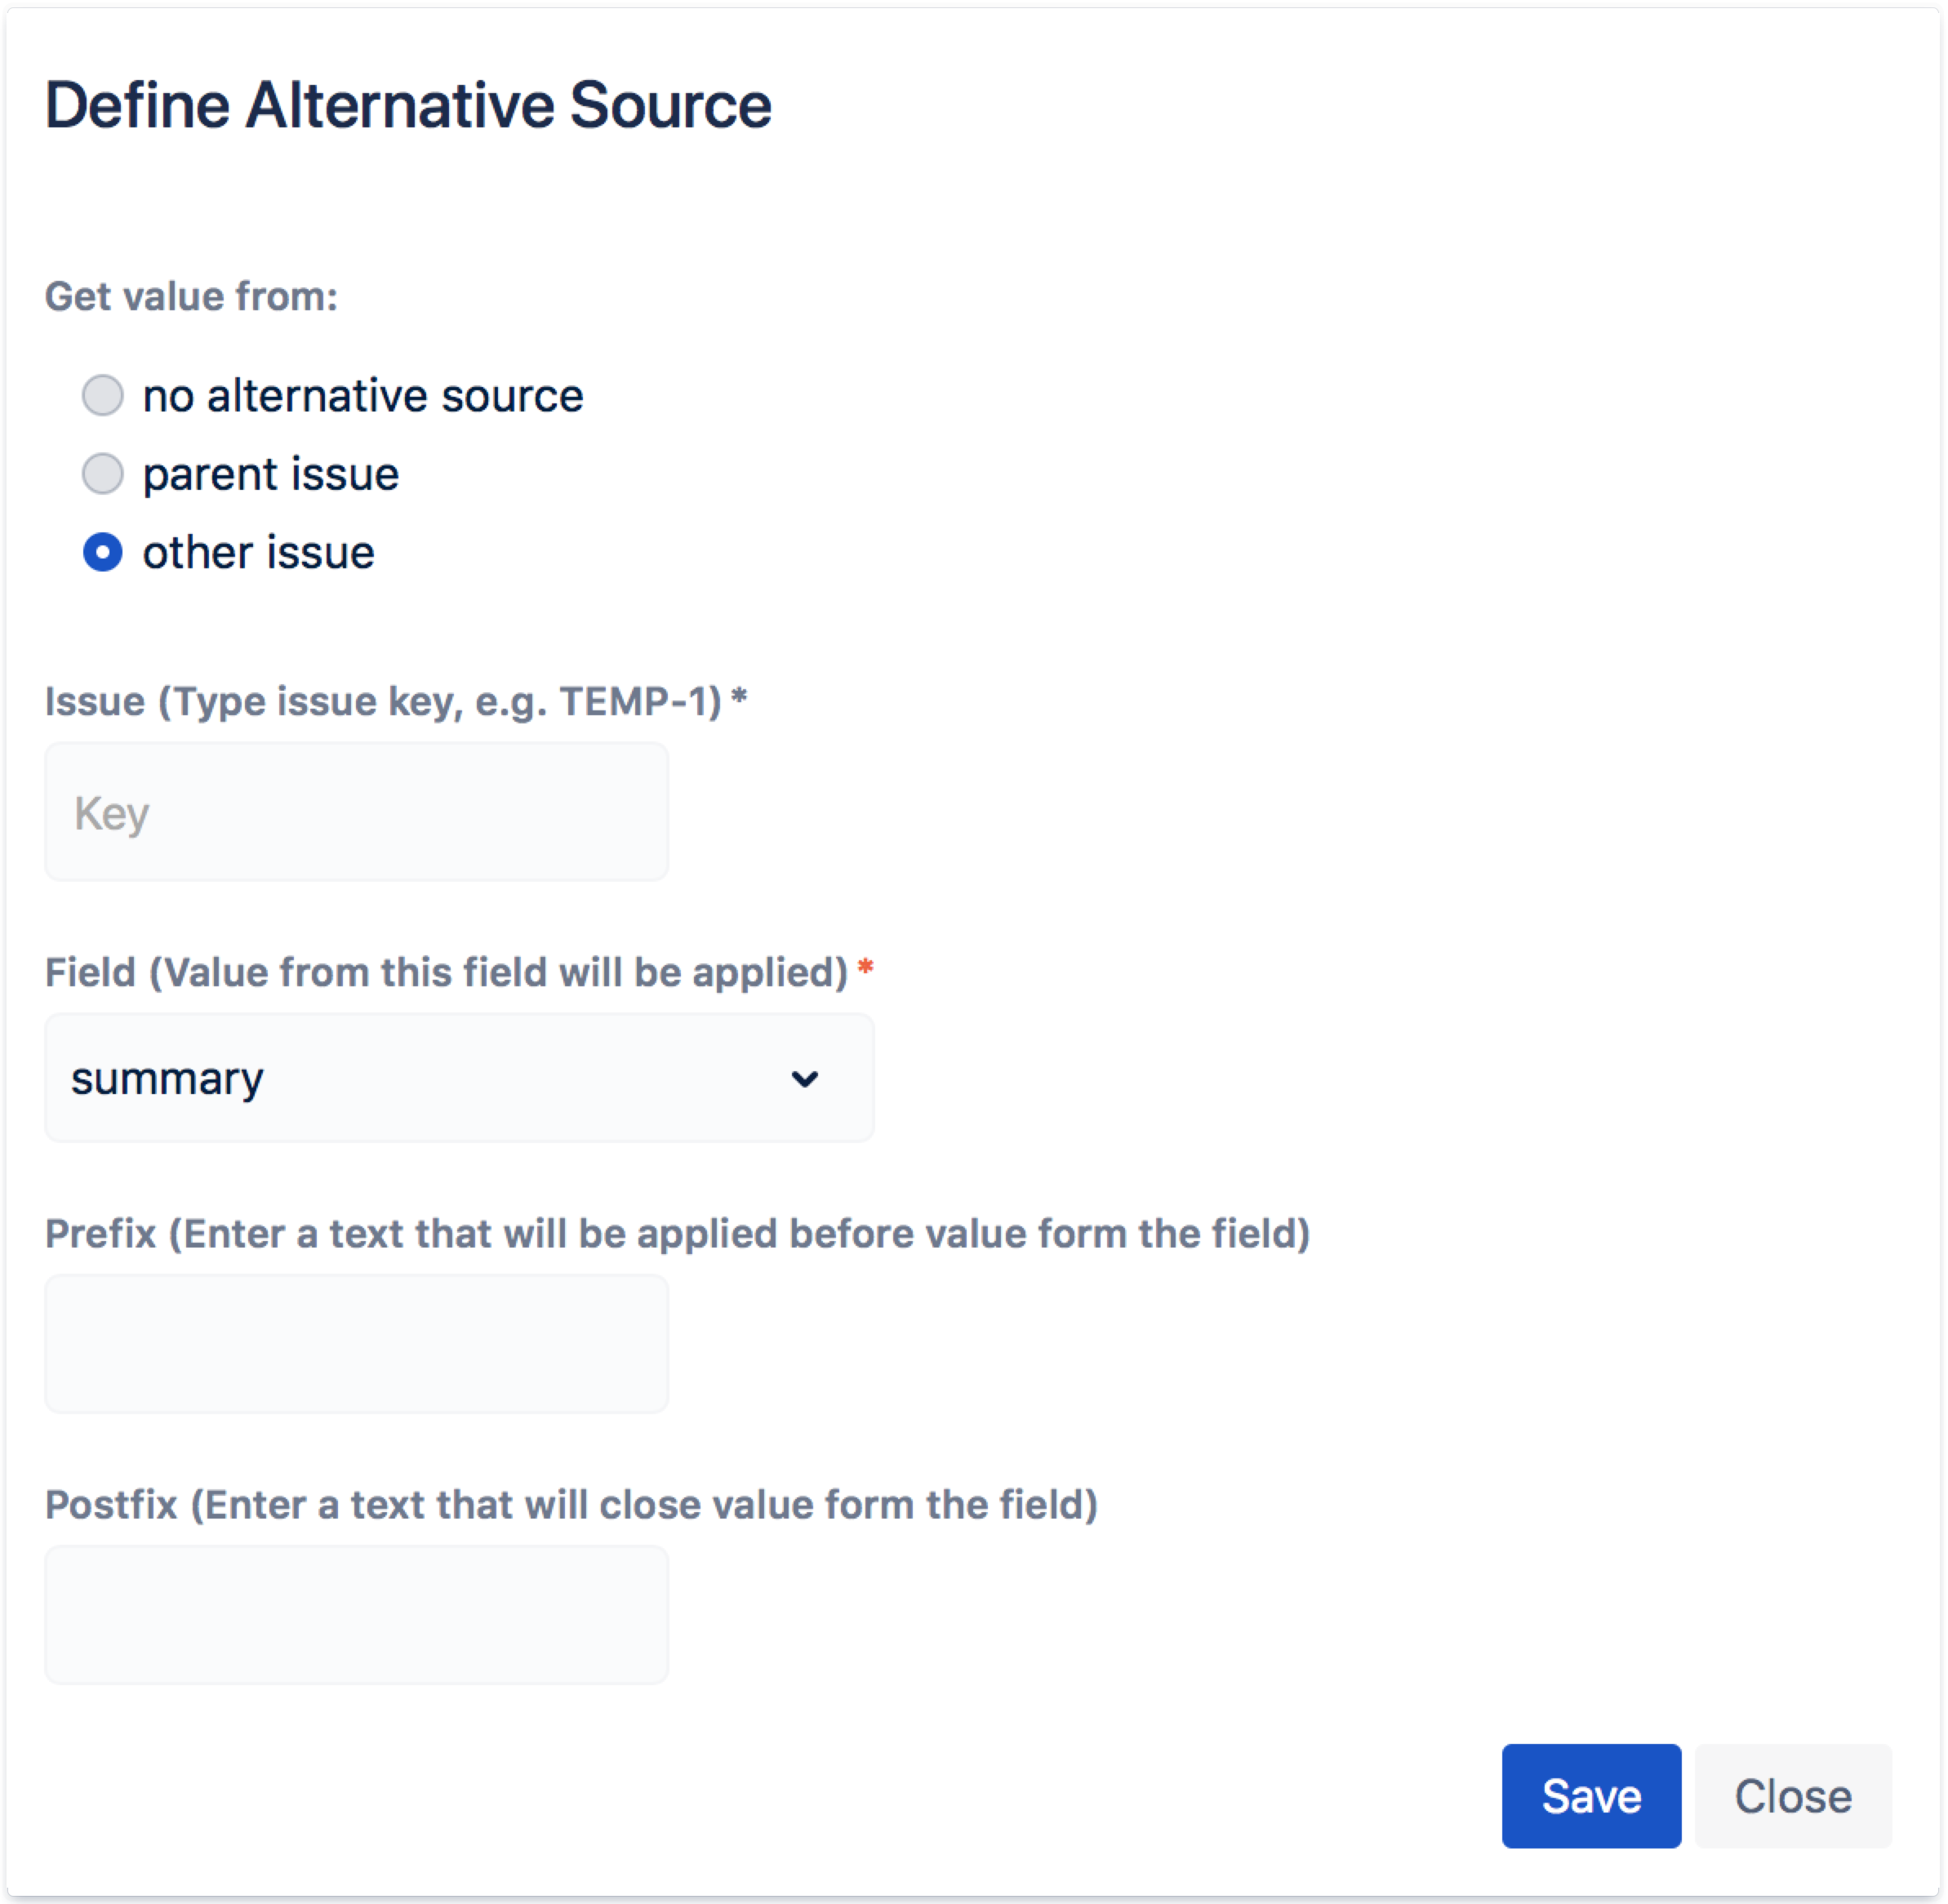
Other issue option allows to select an issue from which the value will be copied.
To complete first field, type the Key of target issue. Select a field from which the value will be applied. Add a prefix, in case you want to enter a text before the copied value. Add a postfix, in order to enter a text closing the value.
Useful features
In Alternative source there are fields, that have additional options:
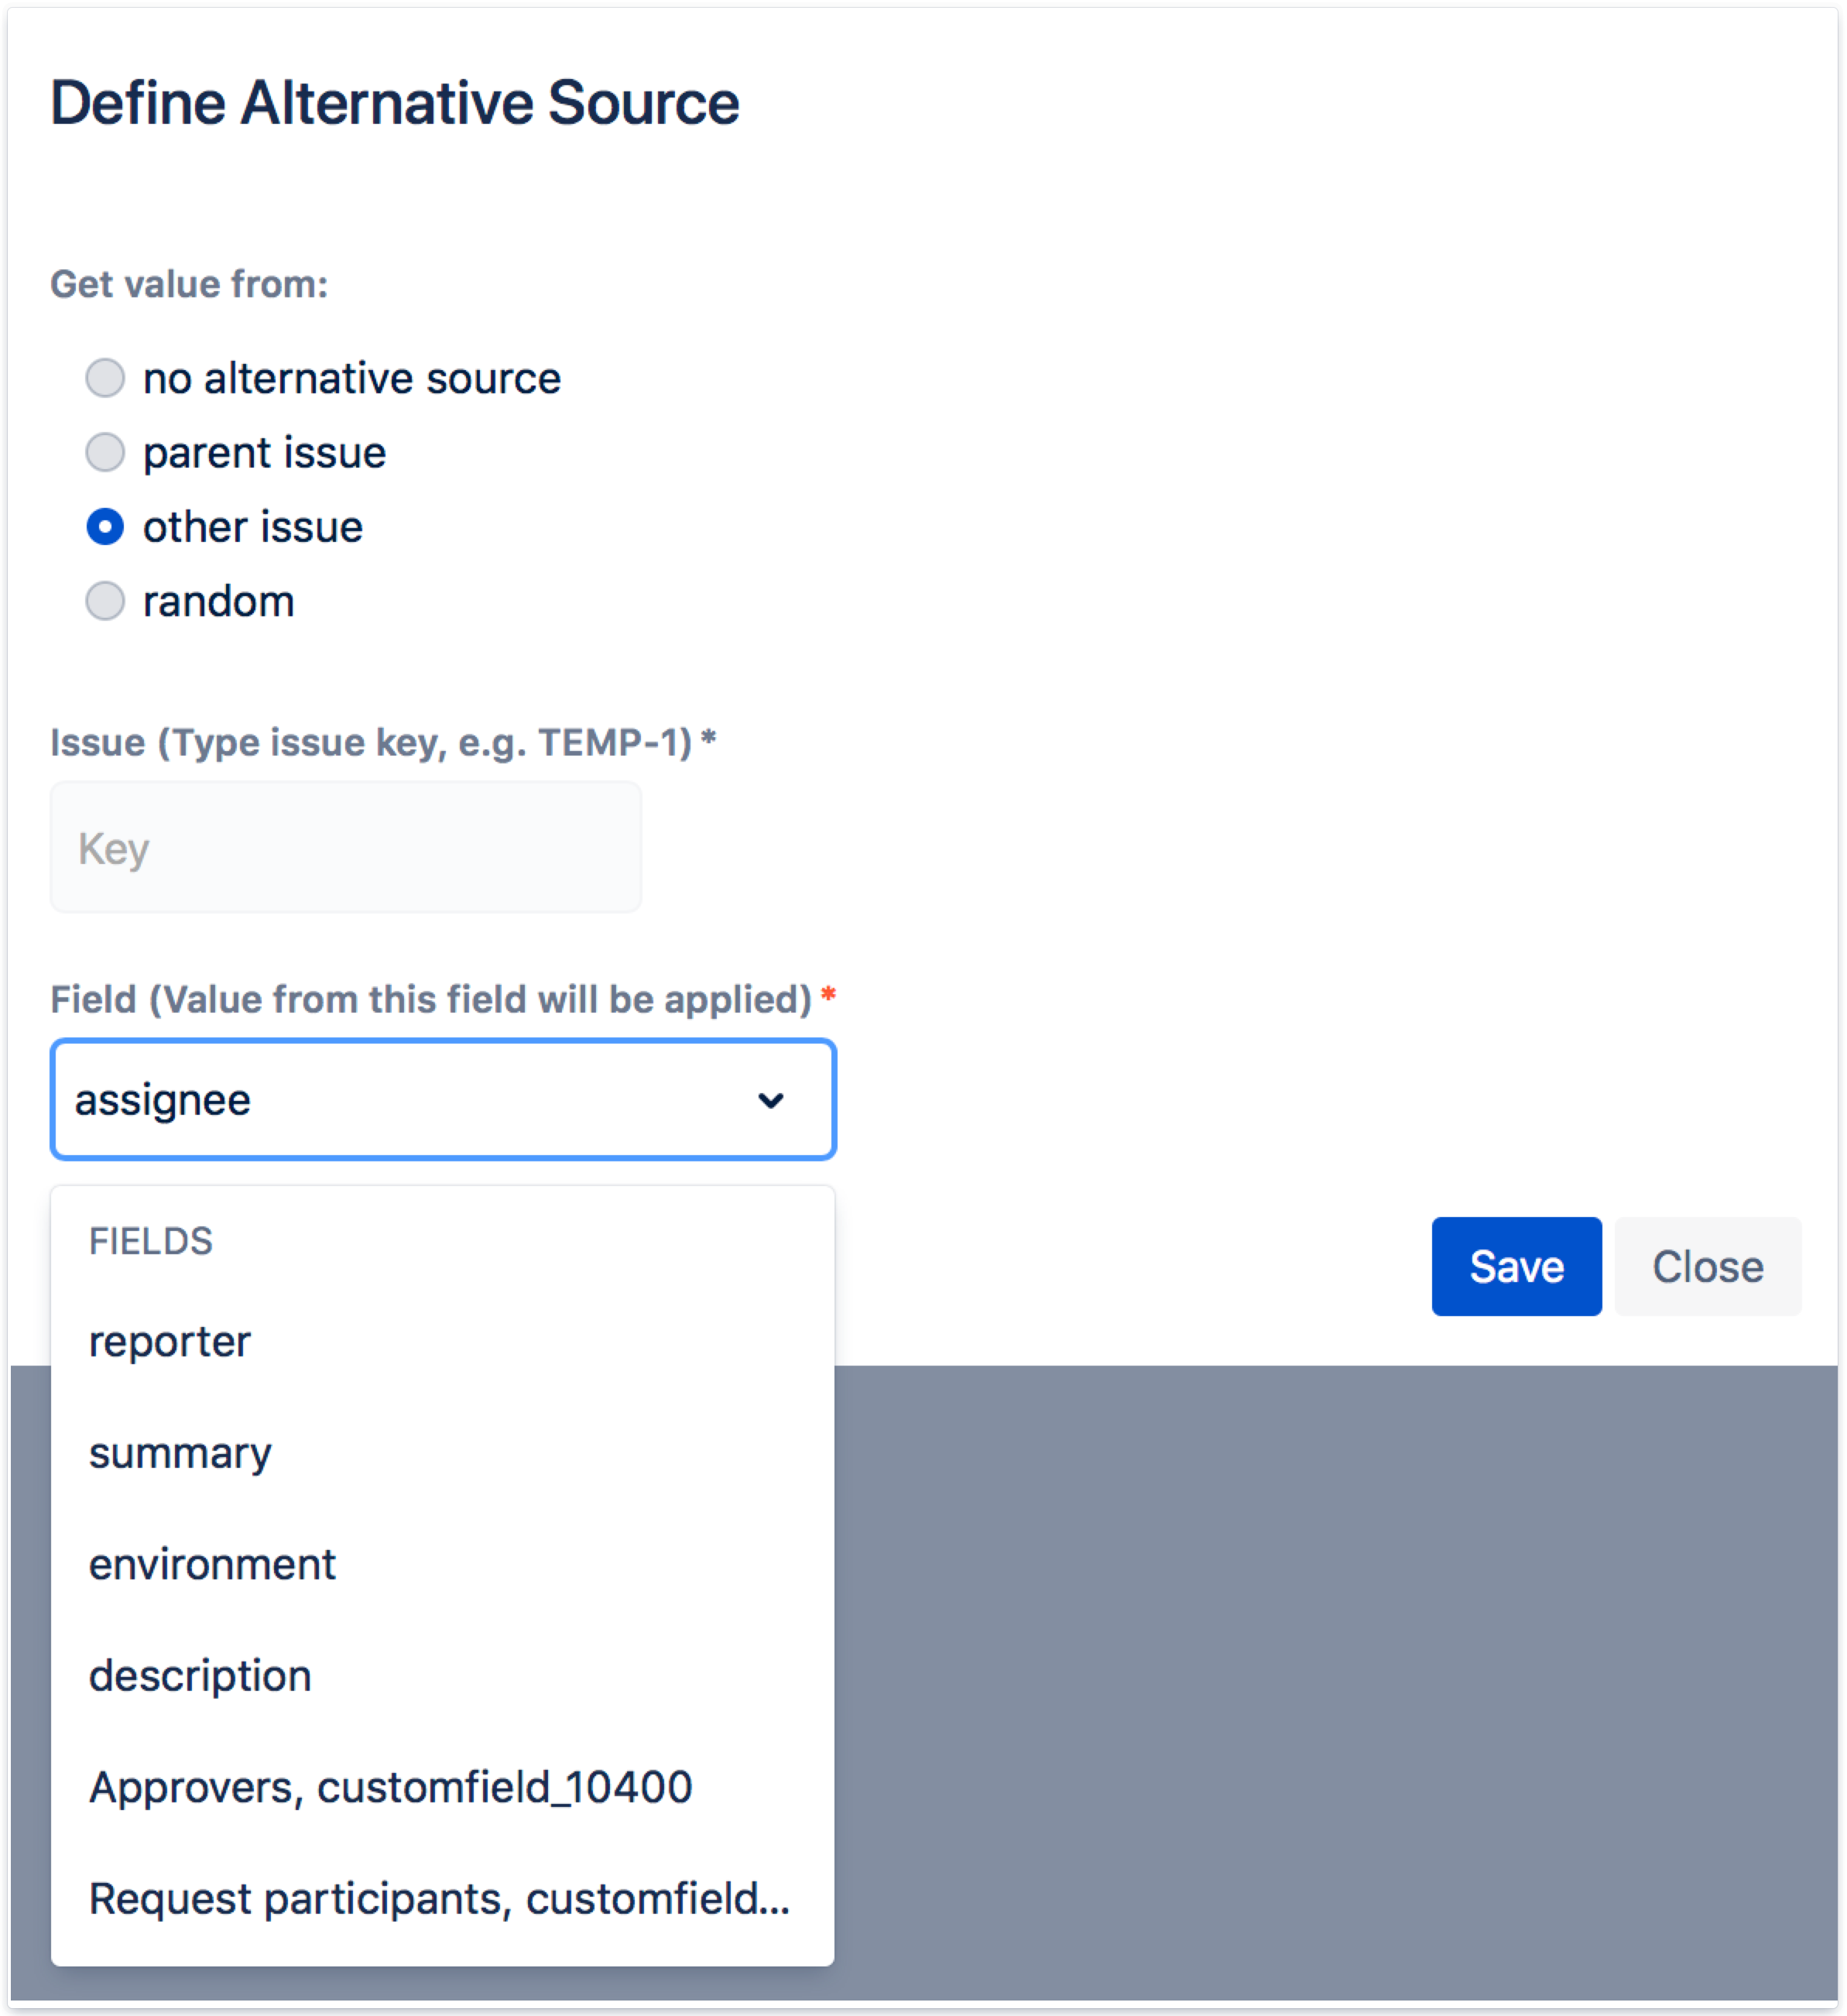
Assignee
There’s a random option in Assignee field, which allows to add a random user from given group.
Type the name of group to the tab.
Attachment
Alternative source allows to copy attachments to issue. Switch the toggle to define an alternative source for attachment. You can re-use it from parent issue or choose one of available in other issue.
Due Date
With alternative source, you are able to set the Due Date as in parent or other issue. It is also possible to set the current date to a Due Date field.
Type the number to the Shift by tab - given number will be added to the date.
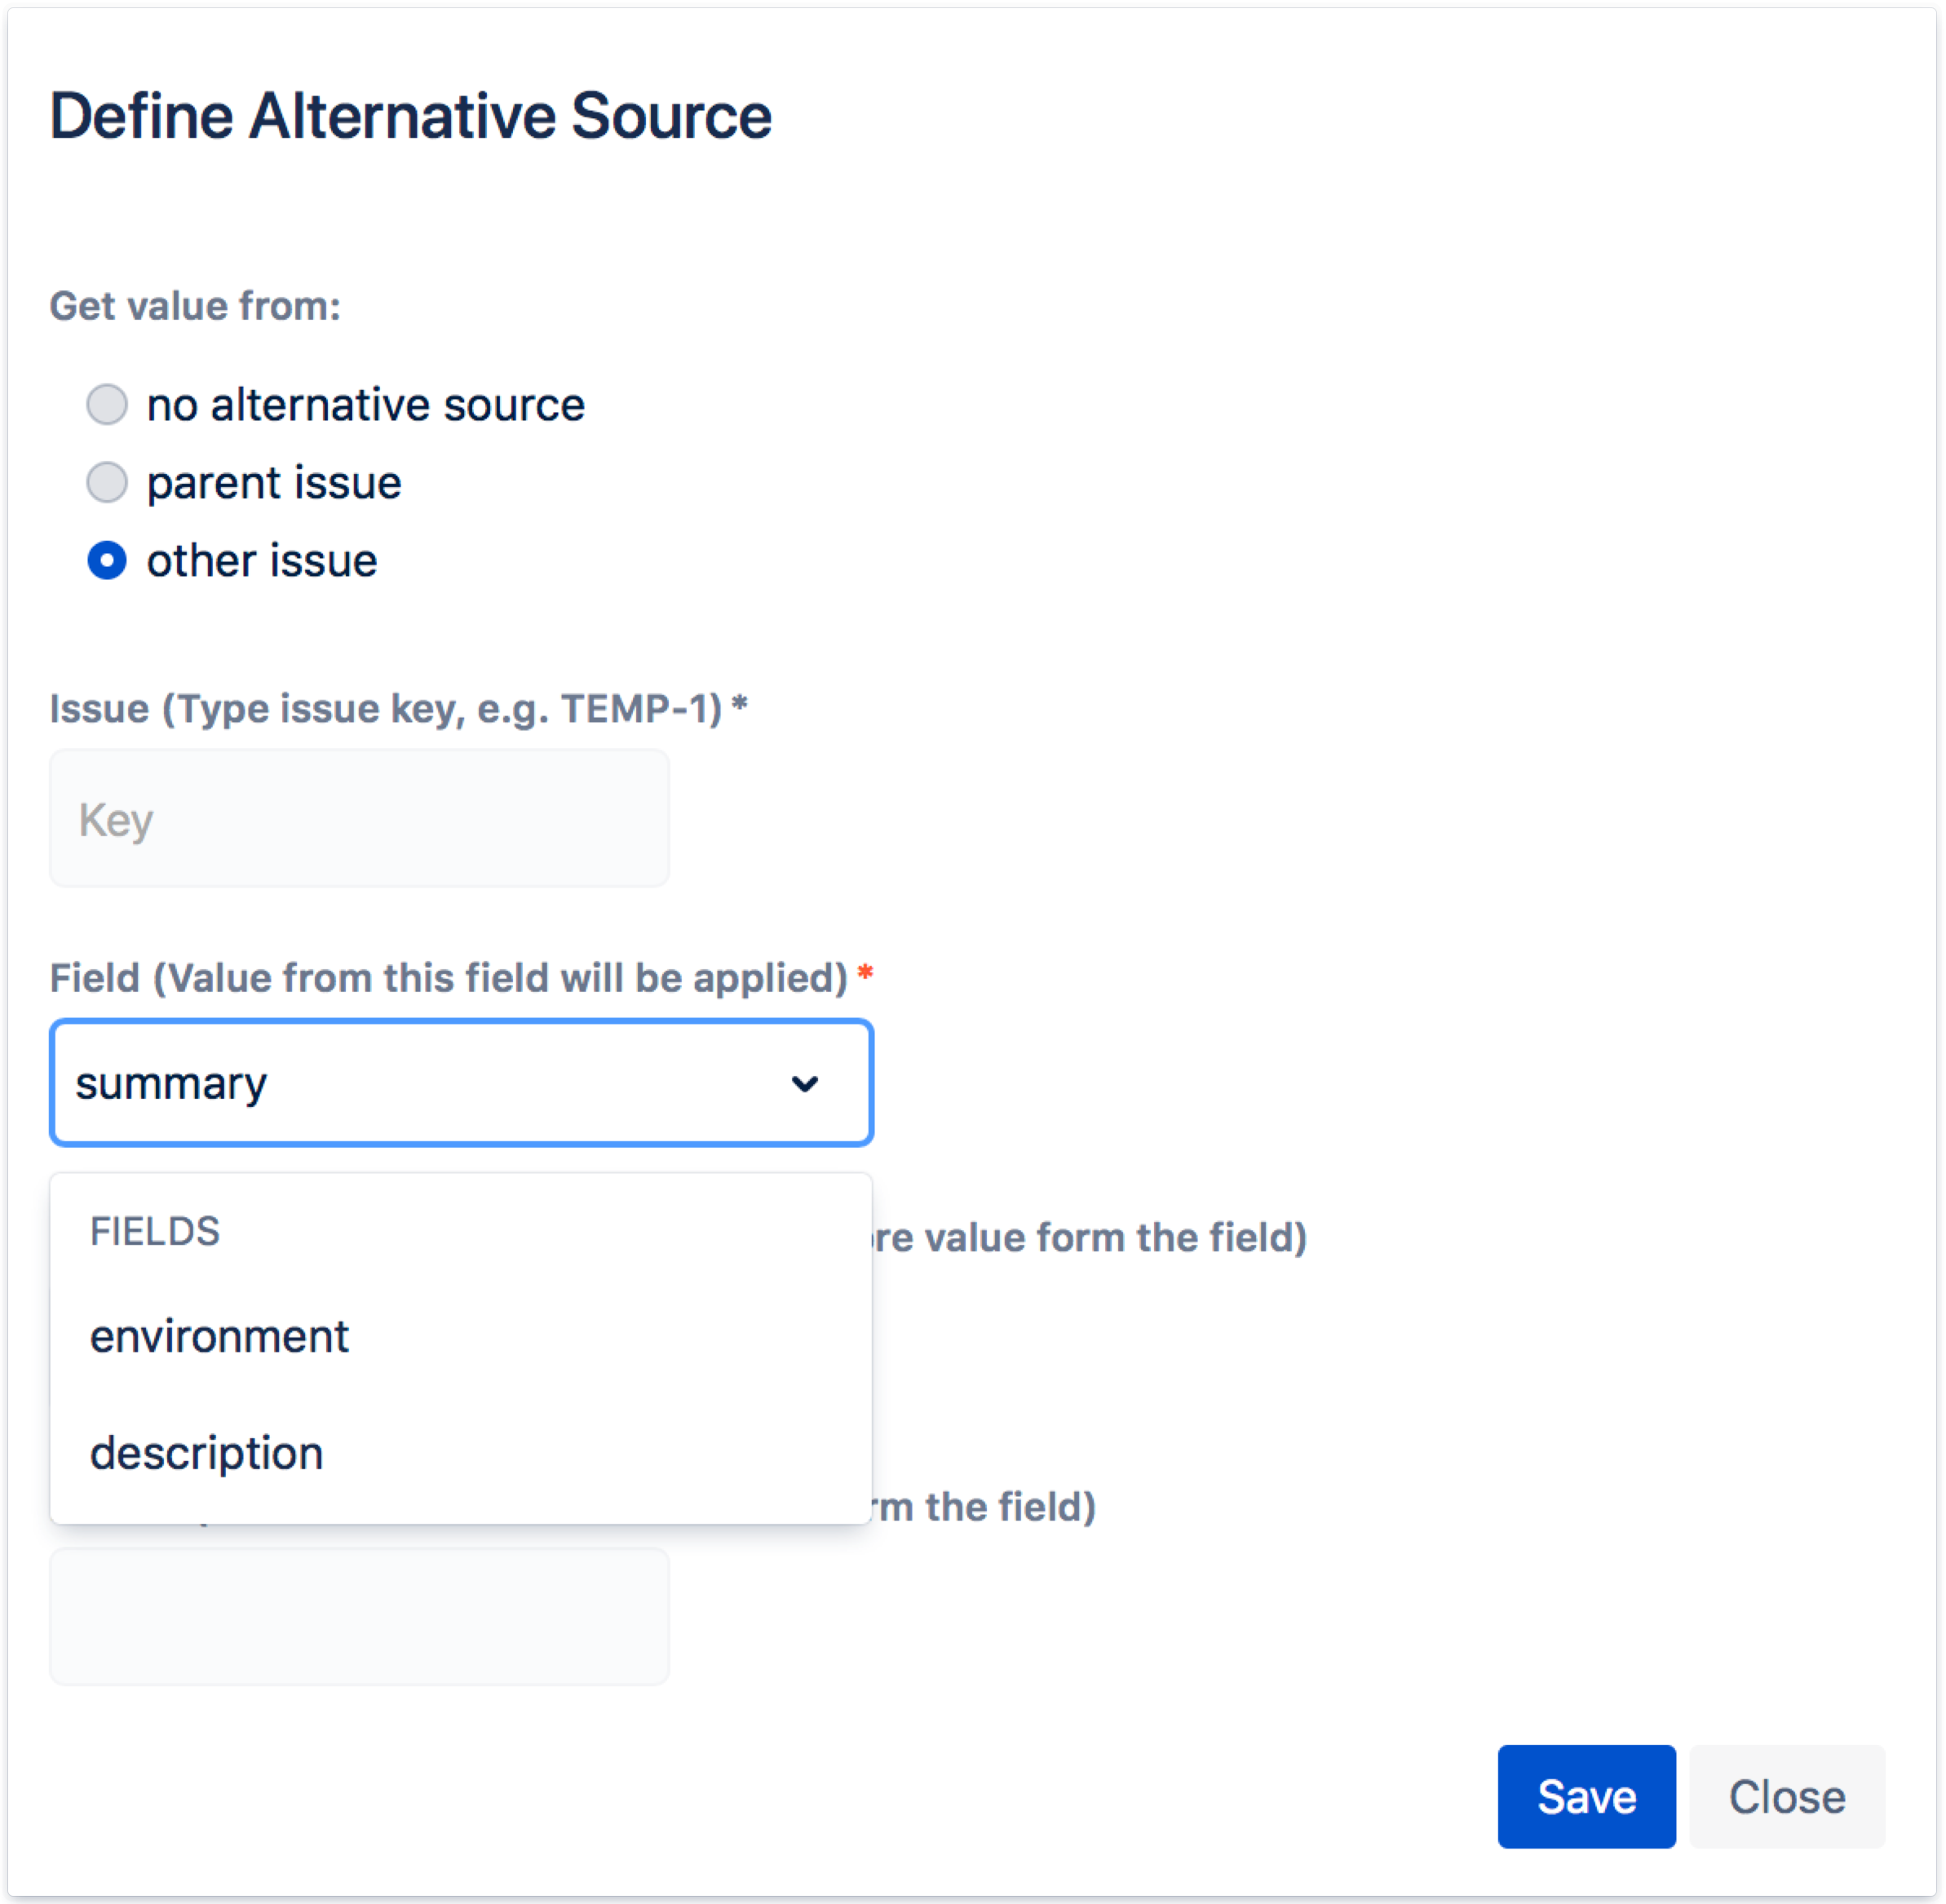
Mapping concepts
While selecting a field in a pop-up window, you can choose another type of field as an alternative source.
For example: you’d like to add a summary to the Set of fields, but re-use a text from another issue’s description. Both fields can be selected from the drop down list, even tough they’re different.
Check the table below to see, which fields are compatible with each other.
Type
Compatible field
text
Summary, Description, Environment, Textfield (single and multi line)
user
Assignee, Reporter, Request participants, User Picker (single and multiple users)
date
Due Date, Date Picker, Date Time Picker
other
Other fields (custom fields)
Use following mapping scheme, to properly configure your alternative source:
text <- text
user <- user, text
date <- date
x <- x (where x is some custom field)
Configured sets are visible in Set of fields section in Issue Templates Details.
Need help?
If you can’t find the answer you need in our documentation, raise a support request.


 NoteIf you’d like to add prefixes and postfixes also to subtasks or to stories under an epic, you need to add the Create Structure post function to your workflow.