- Configuration
- First steps
- Project setup
- Sample templates
- Migration to Cloud
- Supported fields
- Permissions
- Jira Service Management
- Template management
- Create a template
- Template configuration
- Variables
- Template Navigator
- Delete a template
- Use as a template
- Set of Fields - advanced features
- Using template
- Autocomplete
- Default Template
- Apply template
- Use Template in Jira Automation
- Automatic create and close
- JQL Searchers
- Direct links
- Create Structure post function
- About Create Structure
- Create Structure configuration
- App integrations
- REST API
- ScriptRunner and Groovy scripts
Variables
Learn how to use variables in your templates
Variables are placeholders that get automatically filled in when you create an issue using a template. They make your templates consistent and easier to use. Not to mention saving you a lot of time!
Types of variables
System variables - are placeholders with a fixed definition. You can paste them into text fields in your template issues. They are available in all templates within the Template Repository (TEMP).
User variables - are created by you. You can choose any values to become variables in your templates and adjust them to your needs. You may also make them available for your team in all the templates.
Supported fields
You can use variables in the following fields and custom fields:
- Summary
- Description
- Text Field (single line) custom field
- Text Field (multi-line) custom field
- Environment
- Labels system field
The Labels custom field is not supported.
Examples
A wide range of repetitive tasks can be significantly improved by using variables:
Service Management activities get a lot faster, with customized variables like selection and multi-selection lists, as well as ready-to-use support forms with only a few gaps to fill in.
Software Development tracking gets a lot easier with system variables like PARENT_STATUS, PARENT_DUE_DATE or TODAY (day of the issue creation).
Human Resources teams can automate new joiners’ hiring process by creating custom user variables, like [NEW EMPLOYEE NAME], [DEPARTMENT], [START DATE], and basically any value you can think of - you configure them yourself!
- To see a real-life example, read our use case.
- To learn how to add variables to a structure of linked issues, check out the Create Structure use case chapter.
Permissions
Depending on your Jira permissions, you might be able to perform different actions with variables.
If you have the Create issue permission, you’re able to:
- create new variables
- view the list of variables
- preview the variable’s definition
- use variables in issues (copy & paste)
If you are an Administrator (either Project Administrator or Jira Administrator), you can also:
- create global variables (available to all users)
- edit variables’ properties
- remove variables
- reorder variables within the variables’ list
- reorder options within selection and multi-selection lists
How to start
Here’s a short guide on adding variables while creating a template.
Adjusting the template
-
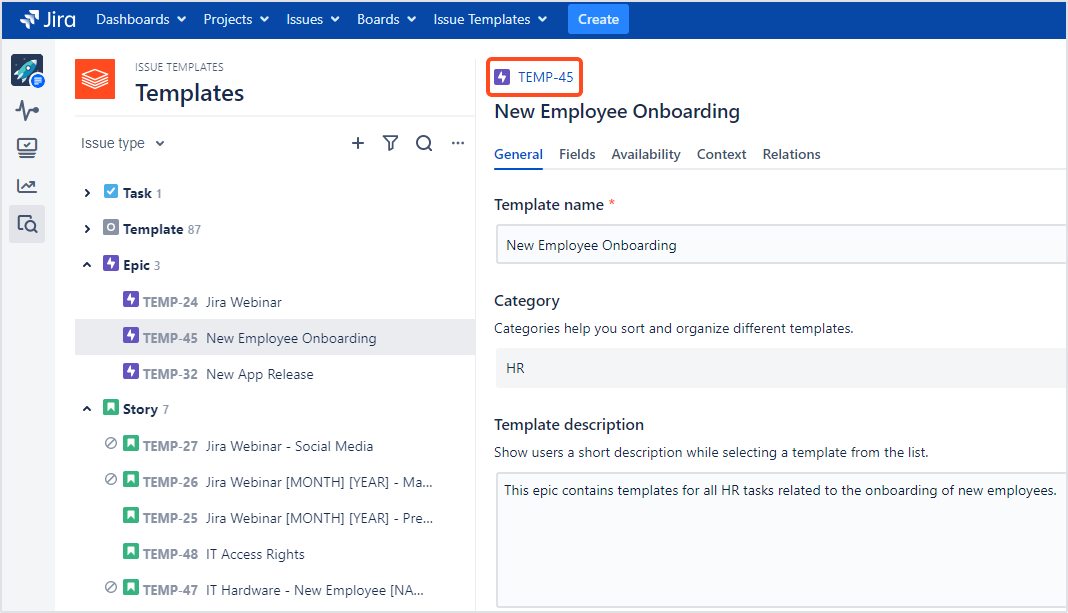
Create a template or use an existing one.
-
Now that your template draft is ready, select it from the template list :
Insert variables
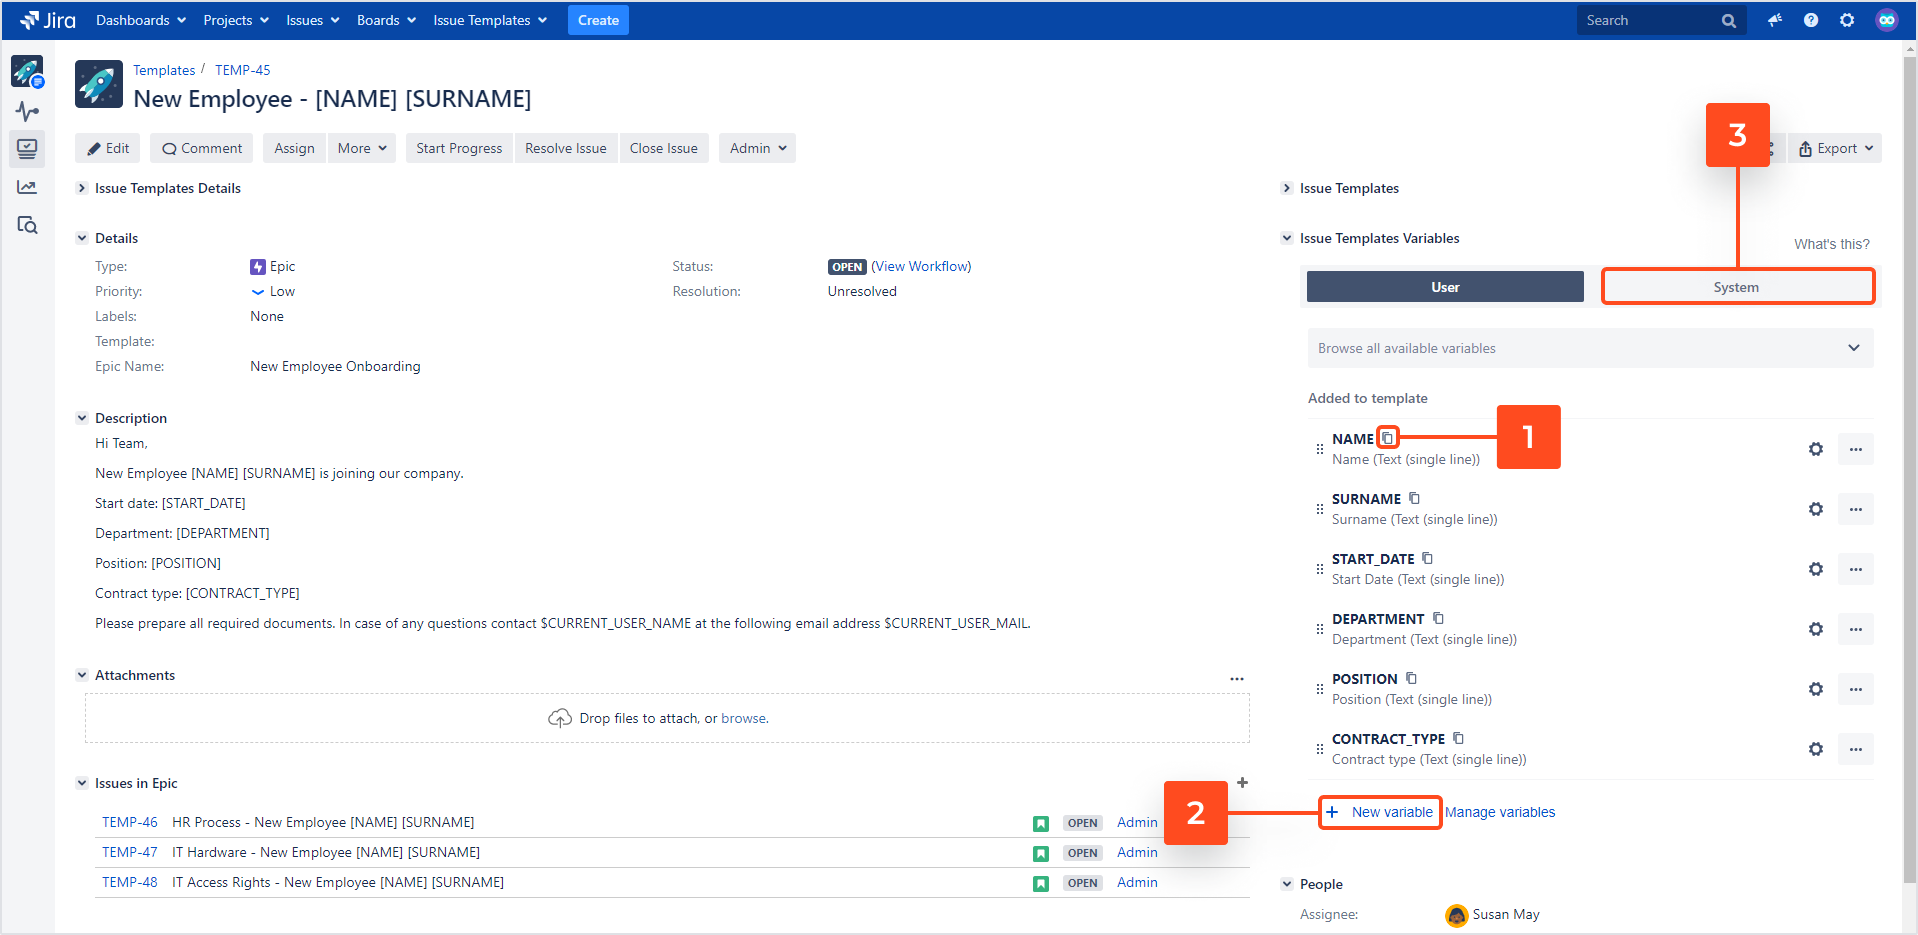
You can start writing the Description and add variables to every text field in your template. There are several ways to add variables:
Steps
To insert variables into a template:
- Copy an existing user variable from the panel and paste it into the text.
- Create a new user variable by clicking on the plus icon. It will then be added to the panel where you can copy it and insert it into your description.
- Use a system variable: go to the System tab and select a system variable of your choice. Copy and paste it, just like the user variables.
Make sure you’ve added the Template field to the Create issue screen of your project.
Define values
Now let’s see our template in use:
Steps
To create an issue using a template with variables:
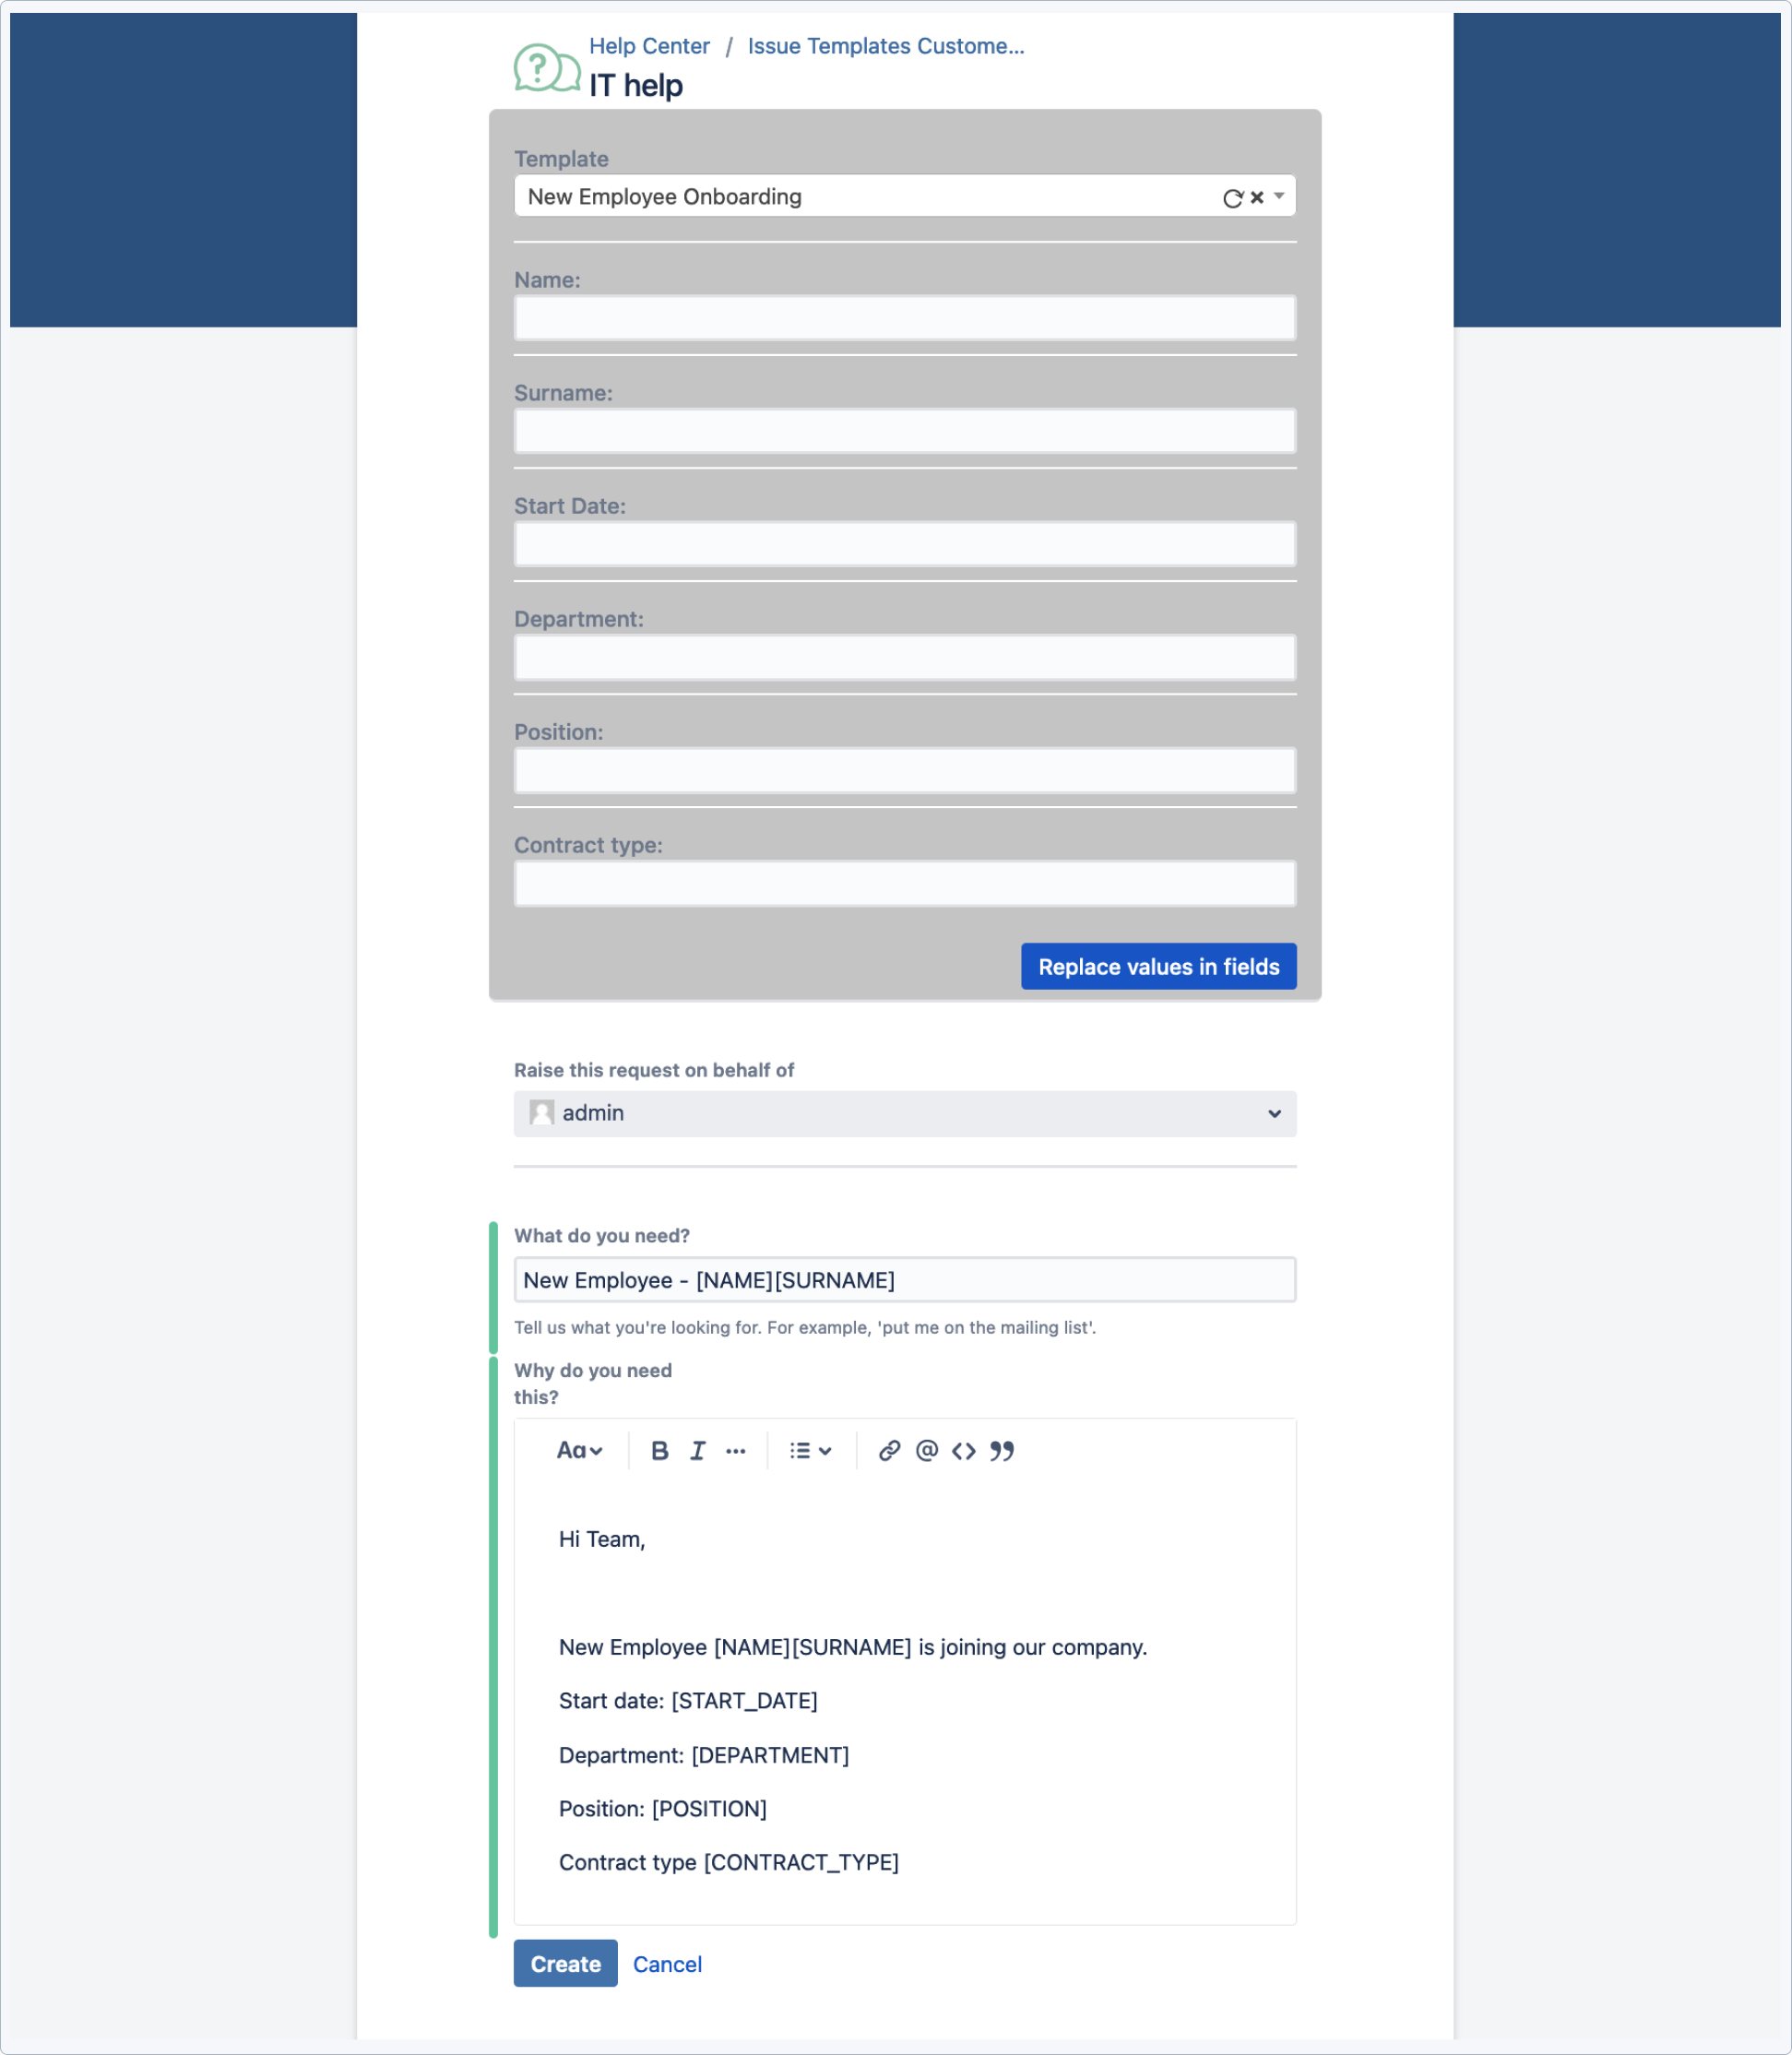
- Go to your target project, click Create and select the new template.
- Type in the values for each variable. (System variables will be replaced automatically).
- Click
Replace values in fieldsand then Create.
Result
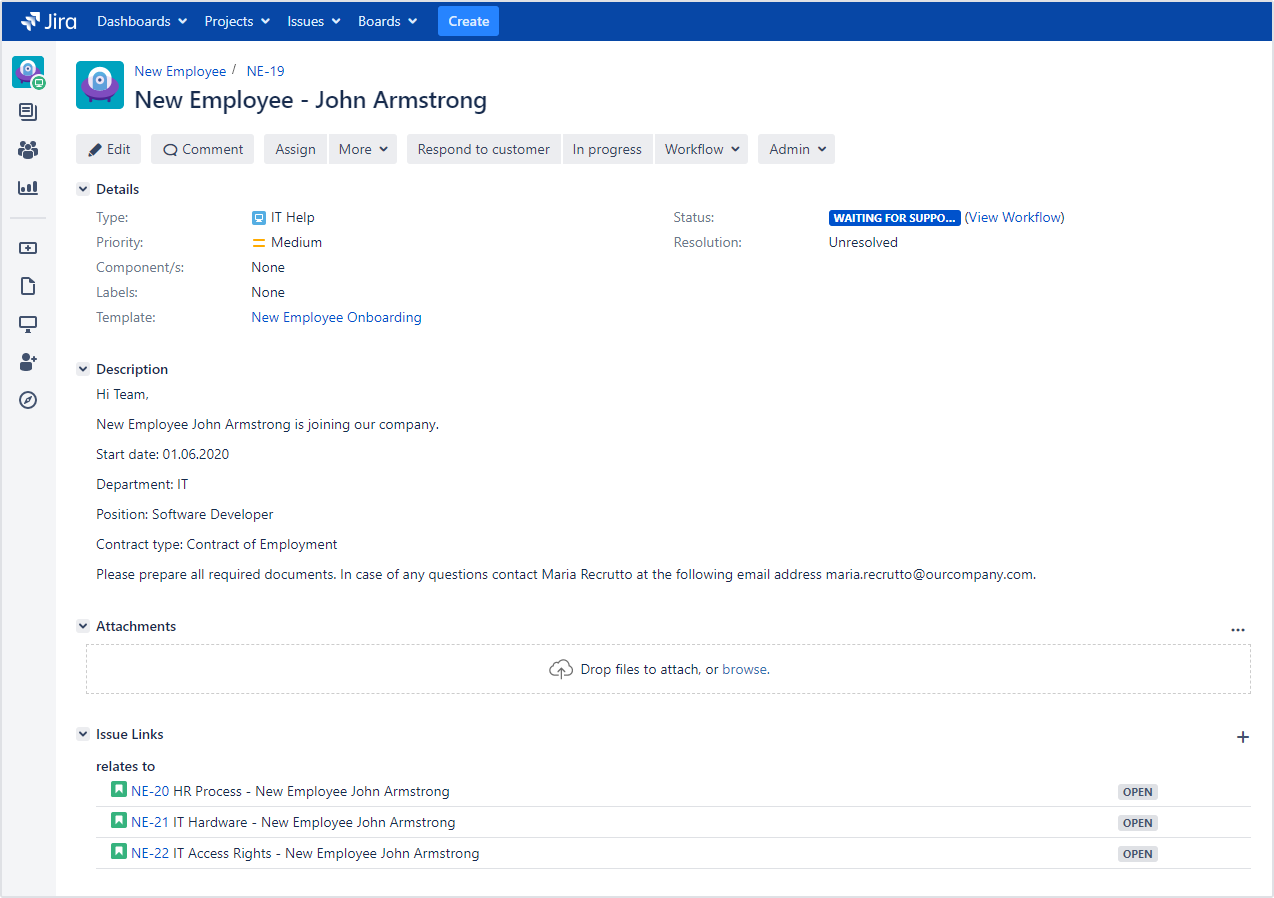
All the variables you defined have been replaced in the newly created issue. If the issue has subtasks, then the variables have been replaced there, too:
Customer portal
Variables work on the Customer portal as well. Here’s what our example looks like when seen from the customer’s perspective:
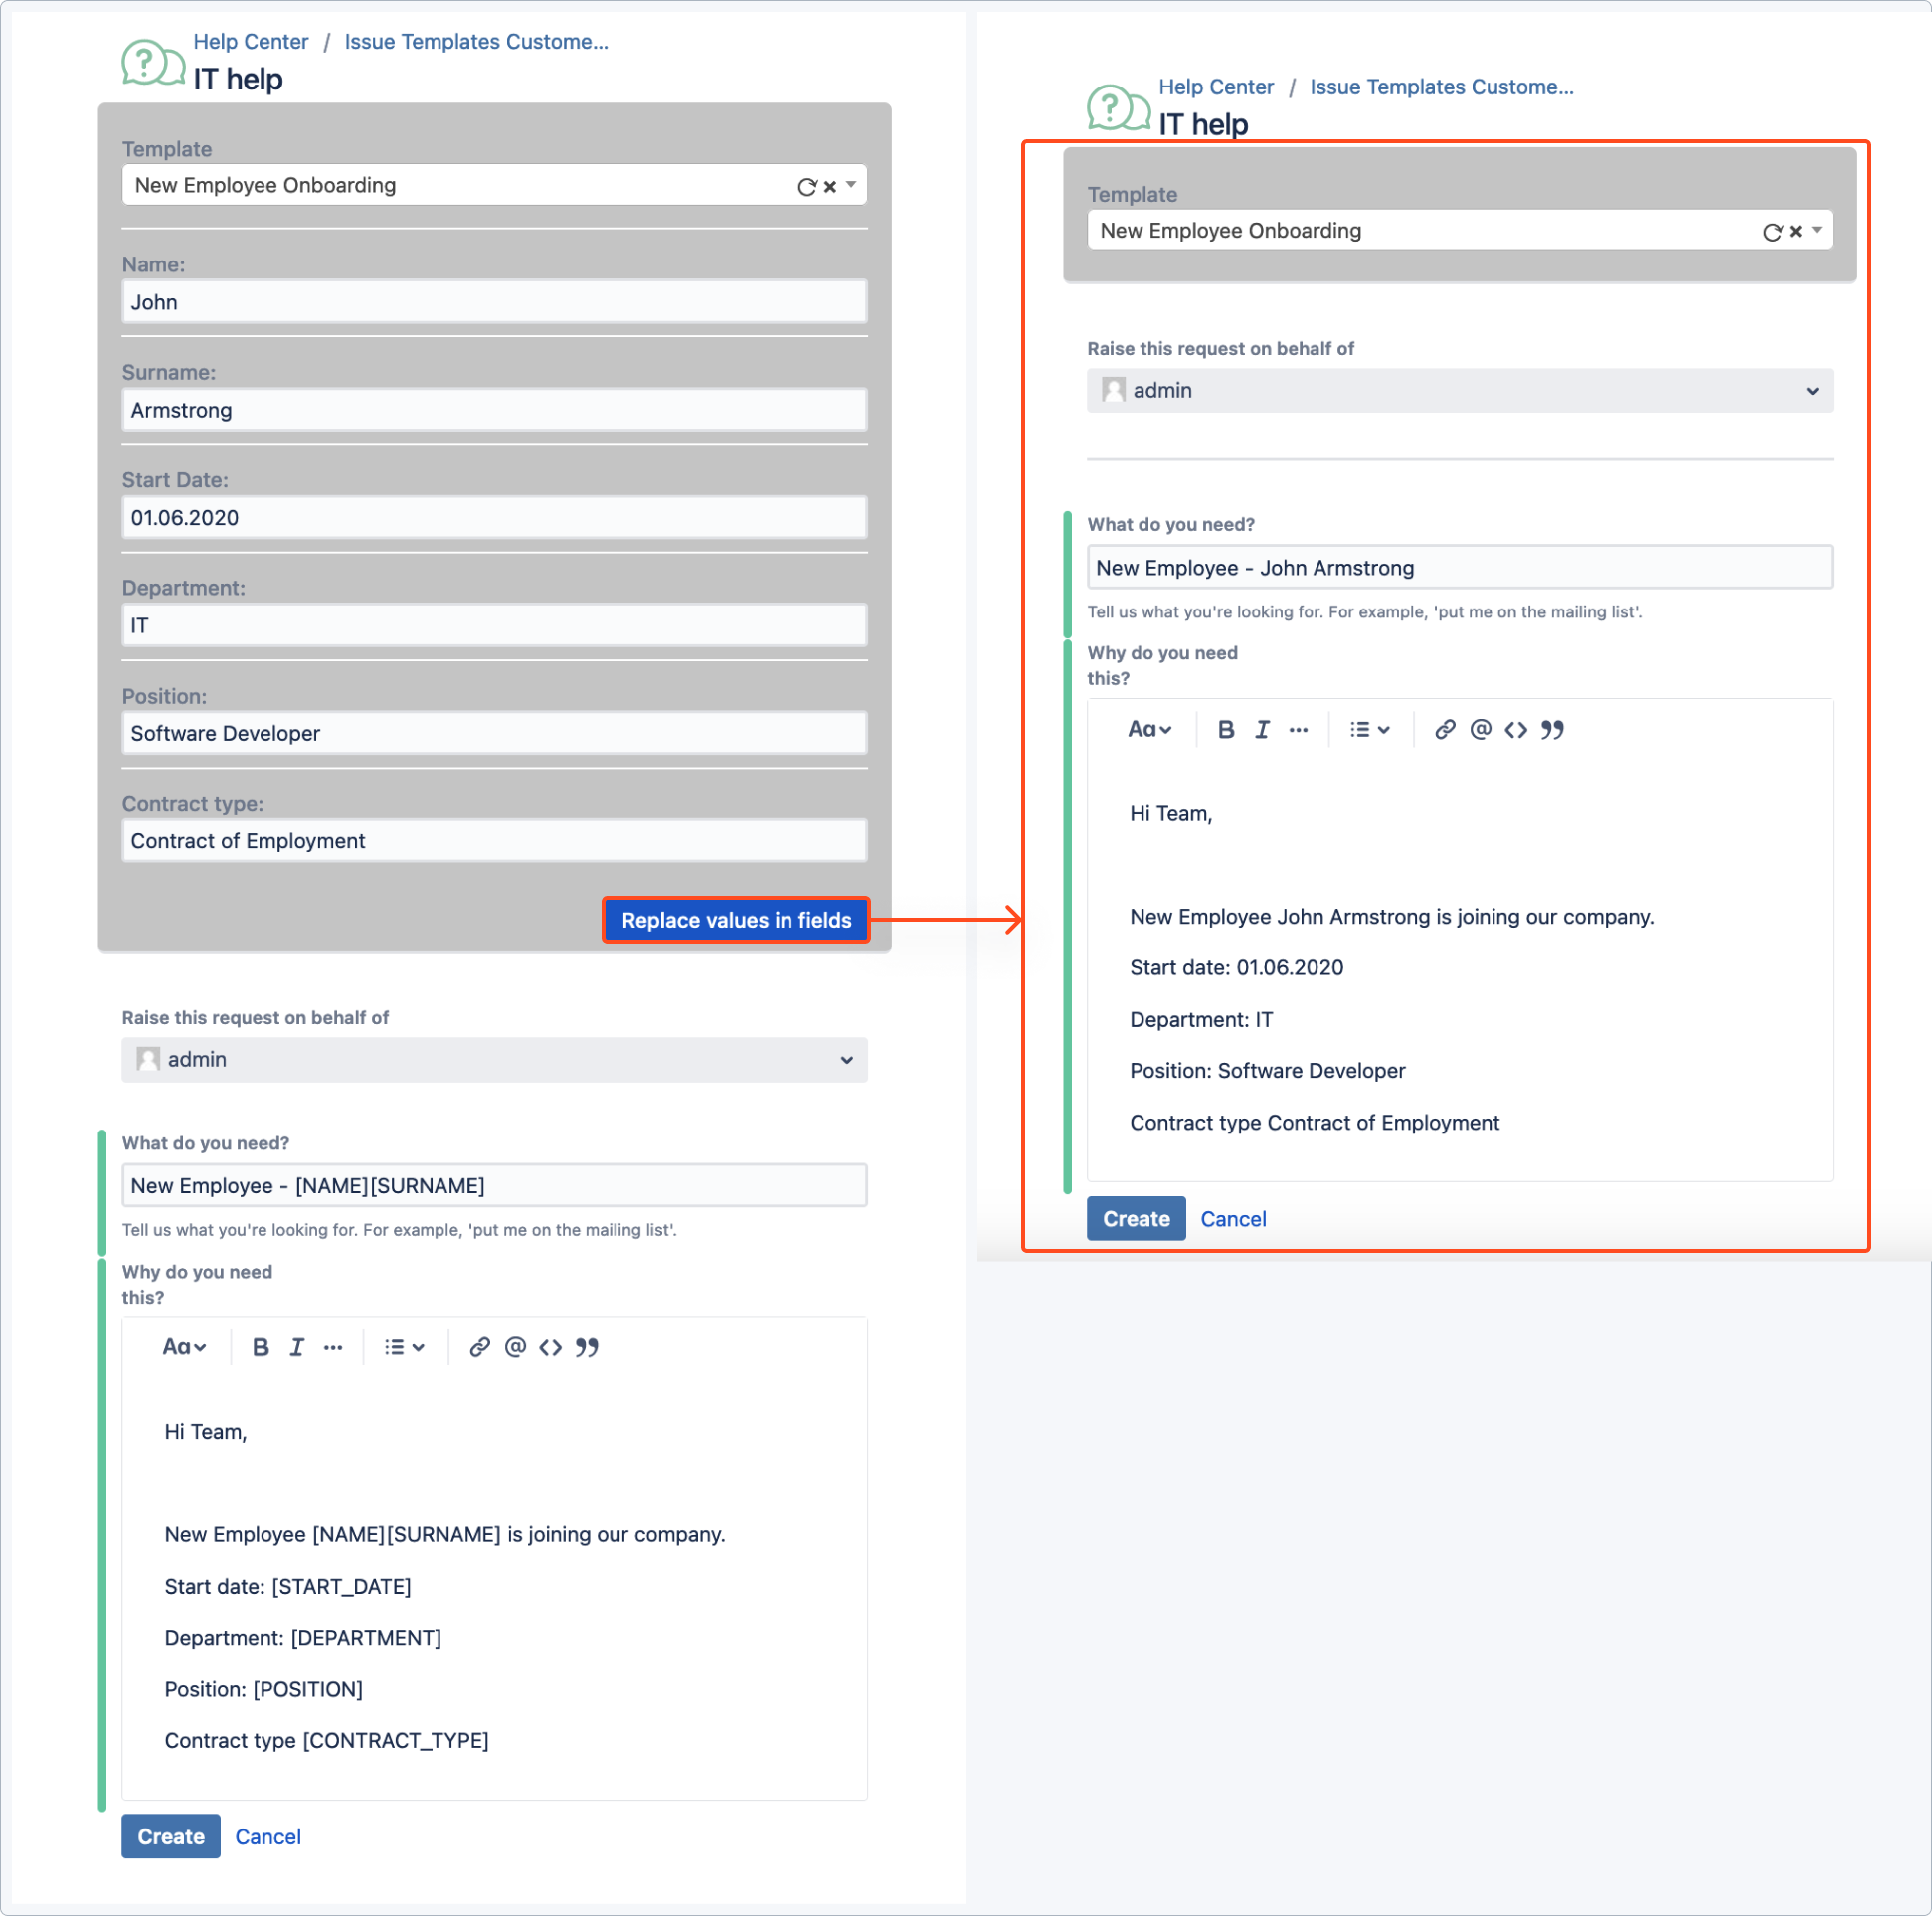
To use your template in the Customer portal, go to the Availability tab and switch on the toggle next to Request form.
Next steps
- Learn more about System variables
- Learn more about User variables
- Learn how to manage Global variables
- Read our Use case
- Learn about migrating variables from older app versions
If you can’t find the answer you need in our documentation, raise a support request.