With Test Repository, you can easily organize tests in each Jira project and build a custom structure that suits your needs best. Create new folders, add tests to them and manage these tests directly from the repository.
The Test Repository is accessible from the project sidebar. It’s view consists of two parts:
Tree folder view
Folder content view
Tree options
Uncategorized folder contains Test Case Templates that have not been categorized in any folder.
All folder contains all Test Case Templates from a particular project. From this folder, you can start to organize your tests and add Test Case Templates to created folders. Select Test Case Templates from the list and drag & drop into the destination folder.
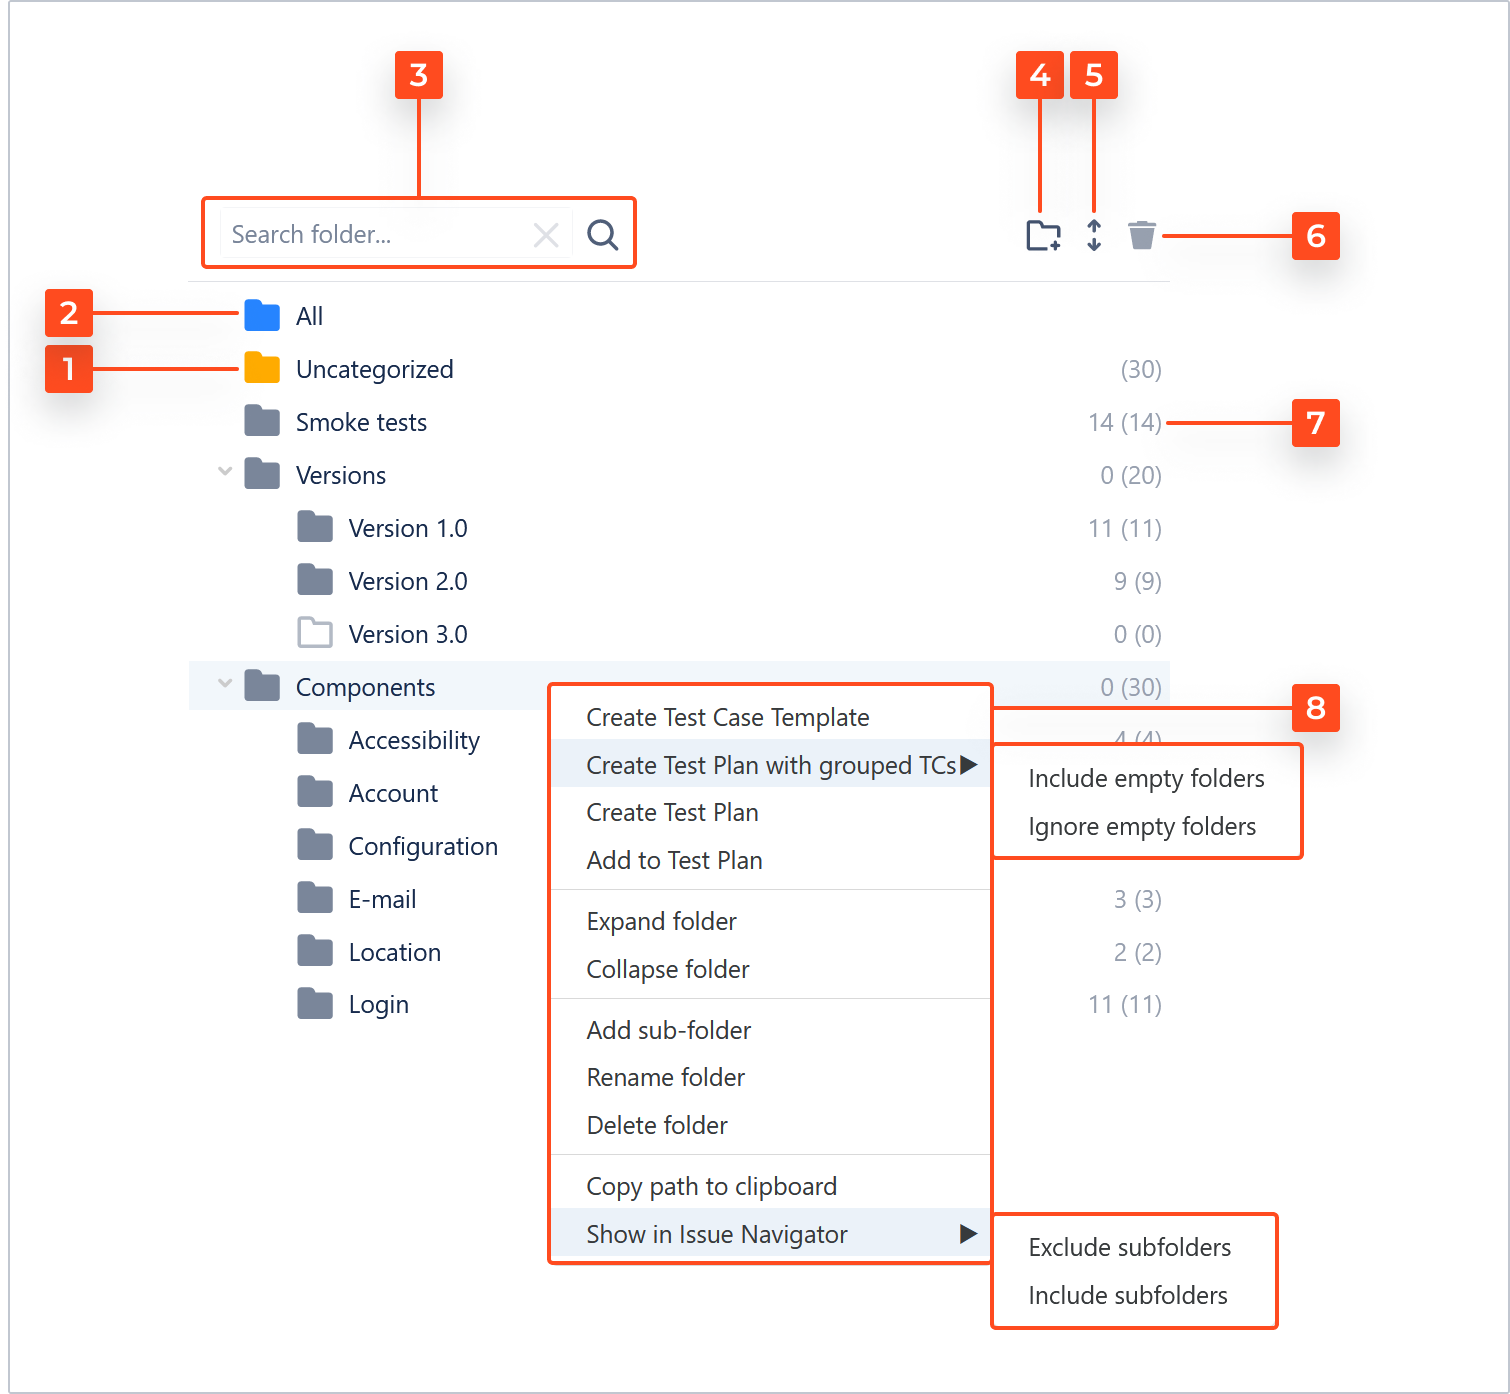
Search folder bar helps you find the desired folder. Type the phrase you want to find and click Enter or the magnifier icon. The results will be highlighted in the folder tree.
Folder icon adds a new folder to the tree.
Arrows icon expands/collapses all folders.
Bin icon deletes the folder and its content. After clicking the Bin icon, a dialog box appears. To confirm click Delete.
Tip
You can also use the Delete button on the keyboard.
Note
If the deleted folder contained Test Cases Templates that have not been categorized in any other folder they will be moved to the Uncategorized folder.
Shows the number of Test Case Templates in folder and sub-folder/s.
You can find more operations in the context menu. Right-click on the selected folder and you will be able to use the following options:
a. Create Test Case Template - creates a Test Case Template in a given folder.
b. Create Test Plan with grouped TCs - creates a Test Plan with Test Case groups based on sub-folder names (path name) and their content. You can use two strategies of creation: Include empty folders - creates a Test Plan with Test Case groups based on folders with and without content. Ignore empty folders - creates a Test Plan with Test Case groups based on folders with content (at least one Test Case Template in a folder). Doesn’t create Test Case groups based on empty folders.
Note
This option is shown when folder contains sub-folders.
c. Create Test Plan - creates a Test Plan with tests from a folder.
d. Add to Test Plan - adds all test from folder to selected Test Plan.
e. Expand folder - expands folder and its sub-folders.
f. Collapse folder - collapse folder and its sub-folders.
g. Add sub-folder - adds sub-folder to the folder.
h. Rename folder - changes the folder name.
Tip
You can also change the folder name by double-clicking the folder name.
i. Delete folder - deletes the folder and its content. After clicking on Delete folder, a dialog box appears. To confirm click Delete.
Note
If the deleted folder contained Test Cases Templates that have not been categorized in any other folder they will be moved to the Uncategorized folder.
j. Copy path to clipboard - copies folder path to clipboard which can be used when searching Test Case Templates from folders using JQL or adding given Test Case Template to Test Repository folder from the issue view.
k. Show in Issue Navigator - shows the contents of a folder in the Issue Navigator view. You can choose between two options and include or not include subfolders.
To move the folder in the tree structure use drag & drop option. Grab the folder icon and drag & drop the folder to the desired location.
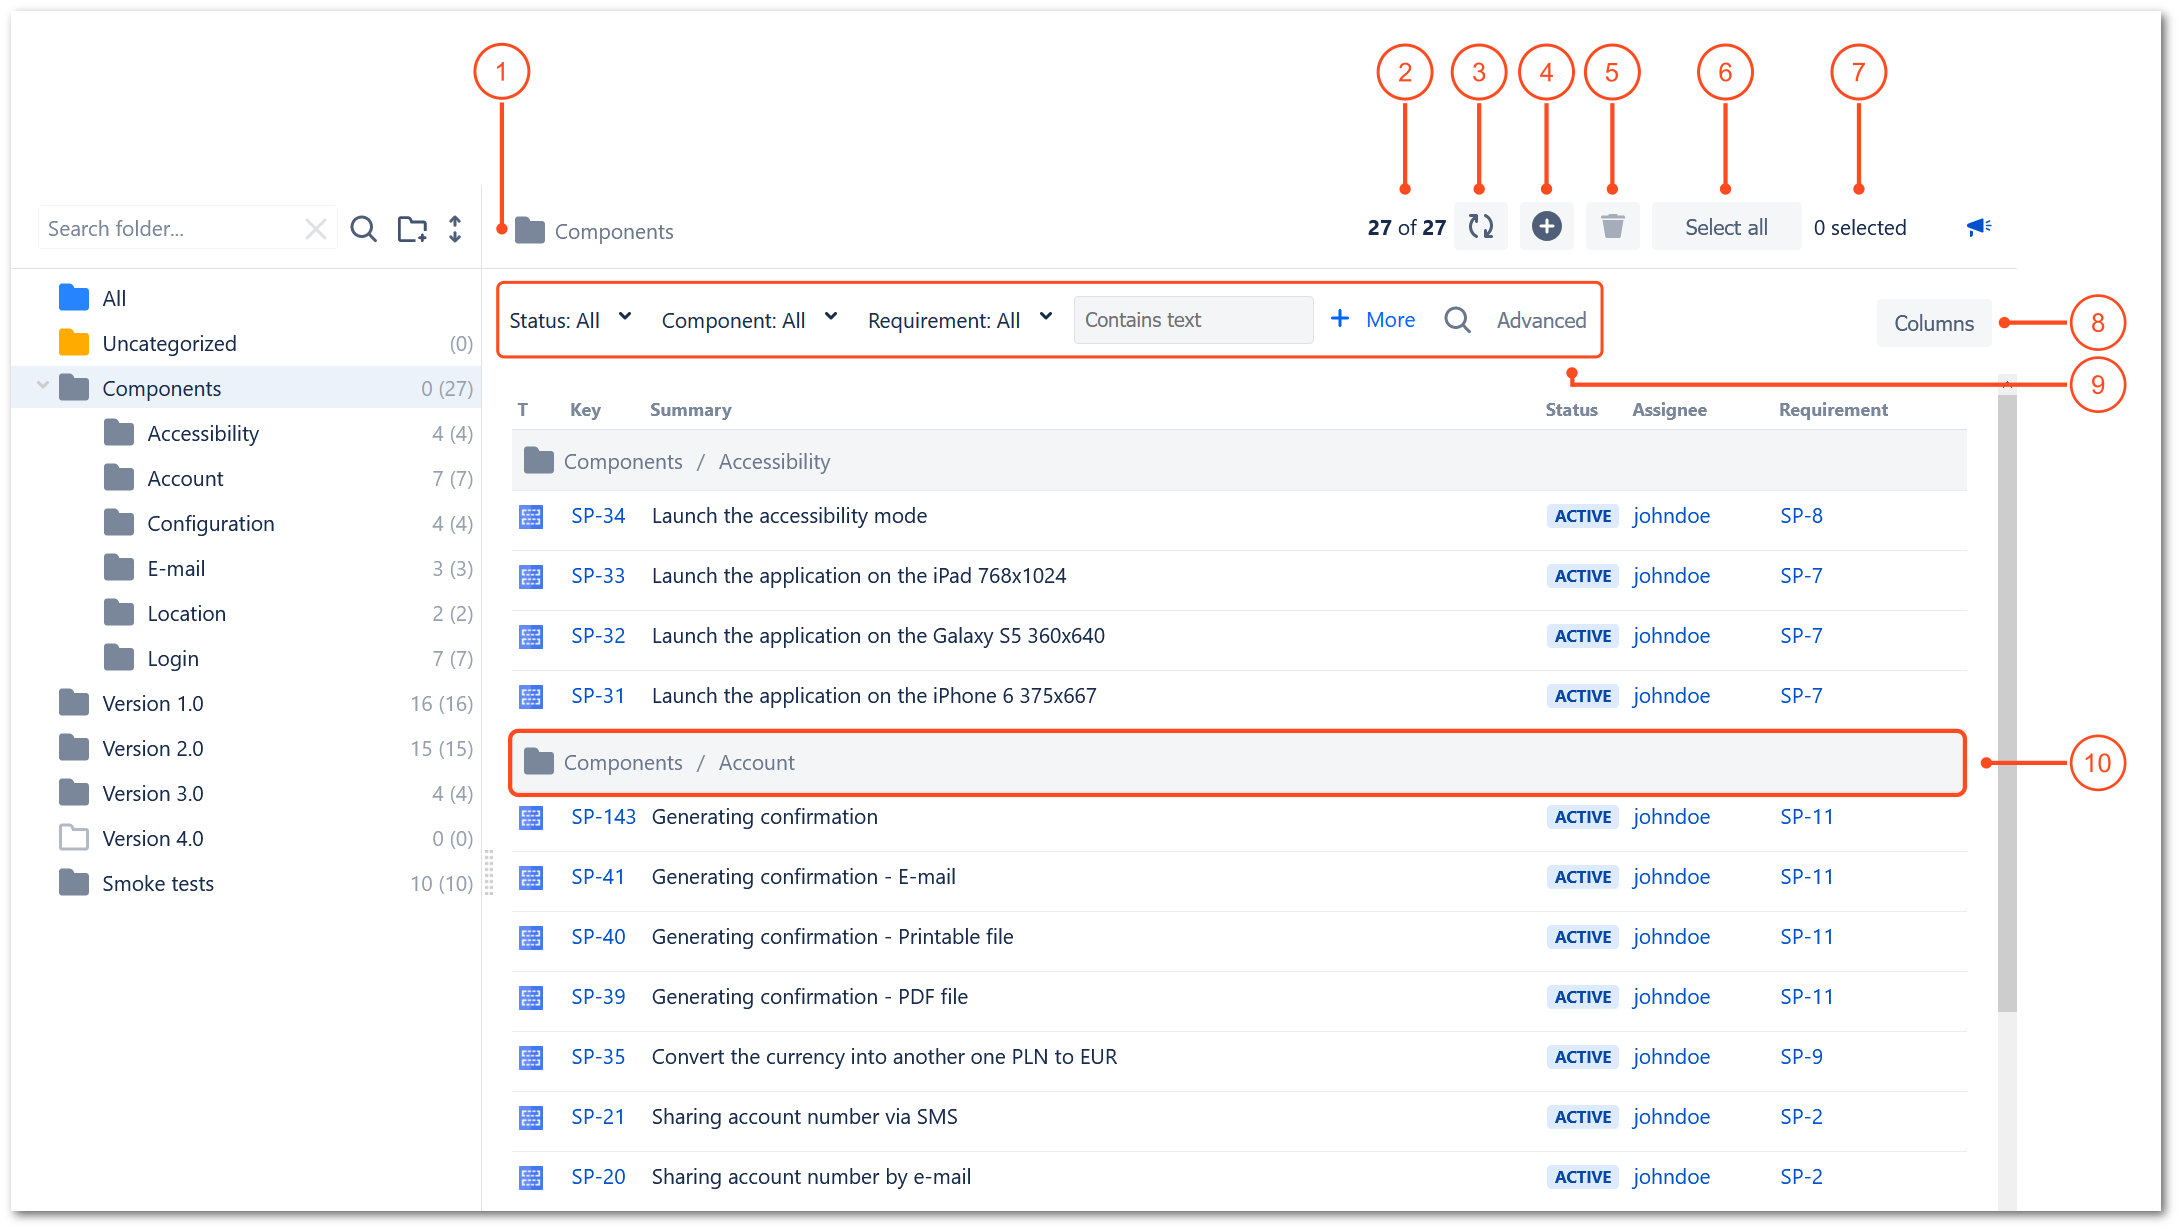
Folder options
The path of the displayed folder.
The number of displayed Test Case Templates.
Refresh icon refreshes the view of the folder and sub-folders content and all folder structure.
Plus icon creates a Test Case Template in a given folder.
Bin icon deletes selected Test Case Templates from the folder.
Select all selects all Test Case Templates from folder and/or sub-folder/s.
The number of selected Test Case Templates.
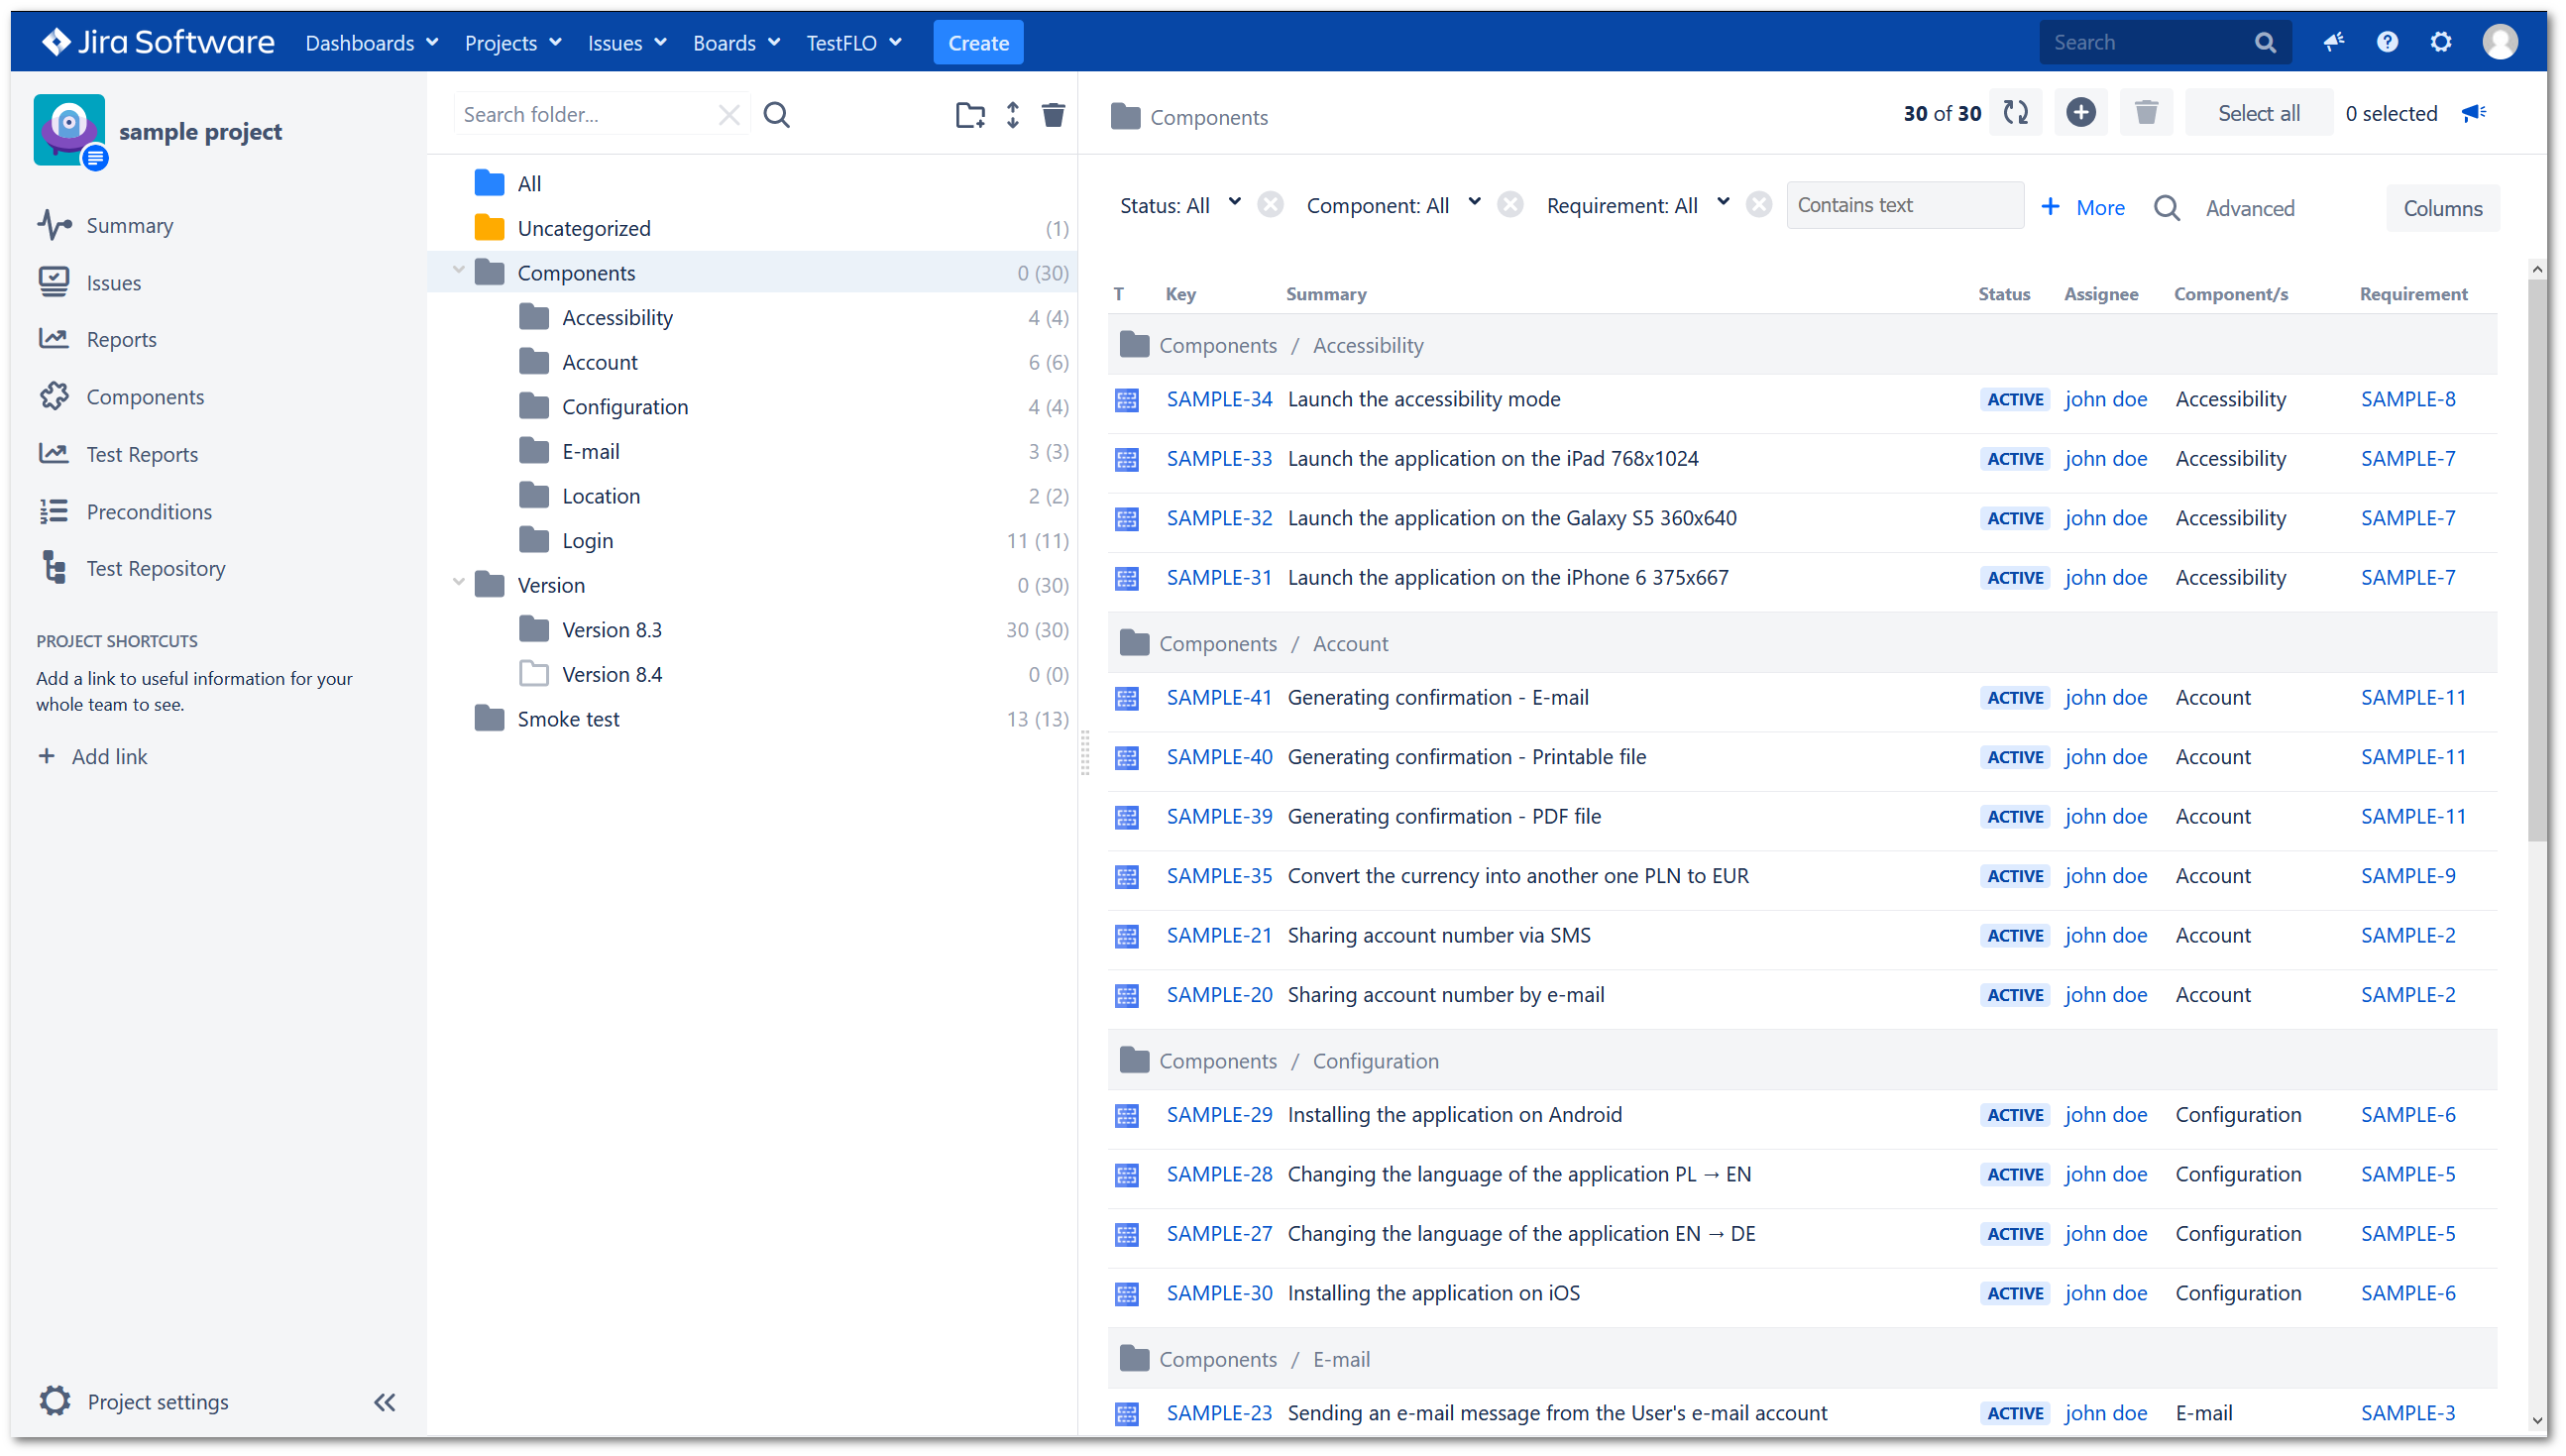
Under Columns, you can choose the fields that will be displayed as columns in the list of Test Case Templates. Select appropriate fields and click Save. If you want to change the order of displayed columns use drag&drop. Use the trash icon to delete the field from the view.
Basic/Advanced search helps to filter Test Case Templates.
Note
The search bar supports system and custom fields from Jira and custom fields from TestFLO.
Basic search contains built-in filters:
Status - contains only the statuses that are included in the Test Case Templates workflow
Component - available components in the project
Requirement - if requirements have been configured, they are narrowed down to selected issue types. Otherwise, all issues for the user are available.
To add more fields to search click + More. To narrow Test Case Templates select the criteria for the search. The search results will automatically update and for text search, press Enter, or click the magnifier icon.
Advanced search gives you the possibility to search using JQL. To change search type click Advanced. Type a JQL query and press Enter or click the magnifier icon to run. If your JQL query is not too complex, you can switch to Basic Search.
Filters are saved per user and their state is remembered until the next change.
The path of the sub-folder.
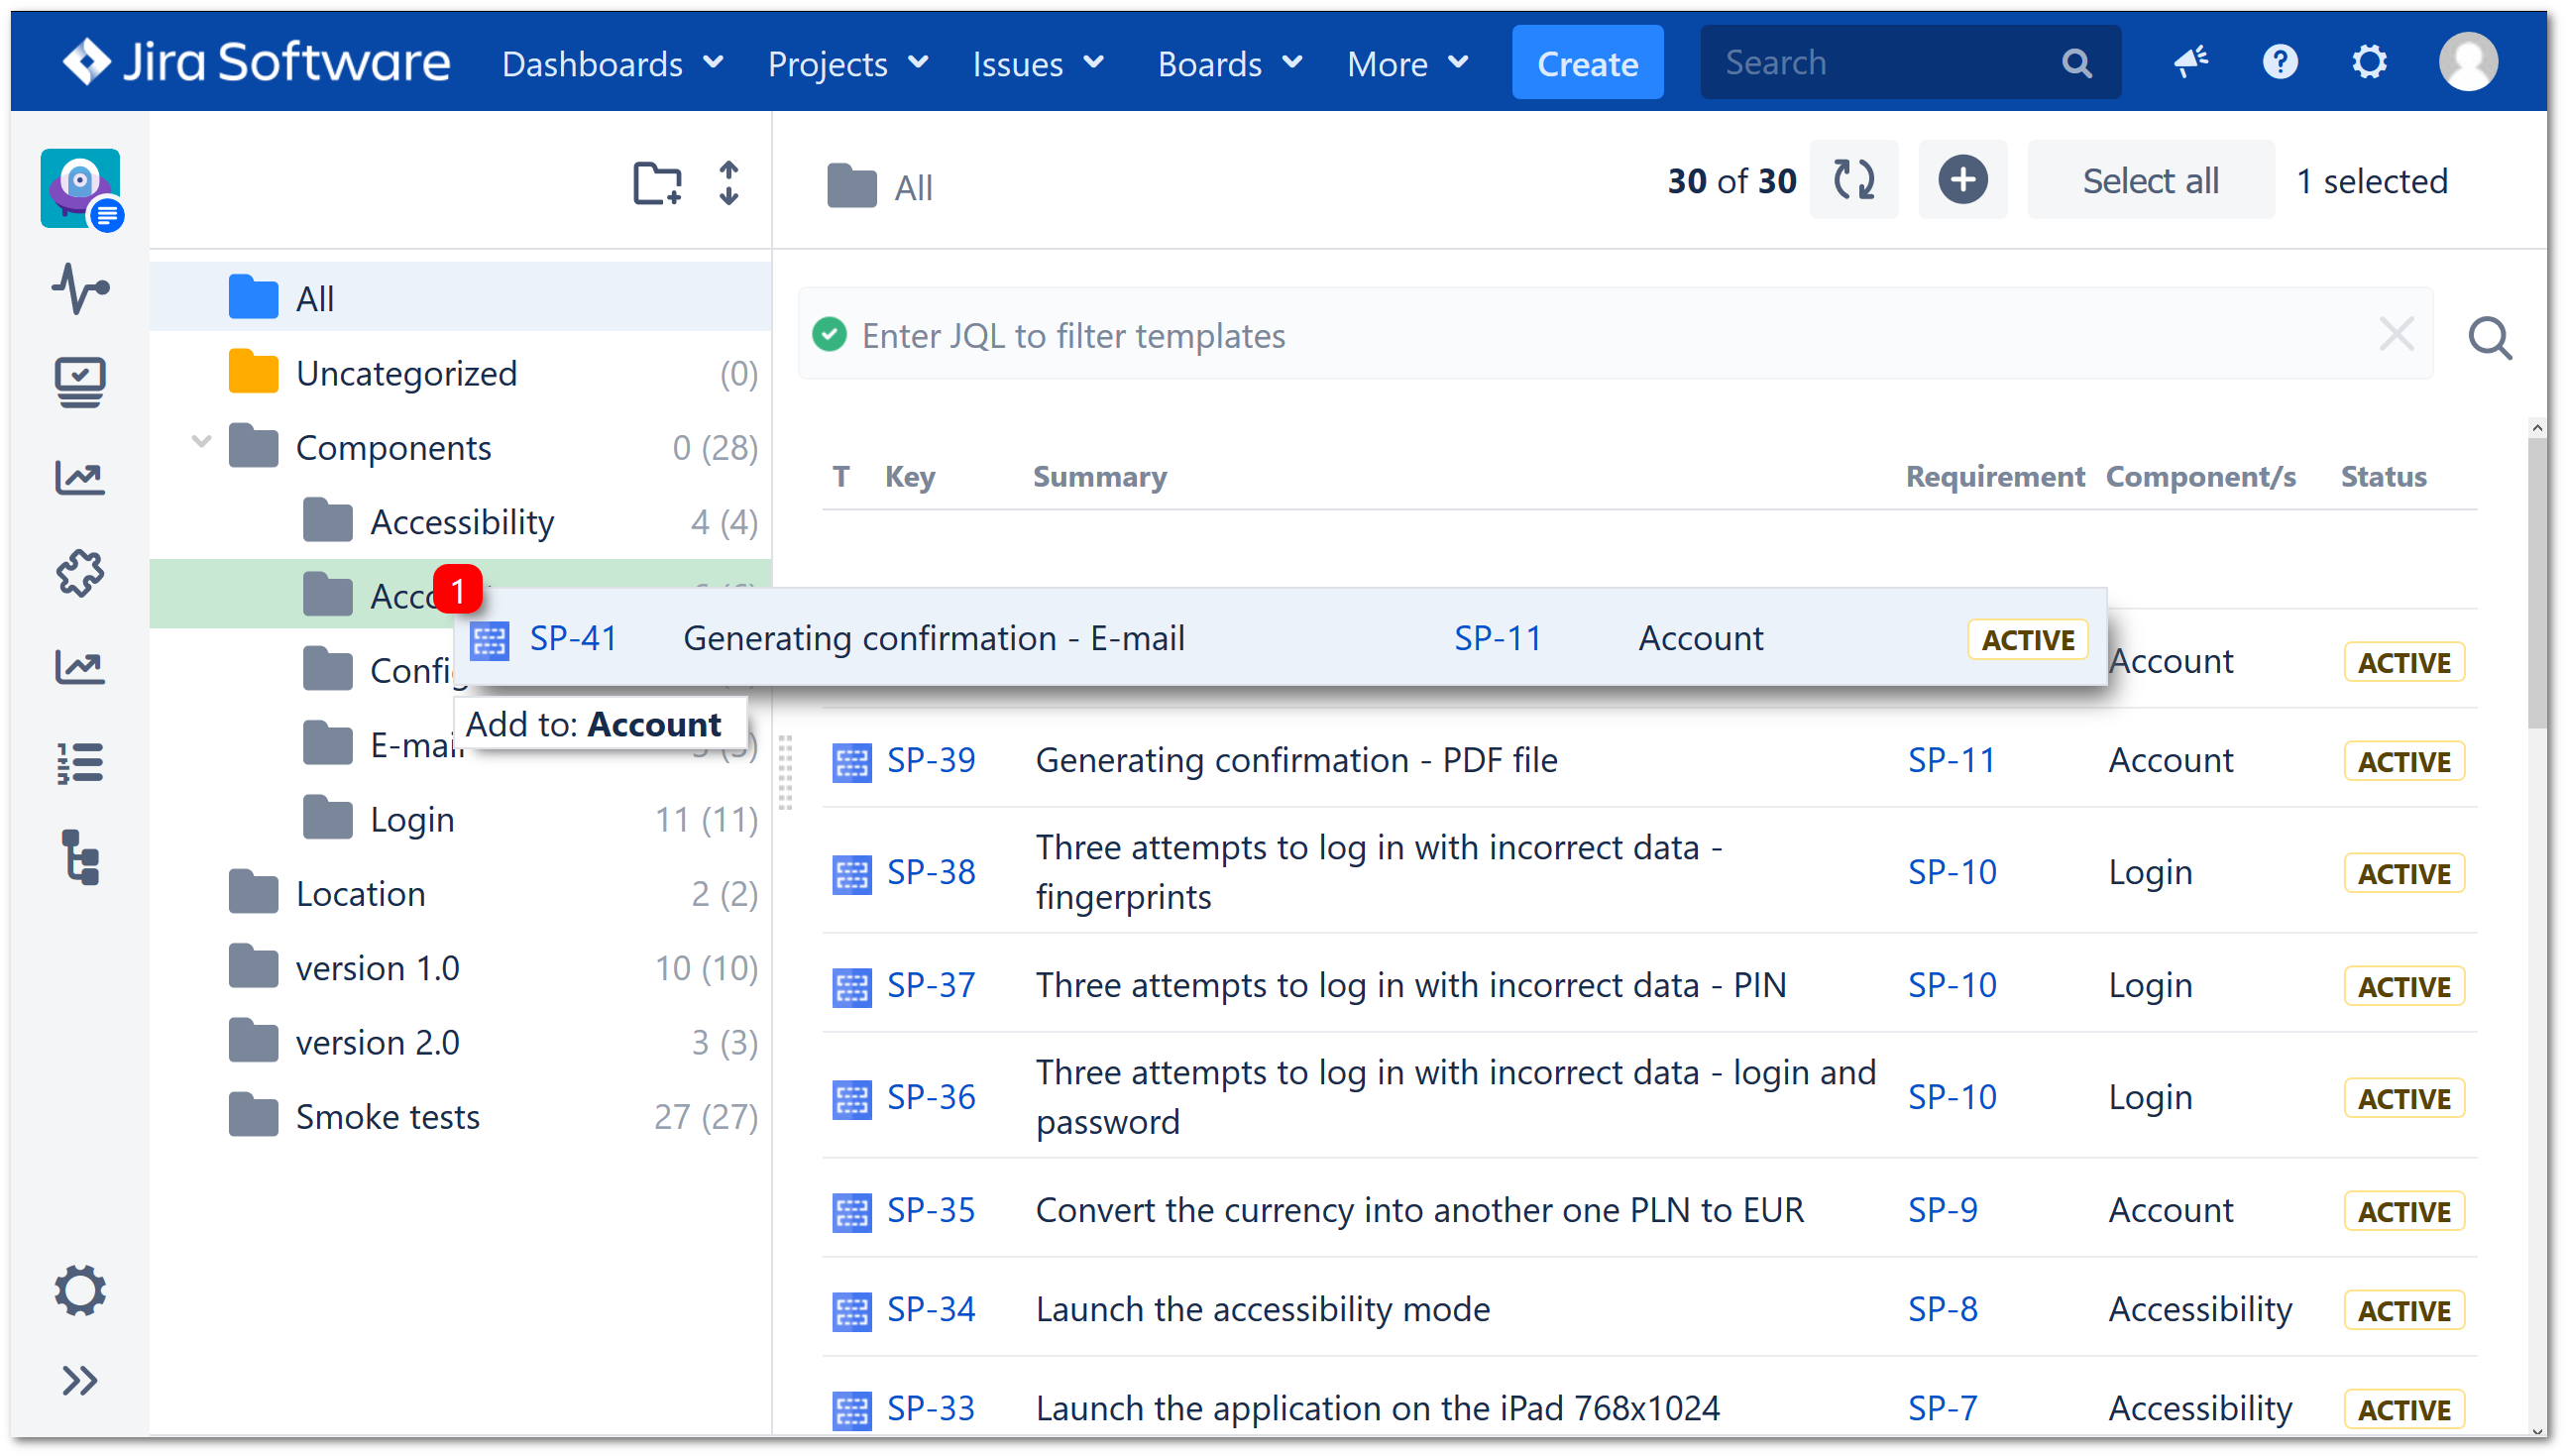
To move Test Case Templates from list to given folder select Test Case Templates and drag & drop into the destination folder. To select several templates, hold down the Ctrl key and click the names. To gather several templates sitting next to each other, click the first one and then hold down the Shift key as you click the last. You can also use the Select all button to select all templates.
Note
If in the folder to which you move Test Case Templates already contains these Test Case Templates, they will not be moved.
To organize Test Case Templates on the list use drag & drop option. Grab the selected templates and drag & drop to the target place.
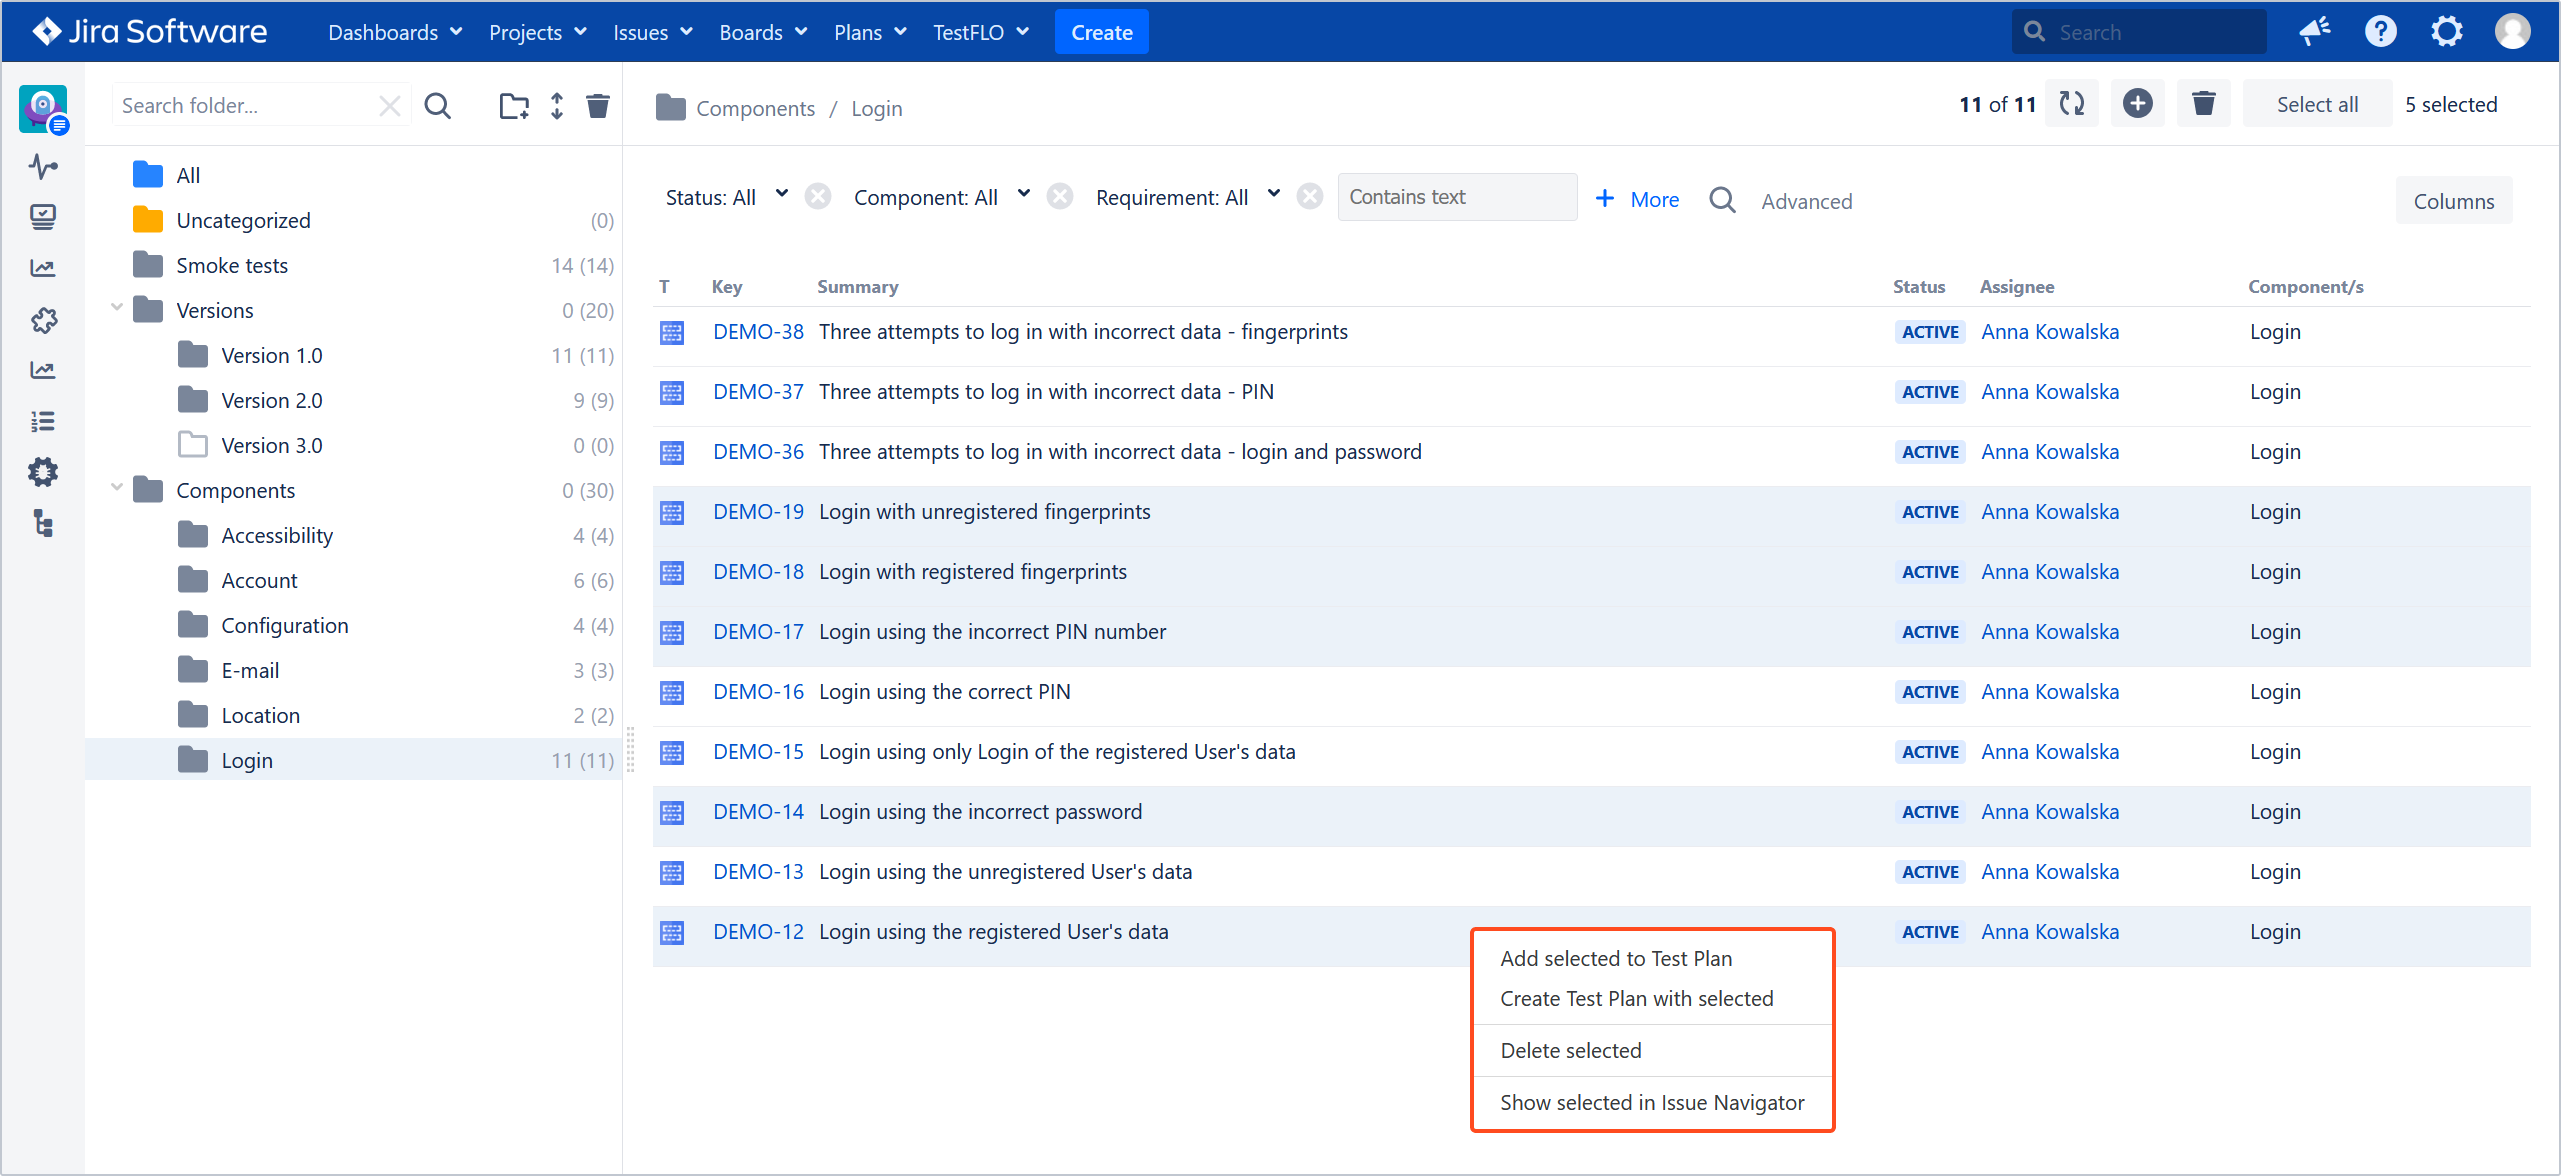
List of operations in the context menu:
a. Add selected to Test Plan - allows to choose Test Case Templates from the folder and sub-folder/s and add them to the given Test Plan.
b. Create Test Plan with selected - allows to create new Test Plan with selected Test Case Templates from the folder and sub-folder/s.
c. Delete selected - allows to delete selected Test Case Templates from the folder and sub-folder/s.
d. Show selected in Issue Navigator - shows selected Test Case Templates in the Issue Navigator view.
Need help?
If you can’t find the answer you need in our documentation, raise a support request*.
*Include as much information as possible to help our support team resolve your issue faster.

 Note
Note