- About TestFLO
- Overview
- For whom
- Key benefits
- Roadmap
- Onboarding
- Basic concepts
- Glossary
- Quick guide for Jira Administrator
- Quick guide for QA manager
- Quick guide for testers
- Demo environment
- Requirements
- Requirements
- Requirement operations
- Designing tests
- Test Case Template
- Organizing tests
- Reporting & tracking
- Reporting and tracking overview
- Requirement Test Coverage Report
- Requirement Traceability Report
- Requirement Test Execution Report
- Test Plan Execution Report
- Test Plan Iterations Report
- Test Execution Report
- Test information panel
- Issue panels
- Export test issues
- Dashboard Gadgets
- Miscellaneous
- TestFLO menu
- Issue Search Dialog
- JQL functions
- Administration & Configuration
- Projects' organization
- Create project
- Project configuration
- TestFLO settings
- TestFLO Permissions
- Custom fields
- Advanced workflow configuration
- Panel Filter Result
- Import/Export TCT
- Test Automation configuration
- Upgrade reports
- Upgrade guide
- Integrations
- Confluence
- REST API
- Configuration Manager for Jira
- Xporter
Import/Export Steps
This section provides information on how to import and export Steps on test issues.
The Import/Export function can be helpful if you prefer to write and modify steps by using external software. See how to prepare files and improve writing steps using import/export function.
On the issue type where the Steps panel exist it is possible to import steps from two kinds of files CSV format and JSON format.
You can also Export steps if needed. The exported file is in CSV format, which can be re-imported using the Import steps from CSV.
Import steps from CSV
Import to steps from CSV allow you to load bigger amount of data into a given Steps field from CSV file. This is a very simple function which is in the Steps edit mode.
The CSV file has to be encoded in UTF-8 format.
The steps column structure in a file has to be the same as the one that is configured in the Steps column in the General tab for the project in which you want to import file. The file should not have headers and the last “additional” column is always treated as a group (the row that contains the group should not have filled steps).
See Steps Configuration to get more information about Steps columns.
For example, if the configuration of the Steps field contains three columns and we want to add a group, the file should contain such a structure:
,,,Group1
First column data1,Second column data1,Third column data1
,,,Group2
First column data2,Second column data2,Third column data2
,,,Group3
First column data3,Second column data3,Third column data3
Steps after import:

Try import Steps with sample file - sample-file-import-to-steps.csv. The file contains the example shown above.
If you want to import only steps the file should contain such a structure:
First column data1,Second column data1,Third column data1
First column data2,Second column data2,Third column data2
First column data3,Second column data3,Third column data3
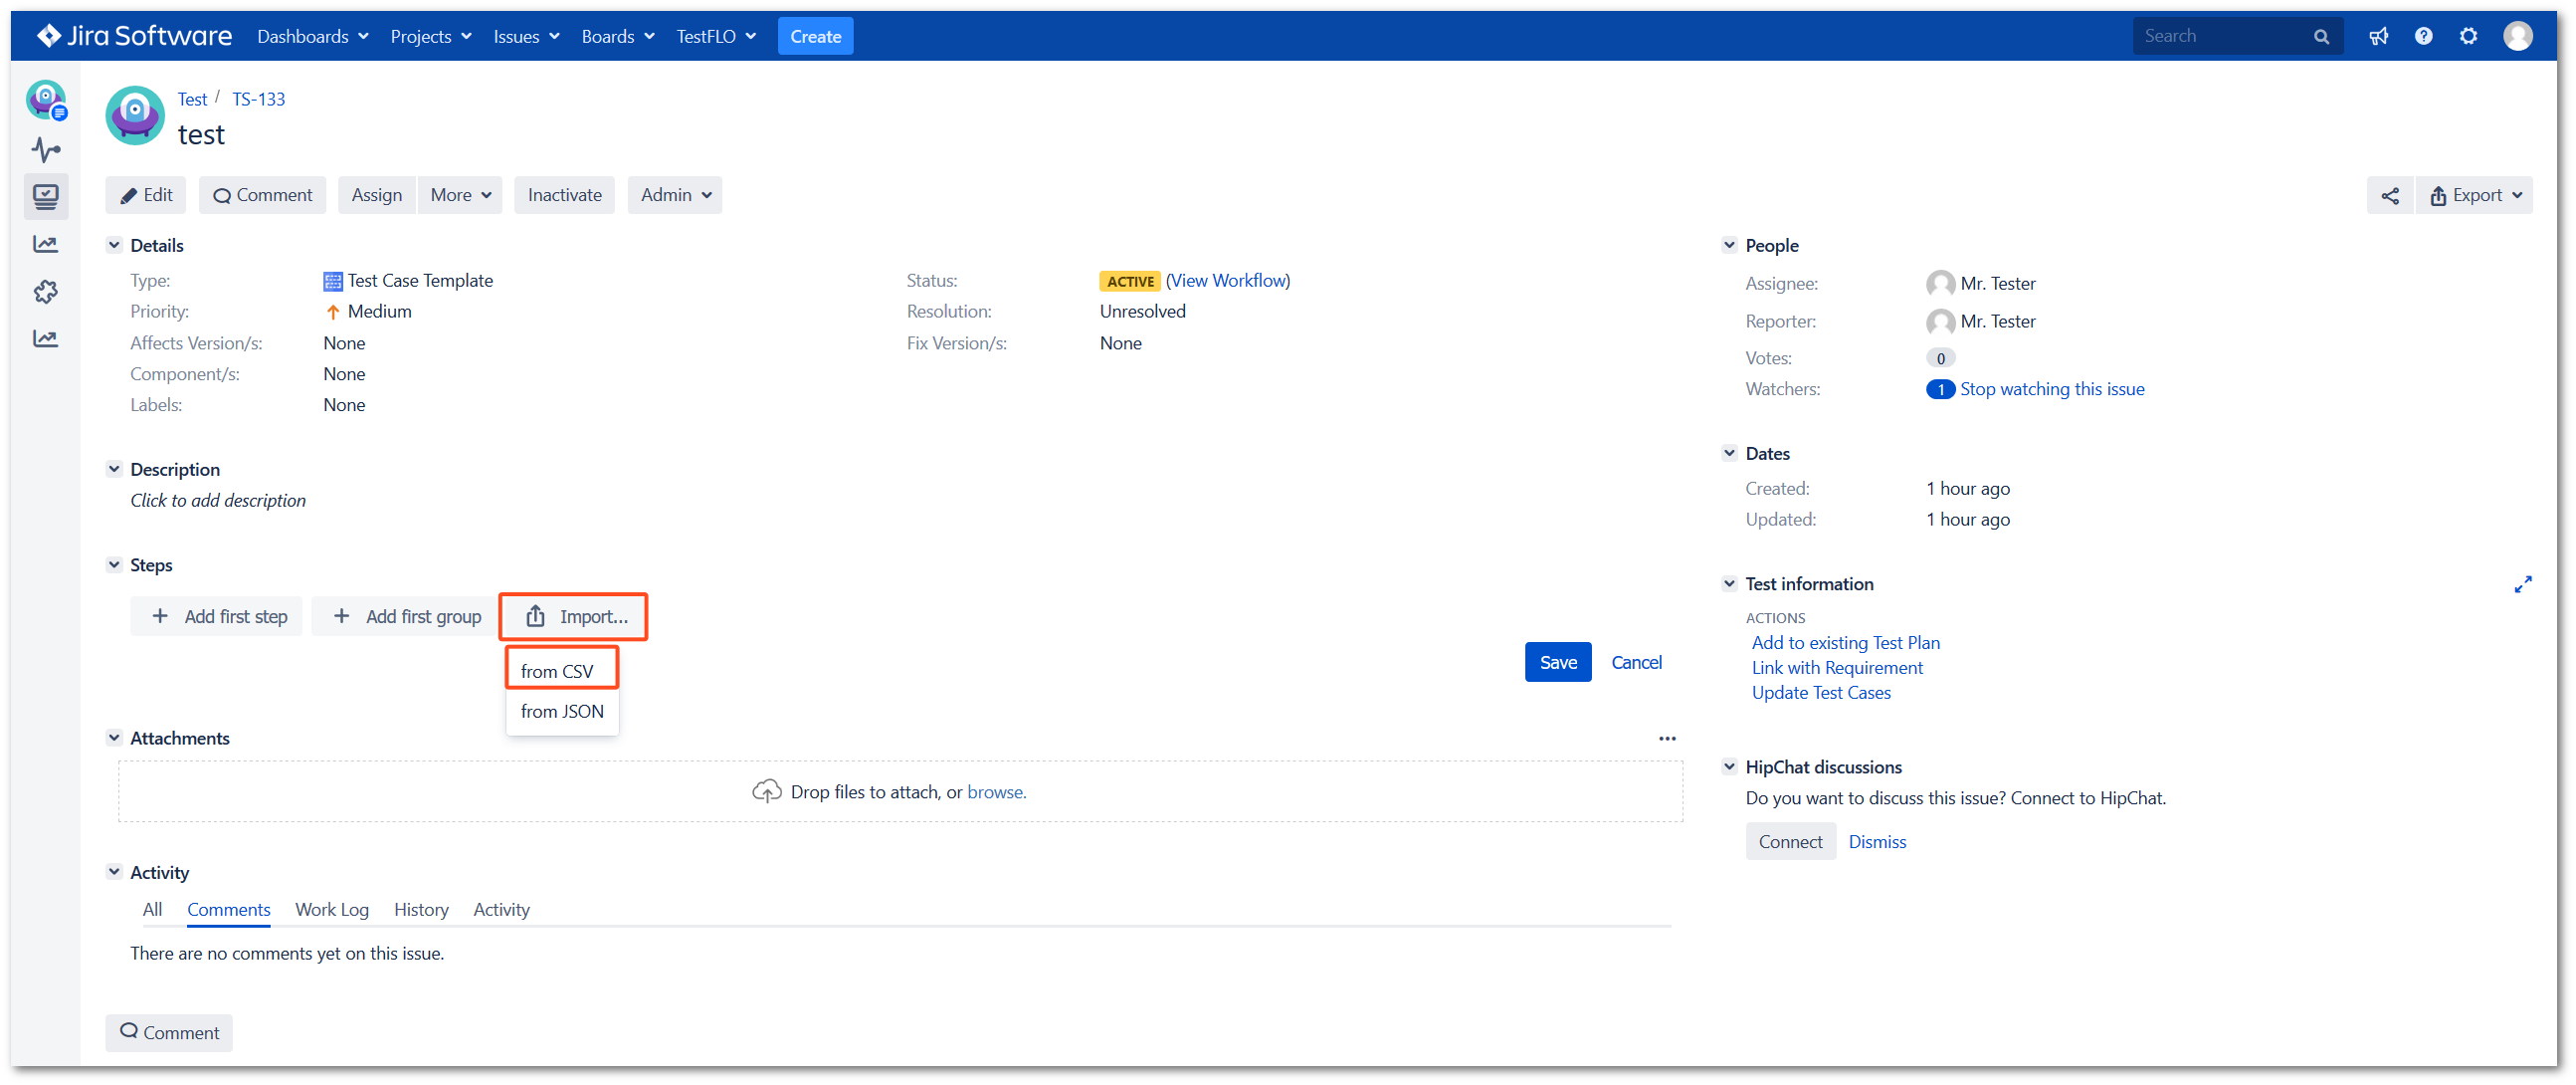
After preparing the file, all you need to do is use the Import button in the Steps edit mode and select option from CSV.

Import steps from JSON
The steps column structure in a file has to be the same as the one that is configured in the Steps column on the General tab for the project in which you want to import file. The file should have the appropriate structure. Steps and name of groups are entered after cells. Depending on whether it should be steps or groups, you should set false or true at “group”. The value false means that these are steps and you must complete the data for each column. The value true means that it is a group and you must complete the name of the group.
Click General tab to get more information about Steps columns configuration .
For example, if the configuration of the Steps field contains three columns and we want to add a group, the file should contain such a structure:
[
    {
        "cells": ["Group 1"],
        "group": true
    },
    {
        "cells": ["First column data1", "Second column data1", "Third column data1"],
        "group": false
    },
    {
        "cells": ["Group 2"],
        "group": true
    },
    {
        "cells": ["First column data2", "Second column data2", "Third column data2"],
        "group": false
    },
    {
        "cells": ["Group 3"],
        "group": true
    },
    {
        "cells": ["First column data3", "Second column data3", "Third column data3"],
        "group": false
    }
]
Steps after import:

Try import Steps with sample file - sample-file-import-to-steps.json. The file contains the example shown above.
If you want to import only steps the file should contain such a structure:
[
    {
        "cells": ["First column data1", "Second column data1", "Third column data1"],
        "group": false
    },
    {
        "cells": ["First column data2", "Second column data2", "Third column data2"],
        "group": false
    },
    {
        "cells": ["First column data3", "Second column data3", "Third column data3"],
        "group": false
    }
]
After preparing the file, all you need to do is use the Import button in the Steps edit mode and select option from JSON.

Export steps to CSV
Export to CSV allows you to export data from Steps. The function is available on Steps view mode. The exported file is in CSV format and contains the same structure as for the CSV import. Thanks to this, you can easily export data, apply any corrections and import the file again.
The CSV file has to be encoded in UTF-8 format.
