- Introduction
- About
- Onboarding
- Getting Started
- Demo backup
- User's guide
- Projects' organization
- Test design
- Organizing tests
- Test planning
- Test execution
- Requirements
- Operations
- Reporting and tracking
- Import/Export TCT
- Export test issues
- Issue search dialog
- TestFLO menu
- Admin's guide
- Project configuration
- Test Automation configuration
- TestFLO settings
- TestFLO Permissions
- Custom fields
- Advanced workflow configuration
- Panel Filter Result
- Upgrade reports
- Upgrade guide
- Integrations
- REST API
- Configuration Manager for Jira
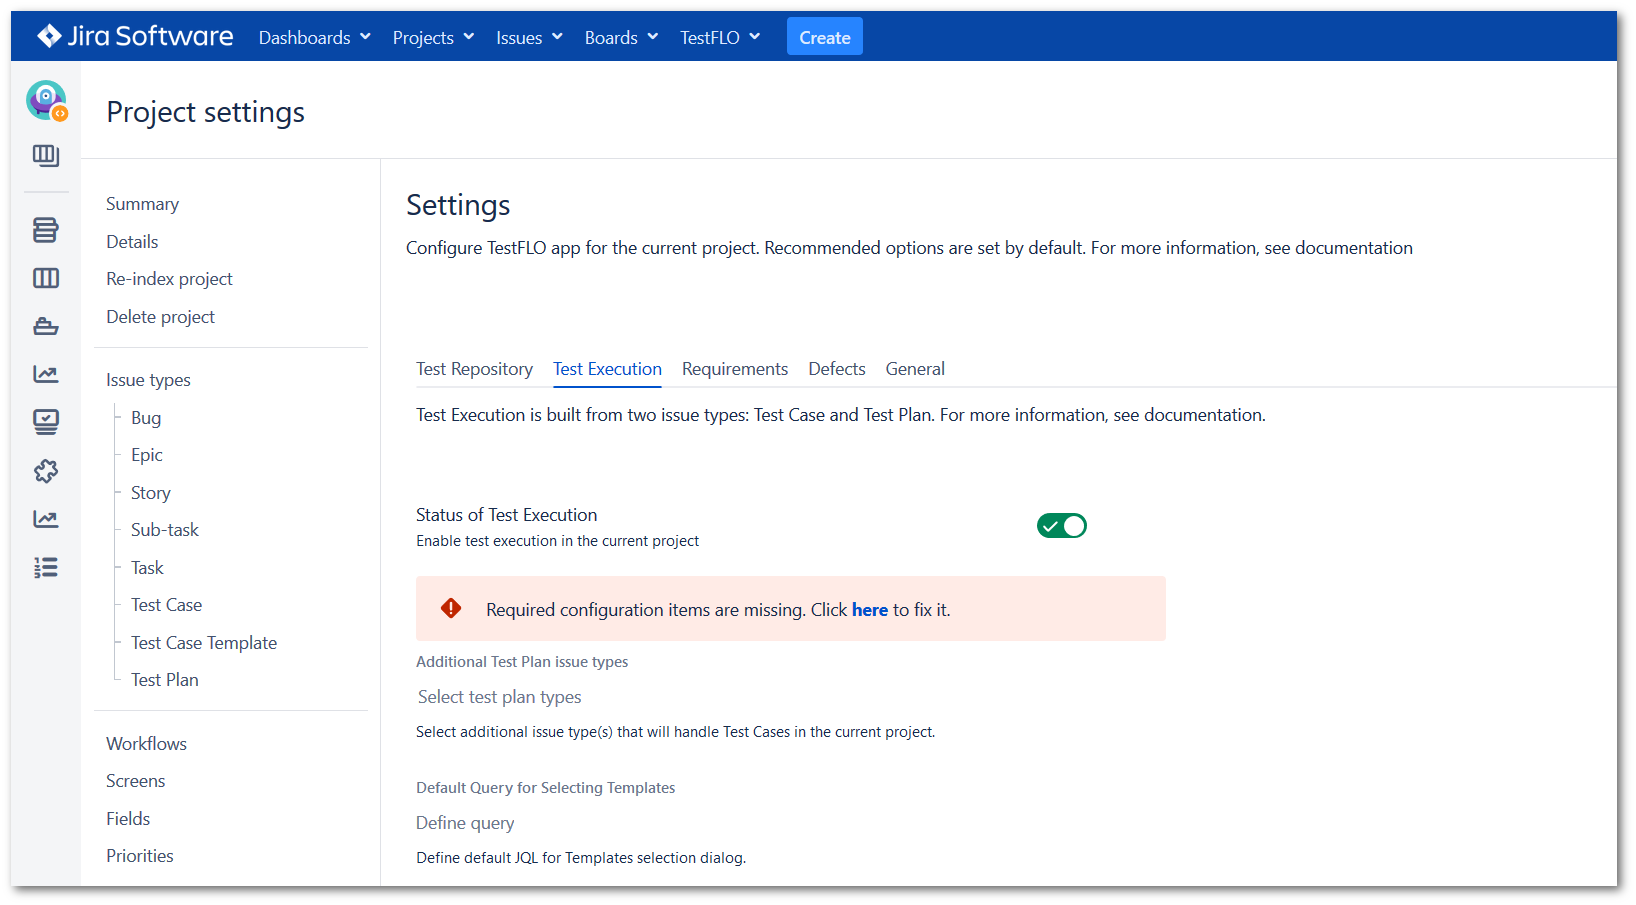
Test Execution tab
The Test Execution module gives you the opportunity to execute tests. After enabling the Test Execution module, the Test Plan and Test Case issue types will be created. You can design Test Plans using previously Test Case Templates that will be transformed into Test Cases when added to the Test Plan. You can also create Test Cases directly on the Test Plan.
Steps
To enable the Test Execution module
- Click the slider to enable module

Result
The Test Execution is enabled. Now the Test Plan and Test Case issue types are avaiable to create in project.
Also new options are avaiable to set:
- an additional issue types as Test Plan
- default query for searching templates

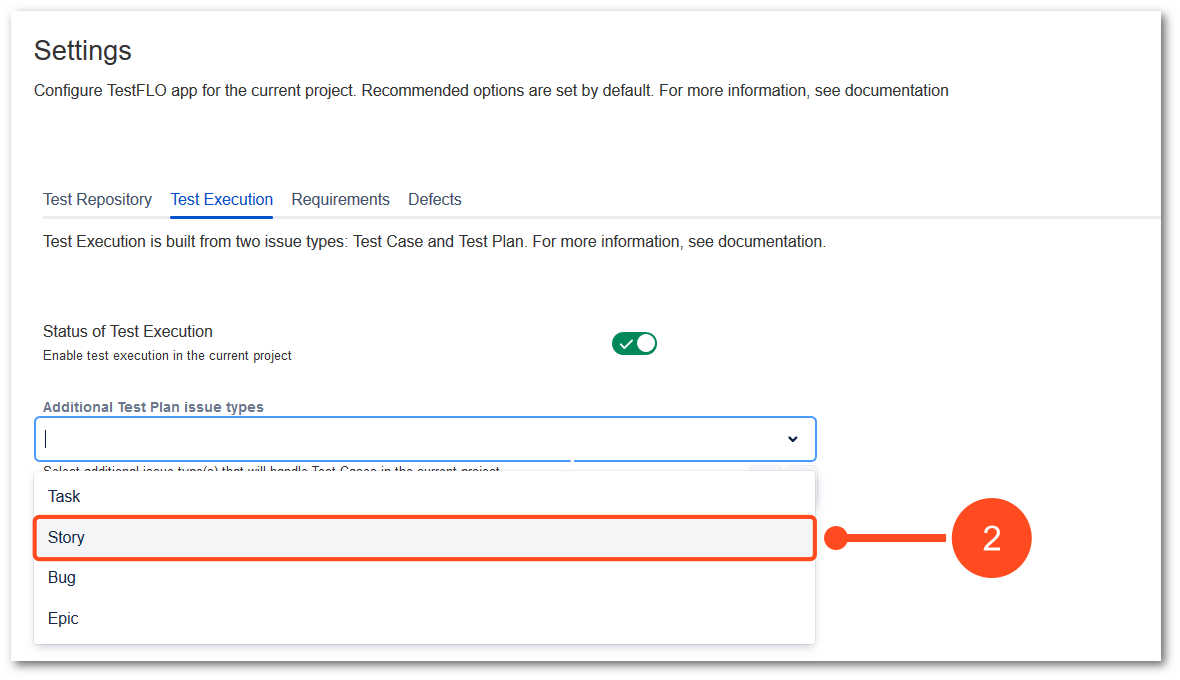
Additional Test Plan issue types
Selected issues in this option inherit all Test Plan functions. You will be able to create Test Cases, perform tests and track their progress.
Steps
To add an additional issue types
- Click Select test plan types.

- Select issue type which will be treated as additional Test Plan.
- Confirm choice by clicking on checkmark.
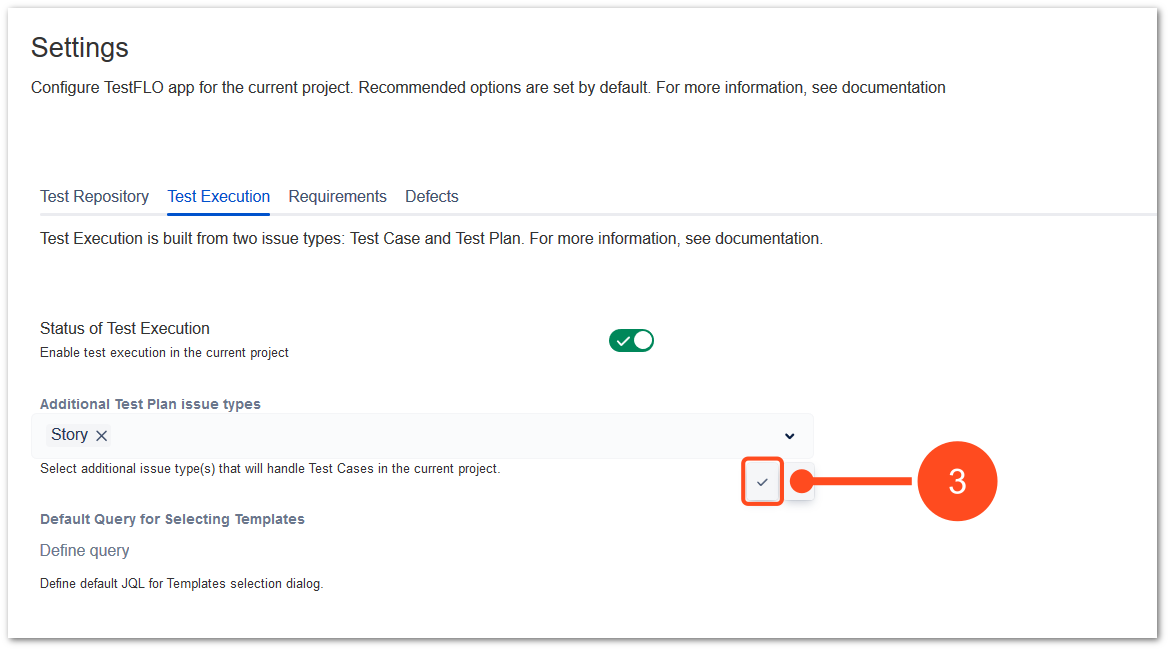
Result
The configuration for additional issue type is saved. From now on the chosen issue type will contain all features from Test Plan.
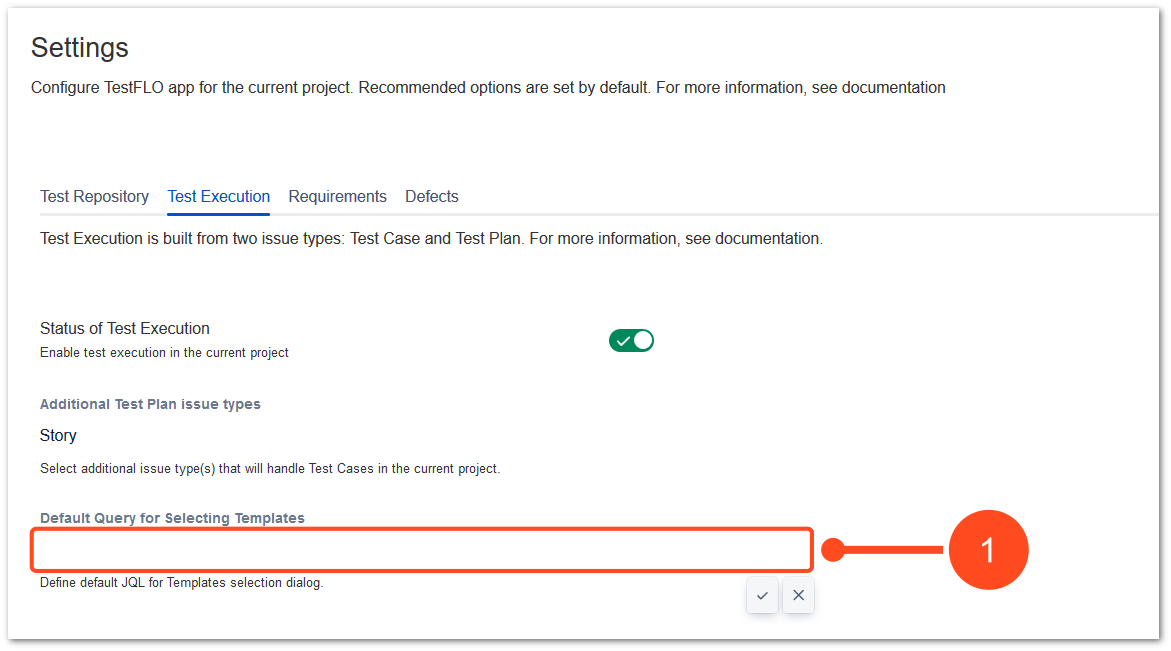
Default Query for Selecting Templates
With this option you can set a default JQL query that will filter the Test Case Templates in the selection dialog on the Test Plan.
Steps
To set default query
- Click Define query.
- Enter the default JQL query.
- Confirm by clicking on checkmark.
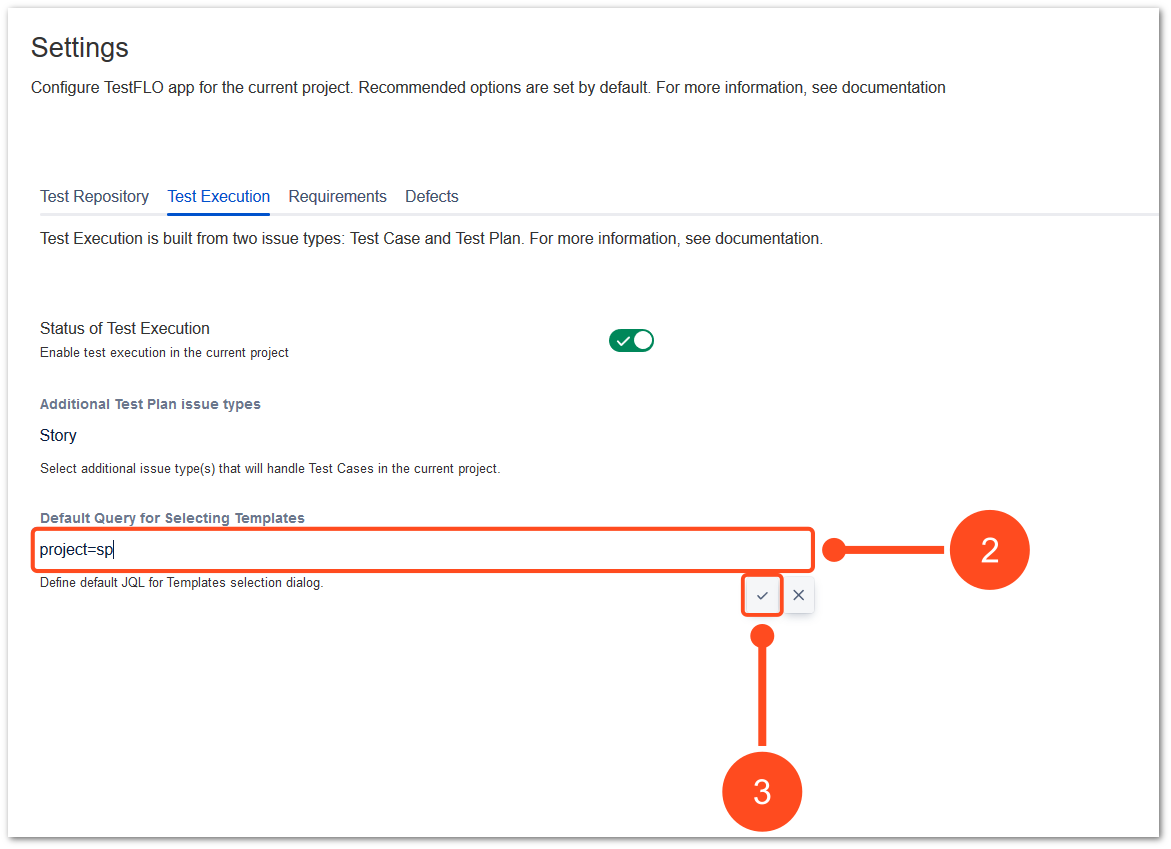
Result
The default JQL query is saved. From now on, when you use the Create Test Cases operation, the selection dialog will be display only the filtered Test Case Templates from the saved query.
Validation and fixing
The Test Execution module has validation of its items. All changes in the default configuration will be detected and depending on whether it is an item required or optional, an appropriate message will be displayed. Changes to the required elements or lack of them may cause the TestFLO to malfunction.
If changes in the Test Execution configuration items are intentional, there is no need to fixing it. Have in mind that all changes in required items may cause to malfunction. We recommend avoiding changes or removing required items.
Type of validation messages
If the default configuration changes a message will be displayed under the Status of Test Execution. Red type of message shows missing required items and blue type shows missing optional items.
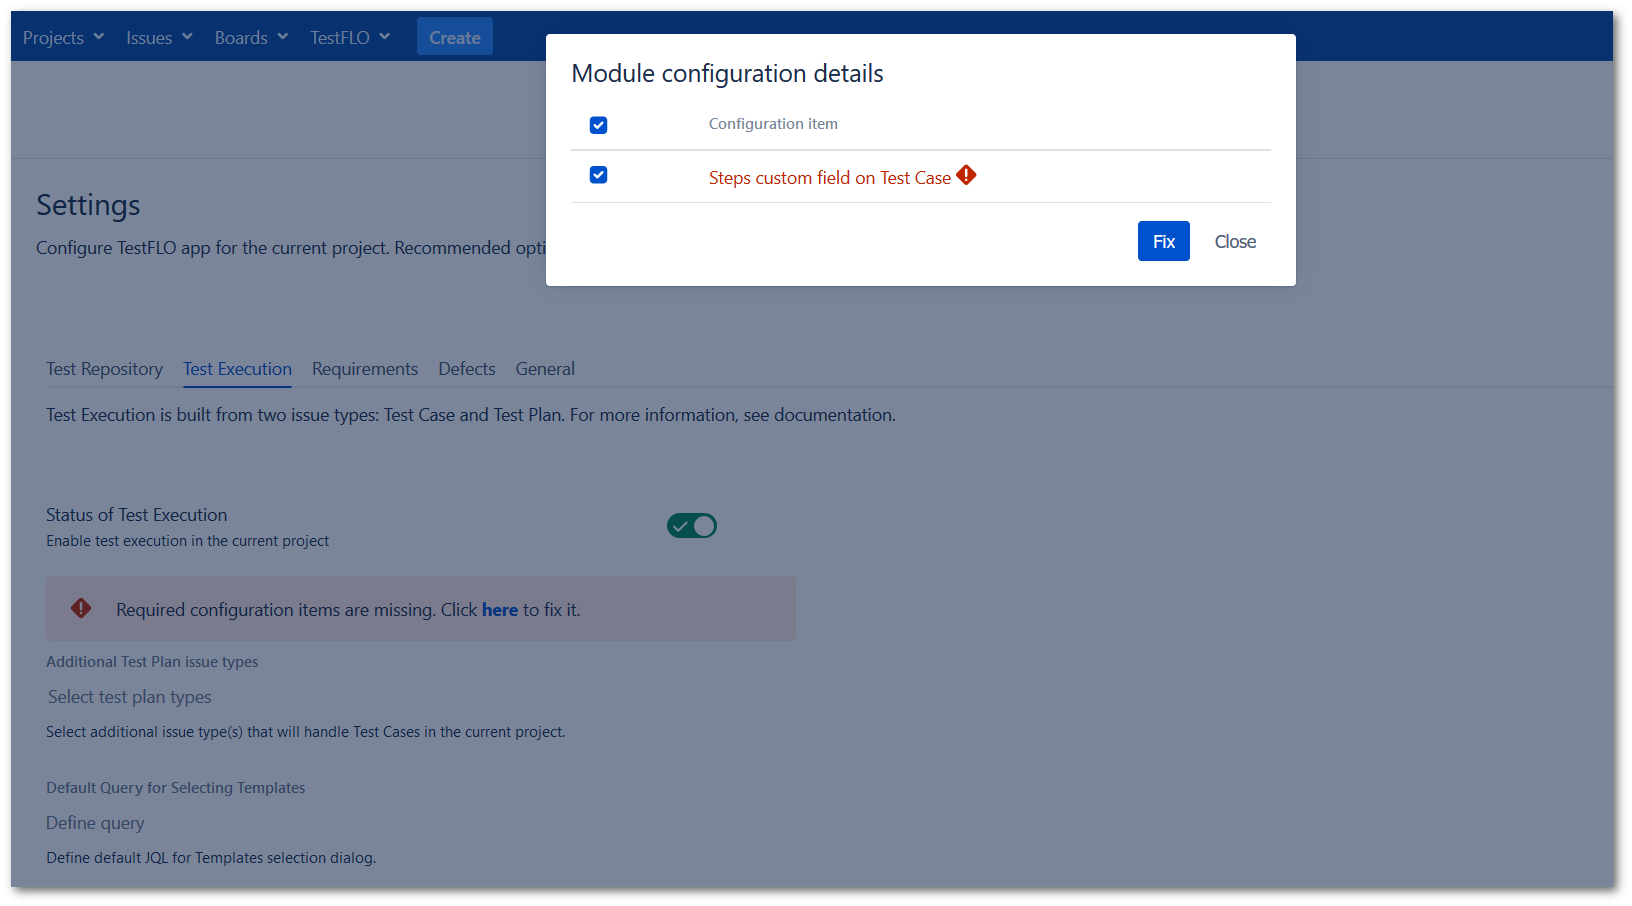
Red message box for required items
The required configuration items for Test Execution are:
- Test Case in project Issue Type Scheme
- Test Plan in project Issue Type Scheme
- Requirement custom field on Test Case Issue Screen
- Requirement custom field on Test Plan Issue Screen
- Steps custom field on Test Case Issue Screen
- TC Status custom field on Test Case Issue Screen
- TC Template custom field on Test Case Issue Screen
- Defect custom field on Test Case Issue Screen
- Defect on TP custom field on Test Plan Issue Screen
- TC Group custom field on Test Case issue type
- selected columns in Test Cases panel columns option in Test Case in TestFLO Settings
To fix missing required items click here. You will be redirected to Module configuration details dialog which displays a list of configuration items. The required items are highlighted in red and automatically marked on a list. To fix the missing item, click the Fix button.
Blue message box for optional items
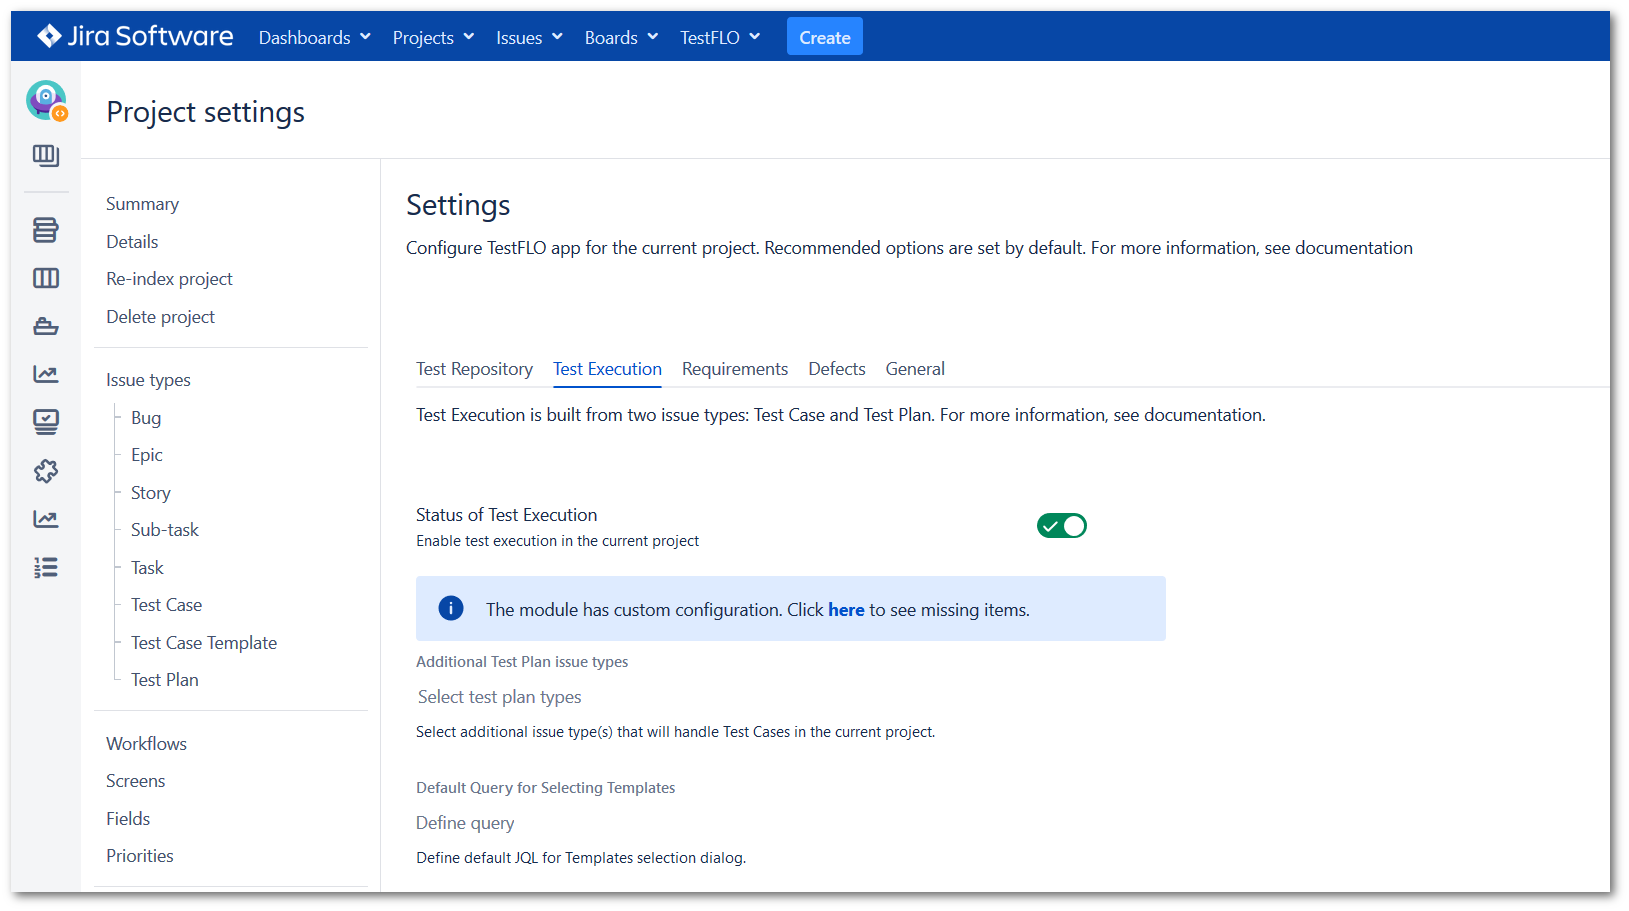
To fix missing optional items click here. You will be redirected to Module configuration details dialog which displays a list of configuration items. To fix the missing item, click the Fix button.