- Introduction
- About
- First steps
- Migration to Cloud
- Admin's guide
- Global settings
- Configure queues
- Create group
- Edit group
- Manage groups
- Reorder queues
- Date settings
- Import queues
- Export queues
- User's guide
- Personal preferences
- Searching
- Favorites
- Filtering issues
- Editing assignee
- Issues per page
- Sorting issues
- Hiding queue
- Hiding group
Editing assignee
This chapter provides information about assigning issues directly from the queue view without going into a specific issue.
To edit the Assignee, editing has to be enabled by the admin and the user must have the Assign issues permission in a Jira project.
If the admin turns off the editing or someone doesn’t have the necessary permissions granted, they won’t be able to change the Assignee and will have a Read-only view.
The Queues for JSM app allows users to assign issues to the Jira users directly from the view of their queue without going into a specific issue.
There are 3 possible scenarios a user can face when editing an assignee:
- The Issue assigned to me
- The Unassigned issue
- The Issue assigned to a team member
Steps
The example shows the Issue assigned to me scenario.
To edit the assignee in the issue assigned to you, follow these steps:
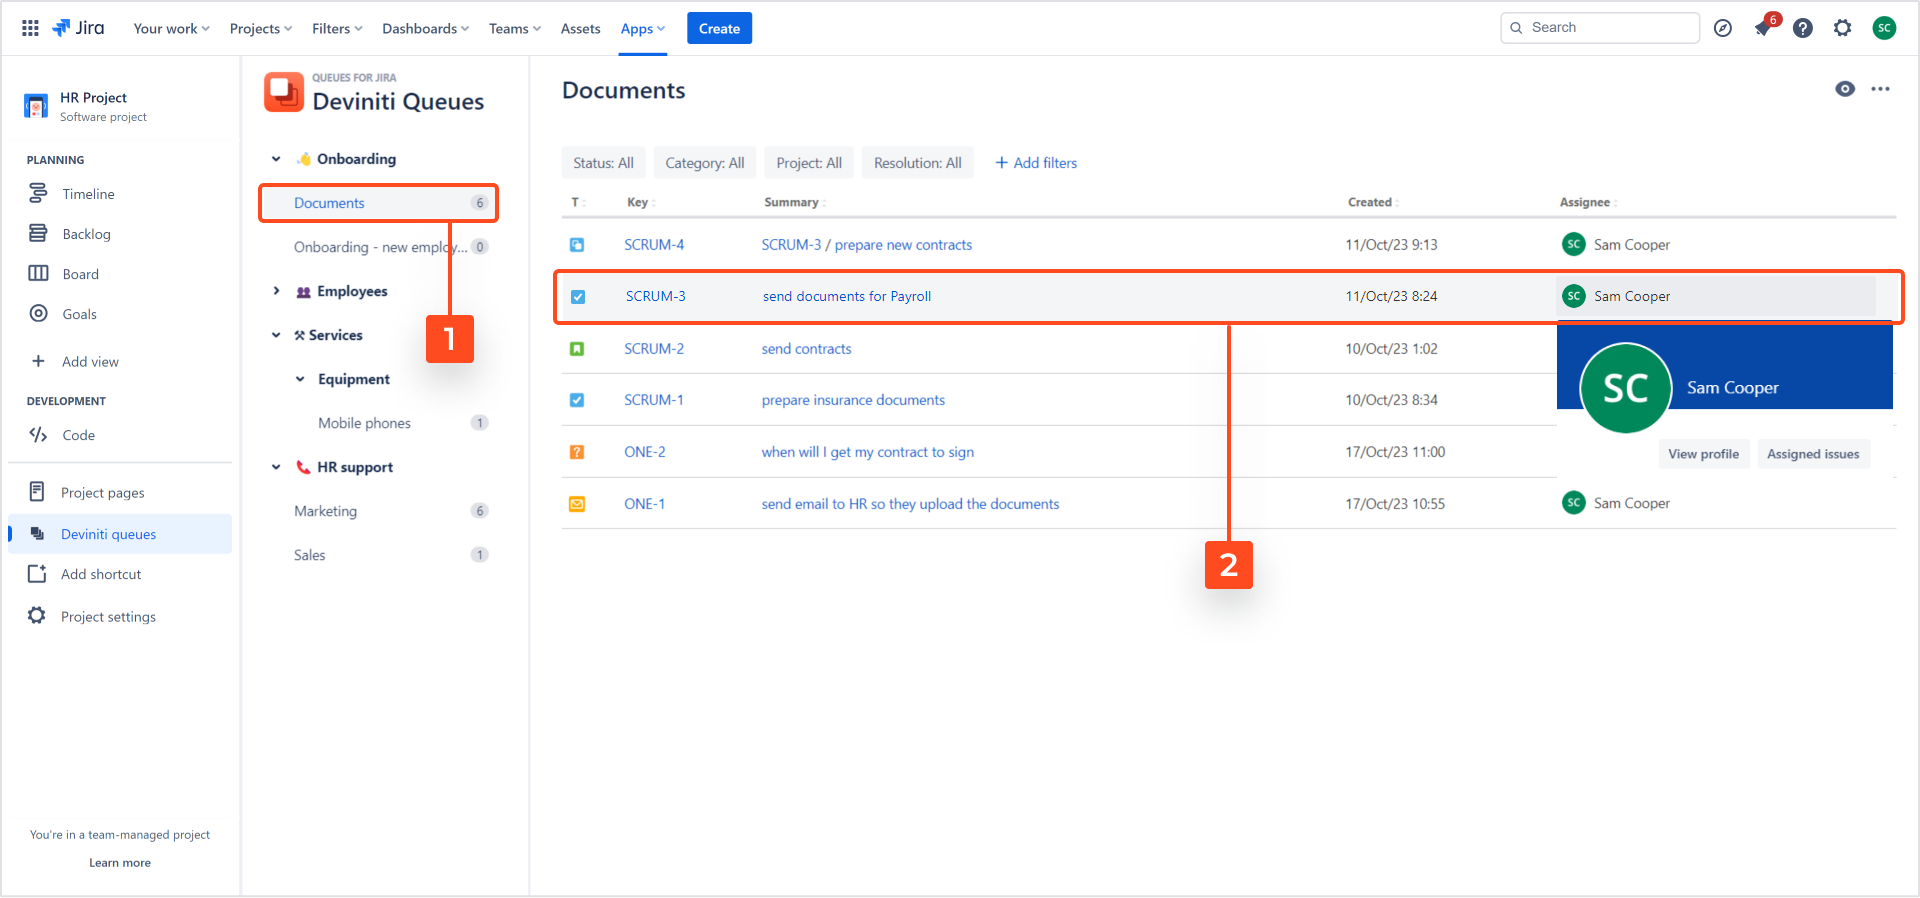
- Select target queue.
- Find an issue assigned to you that you intend to reassign.

Hovering over the assigned Assignee field displays a business card.
- Click on your name to go to edit mode.
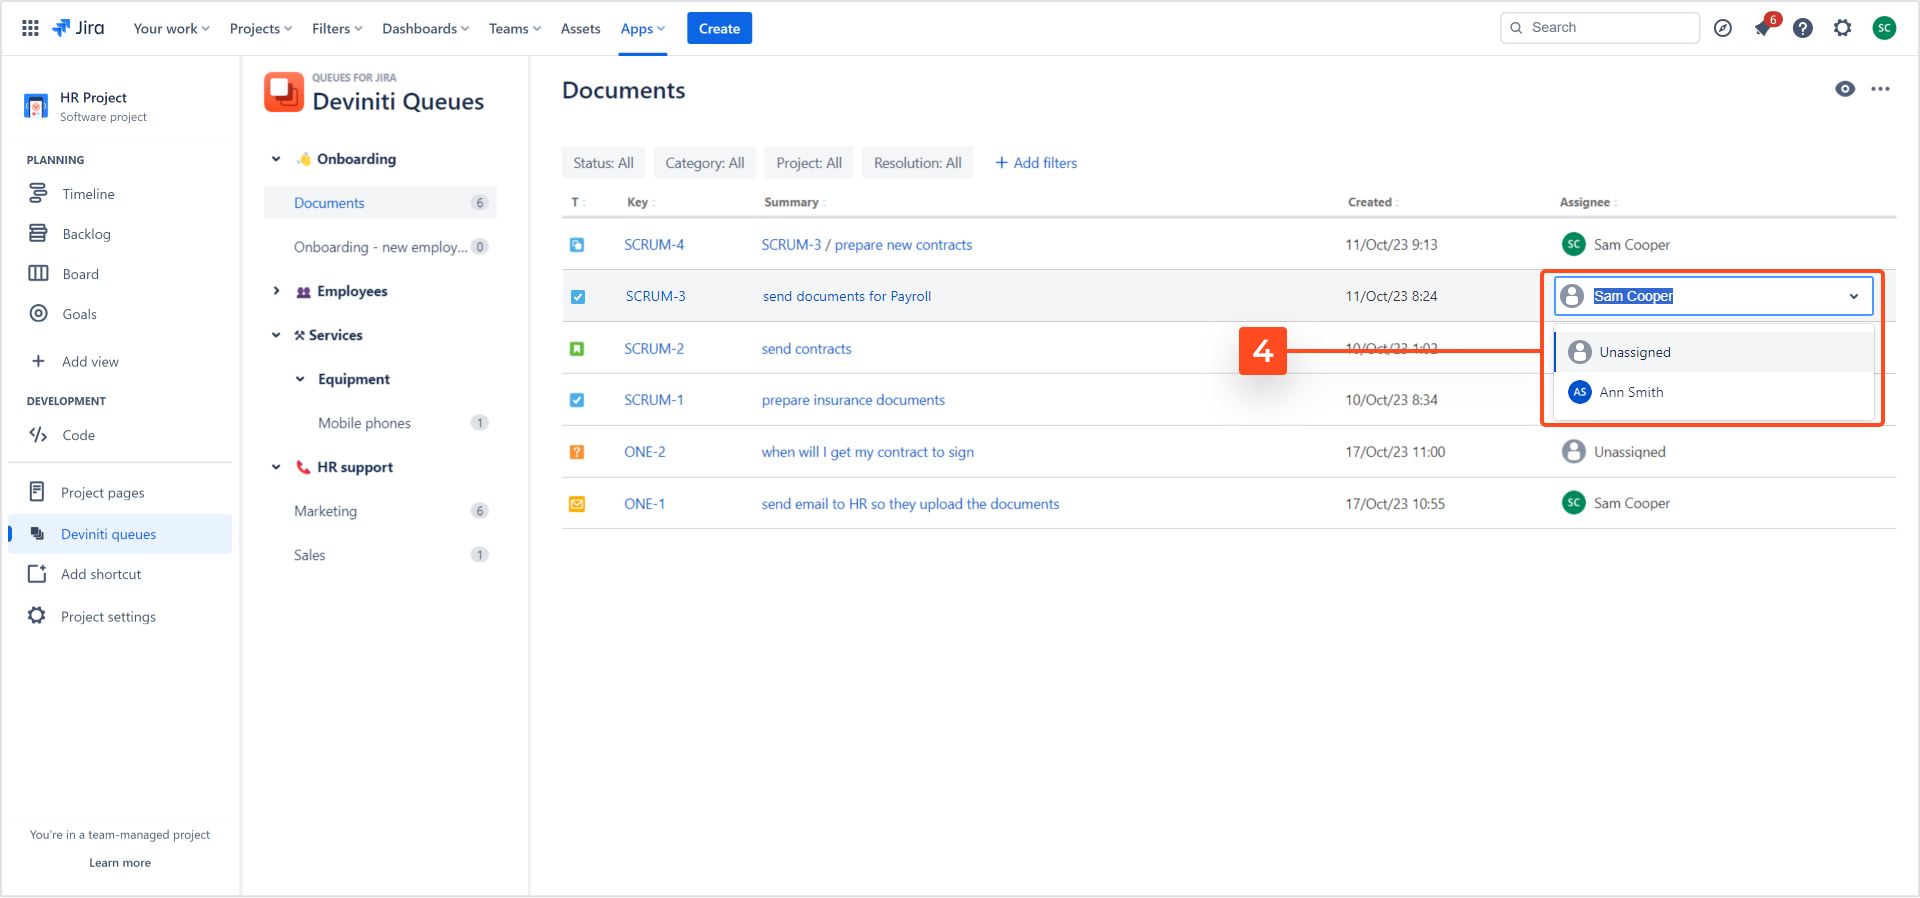
- The list of users is displayed. Choose a user from the list or type their name or surname using the keyboard.

The Unassigned button is listed first on the list. A maximum of 4 users are visible on the list, and as it expands beyond this limit, a scroll bar appears and allows for navigation through additional users.
Clicking outside the editing area functions as a cancel action.
- Choose the desired user.
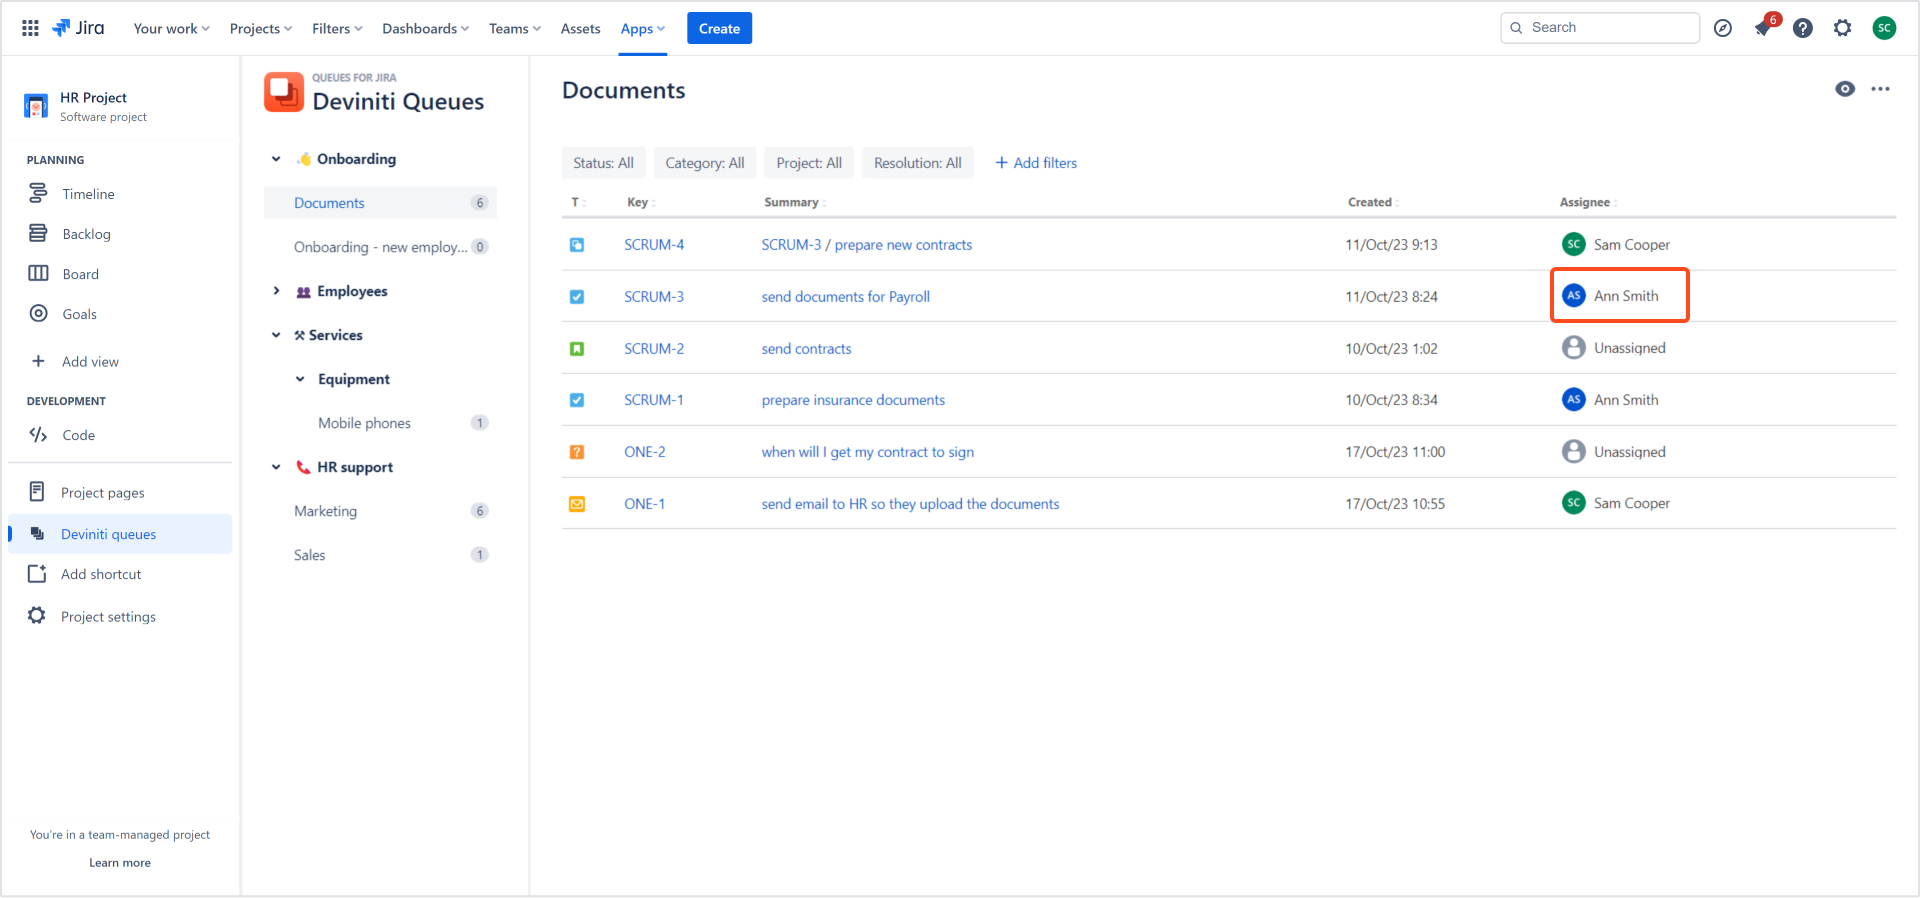
Result
The issue is assigned to the selected user.

When the list of users is displayed in the two remaining scenarios:
- In the Unassigned issue scenario, the Assign to me button is shown at the top of the list.
- In the Issues assigned to a team member scenario, the Assign to me button is listed first, followed by the Unassigned button.
- In both scenarios, a maximum of 4 users are visible on the list, and as it expands beyond this limit, a scroll bar appears and allows for navigation through additional users. Clicking outside the editing area functions as a cancel action.
If you can’t find the answer you need in our documentation, raise a support request.
Include as much information as possible to help our support team resolve your issue faster.