- Introduction
- About
- Get started
- Migration to Cloud
- Bundled Fields
- Overview
- Add Bundled Field
- Bundled Fields Configuration
- Format and validation
- Using Bundled Fields
- Advanced settings
- Bundled Fields Searcher
- Java API (ScriptRunner)
- Data Sources
- Email notifications
- Bundled Fields v.6.8.x - 6.9.x
- Bundled Fields v.6.7.x
- Dynamic Forms
- Dynamic Forms
- Supported fields
- Visibility
- Request Types visibility
- Fields visibility
- Customer Portal visibility
- Options visibility
- Requirements visibility
- SLAs visibility
- Java API
- Multilevel Structure
- Configuration
- Using a multilevel structure on the Customer Portal
- User Synchronization
- Organizations and Groups Synchronization
- Issue View
- Issue View
- Add user's IP address post function
- Restart SLA post function
- Update SLA to date post function
- Customer Portal
- Links
- Export list
- Split column
- Request details view
- Additional fields
- Additional options
- Compatibility
- Configuration Manager
Last updated Feb 1, 2021
Add a Bundled Field
Here’s how to start
Before you start configuring Bundled Fields, add a new custom field to Jira.
Steps
- Go to Jira Administration > Issues.
- Select Custom fields from the menu in the Fields section.
- Click Add custom field.
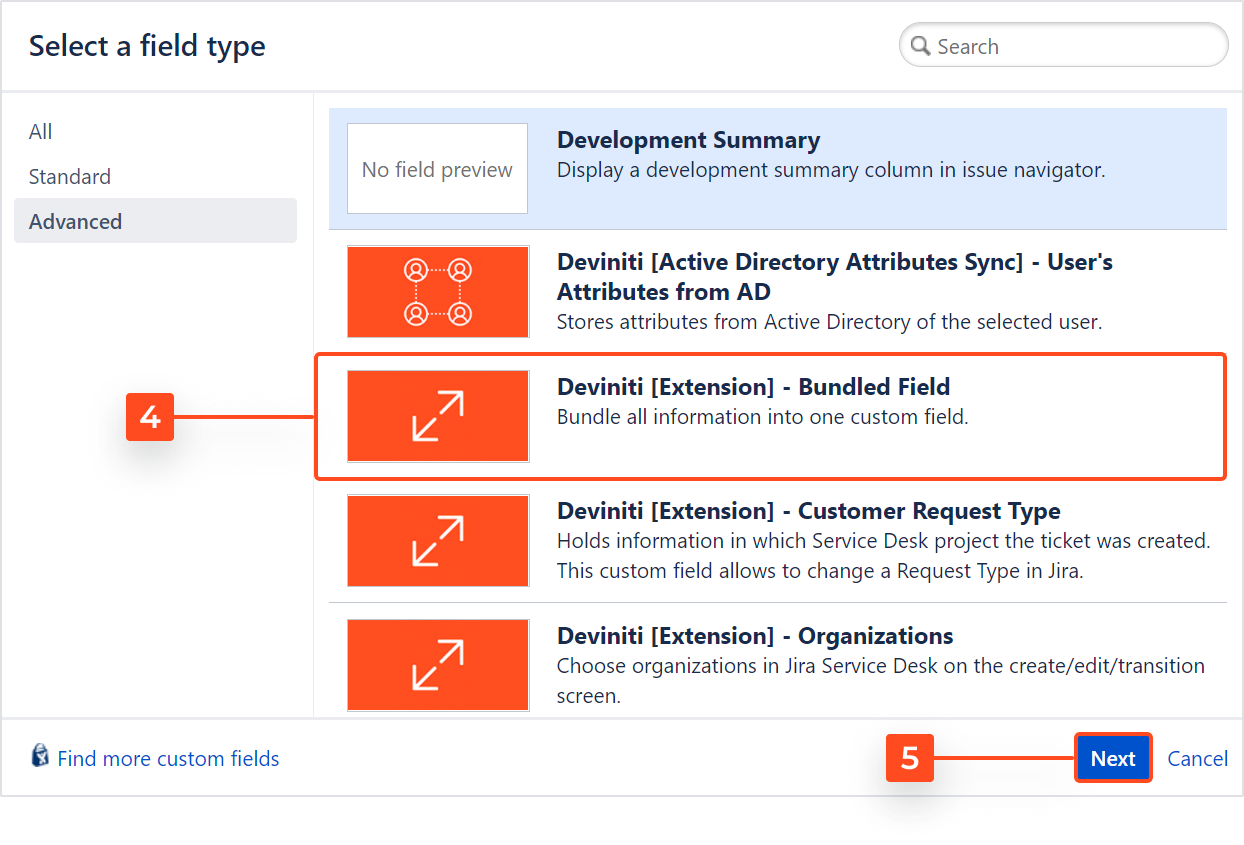
- Select Deviniti [Extension] - Bundled Field from the list (in the Advanced section).
- Click Next.

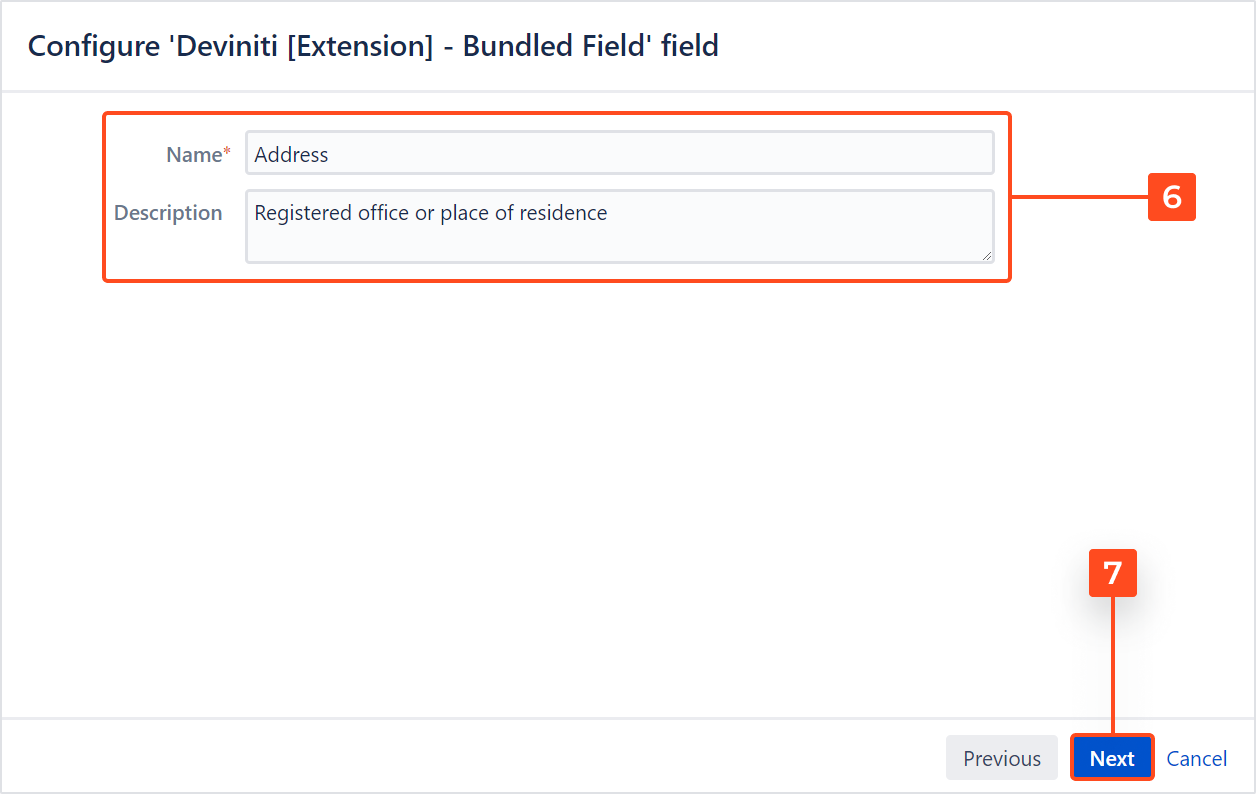
- Configure the selection criteria for the field: Name and Description (optional).
- Click Next.

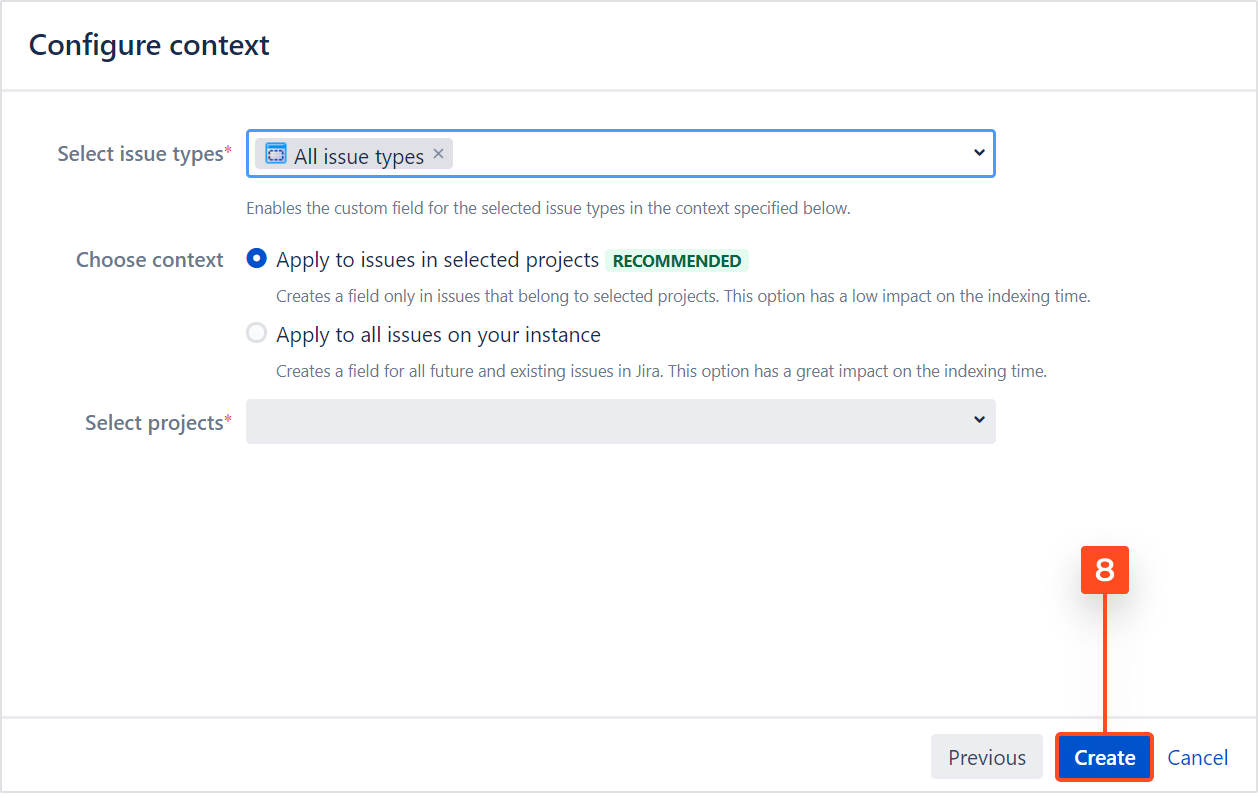
- Choose the context of use (service projects and issue types) and click Create.

- Select the checkboxes of the screens on which this custom field will be displayed.
- Click Update.
Result
A new custom field Deviniti [Extension] - Bundled Field is added to Jira.