- About TestFLO
- Overview
- For whom
- Key benefits
- Roadmap
- Onboarding
- Basic concepts
- Glossary
- Quick guide for Jira Administrator
- Quick guide for QA manager
- Quick guide for testers
- Demo environment
- Requirements
- Requirements
- Requirement operations
- Designing tests
- Test Case Template
- Organizing tests
- Reporting & tracking
- Reporting and tracking overview
- Requirement Test Coverage Report
- Requirement Traceability Report
- Requirement Test Execution Report
- Test Plan Execution Report
- Test Plan Iterations Report
- Test Execution Report
- Test information panel
- Issue panels
- Export test issues
- Dashboard Gadgets
- Miscellaneous
- TestFLO menu
- Issue Search Dialog
- JQL functions
- Administration & Configuration
- Projects' organization
- Create project
- Project configuration
- TestFLO settings
- TestFLO Permissions
- Custom fields
- Advanced workflow configuration
- Panel Filter Result
- Import/Export TCT
- Test Automation configuration
- Upgrade reports
- Upgrade guide
- Integrations
- Confluence
- REST API
- Configuration Manager for Jira
- Xporter
Xporter
By supporting the TestFLO fields in a special format, we have made it possible to integrate with Xporter app. Thanks to this you can create and generate fully customized documents and reports using Xporter.
Configuration
To be able to use fields from TestFLO, you need to map them to the appropriate field type that will be recognized by the Xporter. For this purpose we rendered fields to HTML in TestFLO - Xporter Export field type, which can be used in a document or report template with special placeholders.
The fields can be configured by a user with Jira Administrator permission.
Steps
To configure the TestFLO field:
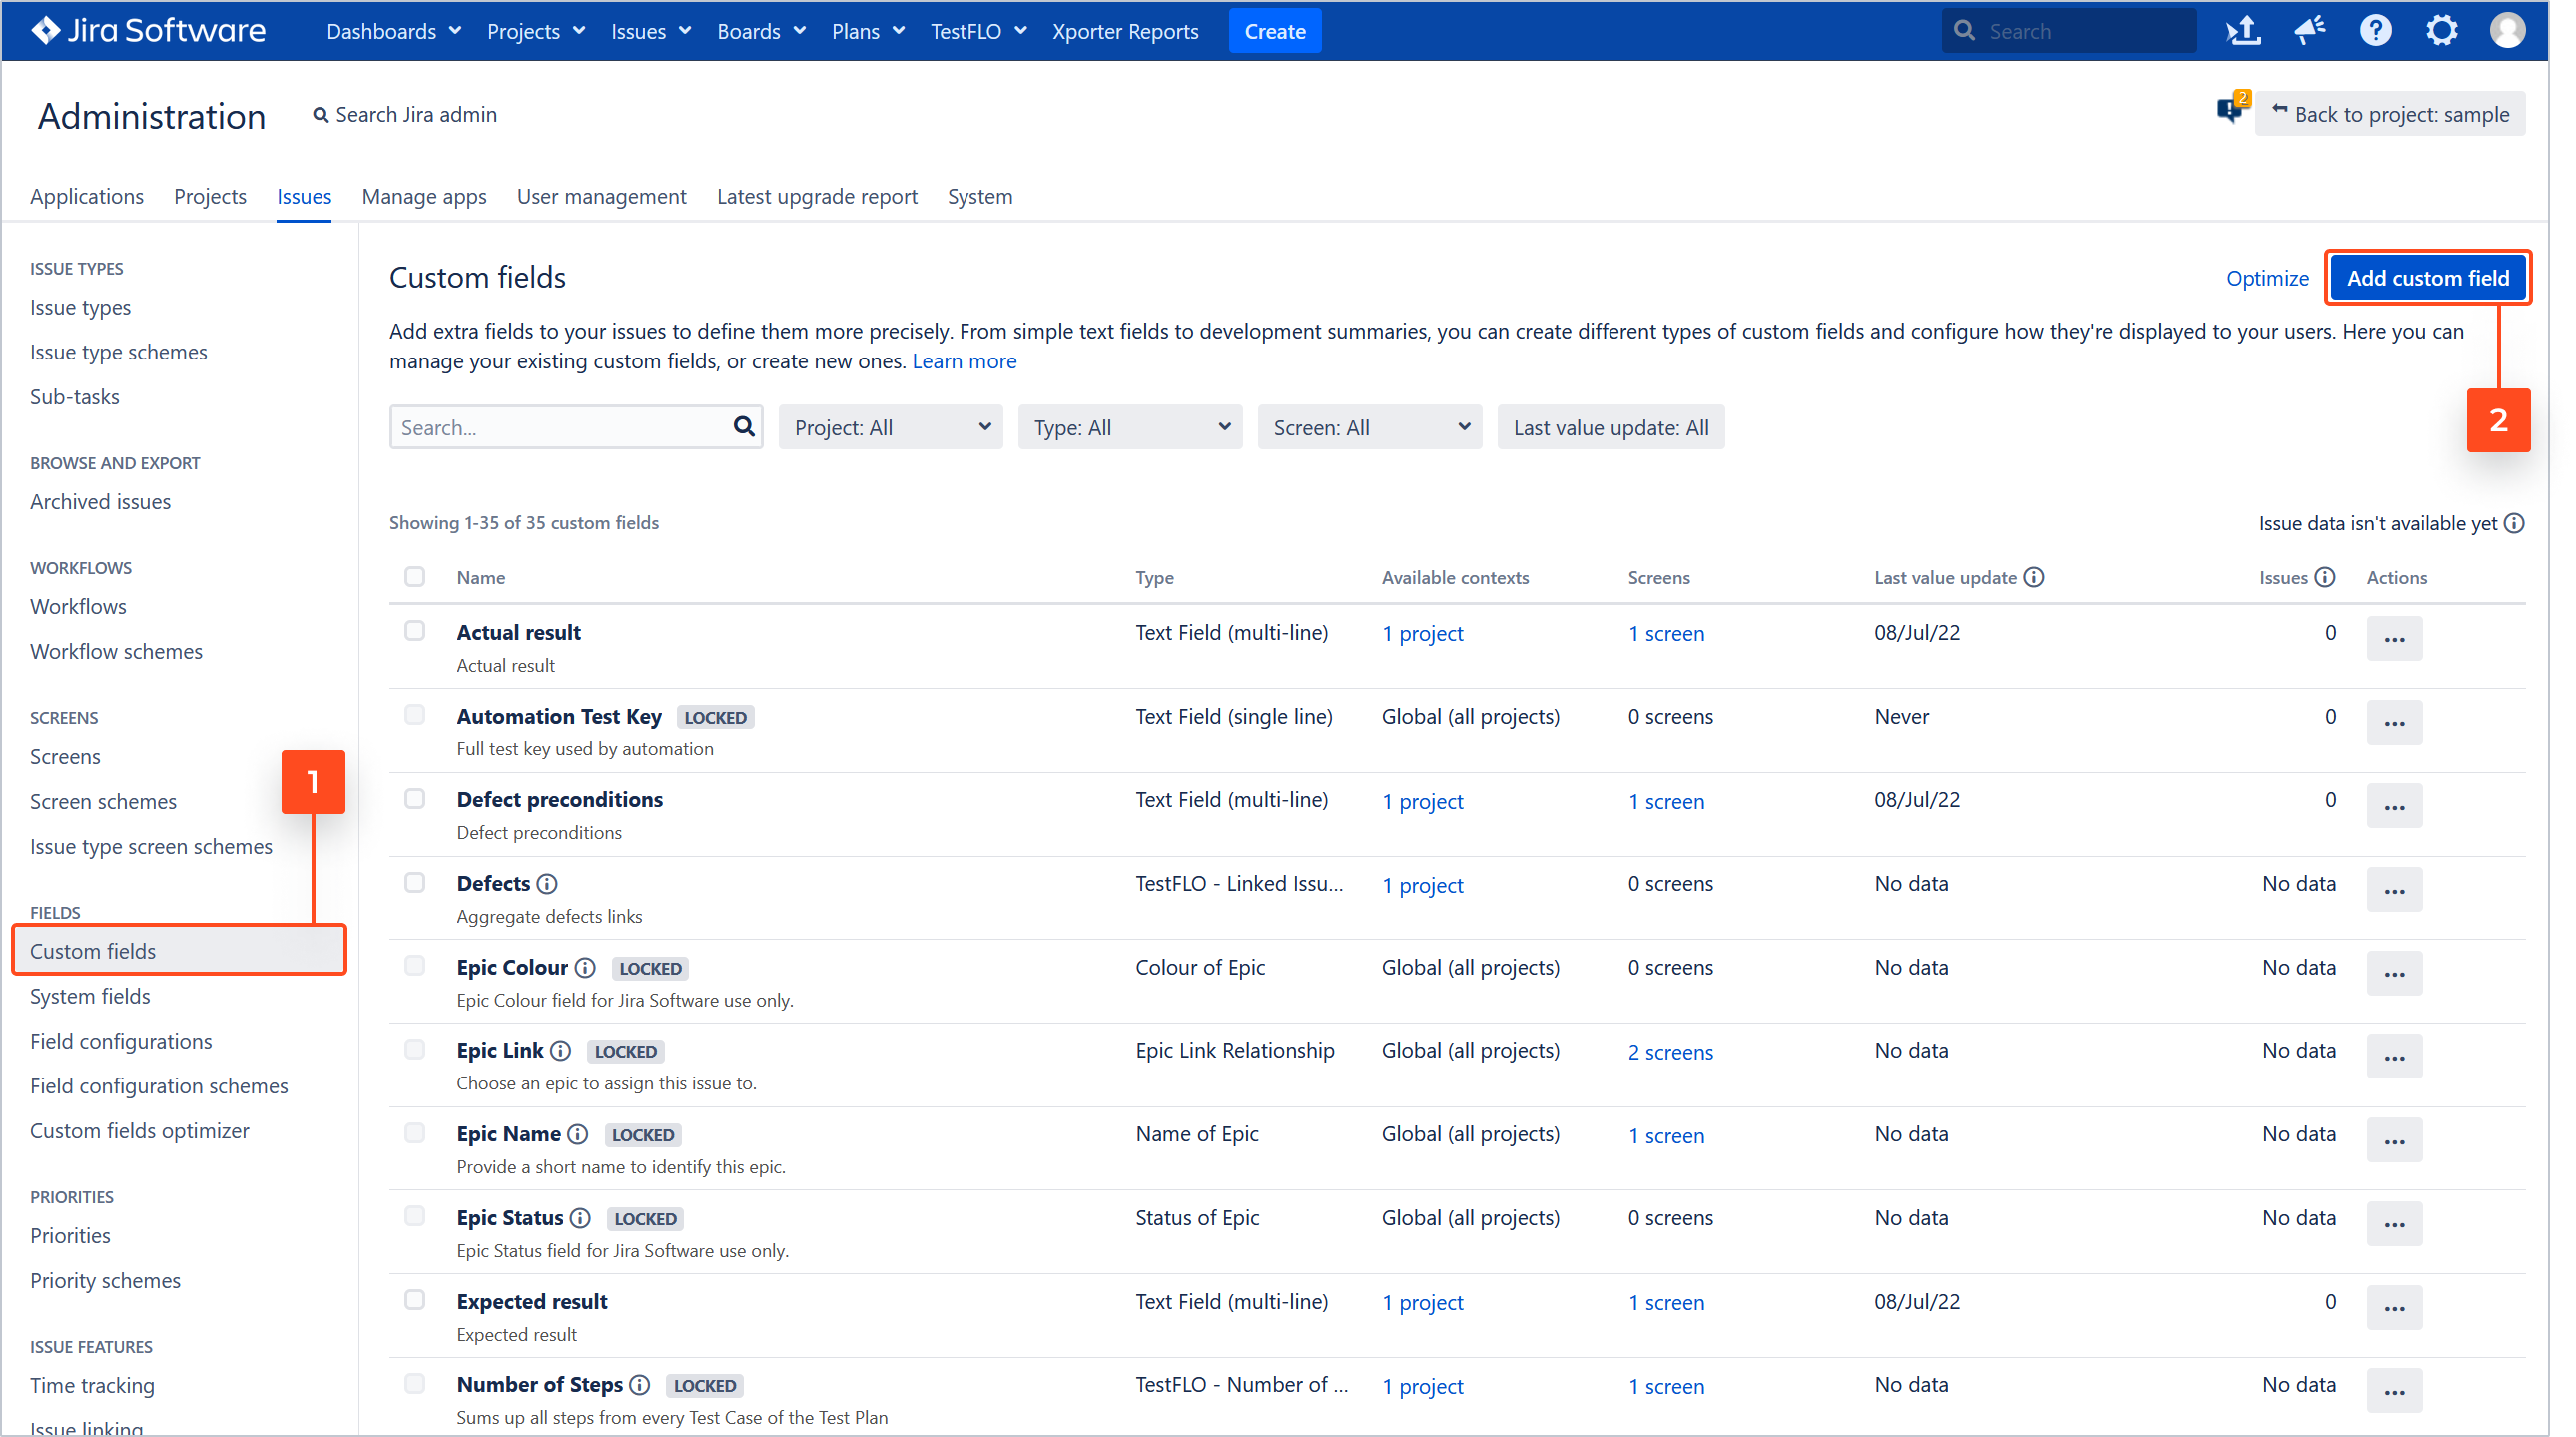
- Navigate to the Administration > Issues > Custom fields.
- Click Add custom field.

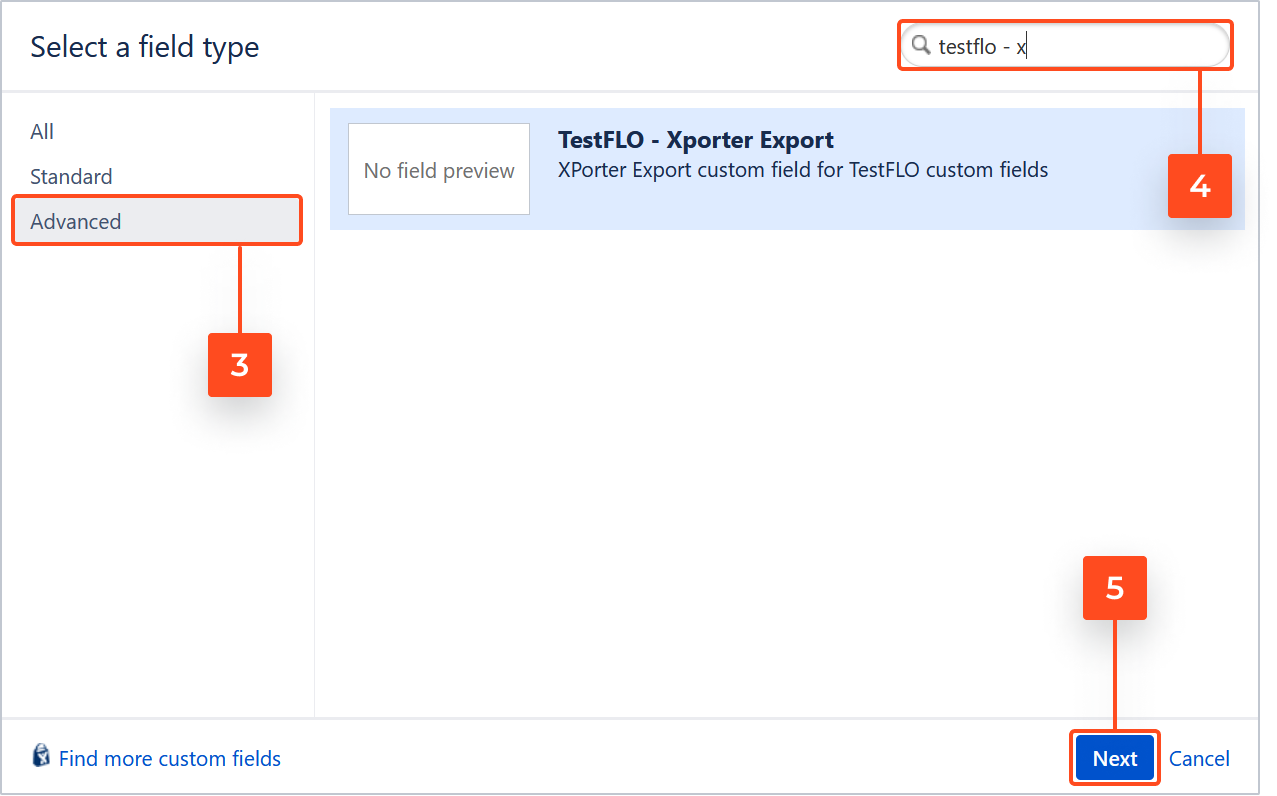
- In the Select a field type dialog click the Advanced tab.
- Search the TestFLO - Xporter Export field.
- Click Next.

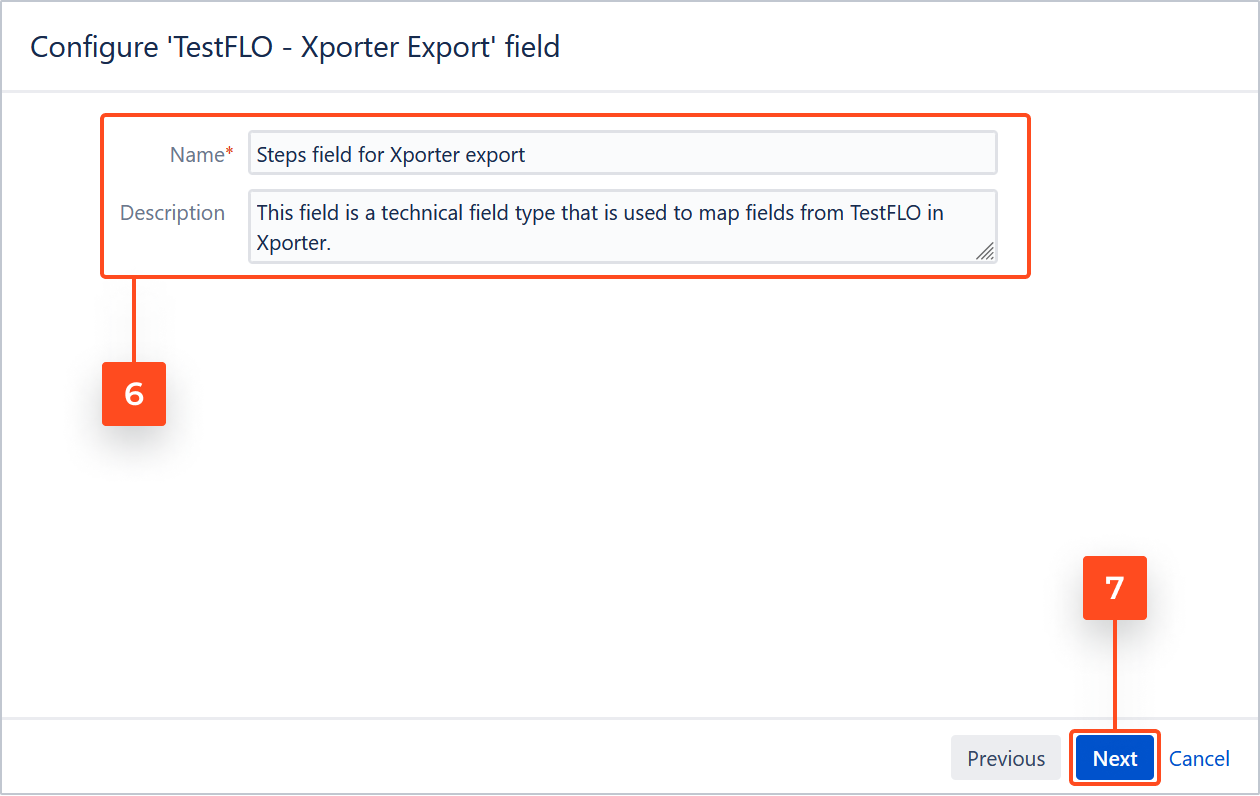
- Name the field for Xporter mapping. Optionally give it a Description.
- Click Next.

- Configure the context.
Note
We recommend that you set the case types and the project the field is from.

- Click Create.
- Leave the selection on the Associate field (…) to screens form empty and click Update.
Note
There is no need to display the field on the Issue Screen as it is only a technical field.

- Find configured field on the custom field list and click Configure.

- Click Edit Configuration.
- Select a field from TestFLO that you want to map.
- Click Save.

Result
You have configured the field mapping. For the rest of the fields that you want to be able to export, repeat the above steps. After you have mapped all the fields you want to use in Xporter, add them using the appropriate HTML placeholder to your templates.
TestFLO fields can only be used on Word templates. We also support the following output file formats from Xporter:
- DOCX
- ODT
- PDF/A
- RTF
- SVG