- Introduction
- About
- Onboarding
- Getting Started
- Demo backup
- User's guide
- Projects' organization
- Test design
- Organizing tests
- Test planning
- Test execution
- Requirements
- Operations
- Reporting and tracking
- Import/Export TCT
- Export test issues
- Issue search dialog
- TestFLO menu
- Admin's guide
- Project configuration
- Test Automation configuration
- TestFLO settings
- TestFLO Permissions
- Custom fields
- Advanced workflow configuration
- Panel Filter Result
- Upgrade reports
- Upgrade guide
- Integrations
- REST API
- Configuration Manager for Jira
Steps design
This section provides information on how to design Steps.
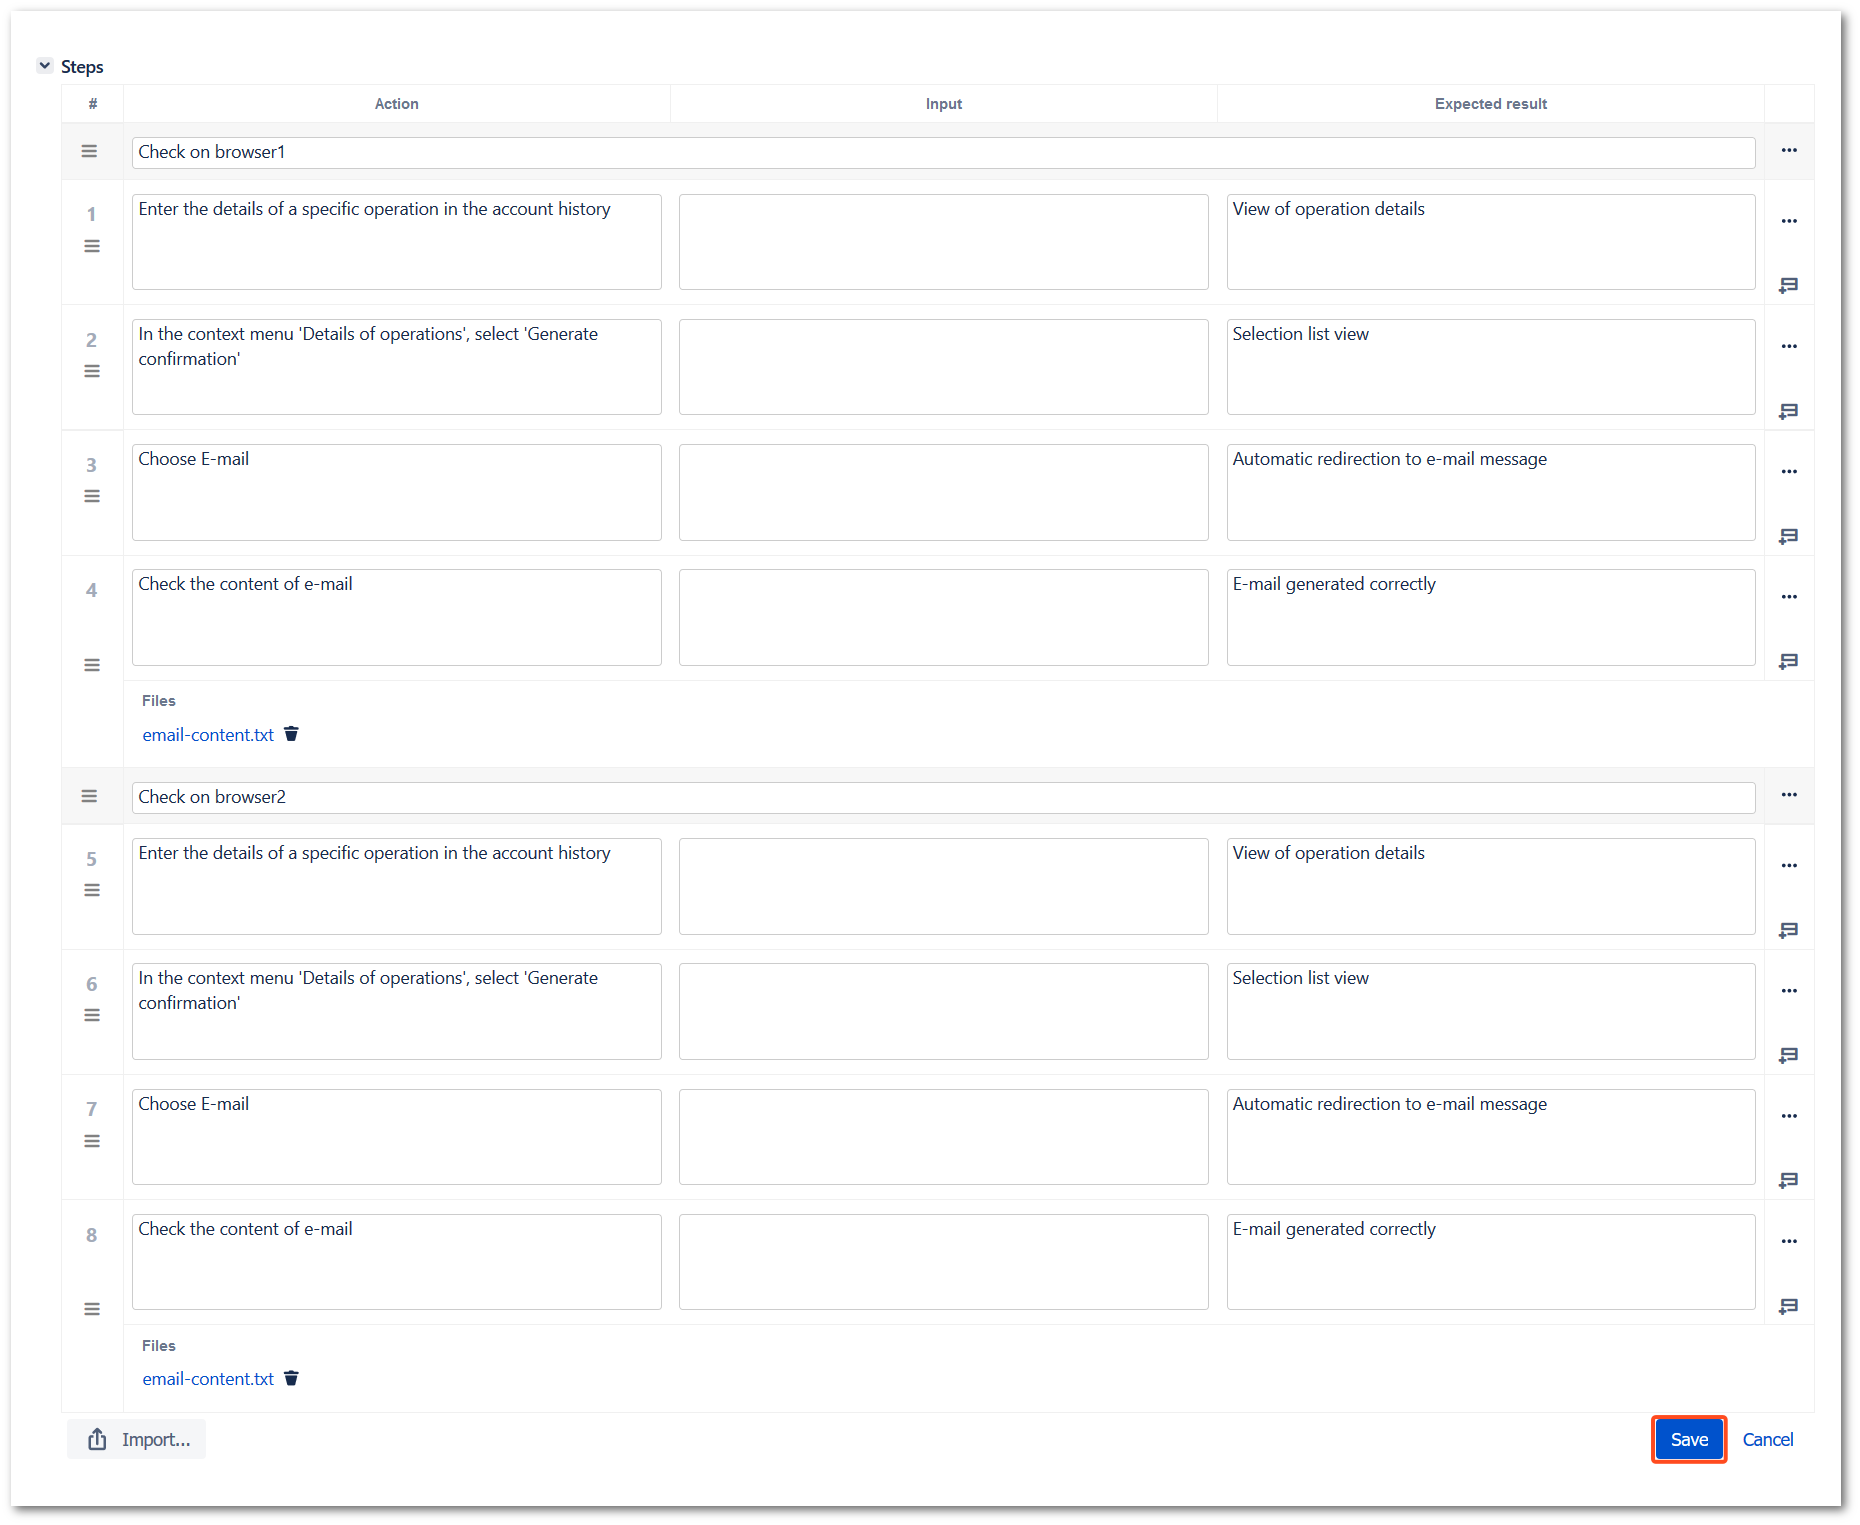
One of the elementary parts of the test are steps. The Steps panel allows to define a list of instructions which are necessary to perform the test. You can add attachments, import and export list of steps or organize steps using groups and many more.
By default Steps field have following columns: Action, Input, Expected result. You can customize the configuration of Steps and decide on number and name of columns. Learn more at Steps configuration.
In all cells in Steps, you can use the Jira Wiki Markup language.
Steps edit mode
To start creating Steps, you have to enter the editing mode. There are several ways to get to the Steps edit mode:
- Edit on Create Issue page. After clicking on the Create in Jira top navigation bar an Create Issue page is displayed. On this page, after selecting Test Case Template it is possible to edit steps.
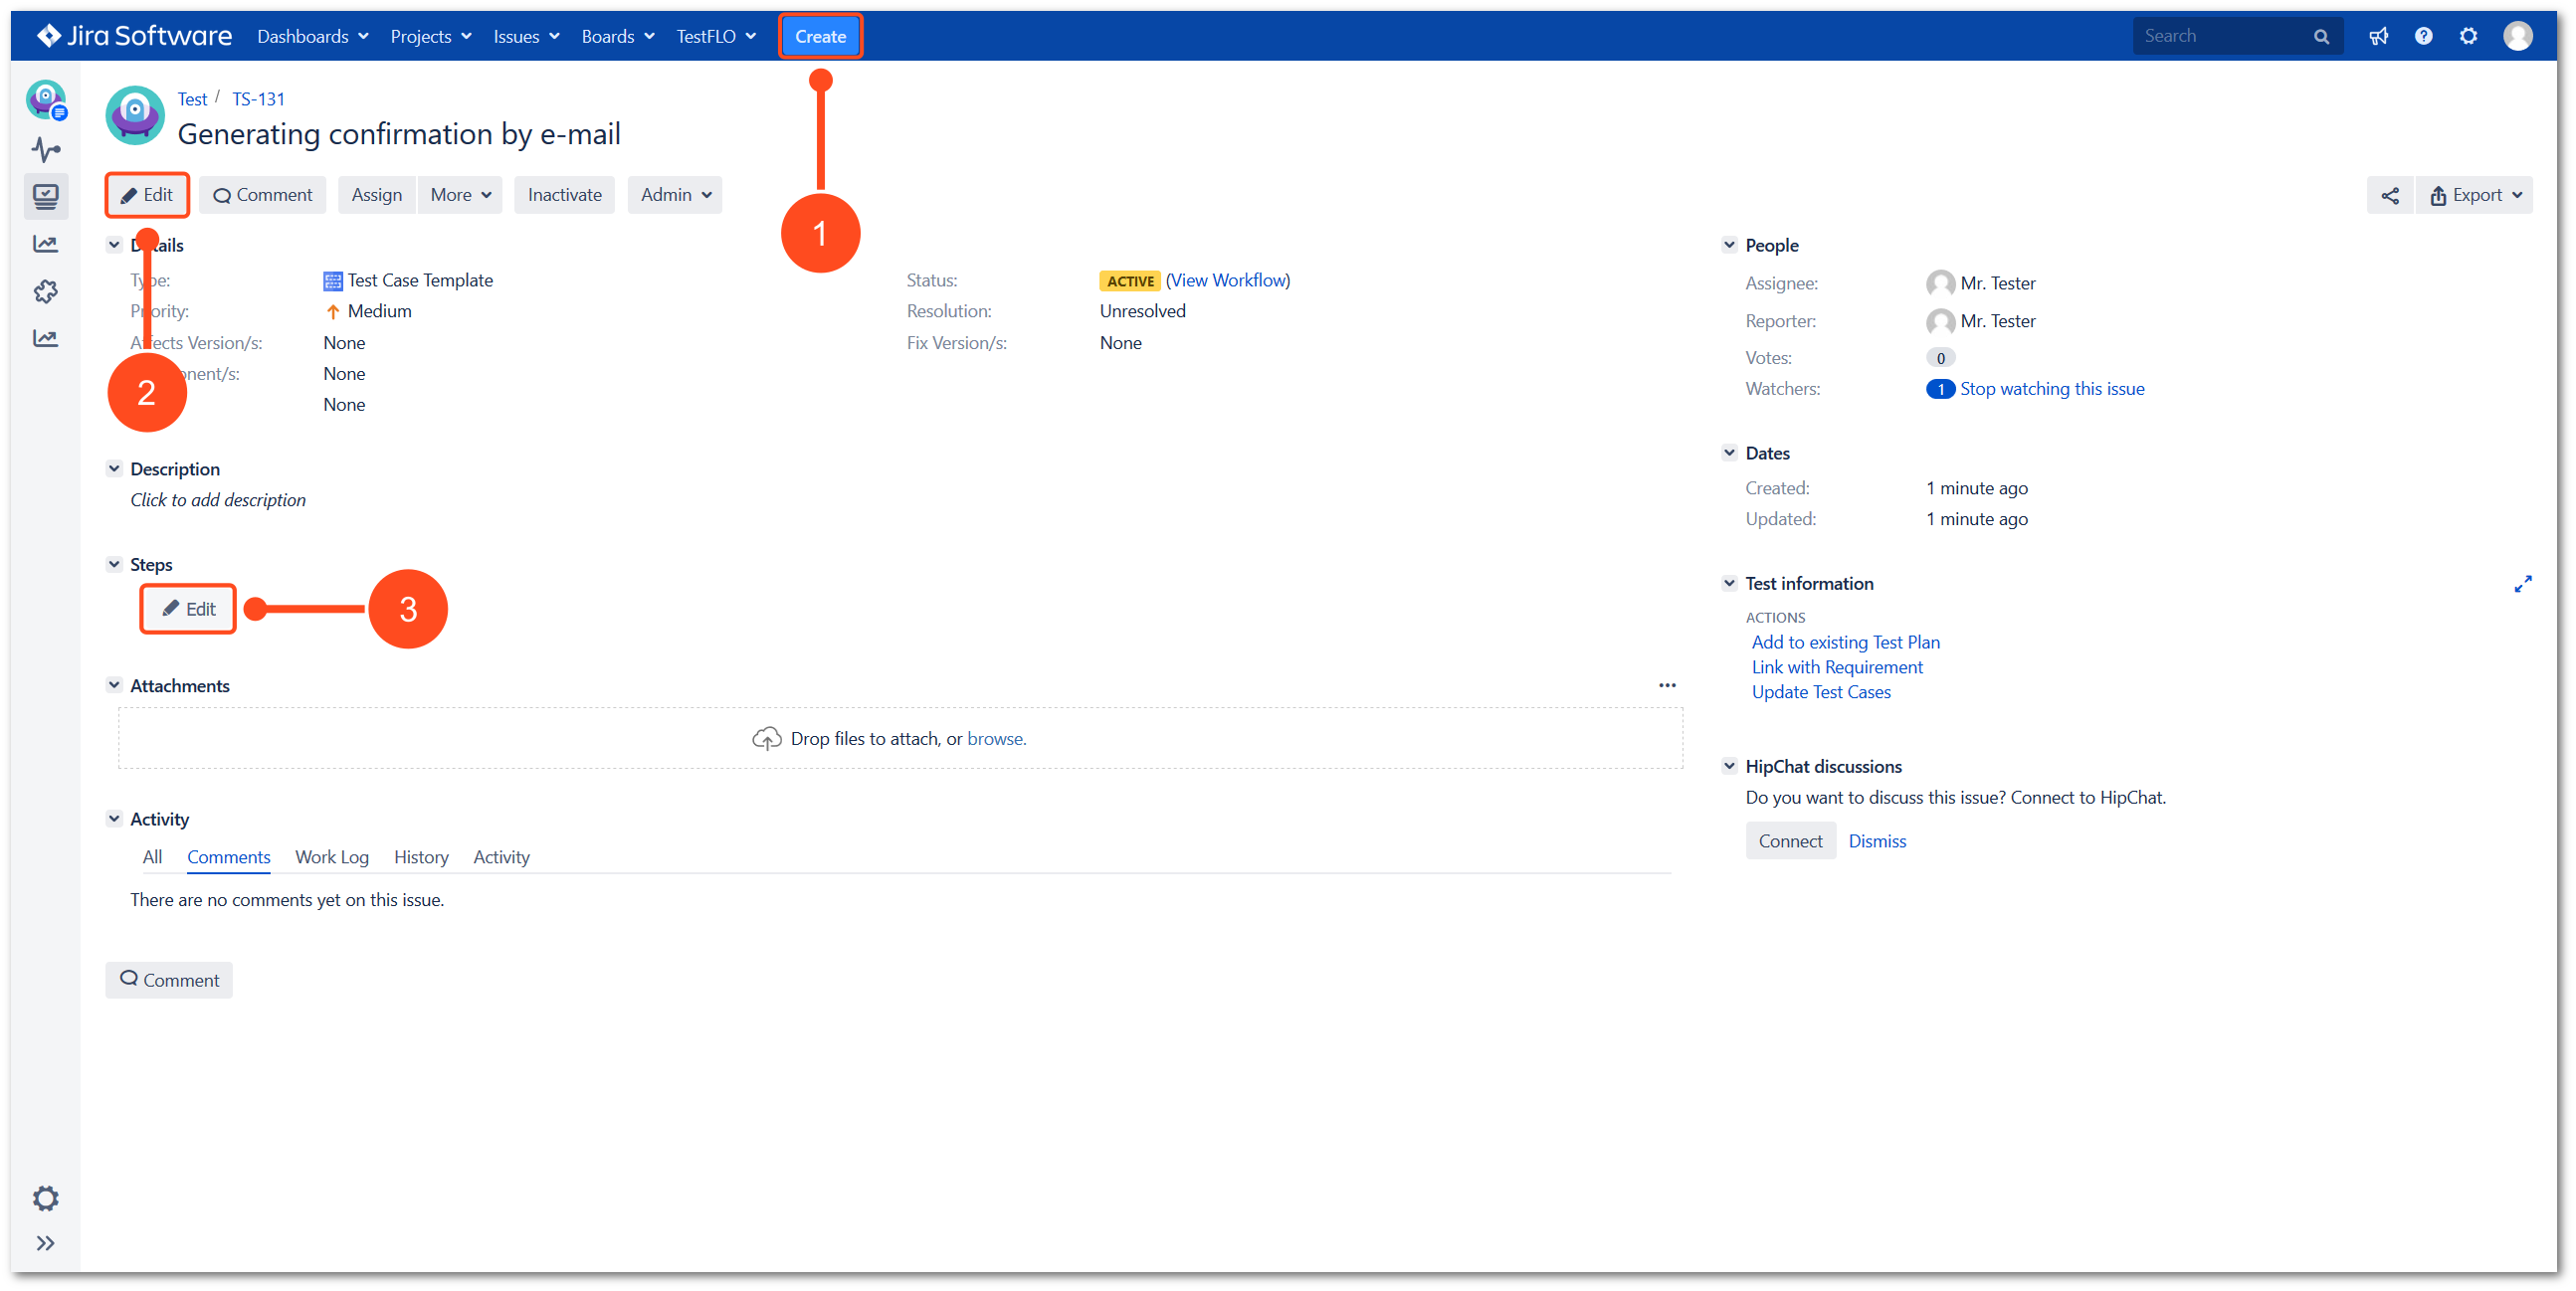
- Edit on issue. On created Test Case Template you can enter edit mode using Edit button on issue. After this operation you will be able to editing steps.
- Edit mode in Steps panel. You can also enter edit mode on created Test Case Template by clicking on Edit in Steps panel.
Adding steps
When the Steps edit mode is avaiable you can start desing tests.
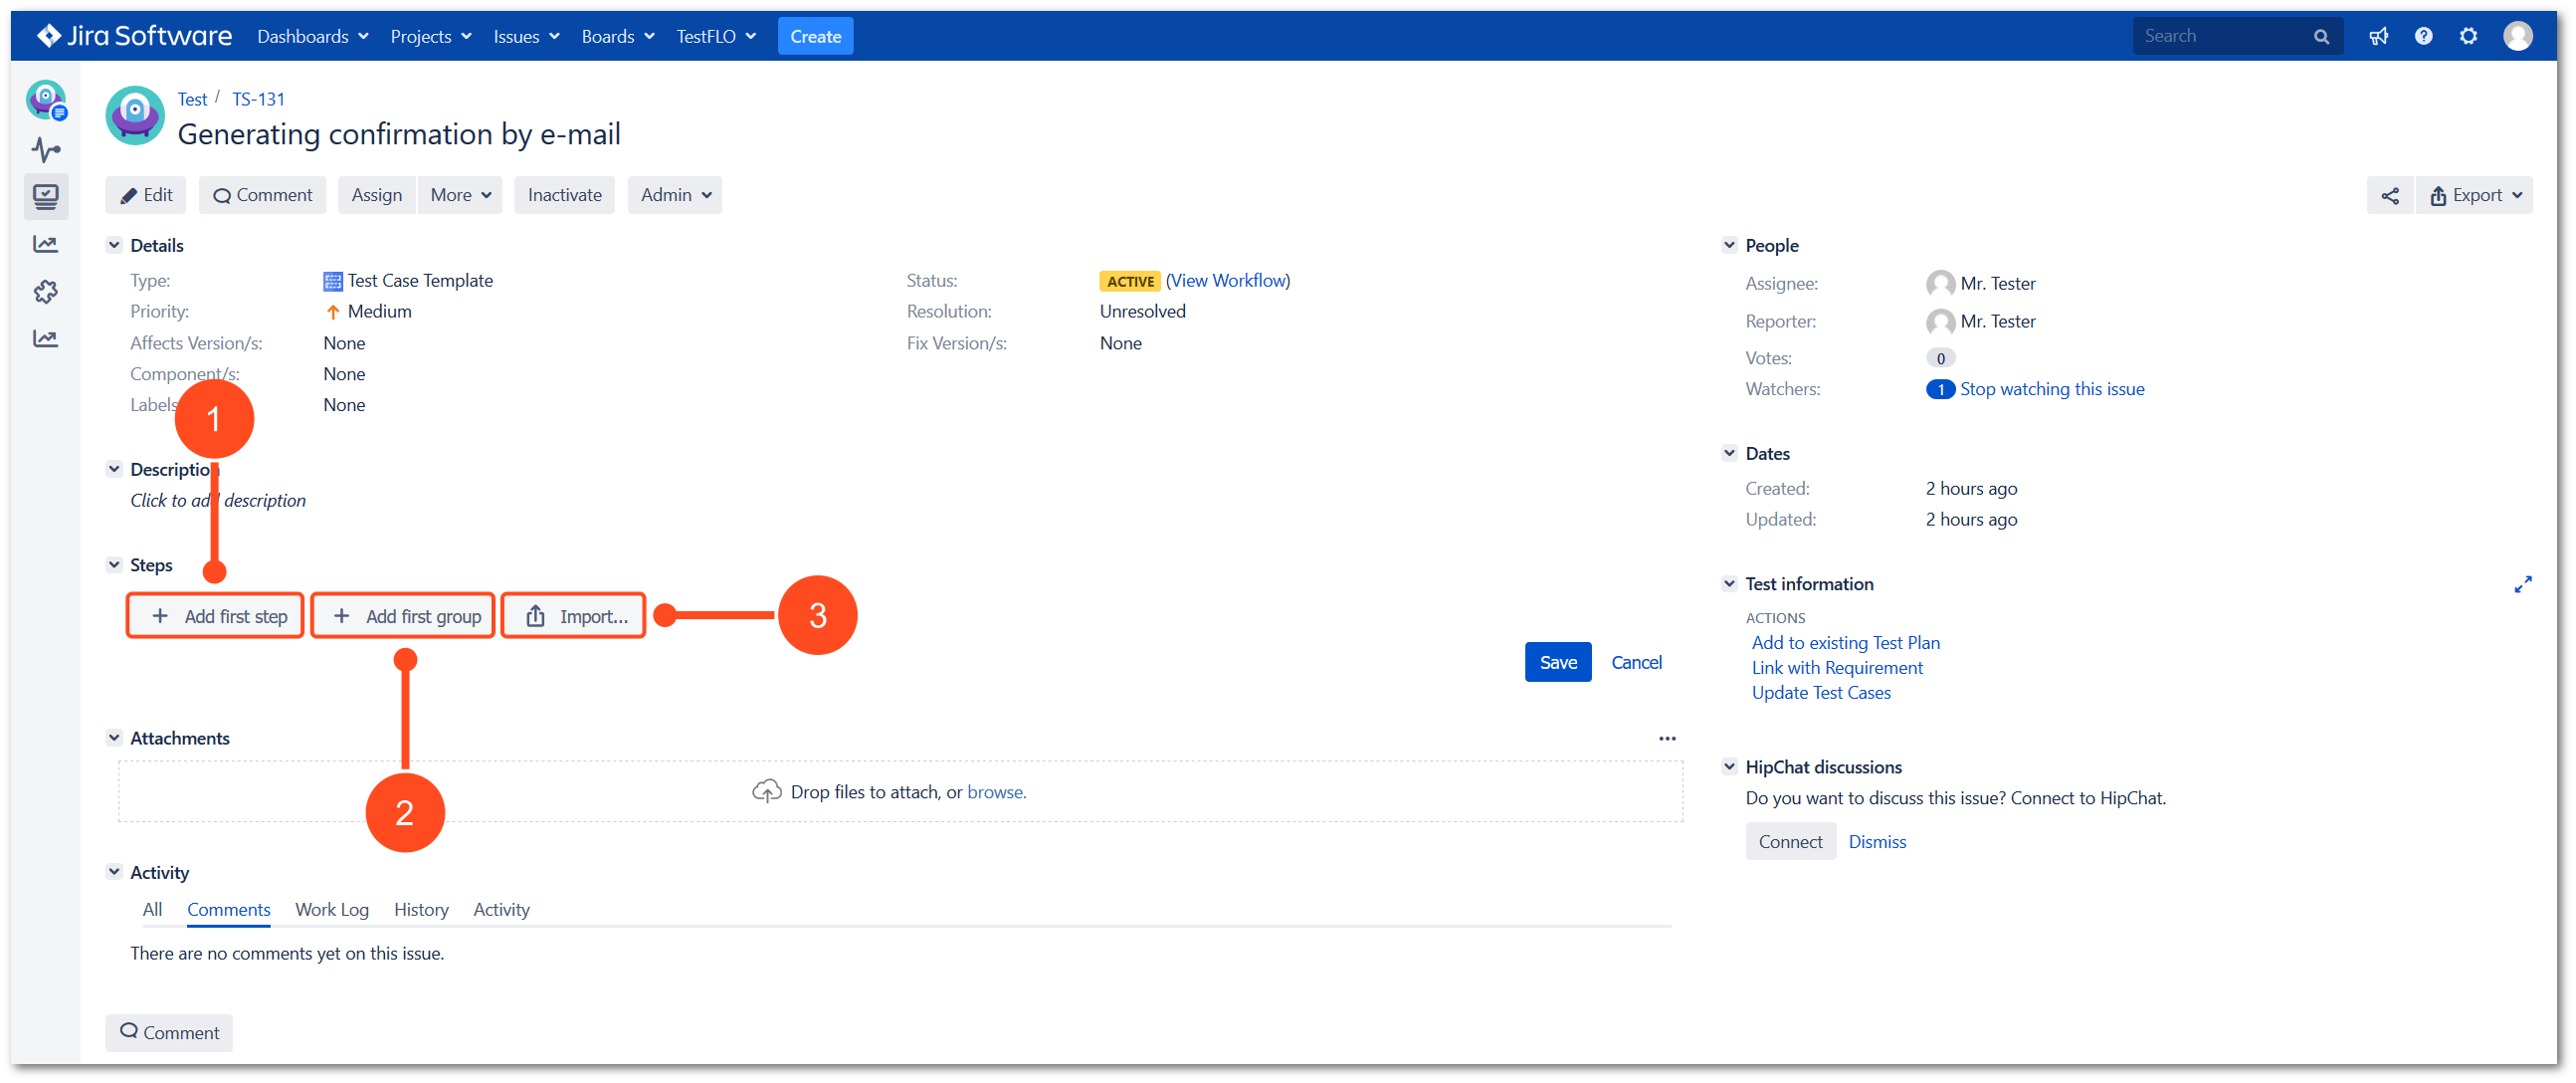
1. Add first step
After clicking the Add first step it becomes possible to complete the first step. Enter the content for the first step.
To paste the image into the Steps’ cell use the copy&paste option. The image will be automatically attached to the issue.
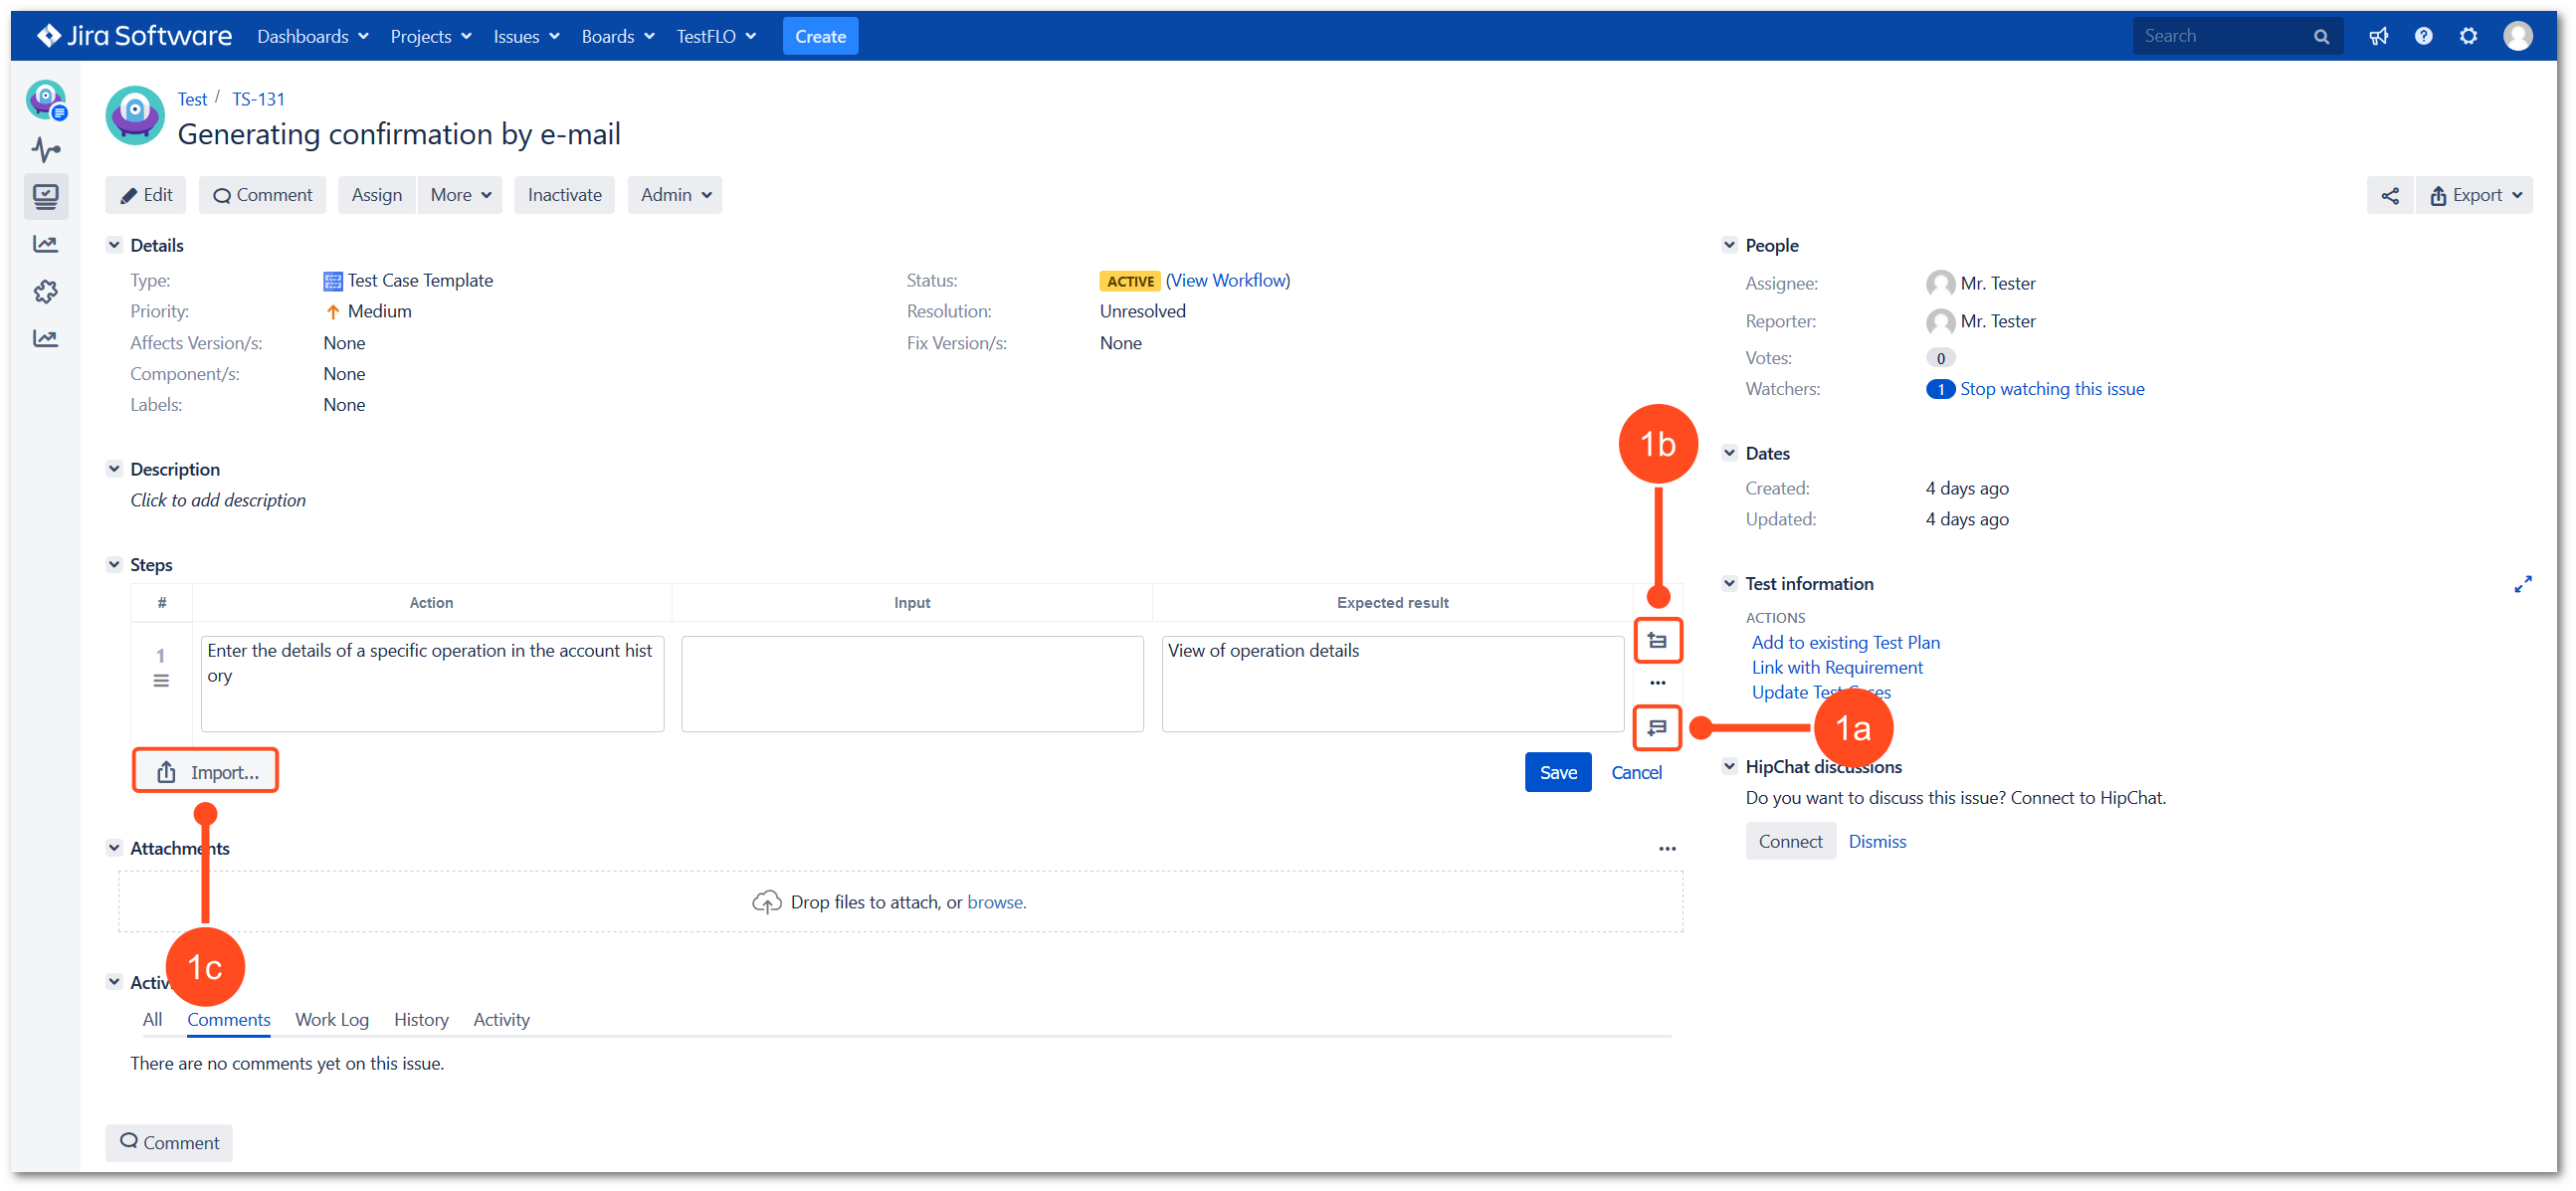
1a. Click Add step below to continue writing steps.
If you complete the last cell in a given step, you can quickly add another step using Tab on the keyboard.
1b. If you forget add step above the first step use Add step above.
1c. To add the steps written in the csv or json file, use the Import option.
To read more, see Import/Export Steps.
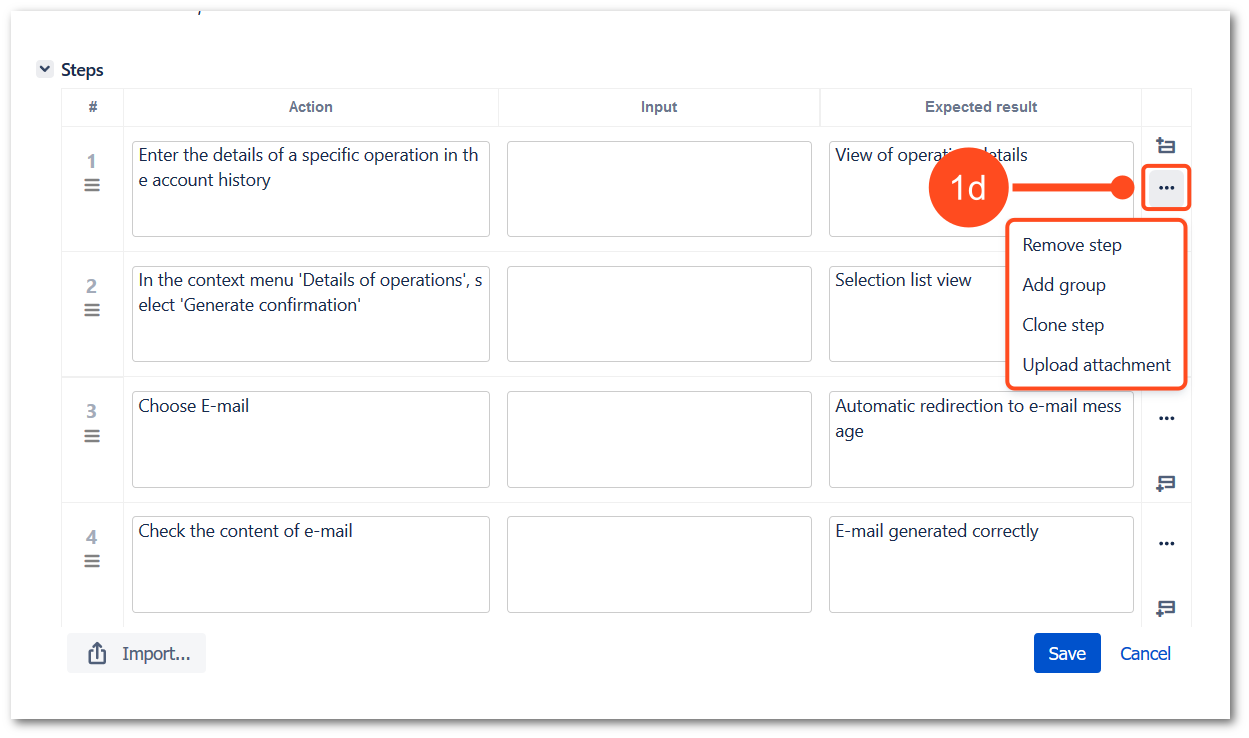
1d. Each step contains additional operation under three dot button. You can:
- Remove step
- Add group
- Clone step
- Upload attachments
2. Add first group
If you want to categorize the test steps, start by adding the group with Add first group.
2a. Each group contains operations under one button. You can:
- Remove group
- Add group (another)
- Add step below
- Add step above (available only for the first added group)

3. Import
You can start by importing steps from a file. Two file formats are supported - CSV and JSON. To import a file, click Import and select the appropriate file.
To read more, see Import/Export Steps.
Viewing steps
After completing all steps, groups and loading attachments, click Save to save changes and exit the editing mode.
After save, the view mode is displayed. In this mode you can:
- edit and add an attachment to the given step
- enter the edit mode to make a change in all Steps panel
- expand and collapse a group of steps by clicking on the name of the group
- export the written steps to a CSV file.
Info
To read more about export, see Export steps to CSV.
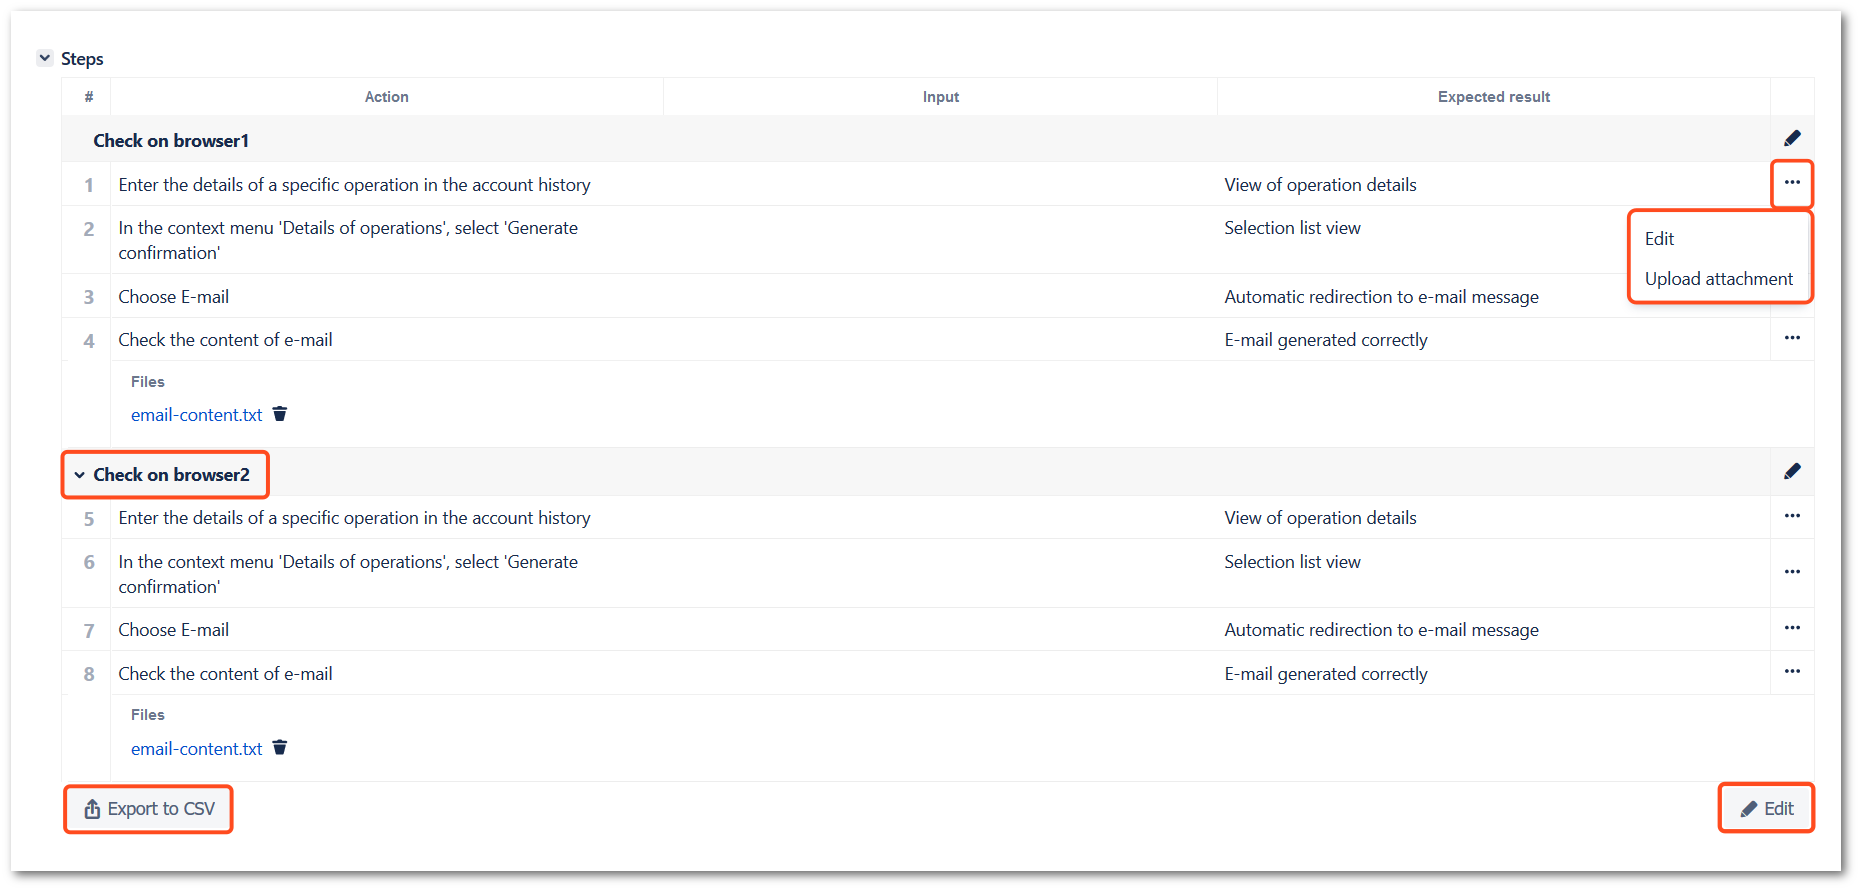
Modifying and reordering steps
In a case when you need to do change after saving, you can go back to the edit mode and modify the steps already written. You can also change the order of steps and groups using the drag&drop option.

