- Introduction
- About
- Onboarding
- Getting Started
- Demo backup
- User's guide
- Projects' organization
- Test design
- Organizing tests
- Test planning
- Test execution
- Requirements
- Operations
- Reporting and tracking
- Import/Export TCT
- Export test issues
- Issue search dialog
- TestFLO menu
- Admin's guide
- Project configuration
- Test Automation configuration
- TestFLO settings
- TestFLO Permissions
- Custom fields
- Advanced workflow configuration
- Panel Filter Result
- Upgrade reports
- Upgrade guide
- Integrations
- Confluence
- REST API
- Configuration Manager for Jira
Project configuration
After installing TestFLO, the additional configuration Test Management appears in each project. In this configuration, based on the test process, you can decide which of the TestFLO modules (elements) to include in a given project.
Learn more about how to adapt TestFLO to test projects in the Projects’ organization.
Test Management consists of the following modules (each of them has its own configuration):
- Test Repository
- Test Execution
- Requirements
- Defects
- General tab (Steps and Preconditions configuration)
- Permissions
Before you turn on TestFLO, please read the information about each module so that you can take full advantage of the functionality of the app.
Configuration in Test Management is available to users with permissions:
- Jira System Administrators
- Jira Administrators
- Project Administrator
Steps
To get to the Test Management:
- Click on Projects in the main bar in Jira and select project from the project list.
- Go to Project Settings by click on the gear icon.

- Click Test Management.
Result
View of the Test Management introduction page.
The Test Management introduction page appears only if TestFLO is not enabled in the project. If TestFLO has already been enabled, when you click Test Management, the view shows tabs with module names that you can configure.

Run TestFLO
Run TestFLO creates automatically default configuration in current project.
Steps
To turn app on by Run TestFLO option
- Click Run TestFLO.

Results
The default configuration is created in project. The Test Repository tab, Test Execution tab and Preconditions have been turn on. From now on you are also able to configure the Requirements tab, Defects tab and elements in General tab.
Customize
Customize will guide you through the configuration wizard and allow to set your own configuration.
Steps
To turn app on by customize
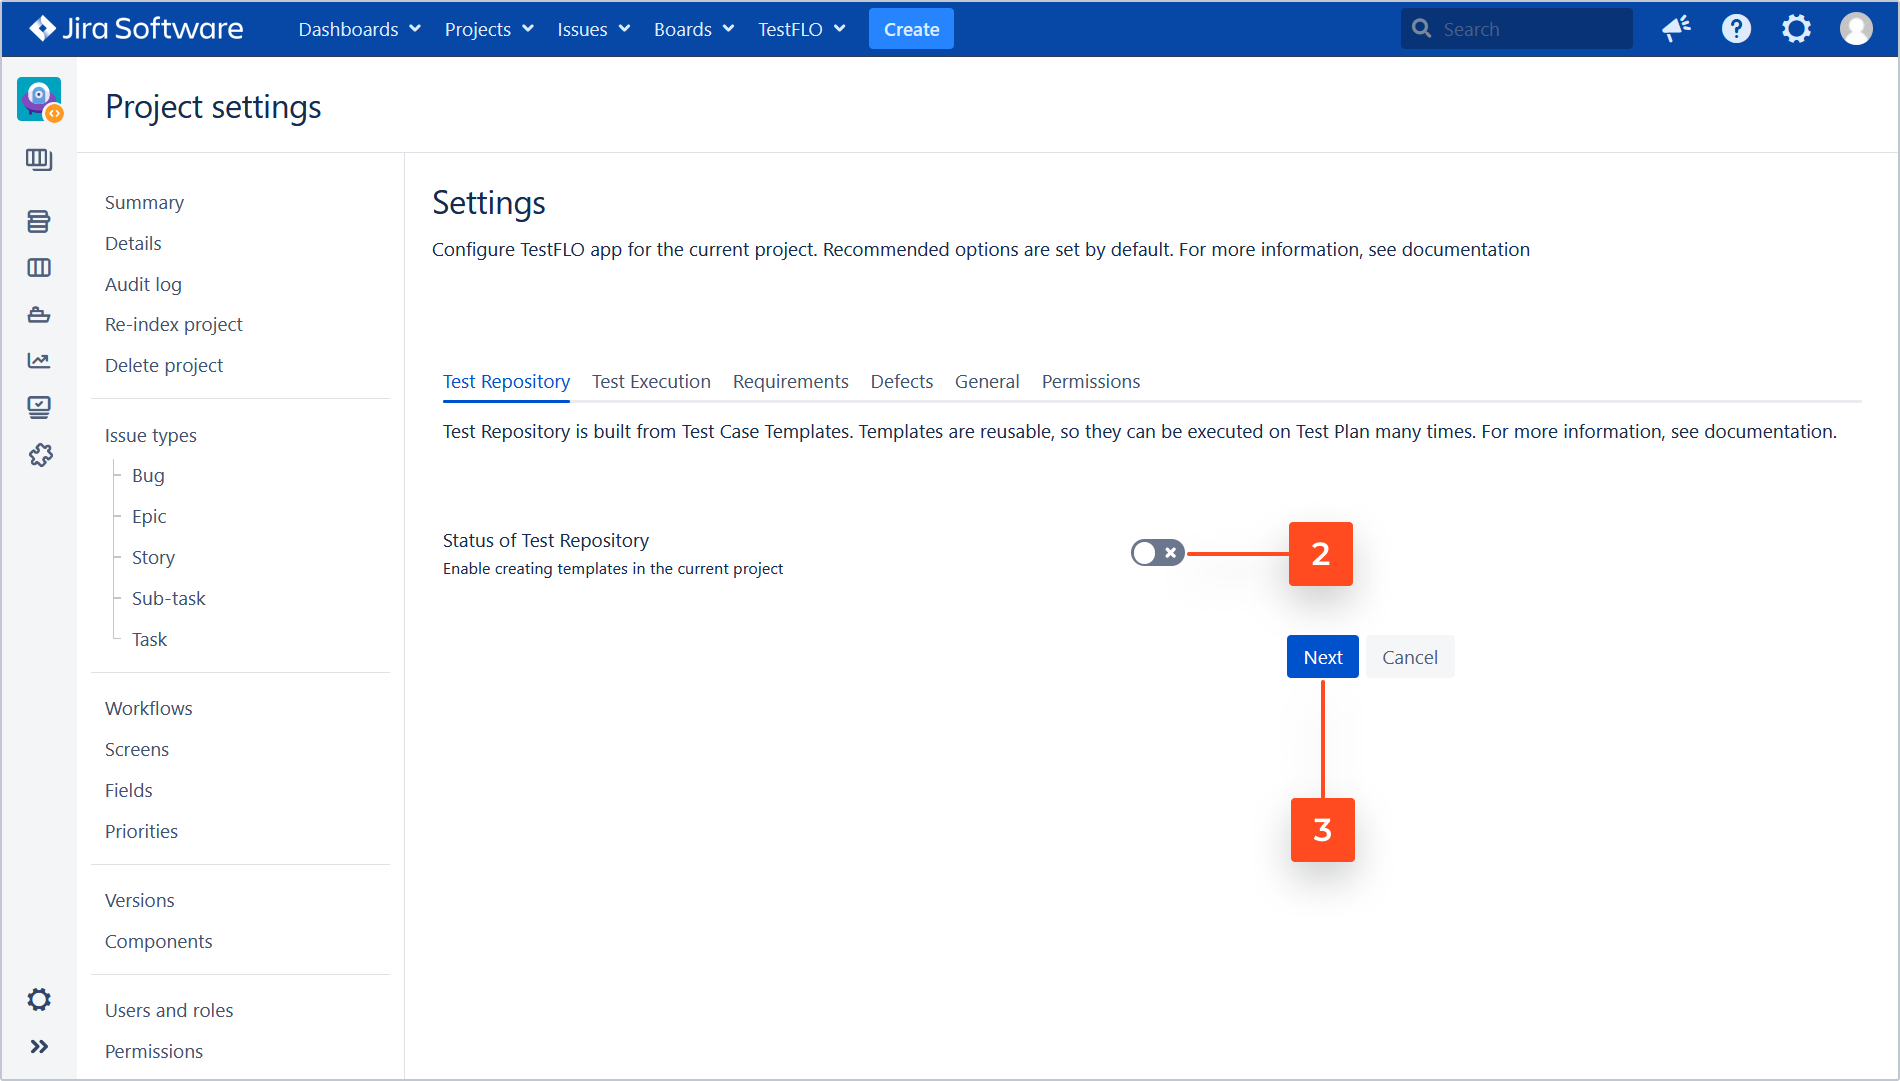
- Click customize.

- Click the slider to enable Test Repository.
- Click Next.
- Click the slider to enable Test Execution.

- After enabling the Test Execution, the additional options become available.
Info
It is possible to set an additional issue type as Test Plan and set default query for searching templates. You can also enable enforcing Test Case execution and define the statuses allowing you to proceed to the next Test Case. To learn more, see the Test Execution tab.
- Click Next.
- Click Add project to set project and issue type/s which will be treated as requirements.
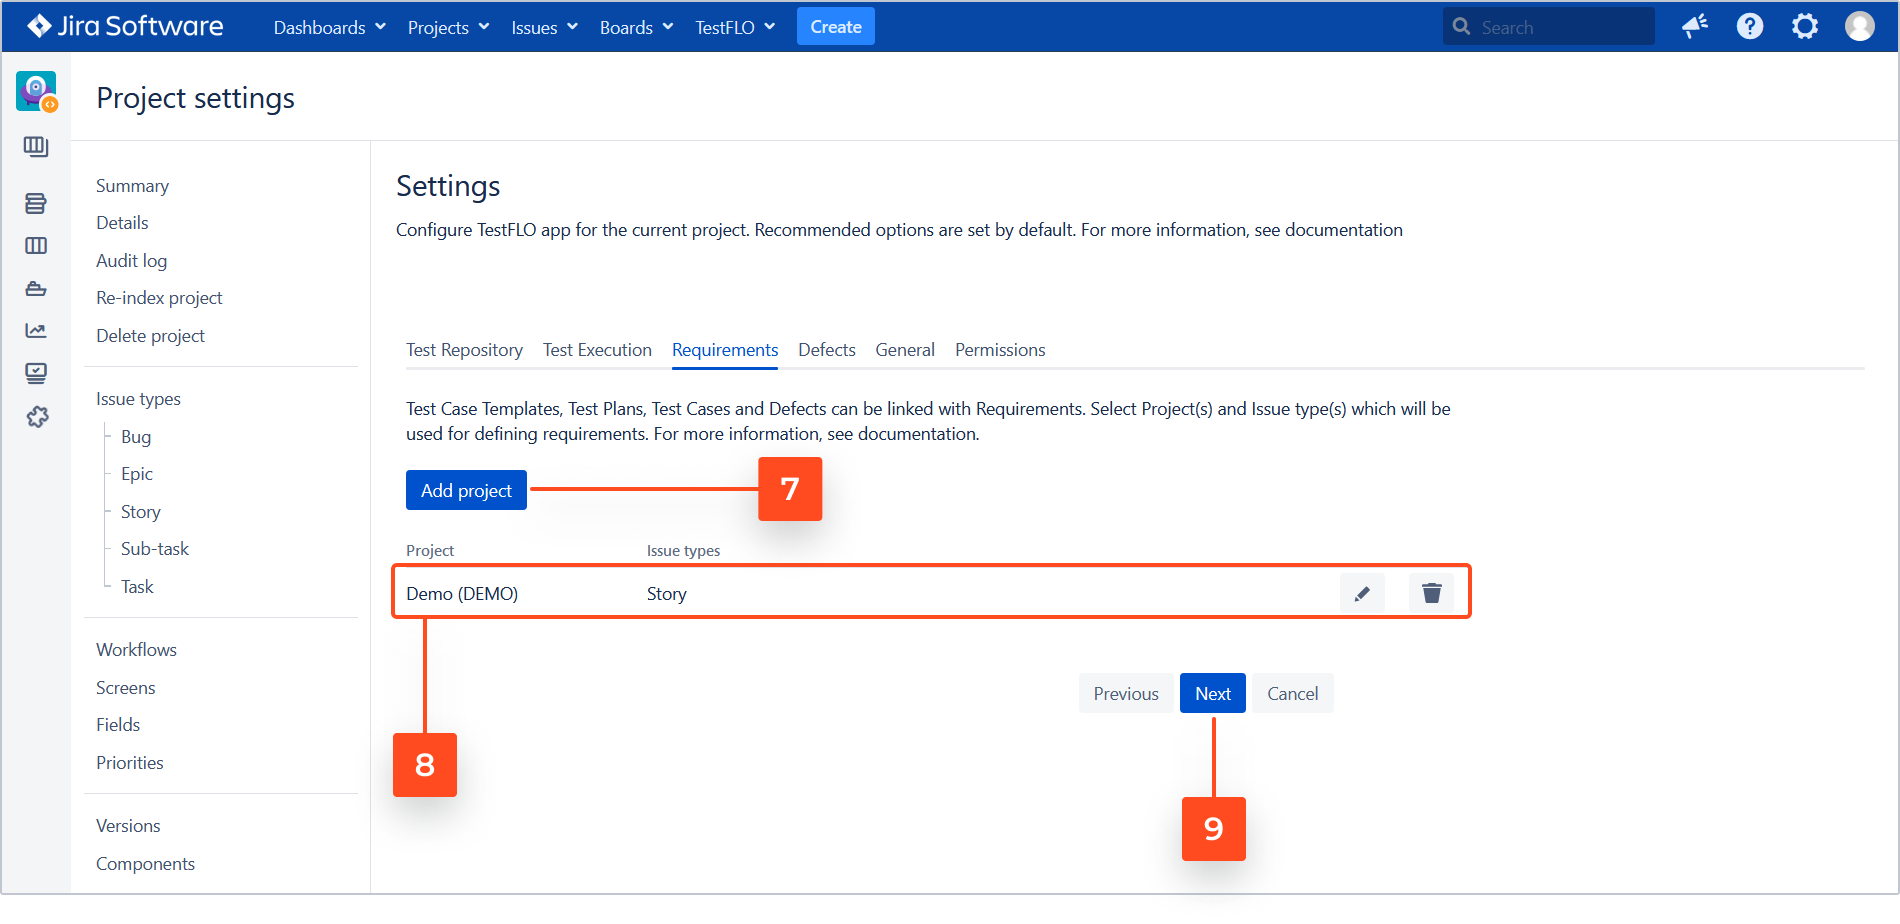
- Selected project and issue type/s is displayed in the list.
Info
To learn more, go to Requirements tab.
- Click Next.
- Click Add project to set project and issue type/s which will be treated as defects.
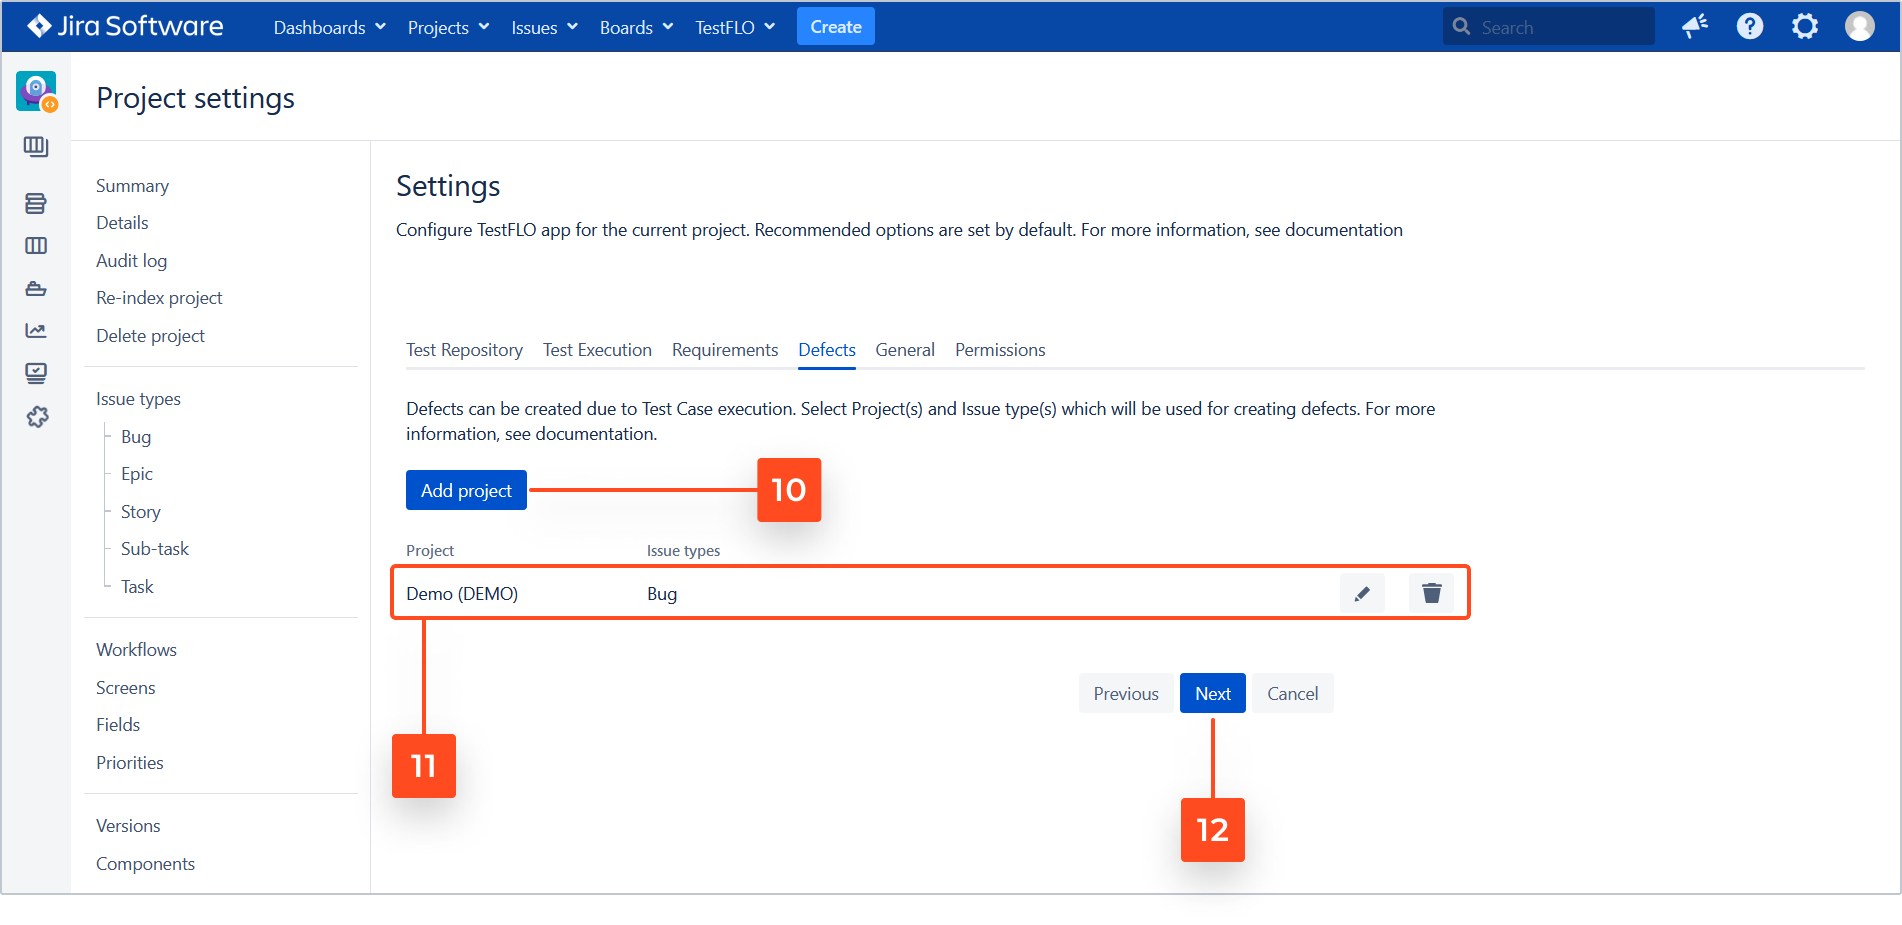
- Selected project and issue type/s is displayed in the list.
Info
To learn more, go to Defects tab.
- Click Next.
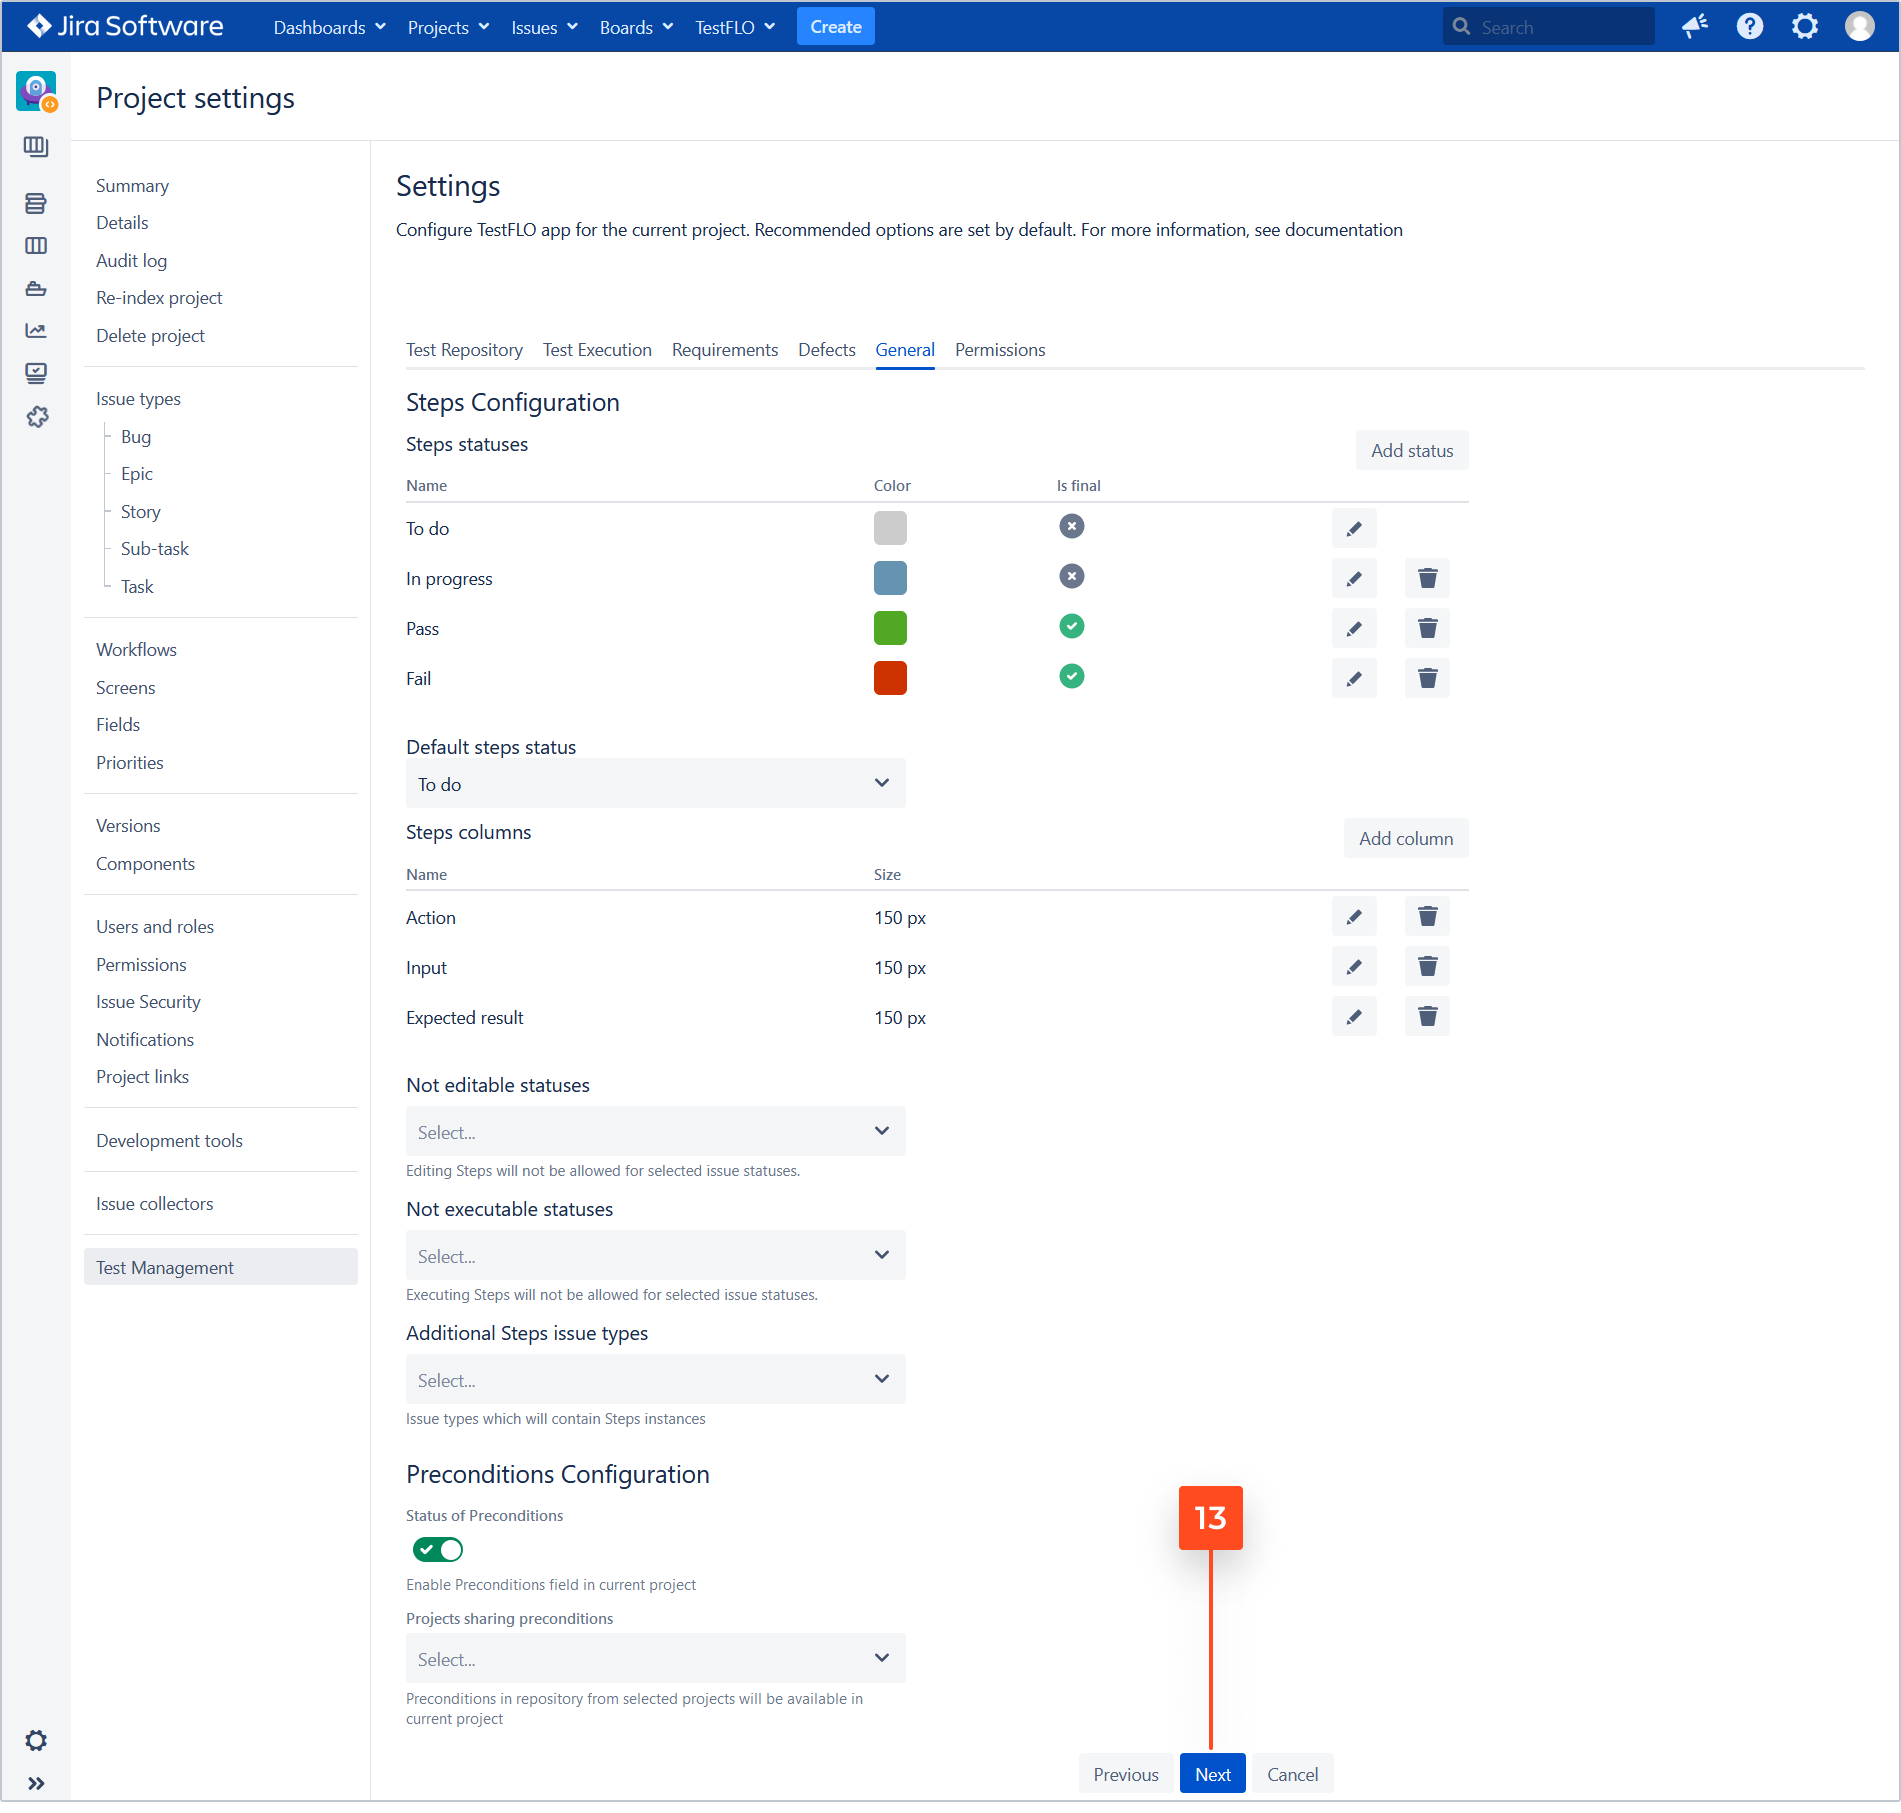
- Set configuration of Steps and Preconditions and click Next.
Info
To get more information see General tab.
- (Optional) Set the project permissions.
Info
To get more information see Permissions tab.
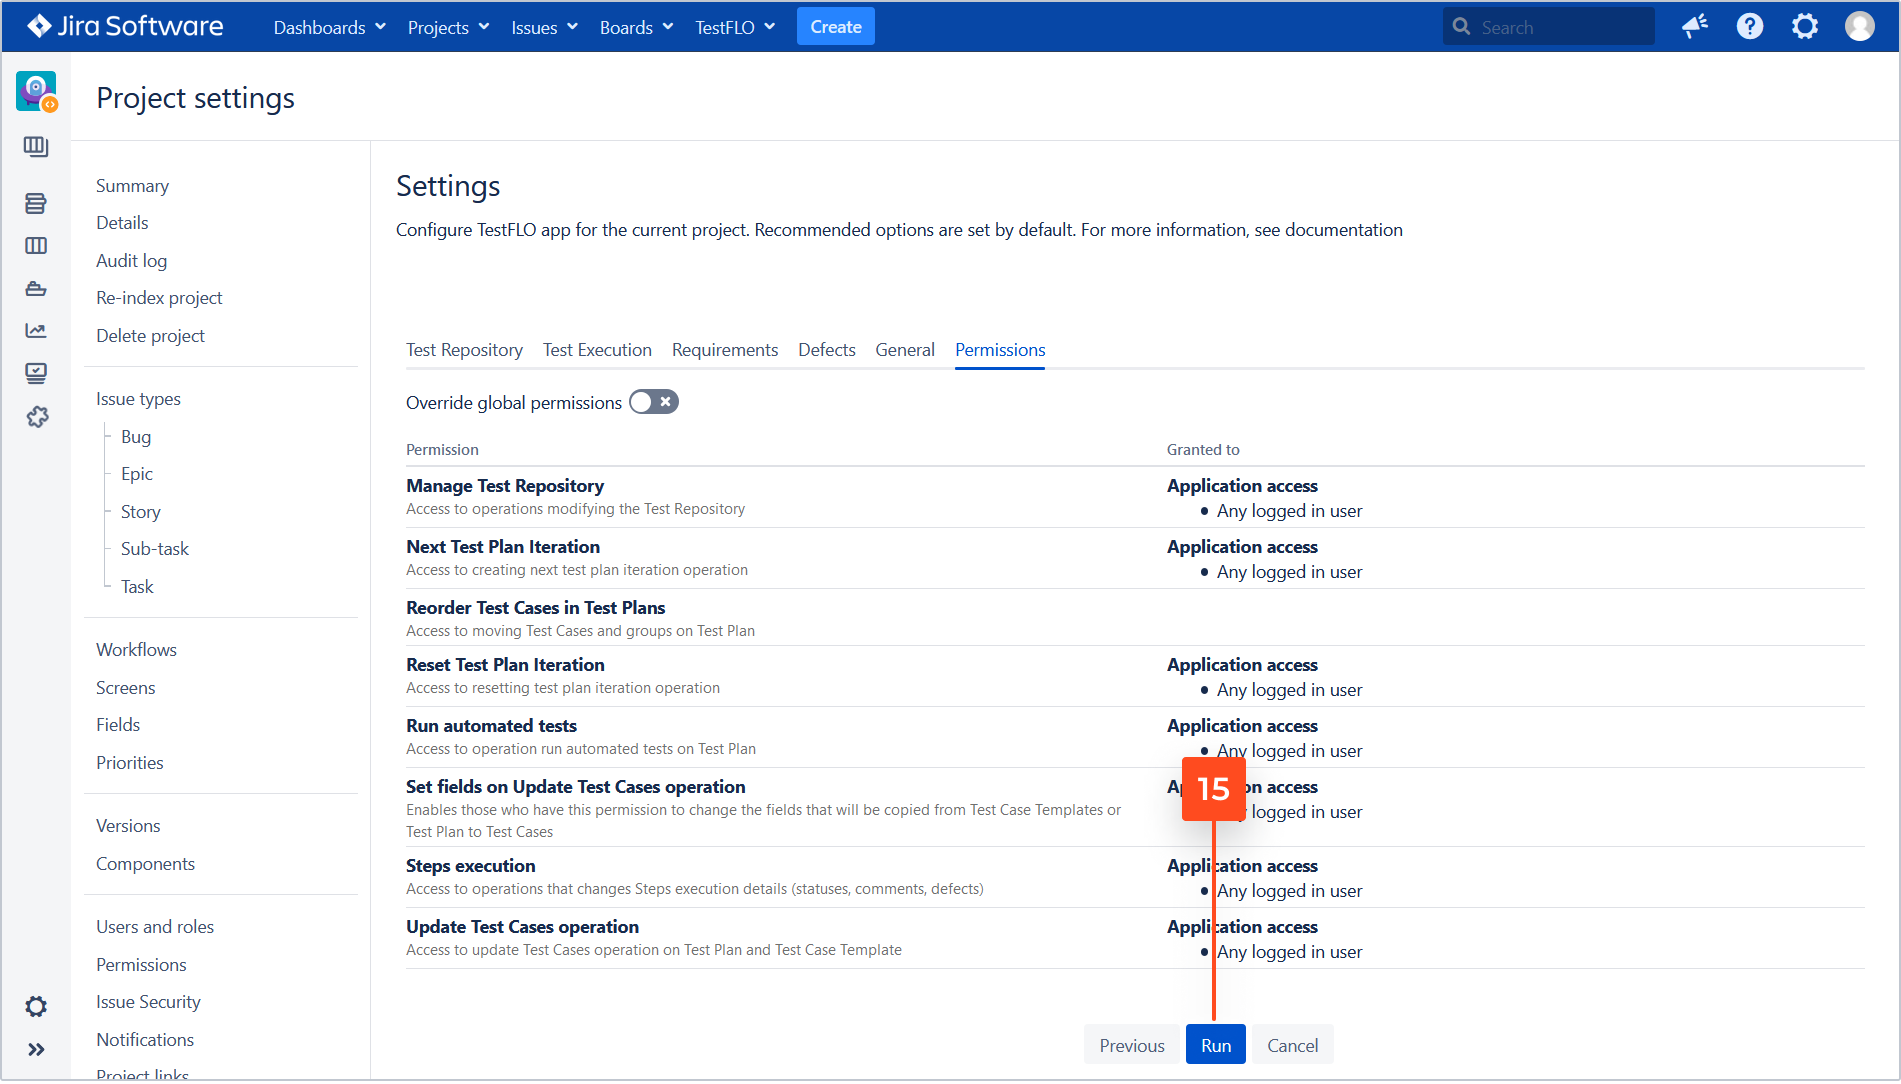
- Click Run
Result
The configuration is complete. From now on you can use the TestFLO in the project.