Manager as approver
Before you start working on your issues, a few may need to be approved. For example, there may be issues where the IT Manager needs to approve the purchase of a new computer.
Azure AD Attributes for Jira allows you to retrieve the user Manager value directly from the Azure AD, and make this manager the approver of the issue right after it was created.
You won’t have to change your configuration, even after the Manager leaves the company - value of the new Manager field will be synchronized immediately.
Steps
- Create a User picker (single user) type field (see the official Atlassian documentation for more information on creating custom fields ), name it for example “Manager”, and add it to a relevant screen.
- Navigate to your workflow configuration and add Copy data from Azure post-function to the Create issue transition (detailed information about adding a post-function to transition can be found here). Parameters of the post-function should be configured as followed:
- Your newly created custom field (for example Manager field) in the Choose target custom field parameter
- Manager in the Select attributes to copy parameter
- Reporter in the Source field parameter

-
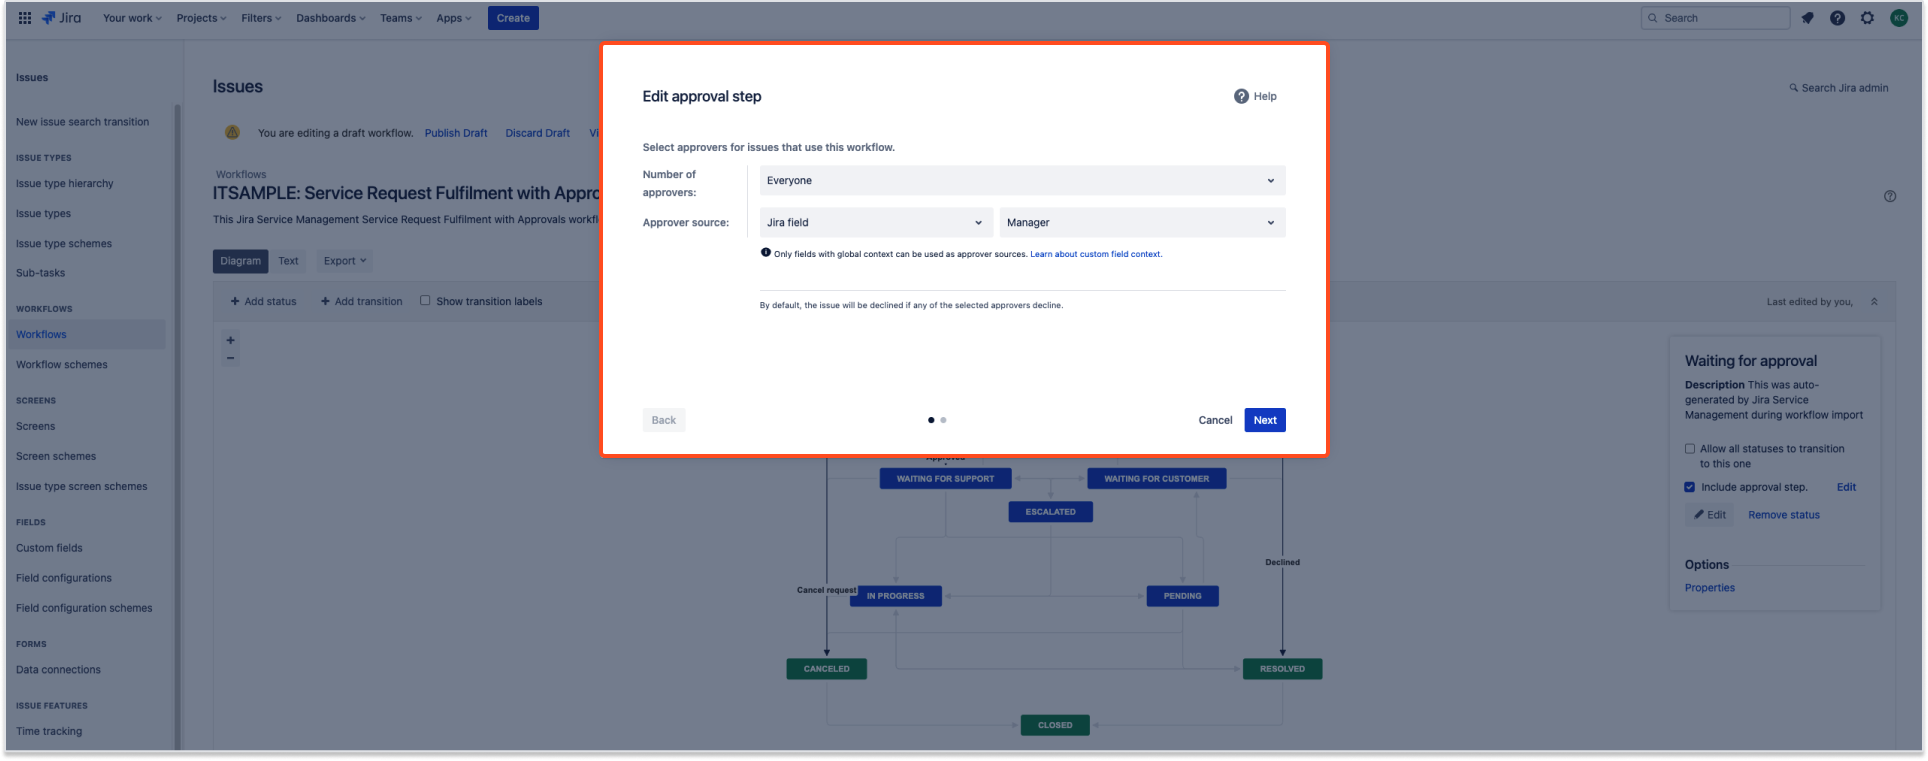
Add or configure the Approval step in the relevant status. Select appropriate number of approvers and as Approver source select Jira field and the custom field you’ve created earlier (for example, the Manager field)
Result
Now after creating an issue, the manager of the reporter will be fetched from the Azure AD and instantly set as the approver of created issue.