Permissions
To use the app’s full potential and read as well as edit user data, Azure AD Attributes Sync for Jira requires a set of
Azure AD permissions. However, if you plan on using only some of the app’s functionalities, the permissions can be adjusted at any moment by the Azure AD admin.
Update permissions in Azure AD
Steps
Here is how to update the permissions in Azure AD:
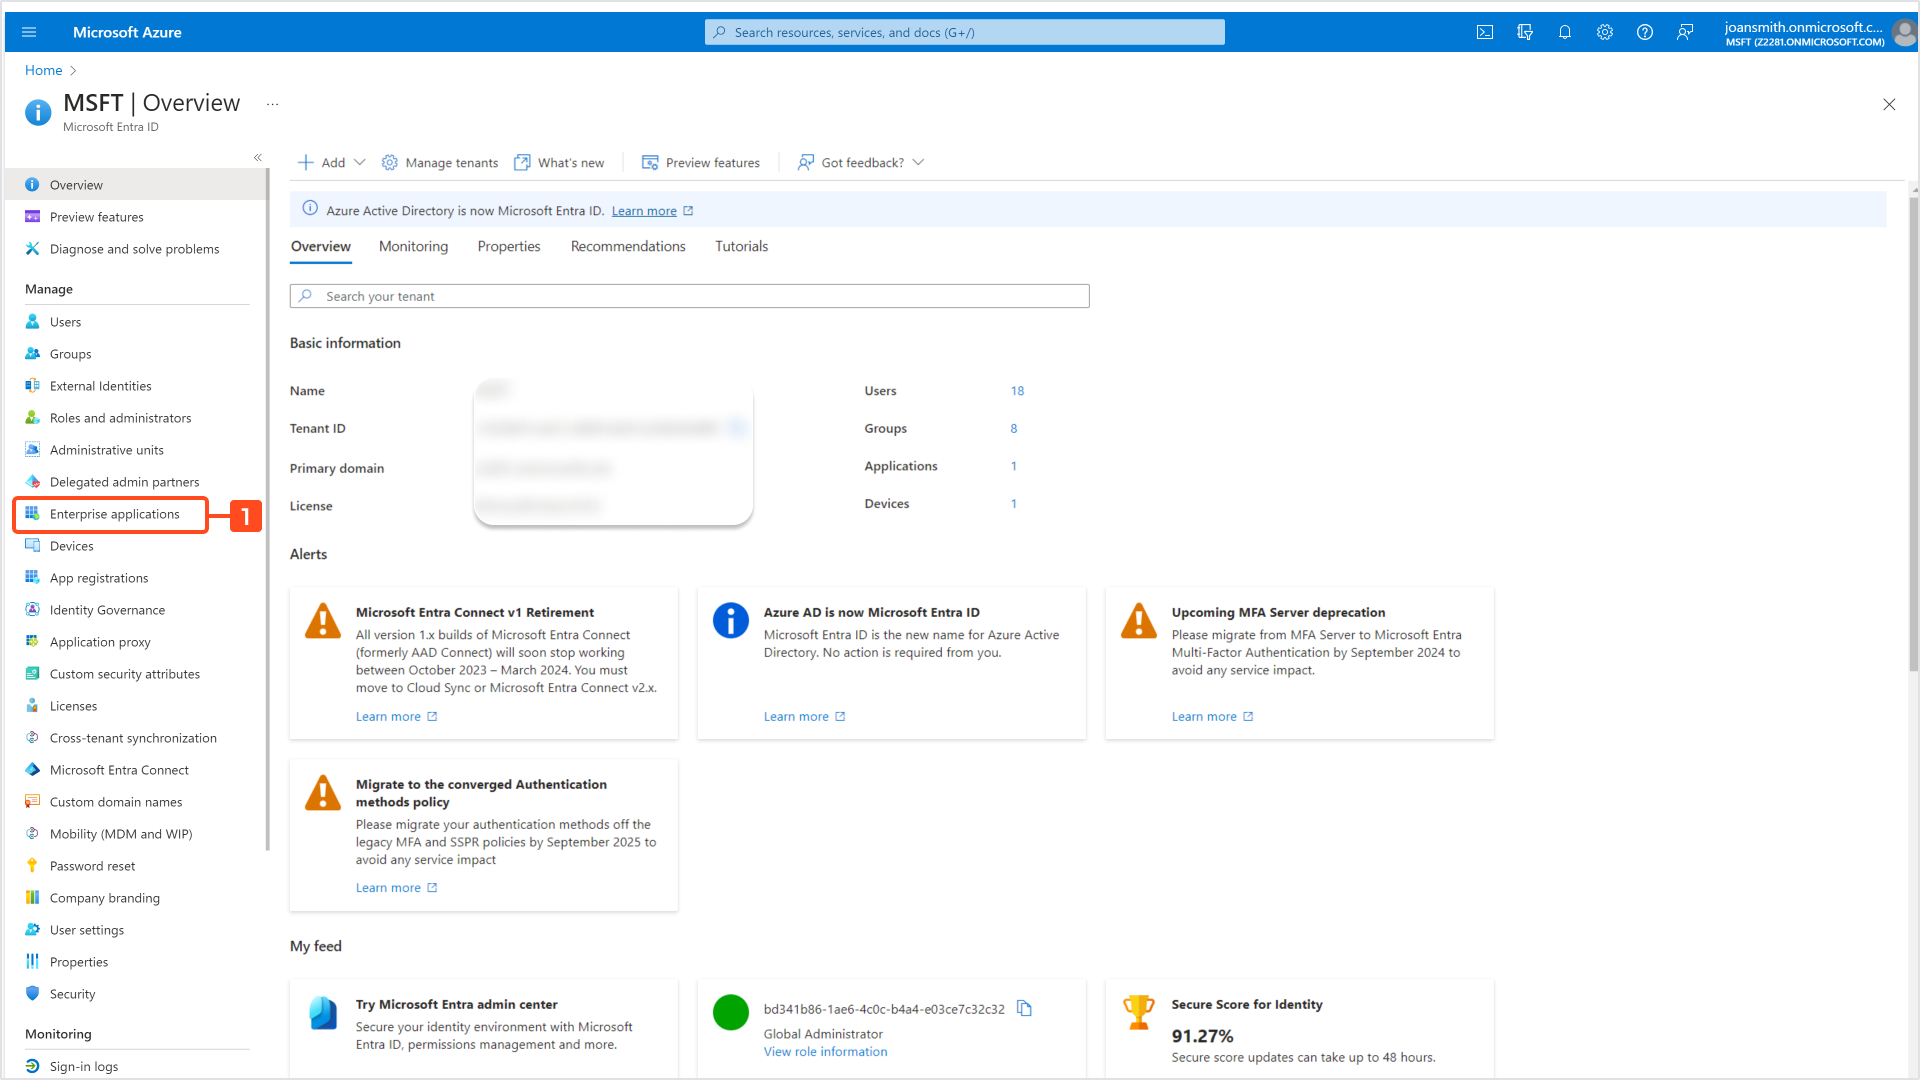
- In Entra ID (formerly Azure AD), go to Enterprise Applications.

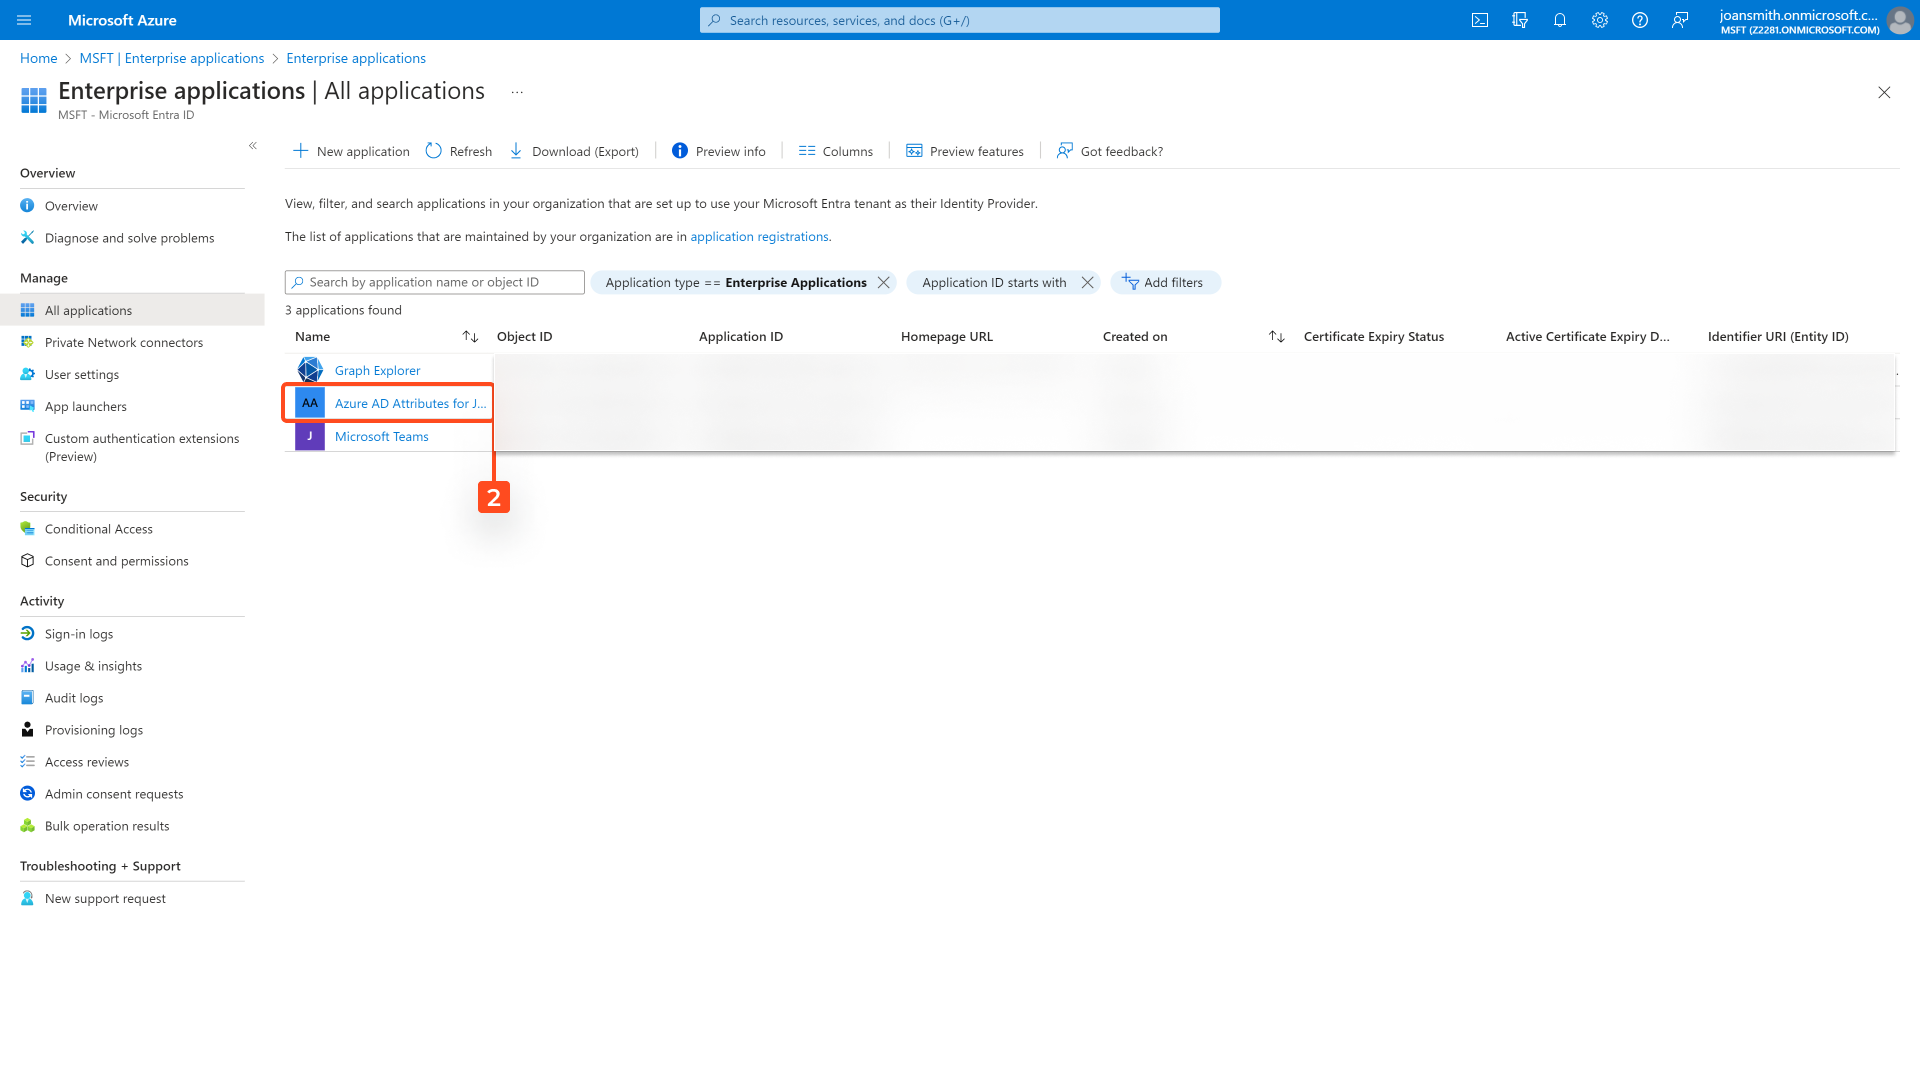
- Choose Azure AD Attributes for Jira.

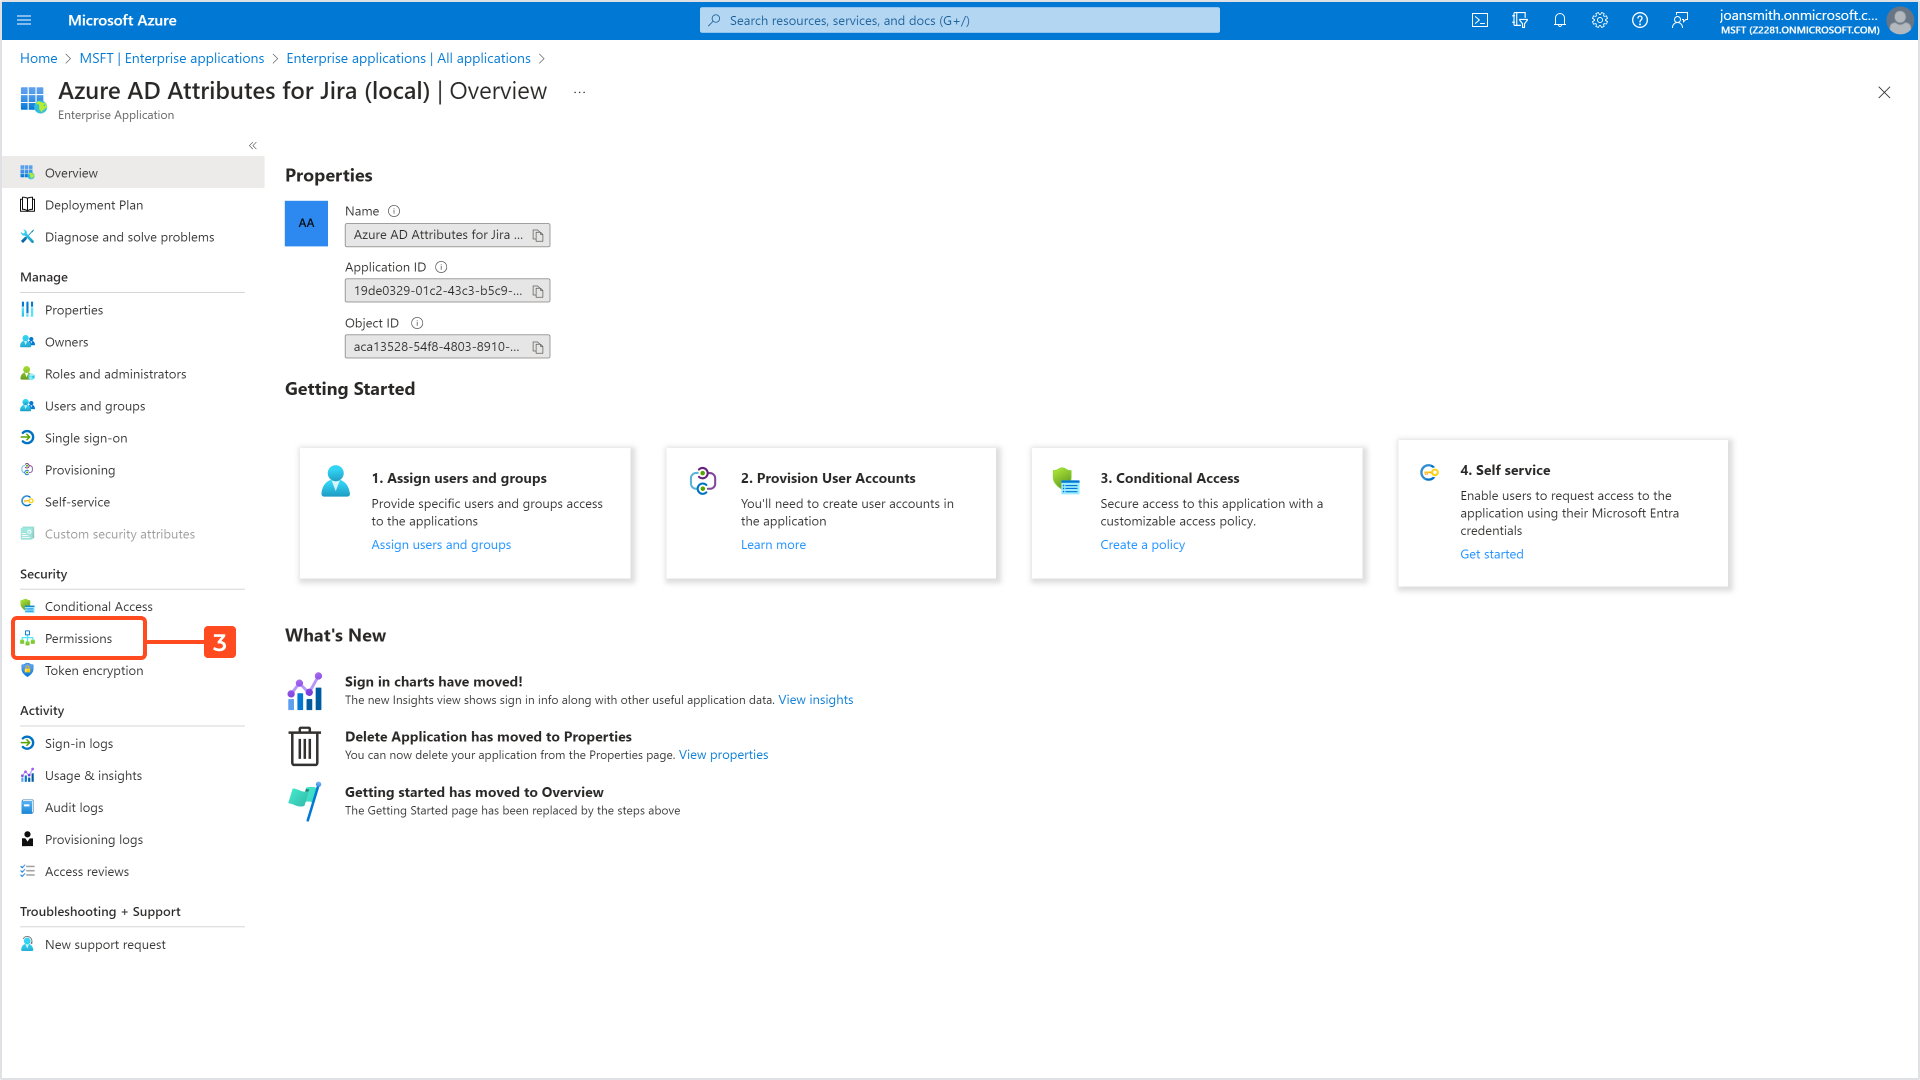
- Go to Permissions.

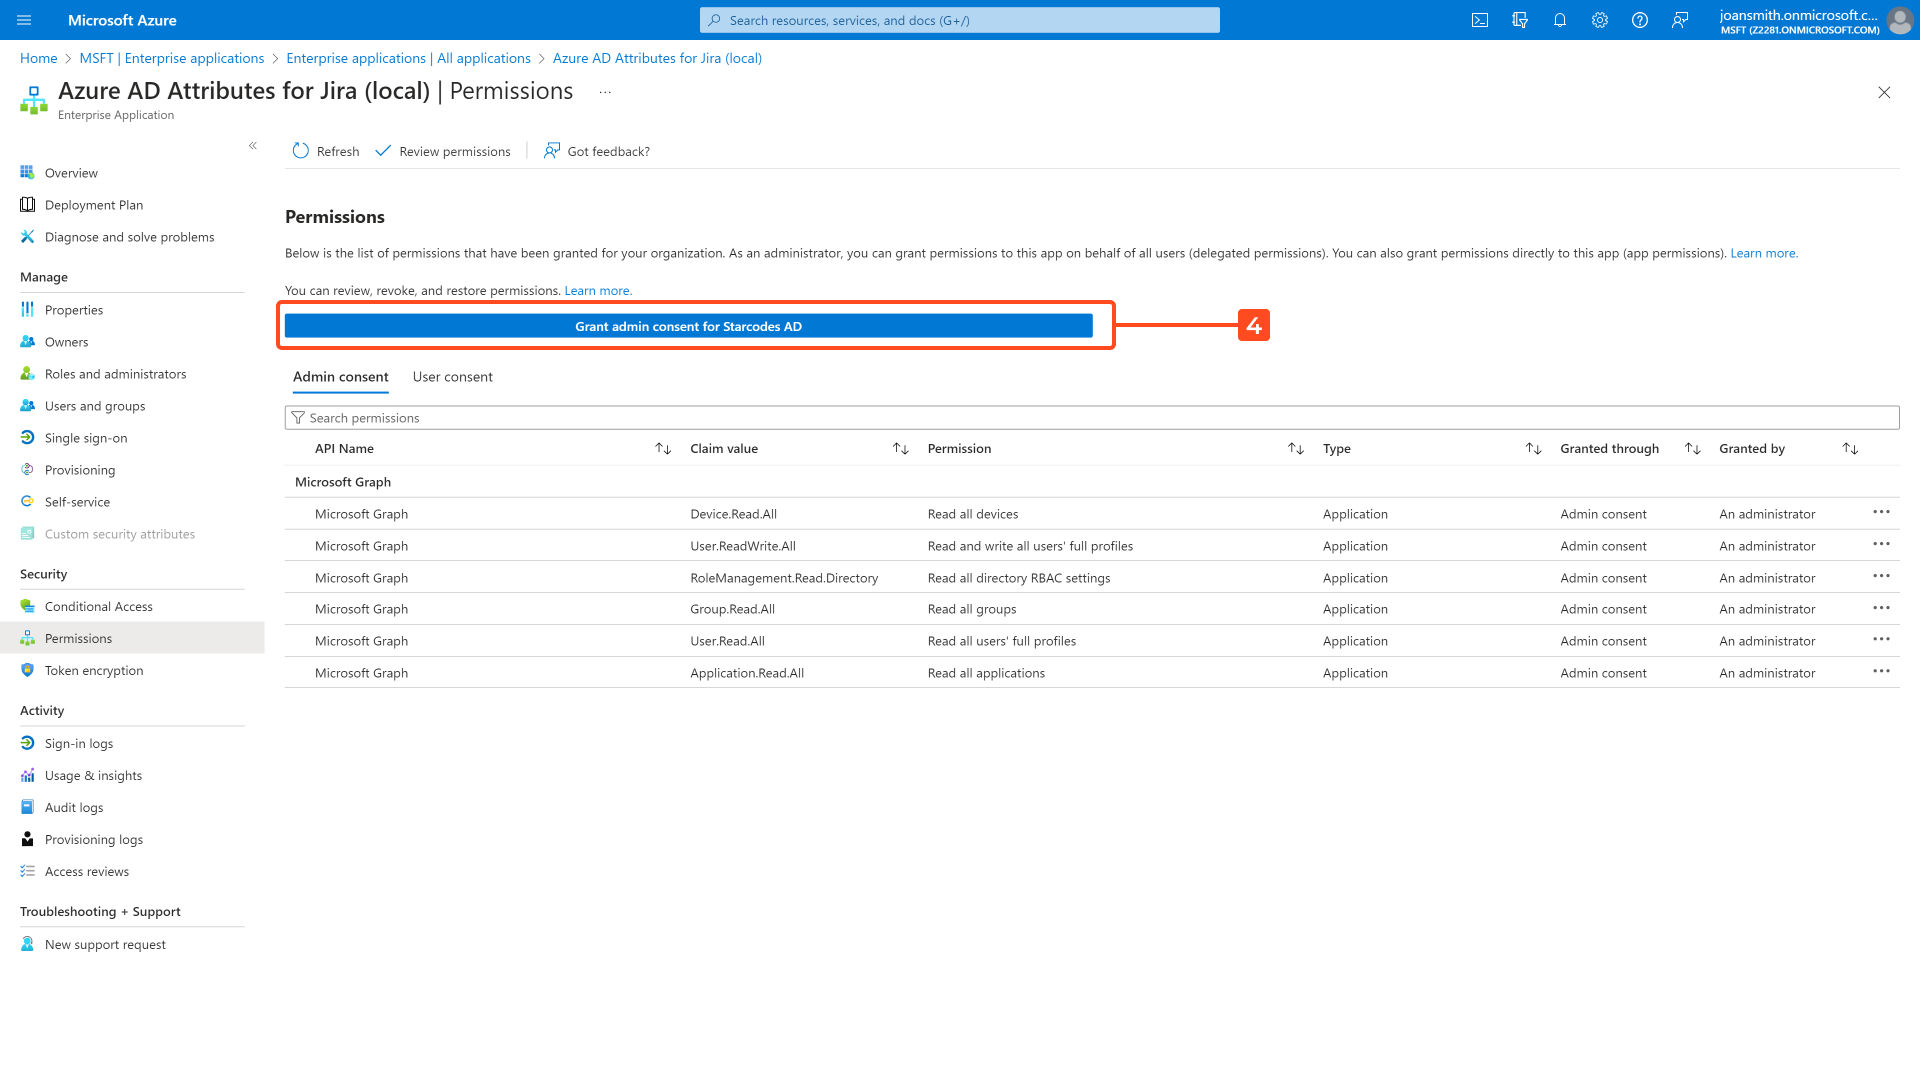
- Click Grant admin consent for the directory.

- Click Accept.
Permissions’ details
The app will ask you to configure the list of permissions according to your preferences. Below, you’ll find them in the same order as they appear in the app, along with
short descriptions explaining what each permission is for and what will happen if you turn it off:
- User.Read permission is required to add the app to the directory, which makes it essential for the app’s key features to work.
- Without the Device.Read.All permission, you won’t be able to synchronize information about devices assigned to the users.
- Without the Group.Read.All permission, you won’t be able to synchronize information about licenses assigned to the users.
- User.Read.All permission is necessary to read user details, which makes it another essential permission for the app’s key features to work.
- Without the User.ReadWrite.All permission, the Update attribute in Azure AD post function won’t work (you won’t be able to edit user information), but other app features will work properly.
Permissions for the newest app version don’t automatically show on the permissions list in the app. They’ll appear when the admin uses the Grant admin consent button.
If you can’t find the answer you need in our documentation, raise a support request.