Apps documentation
Dynamic Forms for Jira
Cloud Server/Data Center
Dynamic Forms for Jira

Cloud

Server/Data Center

Documentation
FAQ
Release notes
Migration to Cloud
Last updated Mar 1, 2025

Custom (Project configuration)

Configuring rules

This chapter guides you through the custom configuration procedure.

Steps

  1. Enable issue types and start a new configuration from scratch.

    Note
    To enable presets you need to create one in global configuration. See presets for details as it’s a different process than custom configuration.
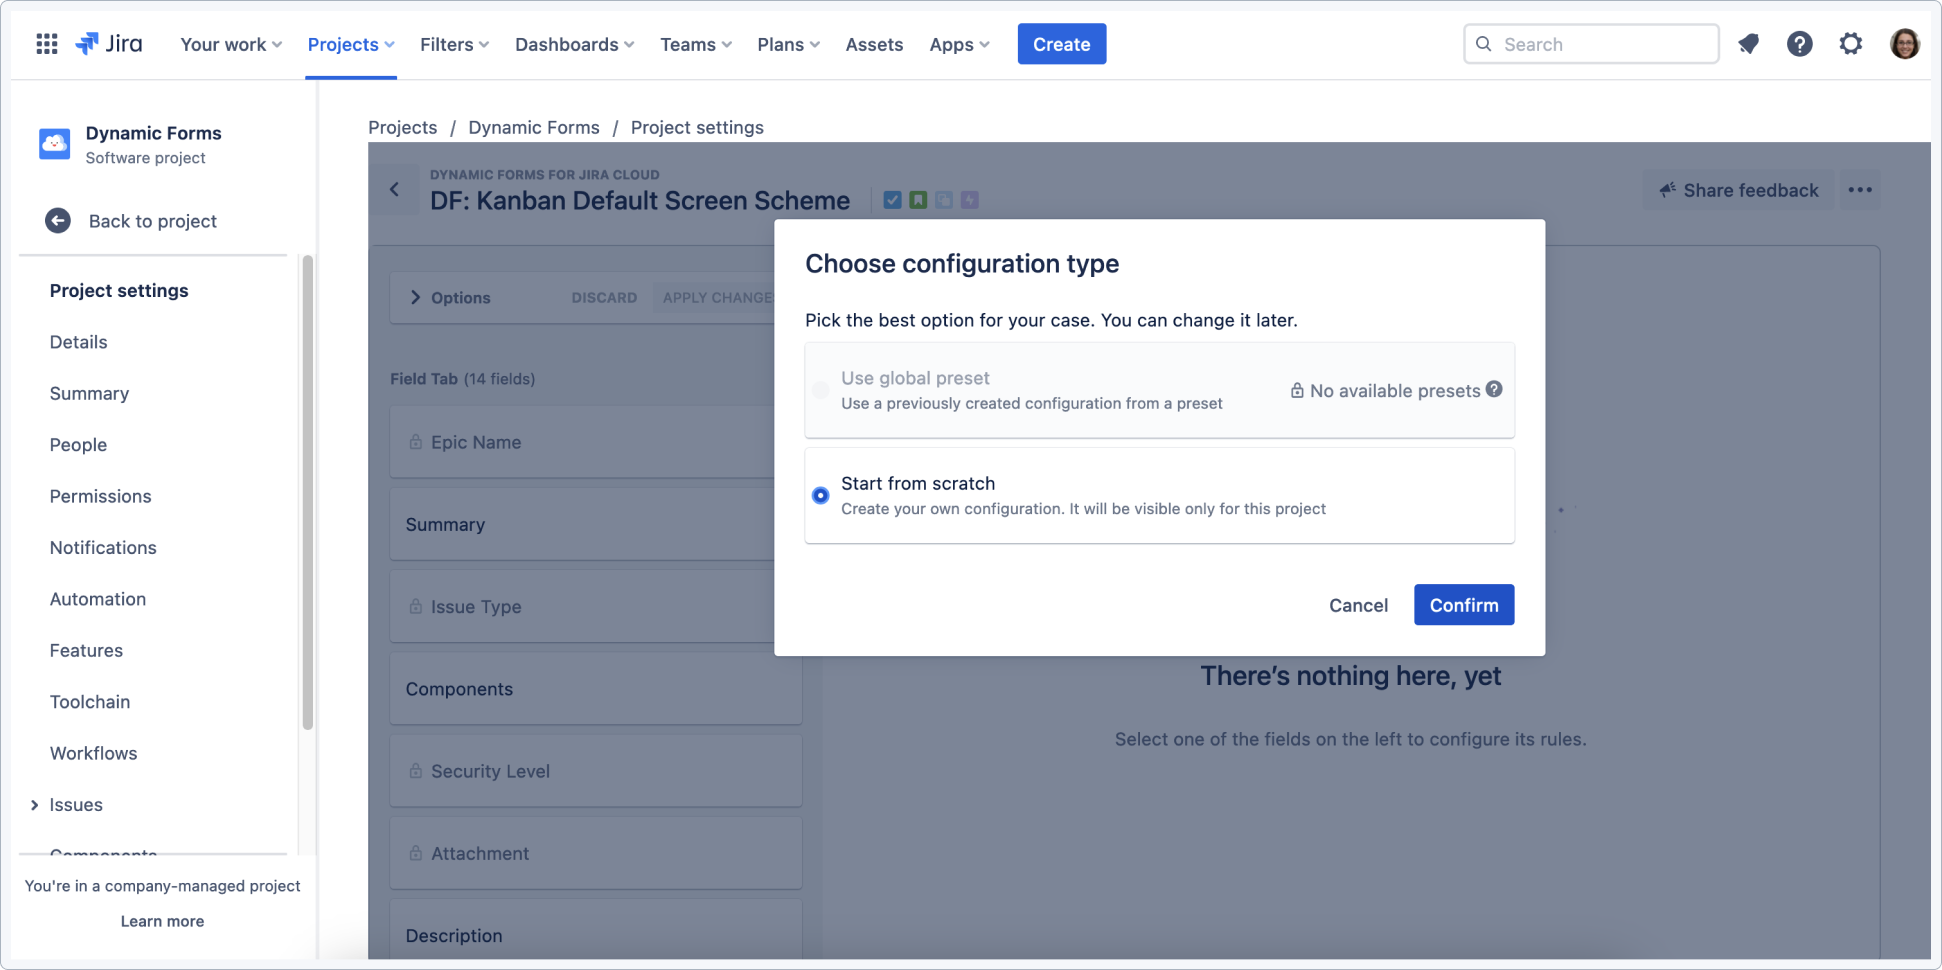
    Dynamic Forms for Jira - extended Jira custom field management for Jira Cloud
    Dynamic Forms for Jira - extended Jira custom field management for Jira Cloud

  2. Choose a field from the list and click + Add new rule for this field.
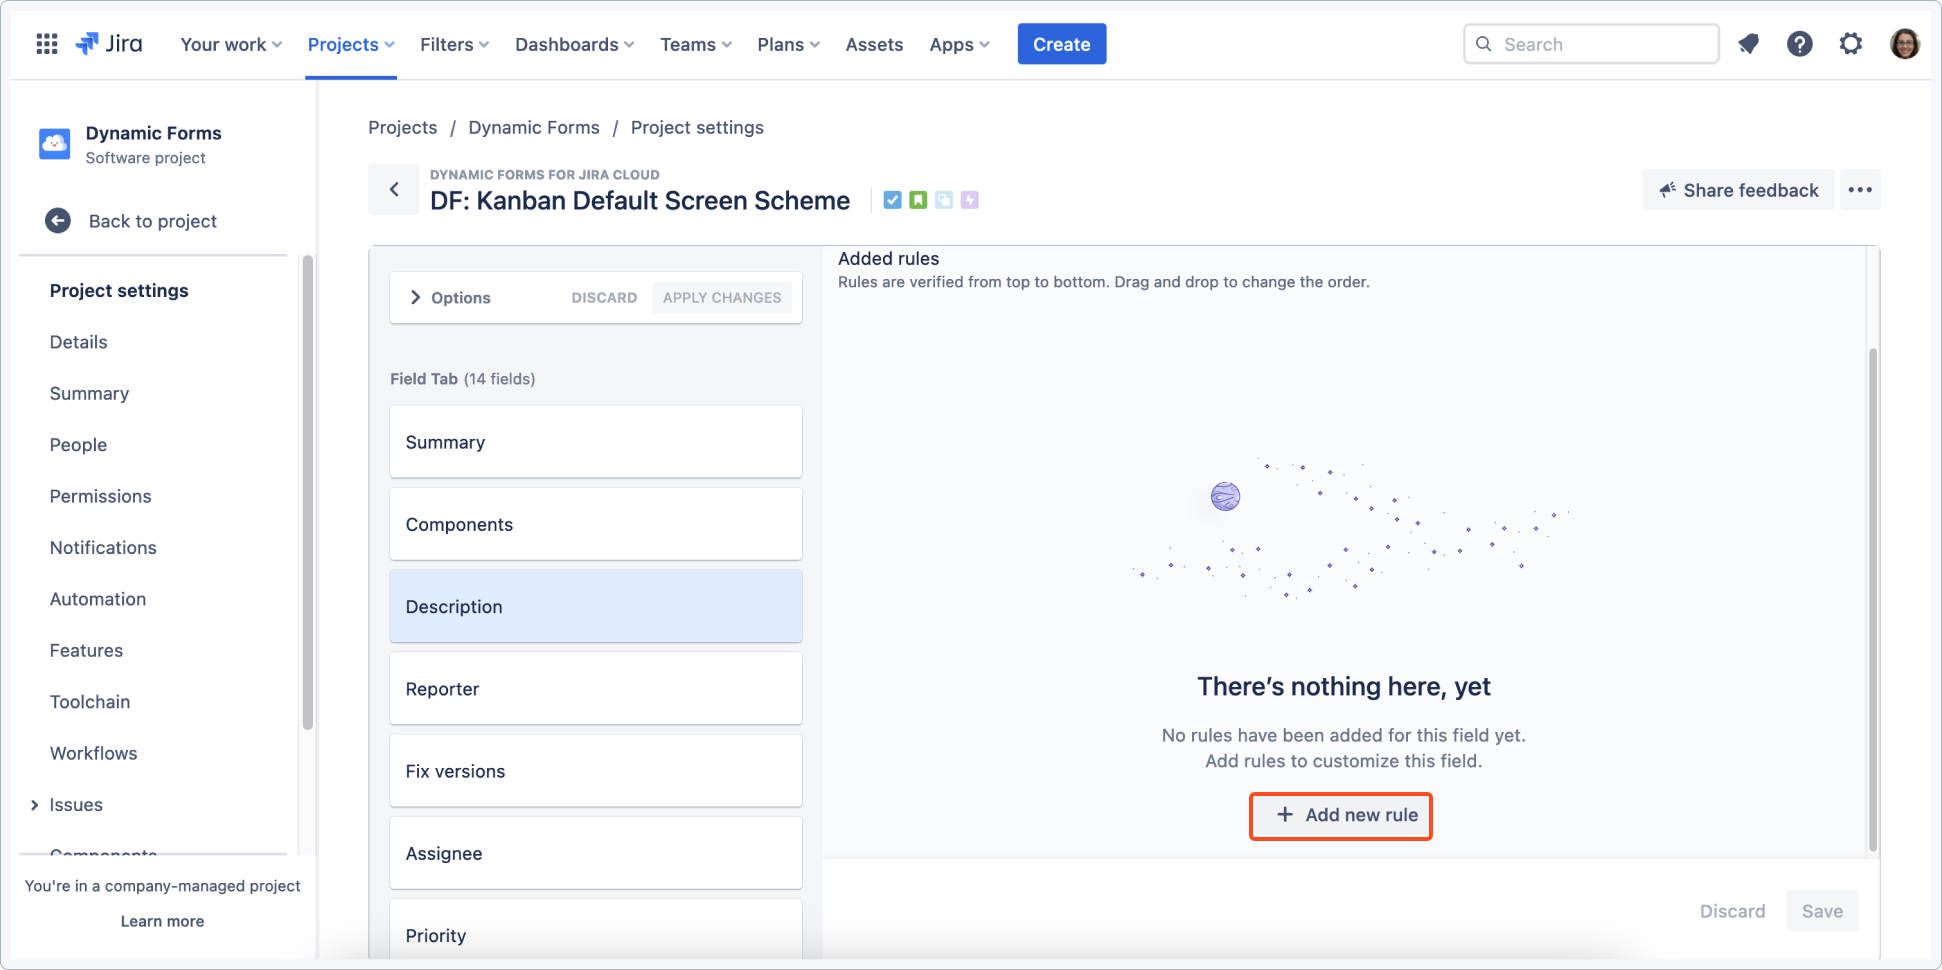
    Dynamic Forms for Jira - extended Jira custom field management for Jira Cloud
    Dynamic Forms for Jira - extended Jira custom field management for Jira Cloud
    Note

    Rules are applied from top to bottom so if any rule is matched, then next rules in the hierarchy won’t be applied.

    Tip

    Icons next to the project name indicate selected issue types. Issue types that are grayed out were not enabled.

    Dynamic Forms for Jira - extended Jira custom field management for Jira Cloud
    Dynamic Forms for Jira - extended Jira custom field management for Jira Cloud
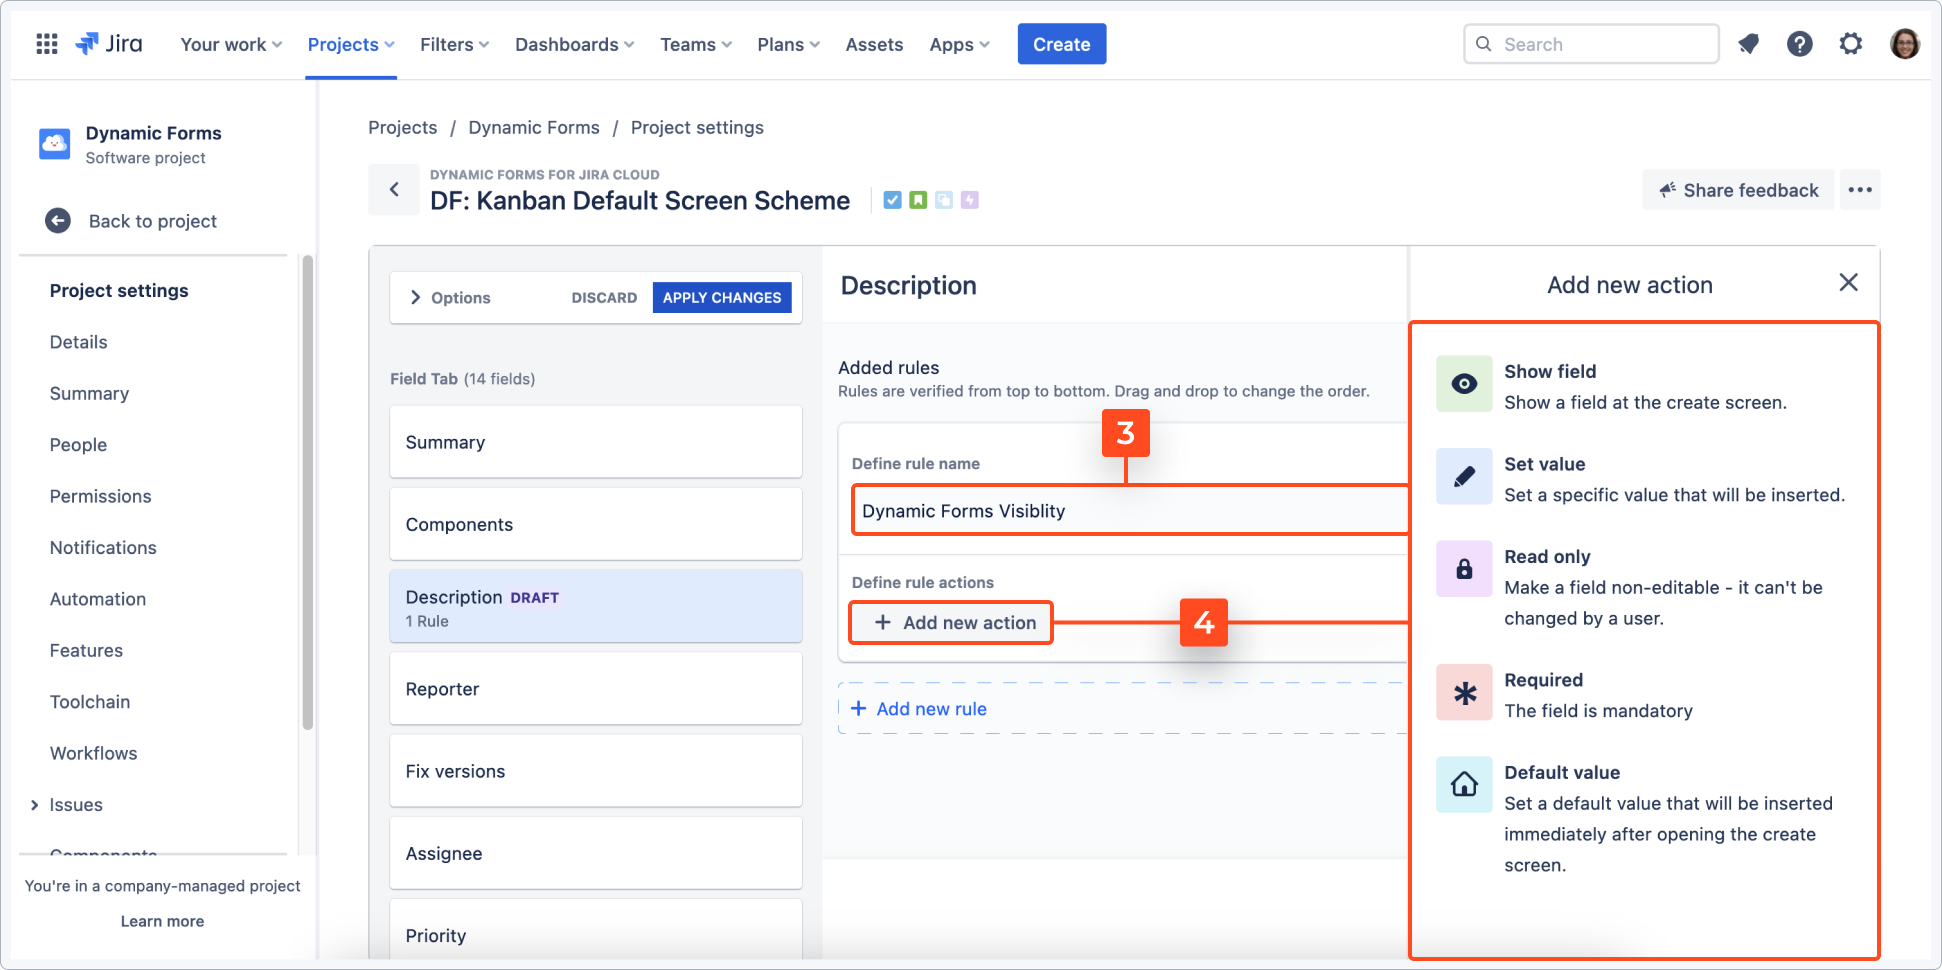
  3. Define a name for the rule.

  4. Click + Add new action and select an action from the list.

    Dynamic Forms for Jira - extended Jira custom field management for Jira Cloud
    Dynamic Forms for Jira - extended Jira custom field management for Jira Cloud

    Tip

    You can see added actions in the rule window. Press and hold the bin icon to remove an action.

    Dynamic Forms for Jira - extended Jira custom field management for Jira Cloud
    Dynamic Forms for Jira - extended Jira custom field management for Jira Cloud
  5. Click + Add condition block to set conditions that trigger the action.

    Each condition has its own editing tools. You can reorder rules and conditions or delete them.
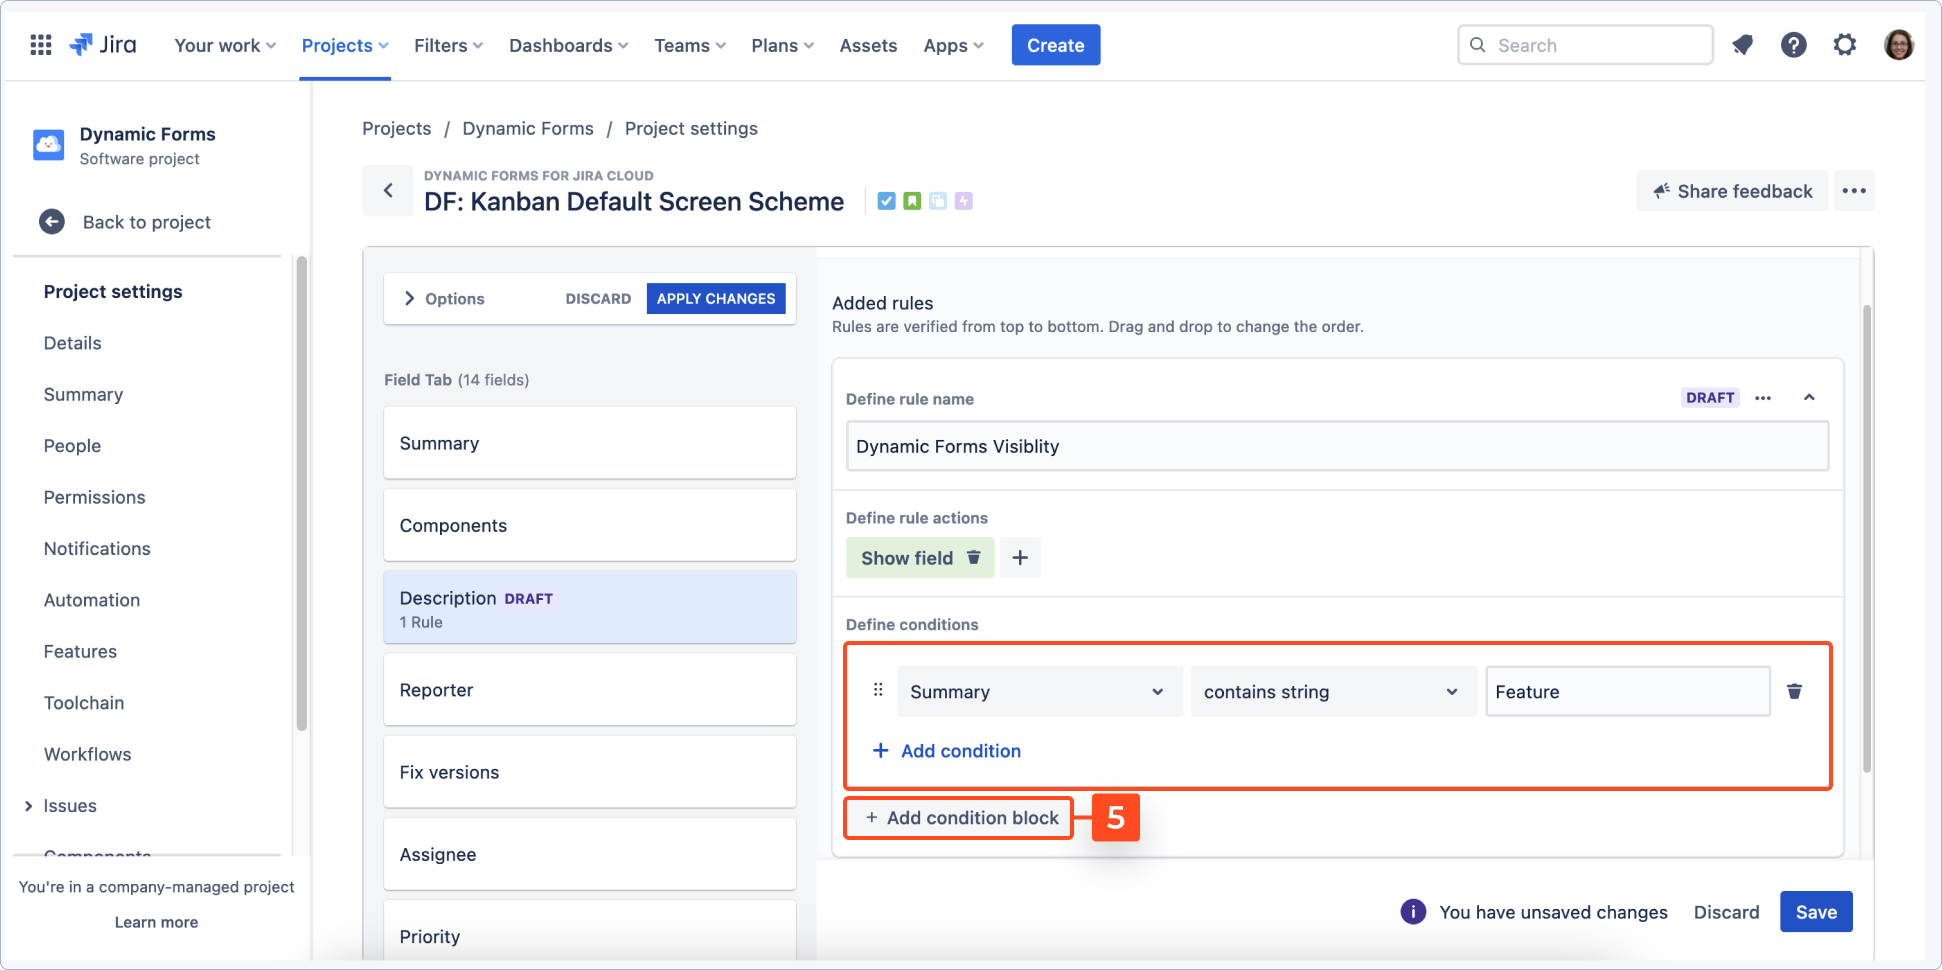
    Dynamic Forms for Jira - extended Jira custom field management for Jira Cloud
    Dynamic Forms for Jira - extended Jira custom field management for Jira Cloud
  6. Save changes.

Tip

All conditions that are not saved are marked as Draft (visible near the field’s name).

You can:

  • use the Save button assigned to each field’s condition configuration.

  • save changes in bulk by clicking Apply Changes (above the list of fields).

    Dynamic Forms for Jira - extended Jira custom field management for Jira Cloud
    Dynamic Forms for Jira - extended Jira custom field management for Jira Cloud
Note
Due to the UI Modifications limitations all rules that are configured in the Dynamic Forms for Jira app can only work on the Create issue dialog.

Result

Configuration has been created.
Tip
Open the create screen and trigger rules to check if configuration is correctly configured.

Transition screens

Transition is a state between two statuses in a workflow. Transition Screens in the Dynamic Forms app allow you to manage fields of issues with different statuses.

To use transition screens add a transition to a worflow.

Info

To use transition issues feature in Jira:

  1. Navigate to Settings.
  2. Click Personal Jira settings > General.
  3. In the Jira labs section turn the toggle on next to the New issue transition experience. Learn more about transition an issue. .

Steps

  1. Navigate to your project > Project settings > Apps > Dynamic Forms.
Tip

You can also access the application by clicking Apps in the main navigation bar and selecting Dynamic Forms.

  1. Click Transition Screens.
  2. Select a workflow from the drop-down list.
Select the workflow to configure transition screen.
  1. Click the cog icon next to the selected issue type.
Click the cog icon next to the selected issue type.
  1. Configure rules.
Tip

Rules can be saved by the project administrator.

  1. Go back to the Transition Screens view.
  2. Turn the Enabled toggle on next to the configured issue type.
Enable transition screen.

Result

The applied configuration of the fields is displayed after the issue status transition.

Warning

Transition screens configuration can be removed when:

  • a configured issue type is removed.
  • a workflow is detached from the given issue type.
  • a transition is removed.
  • a different workflow scheme is applied.
  • a workflow is assigned to another issue type.
  • a workflow scheme for the project is changed.
  • a workflow is removed.

Supported fields for Transition Screens

Field Support
Affects versions
Assignee
Cascading select
Checkbox
Date picker
Date time
Description
Fix versions
Issue type
Labels
Multi select
Multi user picker
Number
Parent
Priority
Radio buttons
Reporter
Resolution
Select
Text area
Text field
URL
User Picker
Need help?

If you can’t find the answer you need in our documentation, raise a support request. Include as much information as possible to help our support team resolve your issue faster.