- About TestFLO
- Overview
- For whom
- Key benefits
- Roadmap
- Onboarding
- Basic concepts
- Glossary
- Quick guide for Jira Administrator
- Quick guide for QA manager
- Quick guide for testers
- Demo environment
- Requirements
- Requirements
- Requirement operations
- Designing tests
- Test Case Template
- Organizing tests
- Reporting & tracking
- Reporting and tracking overview
- Requirement Test Coverage Report
- Requirement Traceability Report
- Requirement Test Execution Report
- Test Plan Execution Report
- Test Plan Iterations Report
- Test Execution Report
- Test information panel
- Issue panels
- Export test issues
- Dashboard Gadgets
- Miscellaneous
- TestFLO menu
- Issue Search Dialog
- JQL functions
- Administration & Configuration
- Projects' organization
- Create project
- Project configuration
- TestFLO settings
- TestFLO Permissions
- Custom fields
- Advanced workflow configuration
- Panel Filter Result
- Import/Export TCT
- Test Automation configuration
- Upgrade reports
- Upgrade guide
- Integrations
- Confluence
- REST API
- Configuration Manager for Jira
- Xporter
Test Case execution
This page provide information about Test Case execution.
Test Case workflow processing
After creating Test Cases on the Test Plan, you can start processing test execution. By default, the Test Case has its own workflow, which is based on five statuses: Open, In progress, Pass, Fail and Retest. You can start running Test Cases using default workflow or change it and adapt to your project needs.
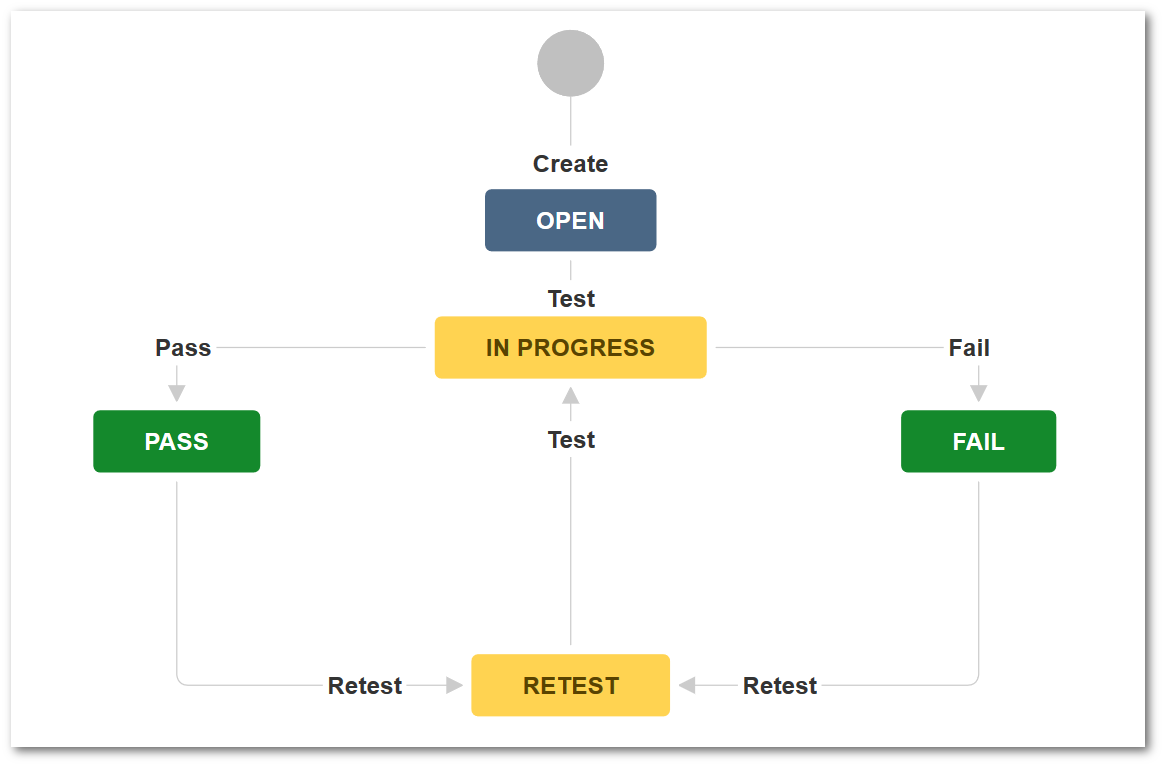
You can configure Test Case workflow in the same way as other workflows in Jira.
Changing steps statuses
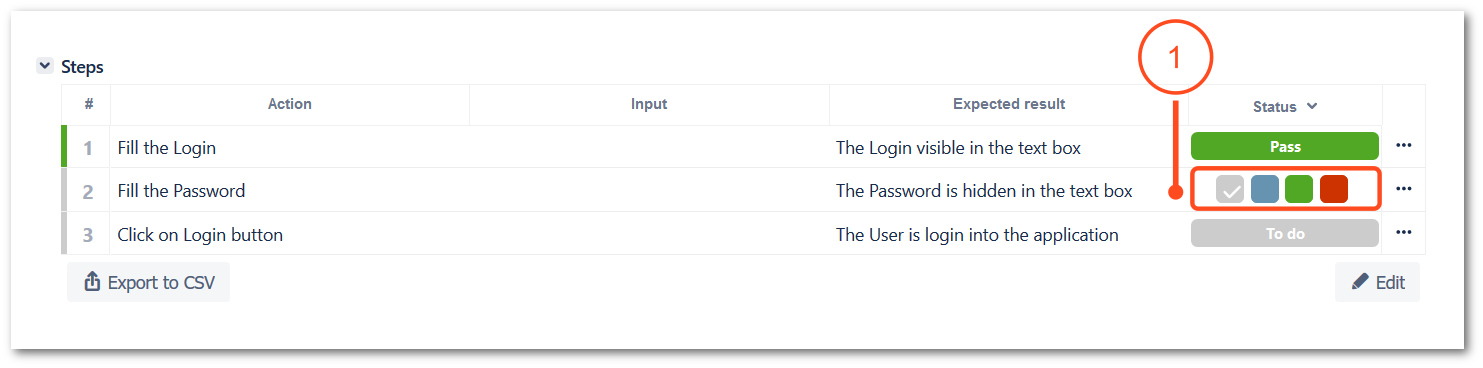
The next step of processing Test Case is execute test steps. After preparing the test environment and meeting all the preconditions, you can start executing the steps. There are three ways to change execution status of steps in Steps panel:
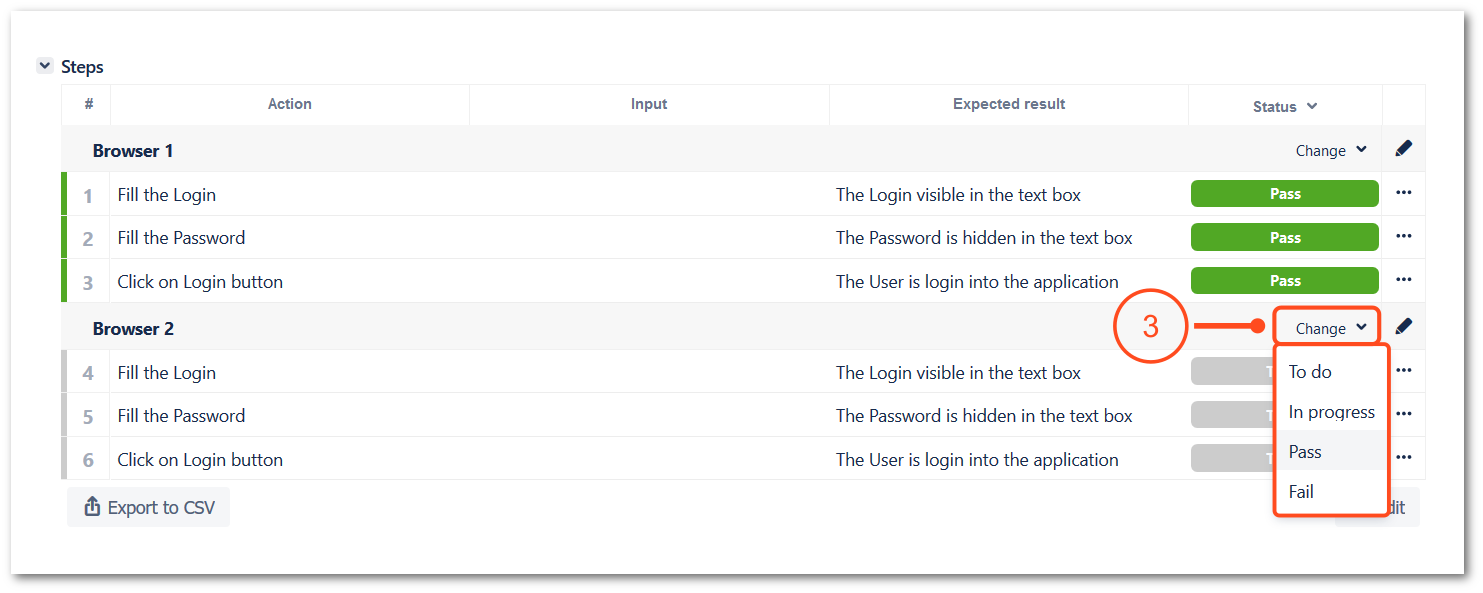
1. Single status change
To change single step status, hover over the status in the appropriate step and click on the one that indicates the step execution.
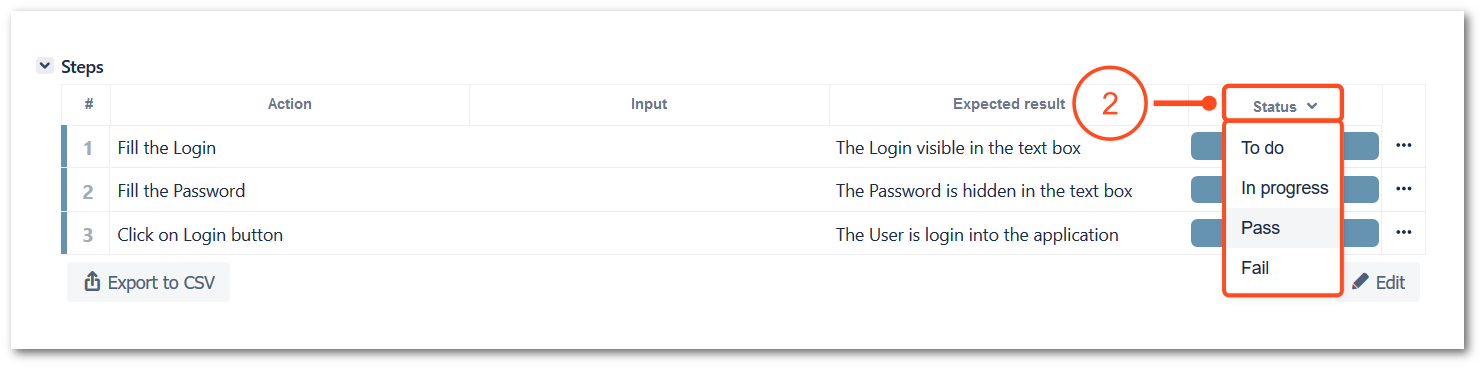
2. Bulk status change
To bulk change you can use the Status button. Click on the Status and choose appriopriate execution status for all steps.
3. Status change for steps group
If the steps are divided into groups, you can change the status for a single step or use the Change option and change the status of the whole group of steps.
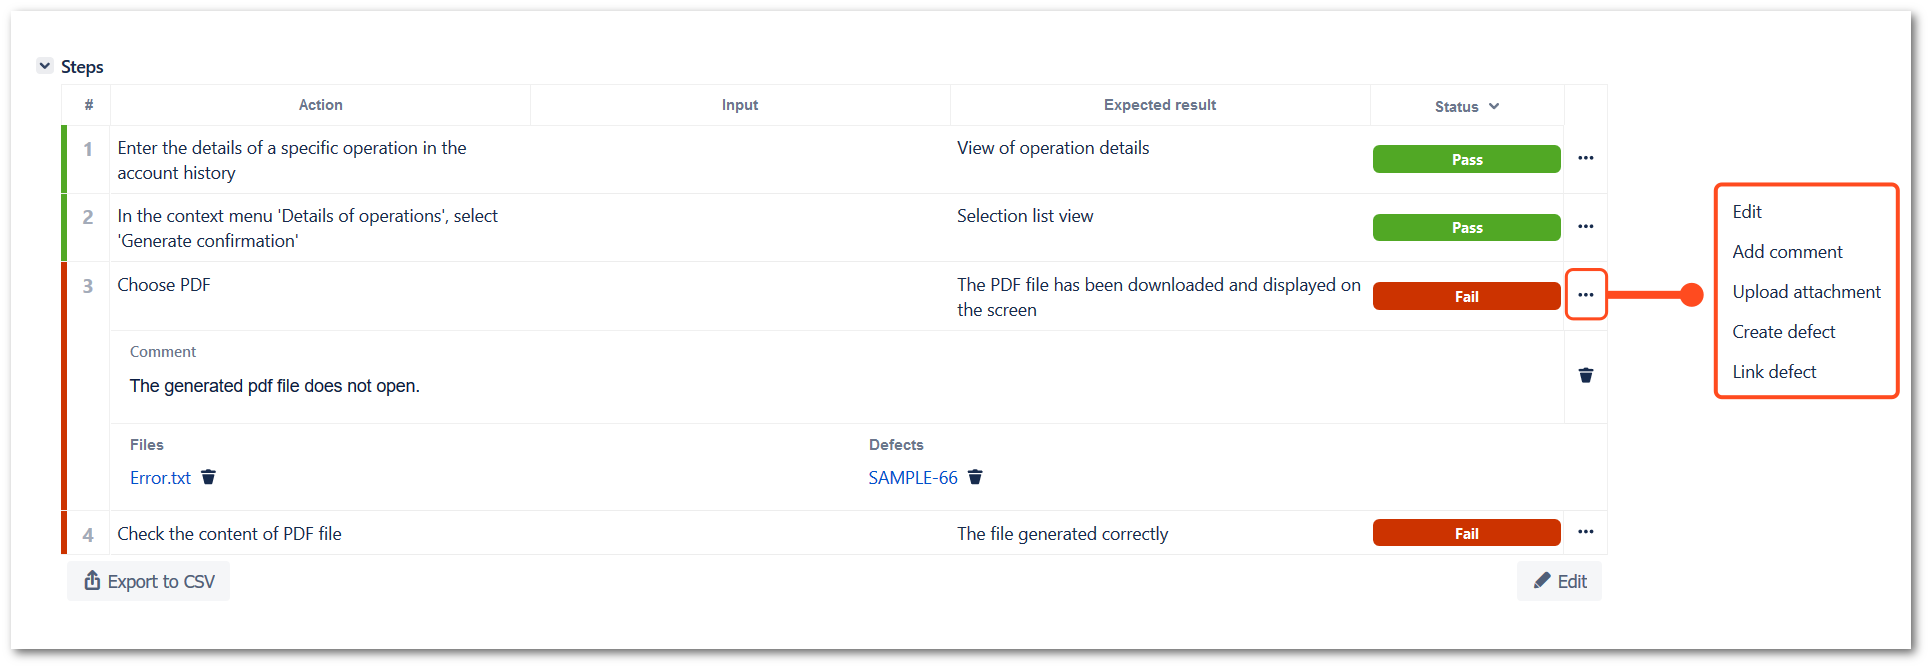
Steps operations
Each step contains operations under one button. With its help it is possible to:
- Edit given step
- Add comment
- Upload attachment
- Create defect
- Link defect
Report and link existing Defect
During the Test Case execution, you can find a defect. You can create new defects for whole Test Case or a specific step. You can also link existing defects to Test Case or attach it to a given step.
1. Create new defect
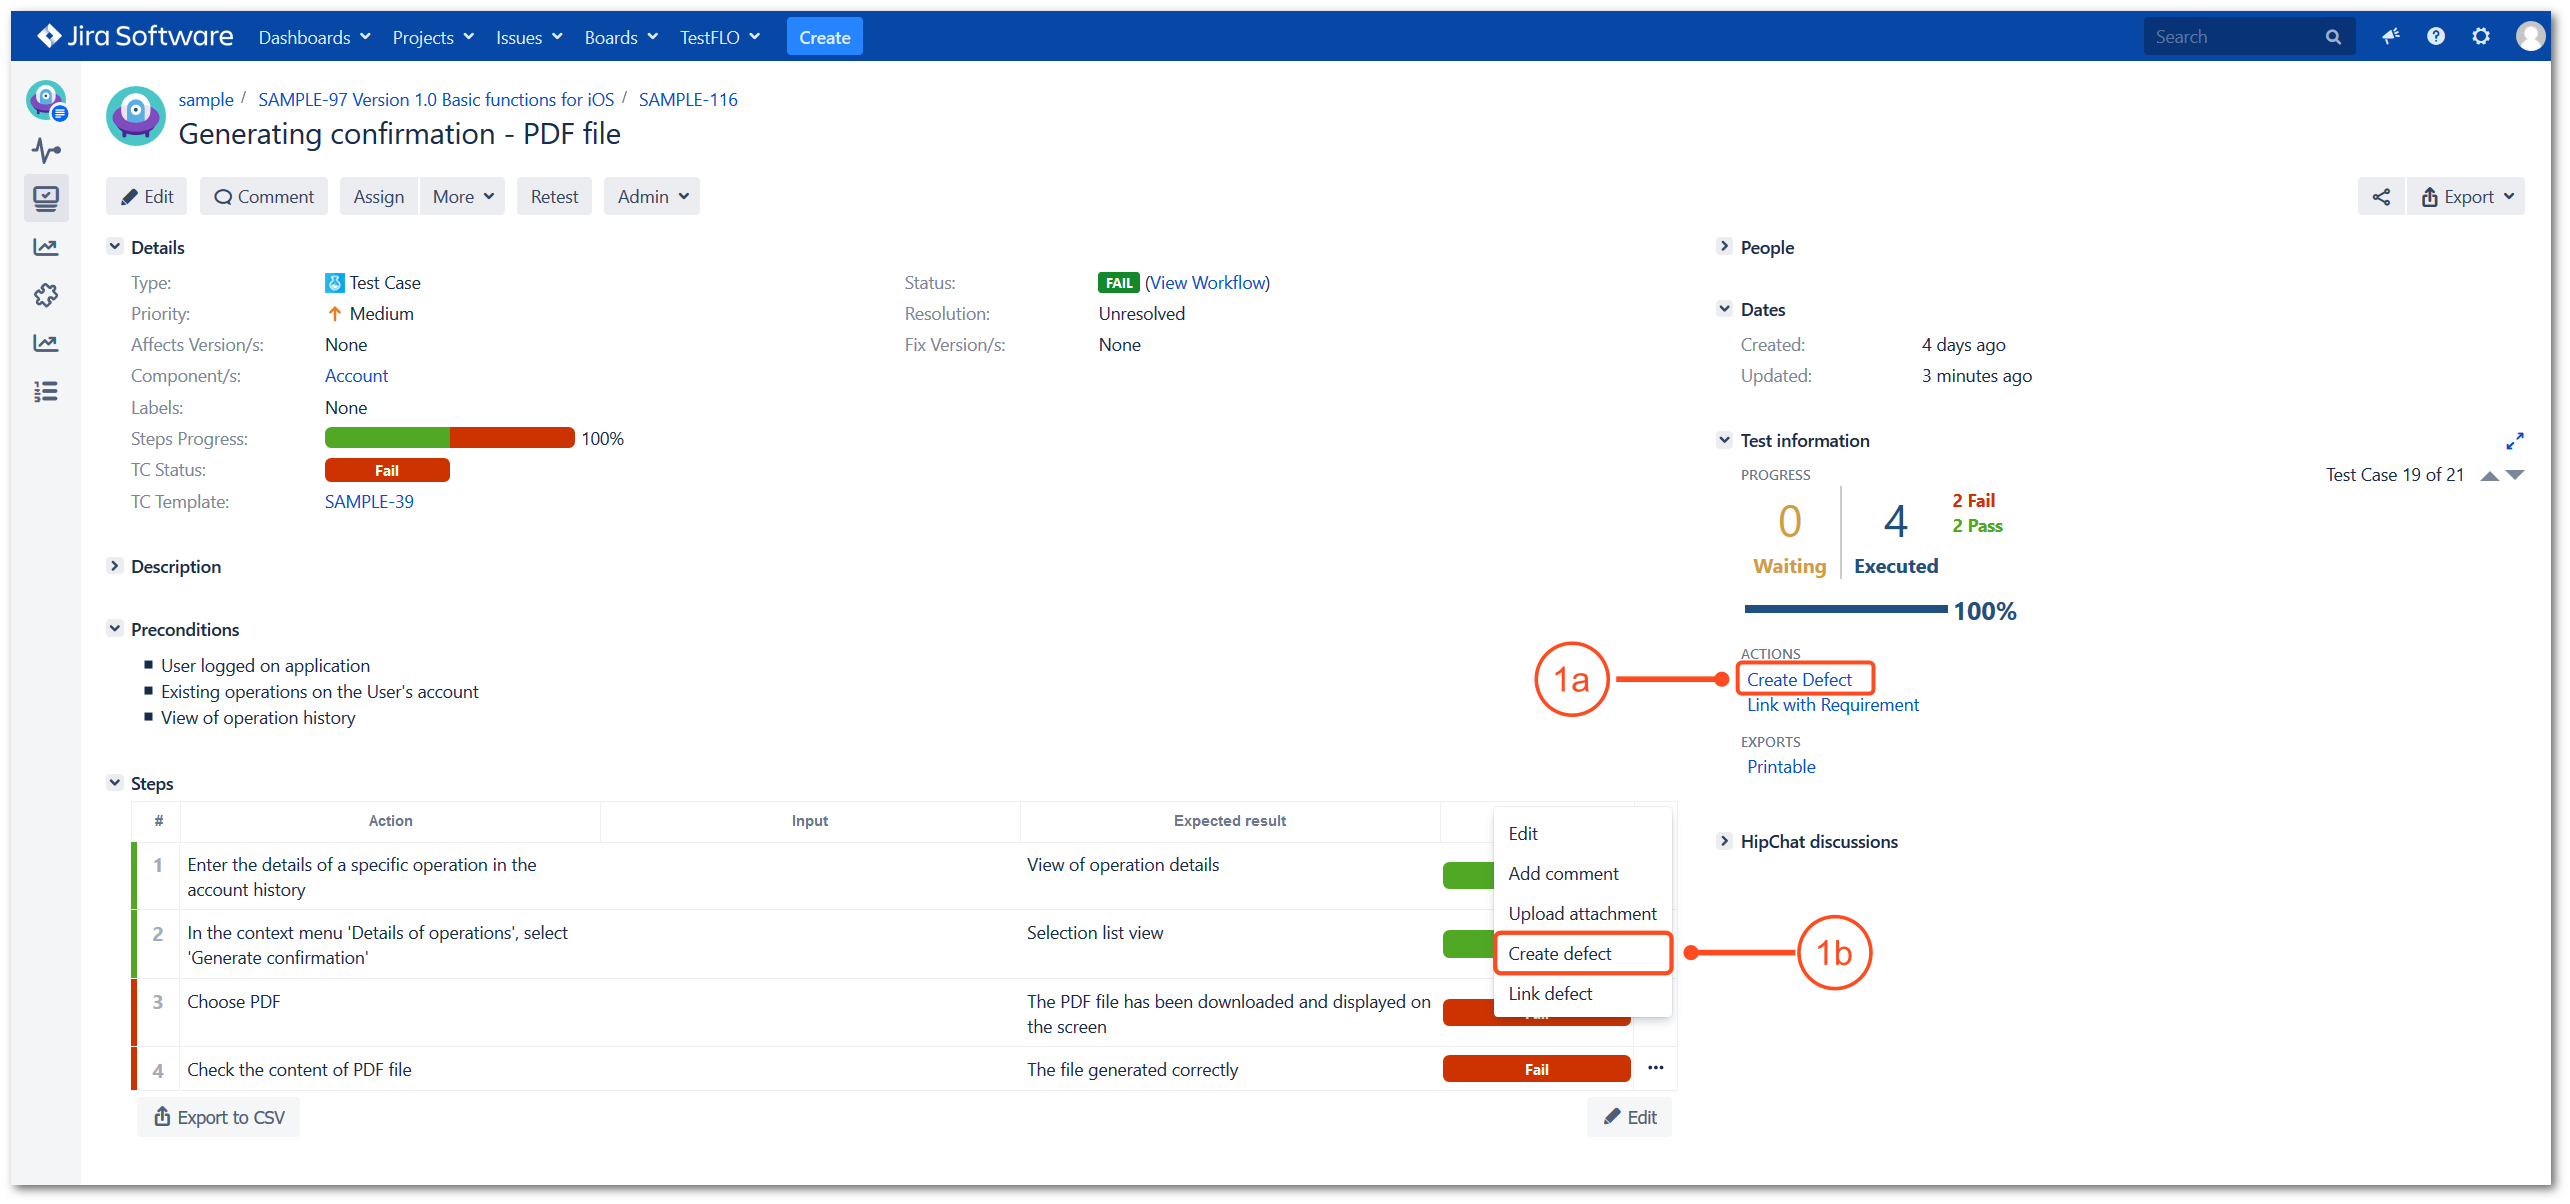
1a. Create Defect on Test Case using Create Defect operation.
1b. Create defect on a particular step. The issue key of created defect will be visible in Defects section on a step.
To get more information about Create Defect operation see Test Case operations.
2. Link existing defect
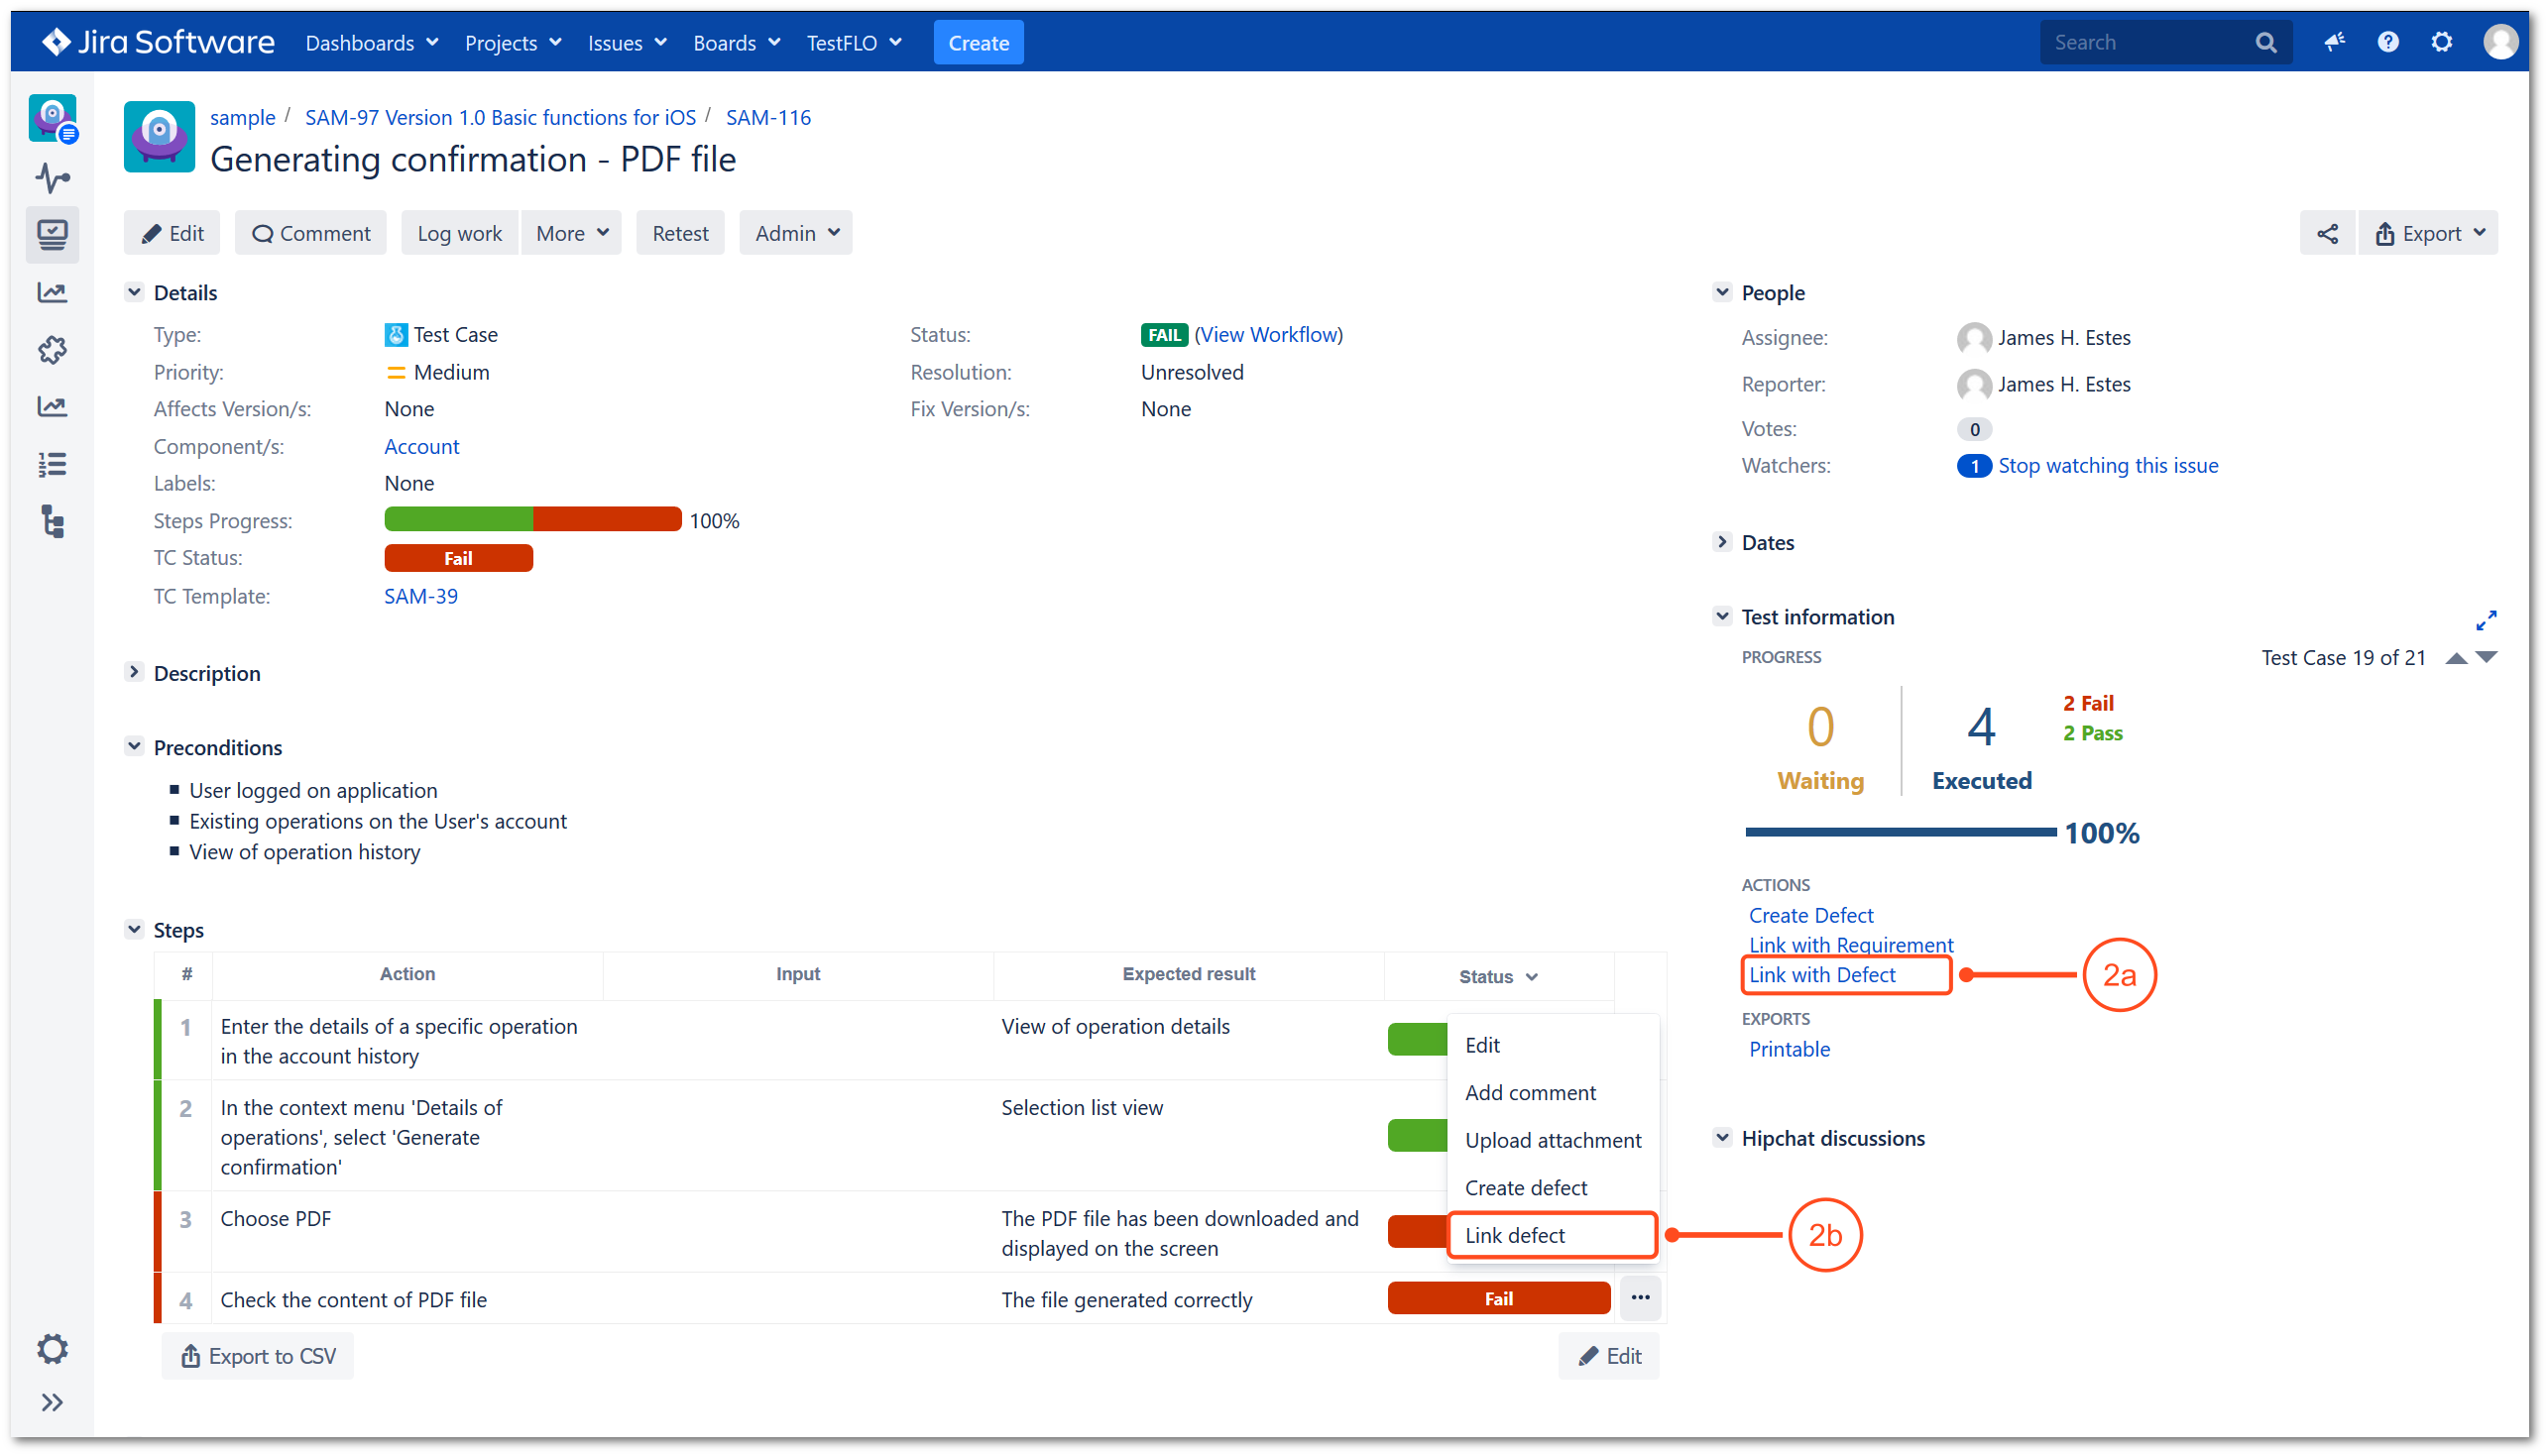
2a. Link existing defect with a Test Case.
2b. Link existing defect to a step.
To get more information, see Link with Defect operation.
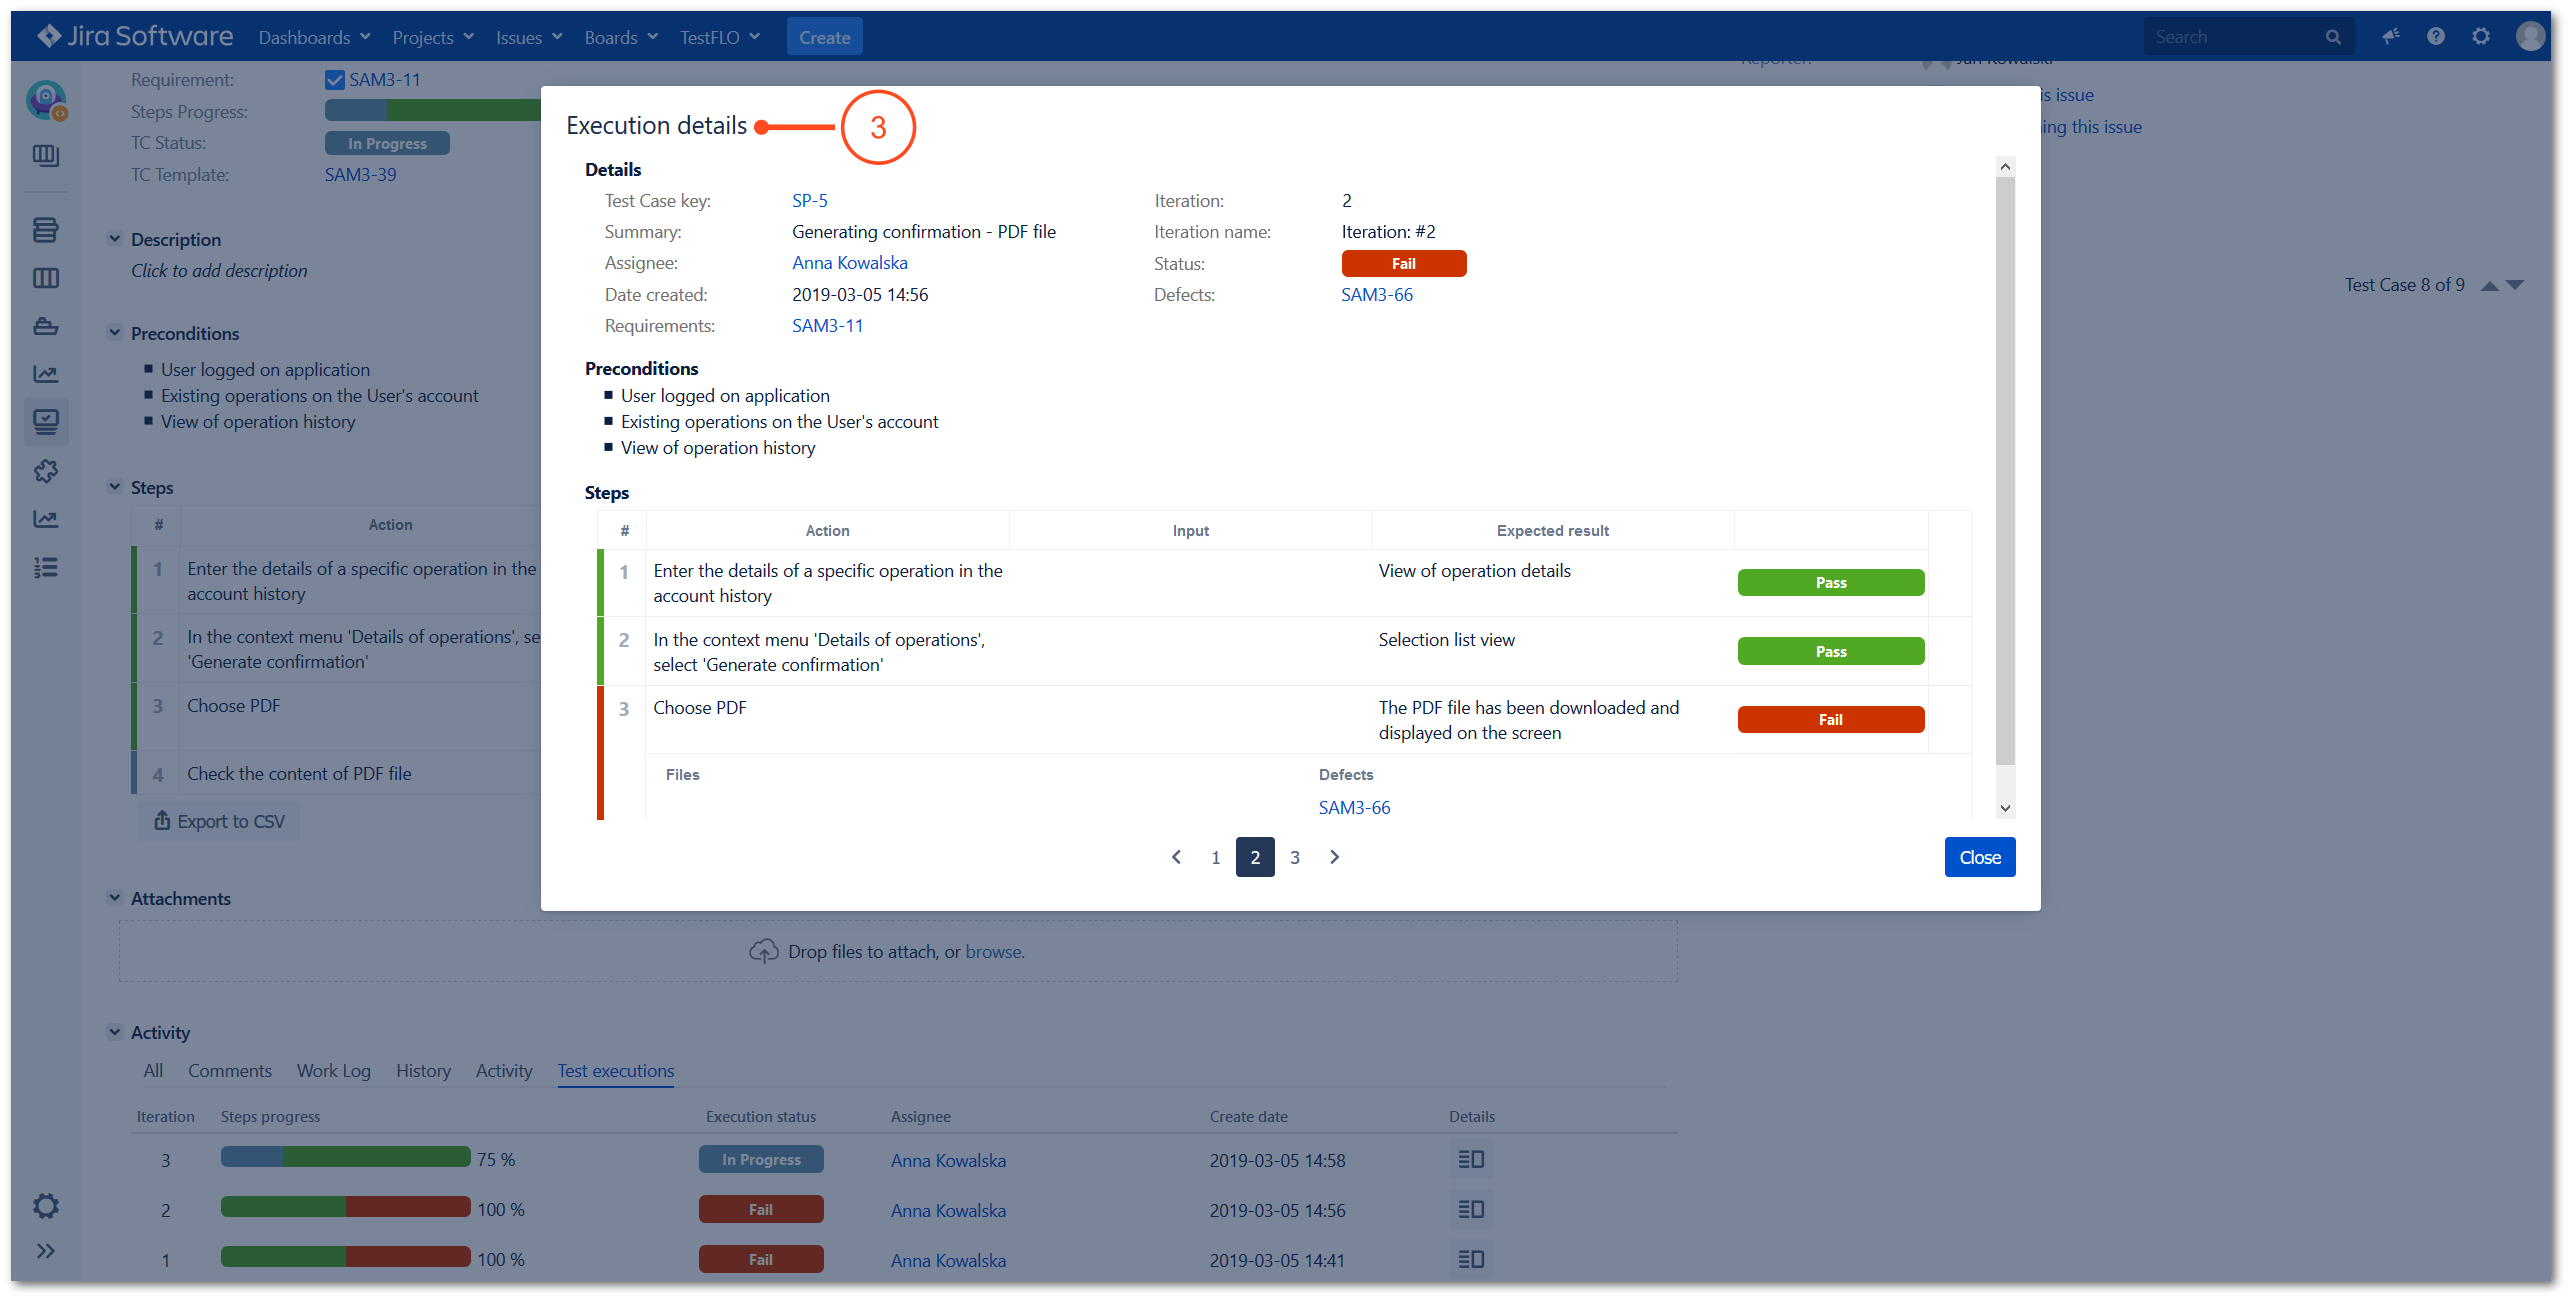
Test executions tab
One Test Case can be execute many times in many Test Plan iterations. Each execution details is stored in Test executions tab.
- The Test executions tab is located in Activity section on Test Case.
- If you want to quickly preview earlier or actual executions click on Details.
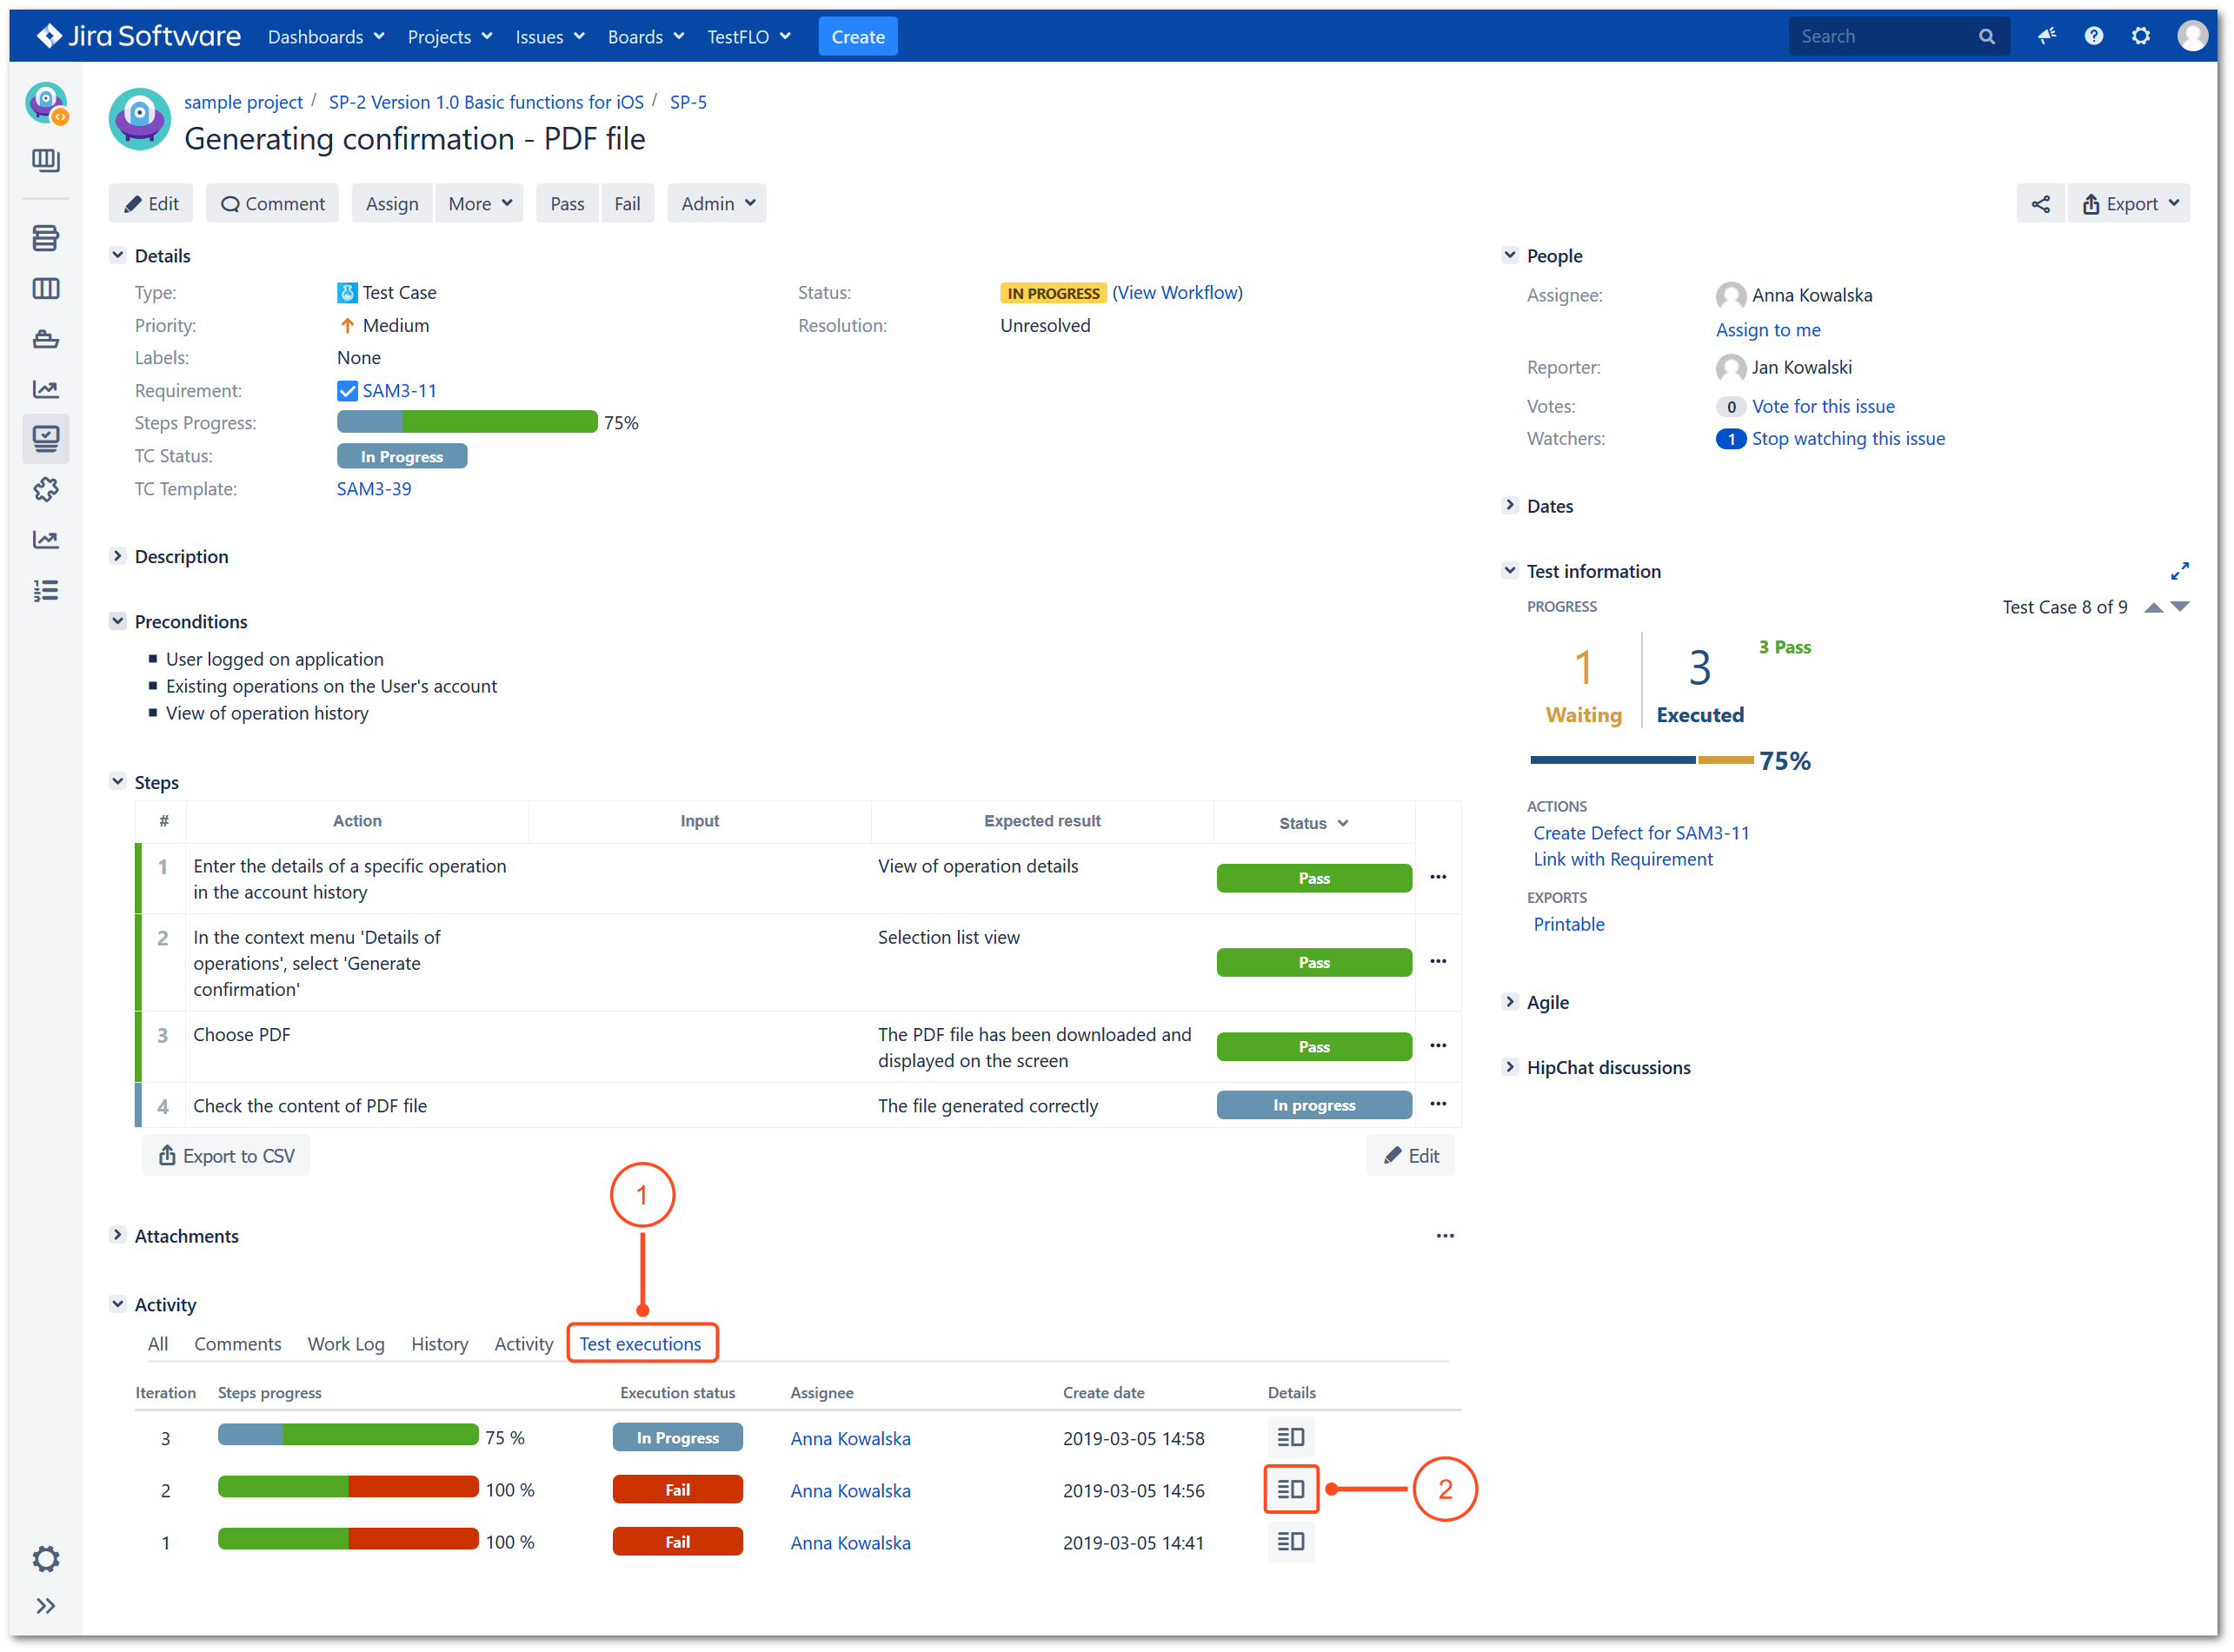
- The Execution details shows the basic information about the execution in given iteration.