- Introduction
- About
- Get started
- Migration to Cloud
- Bundled Fields
- Overview
- Add Bundled Field
- Bundled Fields Configuration
- Format and validation
- Using Bundled Fields
- Advanced settings
- Bundled Fields Searcher
- Java API (ScriptRunner)
- Data Sources
- Email notifications
- Bundled Fields v.6.8.x - 6.9.x
- Bundled Fields v.6.7.x
- Dynamic Forms
- Dynamic Forms
- Supported fields
- Visibility
- Request Types visibility
- Fields visibility
- Customer Portal visibility
- Options visibility
- Requirements visibility
- SLAs visibility
- Java API
- Multilevel Structure
- Configuration
- Using a multilevel structure on the Customer Portal
- User Synchronization
- Organizations and Groups Synchronization
- Issue View
- Issue View
- Add user's IP address post function
- Restart SLA post function
- Update SLA to date post function
- Customer Portal
- Links
- Export list
- Split column
- Request details view
- Additional fields
- Additional options
- Compatibility
- Configuration Manager
Connecting a data source
Learn how to display information from you data source in a Bundled Fields’ subfield
Once you’ve created a data source, you need to connect it to Bundled Fields in order to display the external data in Jira.
Prepare the custom field
This configuration works for the following types of subfields:
- Text Field (single line)
- Text Field (multi-line)
Read about connecting a Select List (single choice) in the Synchronizing options chapter.
Steps
To connect a data source do a Text Field subfield:
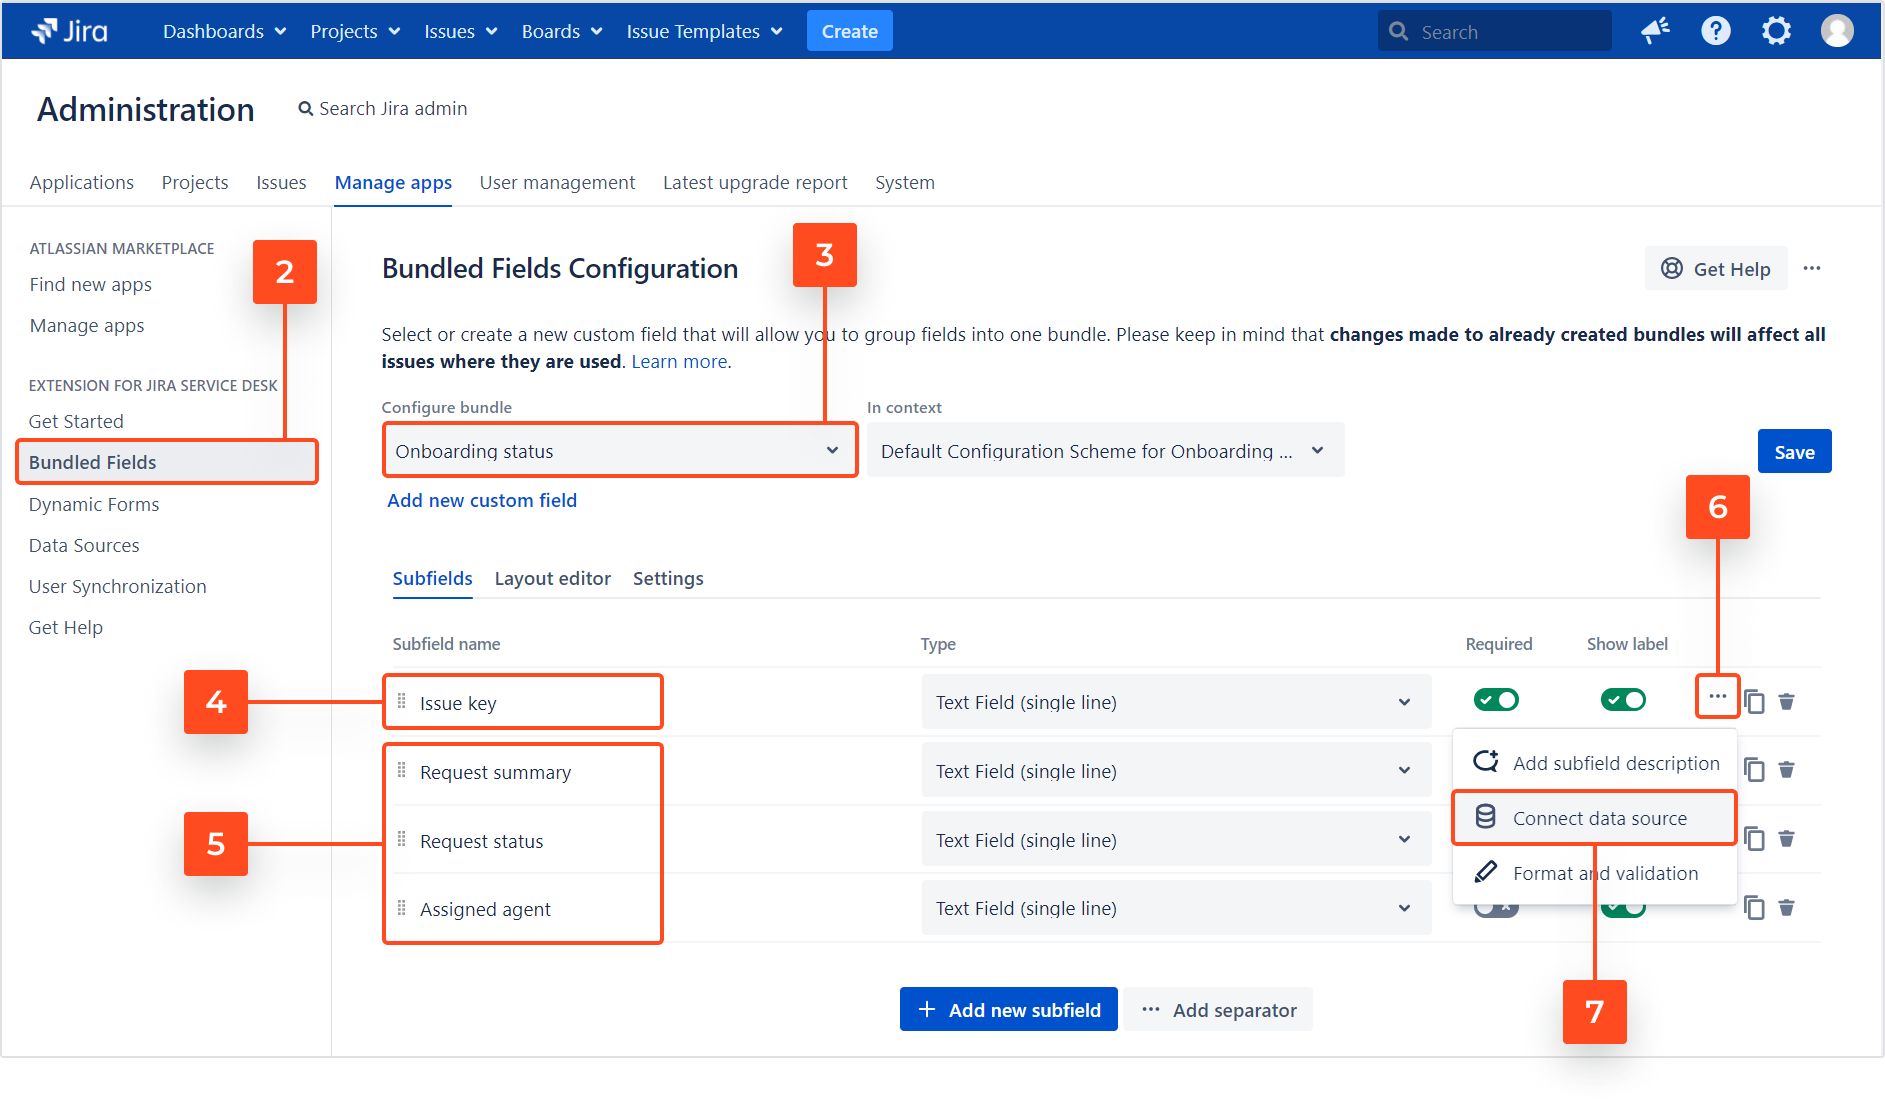
- Go to Jira Administration > Manage apps.
- Select Bundled Fields from the Extension for Jira Service Desk app navigation.
- Select the Bundled Fields custom field or create a new one.
- Prepare the trigger subfield that will activate your data source. (When users fill it in on the Create or Edit screen, it will automatically fill in the other subfields with values from your data source).
- Prepare the subfields that will receive the data from the data source.
- Open the three dots menu of the trigger subfield.
- Click Connect data source.

To learn more about configuring the Bundled Fields custom field, see Bundled Fields Configuration.
Result
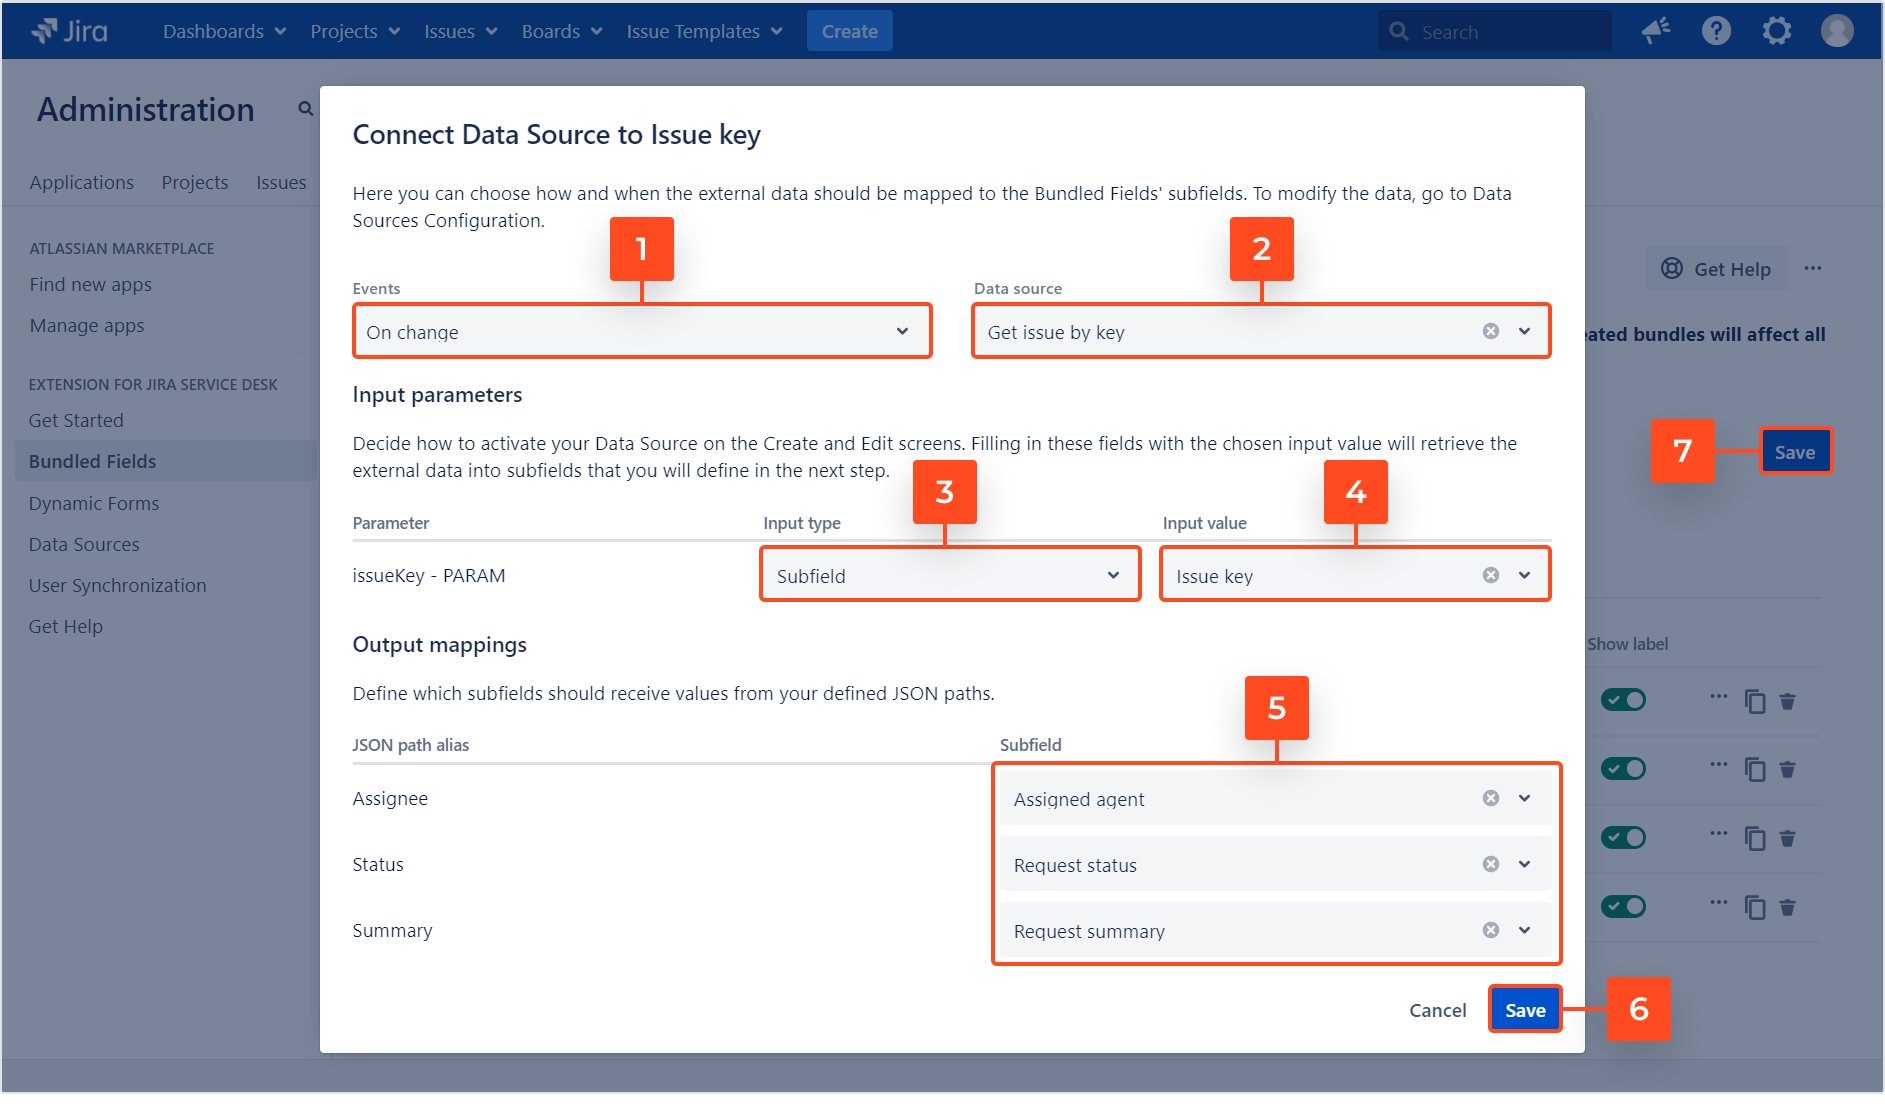
A dialog window for mapping subfields appears.
Map the data to subfields
Steps
- Choose the Event to specify when to retrieve the data from your data source:
- Currently we support only the On change event.
- Choose one of your data sources.
- Select the type of input parameters. You can choose between these two types:
- Subflied
- Constant
- Define the value of input parameters:
- If you’ve chosen Subfield, select the subfield from the list.
- If you’ve chosen Constant, type in the value for the constant.
- Choose the subfields that should receive values from your defined JSON paths.
- Click Save.
- Remember to save the changes to Bundled Fields.

Result
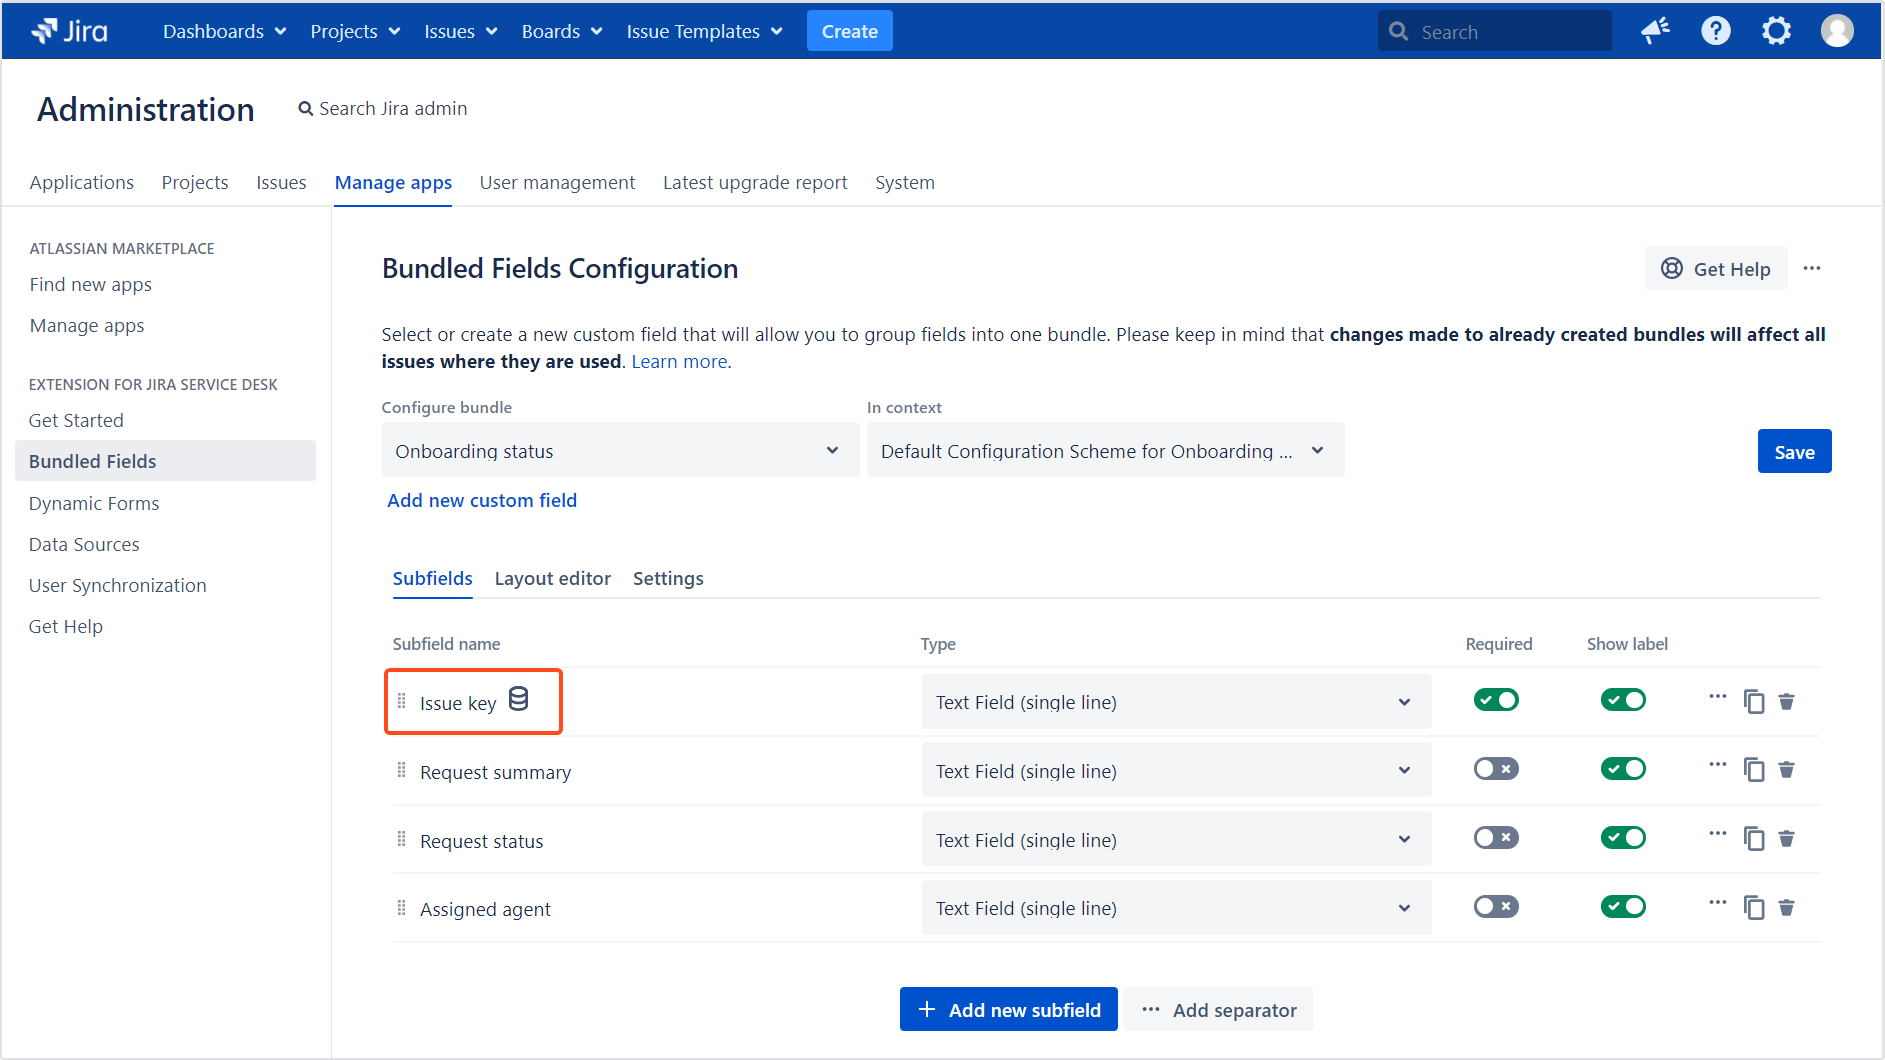
Your data source is connected to the chosen subfields. A server icon is displayed next to subfields connected to a data source:

Displaying the data source on the Create and Edit screens
Your Bundled Fields custom field is now configured to display information from your data source. When users will fill in the trigger subfield, the other subfields will be filled with values of your chosen JSON paths.

Remember to add your Bundled Fields custom field to the target screens.
Next steps
- To edit your configured data source, see Updating a data source.
- To use synchronized options, see Synchronizing options.
- For more information about Bundled Fields, see Bundled Fields Configuration.
If you can’t find the answer you need in our documentation, raise
a support request.
Include as much information as possible to help our support team resolve your issue faster.