- User's guide
- Project view
- Navigation
- Relations
- Requirement
- Test Case
- Test Plan
- Test Execution
- Defect
- REST API
- REST API
- Authentication
- Jira REST API
- Requirements
- Test Case
- Test Plan
- Test Execution
- Test Case Execution
- Defects
- Tree Structure
- Example of use
Create a Test Case
This chapter provides information about creating Test Cases.
- Test Cases can be created as regular Jira issues in Create Issue dialog box. You can also add Test Case by clicking on + in particular folder in the Test Case tree.
- If you haven’t created any new folder yet, go to All.
To create a Test Case navigate to Project > Test Management > Test Cases. Click +.
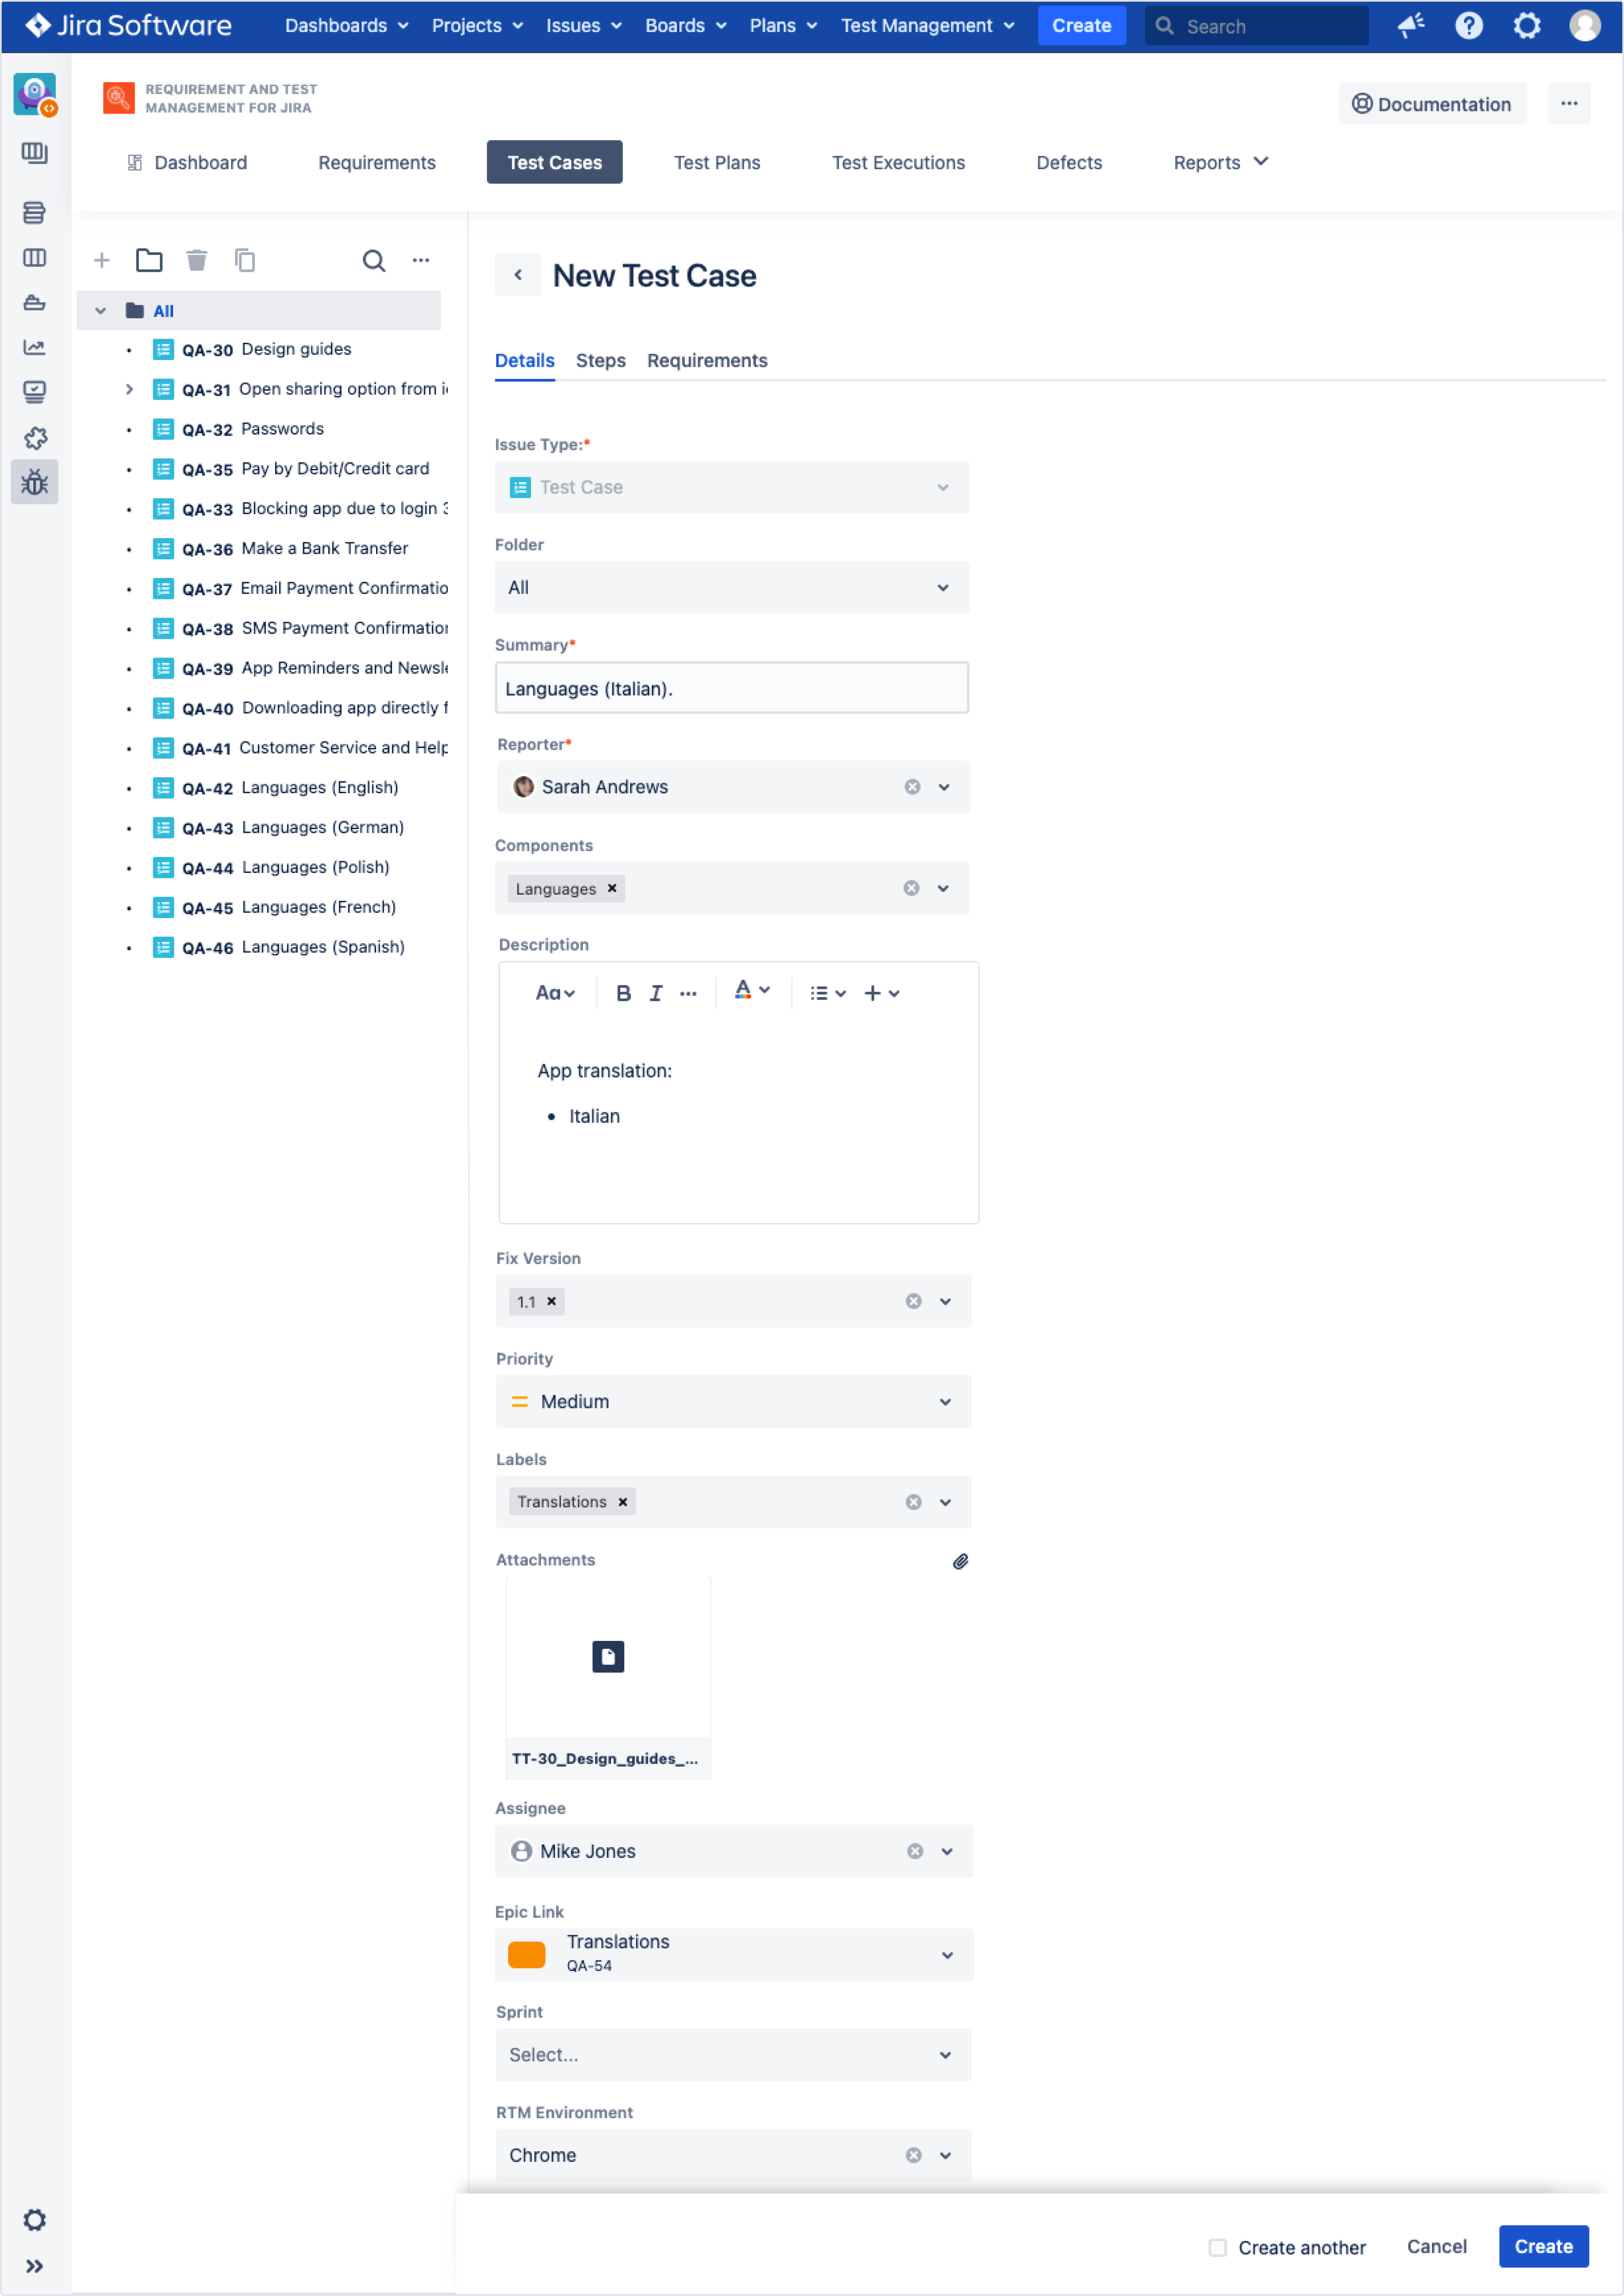
Details
In the Details section, complete all fields added to the screen:
- Summary
- Issue type
- Description
- Assignee
- Test Plan
- Select folder
- Components
- Priority
- Epic link
- Sprint
- RTM Environment
- Fix Version
- Labels
- Attachments
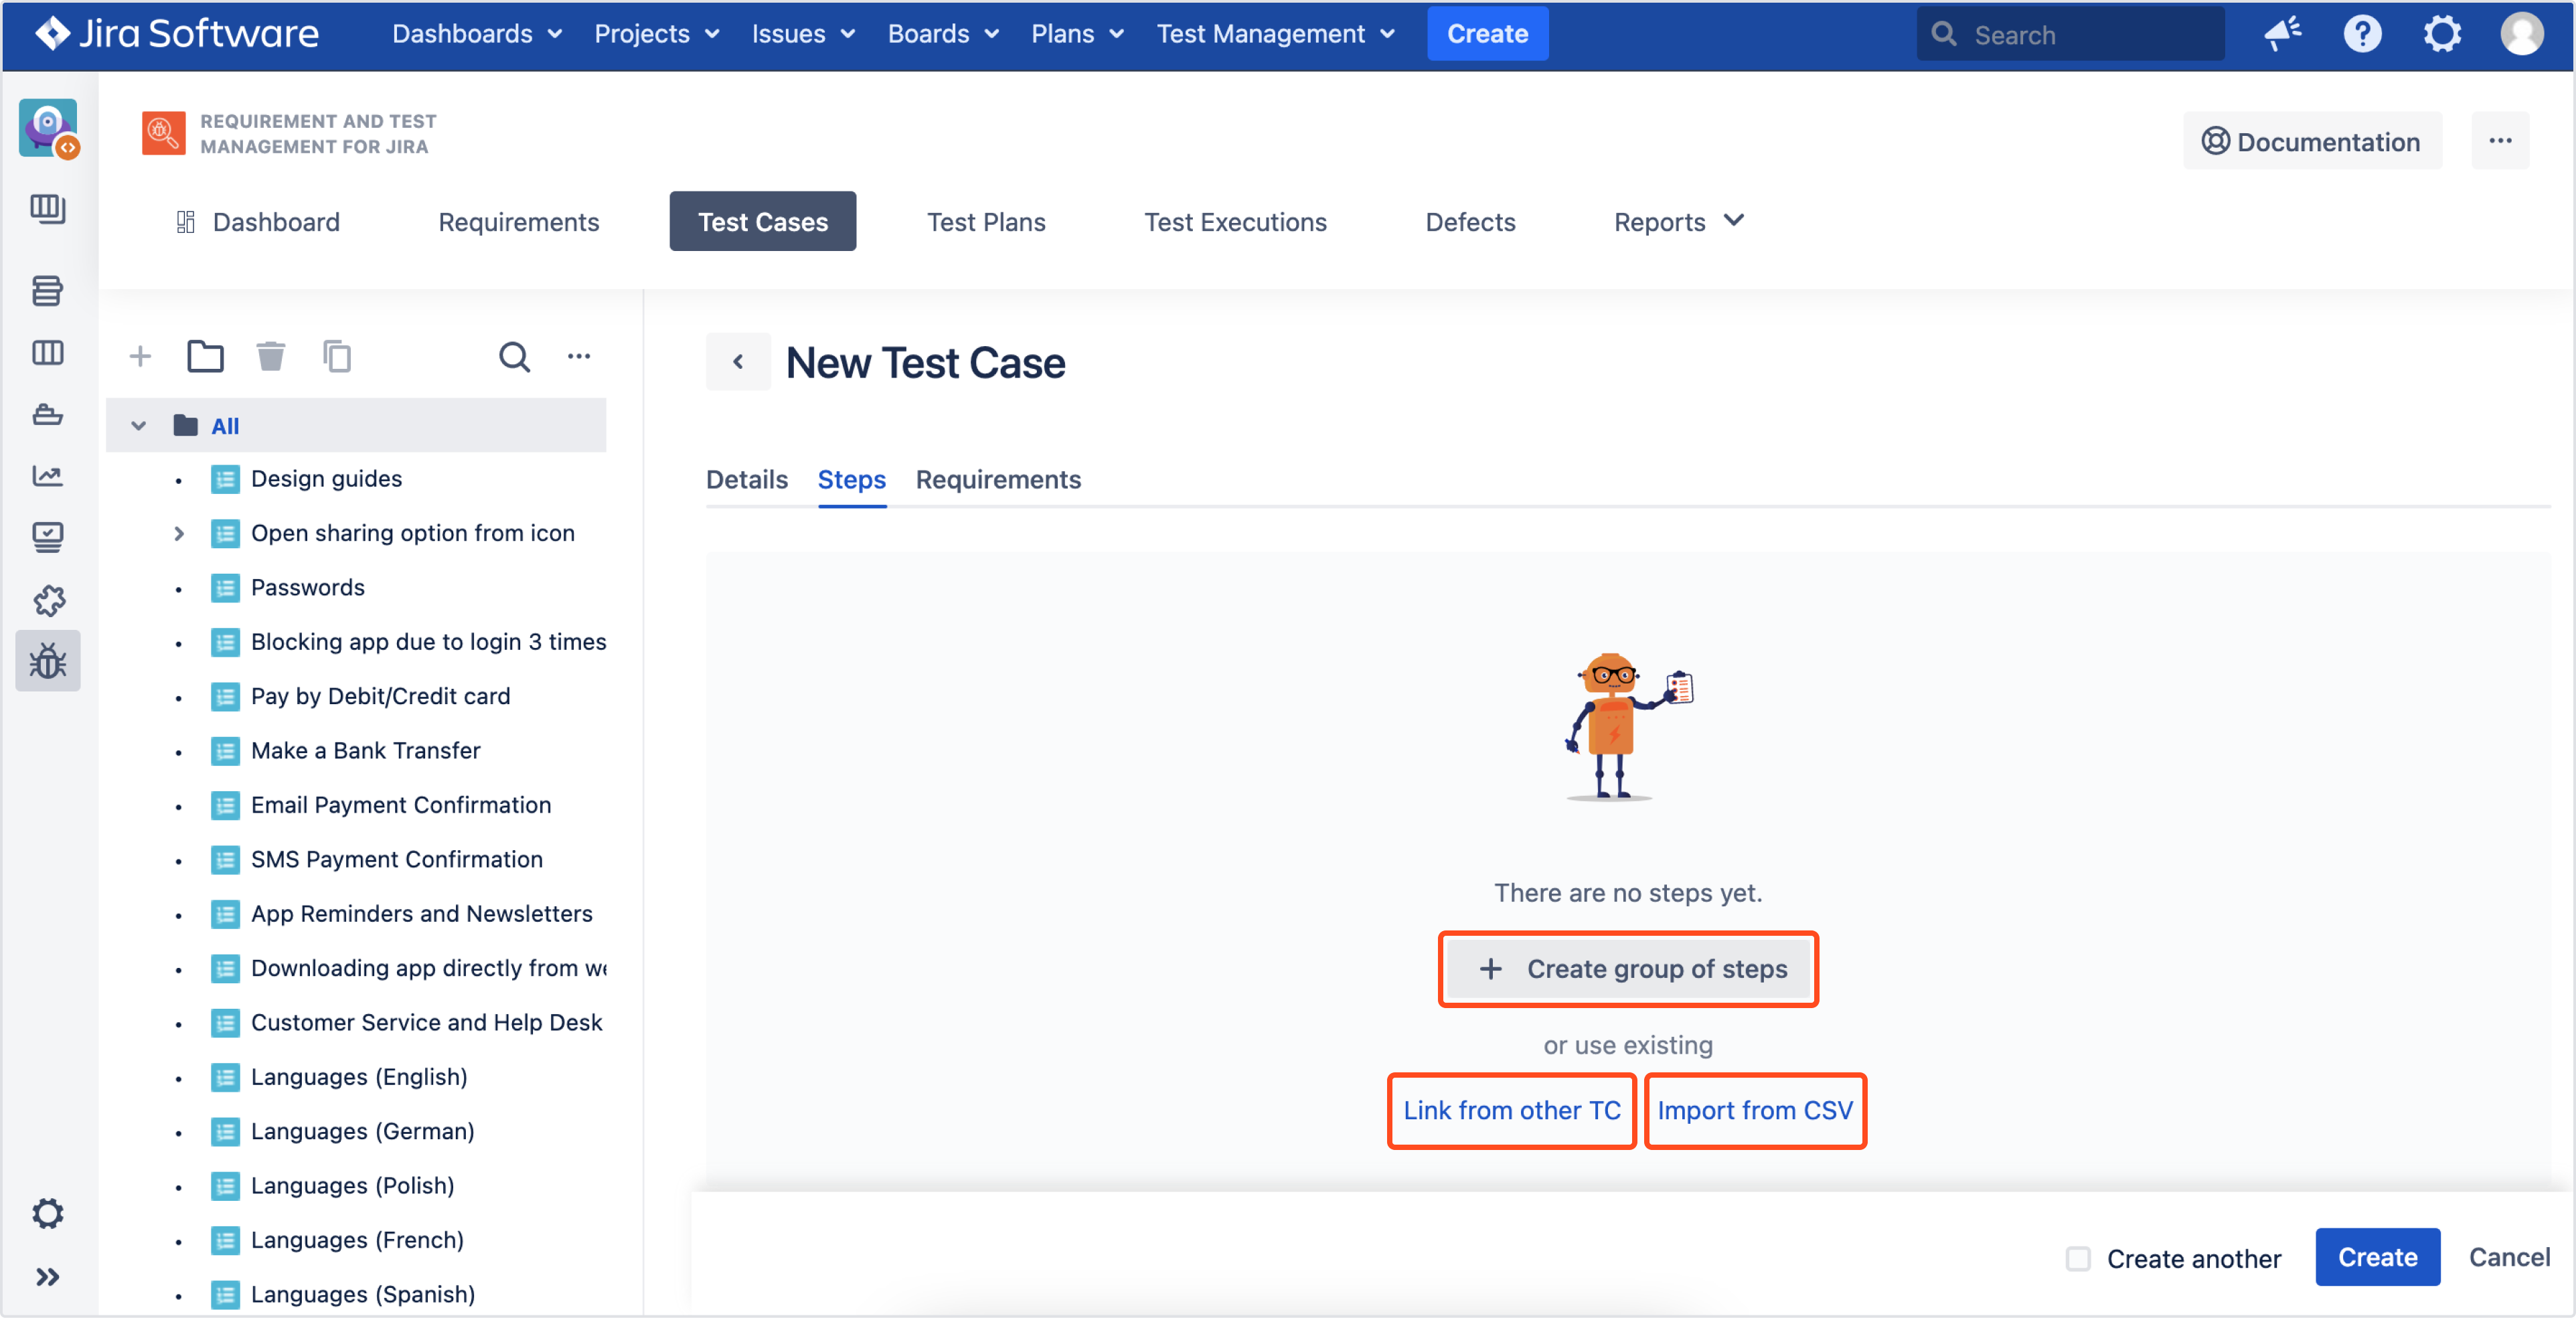
Steps
There are three ways to add steps to your Test Case:
- Create group of steps, where you can create your own step’s procedure
- Link from other TC, where you can copy group of steps from other Test Case
- Import from .CSV file
Preconditions
Fill in the Preconditions field if your Test Case requires an additional condition before running the procedure.
Create a group of steps
Right after clicking +Create a group of steps, a Default group with first step is added. Now you can:

- Change step’s group name
- Complete step’s columns
Tip
Use the text tools to diversify your text.
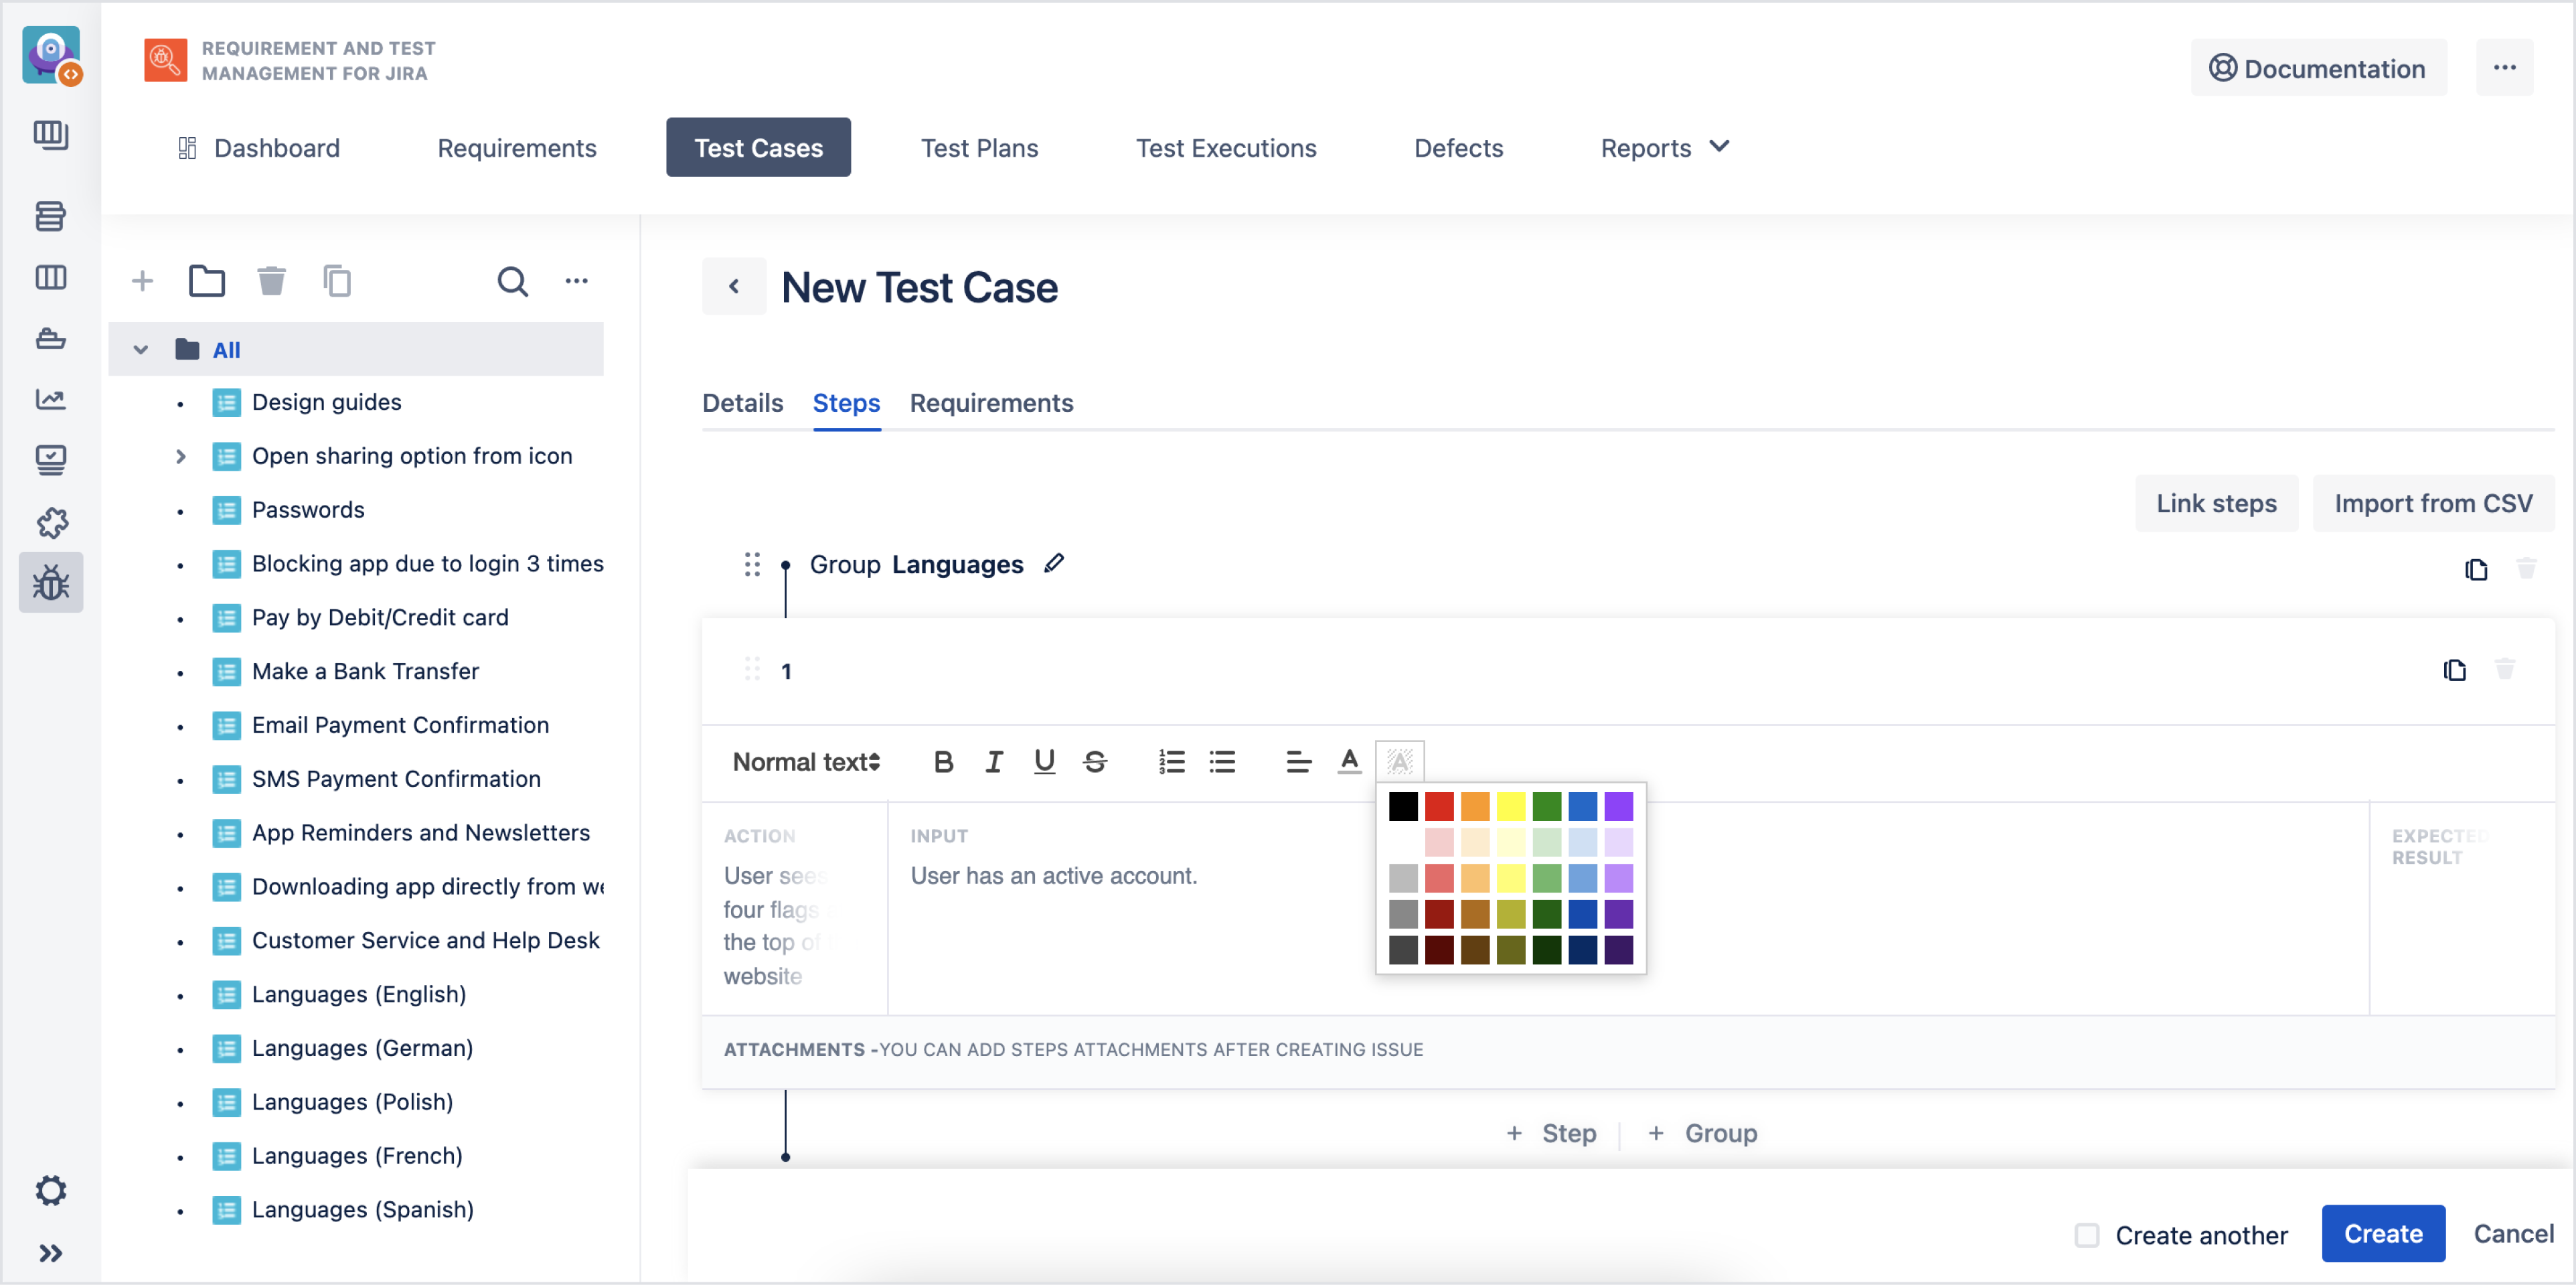
- Copy group of steps
- Copy step
- Add Step
- Add Group
- Add Attachment
InfoEach step can have own attachments. Attachments can be added after creating an issue.InfoUse drag and drop to reorder the steps or group of steps.
Use existing steps and implement them to your Test Case with Link steps and Import from CSV buttons.
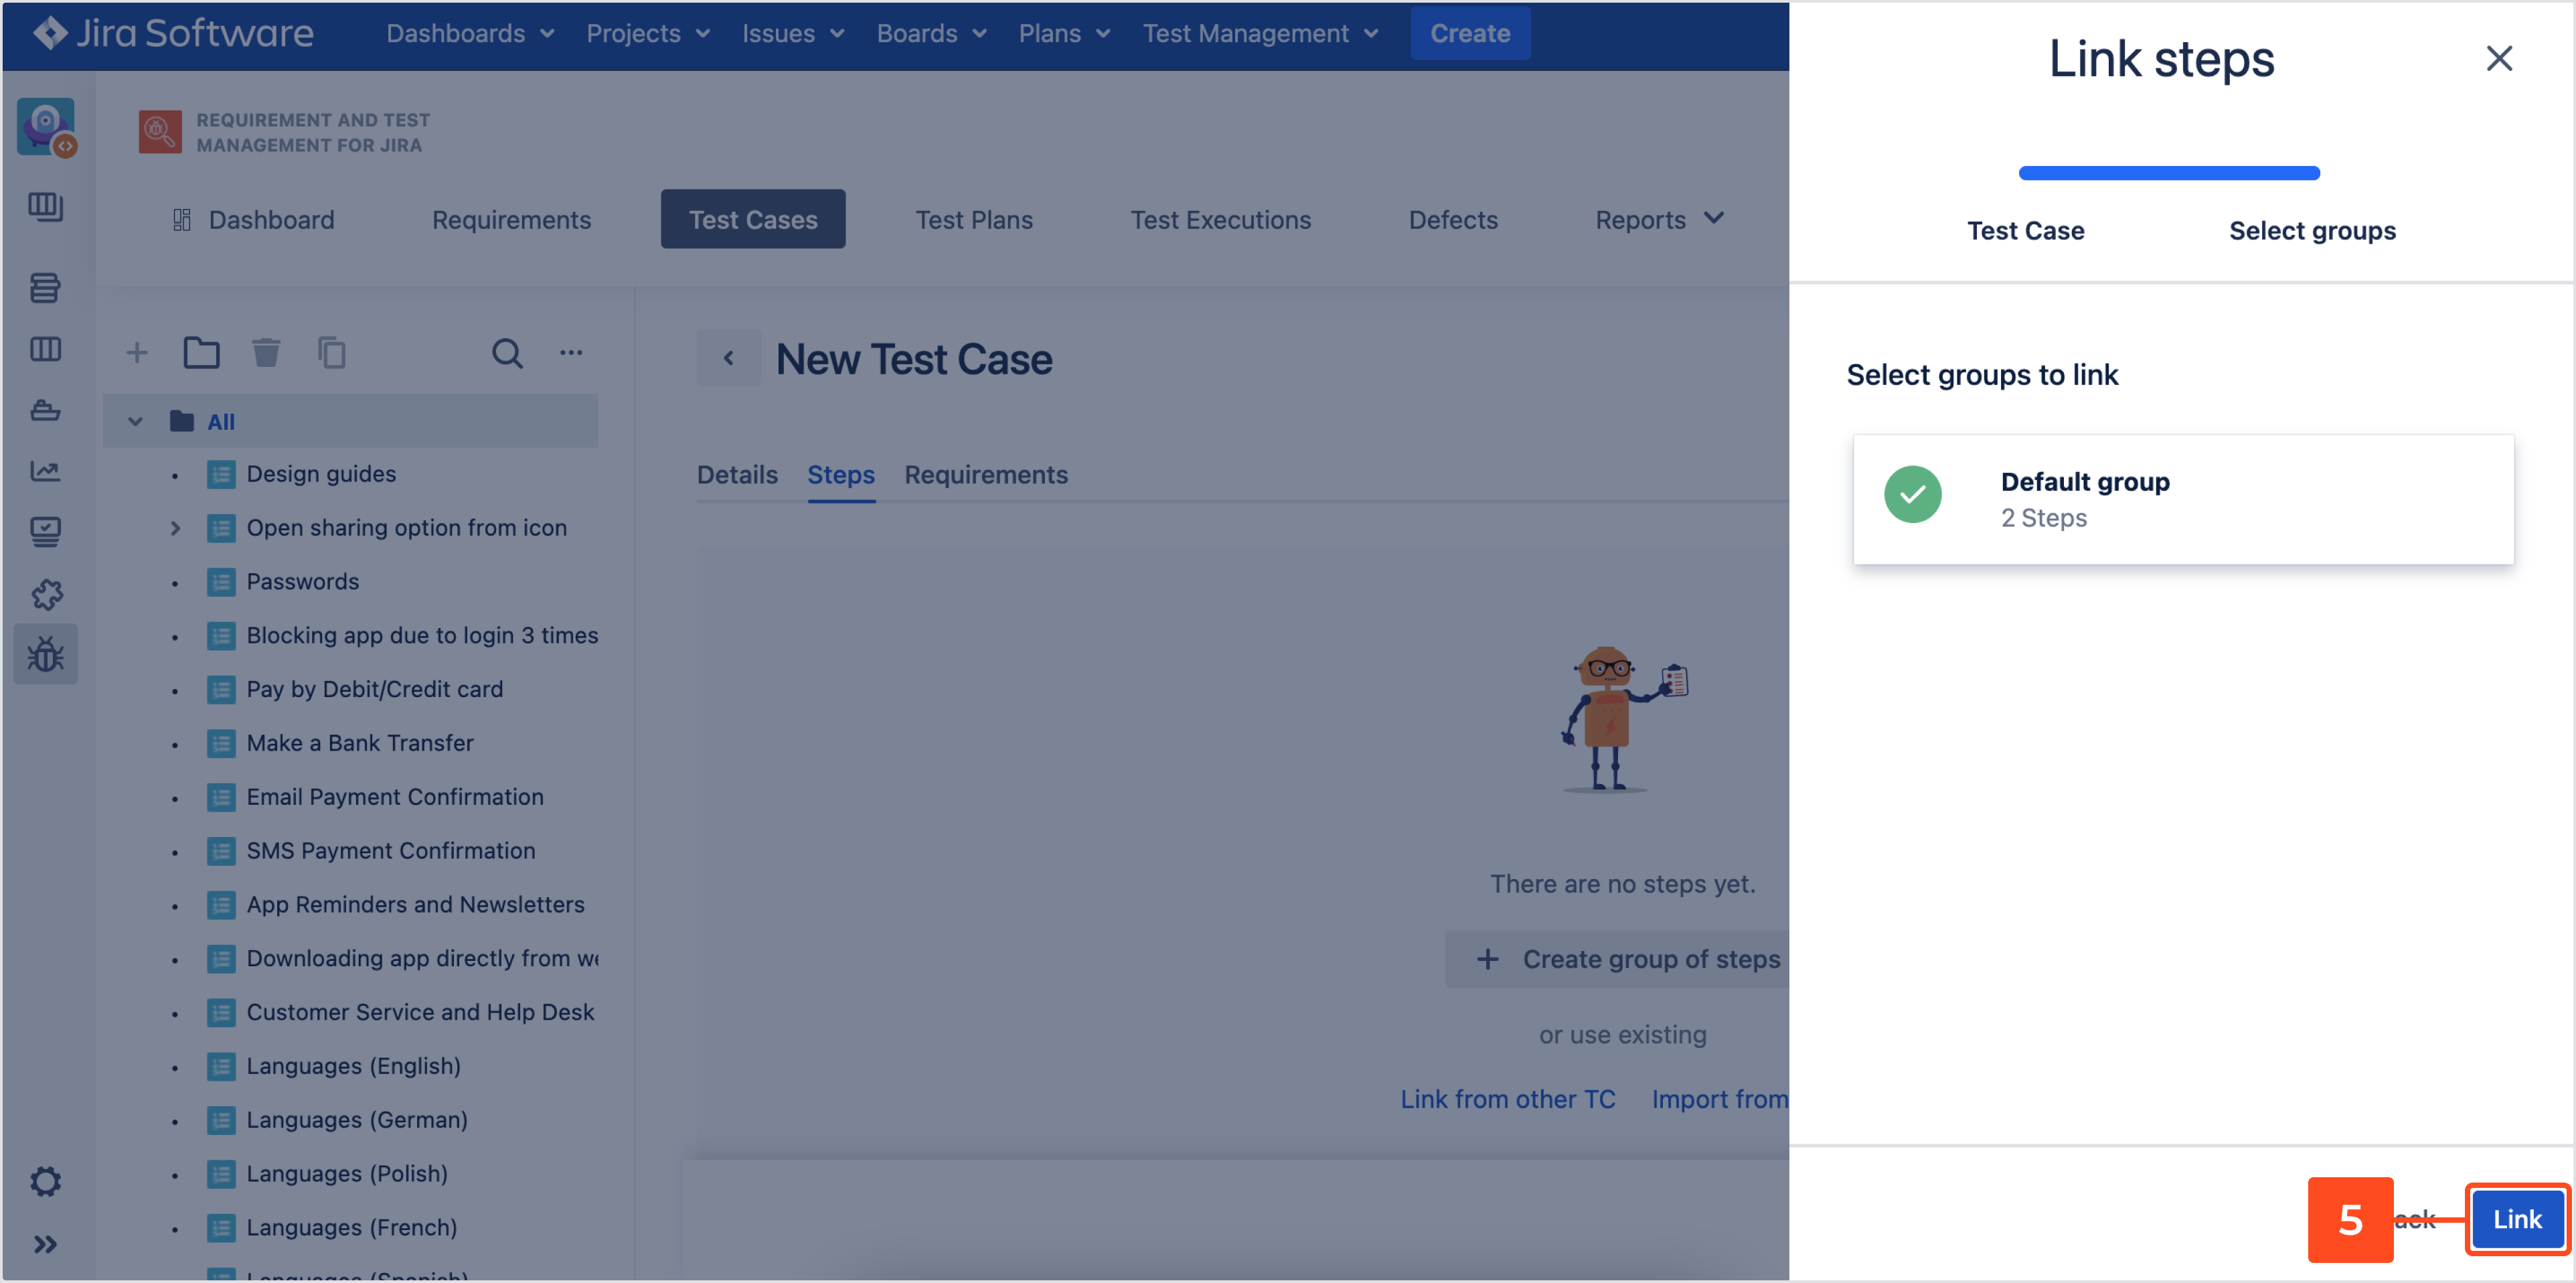
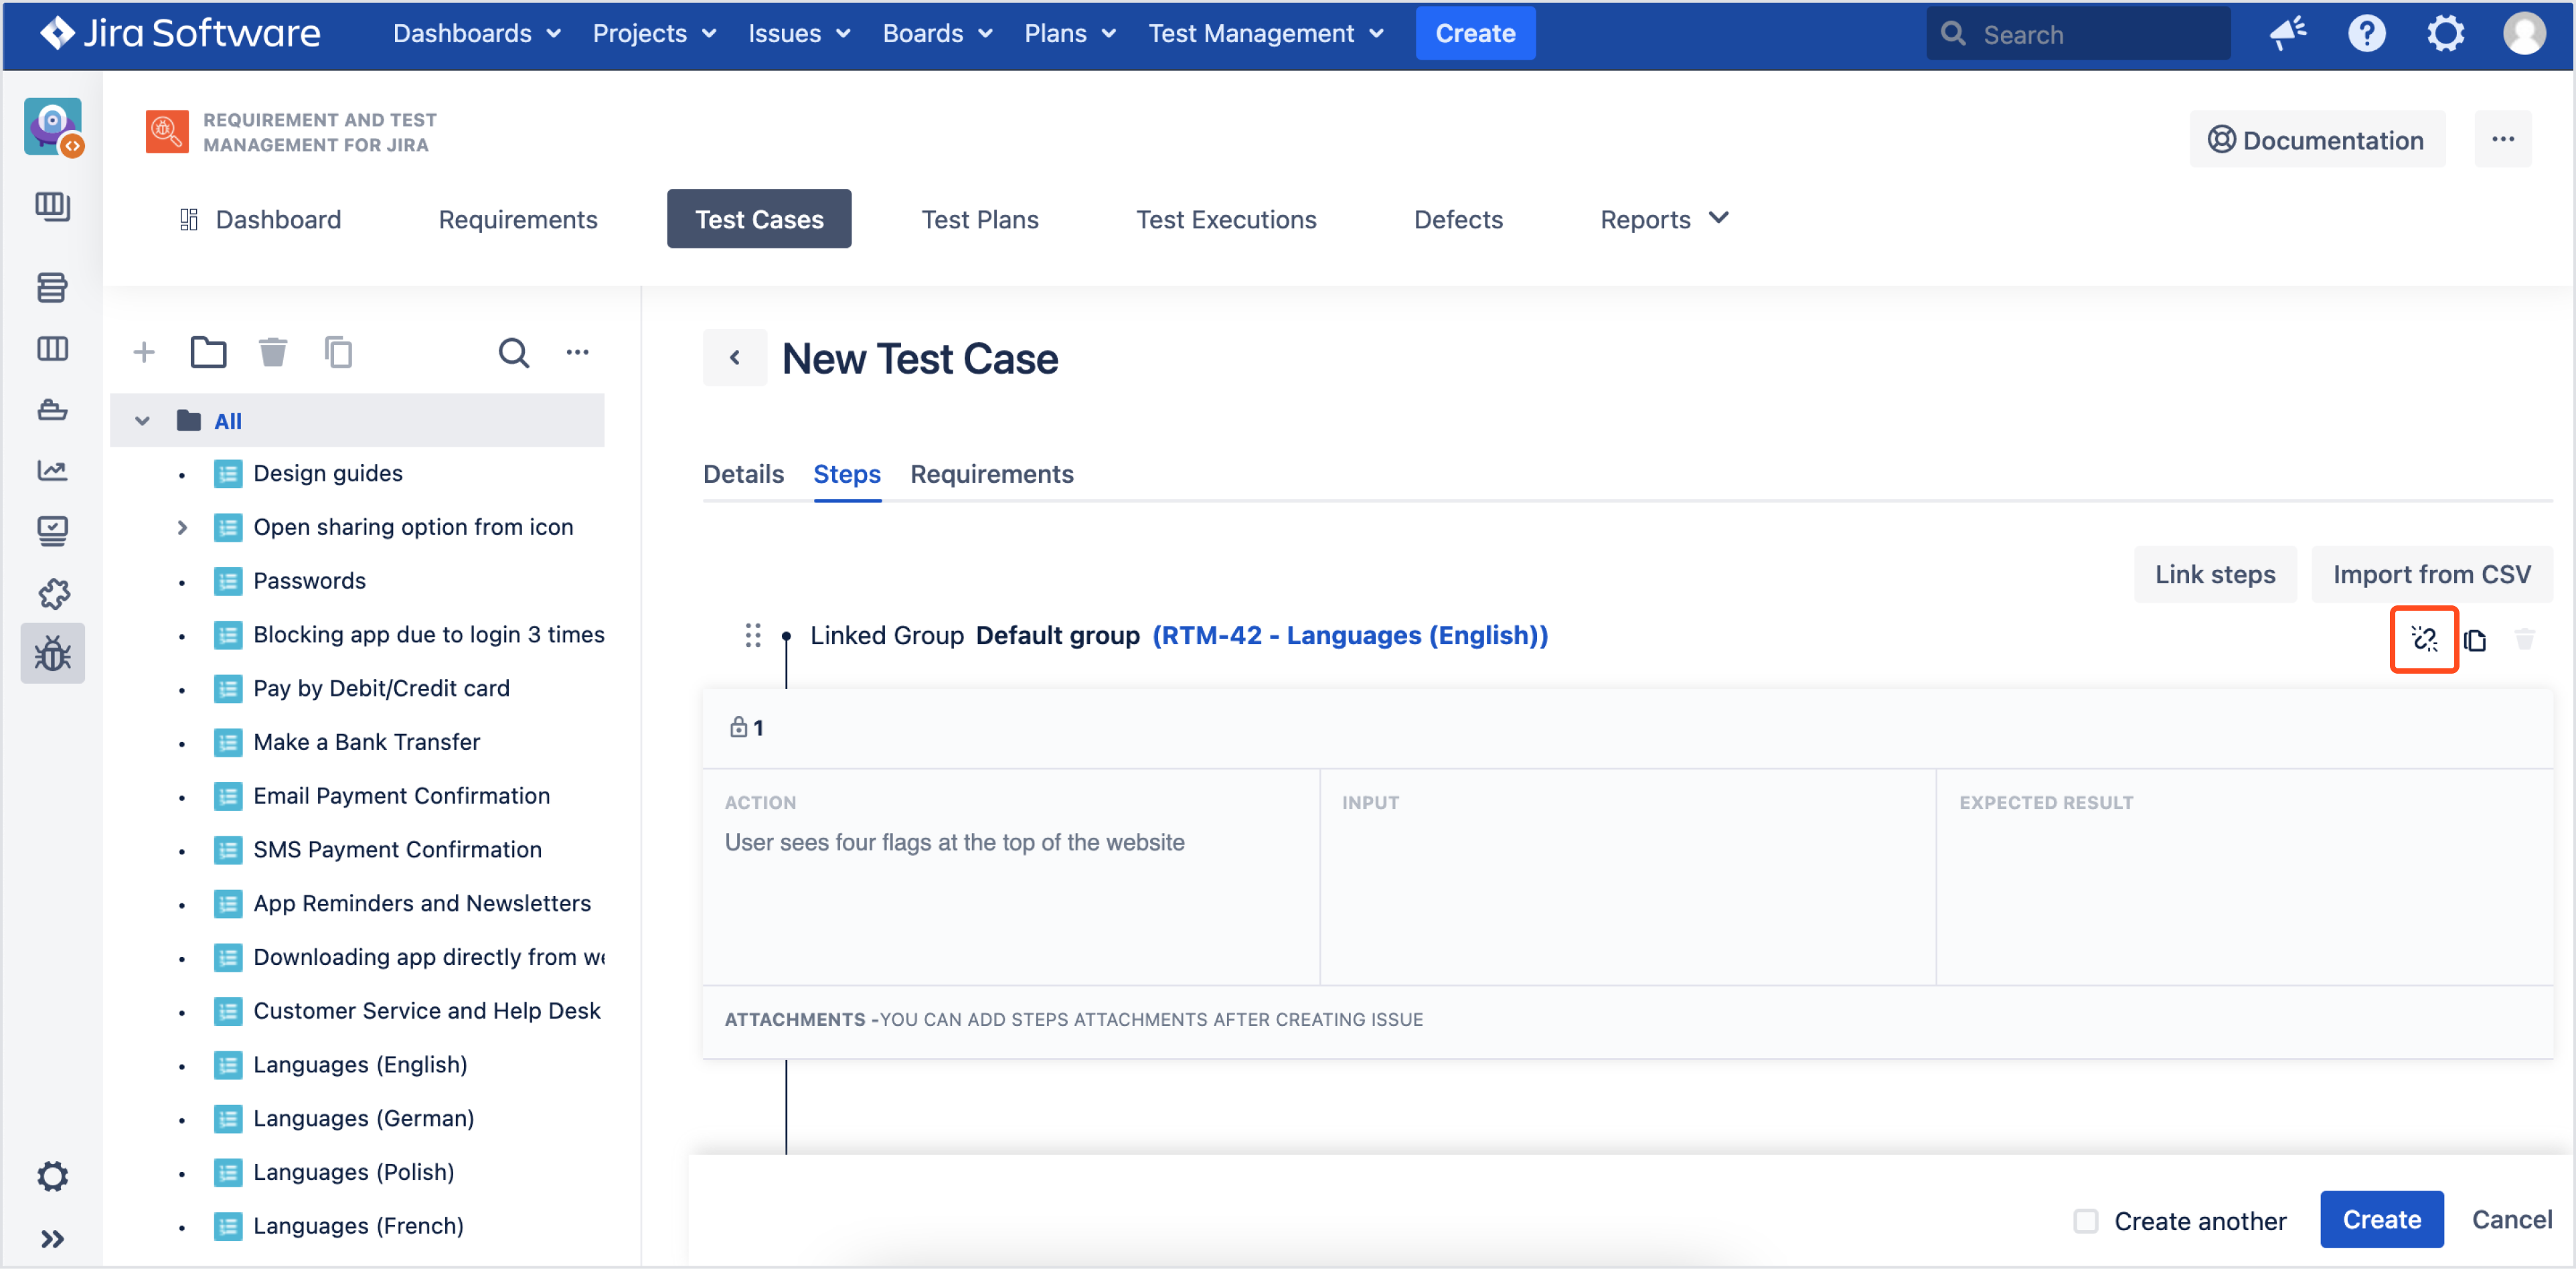
Link from other TC
You don’t have to rewrite Test Case’s steps. Use existing steps from other Test Case and copy them to your new TC:
- Click Link from other TC. A drawer displays.
- Choose Test Case where target steps are stored.
- Click Continue.
 InfoYou can check how many groups of steps are included in Test Case in information box.
 - Select groups of steps.
- Click Link.
As a result, steps from other TC are copied to your Test Case.
Copied steps are blocked. To edit them you need to unlink TCE group. Click the Unlink steps group icon and make changes in your steps.
Import from CSV
Click Import from CSV and choose a .csv file with steps.
Steps add automatically.
Sample file to import can be found here. The file contains three Steps, with columns named Action, Input, Expected result. Each step is located in a separate group.
Requirements
Open Test Case’s Requirements tab. There are two ways to add Requirements to your Test Case:
-
by adding Requirements, that already exist
-
by creating new requirements
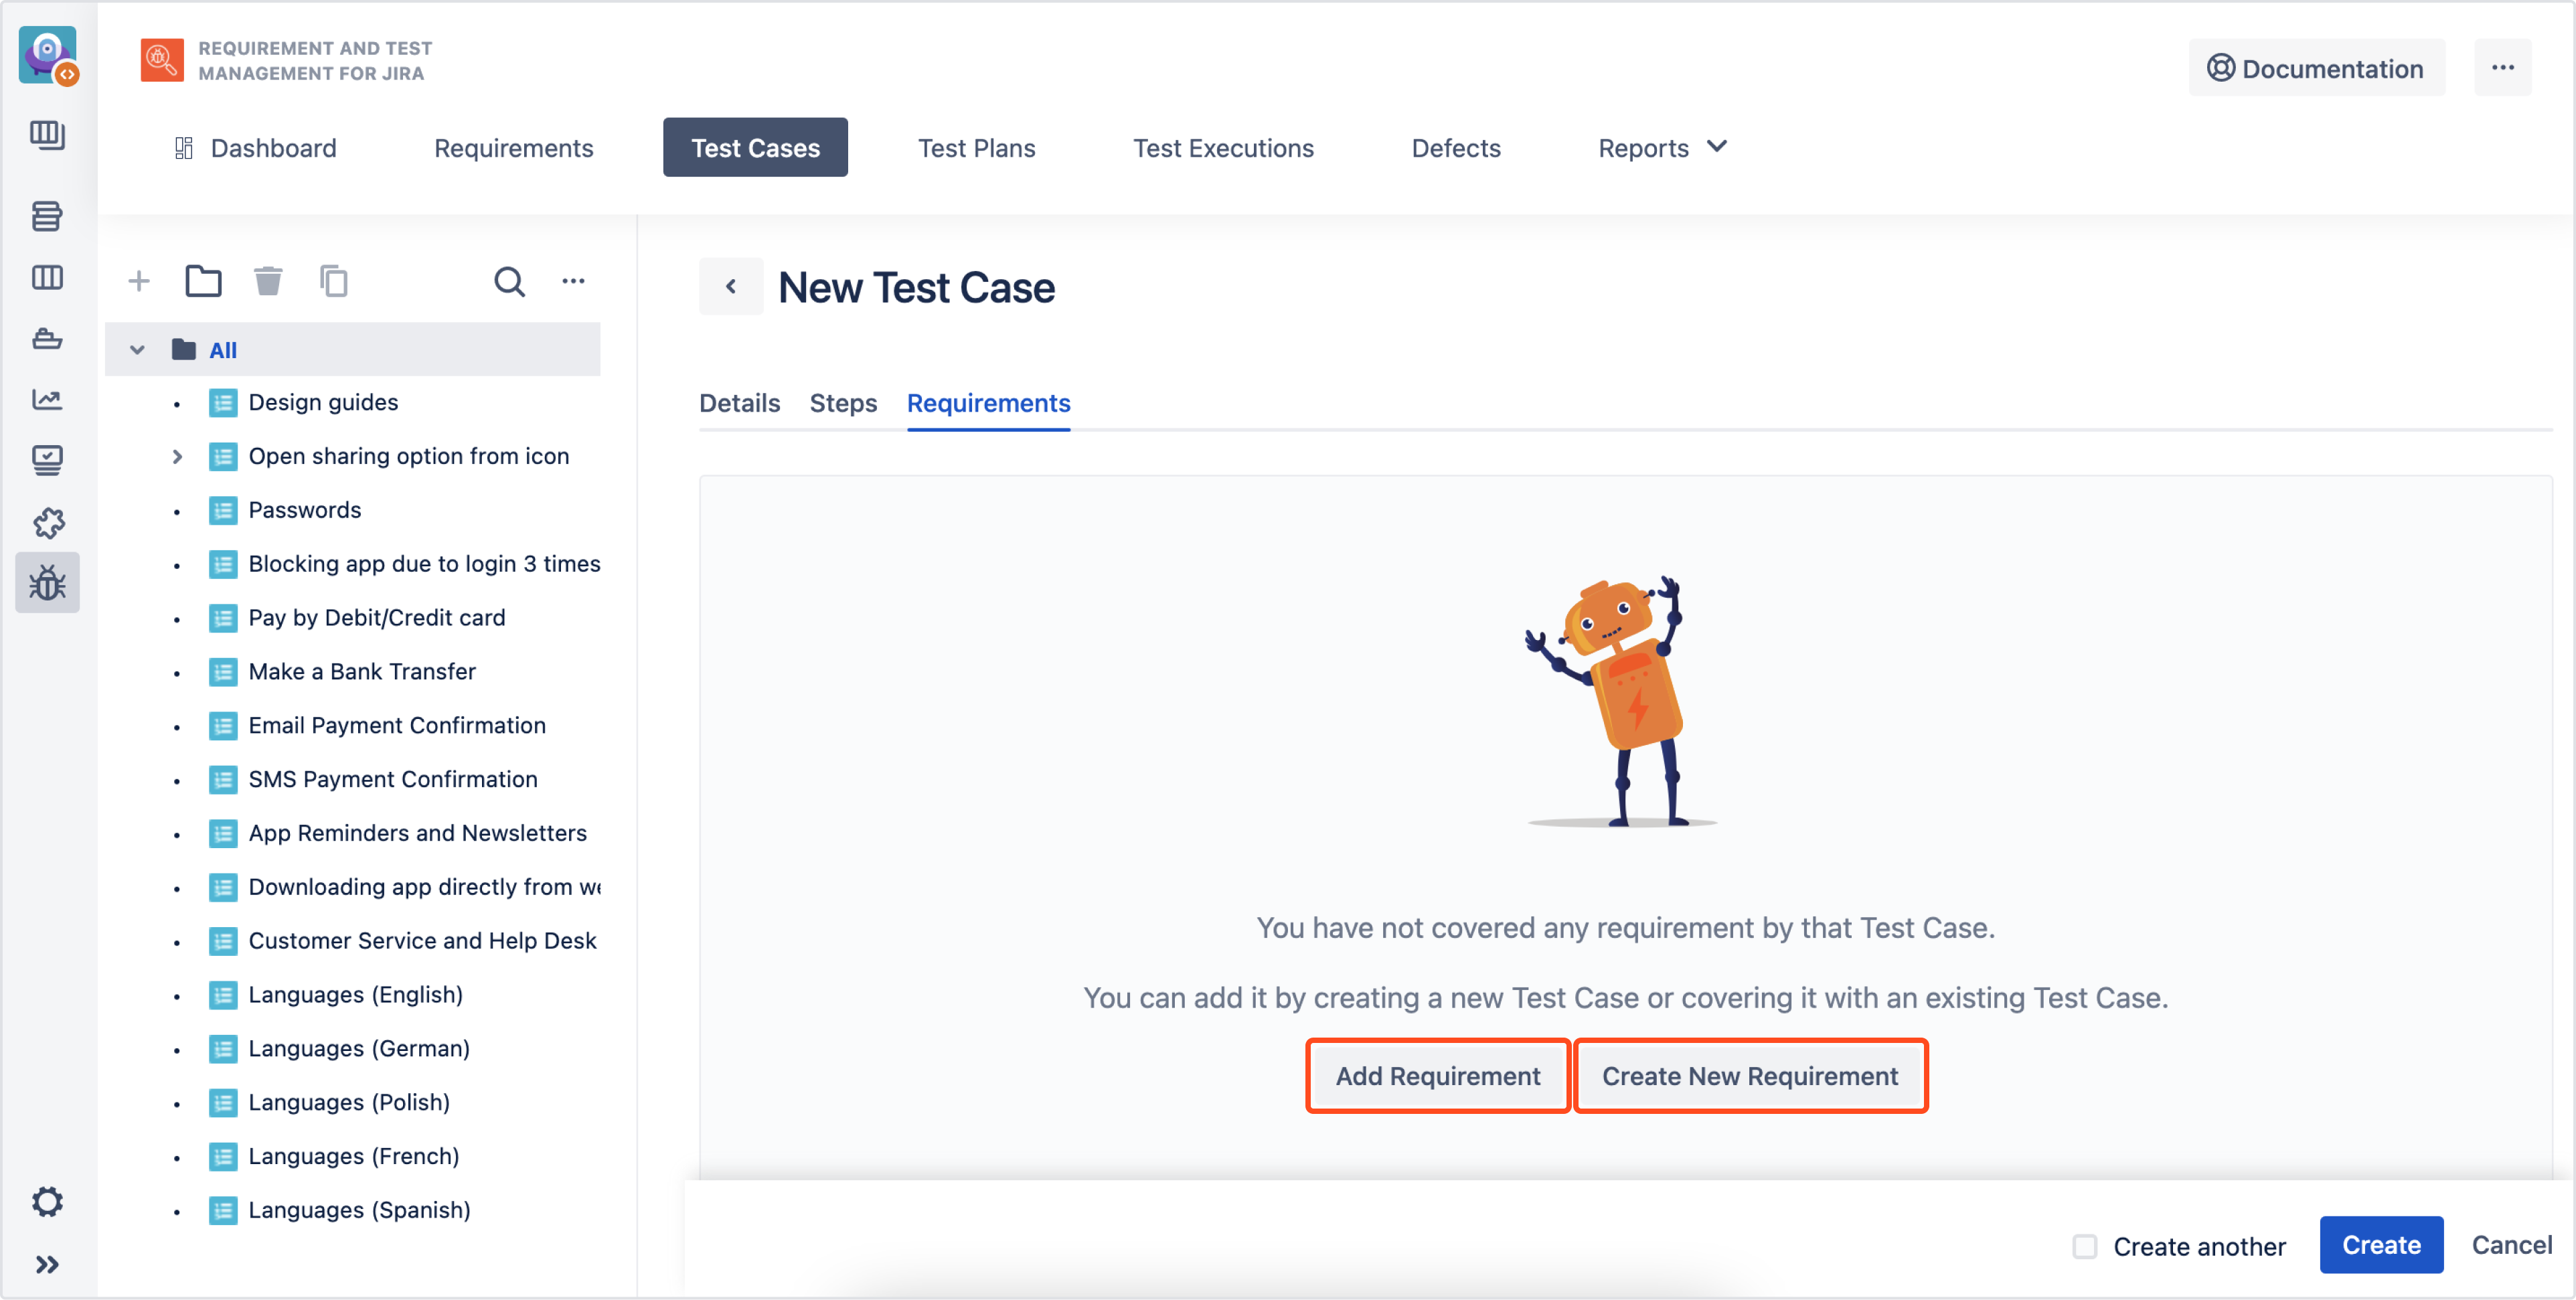
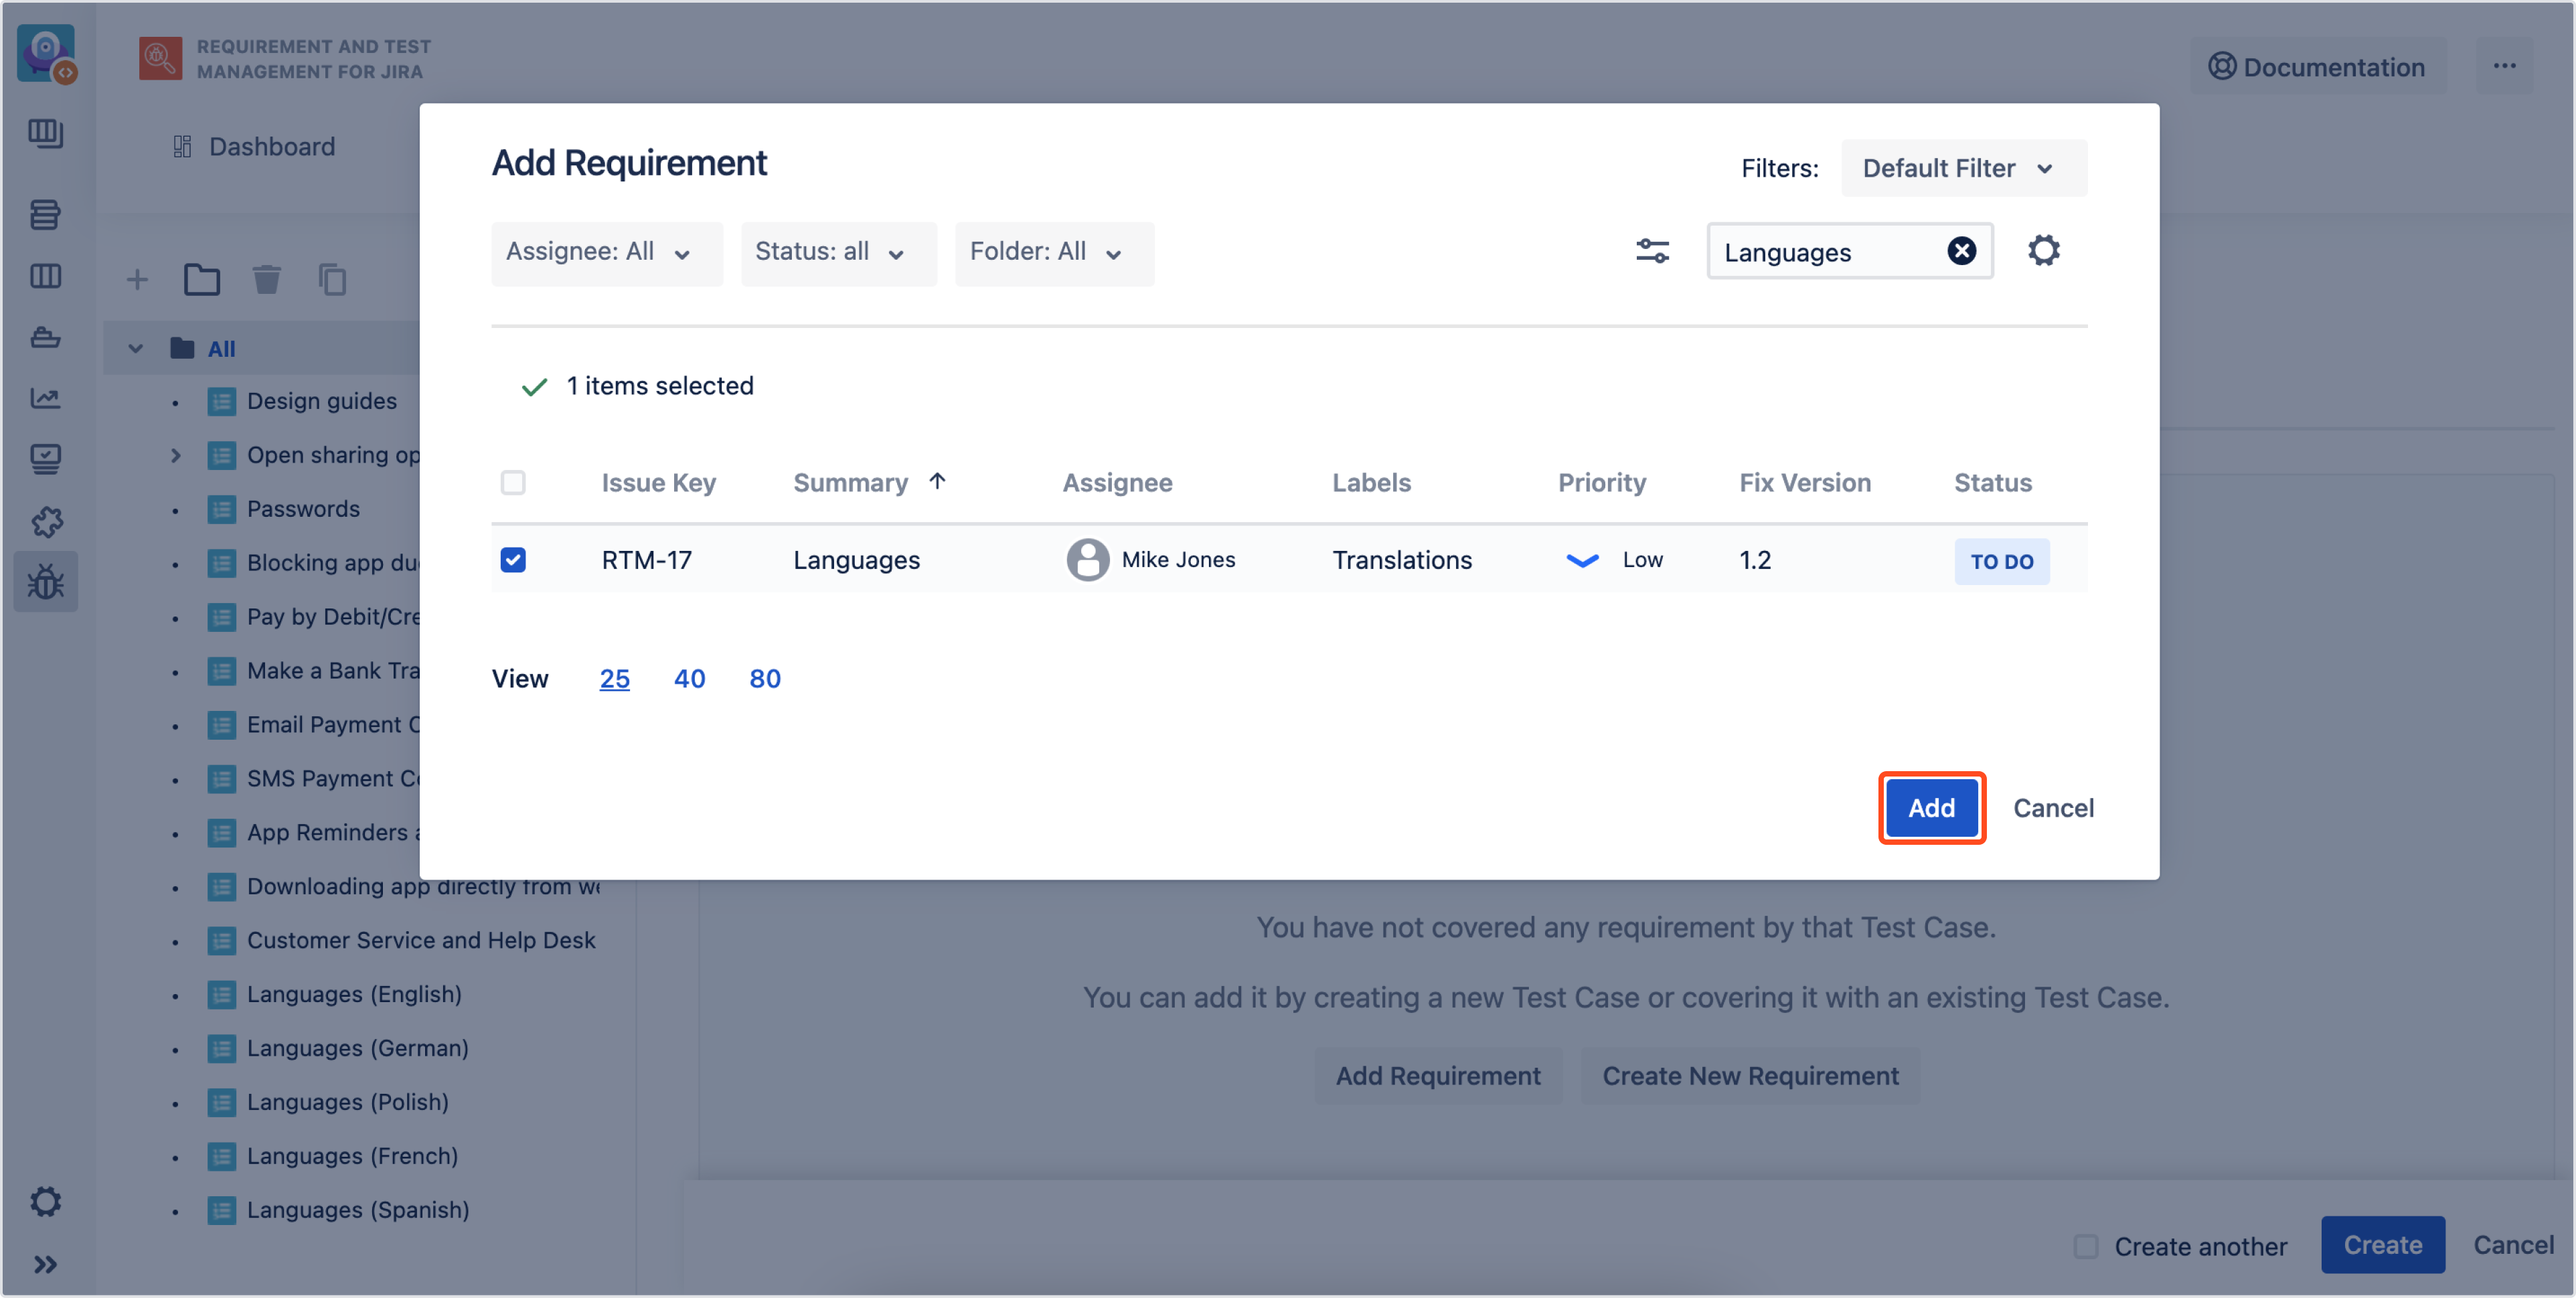
Add Requirement
Right after clicking on Add Requirement button, a dialog with Requirements display. Select Requirements that will be covered by your Test Case and click Add to confirm the action.
Create New Requirement
As soon as you click Create New Requirement, you will be transferred to Requirements tab.
For further information, navigate to Create Requirement chapter.
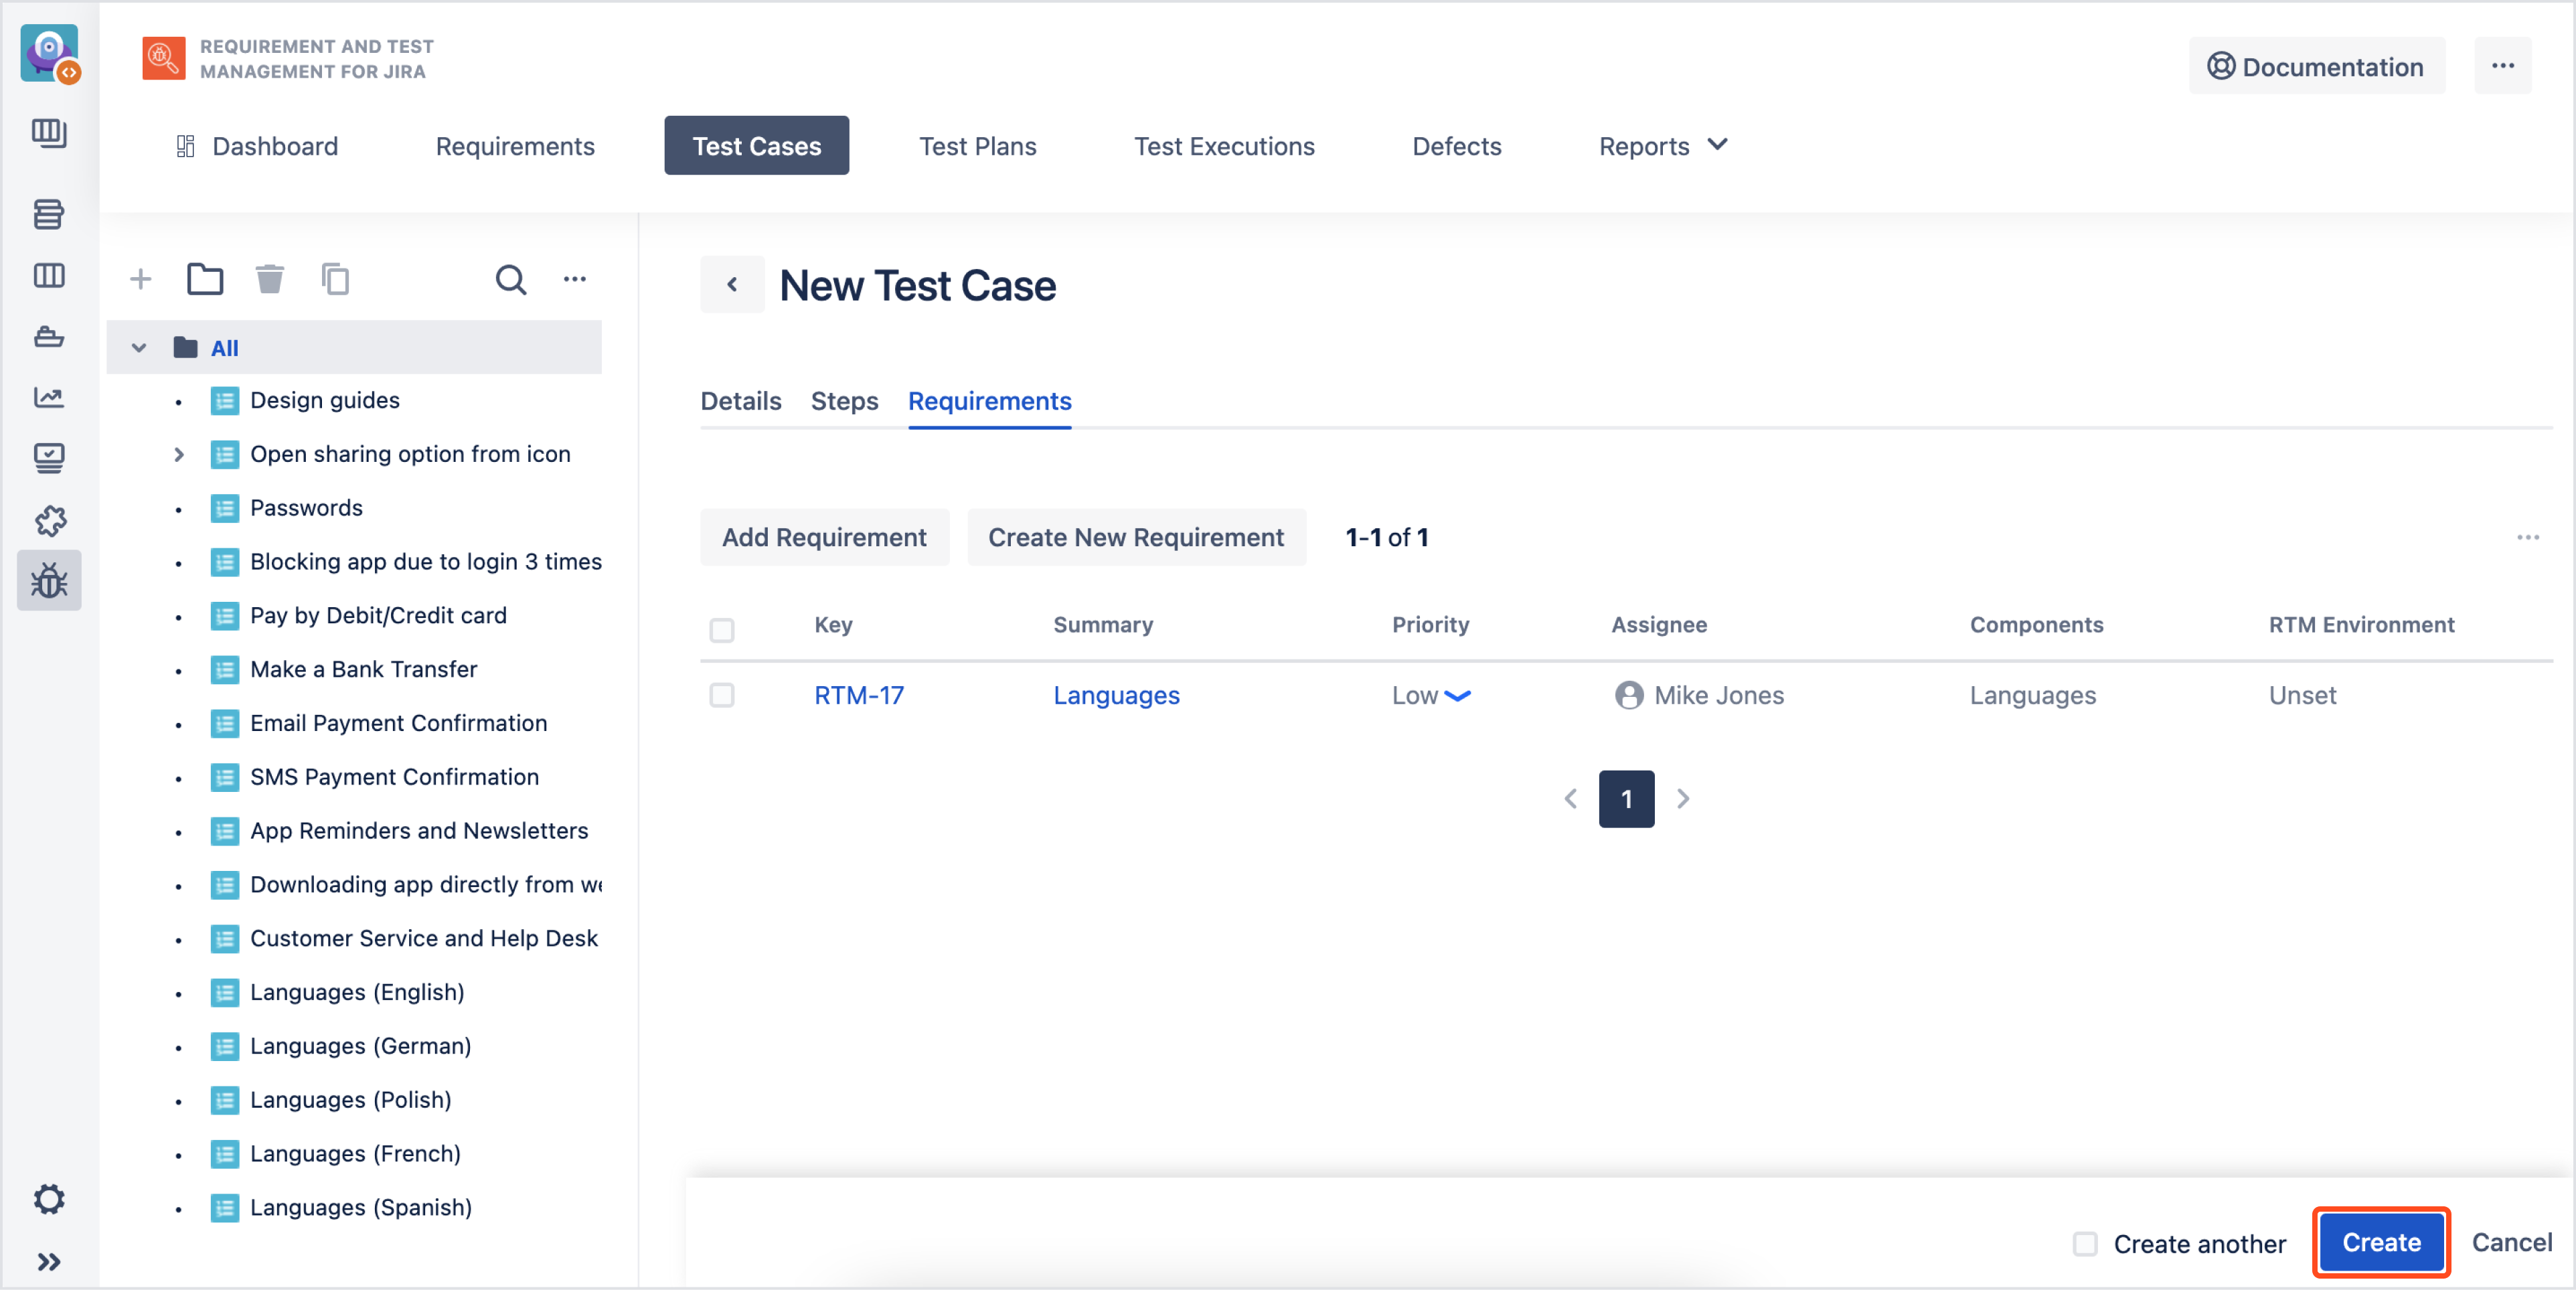
Confirm Test Case creation
If you have already completed all tabs, click Create to generate your Test Case.
Need help?
If you can’t find the answer you need in our documentation, raise a support request*.
*Include as much information as possible to help our support team resolve your issue faster.