- Get started
- About
- First steps
- Glossary
- Migration
- Configuration
- Global configuration
- Repository
- Template configuration
- Template scope
- Manage templates
- Supported fields
- Permissions
- Using templates
- Create issue from template
- Create issue structures
- Apply template to existing issue
- Recreate issue
- Use template custom field on issue create screen
- Default templates
- Direct link
- JQL searchers
- Variables
- Static variables
- Dynamic variables
- Smart defaults
- Basics
- Smart issues
- Smart users
- Smart dates
- Smart project
- How to use smart defaults
- App Integrations
- Team-managed projects
- Jira Software
- Jira Service Management
- Advanced Roadmaps
- Issue Checklist for Jira
- Advanced
- Automation
- Legacy automation action
- REST API
- Create issue and apply template with Jira REST API
- Security
- Security statement
- App permissions
Migration from Cloud to Cloud
Learn about migrating templates from Jira Cloud to Jira Cloud
There are two methods to migrate your templates from one Jira Cloud instance to another:
- Using a CSV file
- Using a Jira Cloud Migration Assistant (JCMA) plugin
You can use either of these methods to migrate your template repository.
These methods migrate only your template issues and the repository project, not app configuration.
Benefits of these methods
| CSV file method benefits | JCMA plugin method benefits |
|---|---|
| Templates are ready to use immediately after import | The source template repository project is automatically migrated |
| No configuration required for users | No configuration required for an admin (for example, additional import of issues) |
Limitations of these methods
| CSV file method limitations | JCMA plugin method limitations |
|---|---|
| Additional export/import of template issues is required after migrating the whole Jira site | Templates are not activated after migrating the project - additional activation is required (see, Migration from server to cloud) |
| You need to exclude the source template repository project for this method to work, when you migrate your jira with the JCMA plugin. | - |
Export and import template issues using CSV file.
With this method, when an issue is imported into the repository project, it’s recognized as a newly created issue, therefore it’s automatically set as a template by the app. All imported issues are enabled as templates after completing the import wizard.
When an issue is imported from the csv file, the issue is created by Jira without issue properties, because the CSV export file doesn’t contain them. That’s why template configuration, such as template name or scope, won’t be migrated.
Steps
- In the target Jira site, install Issue Templates for Jira, then create a new template repository project and choose it as the repository in the configuration (see First steps for details).
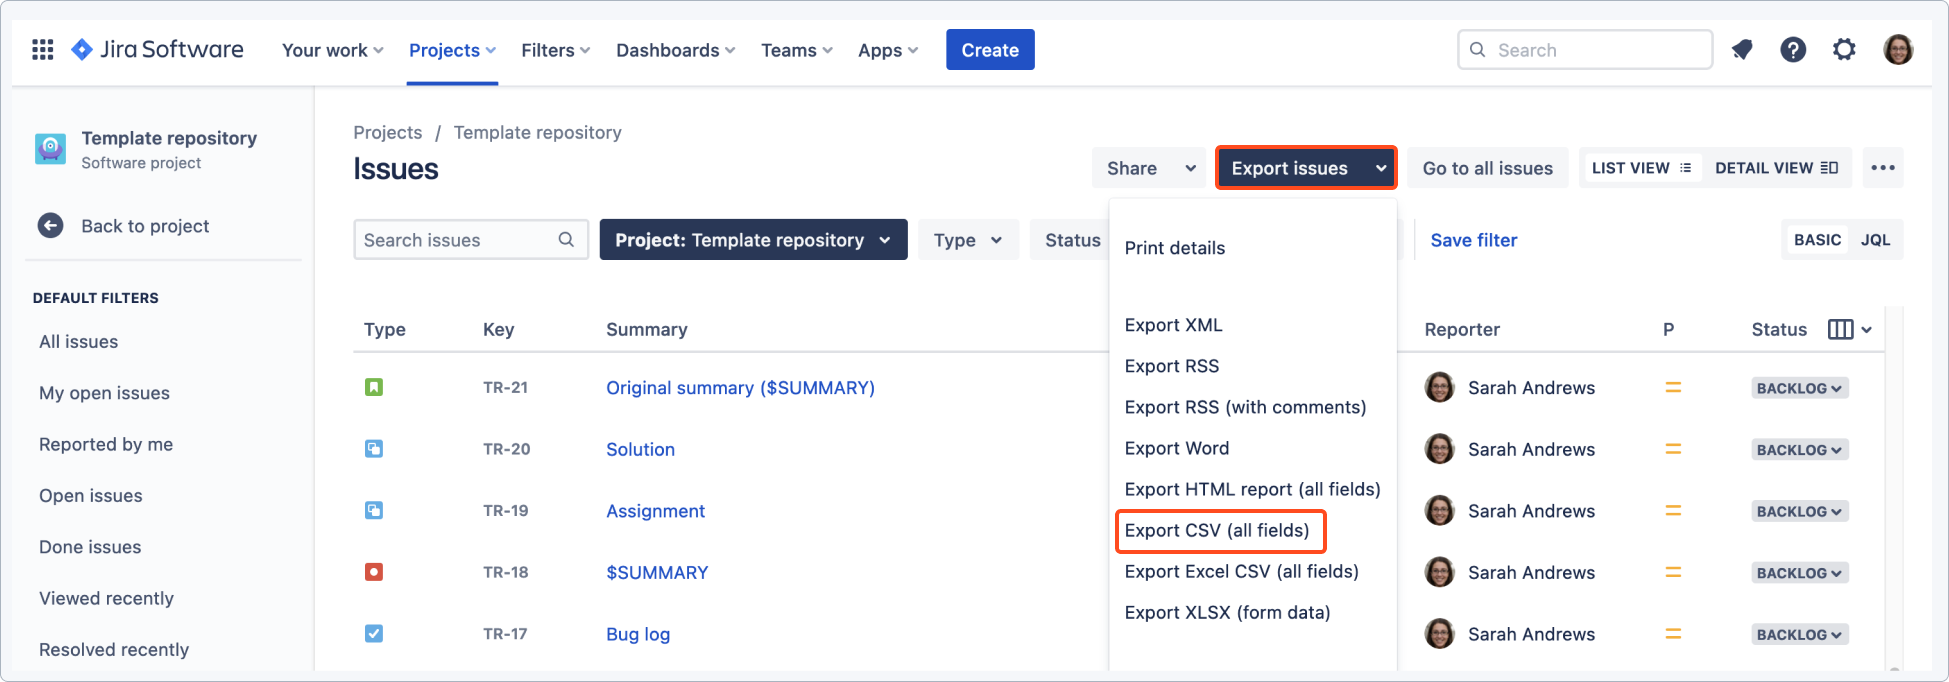
- Export all issues from your template repository. Go to issue navigator in the source Jira Site and select Export issues > Export Excel CSV (all fields).

- In the target Jira site, open System > External System Import (see Importing your CSV file for details).
Warning
The import issues from CSV option from issue navigator doesn’t work if you want to import subtasks. Use System → External System Import.
- Import issues into the created template repository in the target Jira site.
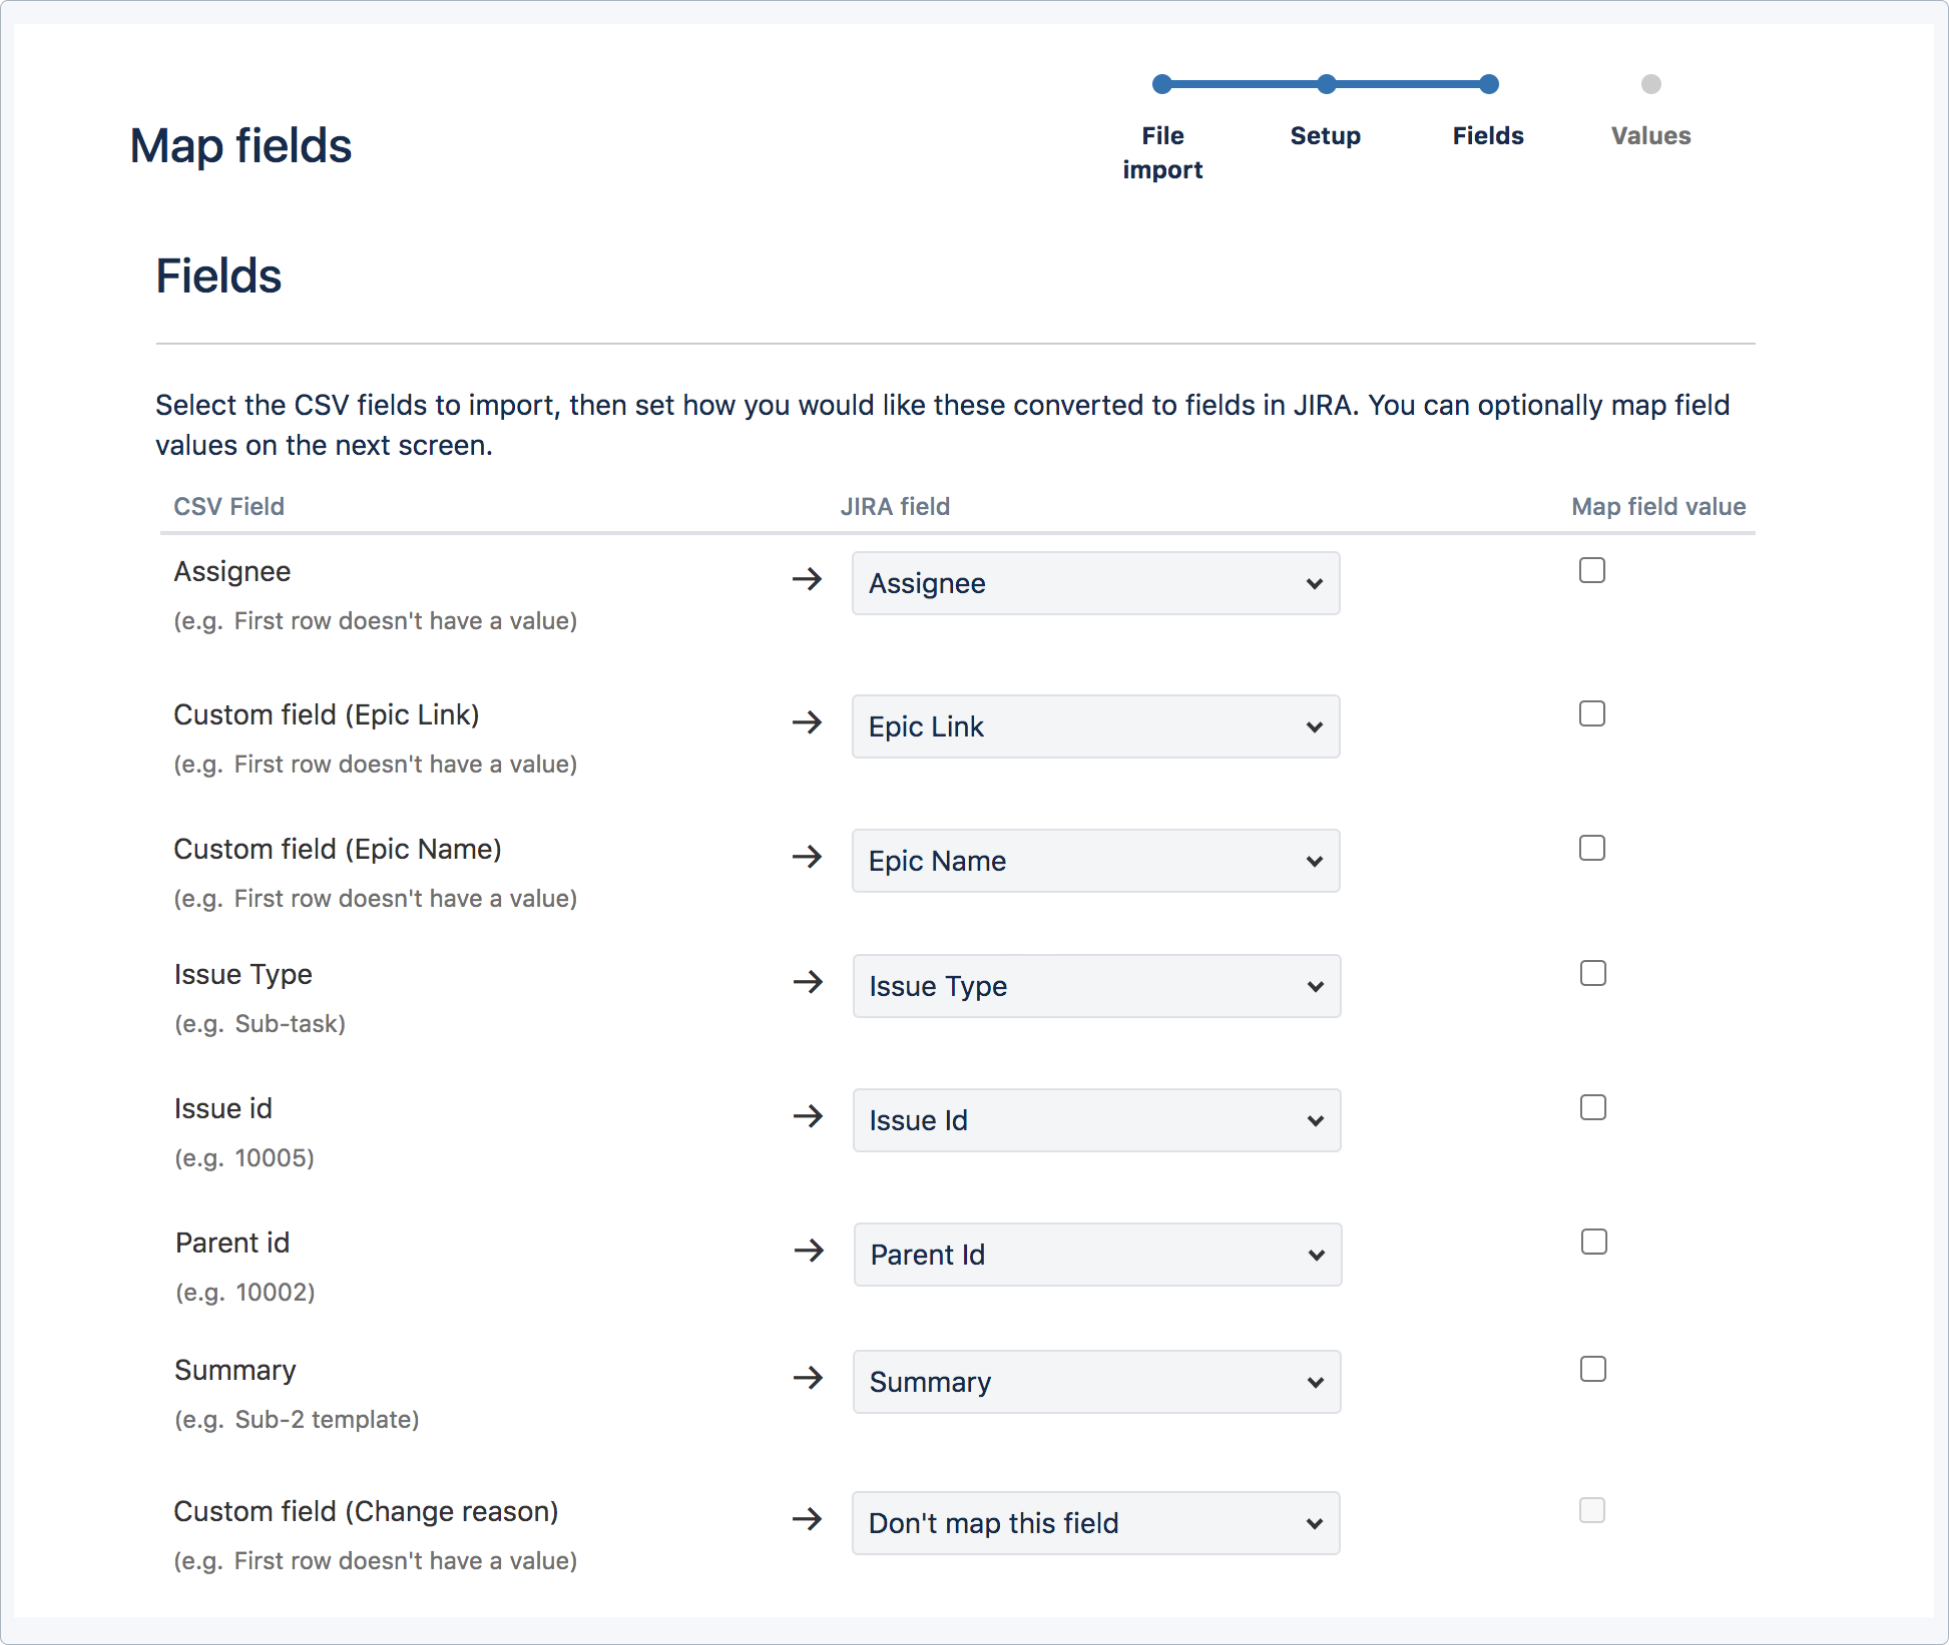
- Follow wizard instructions and add mappings for Summary, Issue Type, Issue Id, Parent Id, Epic Name, Epic Link. Map the fields respectively. For example Issue Id to Issue Id etc.

Jira might fail to import epic links from the file generated by Jira export producing the following error - Cannot add value [ [SPSTEMPL-1] ] to CustomField Epic Link in Issue with summary 'Story template'. Probably value was in incorrect format.
If such a case occurs, change the Custom field (Epic Link) column and replace the issue key value, for example “SPSTEMPL-1“ to the name of the epic.
Result
Once the source template repository project is exported and imported into the target Jira site, all issues are automatically enabled as templates with default settings.
Migrate templates repository using JCMA plugin.
JCMA migrates a whole project. It recreates the same project from the source Jira site in the target Jira site. This method requires no configuration, as all templates are copied automatically, although you need to activate them after the project migration is complete.
Steps
- Migrate Jira using Jira Cloud Migration Assistant.
- Include the template repository project in the migration process.
- Once the migration process is complete, activate templates.
Result
The source templates repository project is moved to the target Jira site with all template issues. All template issues are available and can be found in the Issue navigator.