- Introduction
- About
- First steps
- Migration to Cloud
- Admin's guide
- Global settings
- Configure queues
- Create group
- Edit group
- Manage groups
- Reorder queues
- Date settings
- Import queues
- Export queues
- User's guide
- Personal preferences
- Searching
- Favorites
- Filtering issues
- Editing assignee
- Issues per page
- Sorting issues
- Hiding queue
- Hiding group
Create group
This section provides information on how to create a Queues group.
Before you start, log in as a user with the Jira Administrators global permission or make sure you have a permission to configure queues.
Steps
-
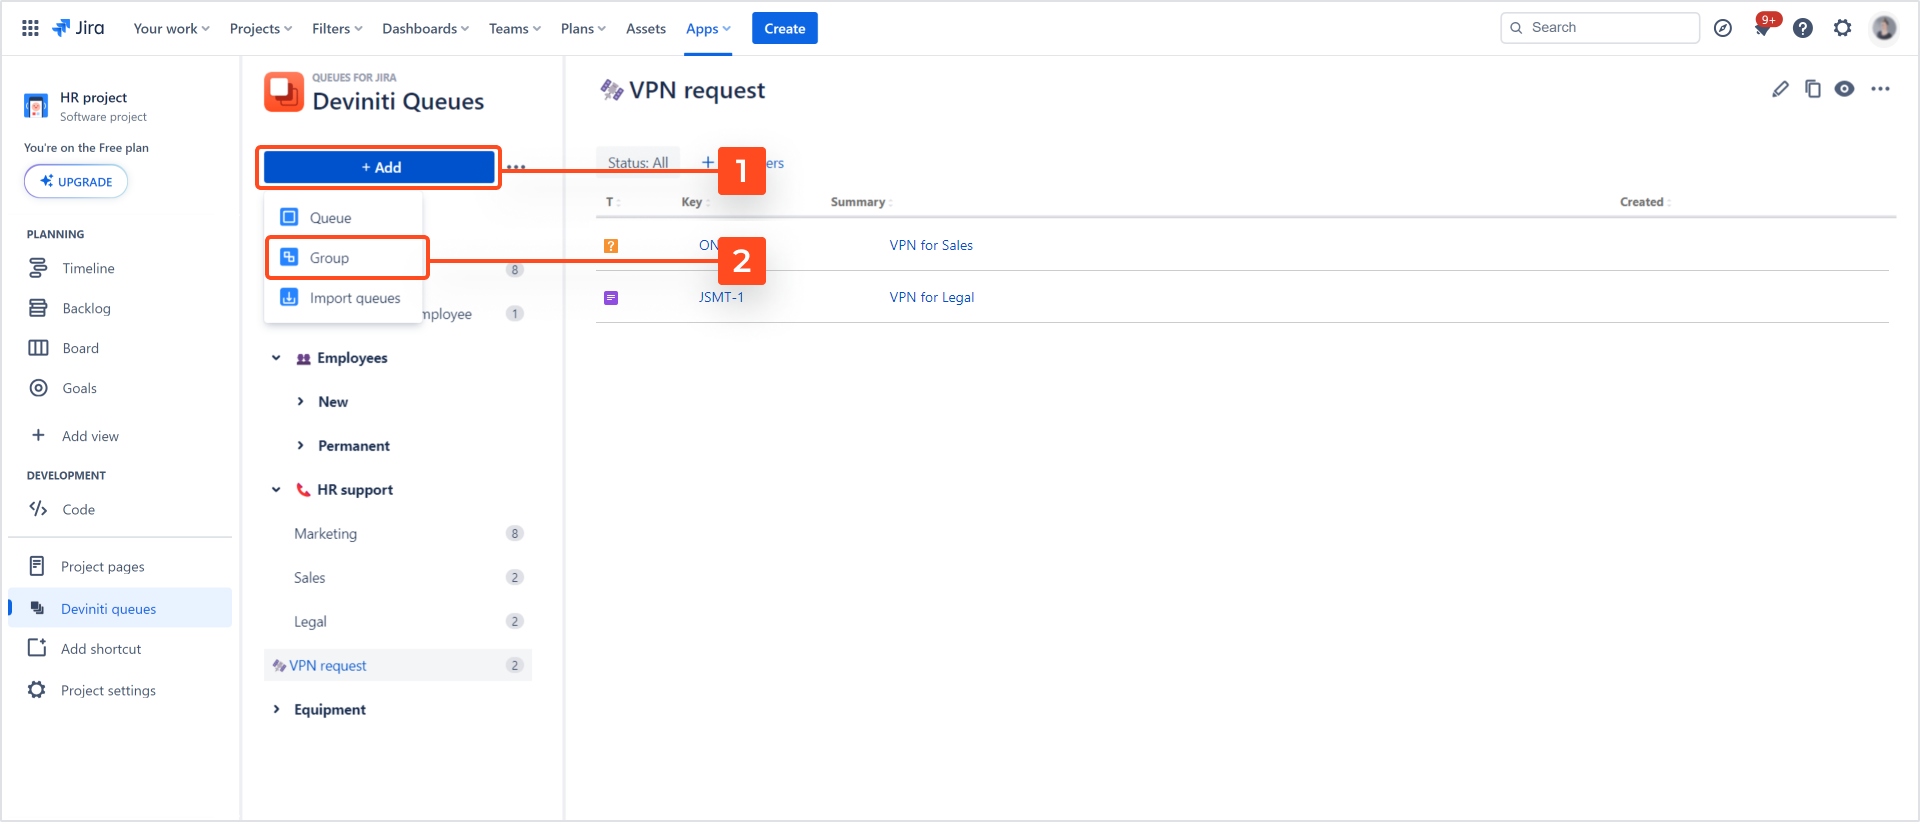
Click + Add.
-
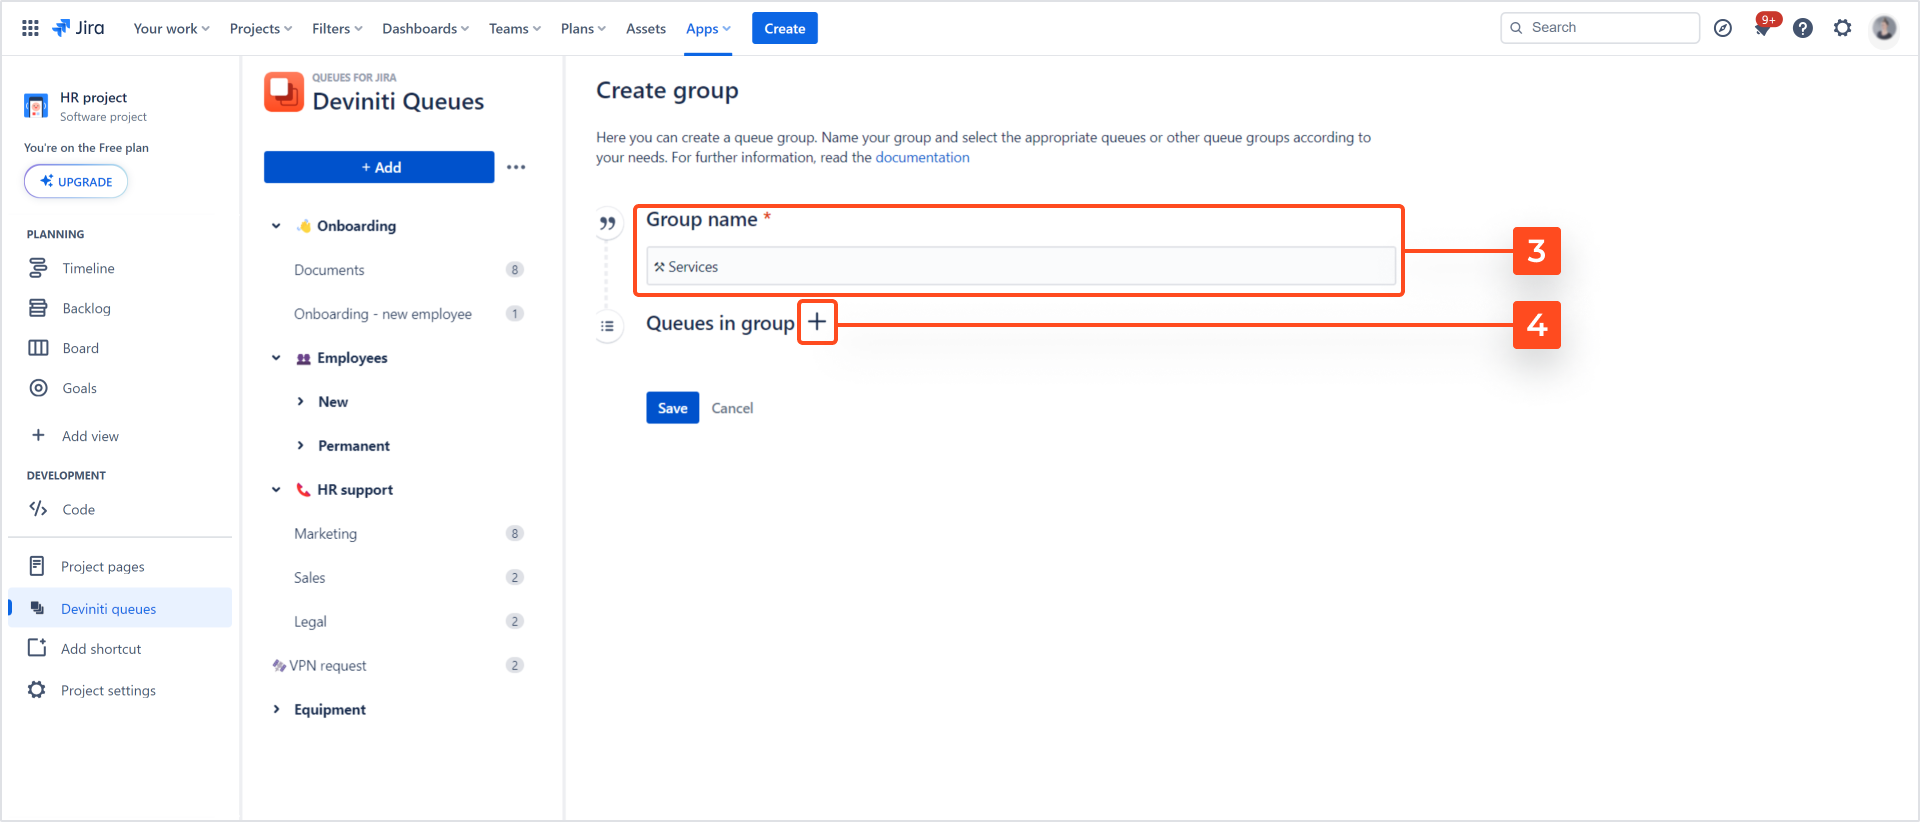
Provide a name for your group.
TipCustomize your queue or group name by adding an emoji. There are several ways you can do it:
- Access emojis through the right mouse button using the Emoji option (on Windows).
- Use the Windows logo key + period (.) combination (on Windows).
- Use the Fn + E combination (on Mac).
- Use an external emoji copy tool.
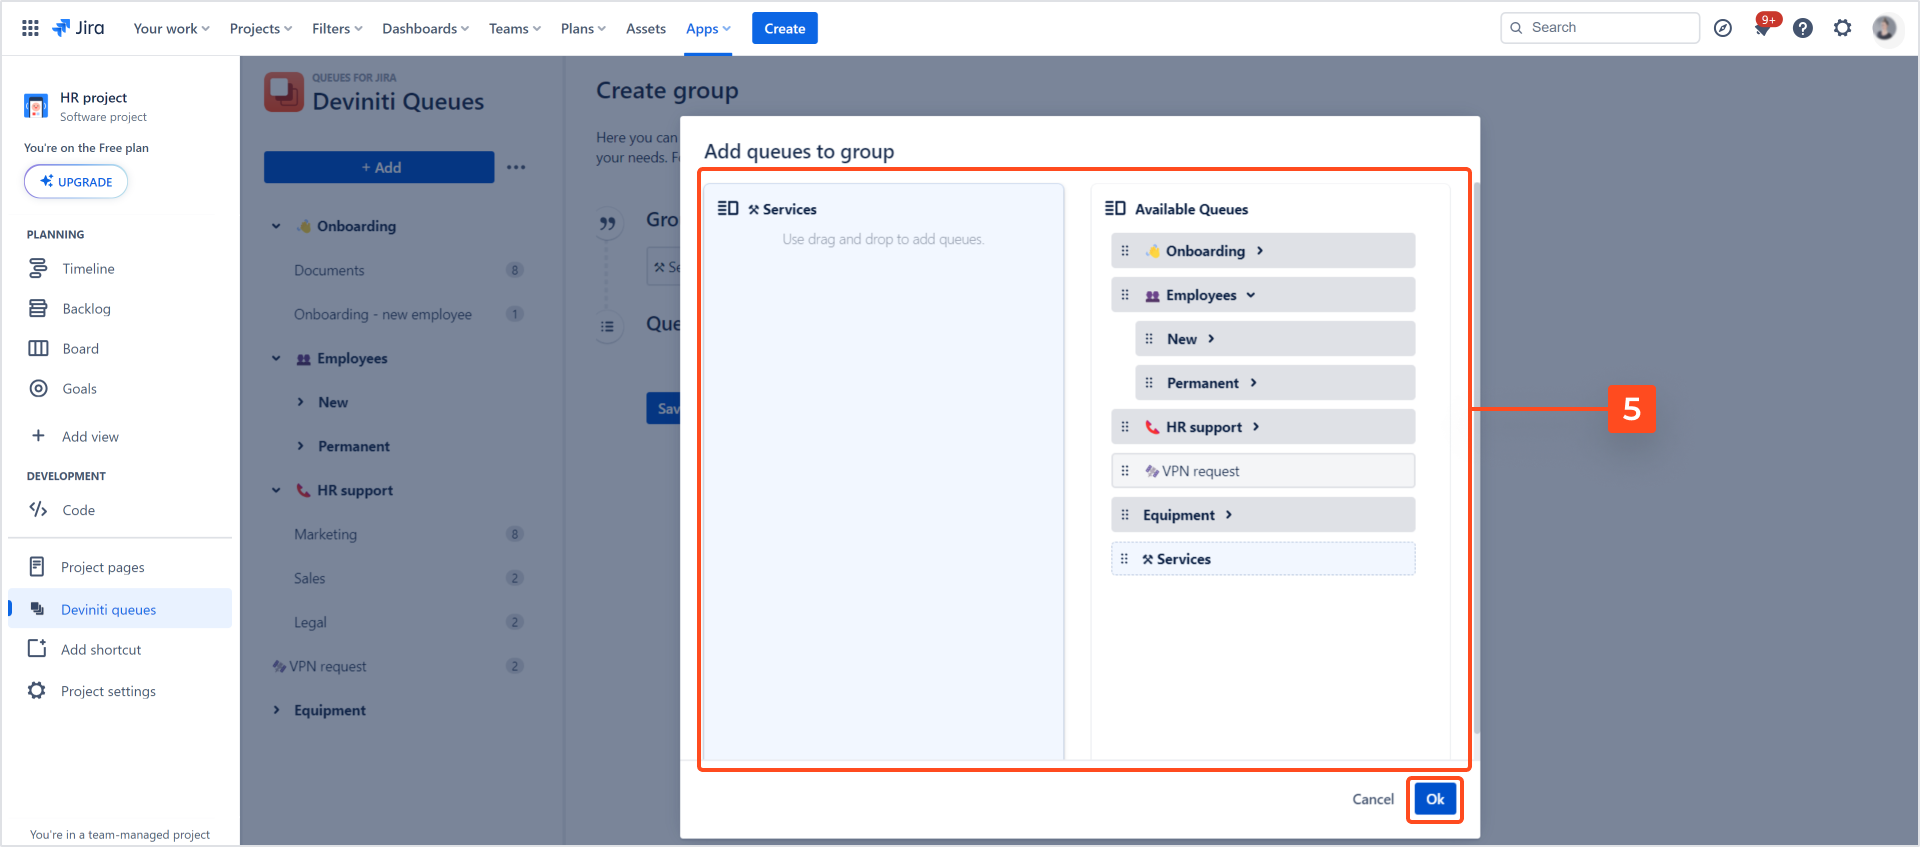
The Add queues to group dialog will show up.
-
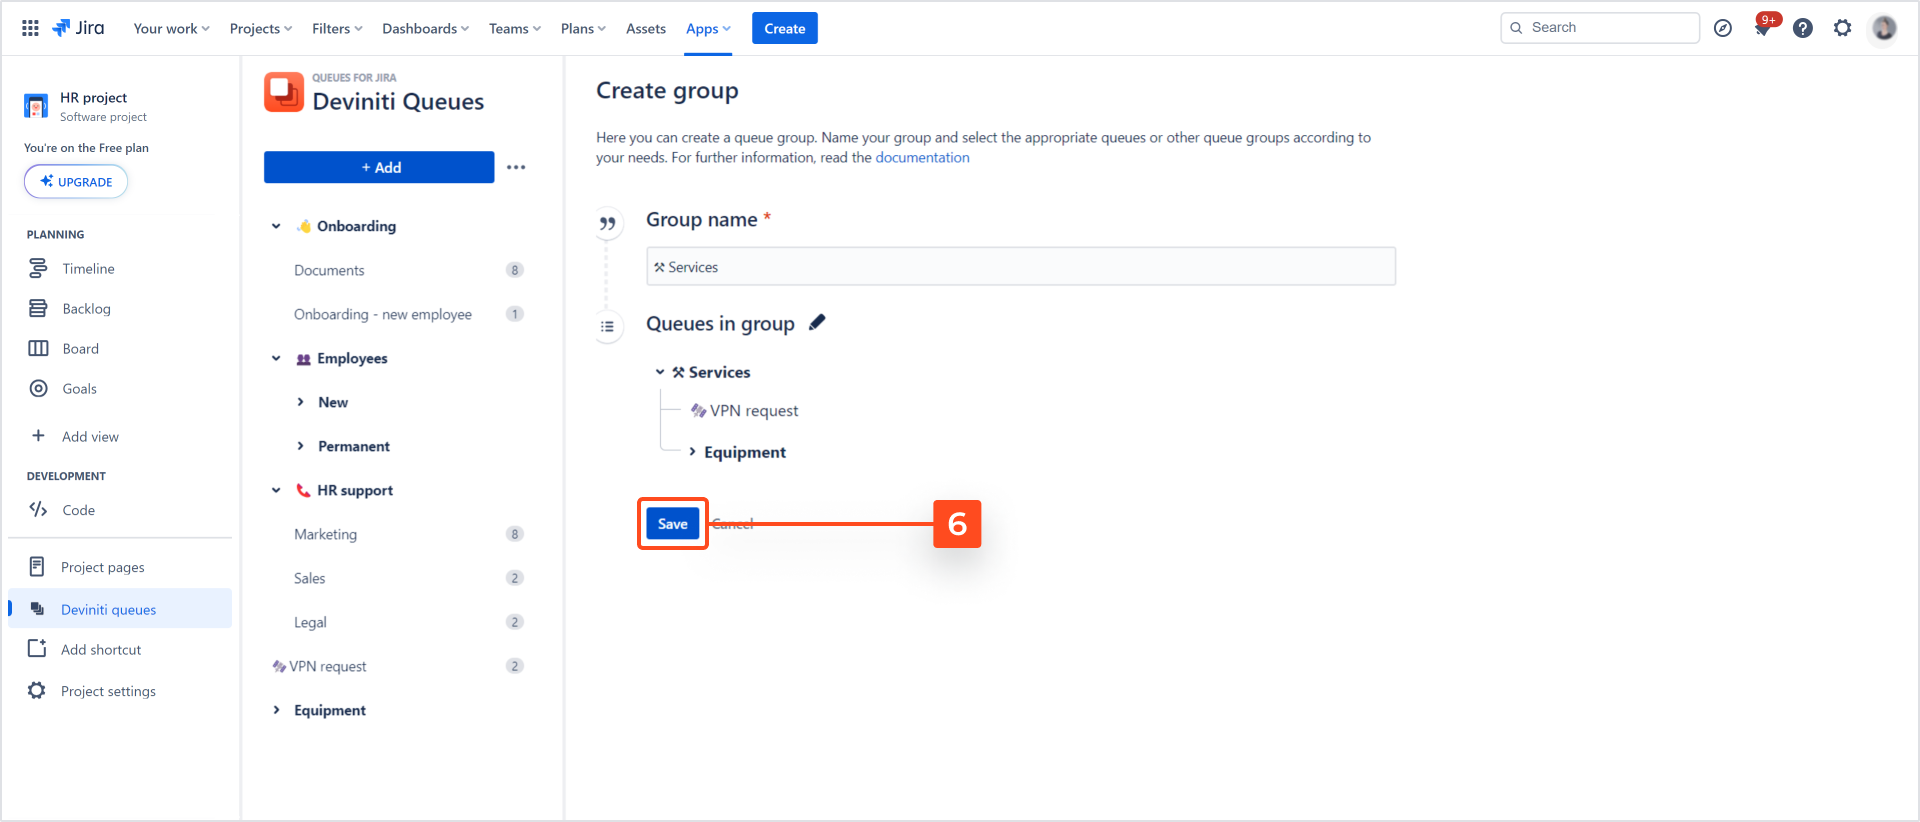
Use drag and drop to add queues to a particular group and click Ok to confirm your selection.
NoteTo move a queue or group from the right column to the left column, first hover the mouse over that element (either a group or individual queue). When relocating elements between columns, please observe the blue line, as it assists you in accurately positioning the specific queue or group. A red line indicates that the element cannot be positioned in the desired location.
 Note
Note- The Add queues to group screen is split into two columns:
- Left, containing newly created group to which you can add queues and queues groups.
- Right, Available queues, where all available queues and queues groups in the structure are located. A newly created group is displayed as a blue label with a bolded name; other groups will have their names bolded as well.
- Queues included on the left column can be rearranged directly on the tree structure in the order of your liking, with the drag and drop functionality. The same applies to other queues and groups on the right column.
Result
The new group is added to the list.
Create subgroup
You can create subgroups to organize your queues and create a multilevel group structure.
In case you already created an advanced structure of your Queues groups, you can rearrange the subgroups using the Enable reorder option on the main Queues panel.
Steps
-
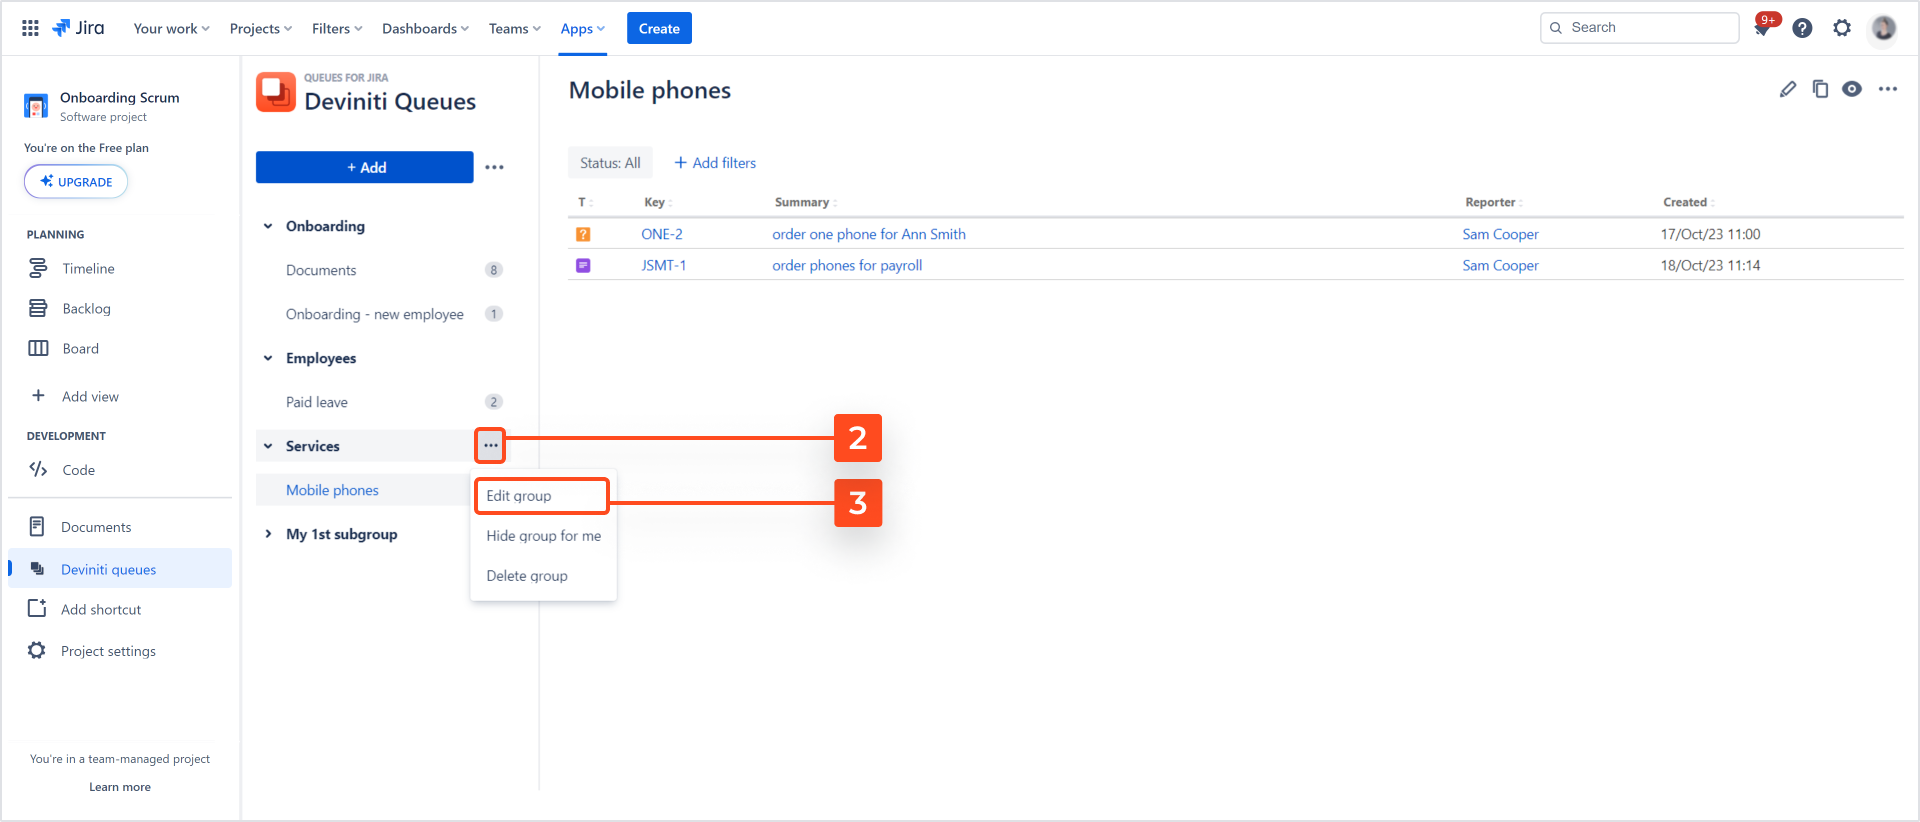
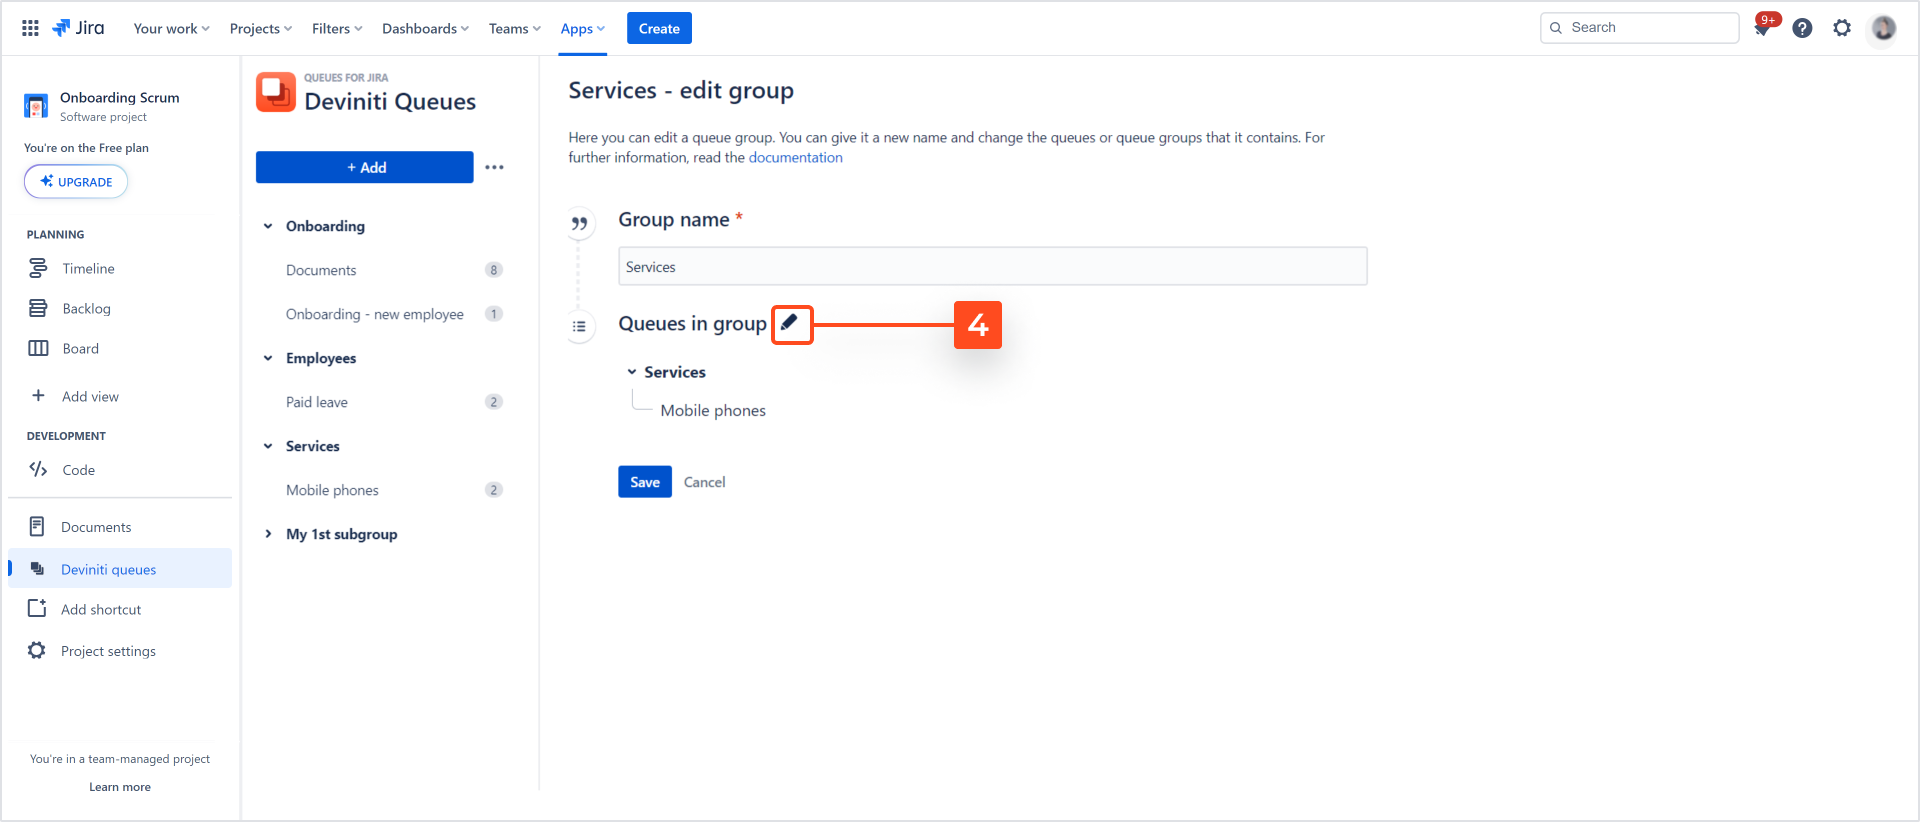
Go to the Queues panel and click on the three dots menu next to the name of the group to which you want to add a subgroup.
-
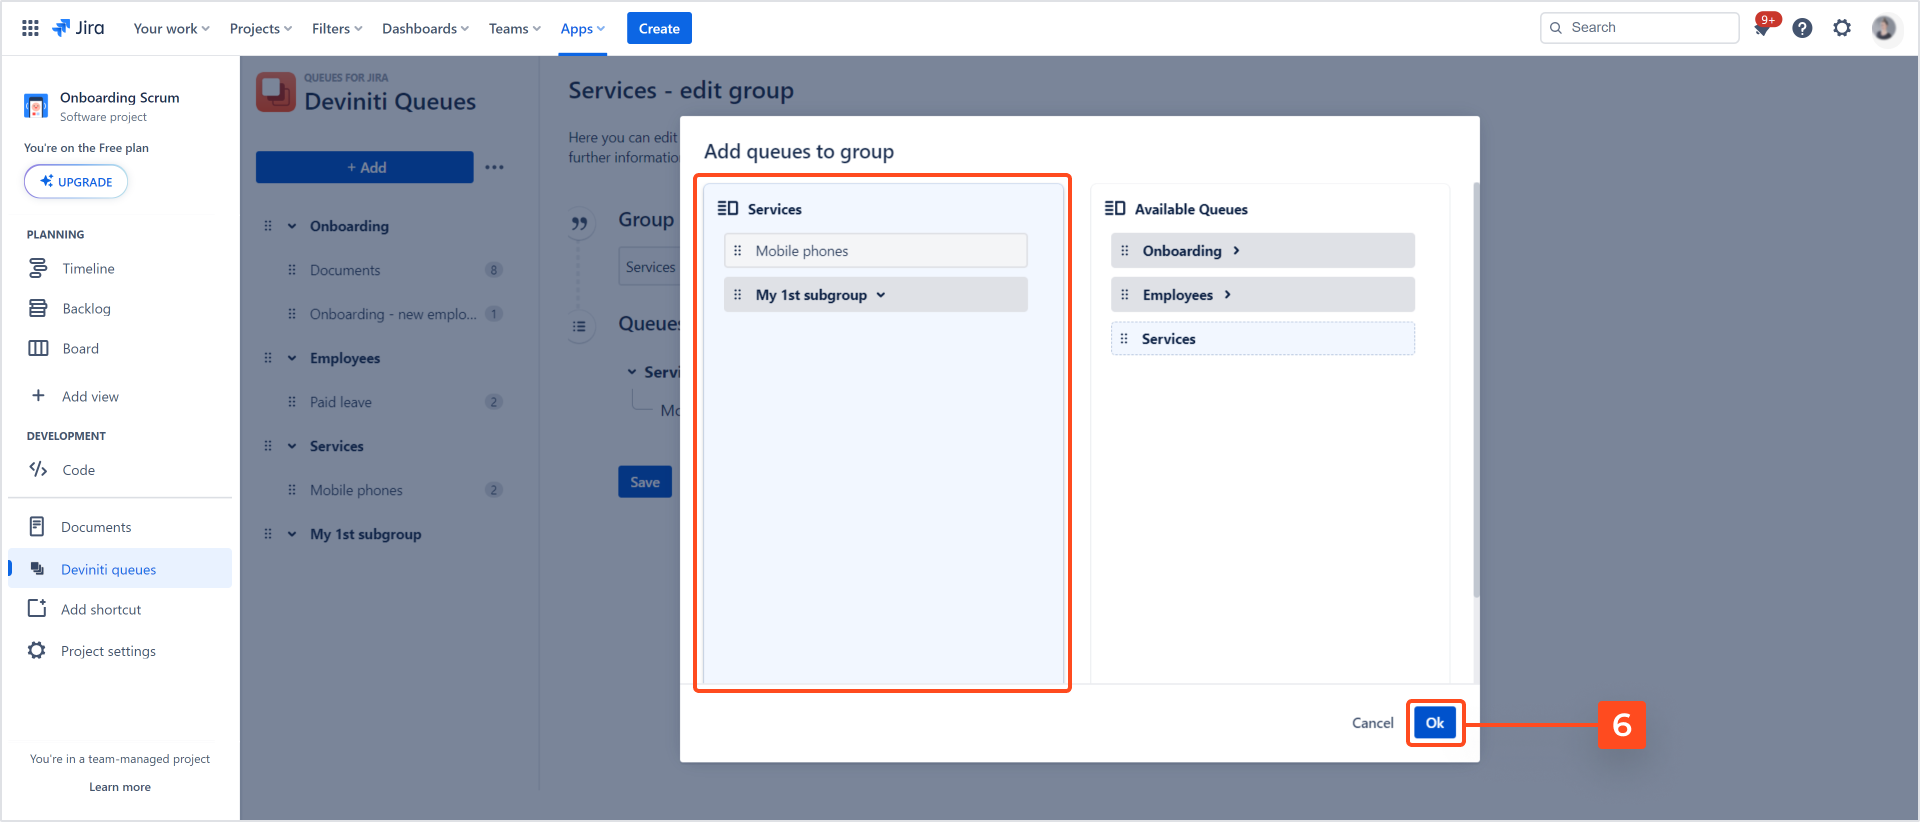
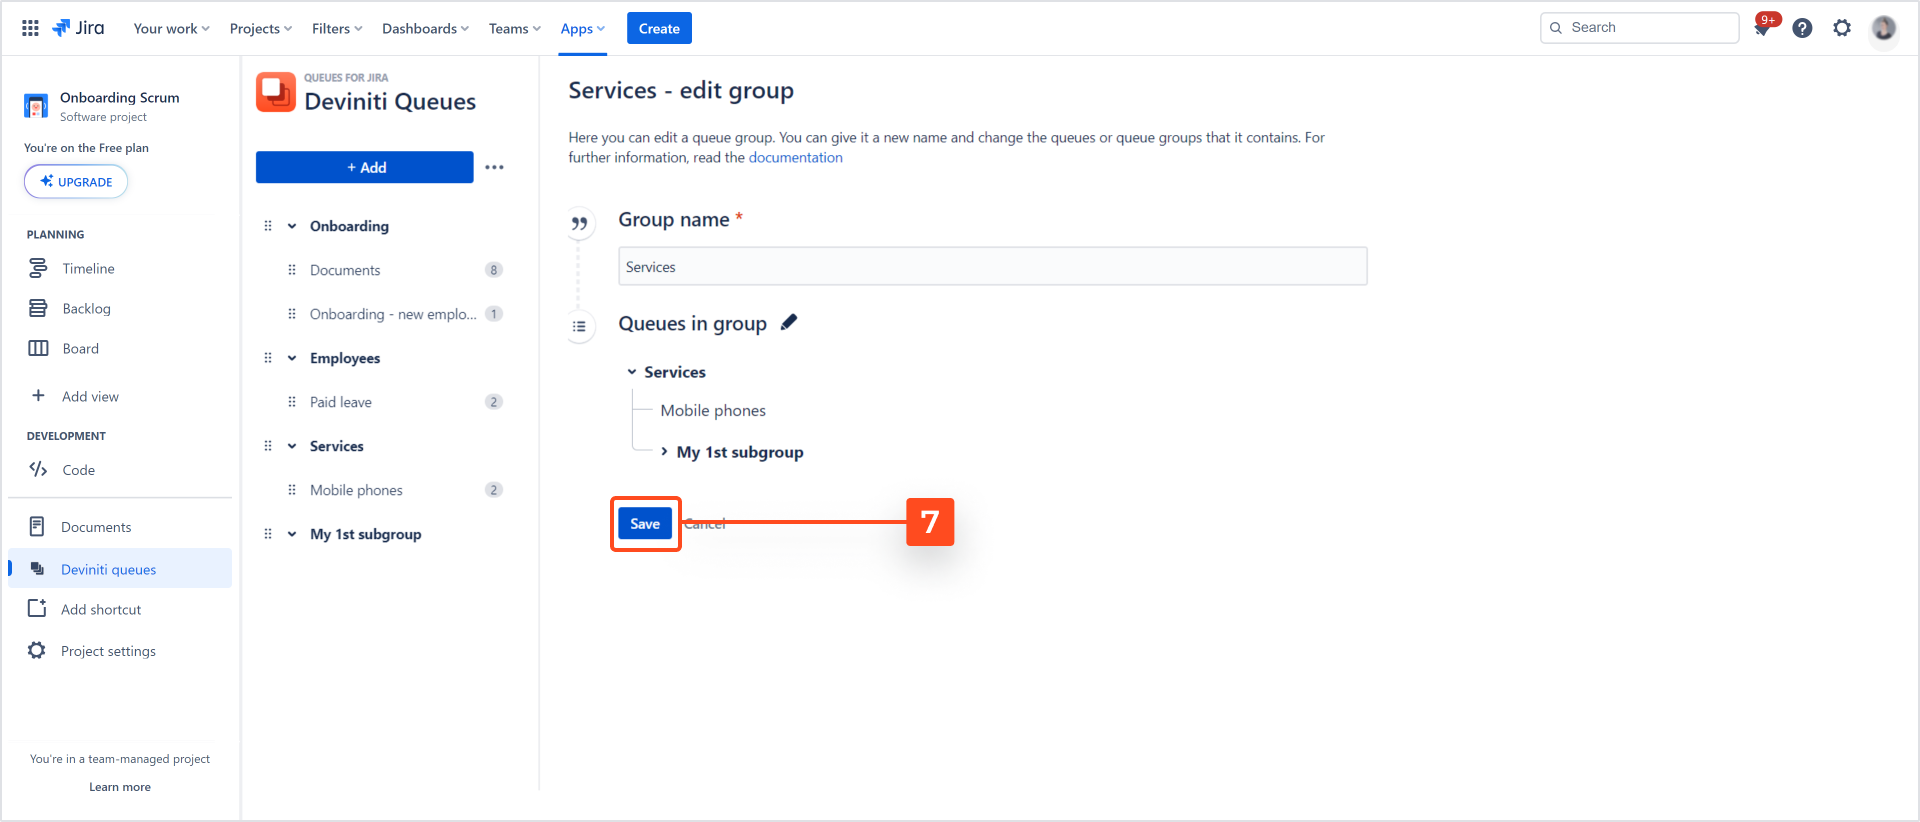
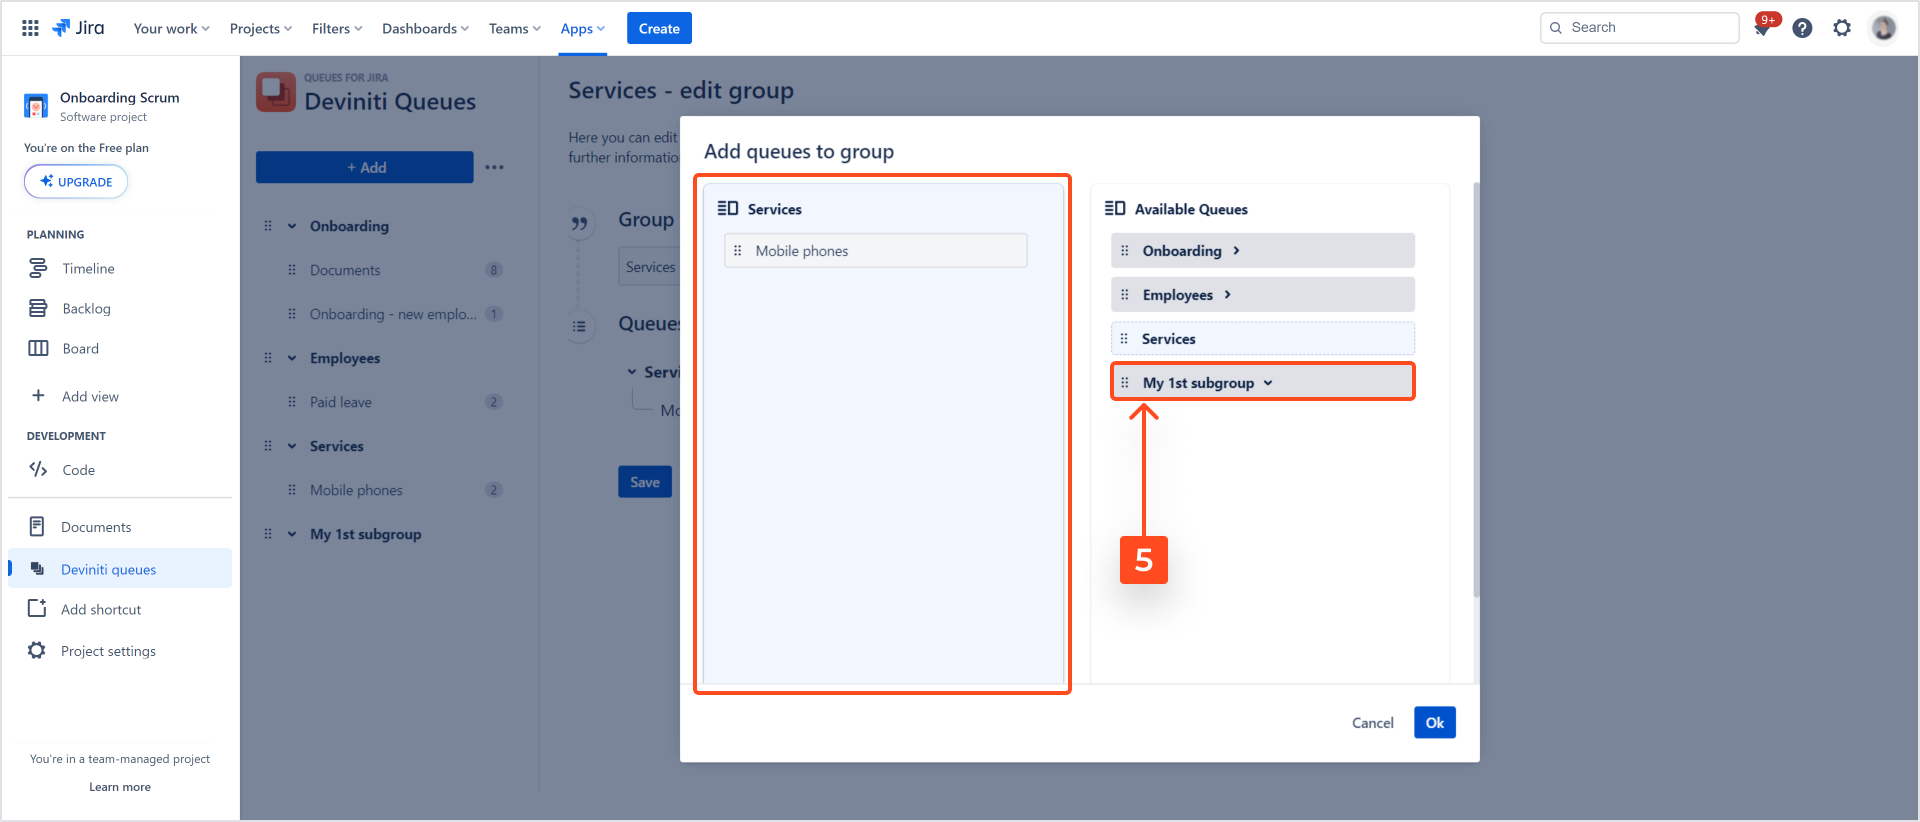
Drag the newly created subgroup onto the already created group with the drag and drop.
NoteTo move a subgroup from the right column to the left column, first hover the mouse over that element. When relocating elements between columns, please observe the blue line, as it assists you in accurately positioning the specific queue or group. A red line indicates that the element cannot be positioned in the desired location.
Result
A newly created group was nested as a subgroup.
If you can’t find the answer you need in our documentation, raise a support request.
Include as much information as possible to help our support team resolve your issue faster.
