- REST API
- REST API
- Authentication
- Test Key
- Jira REST API
- Requirements
- Test Case
- Test Plan
- Test Execution
- Test Case Execution
- Defects
- Tree Structure
- Example of use
Onboarding in a company-managed project
This chapter provides information on how to configure RTM for the first time in a company-managed project.
Before you start, log in as a user with the Jira Project Administrators project permissions.
Steps
-
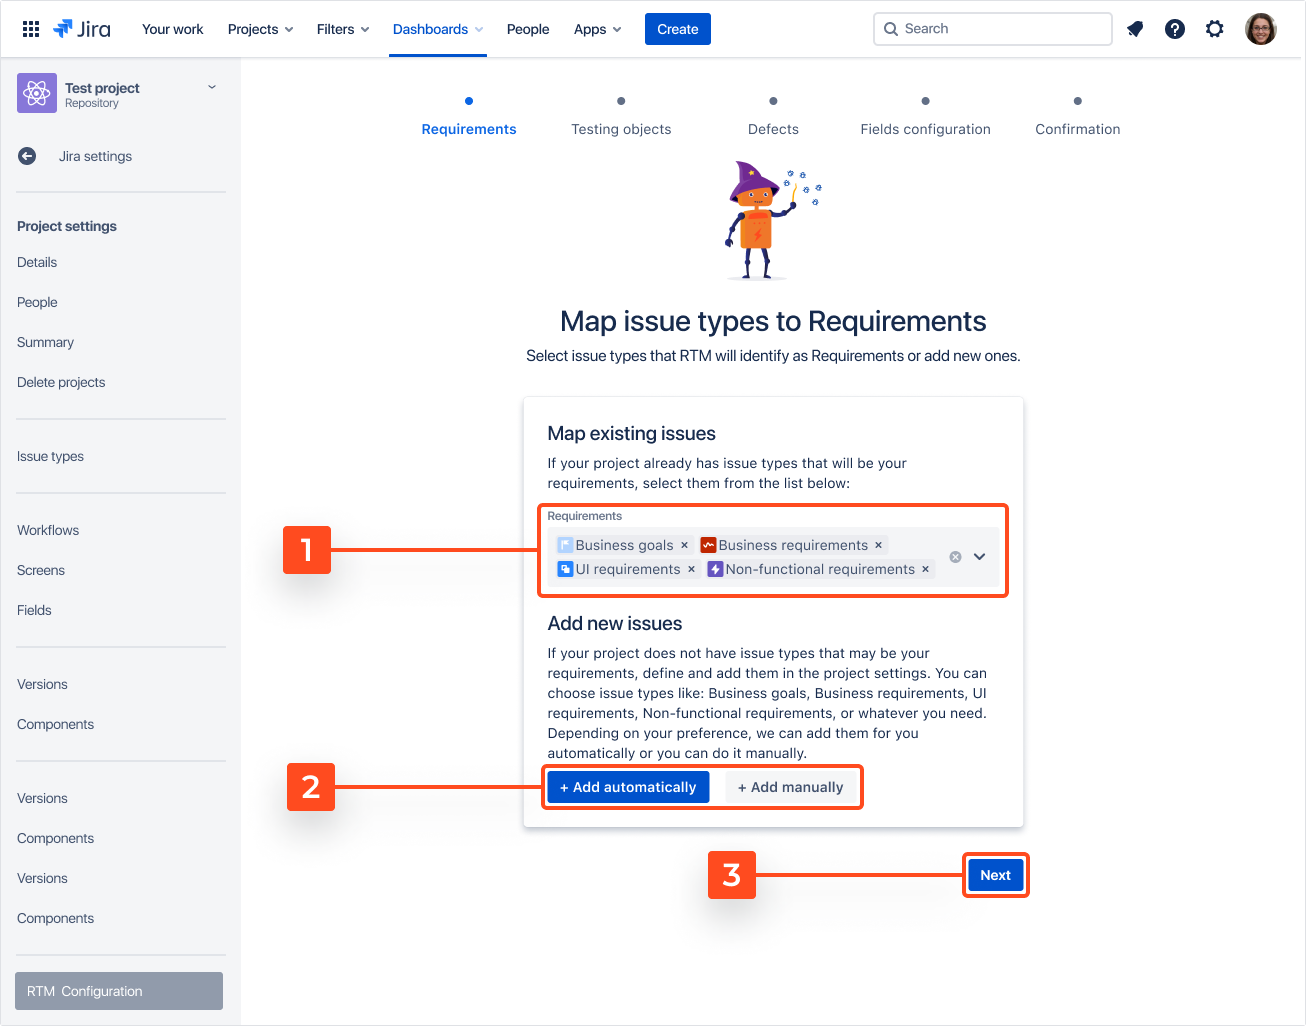
Select issue types that will be your requirements.
-
If your project doesn’t have such issue types, you can add them automatically or manually.
TipWe recommend adding such issue types like: Business goal, Business requirements, UI requirements and Non-functional requirements. If you select the Add automatically option, we will add these issues for you.
-
Click Next.

-
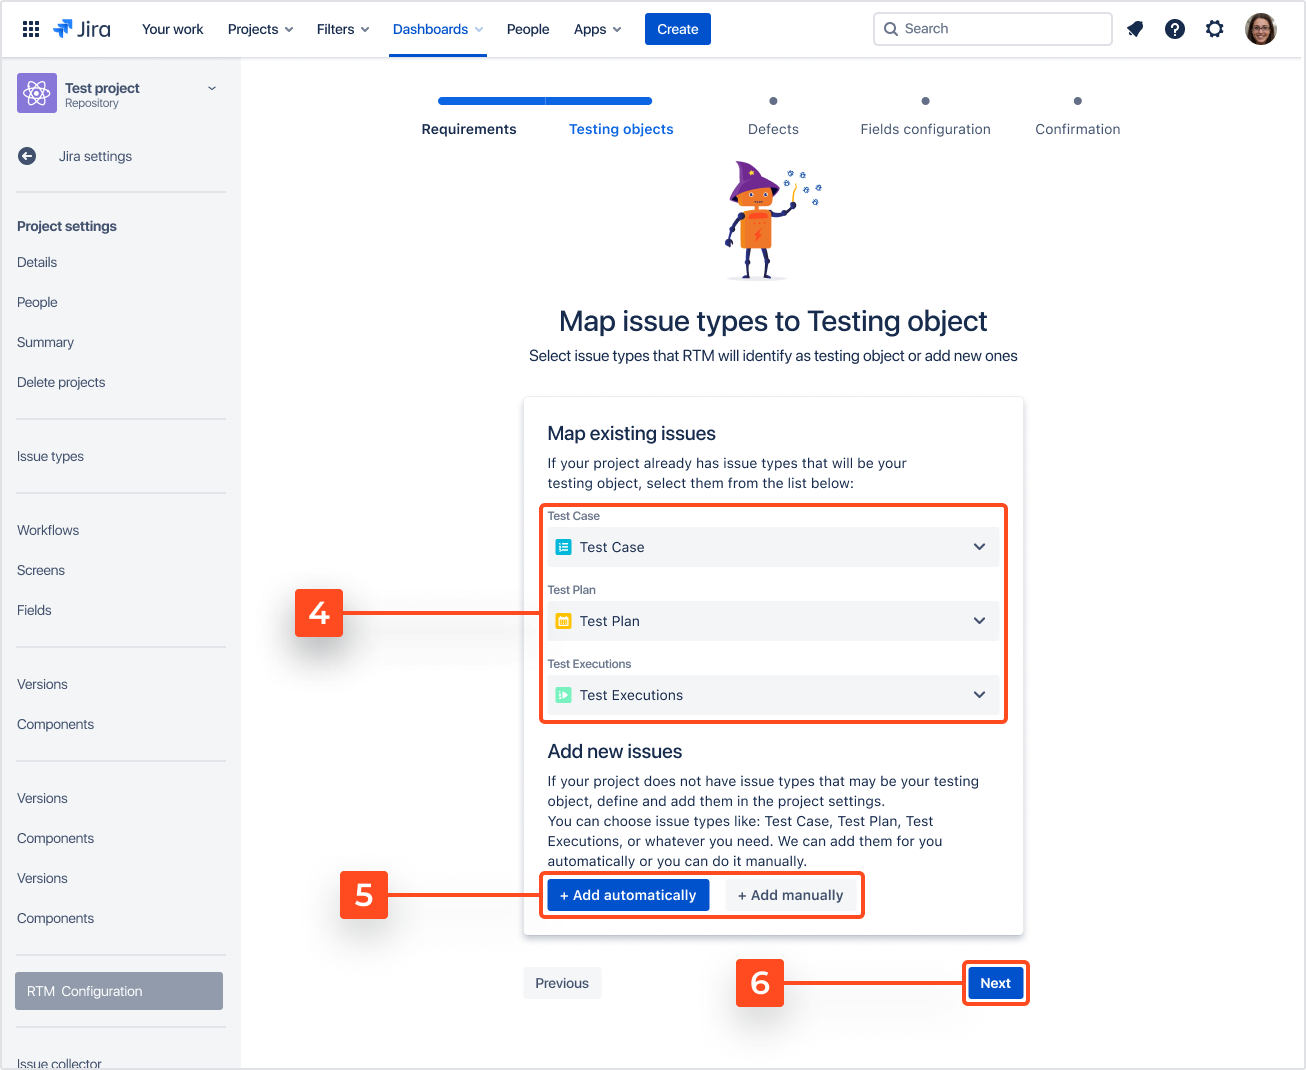
Select issue types that will be your testing objects.
-
If your project doesn’t have such issue types, you can add them automatically or manually.
TipWe recommend adding such issue types like: Test Case, Test Plan and Test Executions. If you select the Add automatically option, we will add these issues for you.
-
Click Next.

-
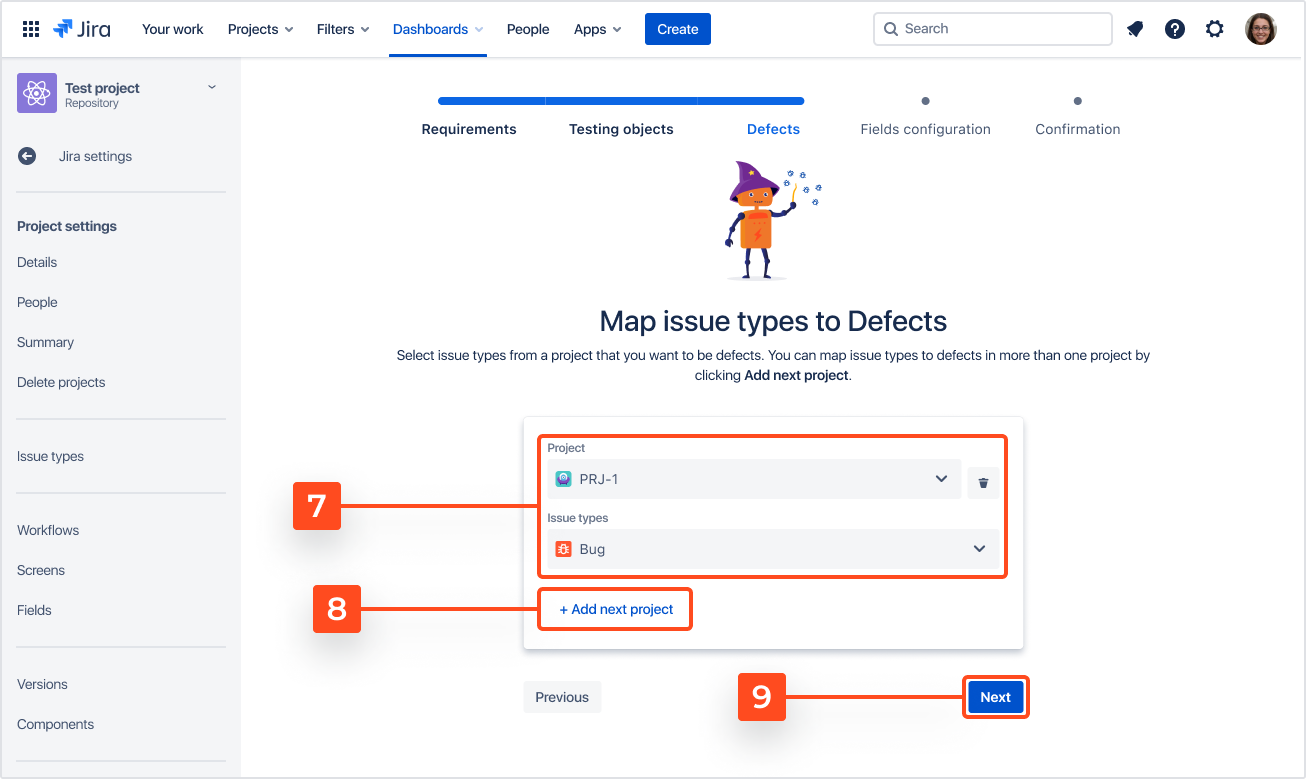
Select the project and issue types where the defects will be stored.
-
Click Add next project to map issue types to defects in more than one project.
-
Click Next

- In the Fields configuration step, we check if your fields configuration is proper. If fields configuration is ready click Next.

At this stage, two obstacles may appear:
- Missing fields to RTM issue types - these fields are required for RTM to work properly. You can add them automatically or manually.
- Incompatible fields - these fields aren’t supported in the RTM and you need to change them to optional. You can add them automatically or manually. If you’re interested in supporting these fields, click let us know.
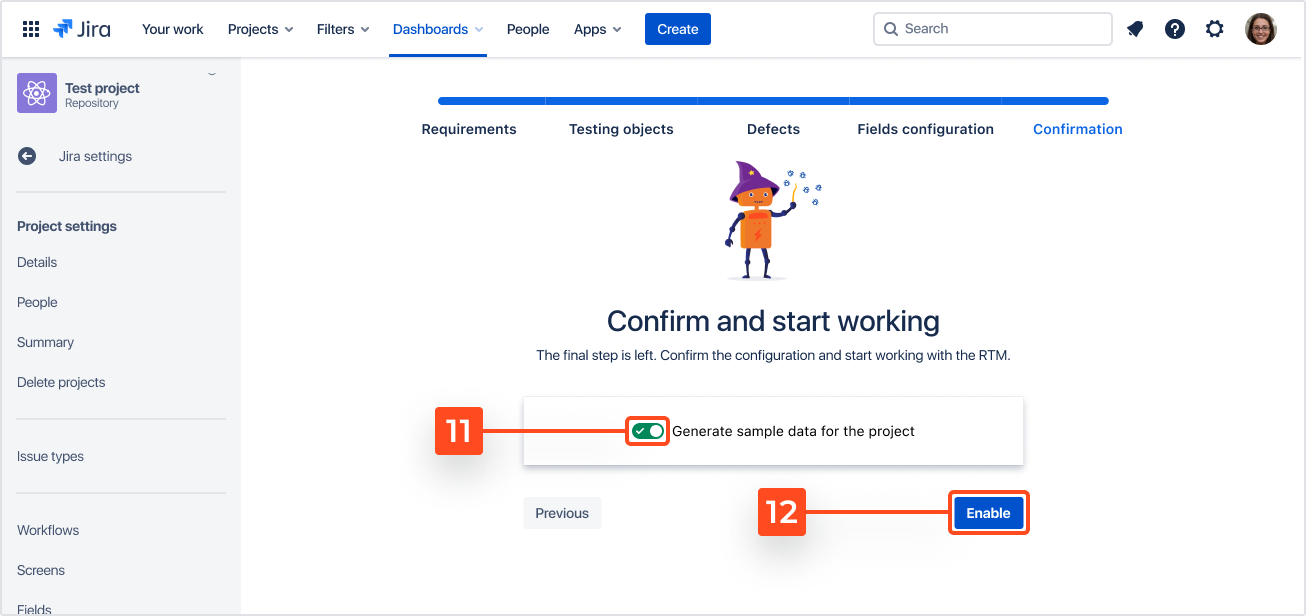
- If you want to generate sample data for your project turn the toggle on.
- Click Enable.

Result
RTM application is configured in your company-managed project. You’ll be redirected to the main page of the application - the Dashboard. Now you’ll be able to create your requirements, test plans, test cases etc.
If you can’t find the answer you need in our documentation, raise a support request. Include as much information as possible to help our support team resolve your issue faster.