- Configuration
- First steps
- Project setup
- Sample templates
- Migration to Cloud
- Supported fields
- Permissions
- Jira Service Management
- Template management
- Create a template
- Template configuration
- Variables
- Template Navigator
- Delete a template
- Use as a template
- Set of Fields - advanced features
- Using template
- Autocomplete
- Default Template
- Apply template
- Use Template in Jira Automation
- Automatic create and close
- JQL Searchers
- Direct links
- Create Structure post function
- About Create Structure
- Create Structure configuration
- App integrations
- REST API
- ScriptRunner and Groovy scripts
Default Template
Learn how to configure default templates for different projects, issue types, and transitions
The Default Template feature allows you to select a template that will be automatically applied to chosen issue types in a project. Here’s what you can configure:
- Issue type: choose what issue type the template should apply to.
- Screen: choose at which point the template should be used (either on the Create or Edit screen, or upon any issue transition).
- Visibility: decide if the Template field should be visible for users.
- Default Template is available for Jira Core, Jira Software and Jira Service Management.
- You can configure Default Template in many projects at once using REST API. Learn how from the REST API chapter.
Configure default templates in a project
Steps
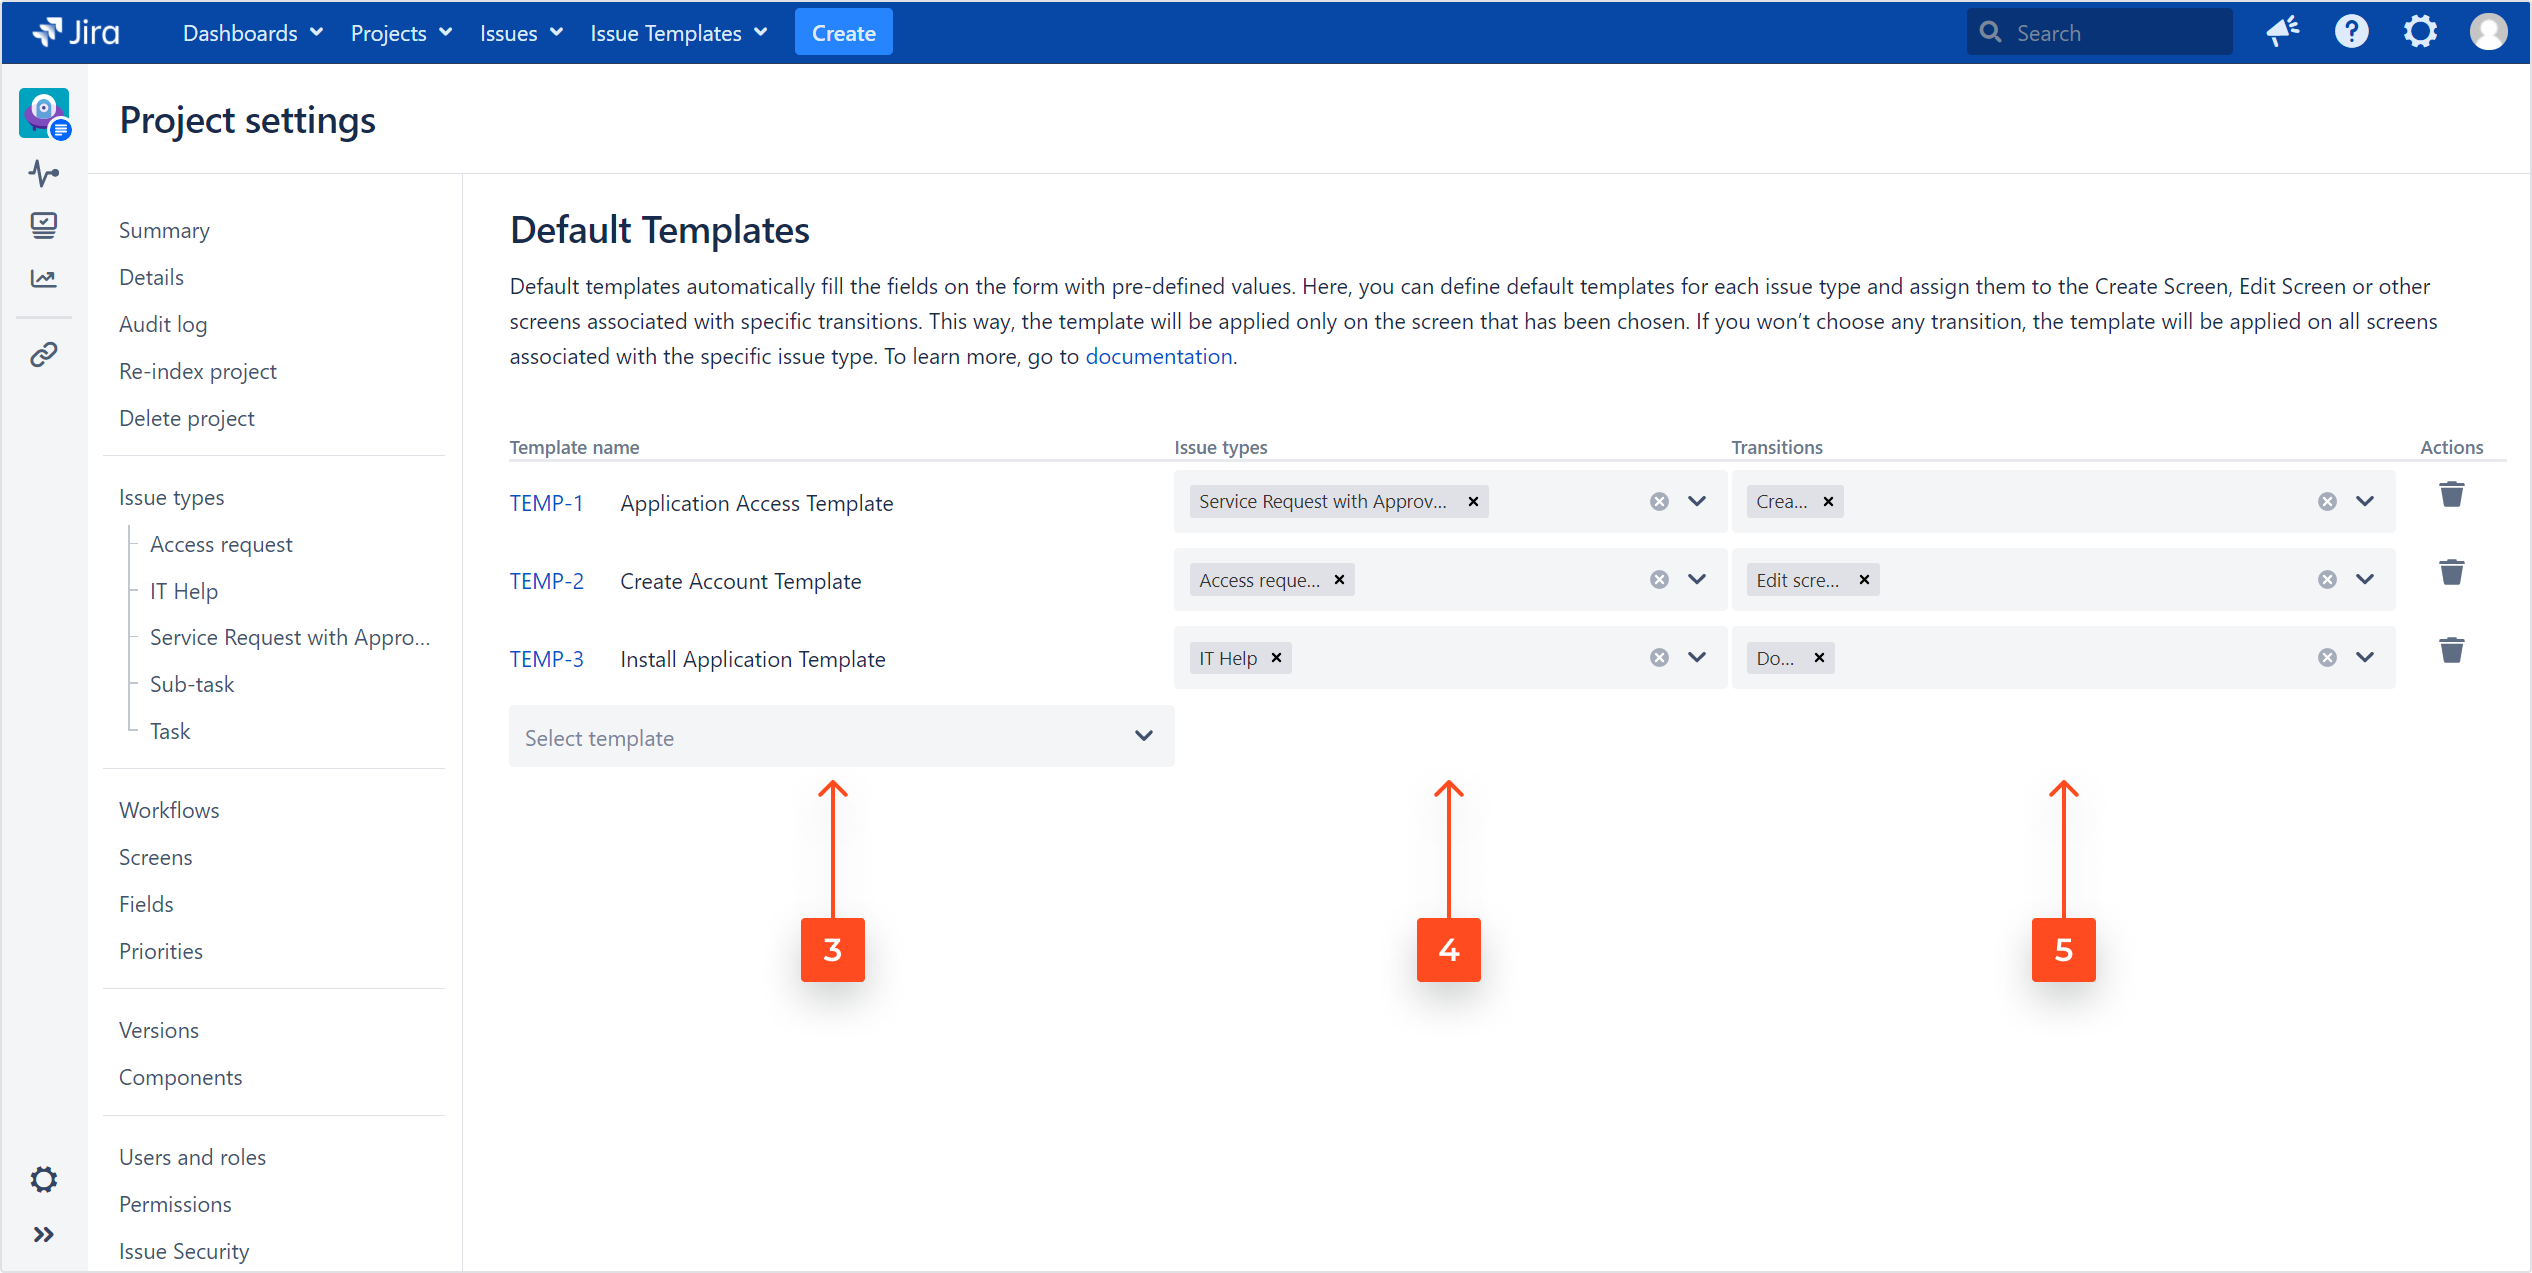
To configure a default template:
-
Open the project where you want use templates and select Project settings.
-
Select the template from the drop-down list.
-
Choose the issue type the template should be associated with.
-
Choose the workflow transition upon which the template should be applied.
Result
Selected templates are set as defaults for the defined issue types and will be applied upon chosen transitions (or on selected screens).
- It is possible to apply a default template to all issue types (click Apply to all).
- Click on the bin icon to delete the Default Template configuration.
If you make a template unselectable in the Availability tab, a warning icon will appear next to the template name.

Default Template on the Customer portal
Default Template allows you to automatically apply selected templates on request forms. You can define a different template for each request type.
Learn more about this feature in the Default Template chapter.
Steps
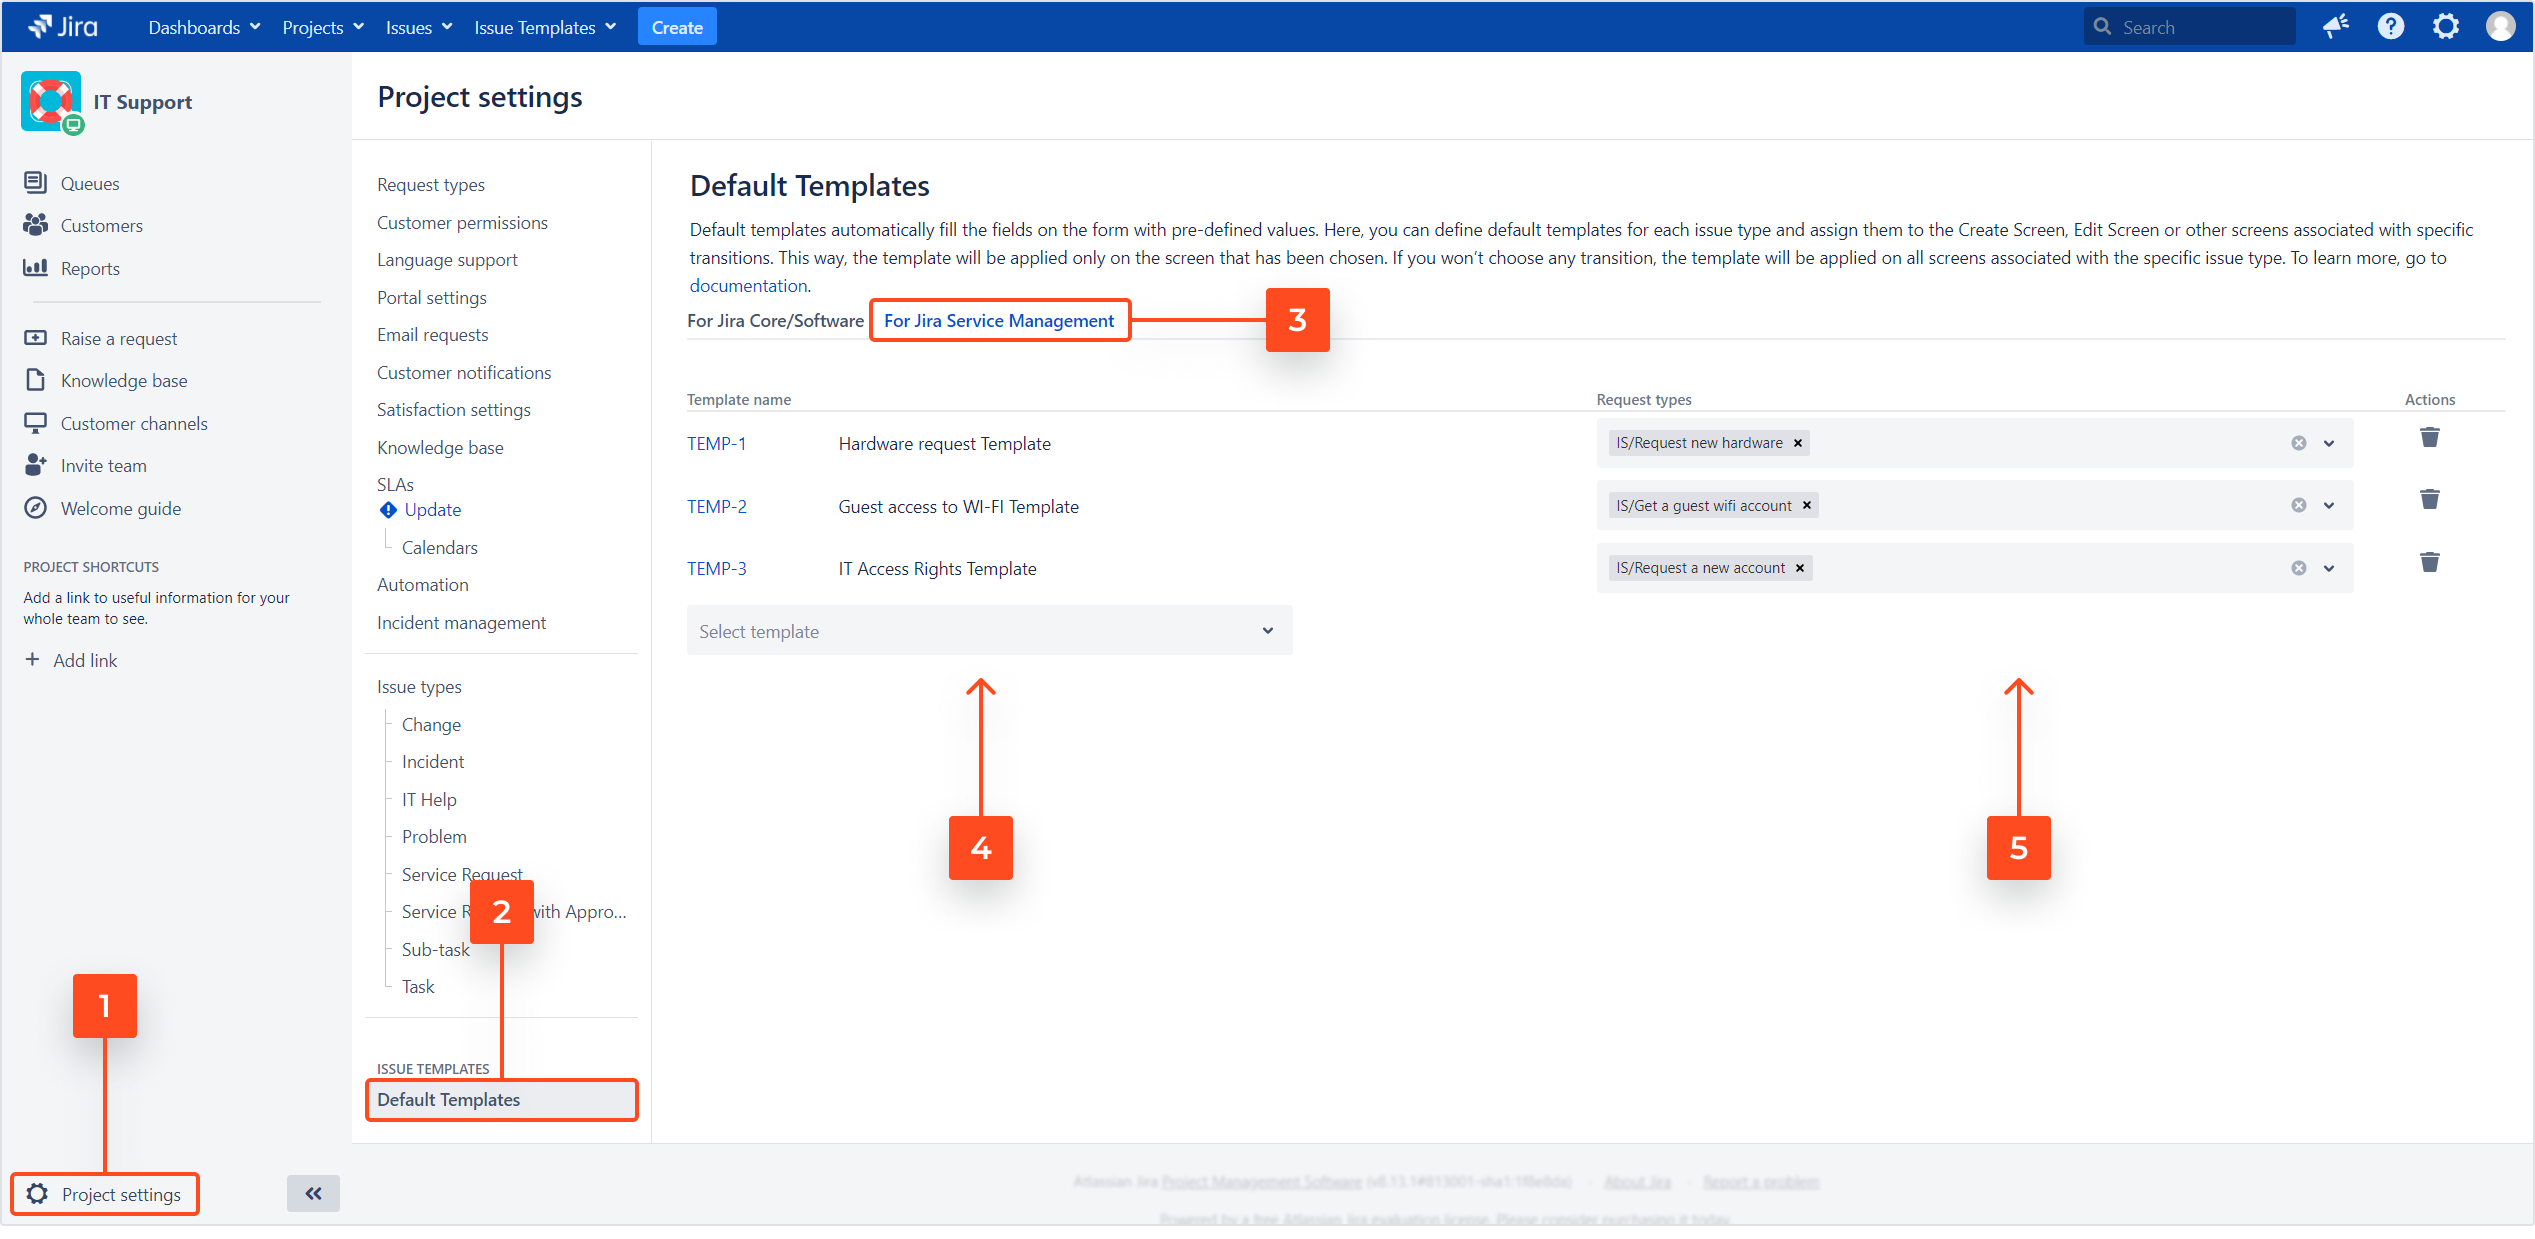
To configure Default Template on the Customer portal:
- Open your service project and select Project settings.
- Go to Default Templates in the Issue Templates section.
- Open the For Jira Service Management tab.
- Select the template from the drop-down list.
- Choose the request type.
Result
Selected templates are set as defaults on the Customer portal for defined request types.
- It is possible to apply a default template to all issue types (click Apply to all).
- Click on bin icon to delete the Default Template configuration.
If you disable a template in the Availability tab, a warning icon appears next to the template name.

Create a template
Say, we have a software development project called New App, and we’d like to auto-populate all Bug issues with some basic information.
First, we need to prepare a Bug Template that we’ll use as the default template. In order to do so, we need to create it under Issue Templates > Manage Templates:
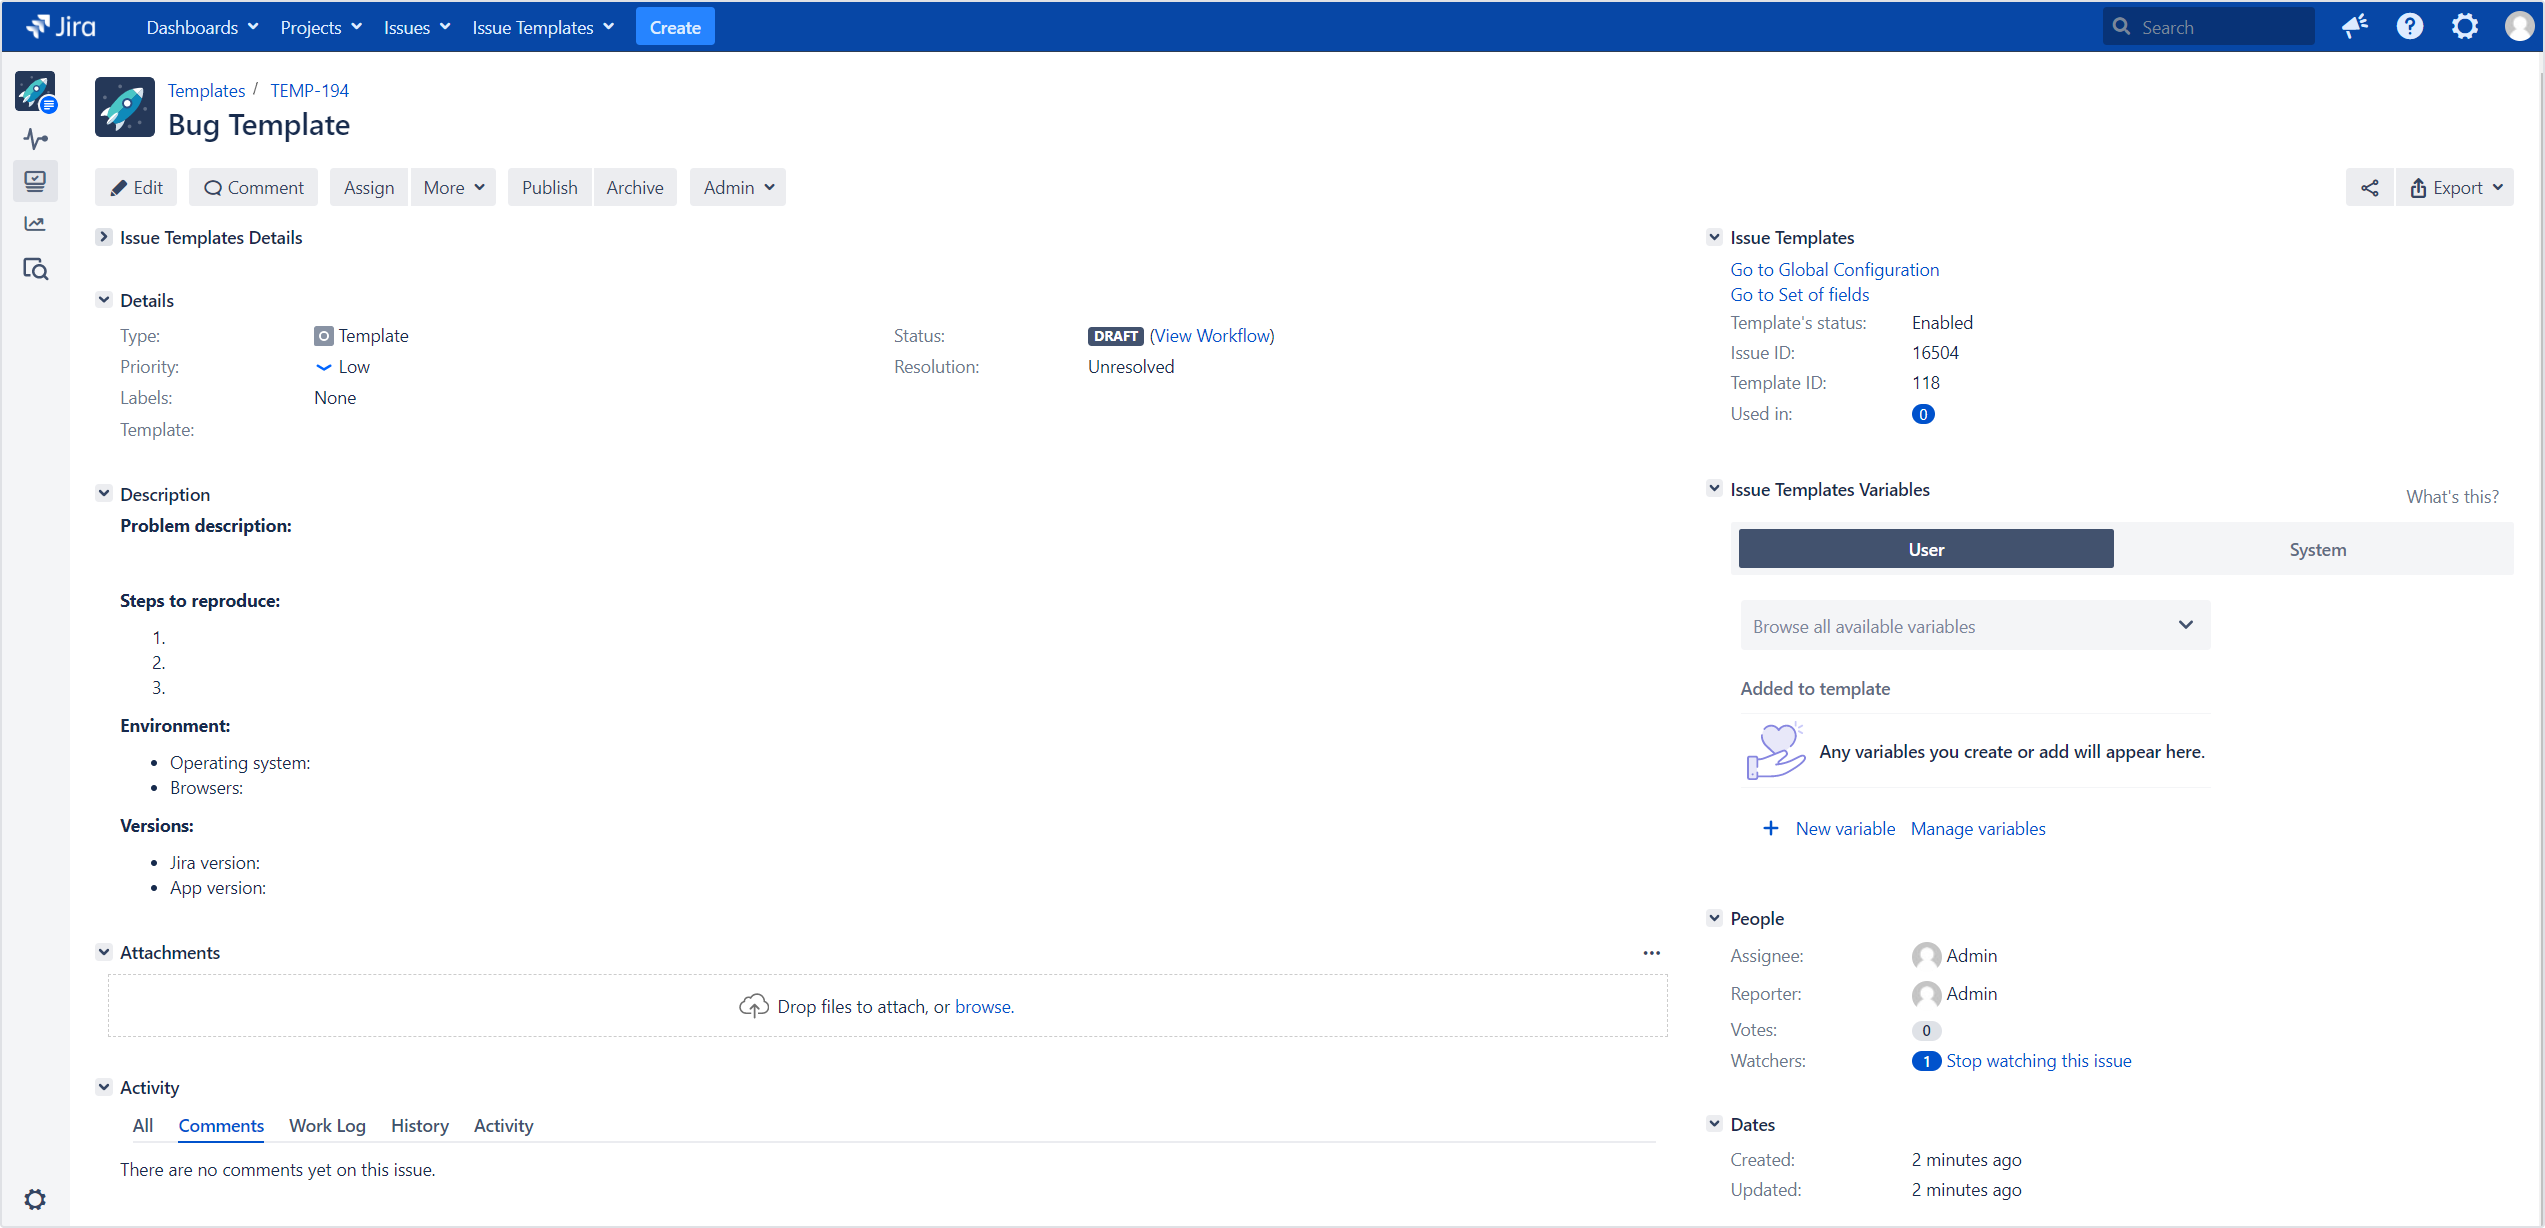
Read more on creating templates in the Create a template chapter.
Select the template as default
Now that our template is ready, we can associate it with the Bug issue type in our project. Let’s go to the New App project settings and select Issue Templates > Default Templates.
There, we’ve got three steps to follow in order to make it work for us:
- Select the Bug Template from the list.
- Choose the Bug issue type.
- Choose the workflow transition. For this simple example let’s choose Create.
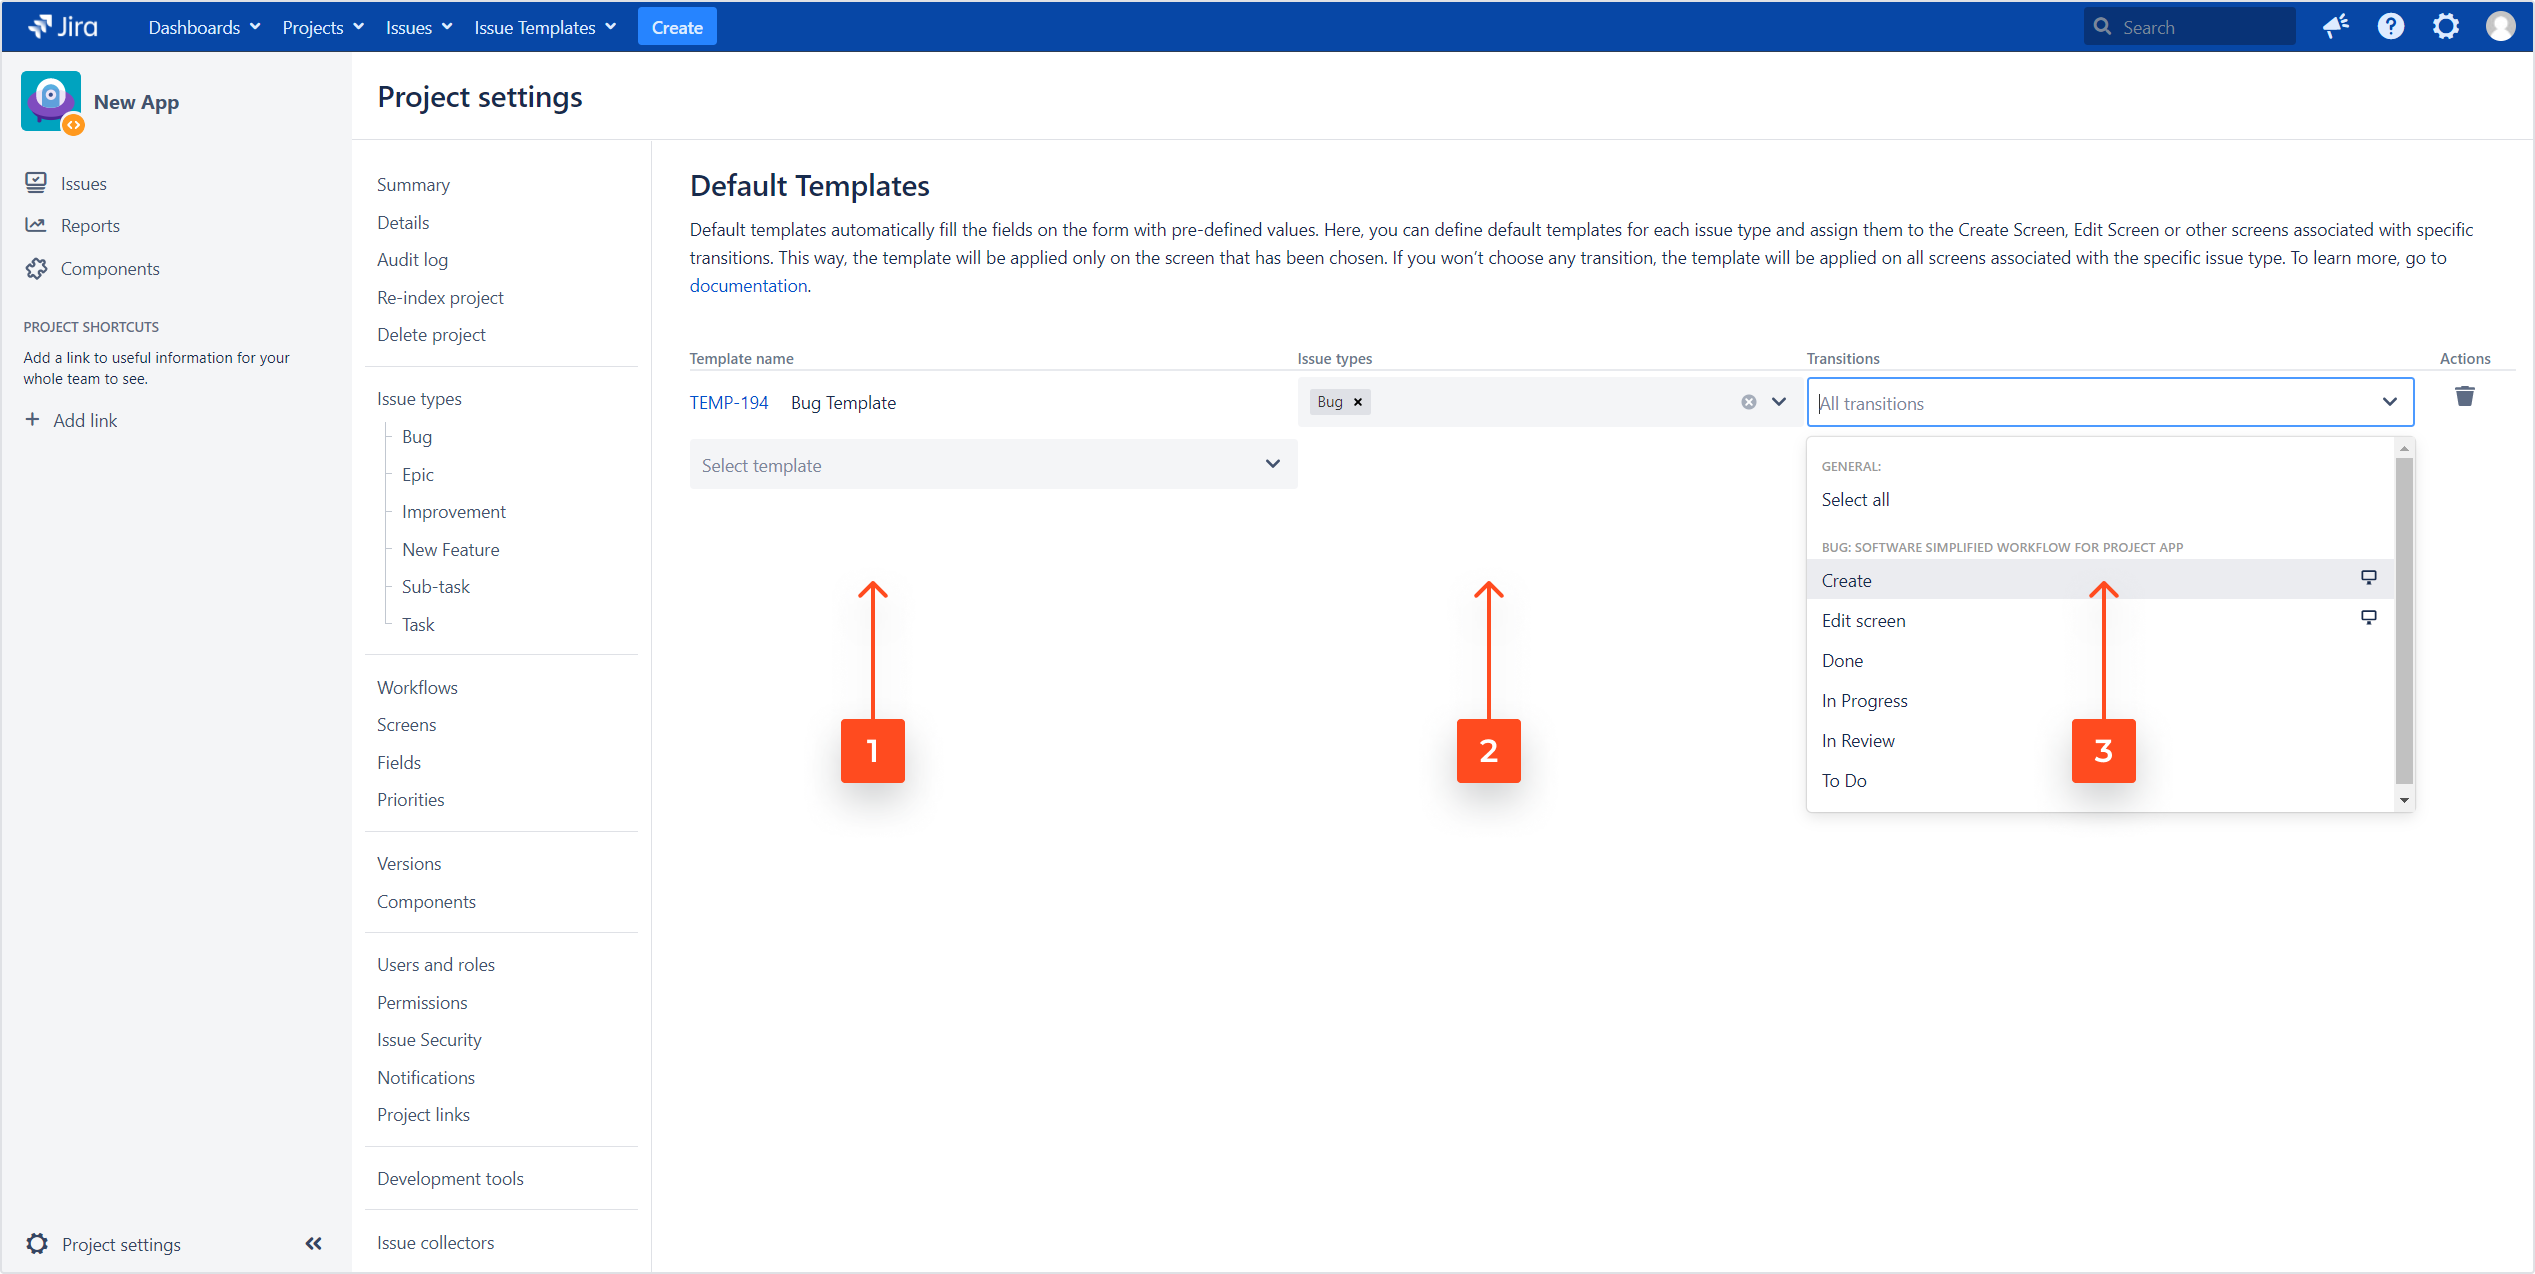
Let’s not forget to add the Template field to the Create issue screen in our project.
Configure template’s editability
The last thing to set up is if the template can be edited. If you don’t want your users to be able to change the template, you may leave this option disabled. Otherwise, you can go to Issue Templates > Configuration > Default Templates and check the box to Allow the change of applied template. This state applies only when an issue uses a default template.
If you don’t set a default template, users can still change values. The template selection field will be visible for a user, but they won’t be able to change it. If a user has variables in this template, they can still fill them.
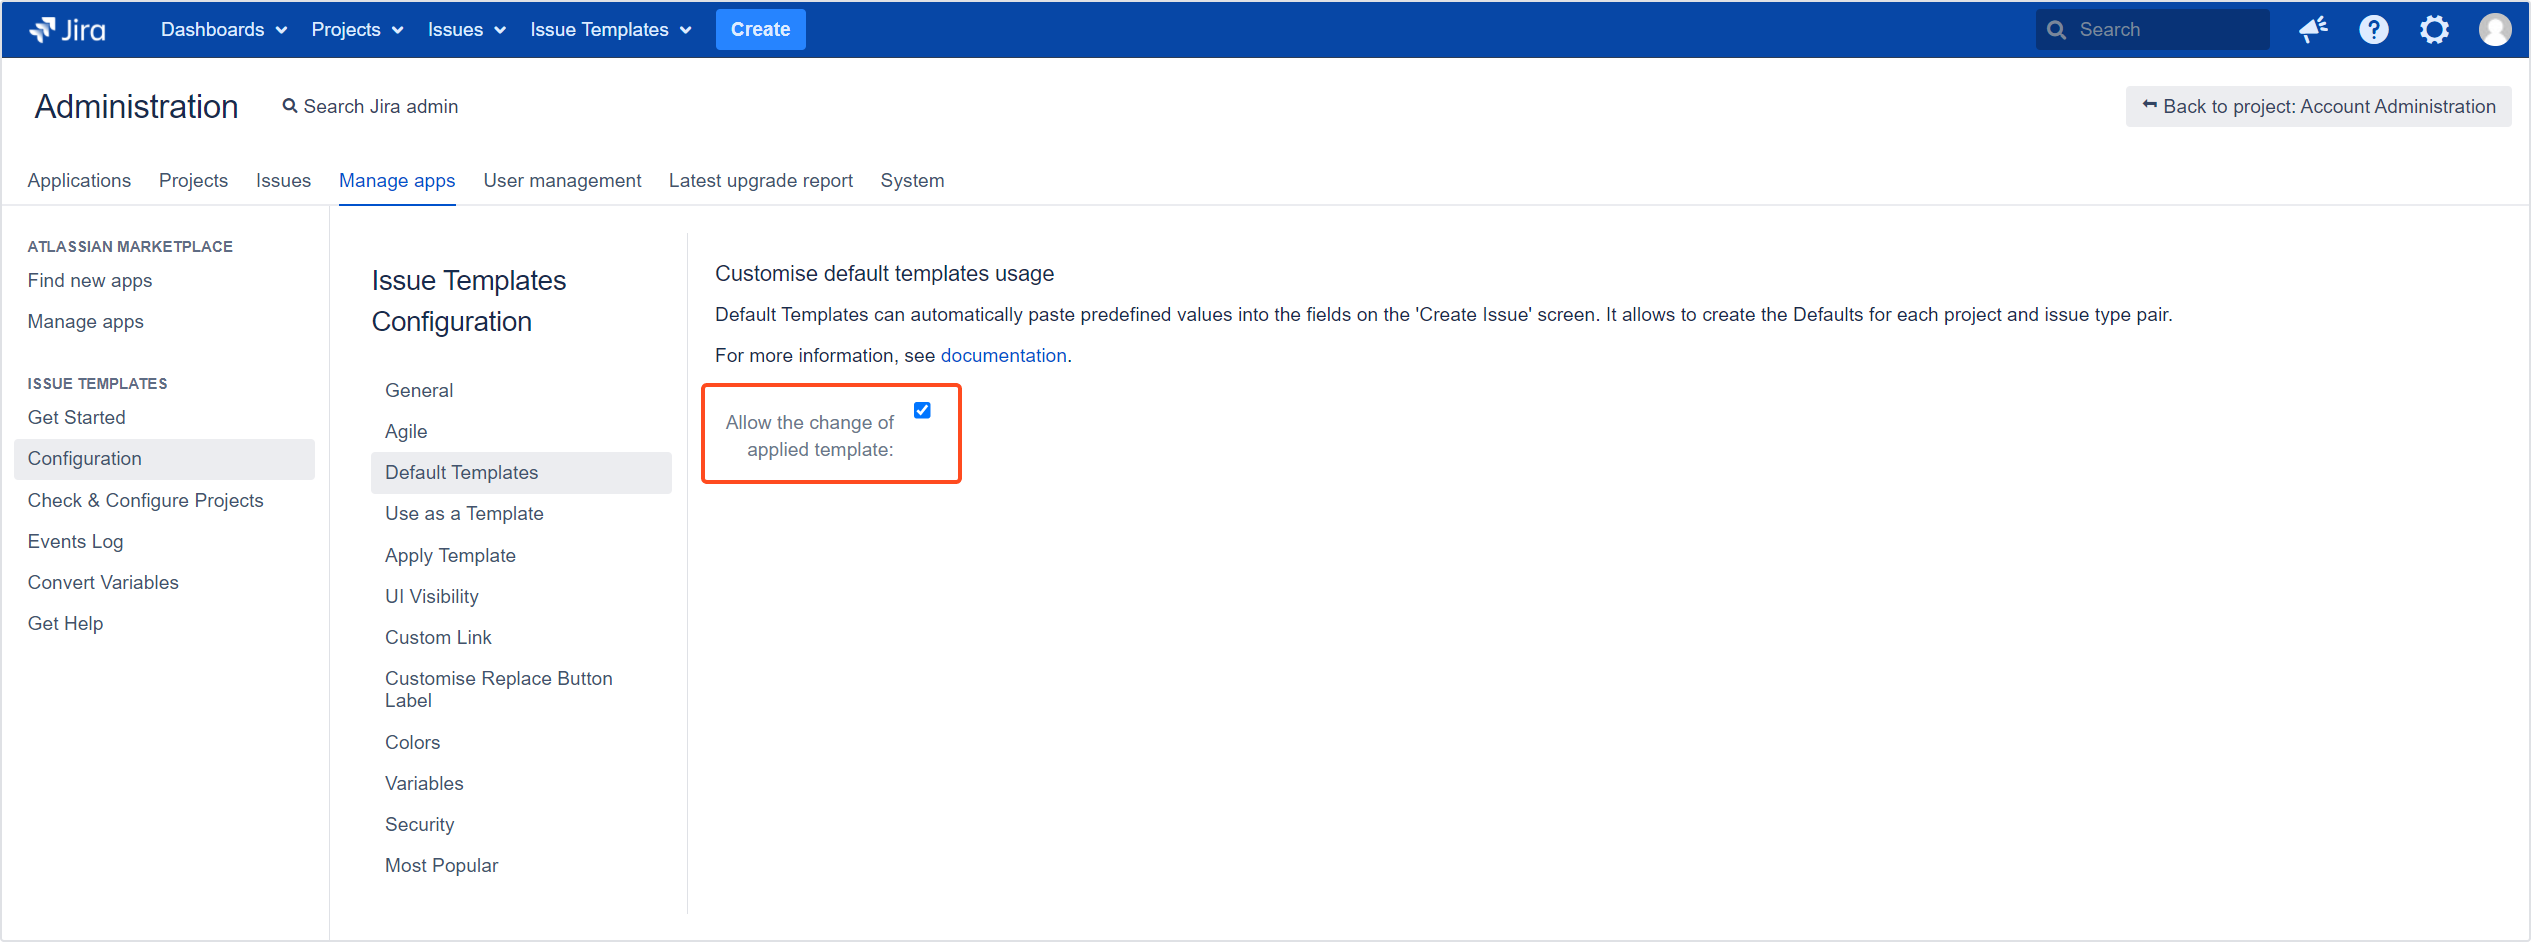
Remember that this setting affects all projects in your Jira instance.
Result
Depending on the visibility settings, we may have two different results:
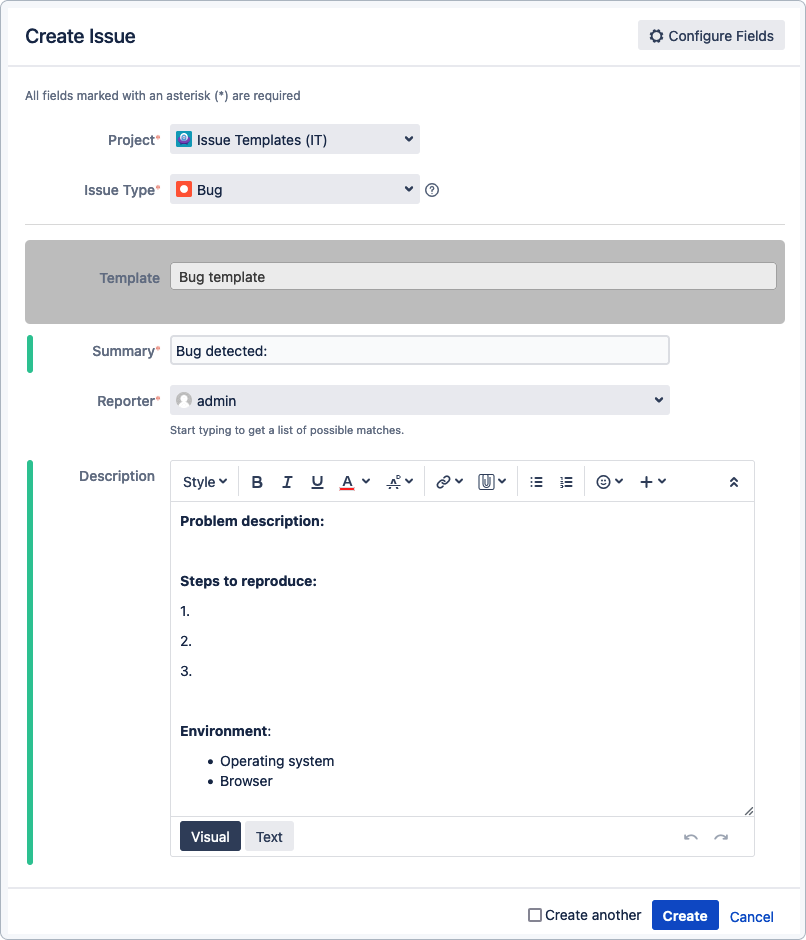
-
Default Template is applied automatically in the background and can’t be changed (Allow the change of applied template option is disabled):
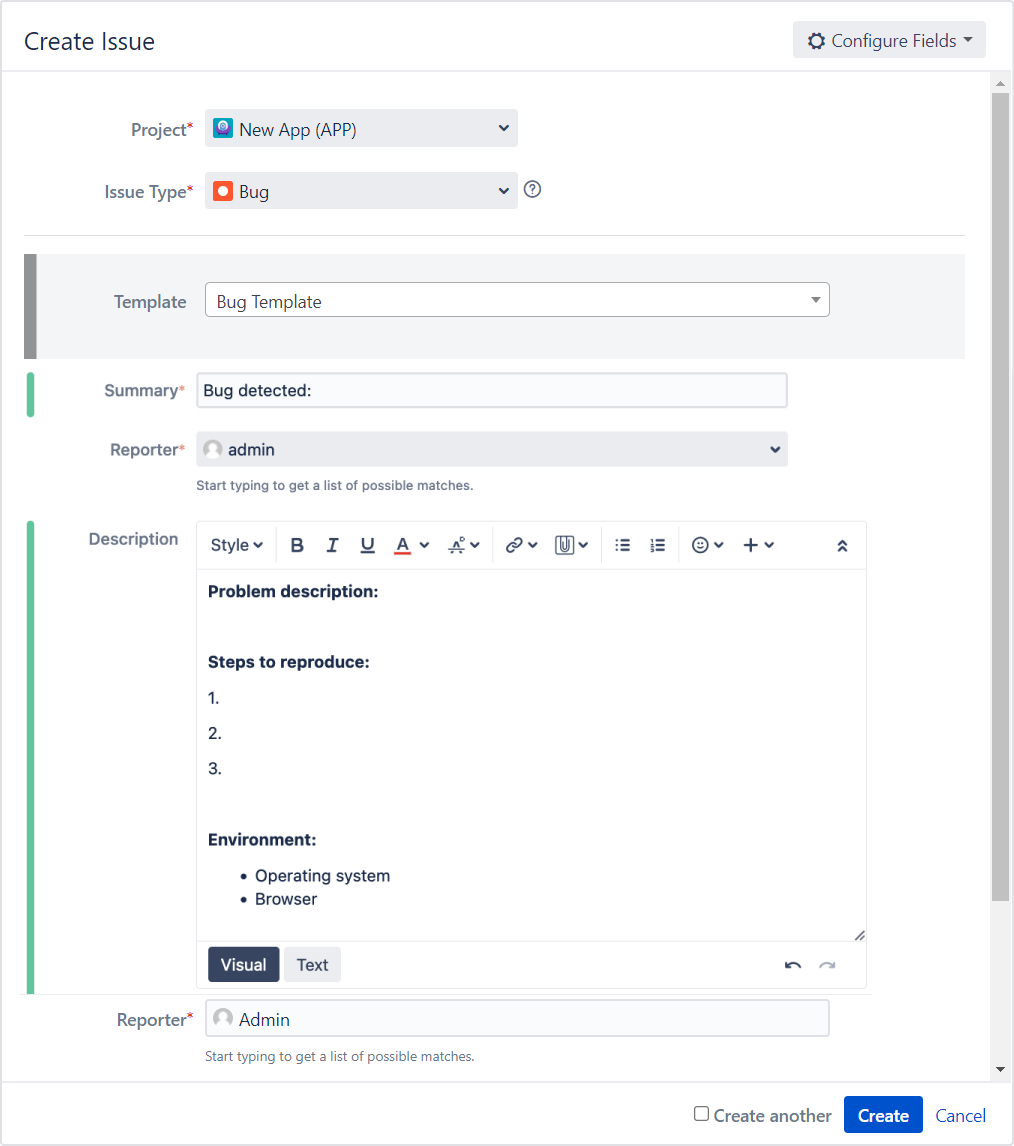
-
Default Template is applied automatically but users can change it by selecting a different template from the list (Allow the change of applied template option is enabled):
- Check out our Use case to see how Default Template adds additional custom fields later in the workflow.
If you can’t find the answer you need in our documentation, raise a support request.
