- Configuration
- First steps
- Project setup
- Sample templates
- Migration to Cloud
- Supported fields
- Permissions
- Jira Service Management
- Template management
- Create a template
- Template configuration
- Variables
- Template Navigator
- Delete a template
- Use as a template
- Set of Fields - advanced features
- Using template
- Autocomplete
- Default Template
- Apply template
- Use Template in Jira Automation
- Automatic create and close
- JQL Searchers
- Direct links
- Create Structure post function
- About Create Structure
- Create Structure configuration
- App integrations
- REST API
- ScriptRunner and Groovy scripts
Create a template
Learn basic facts about templates
Template is a Jira issue that can be replicated any number of times. It allows you to copy the fields and their contents into new issues you create. Depending on your needs, it can copy values into selected fields or create a complex structure of issues, including linked epics with stories and subtasks.
Templates get created in the Template Repository - a Jira Business project that appears right after installing Issue Templates for Jira. Read more about it the First steps chapter.
First thing you’ll need to know, is how to create and edit a single template.
Steps
To create a template:
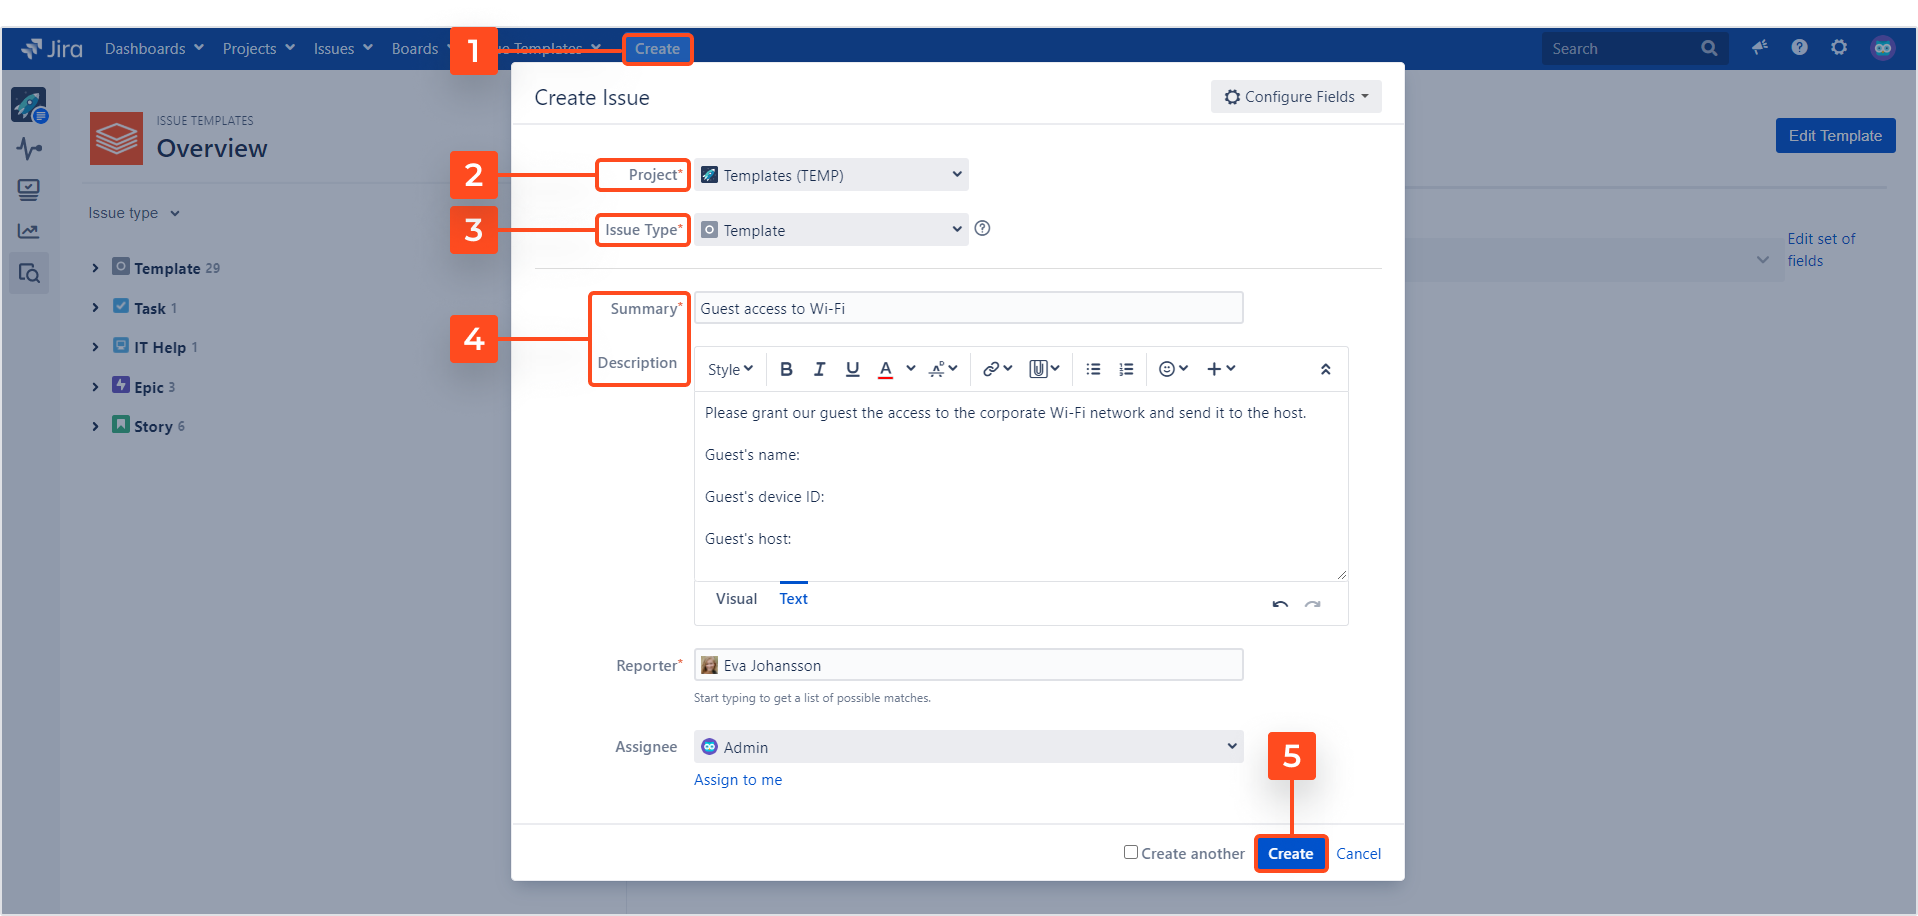
- Click Create at the top of the screen to open the Create issue screen.
- In the Create Issue dialog box, select the Template Repository project - the default repository is called Templates.
- Choose Template as the Issue Type.
- Fill in the Summary and Description fields.
- Click Create.

Result
The template is ready to be used.
Advanced settings
There are two ways you can further refine your new template:
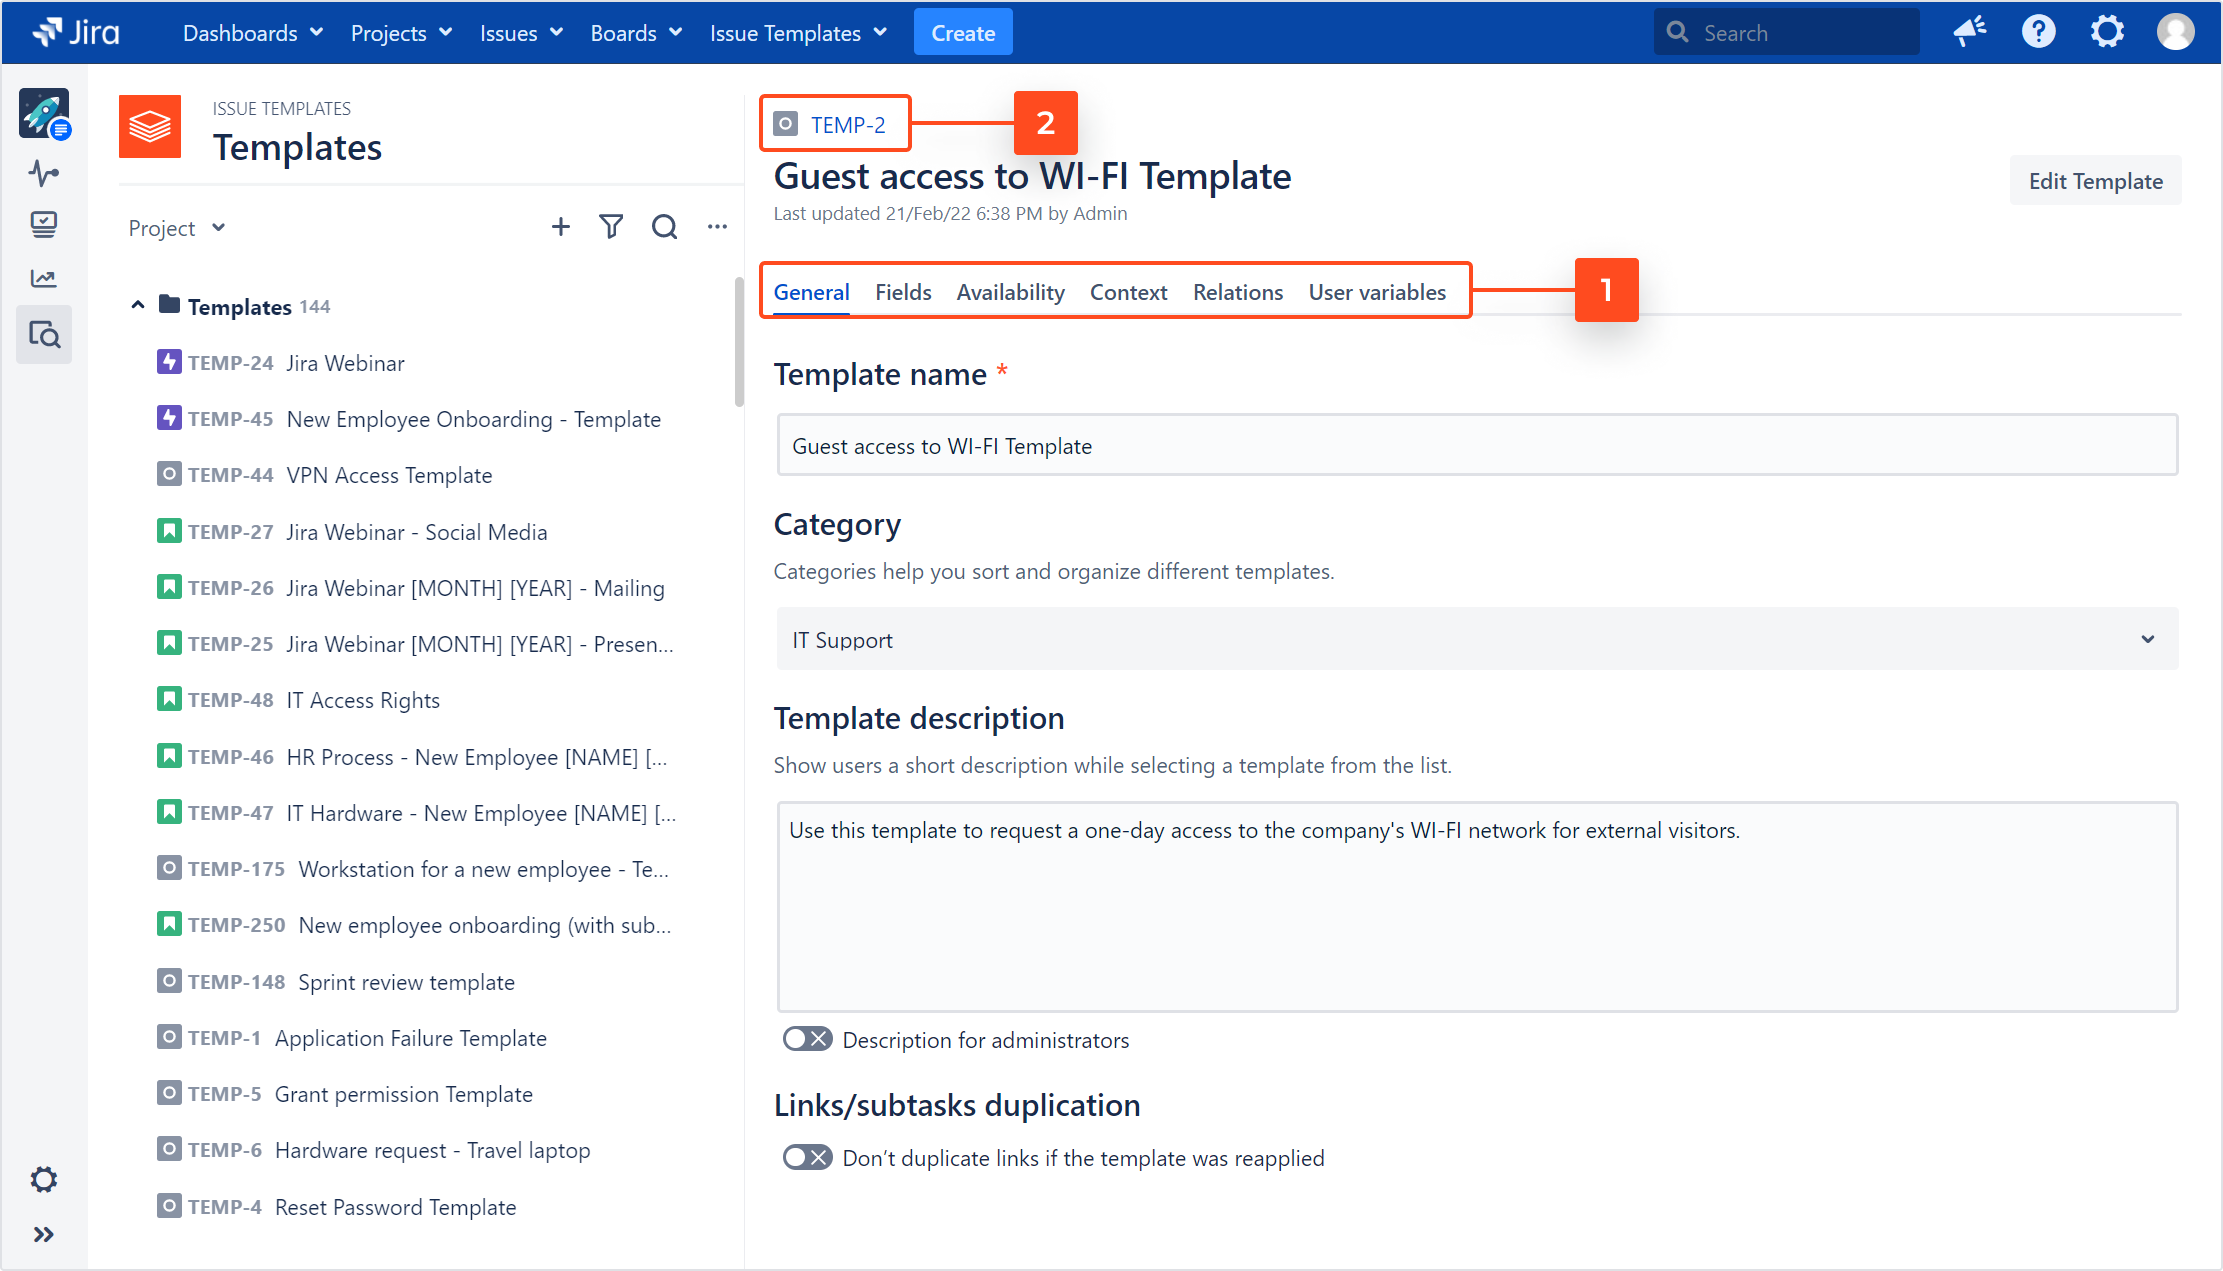
- Manage the template’s settings it in the Template configuration panel.
- Improve the template’s contents in the extended issue view. Click the template’s issue key in order to get there.

Edit a template
You can make changes to your templates at any time, you just need to have the Edit issue permission. See the Permissions chapter for more information.
Steps
To edit a template:
-
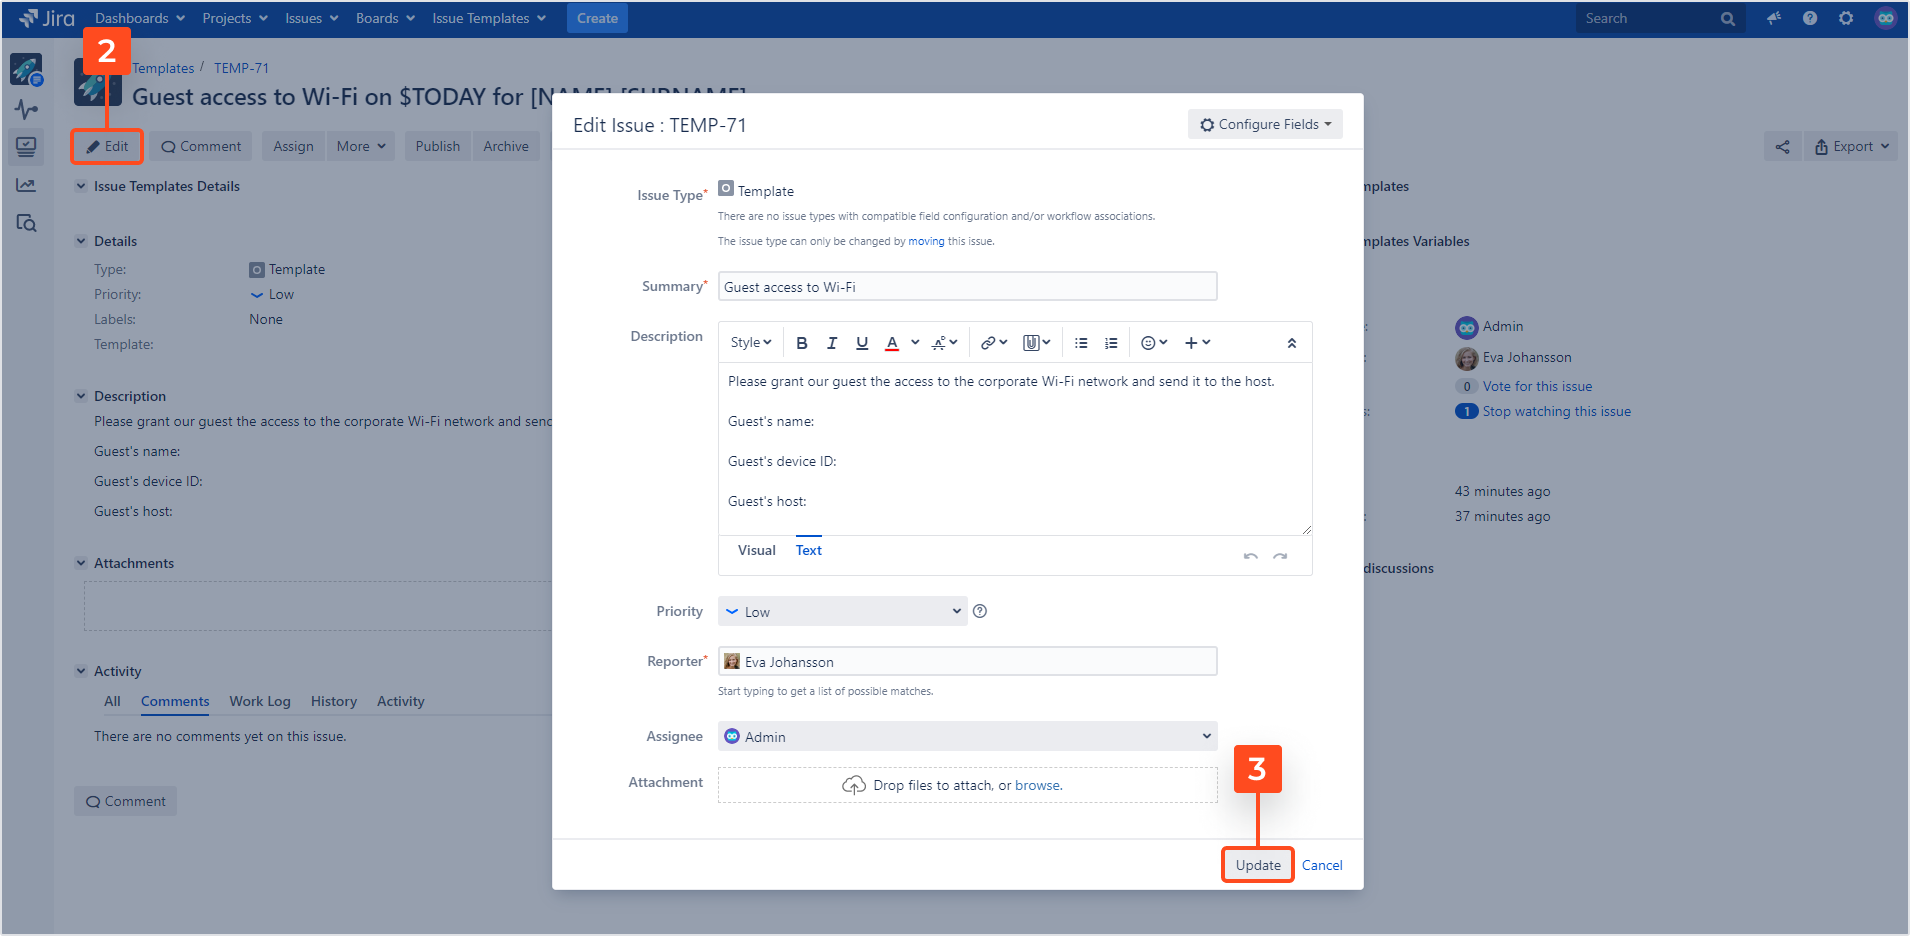
Navigate to the template issue you would like to edit and click the template’s issue key.

-
Click Edit and update your chosen fields.
-
Click Update at the bottom of the page to save the changes.

Result
Changes are applied to the template.
Changes won’t be applied to issues previously created using the edited template.
Related topics
- Use cases with more examples
- Templates for large structures of linked issues
- Adding variables to a template
- Turning an existing issue into a template
- Configuring user notifications
If you can’t find the answer you need in our documentation, raise a support request.

