- Configuration
- First steps
- Project setup
- Sample templates
- Migration to Cloud
- Supported fields
- Permissions
- Jira Service Management
- Template management
- Create a template
- Template configuration
- Variables
- Template Navigator
- Delete a template
- Use as a template
- Set of Fields - advanced features
- Using template
- Autocomplete
- Default Template
- Apply template
- Use Template in Jira Automation
- Automatic create and close
- JQL Searchers
- Direct links
- Create Structure post function
- About Create Structure
- Create Structure configuration
- App integrations
- REST API
- ScriptRunner and Groovy scripts
Template Navigator
See how you can manage your templates using Template Navigator
In order to access this area you need the edit issue permission (or higher). Read more about permissions here.
Overview
Template Navigator is a simple way of accessing the Template Repository. It allows you to display, edit and configure your templates.
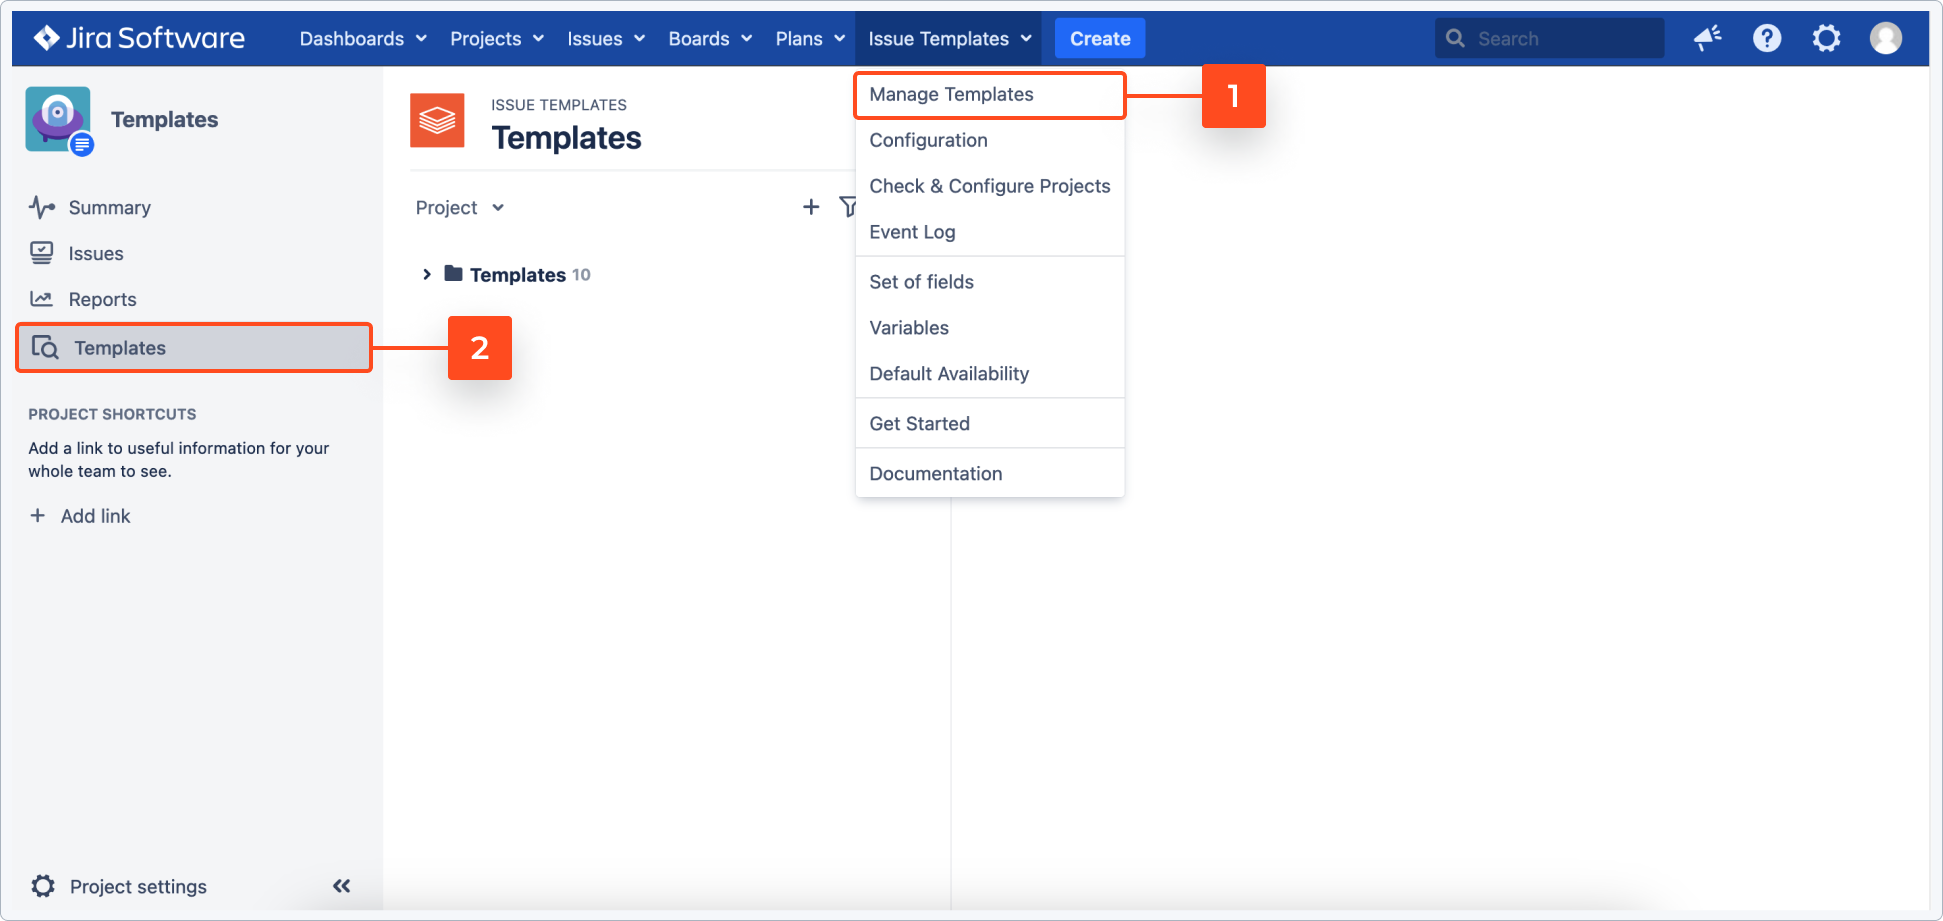
You can find it by clicking Issue Templates > Manage Templates in the upper bar or by selecting Templates from the left-hand side navigation in the Templates (TEMP) project:
Browse and filter options
You can display your templates in many easy-to-navigate modes:
- Group them by project, category or issue type.
- Sort and filter the issues, search through them and change the way they are displayed.
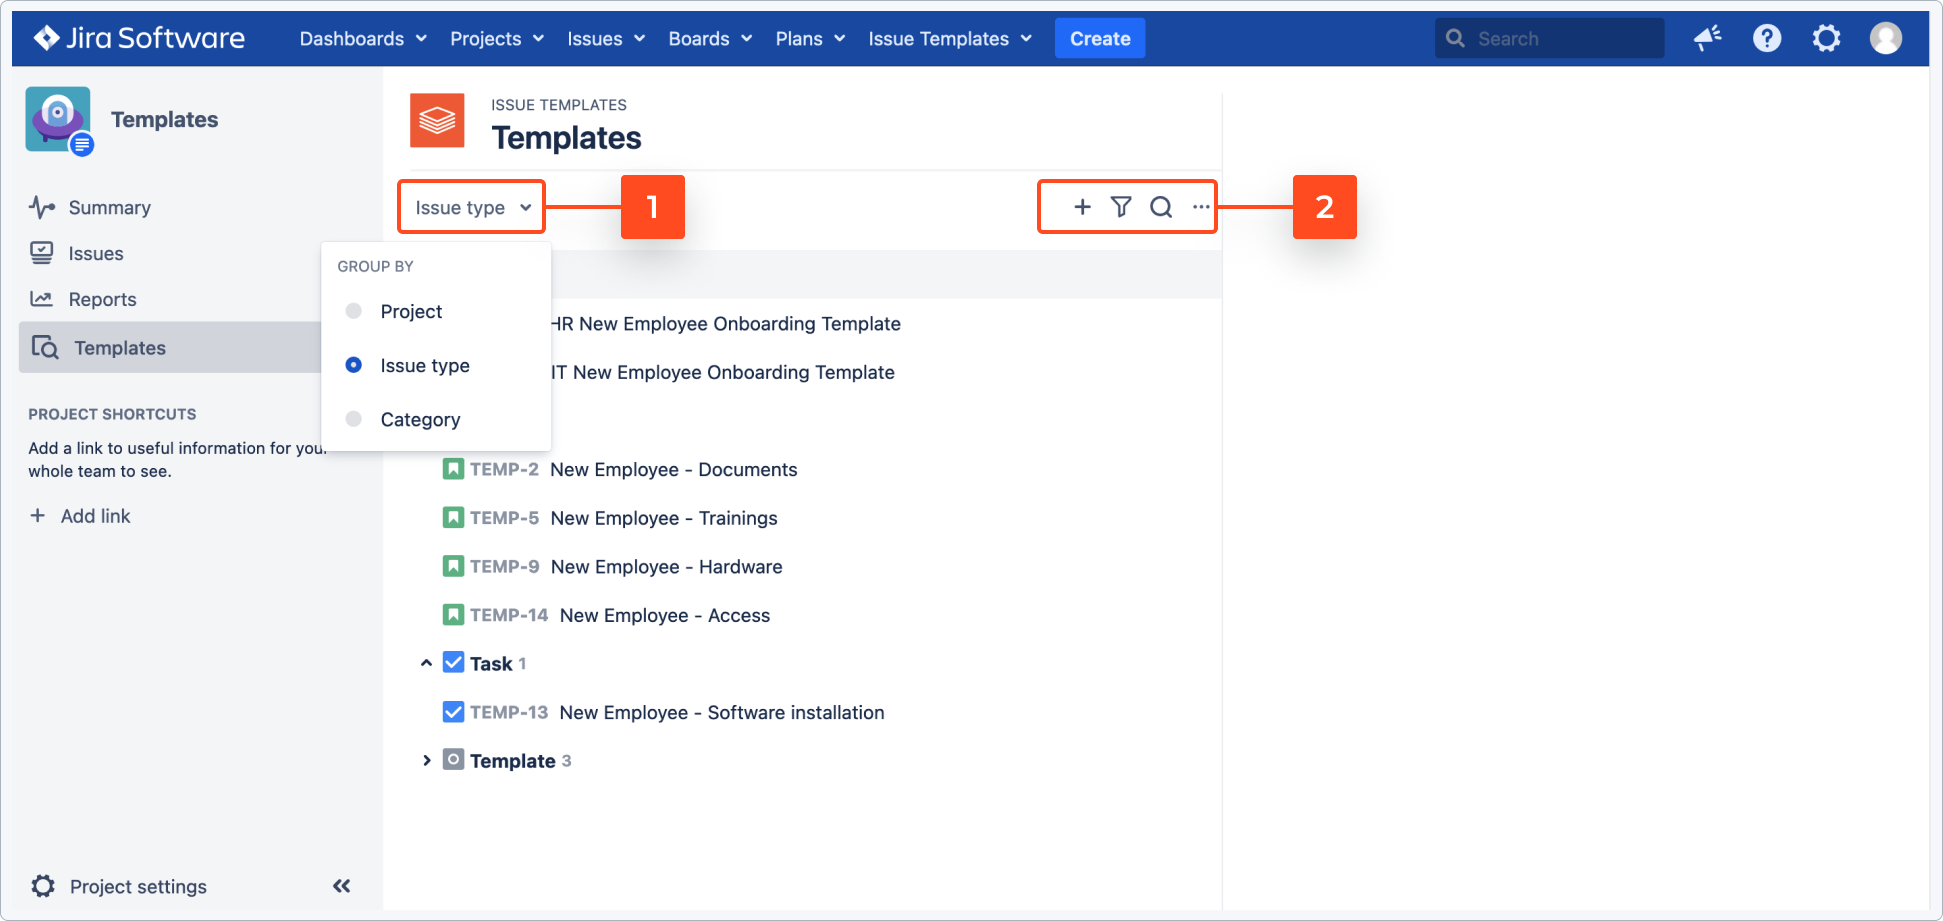
Issue tree
Your templates are displayed in a tree structure which shows their issue type, name, issue key and relation to other issues. There are three main actions you can take from there:
- Click on the template name to open its details in the preview area to the right.
- Click on the three dots right to the template’s name to see the additional options.
- Click on the template’s issue key to open the actual template issue, where you can edit its summary, description and other fields.

Selectable and unselectable Templates
You can easily figure out if a template is available or not in different contexts (either on the Jira Create issue screen or on the Customer Portal).
- If a template has been made unavailable in at least one context, a crossed circle icon will appear next to it on the list.
- You can find all selectable and unselectable templates by using one of the custom filters.
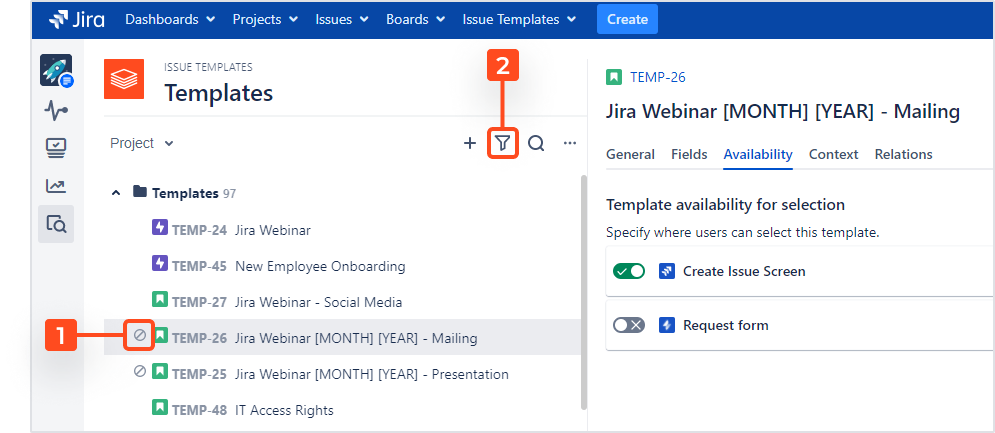
Bulk operations
You can use bulk editing to change some settings for many templates at once. Properties that can be configured this way include:
- Template category
- Set of fields
Steps
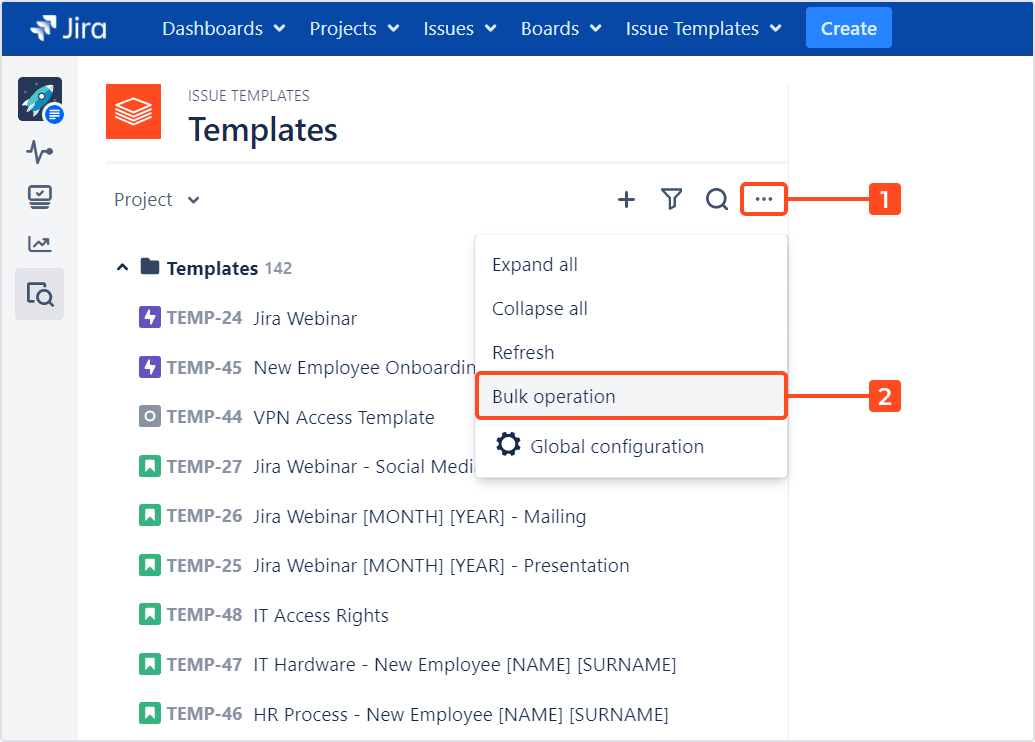
-
Open the three dots menu on top of the templates’ list.
-
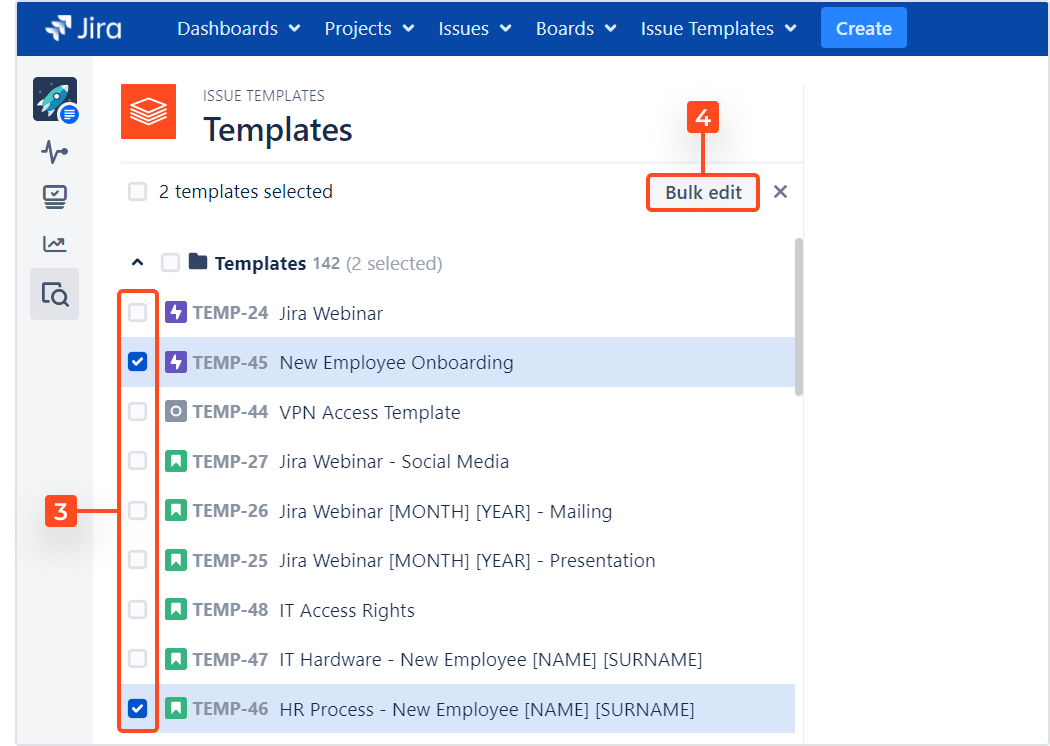
Check the boxes next to templates to select them for a bulk operation. You can select:
- each template separately
- one category (the checkboxes next to folder icons)
- all the templates at once (the checkbox at the top of the list)
Result
A dialog screen appears allowing you to bulk edit the category and the set of fields of the templates you’ve selected.
Bulk editing the template category
Learn more about template categories in the General tab chapter.
Steps
To edit the category of multiple templates:
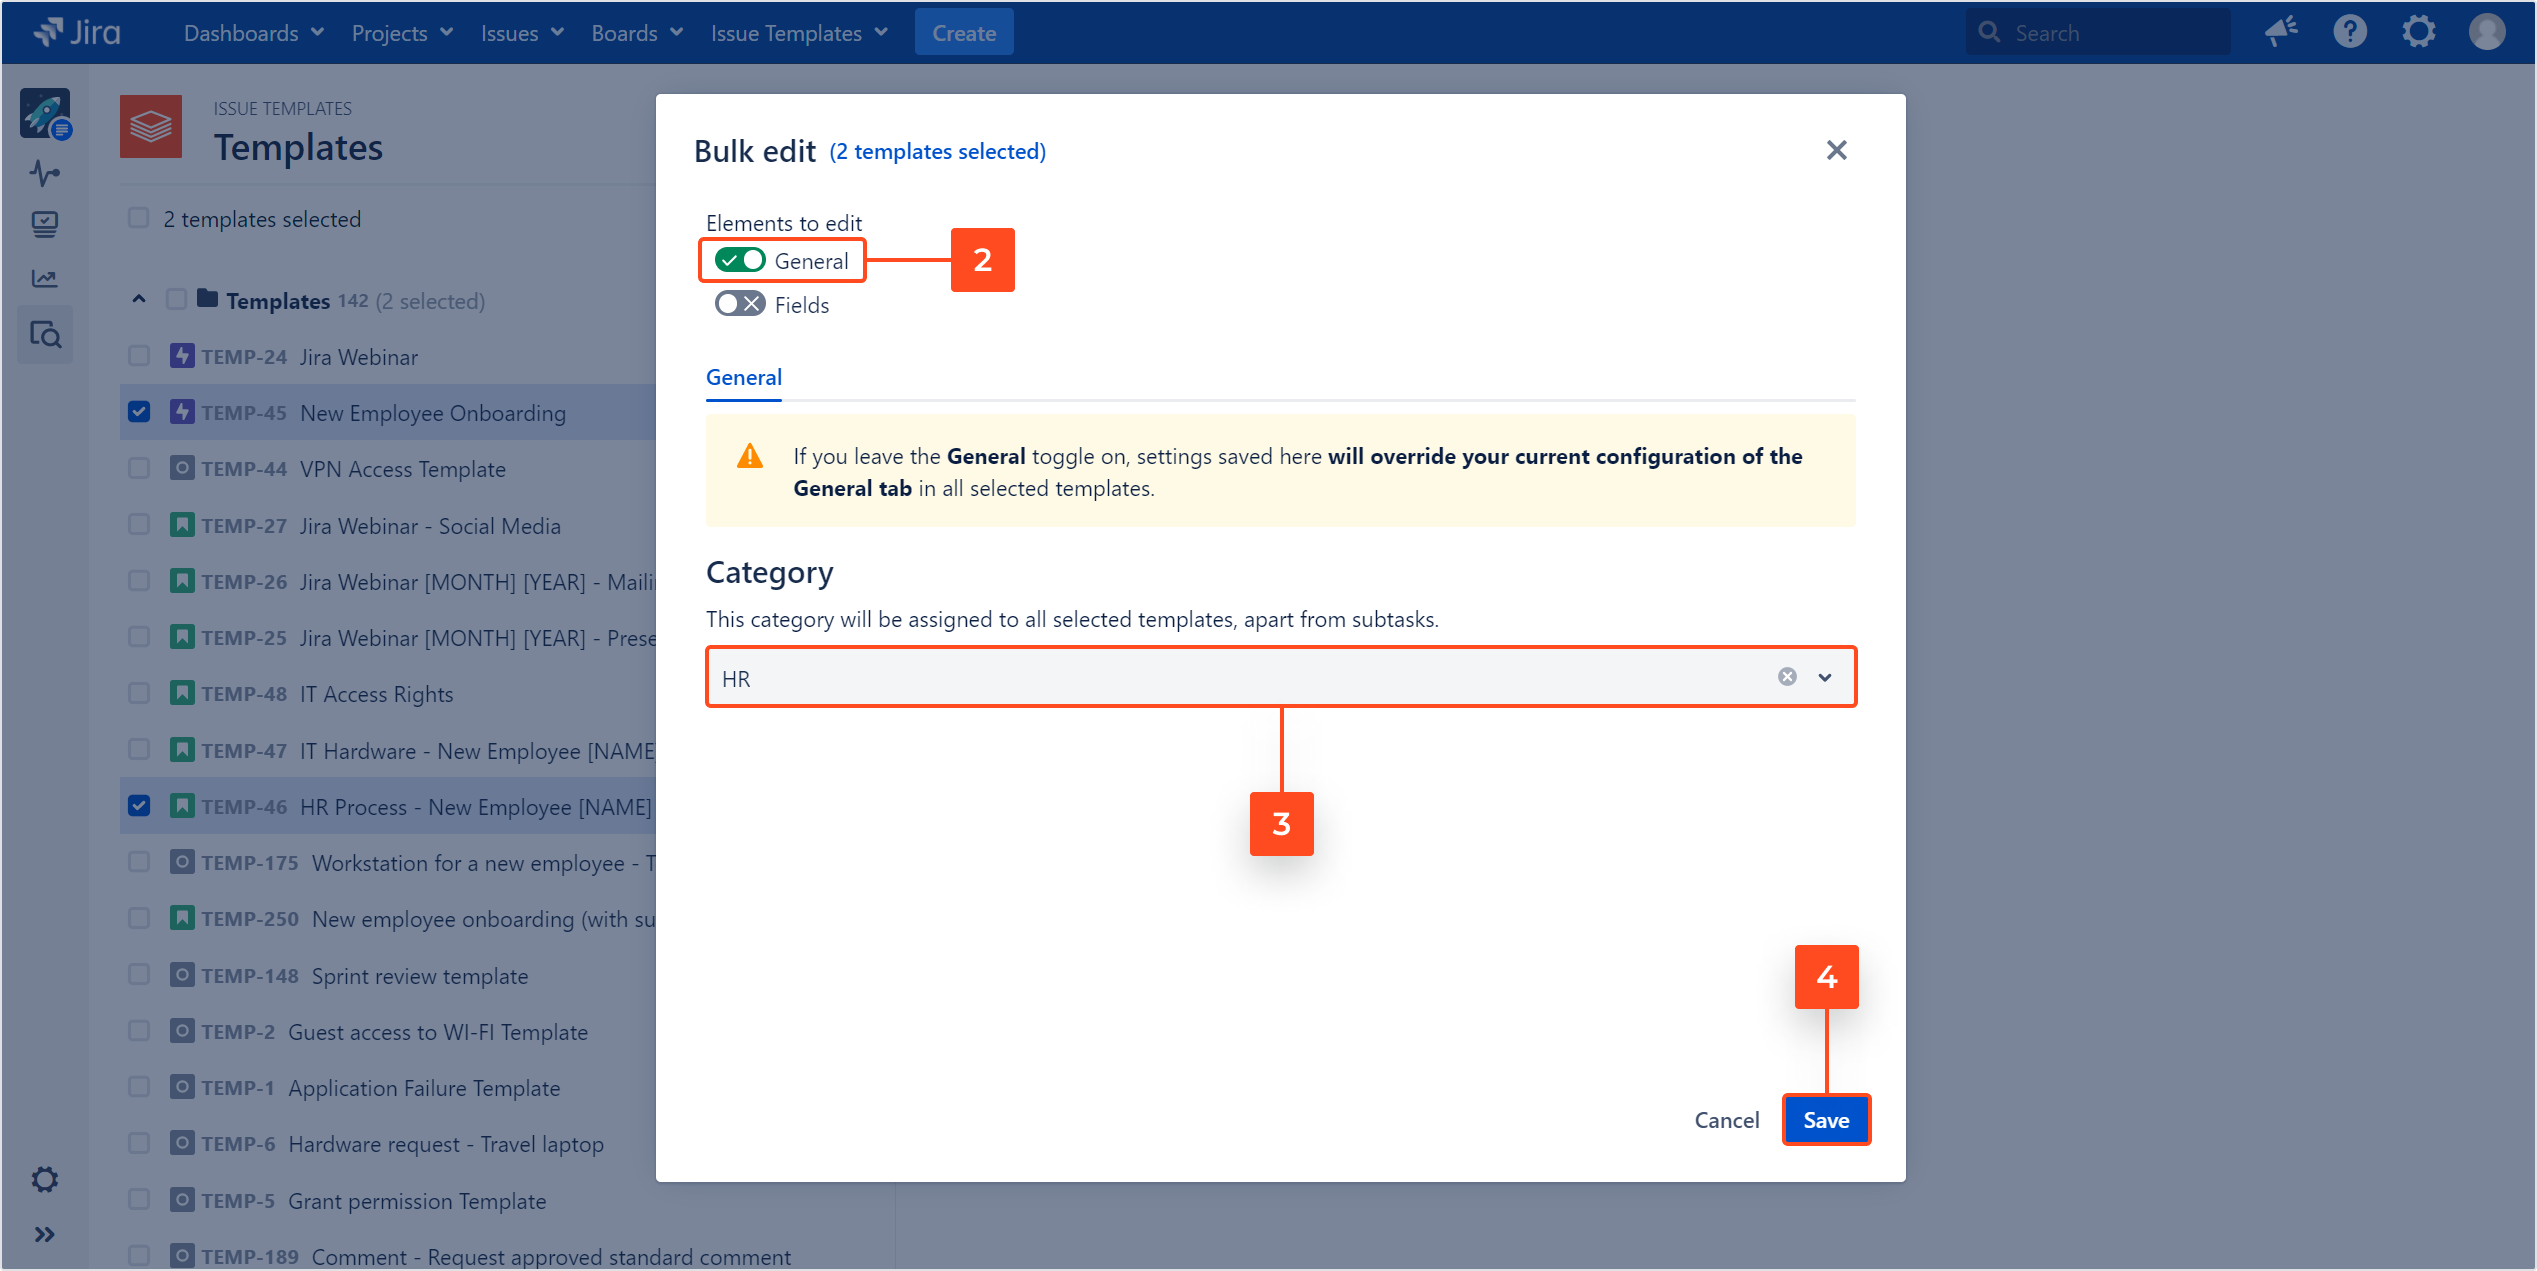
-
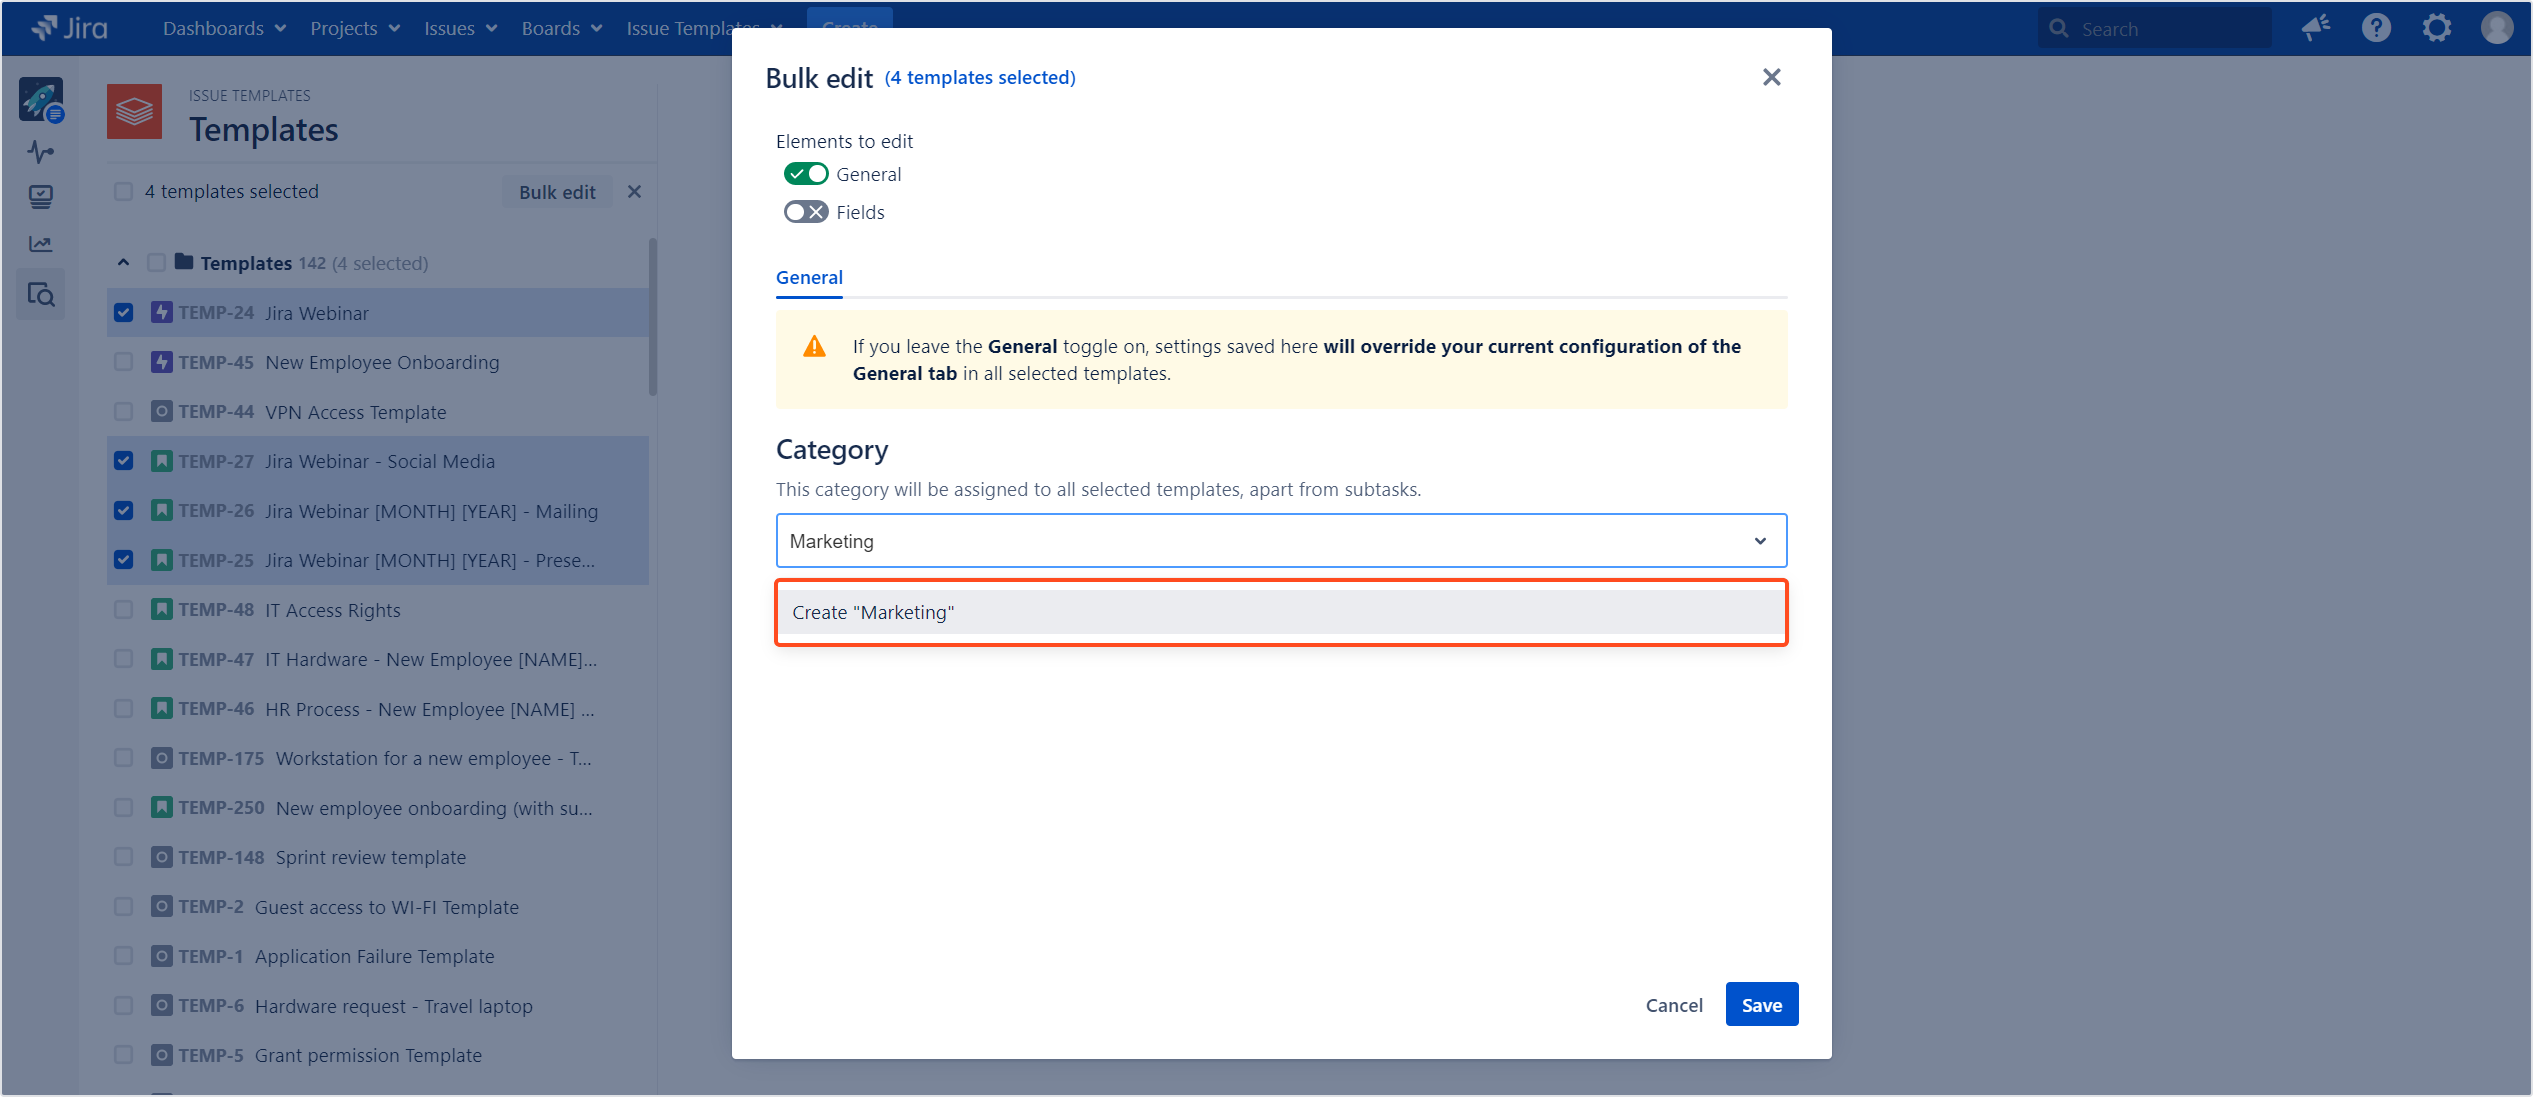
Select the templates to be edited.
-
Turn on the toggle next to General.
-
Choose the category from the list.
WarningRemember to check the other tab before saving the changes. If you leave the Fields toggle on, settings saved here will override your current Fields configuration in all selected templates. For example, if the selected templates have different Fields settings, then values in the corresponding fields in this dialog will be blank. So, if you leave the Fields toggle on, those empty values will be saved, resulting in the Set of fields being removed in all those templates.
-
Click Save.
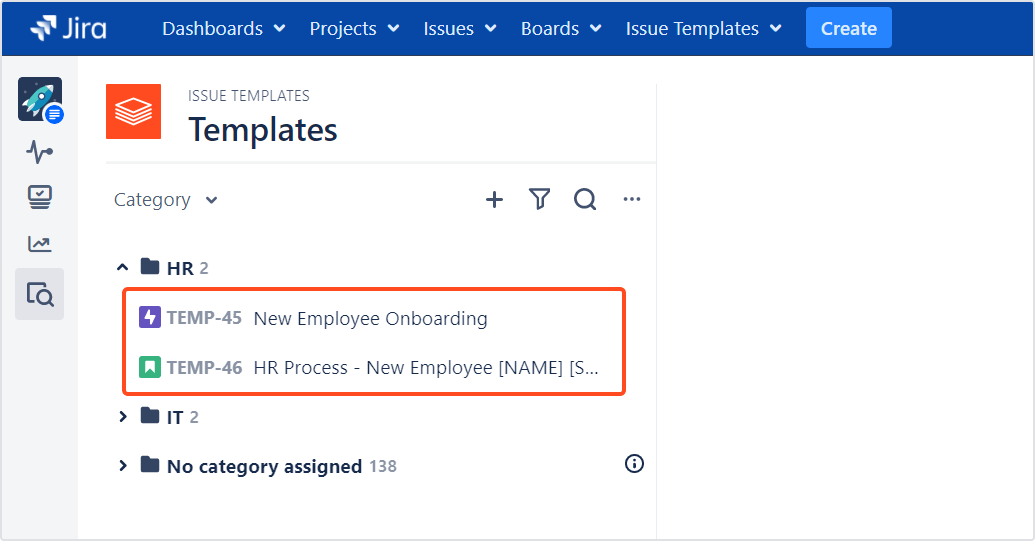
Result
The chosen category is assigned to the selected templates.
Bulk editing the Set of fields
Learn more about Set of fields in the Fields tab chapter.
Steps
To edit the Set of fields of multiple templates:
-
Select the templates to be edited.
-
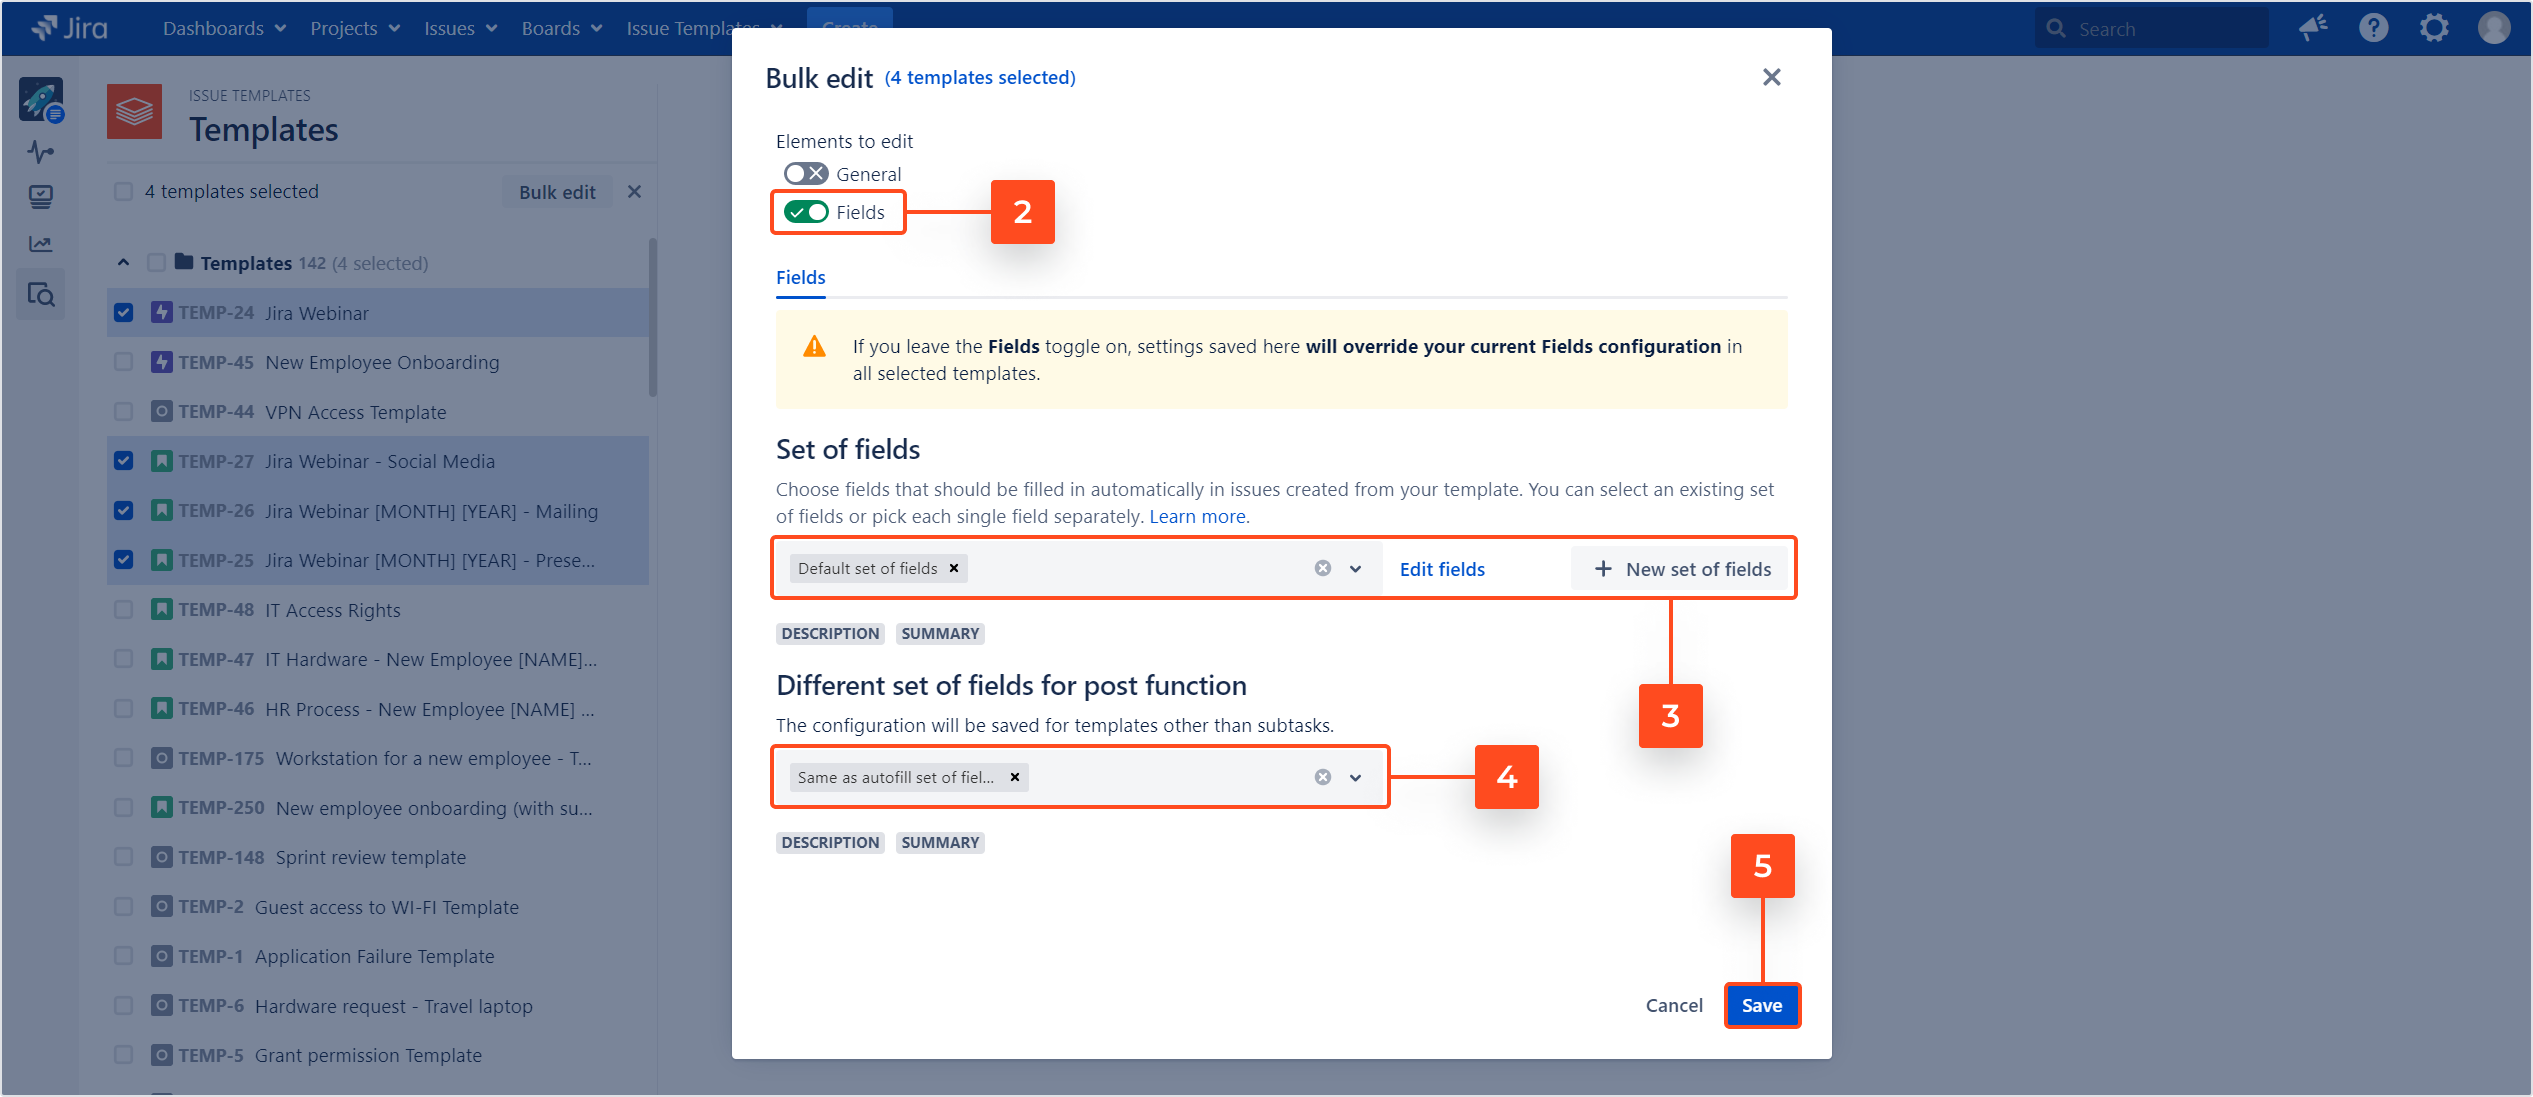
Turn on the toggle next to Fields.
-
Choose the Set of fields from the list or create a new one.
-
Configure a Different set of fields for post function (optional).
WarningRemember to check the other tab before saving the changes. If you leave the General toggle on, settings saved here will override your current General settings in all selected templates. For example, if the selected templates have different categories, then the value in the corresponding field in this dialog will be blank. So, if you leave the General toggle on, that empty value will be saved, resulting in the category being removed in all those templates.
-
Click Save.
Result
The Set of fields is configured for the selected templates. You can check the result by opening any of the selected templates - the Set of fields configuration will be visible under the Fields tab.
Editing categories
Changing the category name
Steps
To change the name of a template category:
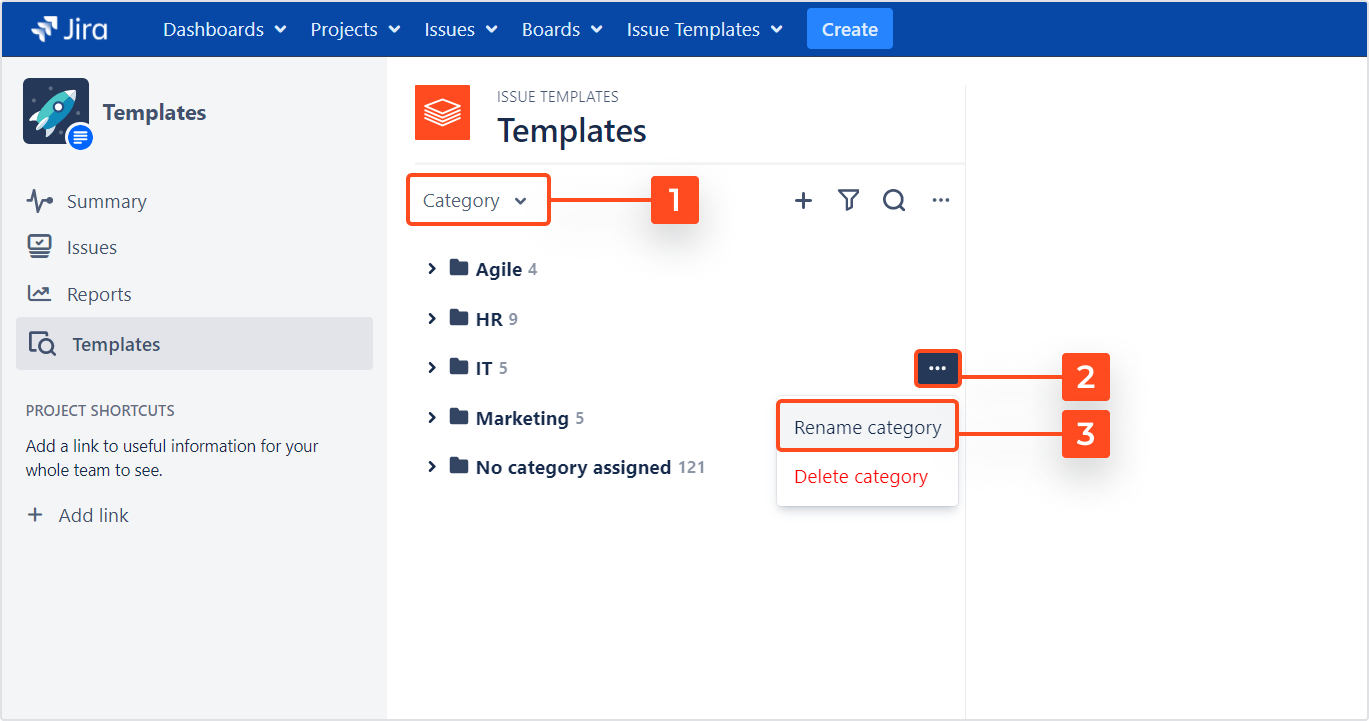
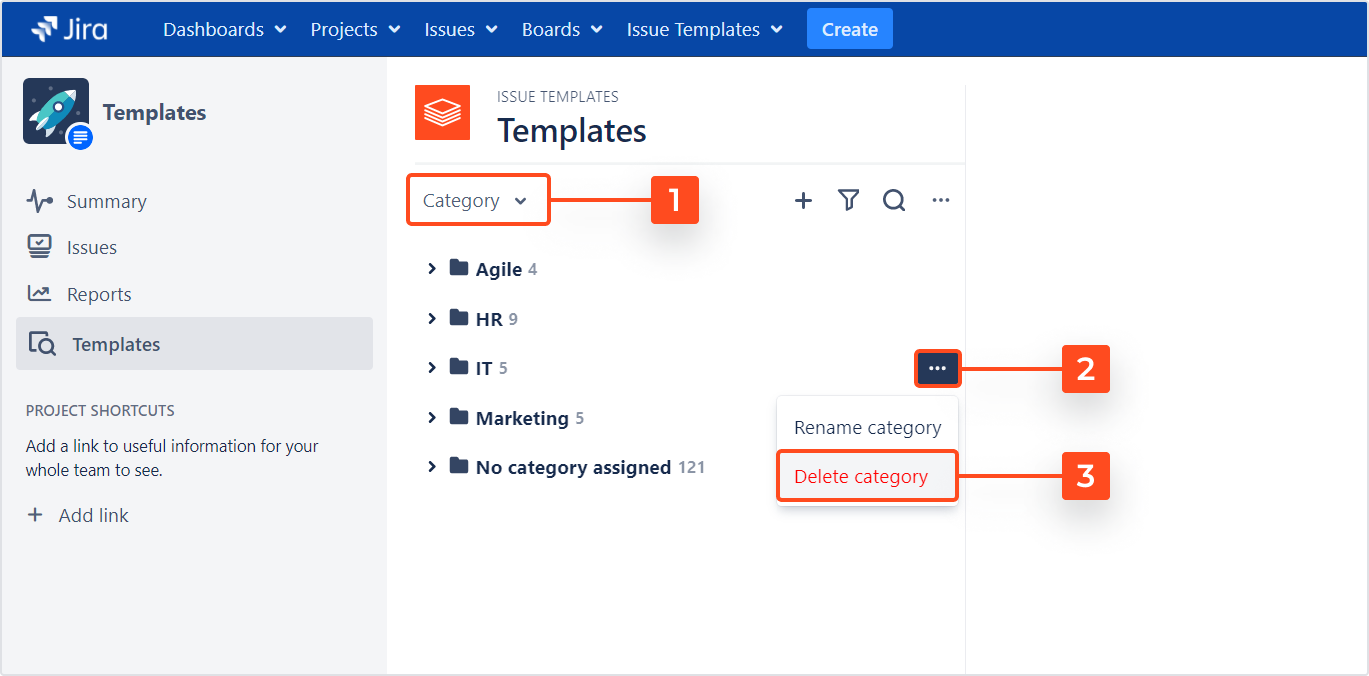
- In the Template Navigator, group the templates by Category.
- Click More next to the category you want to edit.
- Select Rename category.
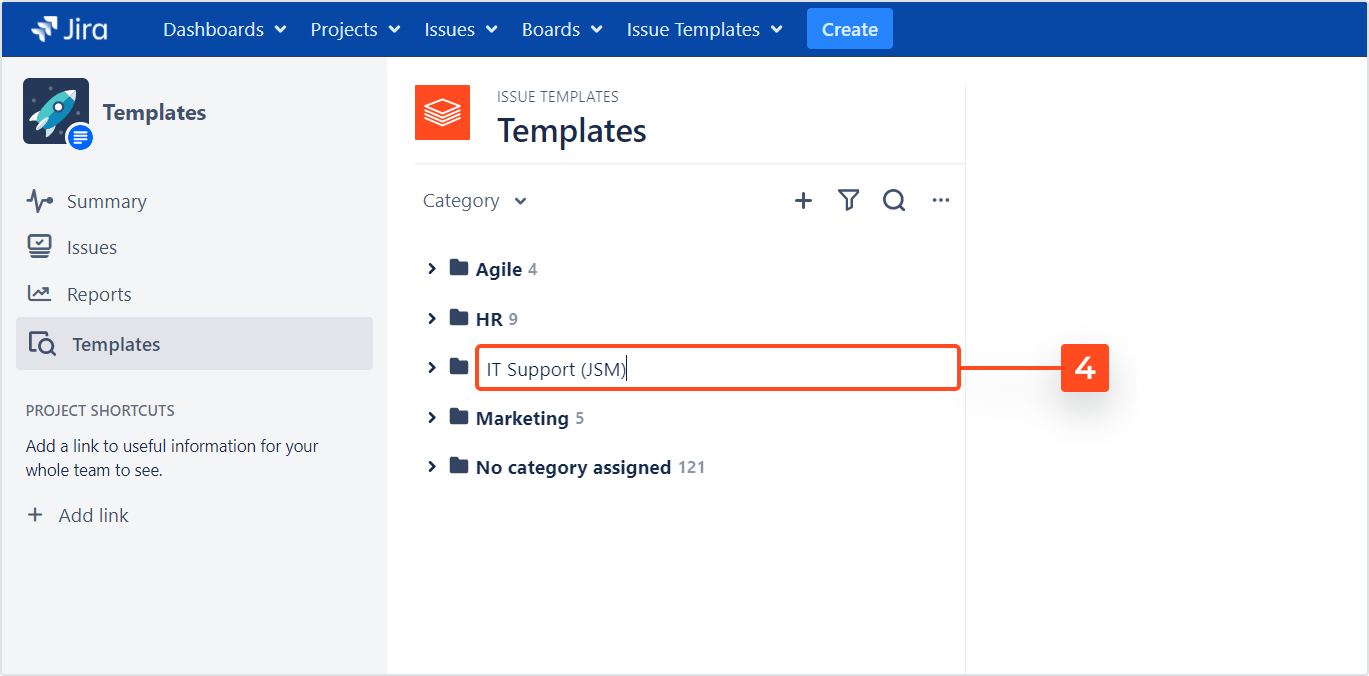
- Type in the new name and leave the field.
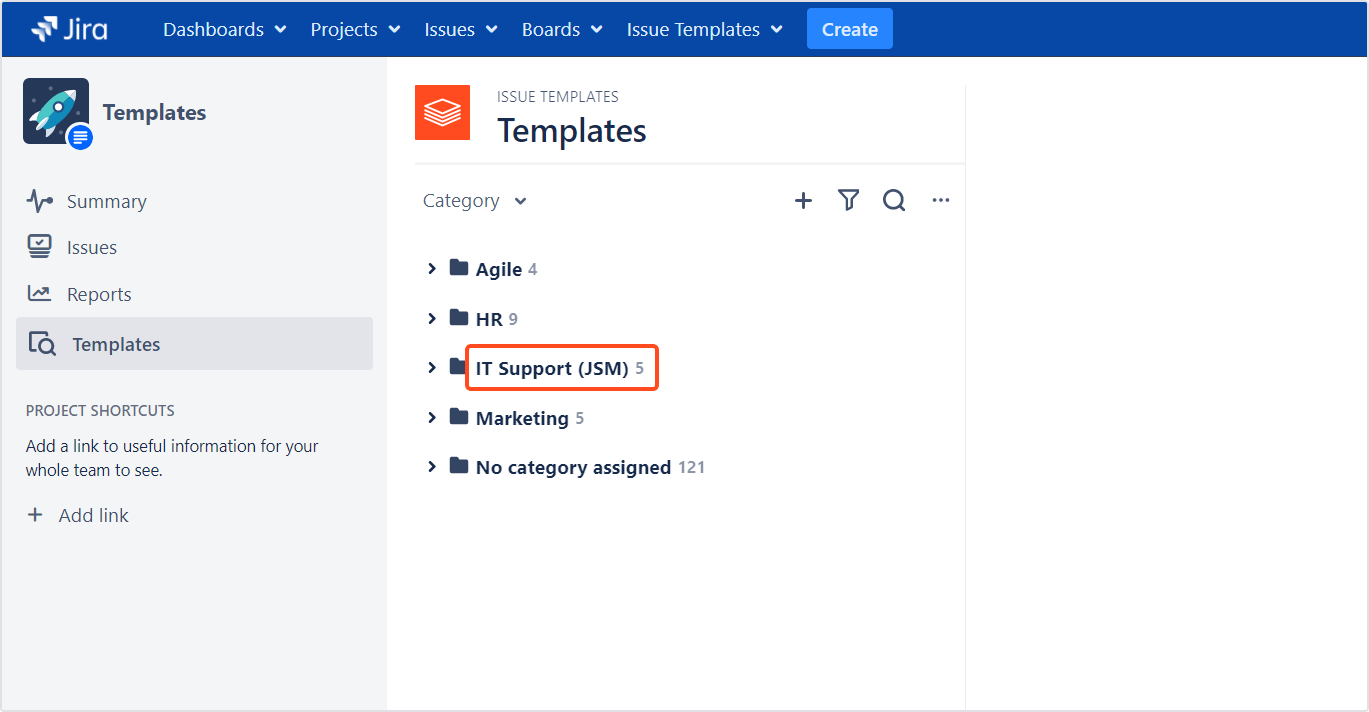
Result
The name of the category is changed.
Deleting a category
Steps
To delete a template category:
- In the Template Navigator, group the templates by Category.
- Click More next to the category you want to delete.
- Select Delete category.
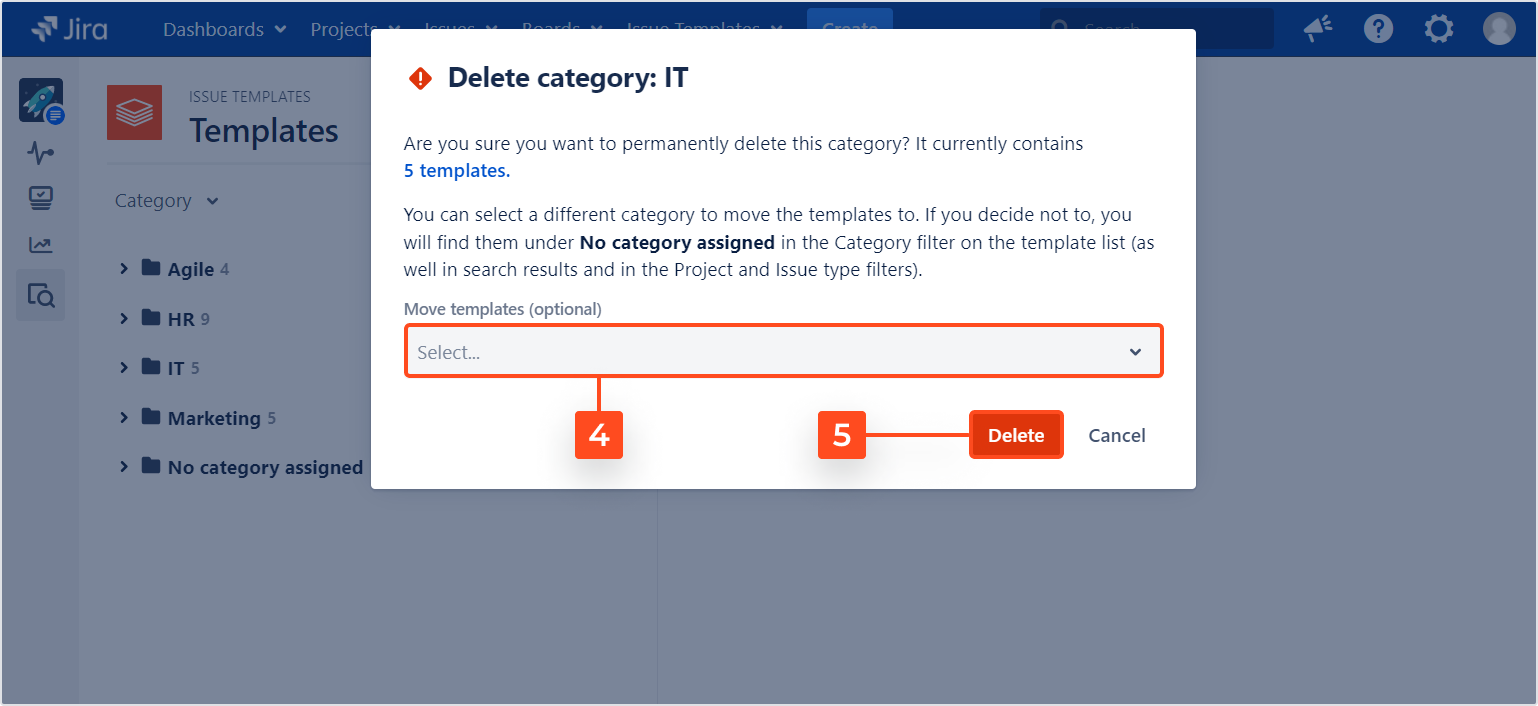
- (Optional) In the dialog box, select a new category for the templates that are currently assigned to the category you are about to remove.
Note
If you decide not to move the templates to a different category, you will find them in the No category assigned folder in the template list (as well in search results and in the Project and Issue type filters).
- Click Delete.
Result
The category is deleted.
If you can’t find the answer you need in our documentation, raise a support request.
