- REST API
- REST API
- Authentication
- Test Key
- Jira REST API
- Requirements
- Test Case
- Test Plan
- Test Execution
- Test Case Execution
- Defects
- Tree Structure
- Example of use
Authentication
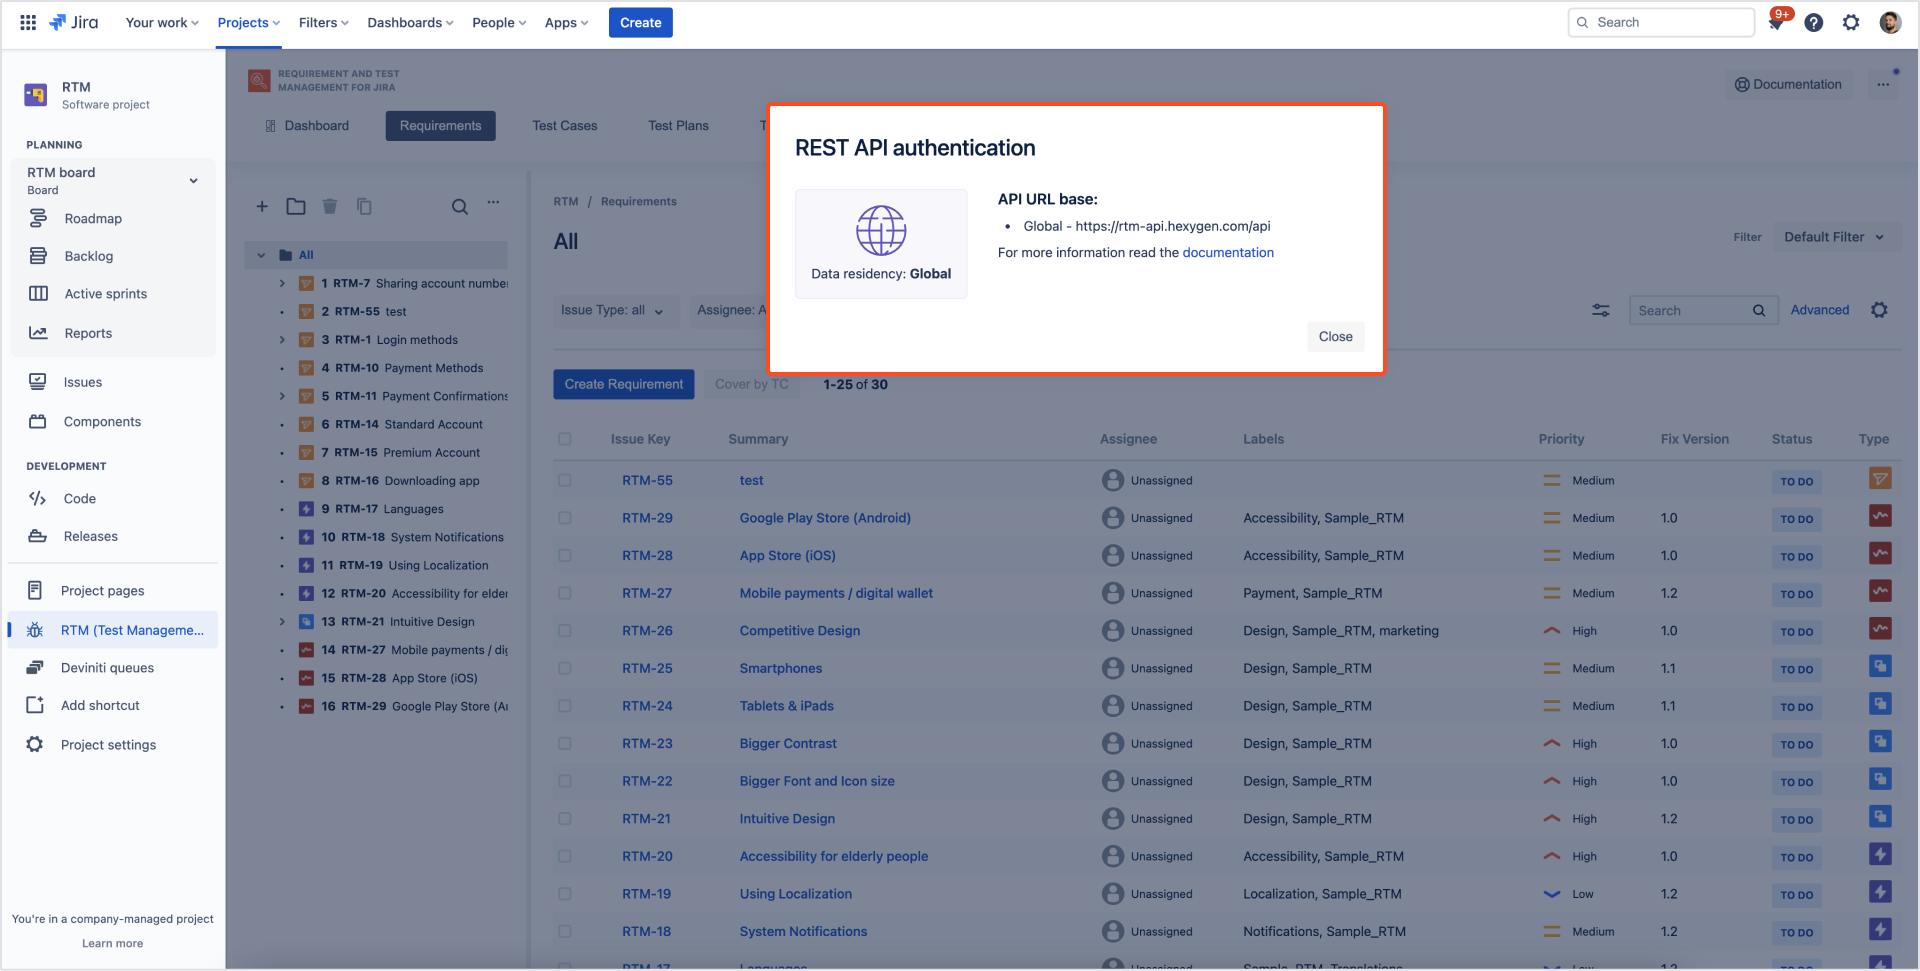
The API URL is:
https://rtm-api.hexygen.com/apifor US and Global data residencyhttps://rtm-eu-api.hexygen.com/apifor EU data residency
If you’re not sure what your API URL is, navigate to Data residency.
In the Jira Cloud environment it IS NOT the same as your Jira base URL.
To authenticate, use your internal API TOKEN mechanism provided by Requirements and Test Management for Jira Cloud.
Steps
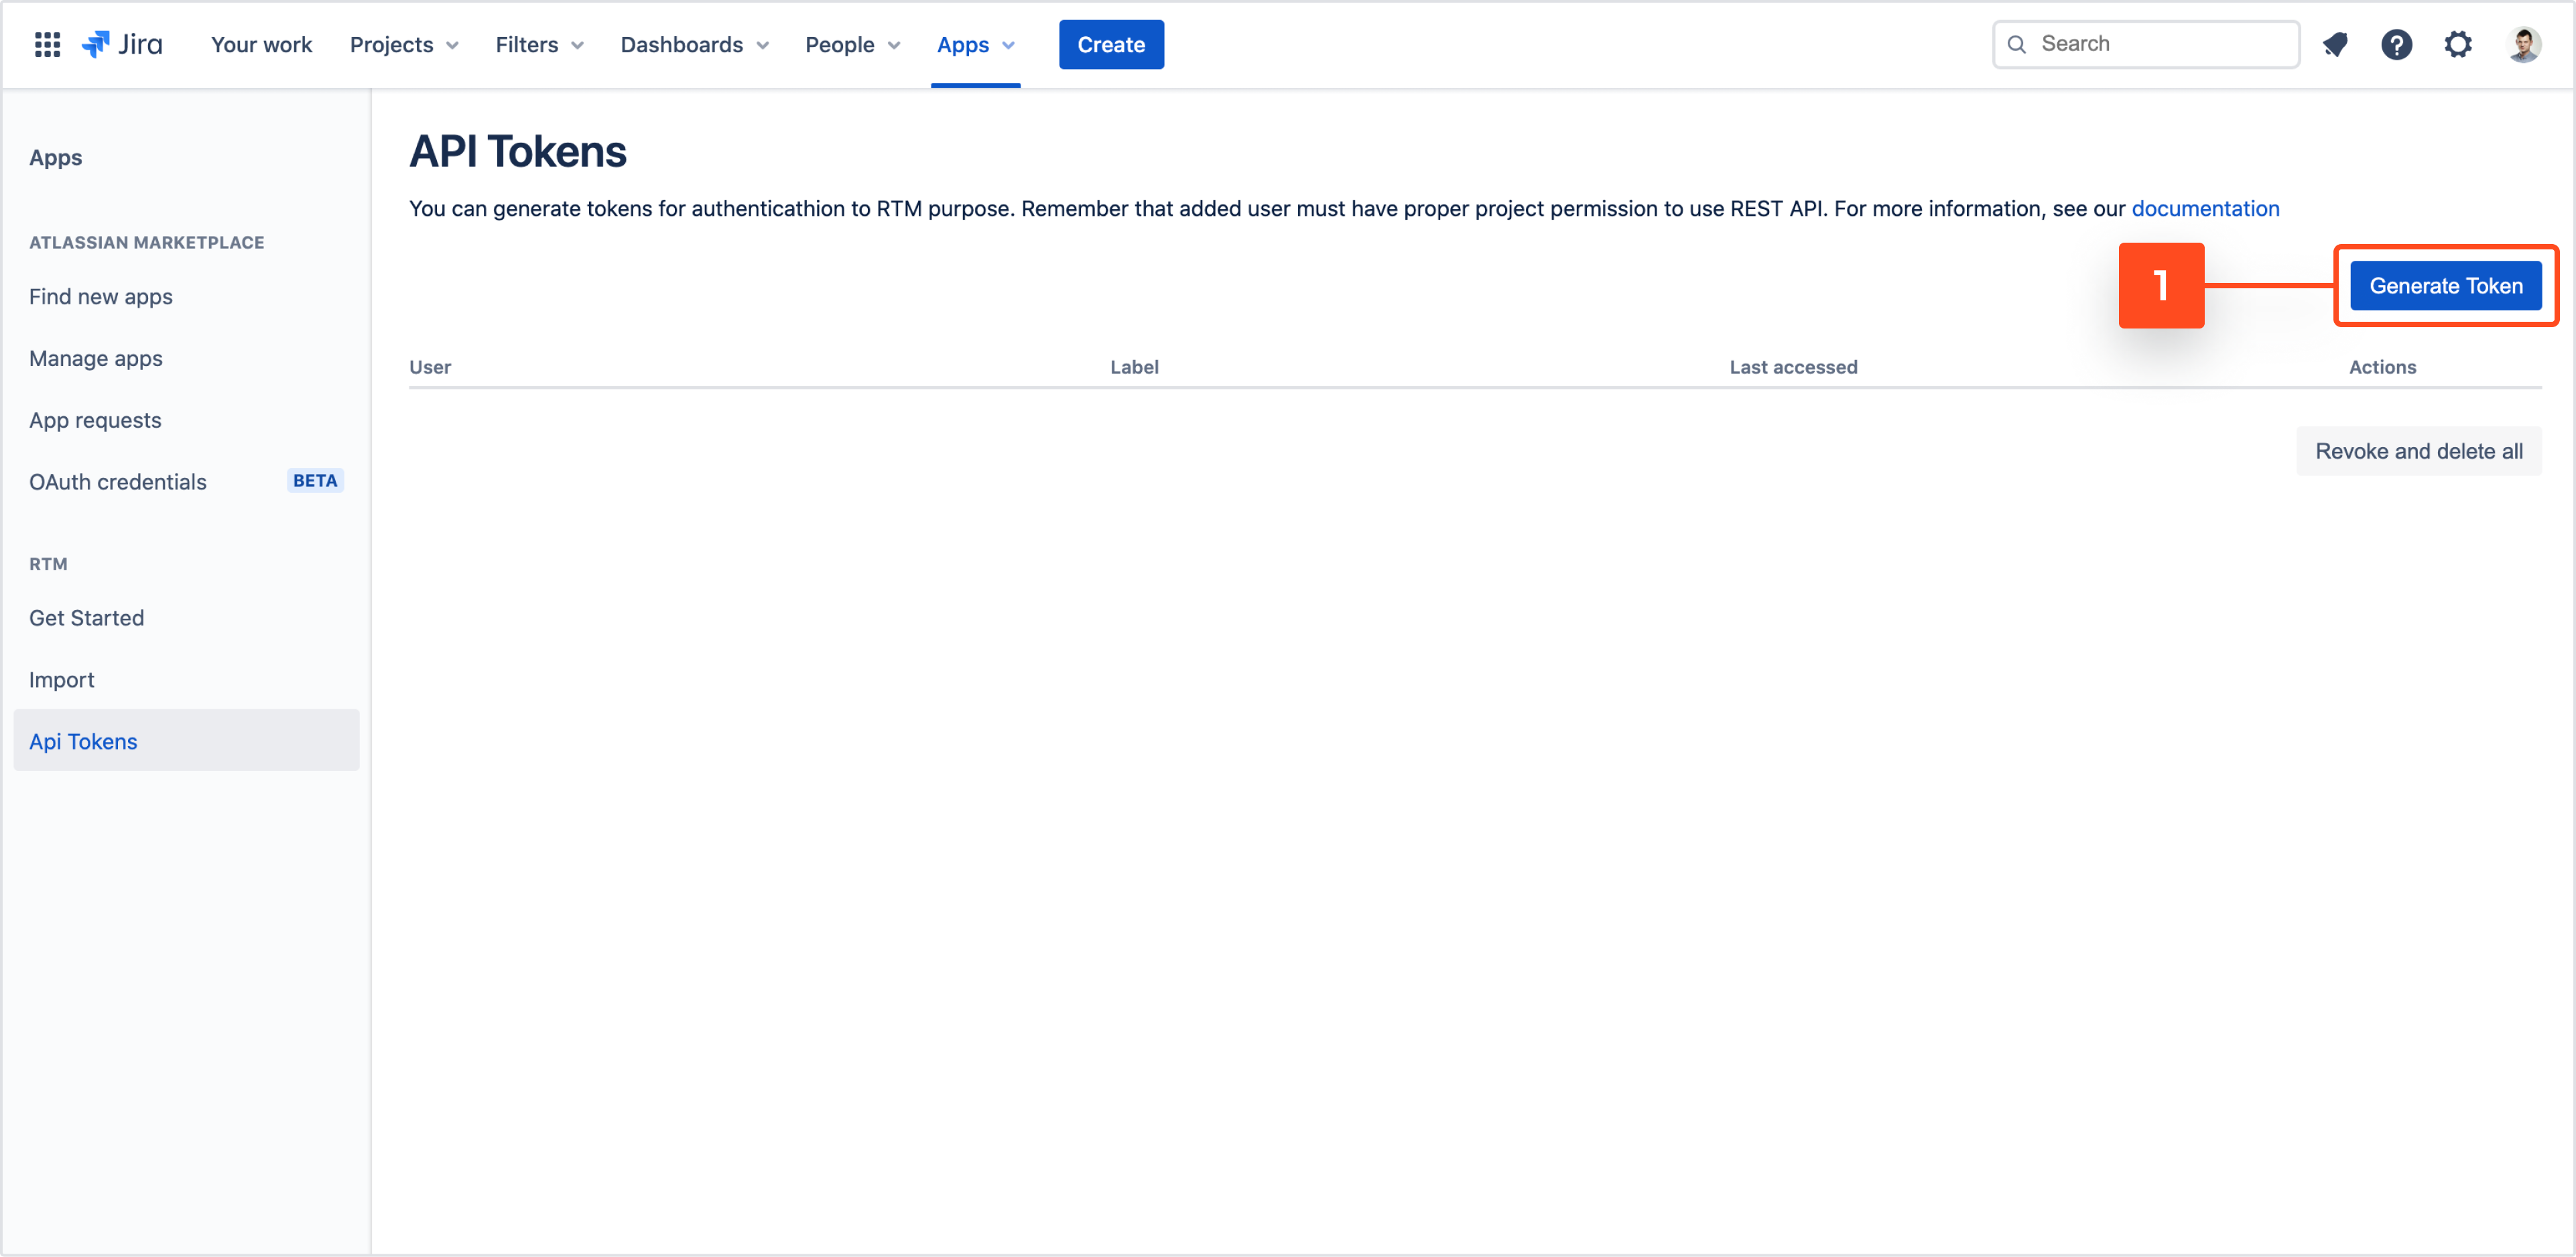
- Click Generate Token.

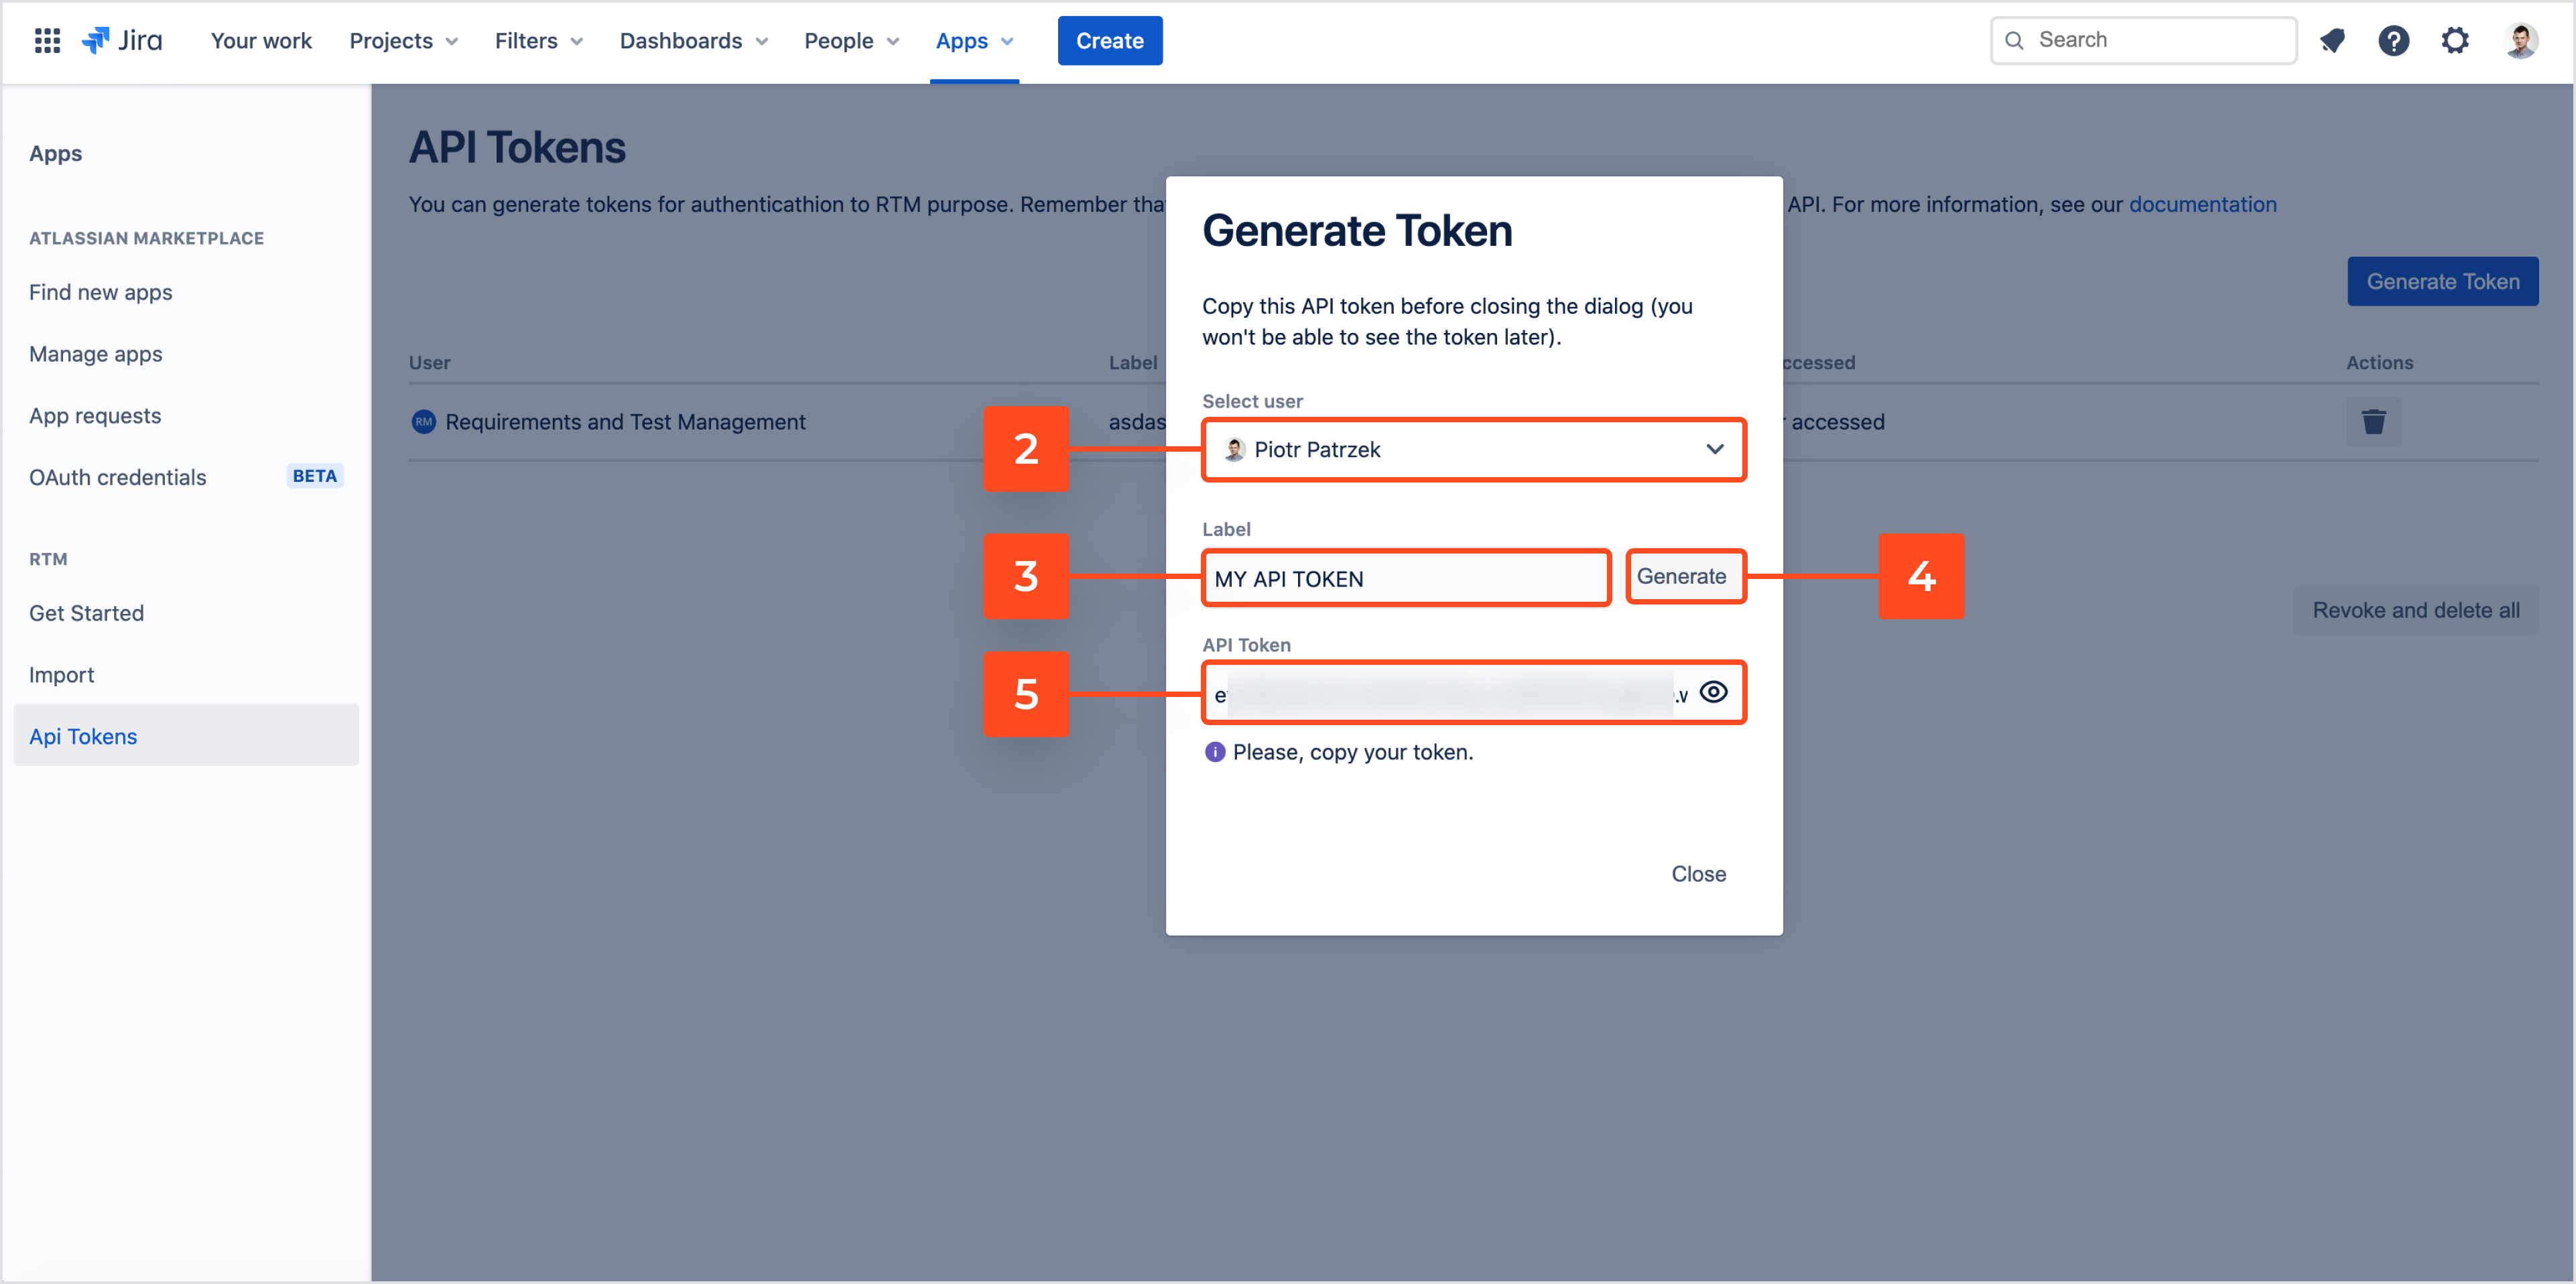
- Select the specific user for whom you want to generate a token.
- Use a label to give it a name.
- Click Generate.
- Copy your token, because after closing the window you will not be able to see the token anymore.

Result
After generating a token, this is how your API Tokens list should look like:

To use the generated key, in Postman tool choose the Authorization type called Bearer Token. In the Token field on the right side of the screen, type in the token generated before. You can also assign the request parameters to the token variable and type it in the field like it’s shown on the screen below.

Data residency
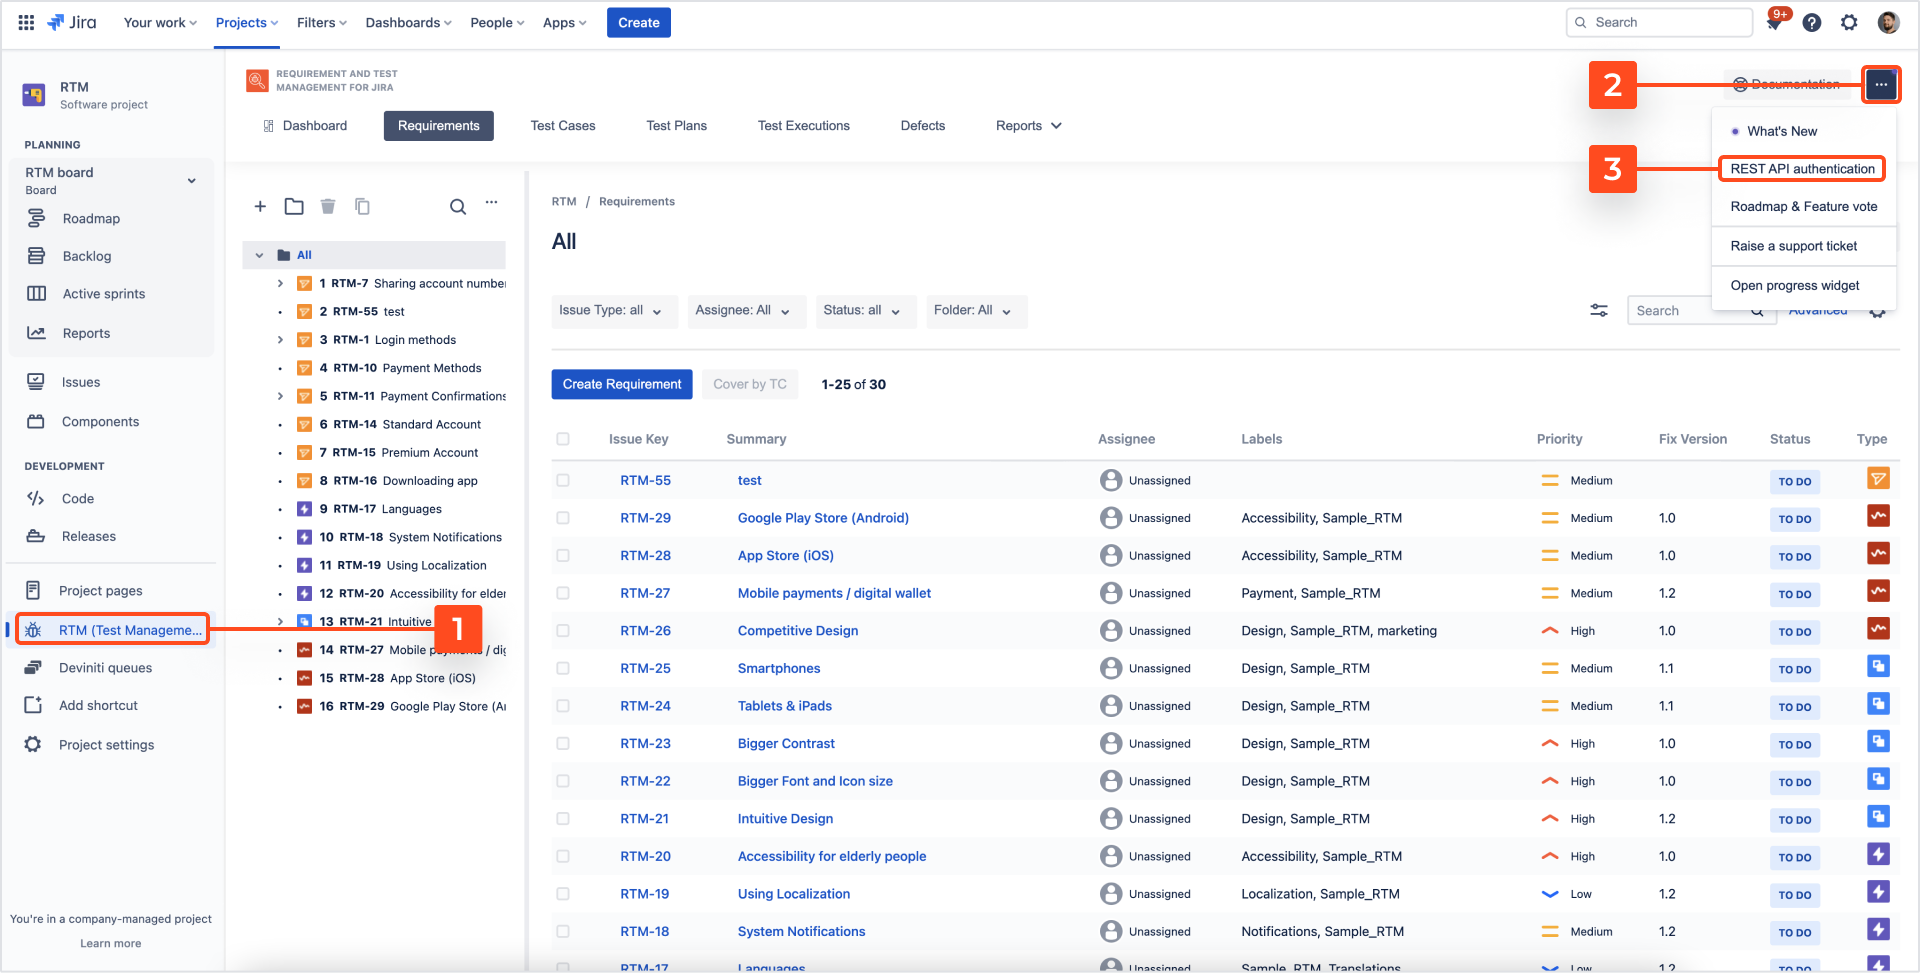
Depending on your location you will be using different base REST API URL. To check, what is your current data residency location and what is your REST API URL do as follows:
This brings the REST API authentication window:

Need help?
If you can’t find the answer you need in our documentation, raise a support request*.
*Include as much information as possible to help our support team resolve your issue faster.
