- Introduction
- About
- Get started
- Functionalities
- Fields Visibility
- Translations
- Tabs Visibility
- Mapper
- Secured Fields
- Supported fields
- Bundled Fields
- Overview
- Bundled Fields Configuration
- Using Bundled Fields
- JQL Searcher
- Java API (ScriptRunner)
- Data Sources
- Email notifications
Bundled Fields Configuration
Learn how to configure Bundled Fields
Before you start, log in as a user with Jira Administrators global permission.
Changes made to an existing configuration affect all issues where the custom field is used.
Adding a Bundled Fields custom field
Before you start using Bundled Fields you need to add a dedicated custom field first.
- Navigate to Manage Apps > Dynamic Forms > Bundled Fields
- Click Add field or Add new field

- You will be transferred to Jira Custom Fields tab, click Add custom field.

- Choose Bundled Fields from the list (in the advanced section) and click Next.

- Configure the custom field according to your needs.
- Specify issue types and projects (recommended) or apply to all issues in all projects and click Create.

- Associate the custom field to screens and click Update.

Result
When you go back to the Bundled Fields tab in Dynamic Forms your custom field is present and you can configure it.

You can add more fields with Add new field.
Add subfields
In the first configuration tab you can add and configure subfields of your future form. Scroll down to read descriptions of each option:
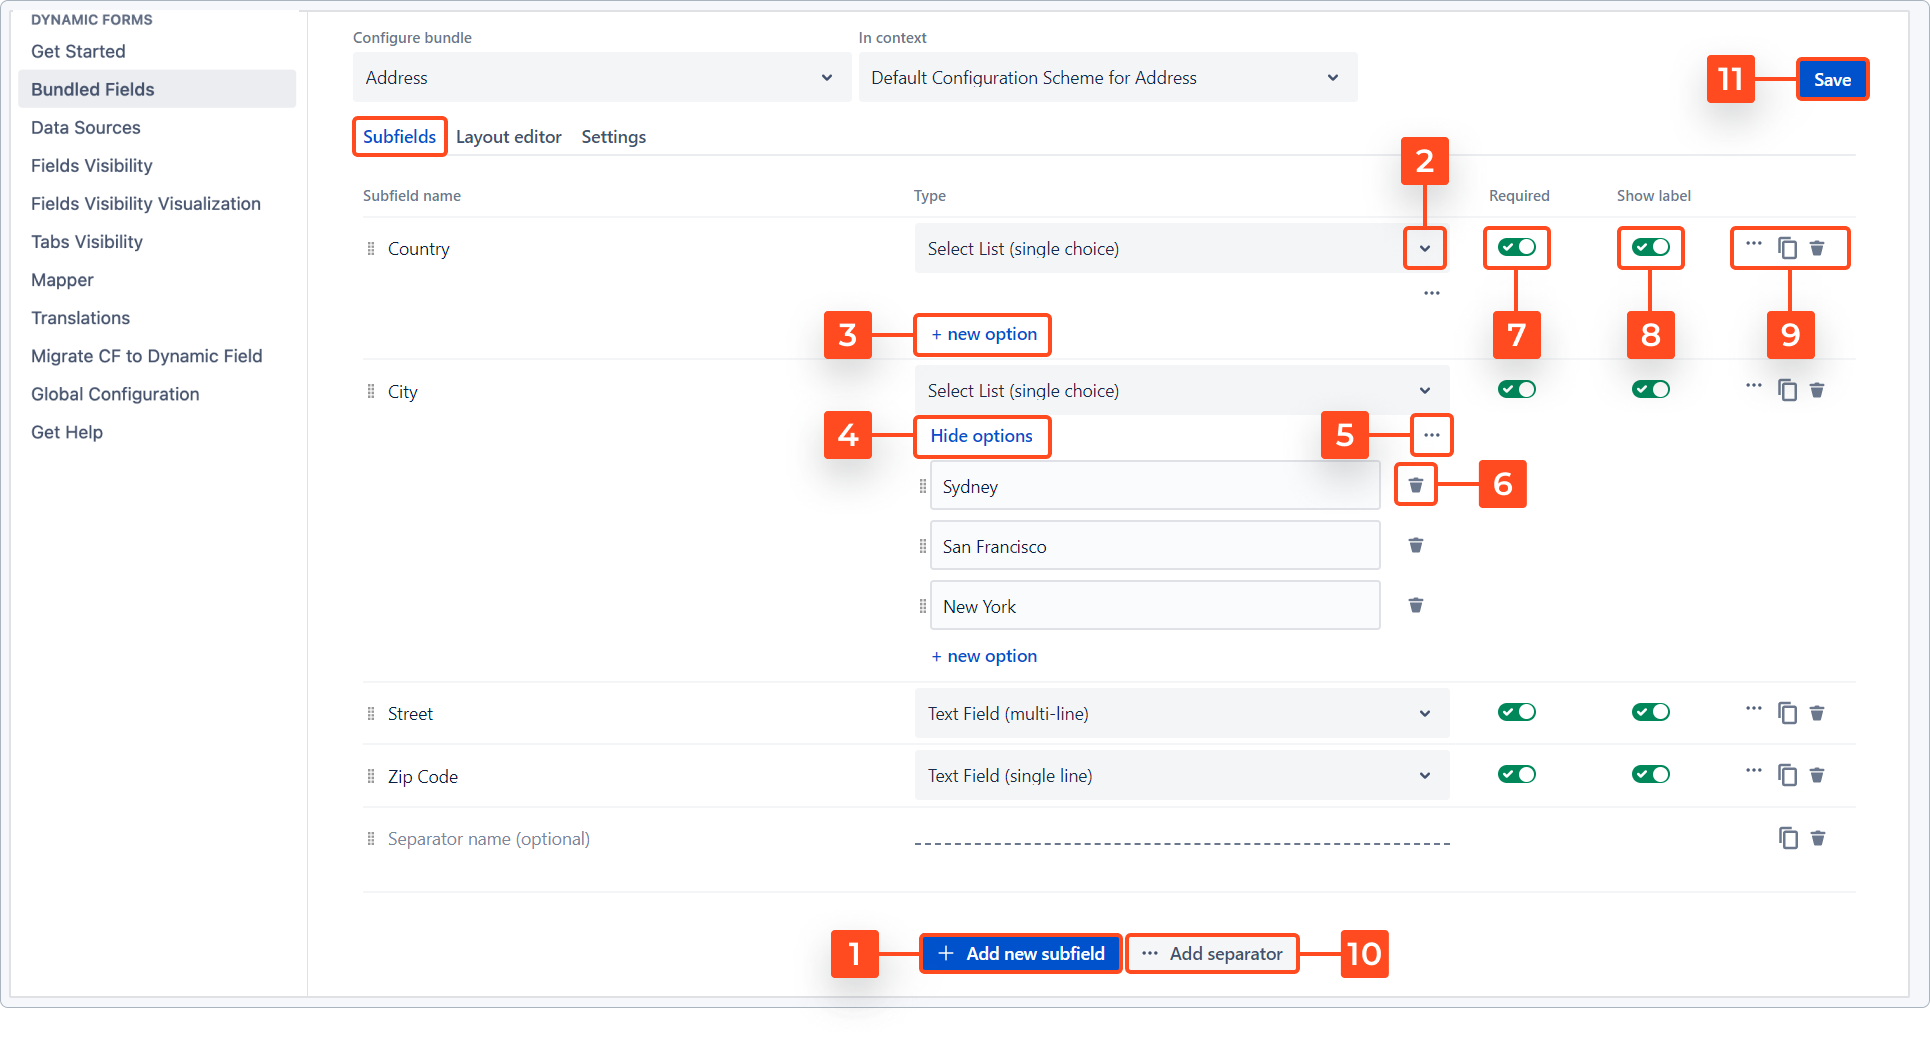
- Add a new subfield. Type the new subfield’s name in the first configuration column.
- Select the subfield type. You can choose one of these:
- Checkbox
- Date Picker
- Date Time Picker
- Time Picker
- Text Field (single line)
- Text Field (multi-line)
- Select List (single choice)
- User Picker (single user)
For Text Field (single line), you can define the formatting and validators. Read more about it here.
-
Add options to your select list.
-
Hide options. You may want to hide options to make the configuration view more clear. They won’t disappear from the list.
-
Additional settings for options include:
- Add bulk options. You can copy and paste an already prepared list of options, or type them in quickly one by one. Just remember to separate the options with an Enter.
- Import from field. You can import options from an existing custom field. In a separate window you’ll be able to define the source field and its context, so that all the options will be added to your list at once.
-
Remove options. Delete the options you no longer need.
TipIf you only want to reorder them, you can do it by drag and drop.
-
Required. Turn on the toggle to make a given subfield mandatory.
NoteIn order to work properly, related fields shouldn’t be marked as required in the global Jira settings. Otherwise, all Bundled Fields’ subfields would be recognized as required and you wouldn’t be able to differentiate required subfields from optional ones.
If you’d like to make the entire custom field required, you can do so by setting up a minimum and maximum number of rows. For example, if you set up a minimum number of rows as 1 (or more), it will make it impossible to delete rows on the Create Issue screen and therefore practically make the custom field required.
-
Show label. Turn on the toggle to show the subfield’s label. This might be a good idea if you want your final form to be a table.
-
Additional settings for subfields include:
-
Adding a subfield description. Click on the three dots menu to get to this option. In a new window you’ll be able to add a field description that will show up right under the subfield in your final form.
- You can use Jira Markdown to format the text.
- Character limit is maximum 500 characters including spaces.
- You might need to free some additional space for longer descriptions. In order to do so, enable the Split labels into lines option and then manually move the subfields apart in the Layout editor.
-
Duplicating subfields. You can make a copy of the selected subfield, to easier configure another one. The duplicated subfield will be displayed right under the original one.
-
Deleting subfields. You can remove subfields you no longer need. Tip: If you only want to reorder them, you can do it by drag and drop.
WarningDeleting a subfield from the Bundled Fields configuration will remove it from all issues (even already existing ones) and data it now contains will be permanently lost.
-
-
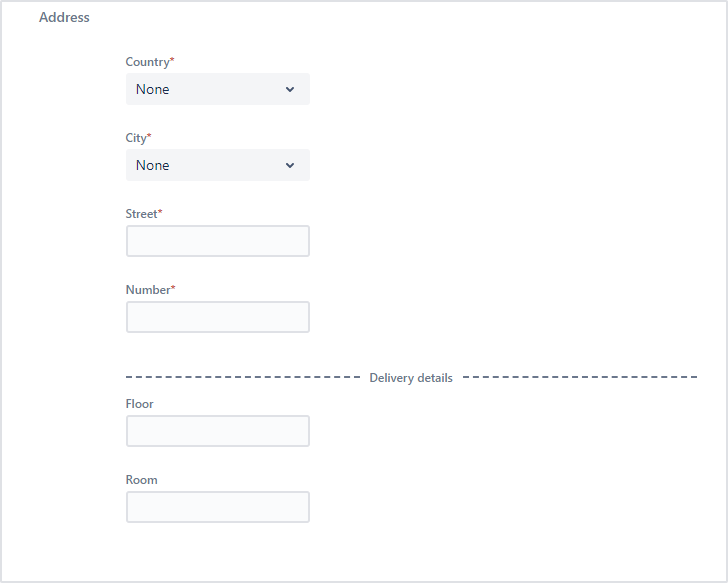
Add a separator. You can divide your subfields into certain groups with a separating line. If you decide to give it a name, it will be integrated in the middle of the line on your final form.
You can change the separator’s position in the Layout editor.
- Save the configuration.
Remember to always save the changes before leaving the configuration screen.
Layout
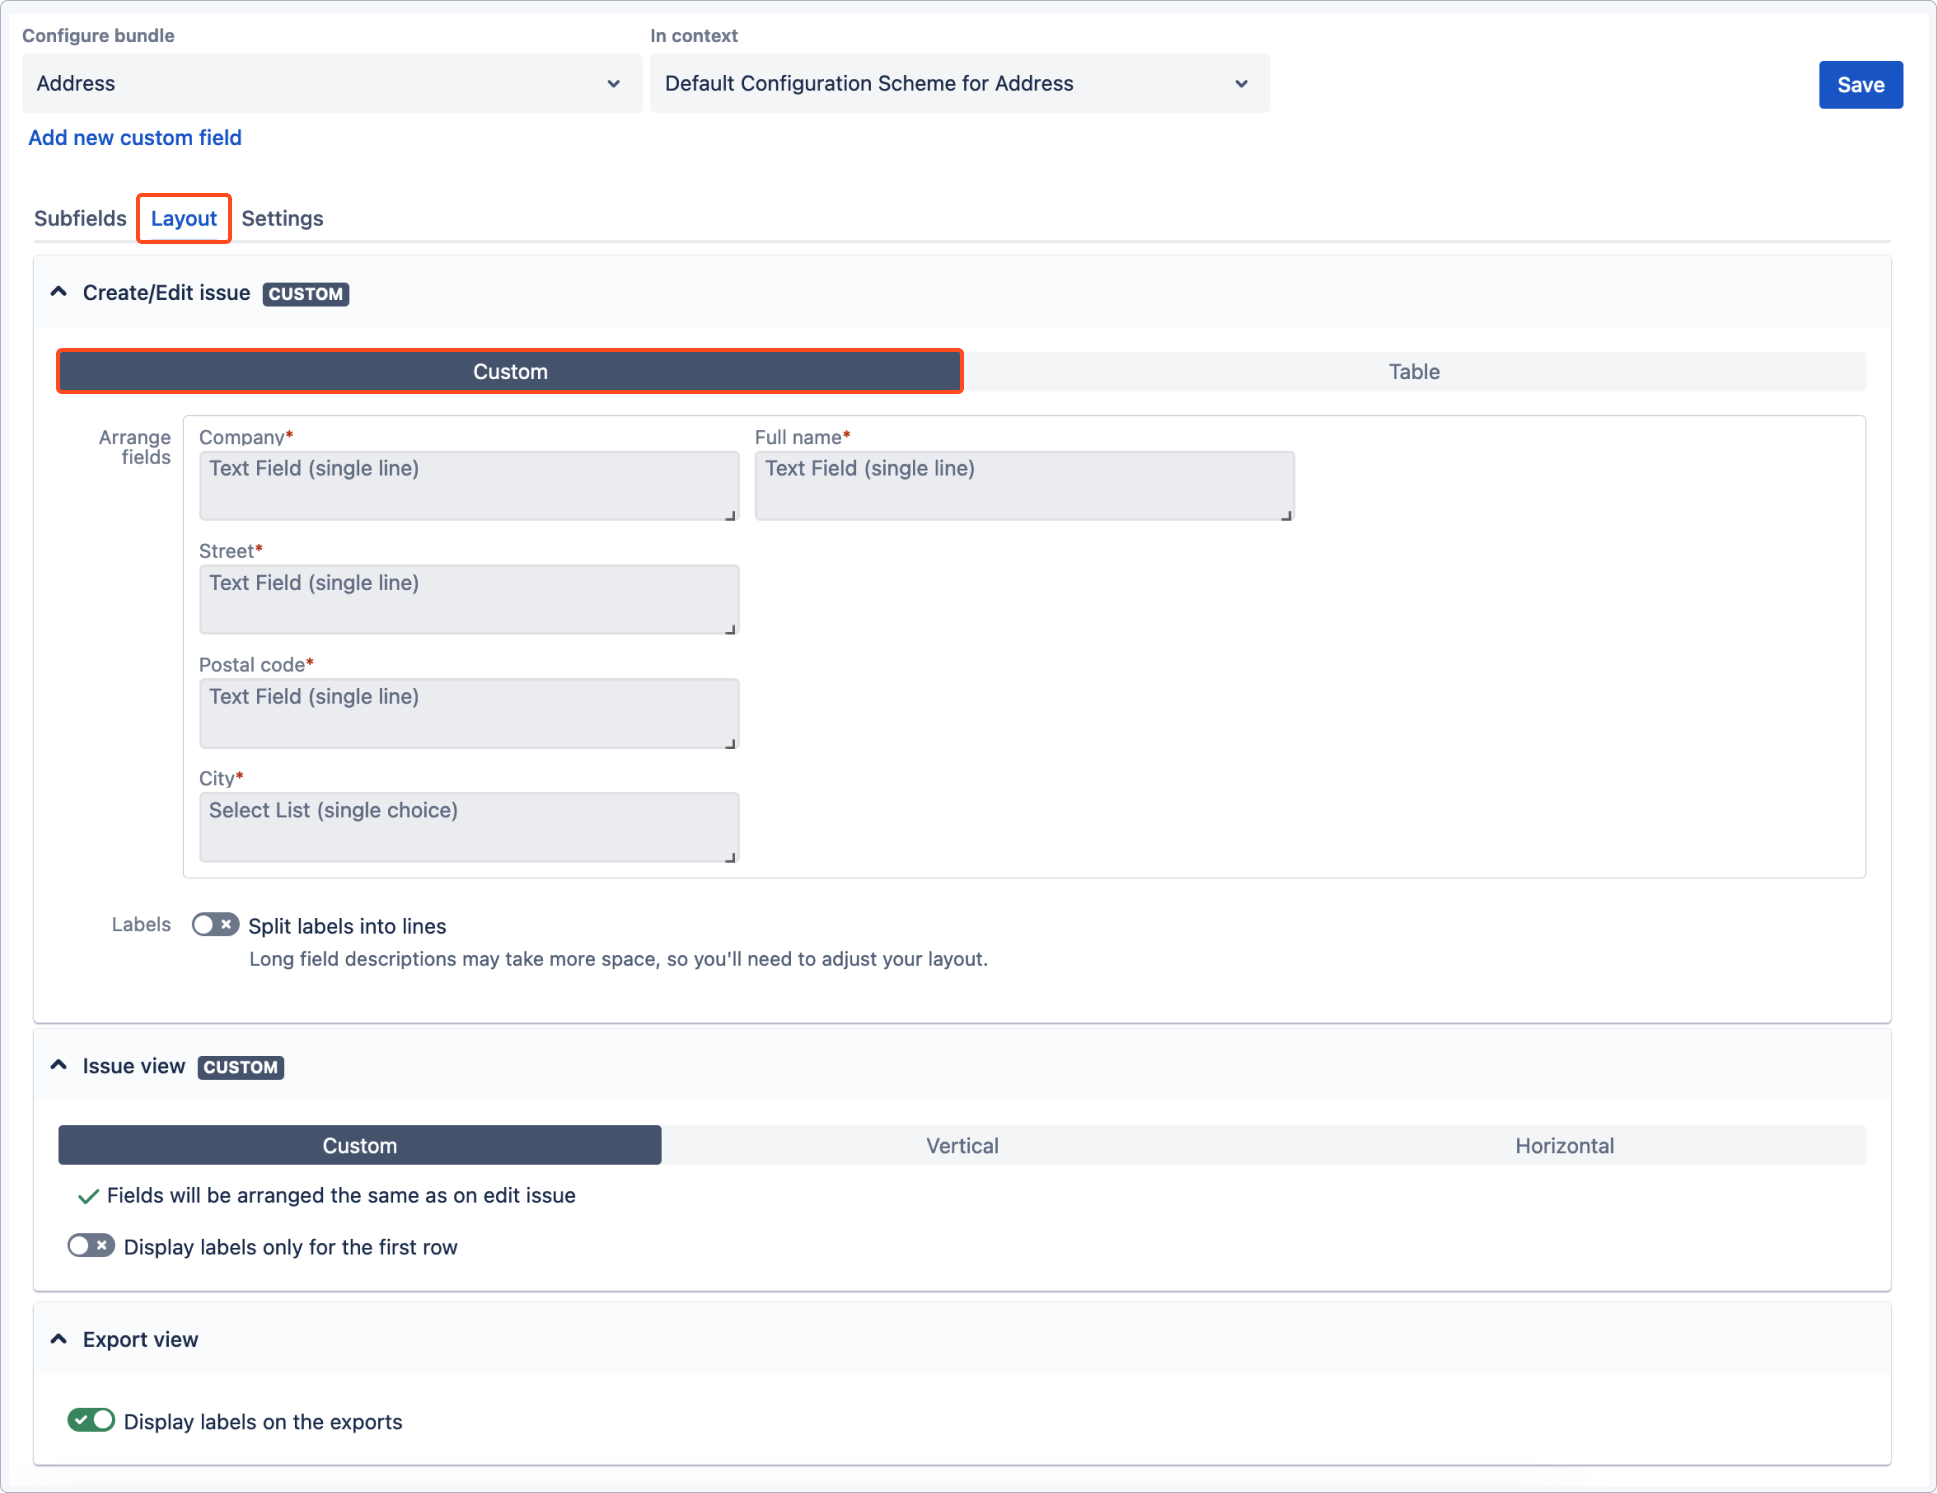
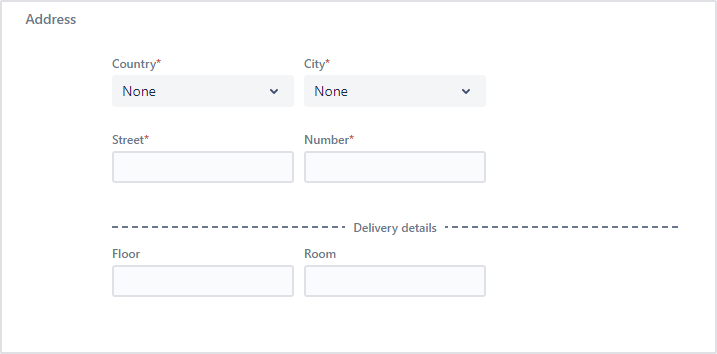
The second configuration tab lets you decide how the subfields will be displayed on your form. You can reorder them, change their size, or place short fields next to each other to save some space.
You can rearrange the fields simply by dragging and dropping them within the Layout tab:
Custom Layout
- used on the Create Issue and Edit Issue views
- saves space on the form
- highly customizable
- the order of fields is defined in the Layout
Table
- Enables a table view to display a bundled field in this form
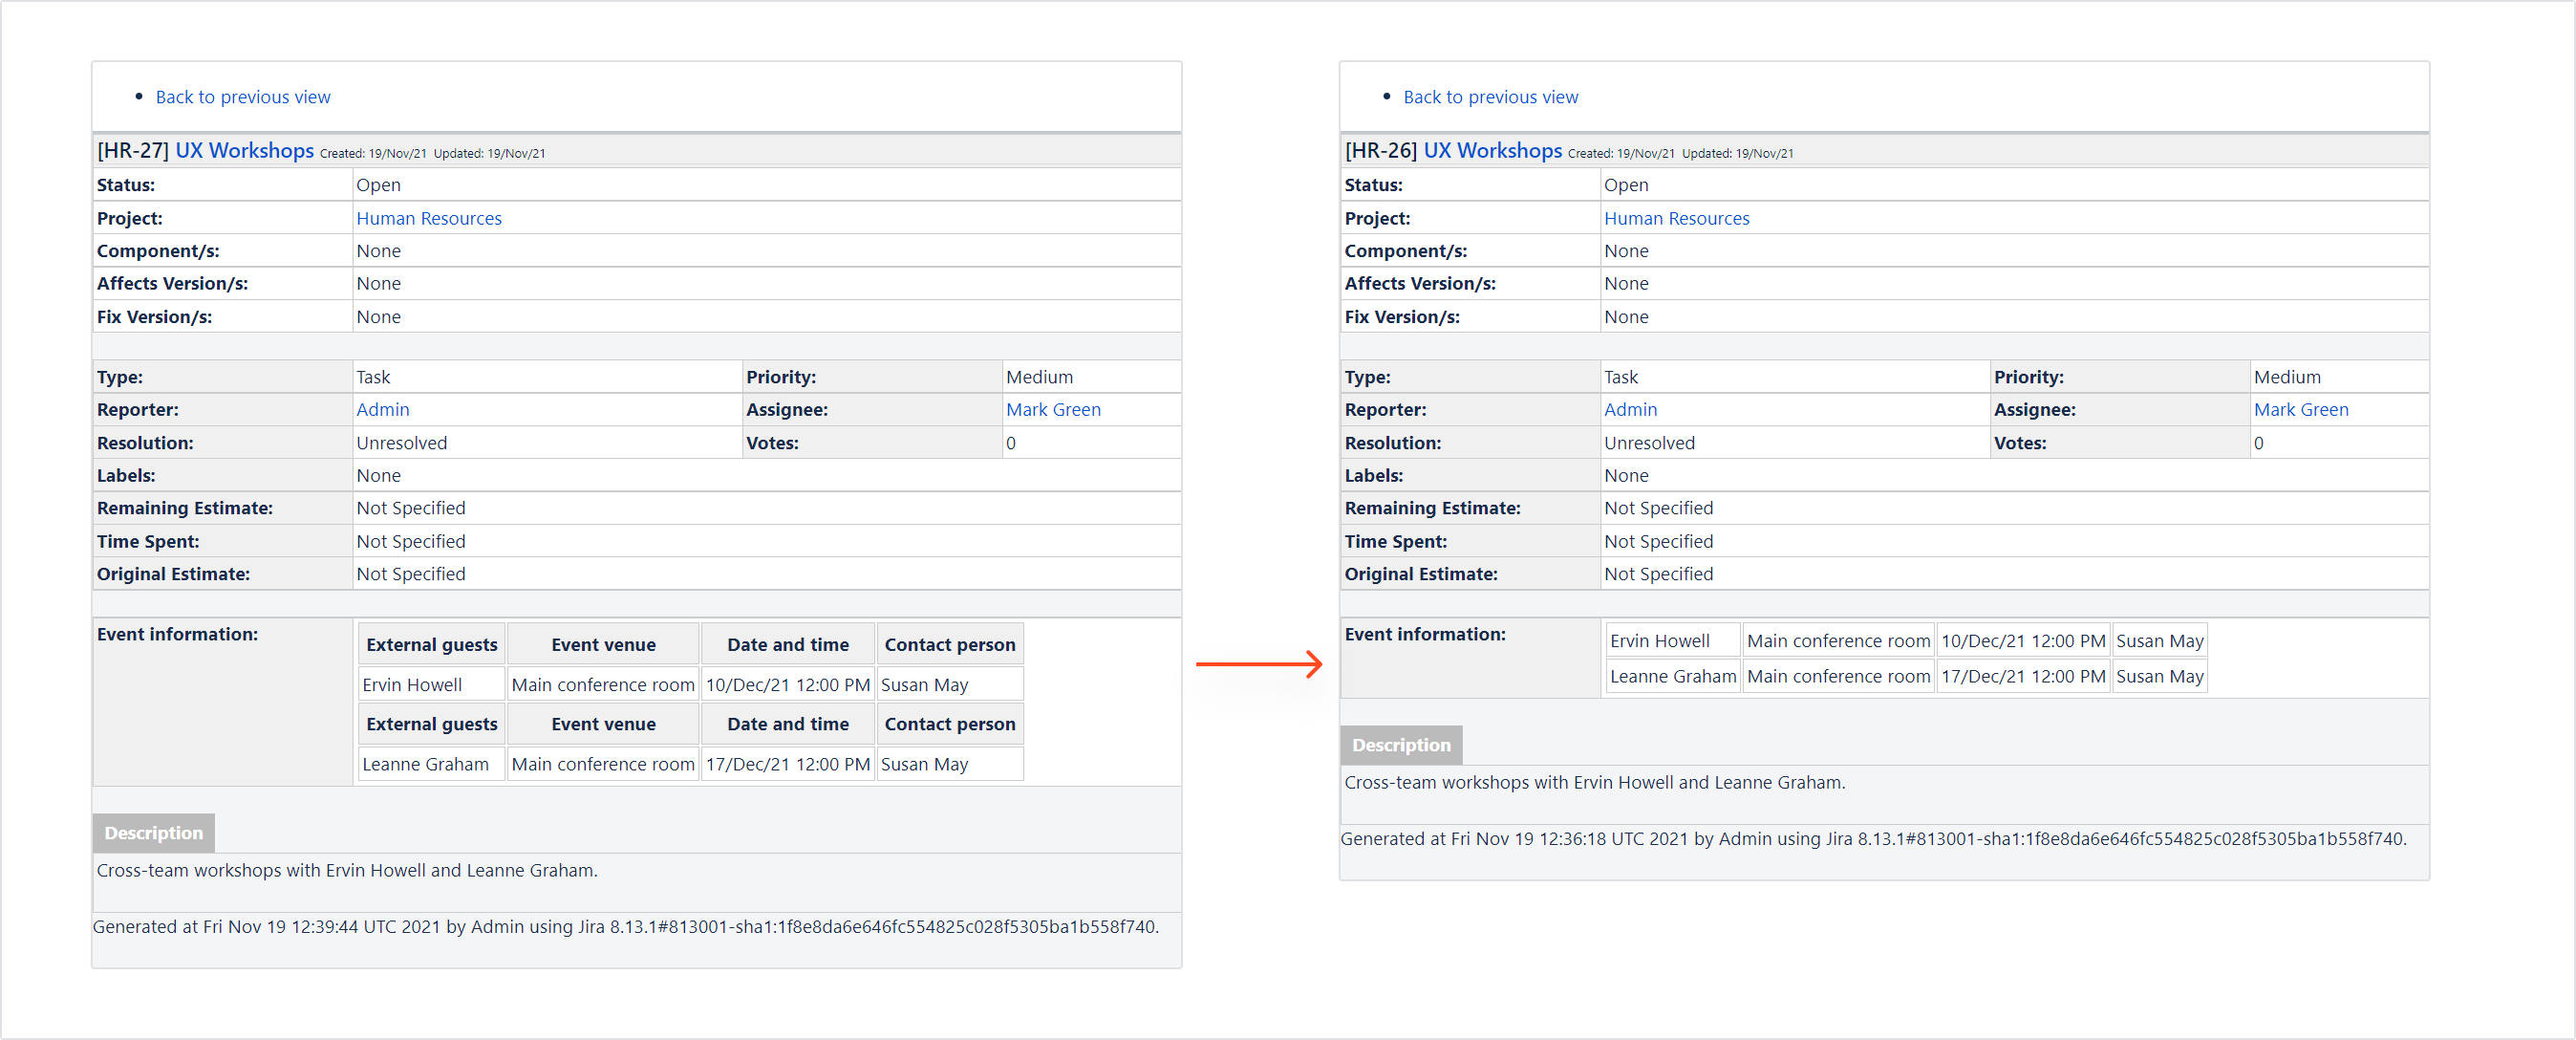
Vertical
- available only for the Issue View
- looks like a list
- easy to read
- the order of fields is defined in the Subfields tab
Horizontal
- available only for the Issue View
- looks like a table
- allows for data exports to other file formats
- works best when the Display labels only for the first row option is enabled
- the order of fields is defined in the Subfields tab
Display labels only for the first row
This option is particularly useful when you build a table with many rows. This way the label will only be displayed once, at the top of the column.
Display labels from exports
Turn on the toggle to remove labels in Bundled Fields data exported to tables of the following formats:
- Printable
- HTML
- Word
Split labels into lines
By default, long text labels get wrapped to fit the subfield’s length. The remaining part of the too long label text is then only displayed on hover. To display the full text of your label on the form, you can enable the Split labels into lines option and see the label text in several lines.
When you drag and drop a field, it doesn’t automatically expand the form. If you’d like to put a field between two other fields, you’ll need to move them apart, so that there is enough white space between them.
Settings
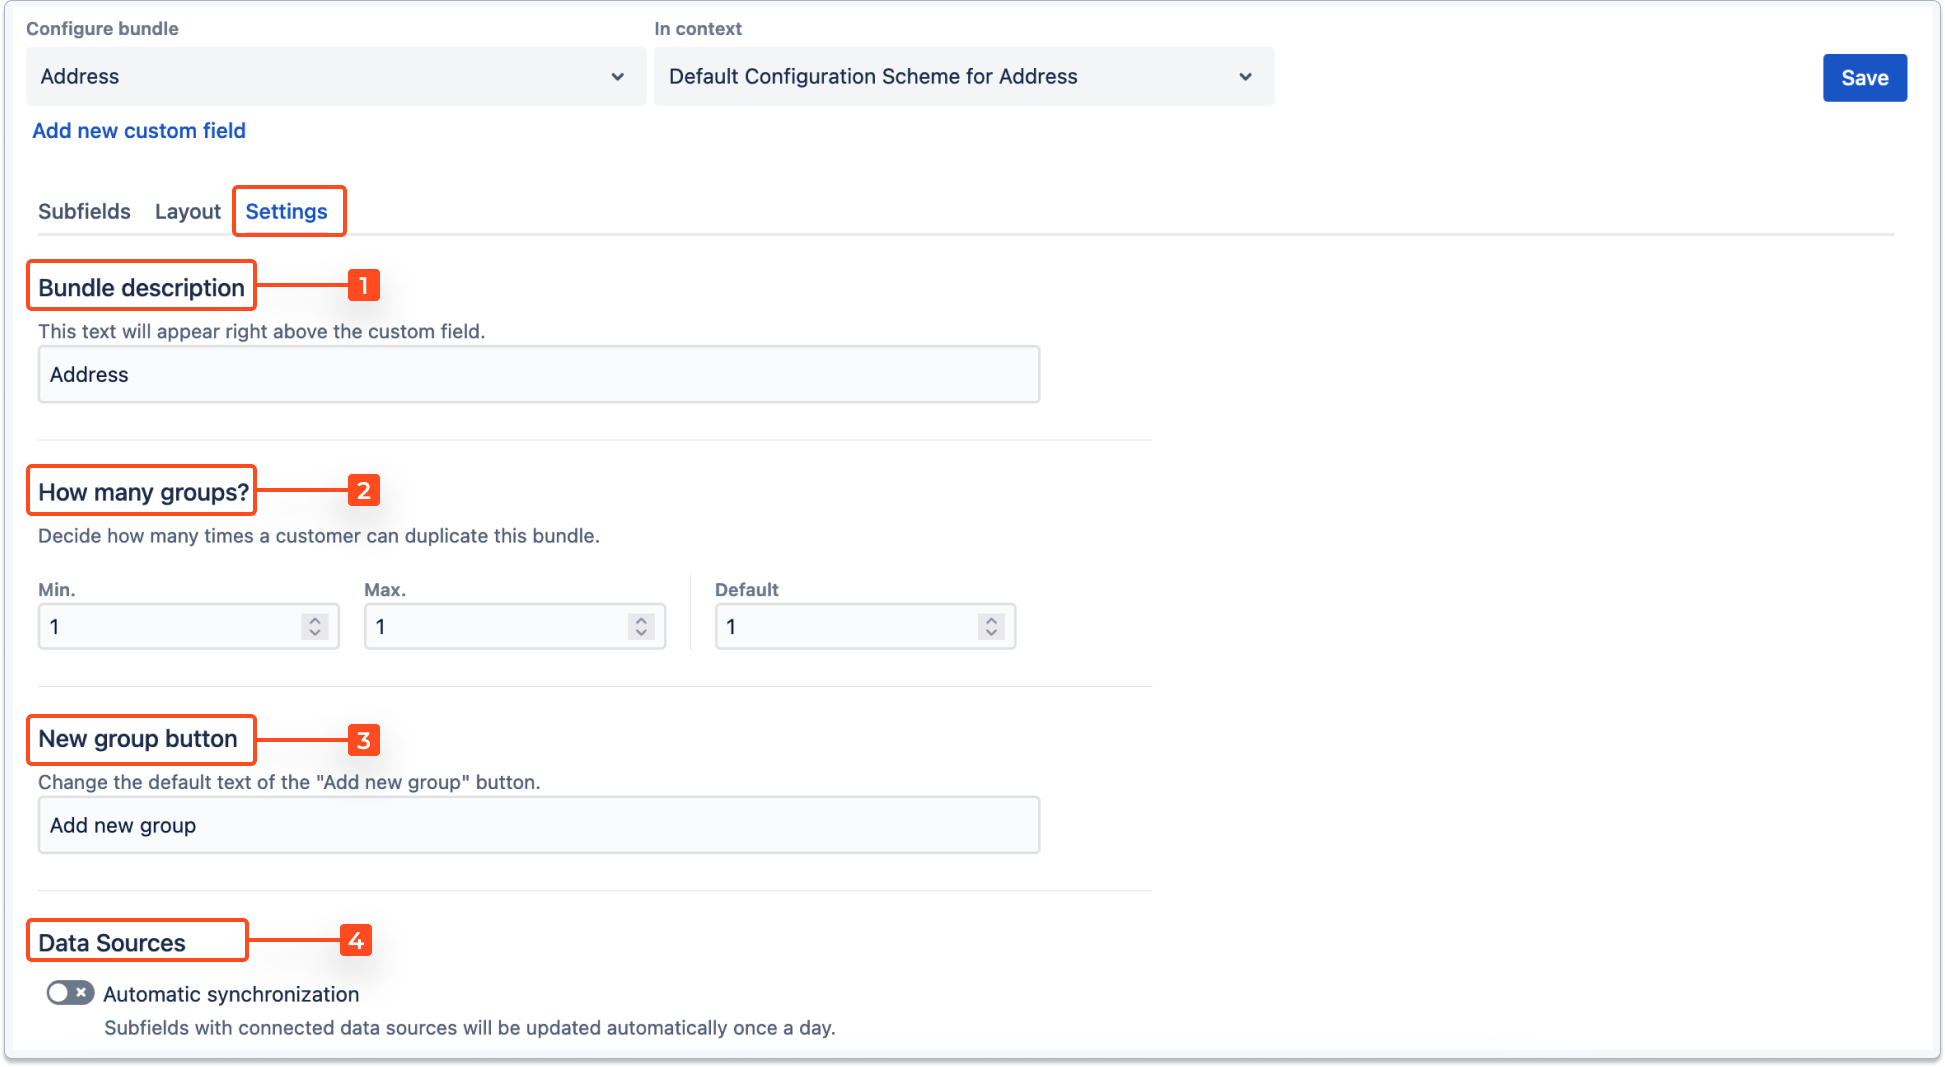
In the third tab you’ll be able to further improve your Bundled Fields. Scroll down to read the descriptions:
-
Bundle description. You can give your form a name or write a short description for the users. The text will appear right above the Bundled Field custom field in an issue.
-
How many groups. Define how many times your form can be displayed on the Create Issue and Edit Issue screens. There are three parameters available:
- Default number of groups: Choose a default number of Bundled Fields groups. For example, if you select 3 groups, your form will be displayed three times (in 3 groups).
- Min. number of groups: The user will not be able to remove any Bundled Fields groups if they reach this number.
- Max. number of groups: The user will not be able to add any Bundled Fields groups if they reach this number.
- Default number of groups: Choose a default number of Bundled Fields groups. For example, if you select 3 groups, your form will be displayed three times (in 3 groups).
-
You can choose a maximum of 35 groups. If you select 0 as the Default number of groups, your Bundled Field will be generated as an empty state.
-
If you select 0 as the Min. number of groups and a user will remove all the groups on the Create Issue screen, all required subfields will be converted to optional.
-
New group button. Here you can change what’s written on the button for adding new groups. In other words, the button lets users multiply a group of subfields and provide a new set of data into subfields of the same type (for example, an alternative address).
To change the label, delete the default Add new group text and type in your own.
-
Data Sources. Turn on the toggle to synchronize subfields with their connected Data Sources once a day. For more information, see Synchronizing options.
Result
A Bundled Field has been configured.
If you can’t find the answer you need in our documentation, raise a support request.

