- Introduction
- About
- Get started
- Functionalities
- Fields Visibility
- Translations
- Tabs Visibility
- Mapper
- Secured Fields
- Supported fields
- Bundled Fields
- Overview
- Bundled Fields Configuration
- Using Bundled Fields
- JQL Searcher
- Java API (ScriptRunner)
- Data Sources
- Email notifications
Synchronizing options
Learn how to synchronize options with a data source
Let’s test how objects of a JSON collection can be used as options in a select list. We’ll import a list of users from a JSON file. Then, we’ll display them in Jira in a Bundled Fields subfield of the Select list (single choice) type.
In this chapter we use exemplary data provided by the JSON Placeholder page. We’ve chosen this example: https://jsonplaceholder.typicode.com/users
Adding the data source
Steps
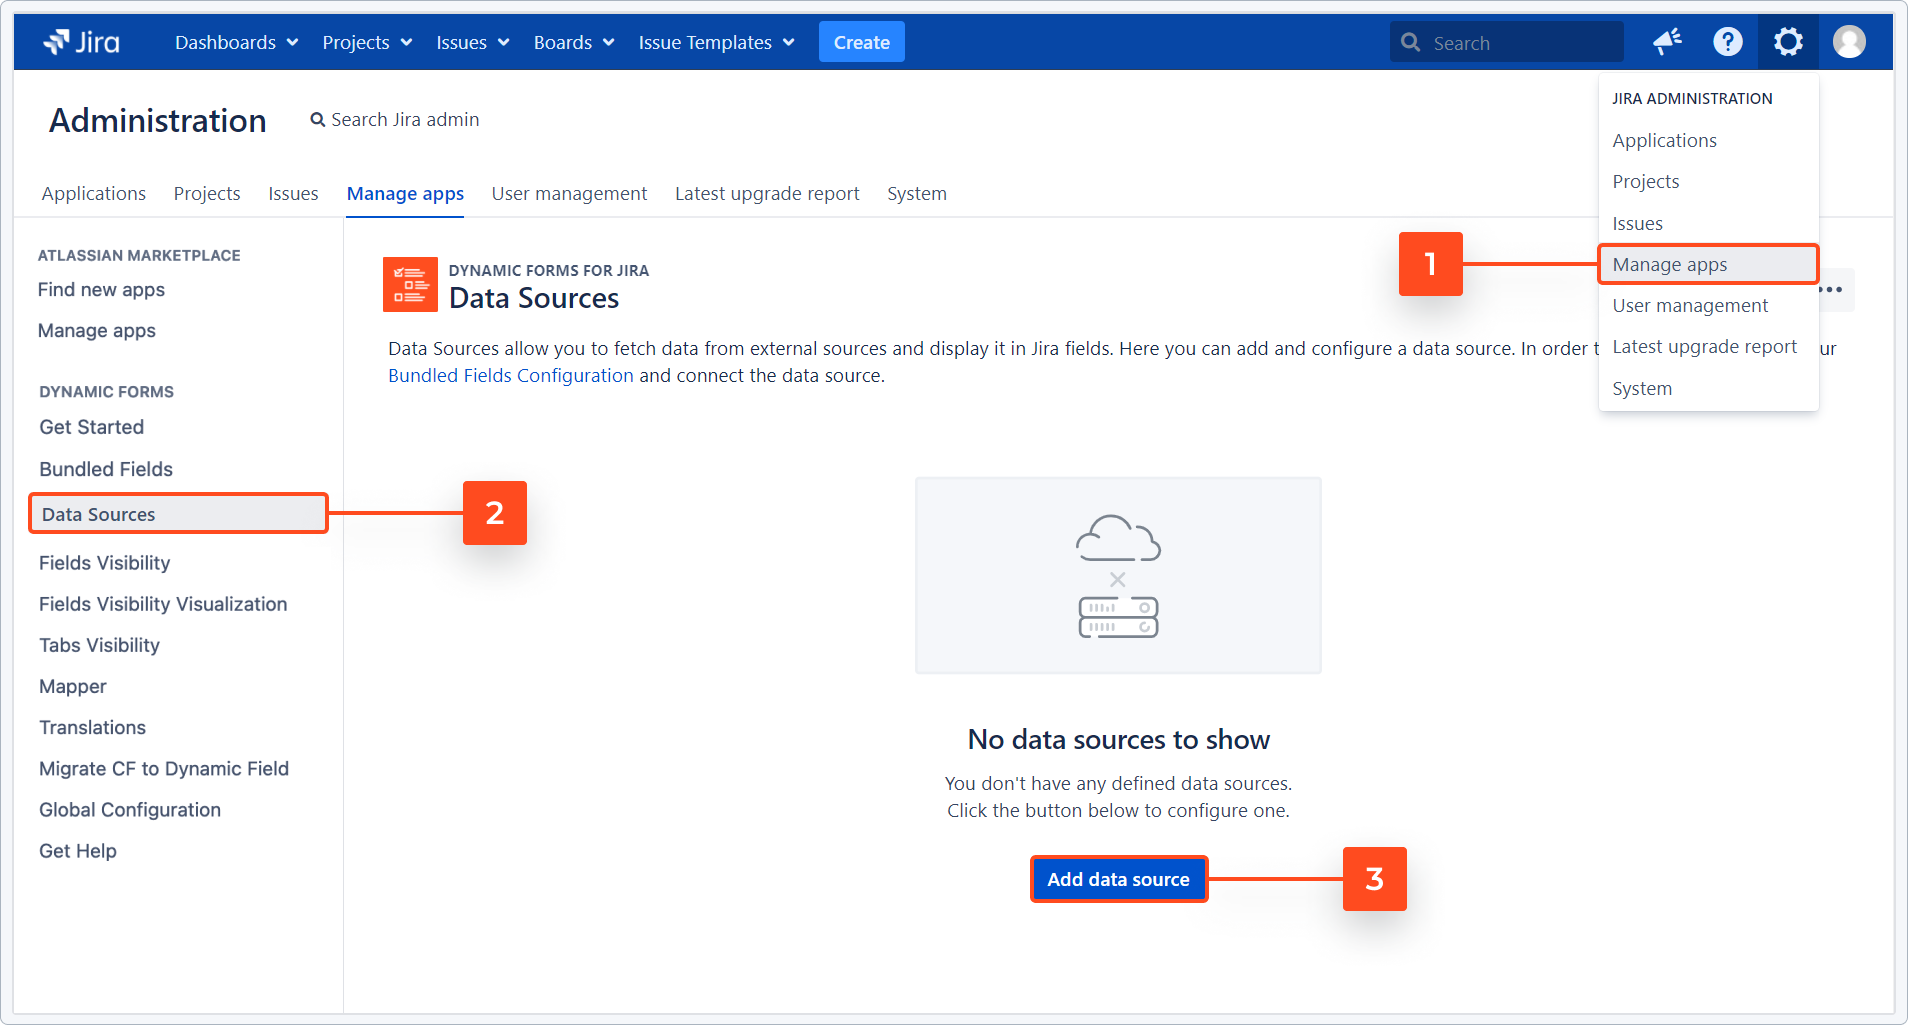
- Go to Jira Administration > Manage apps.
- Select Data Sources from the Dynamic Forms app navigation.
- Click Add data source.
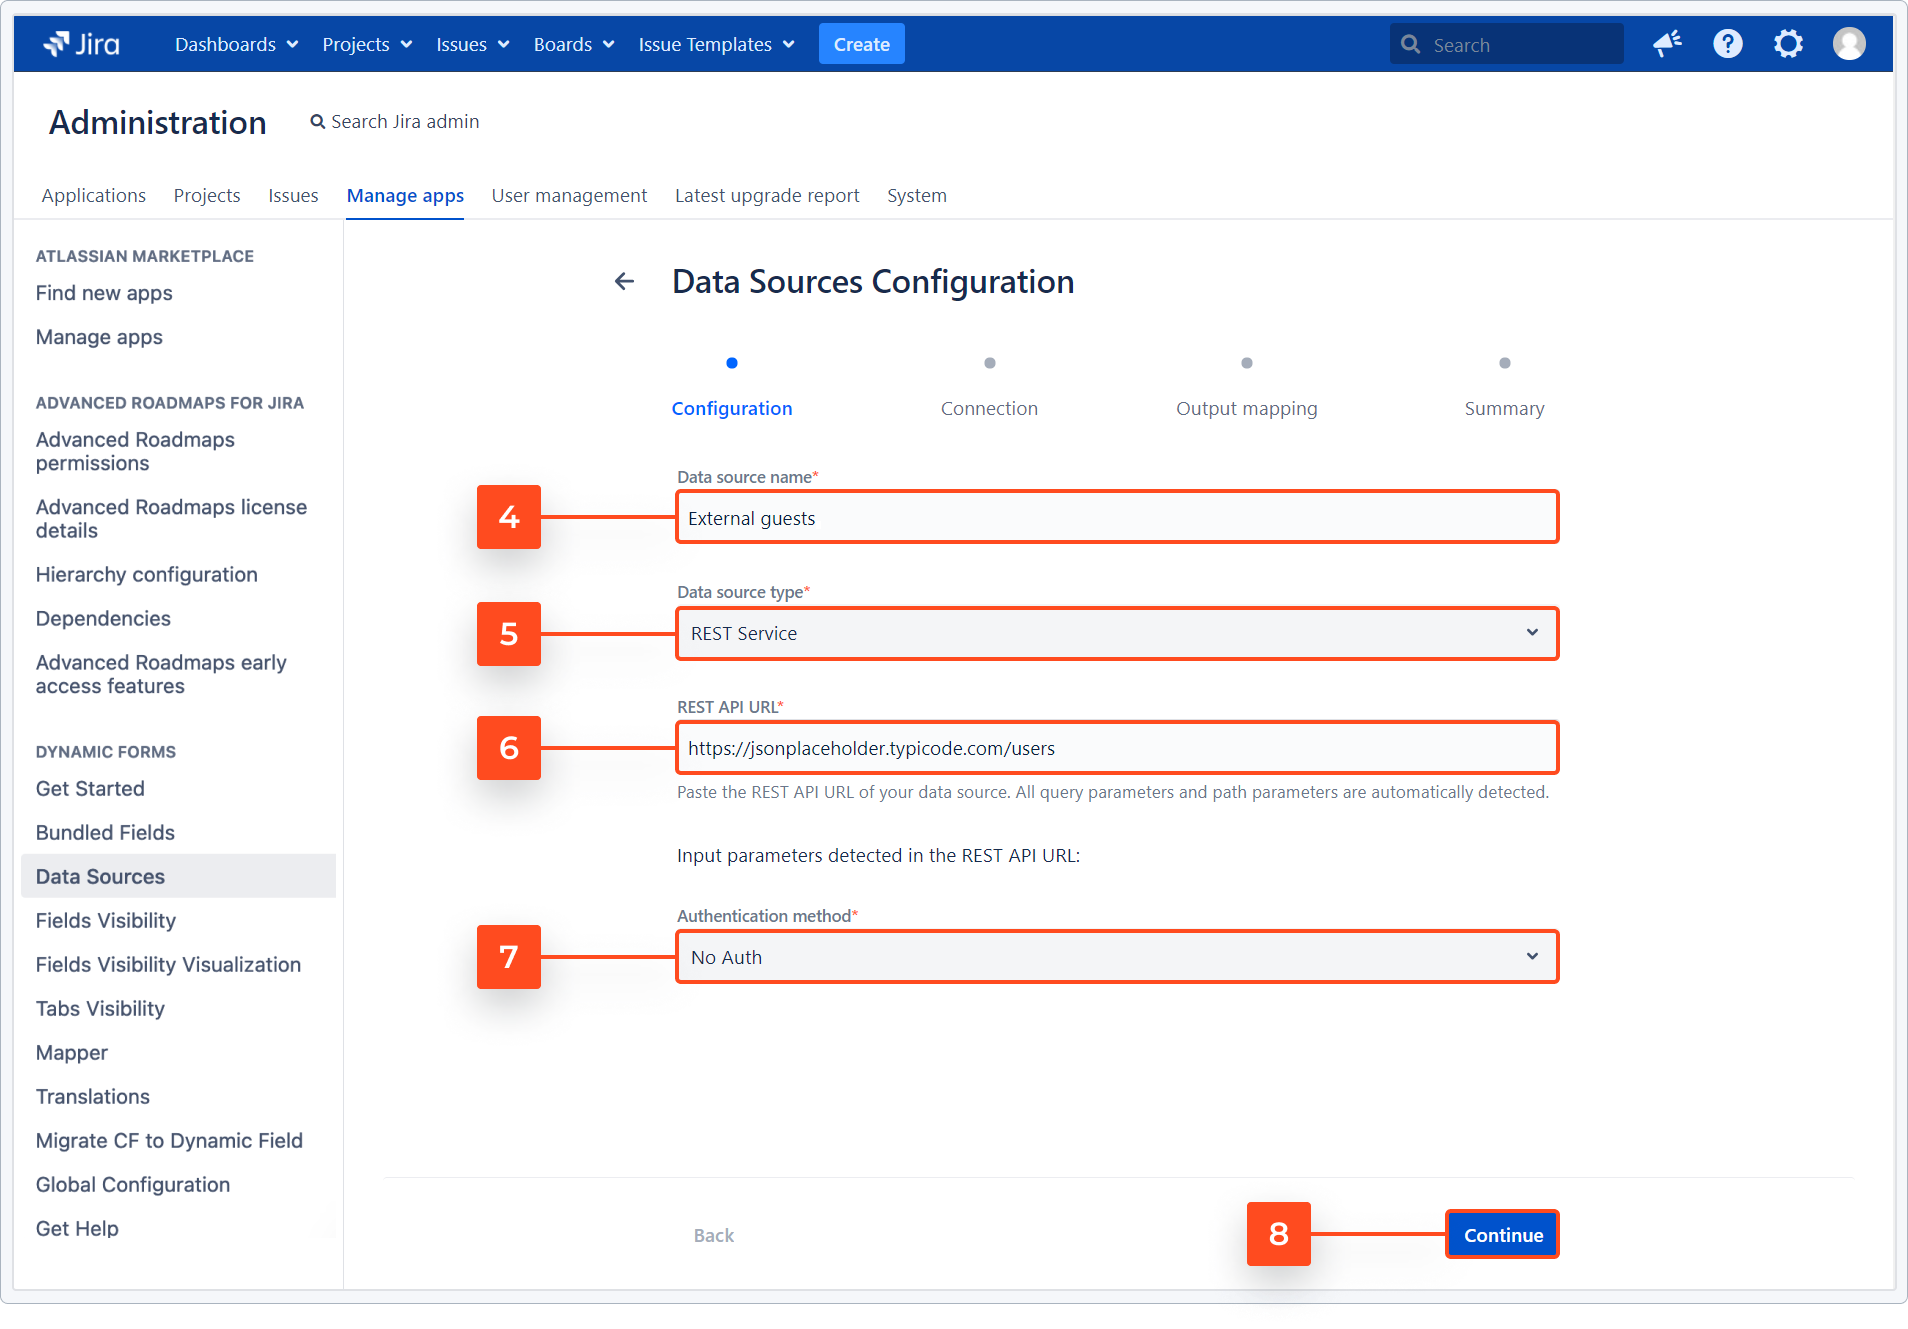
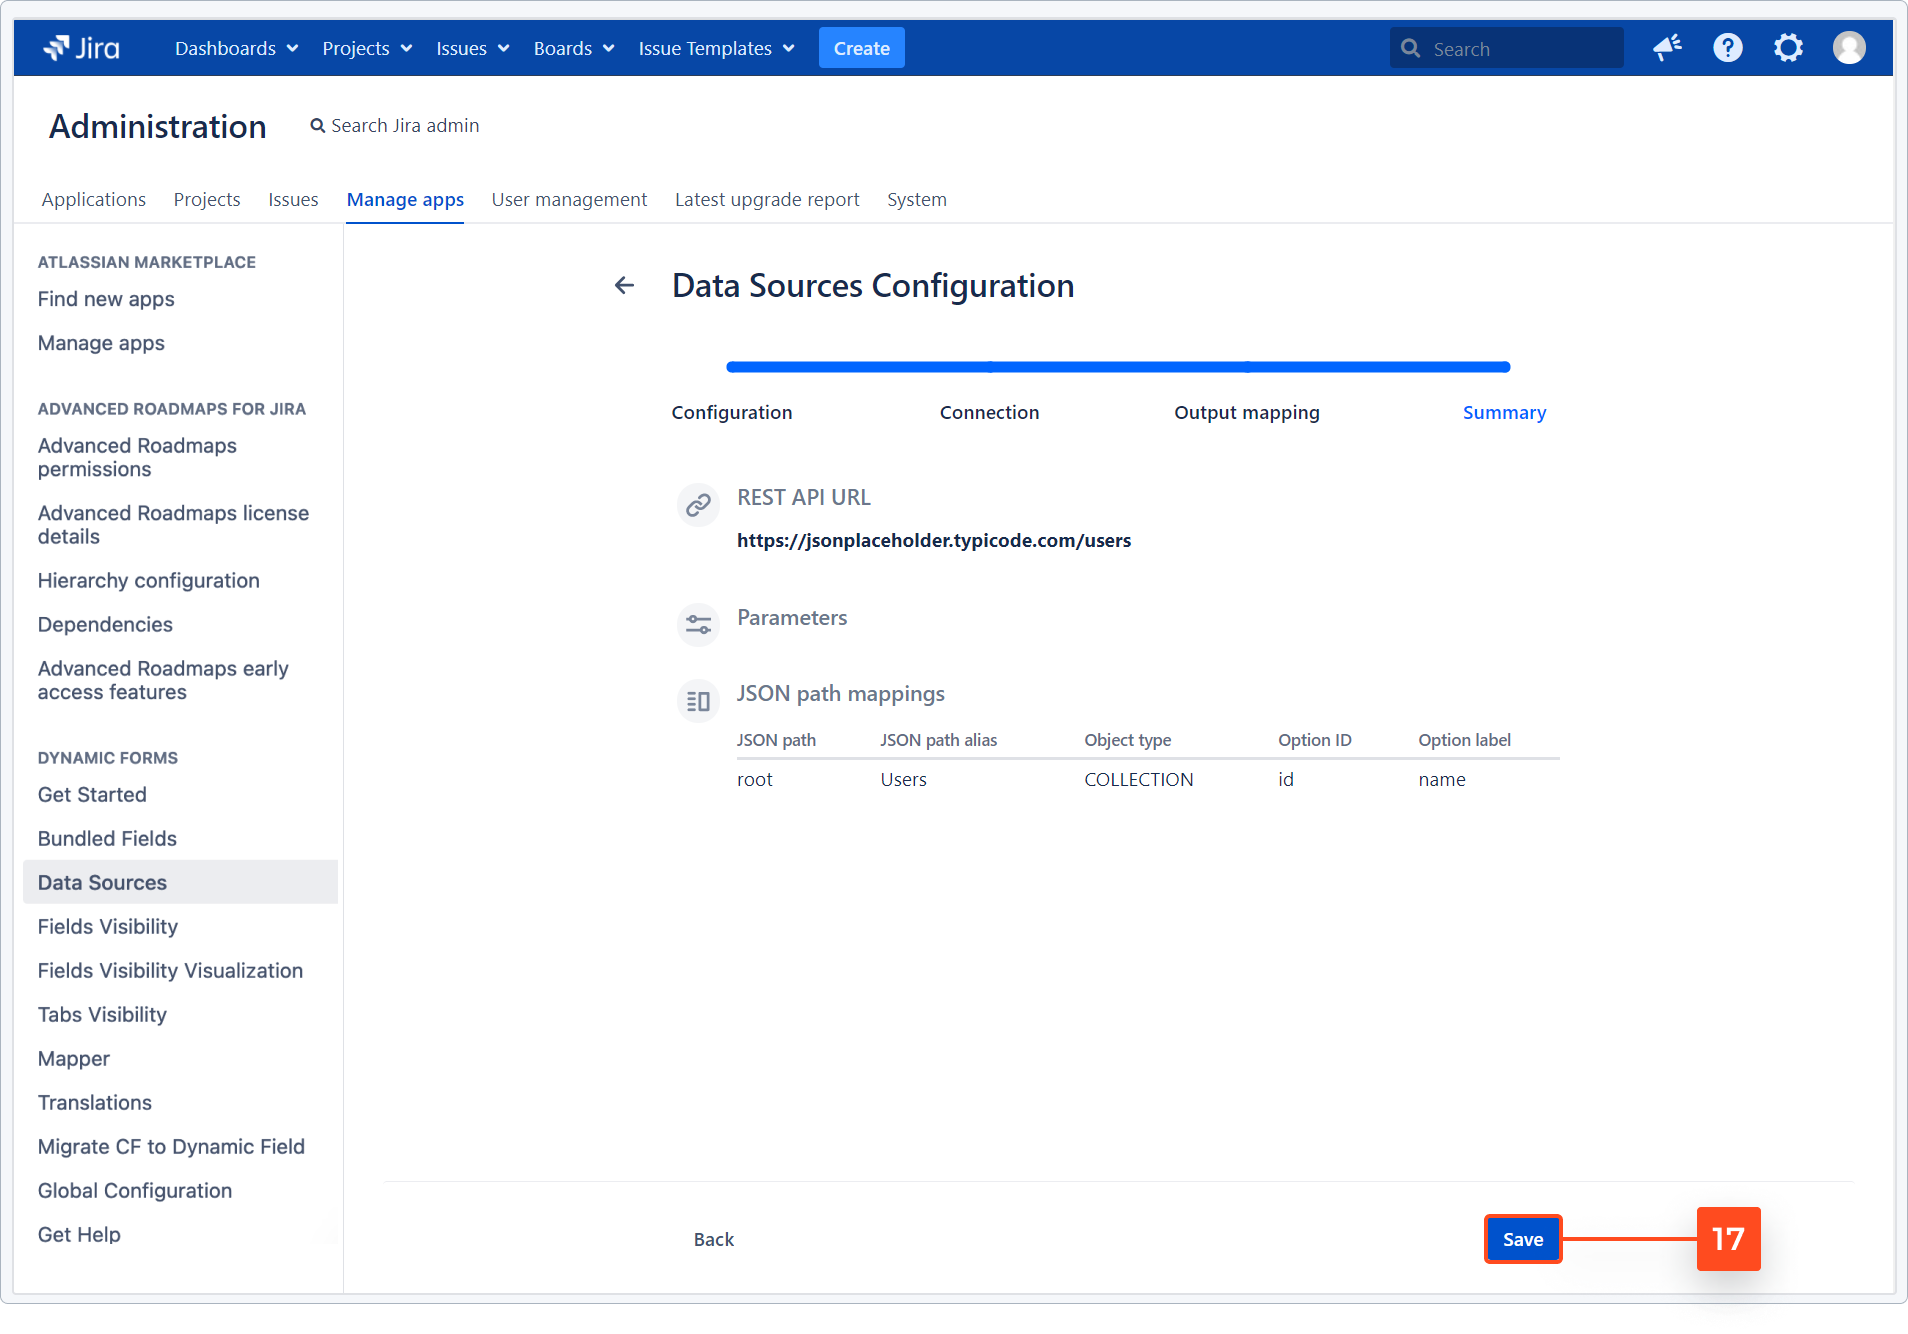
- Add a Data source name, in our case > External guests.
- Choose the Data source type > REST Service.
- Paste the REST API URL > https://jsonplaceholder.typicode.com/users
- Select the Authentication method > No Auth.
- Click Continue.
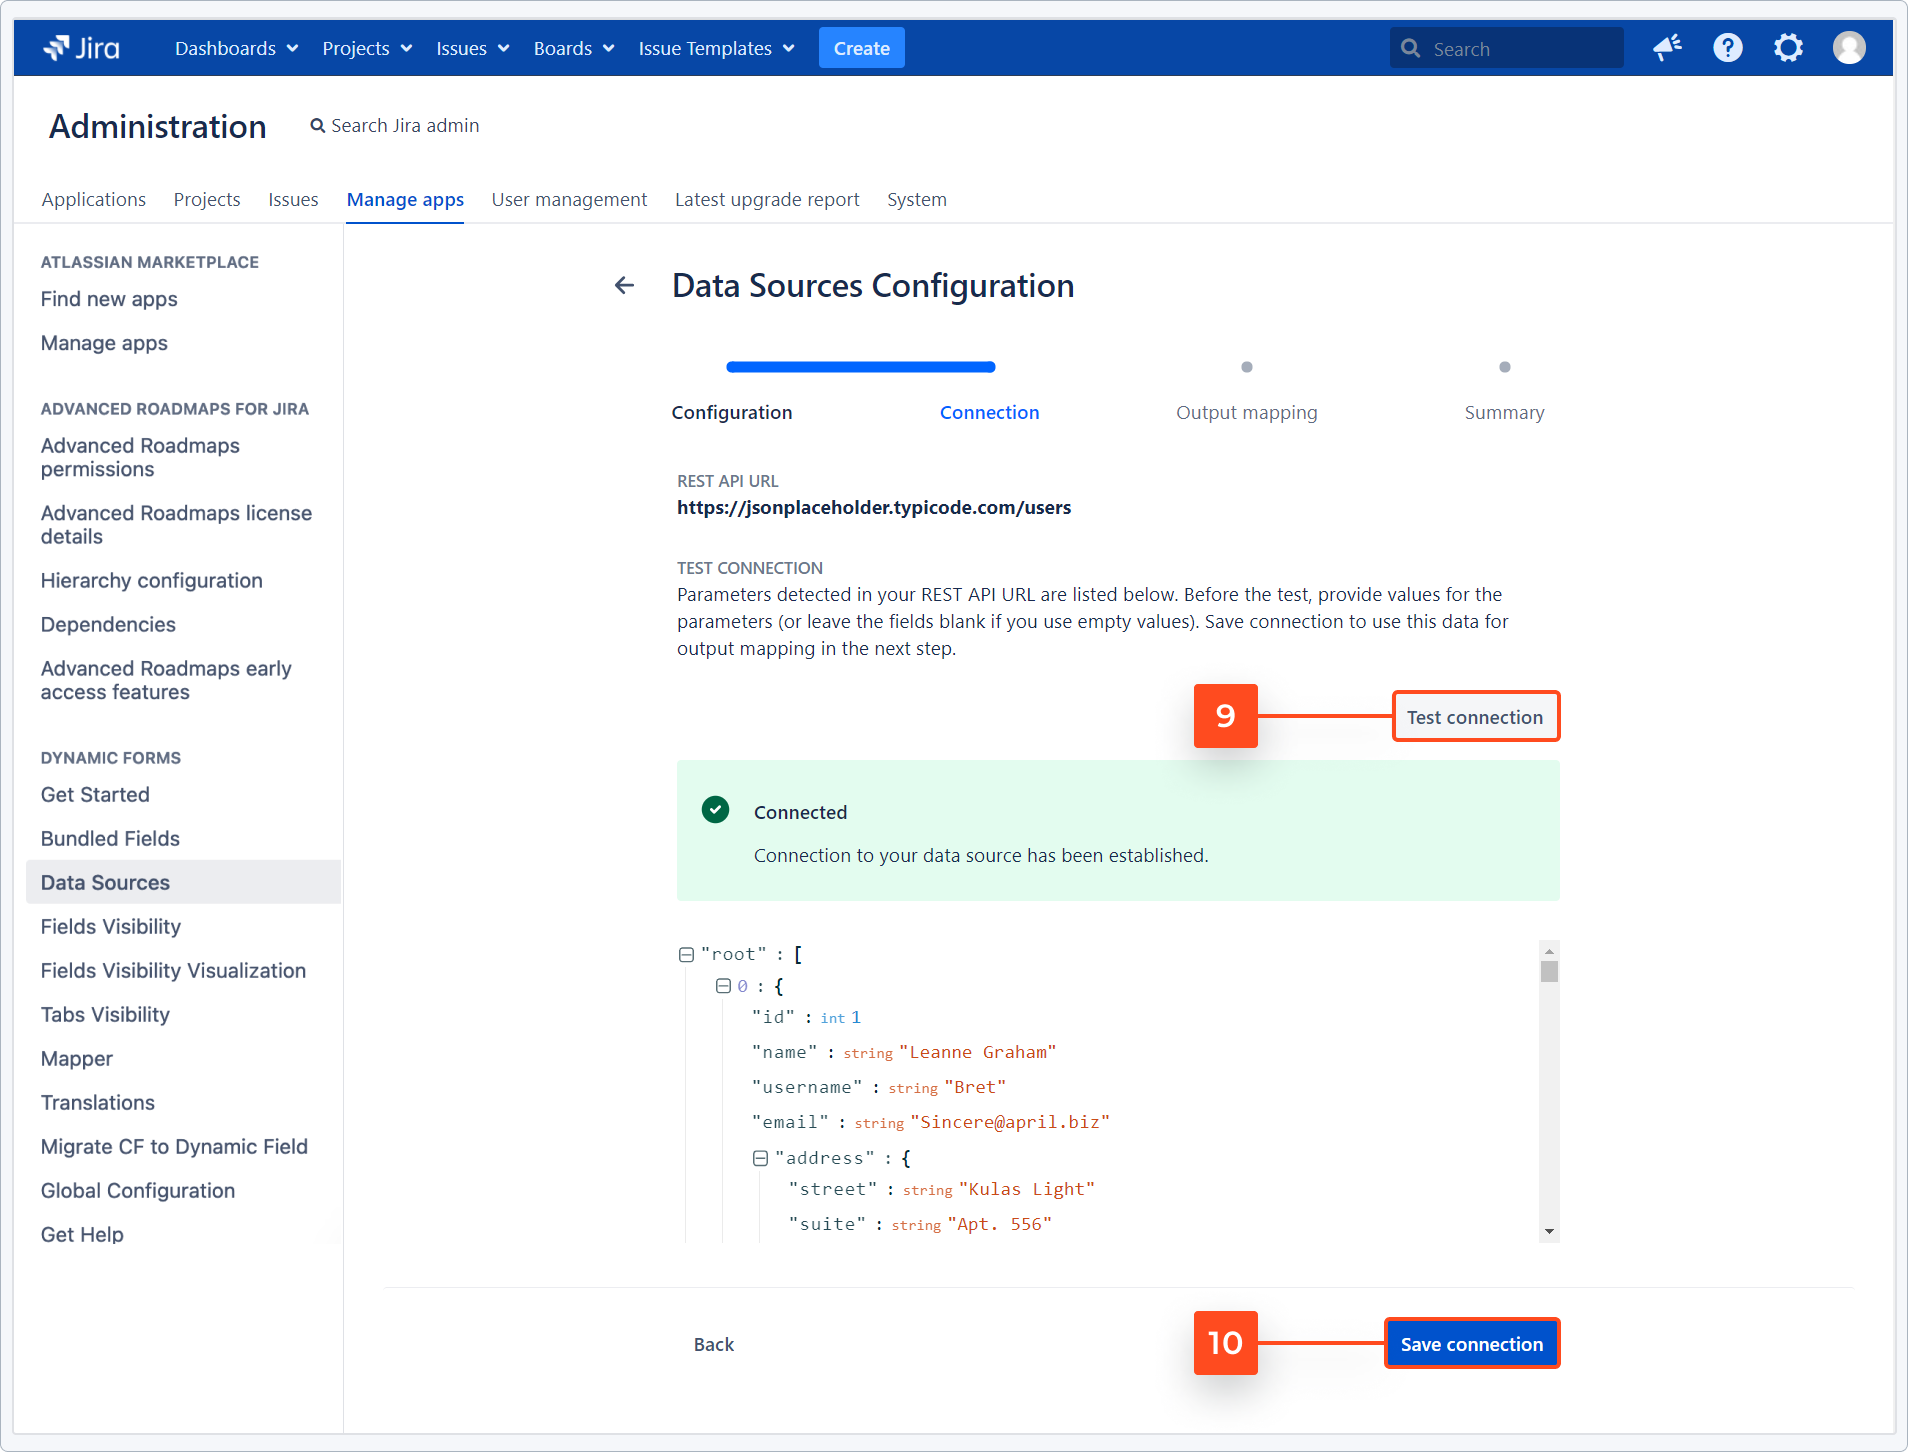
- Click Test connection.
- After receiving a confirmation, click Save connection.
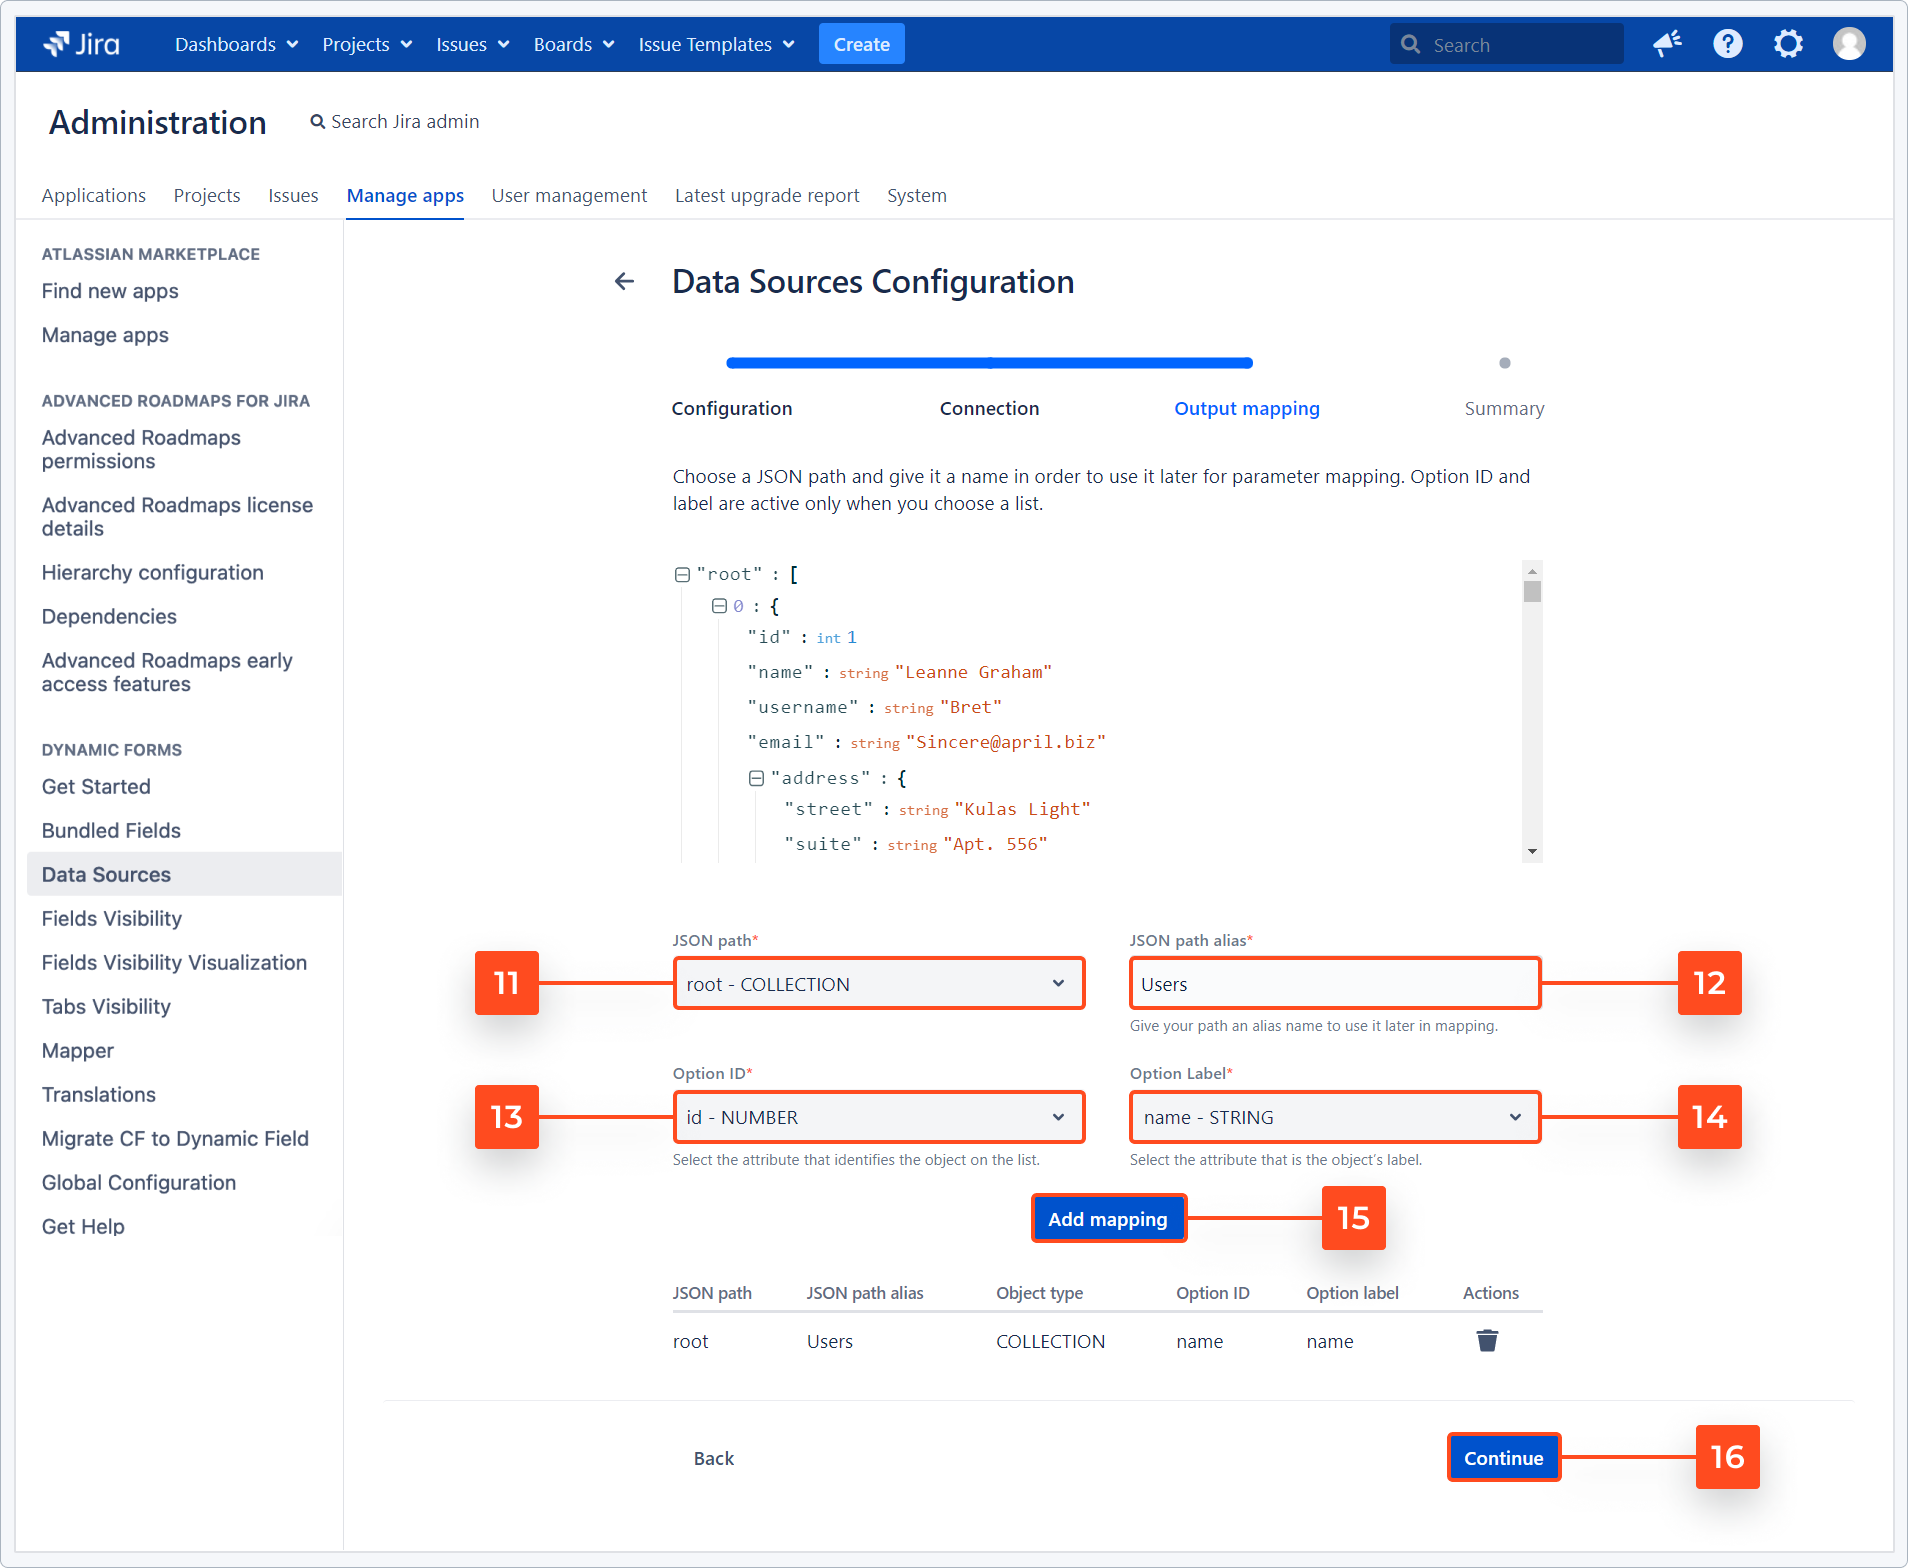
- Select a JSON path to be mapped > root - COLLECTION.
- Provide an alias name for your JSON path > Users.
- Select the option ID (the attribute that identifies the object on the list) > id - NUMBER.
- Select the option > name - STRING.
- Click Add mapping.
- Click Continue.
- Click Save to confirm creating the data source.
Result
The data source is added to the Data Sources list.
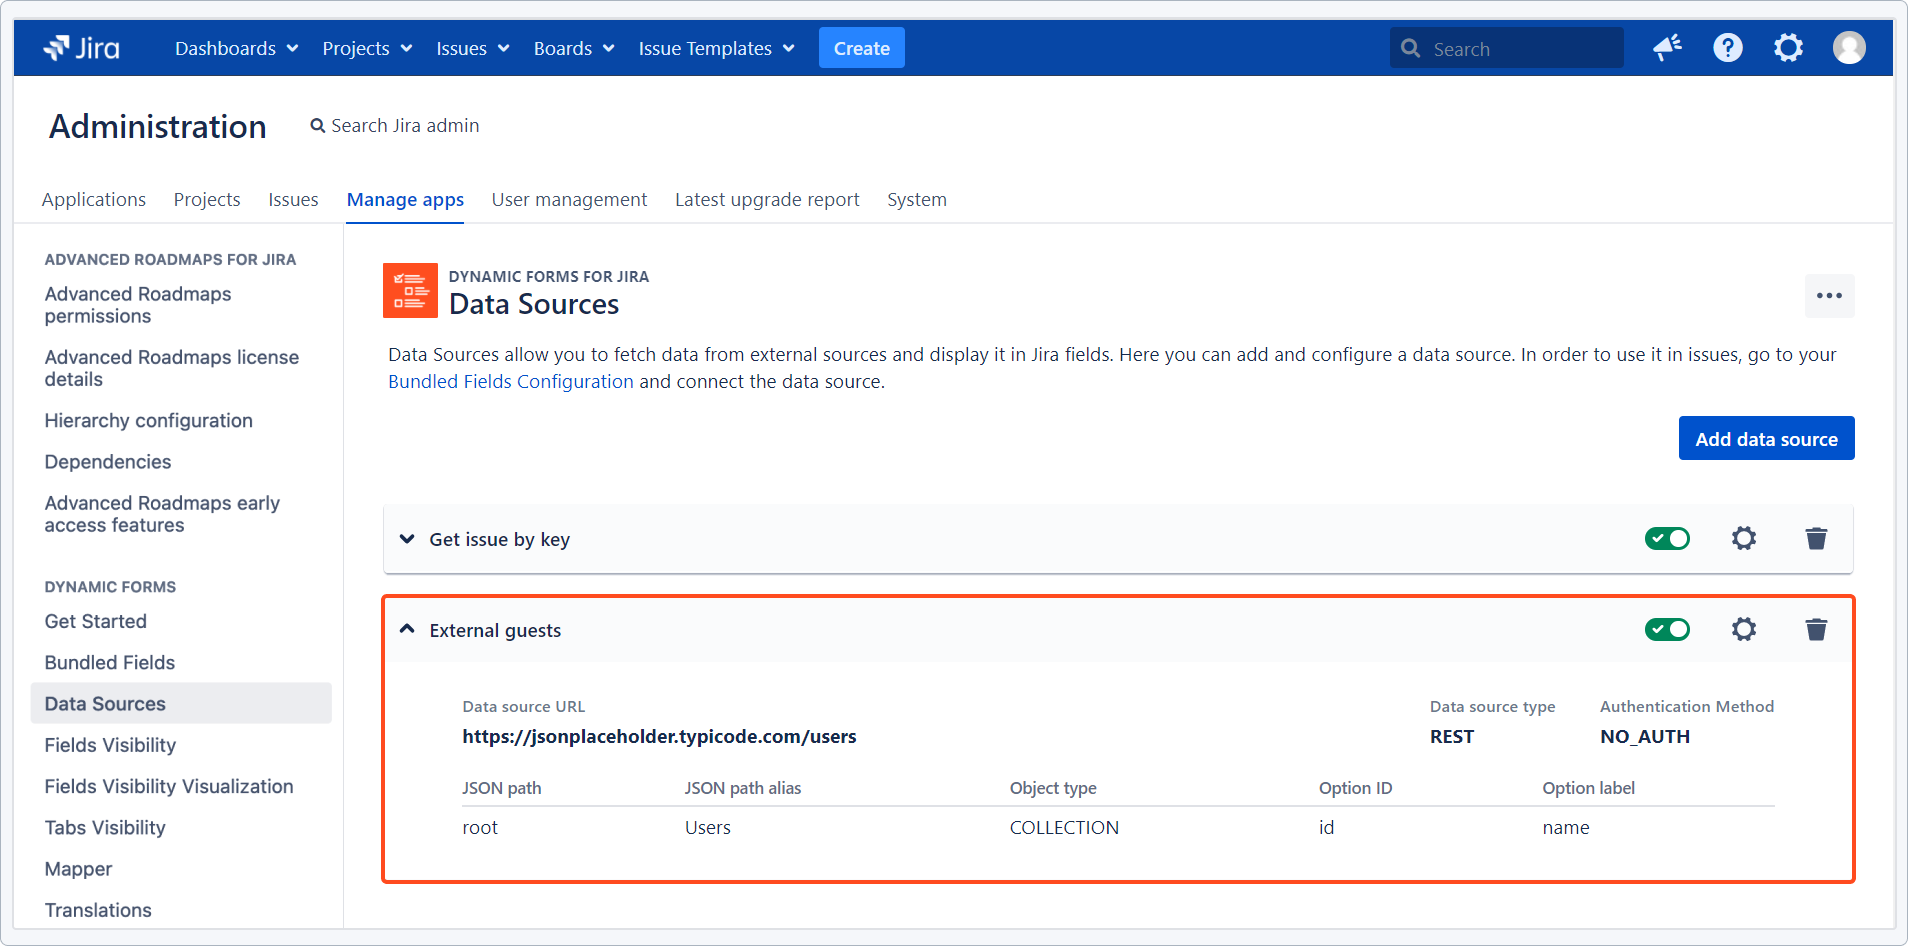
Options get automatically synchronized with the data source right after establishing the connection. Learn more about possible ways of further synchronization below.
Connecting the data source
Steps
- Select Bundled Fields from the Dynamic Forms app navigation.
- Create a new Bundled Fields custom field and name it, for example, Event information.
- Add a subfield that will contain your list of users > type: Select list (single choice), name: External guests.
- In the three dots menu, click Connect data source.

- Choose your data source > External guests.
- Choose a list from your data source > Users.
- Click Save.
- Save the changes to your Bundled Fields configuration.

Result
Your data source is connected to the subfield. Options in the select list synchronize with the JSON collection of users:
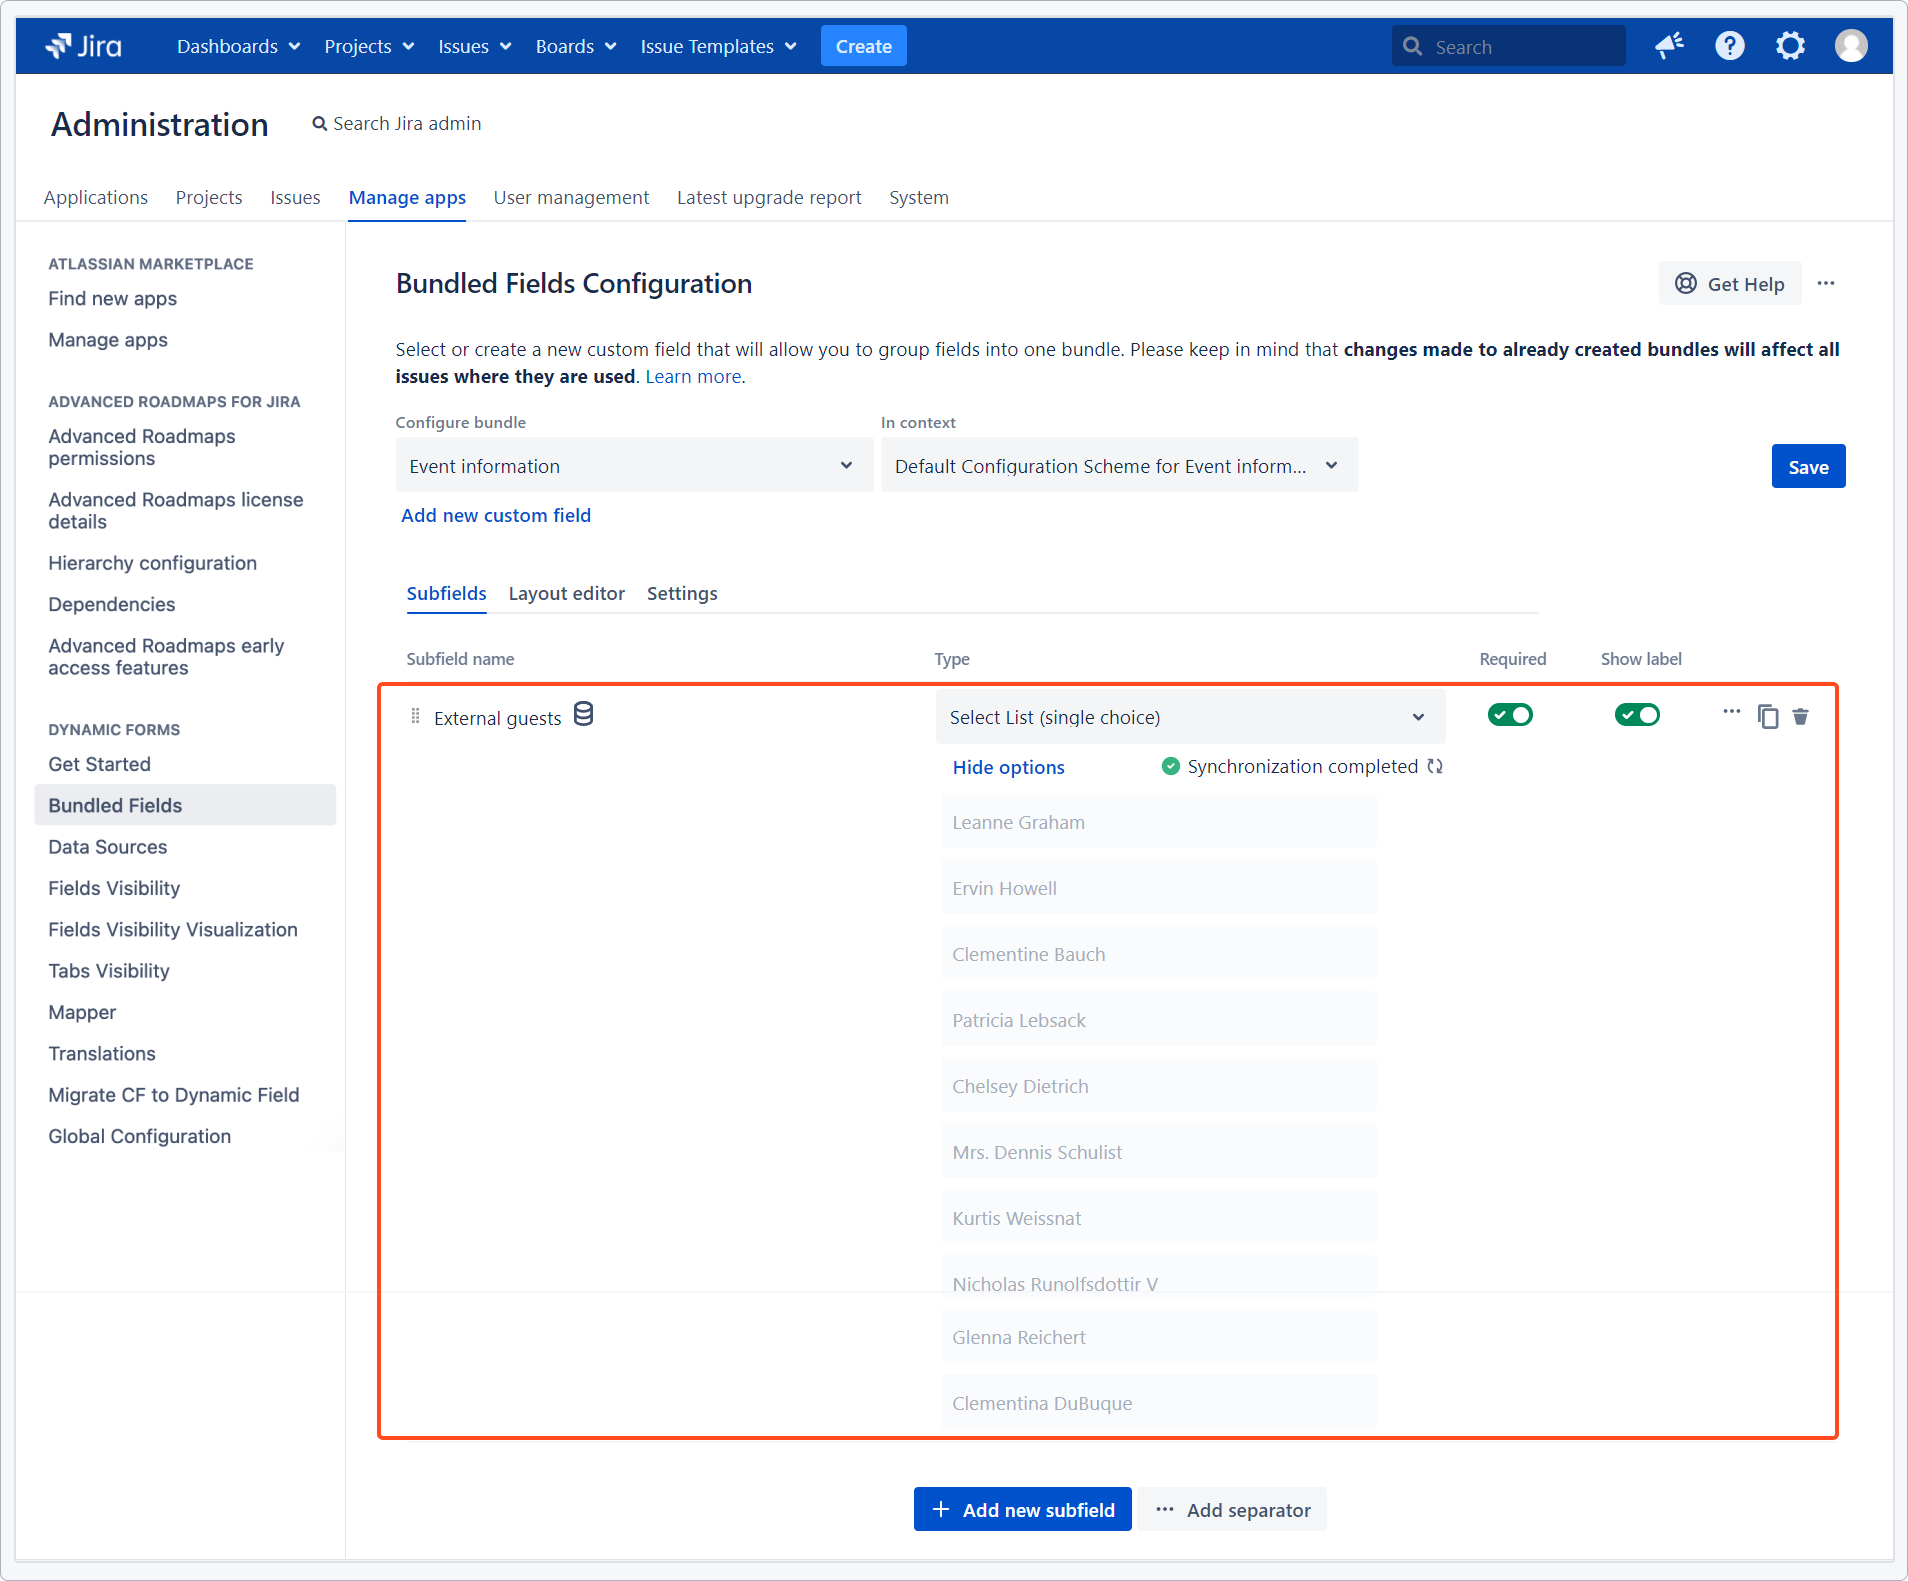
The synchronization happens after saving changes to the entire Bundled Fields configuration.
Displaying the data source
Add the newly configured Bundled Field to your chosen screen and it will display the list of external users as a select list:

Synchronization
You can choose from three ways of synchronizing options in subfields connected to a data source:
- No synchronization (default)
- Manual synchronization
- Automatic synchronization
No synchronization
By default, the options won’t be synchronized unless you take an action. This prevents overwriting the options unexpectedly and any other errors caused by changes in the external data source, while the data is already displayed in Jira issues.
Manual synchronization
Click Synchronize under the subfield type to update the subfield with the current state of your data source:

This action will only synchronize the options once. To set up periodic updates, turn on the automatic synchronization.
Automatic synchronization
You can configure your subfield to be synchronized once a day.
In order to enable it, go to Bundled Fields > Settings and turn on the toggle next to Automatic synchronization:

Follow up
- Overview
- Adding a data source
- Connecting a data source
- Updating a data source
- Bundled Fields Configuration
If you can’t find the answer you need in our documentation, raise
a support request.
Include as much information as possible to help our support team resolve your issue faster.