- Configuration
- First steps
- Project setup
- Sample templates
- Migration to Cloud
- Supported fields
- Permissions
- Jira Service Management
- Template management
- Create a template
- Template configuration
- Variables
- Template Navigator
- Delete a template
- Use as a template
- Set of Fields - advanced features
- Using template
- Autocomplete
- Default Template
- Apply template
- Use Template in Jira Automation
- Automatic create and close
- JQL Searchers
- Direct links
- Create Structure post function
- About Create Structure
- Create Structure configuration
- App integrations
- REST API
- ScriptRunner and Groovy scripts
Use as a template
Learn how to convert an issue into a template
Use as a template allows you to create a new template from an existing issue. You can also create a template from a template - in this case the feature is called Duplicate template but it works the same.
Creating a template from an issue
You can use a regular Jira issue in any project or one of your existing templates.
Steps
To create a new template from an existing issue:
- Open the issue that should become a template.
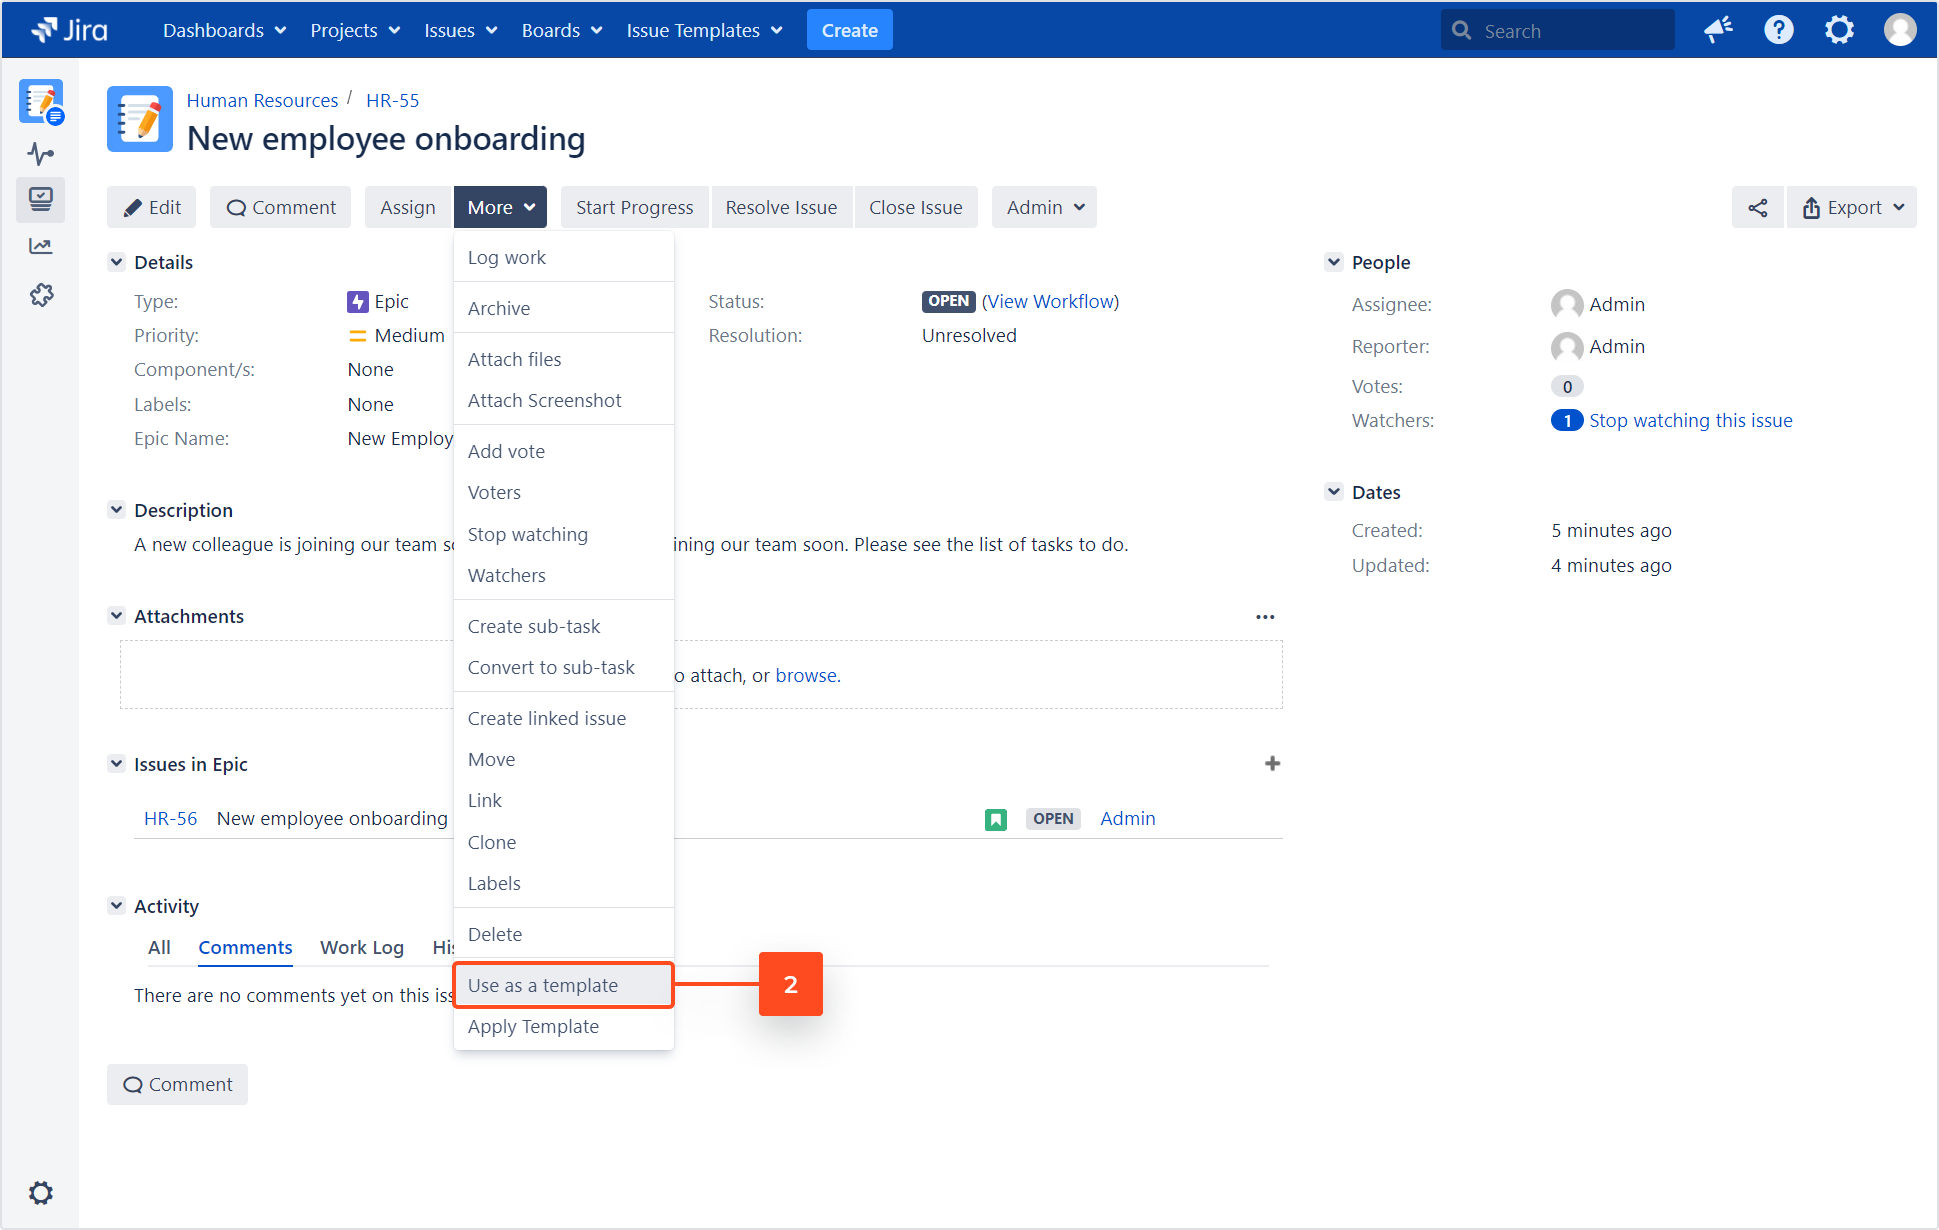
- Select More > Use as a template.
If you are using this feature on an existing template, the navigation item will be called Duplicate template.
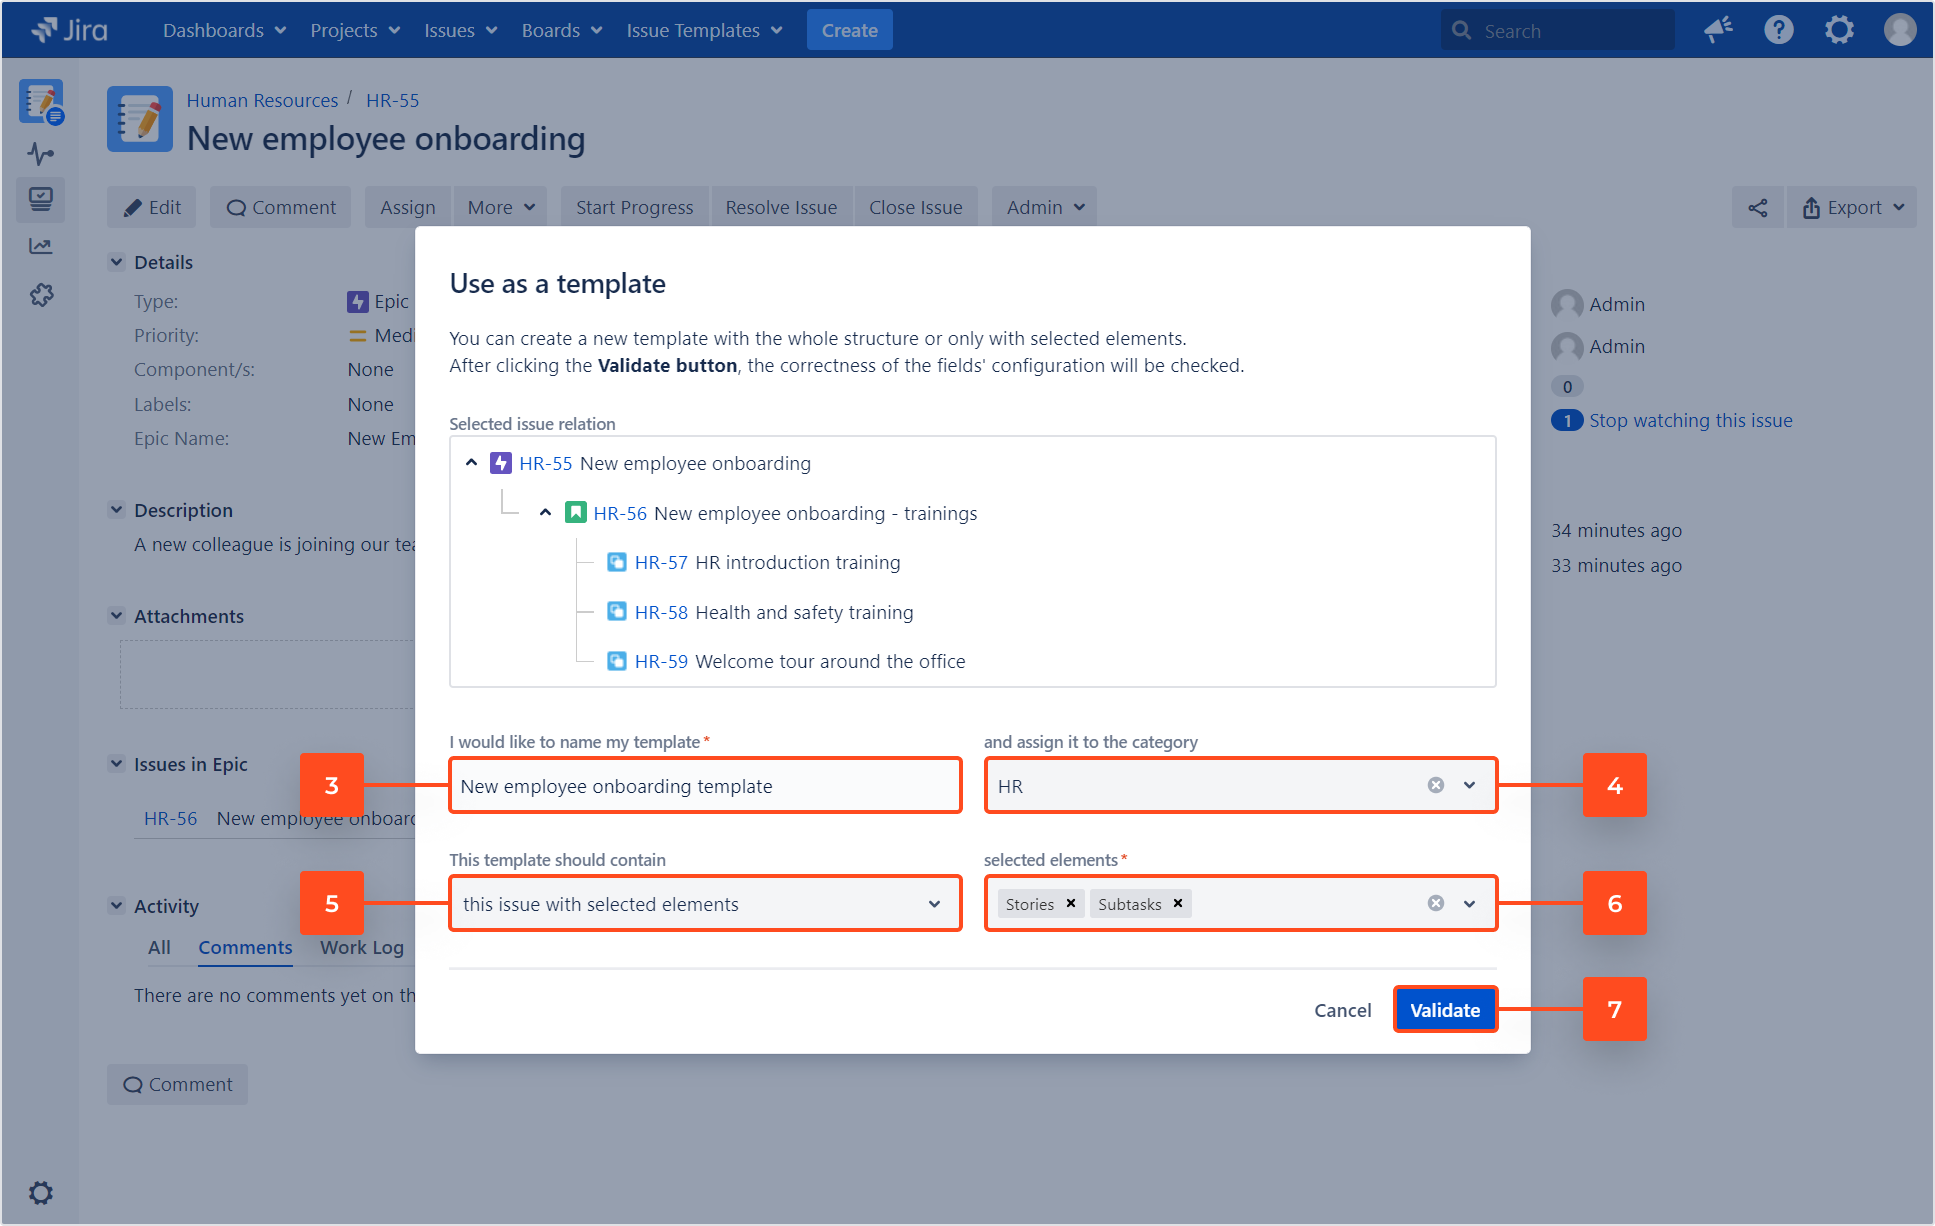
- Give your template a name. Users will see it while choosing a template on the screen. (It applies only to the parent issue.)
- Assign the template to a category (optional).
You can also create a new category right on this screen. In order to do so, type in the name for the new category and click Create.
- Choose the template’s scope. You can choose from:
- this issue only
- this issue with selected elements
- the whole structure
- Choose which parts of the structure should be included in the template. This setting is optional and will only be visible after selecting this issue with selected elements. You can select one or more of these elements:
- stories
- subtasks
- issue links
Templates for stories, subtasks and issue links will be created only if the issue contains them.
- Click Validate.
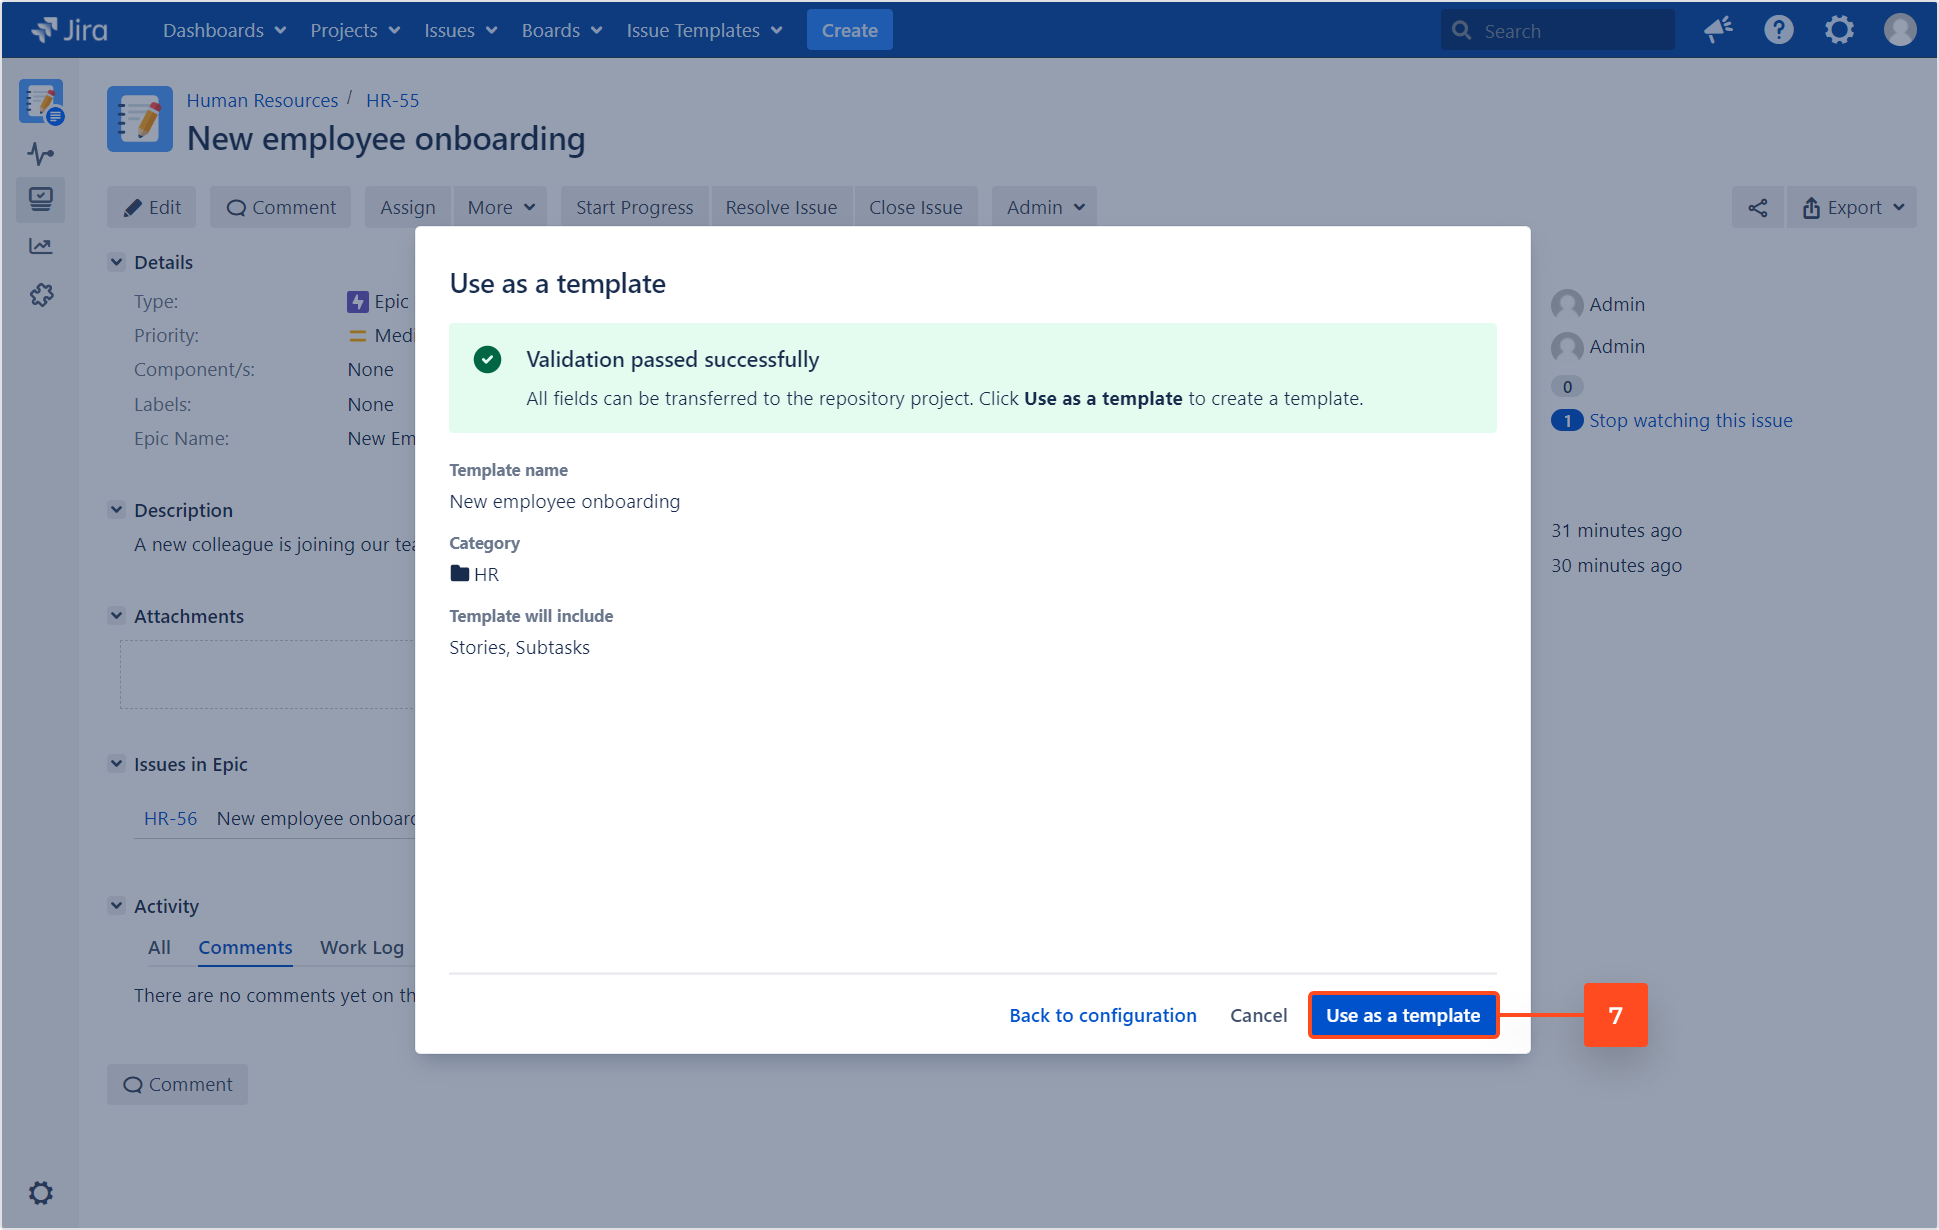
- On the next screen, click Use as a template.
Result
The issue became a template and can be found in the Template Repository.
View the results
To view the newly created template, click the link in the flag that appears right after the process is finished. It is especially helpful if you’ve reproduced a larger structure of issues, as all the templates will be listed on the next screen:
Steps
To view a list of all the newly created templates:
- Click Templates in the notification flag:

- View the results:

Limitations
Please note that in case of duplicating an existing template, the second template won’t be an exact copy of the original template. Some properties, like the availability settings or variables, need to be configured separately afterwards. Below you’ll find all the information on what can be copied and what needs further configuration.
What is possible
Definining the scope
Any Jira issue can be turned into a template. You can choose to include subtasks and linked issues as well. Here are the possible scope settings:
- Only the parent issue
- Parent with stories
- Parent with subtasks
- Parent with issue links
- Parent with stories and subtasks, stories and issue links, or subtasks with issue links (you can select each type separately)
- The whole issue structure that includes stories, subtasks, and issue links
Preconfiguring the template
During the setup process you can configure the following properties of your future template:
- Template name (applies only to the parent issue)
- Template category (all templates created from the given structure will be assigned to the same category)
- Set of fields (the Set of fields of the future template will consist of all non-empty fields from the original issue)
What needs to be done next
Template configuration
Any template created using this feature needs some additional configuration to work best for you and your team. After creating the template, reopen it and you’ll be able to set up the following:
- Fields (if you’d like to change the Set of fields made up of all non-empty fields from the original issue)
- Availability
- Context
- Variables
- Create Structure post function
- … and any remaining advanced features you’d like to use
Project configuration
- Template Repository project. In order to make a template from an entire structure of issues you’ll need to add all the issue types used in your structure to your Template Repository project.
- Target project. You’ll need to configure the project where your template will be used, too. Most important things to remember about are:
- adding the Template custom field to relevant screens
- adding the Create Structure post function to the workflow if you want to copy values from the template
Version 8.2 and older
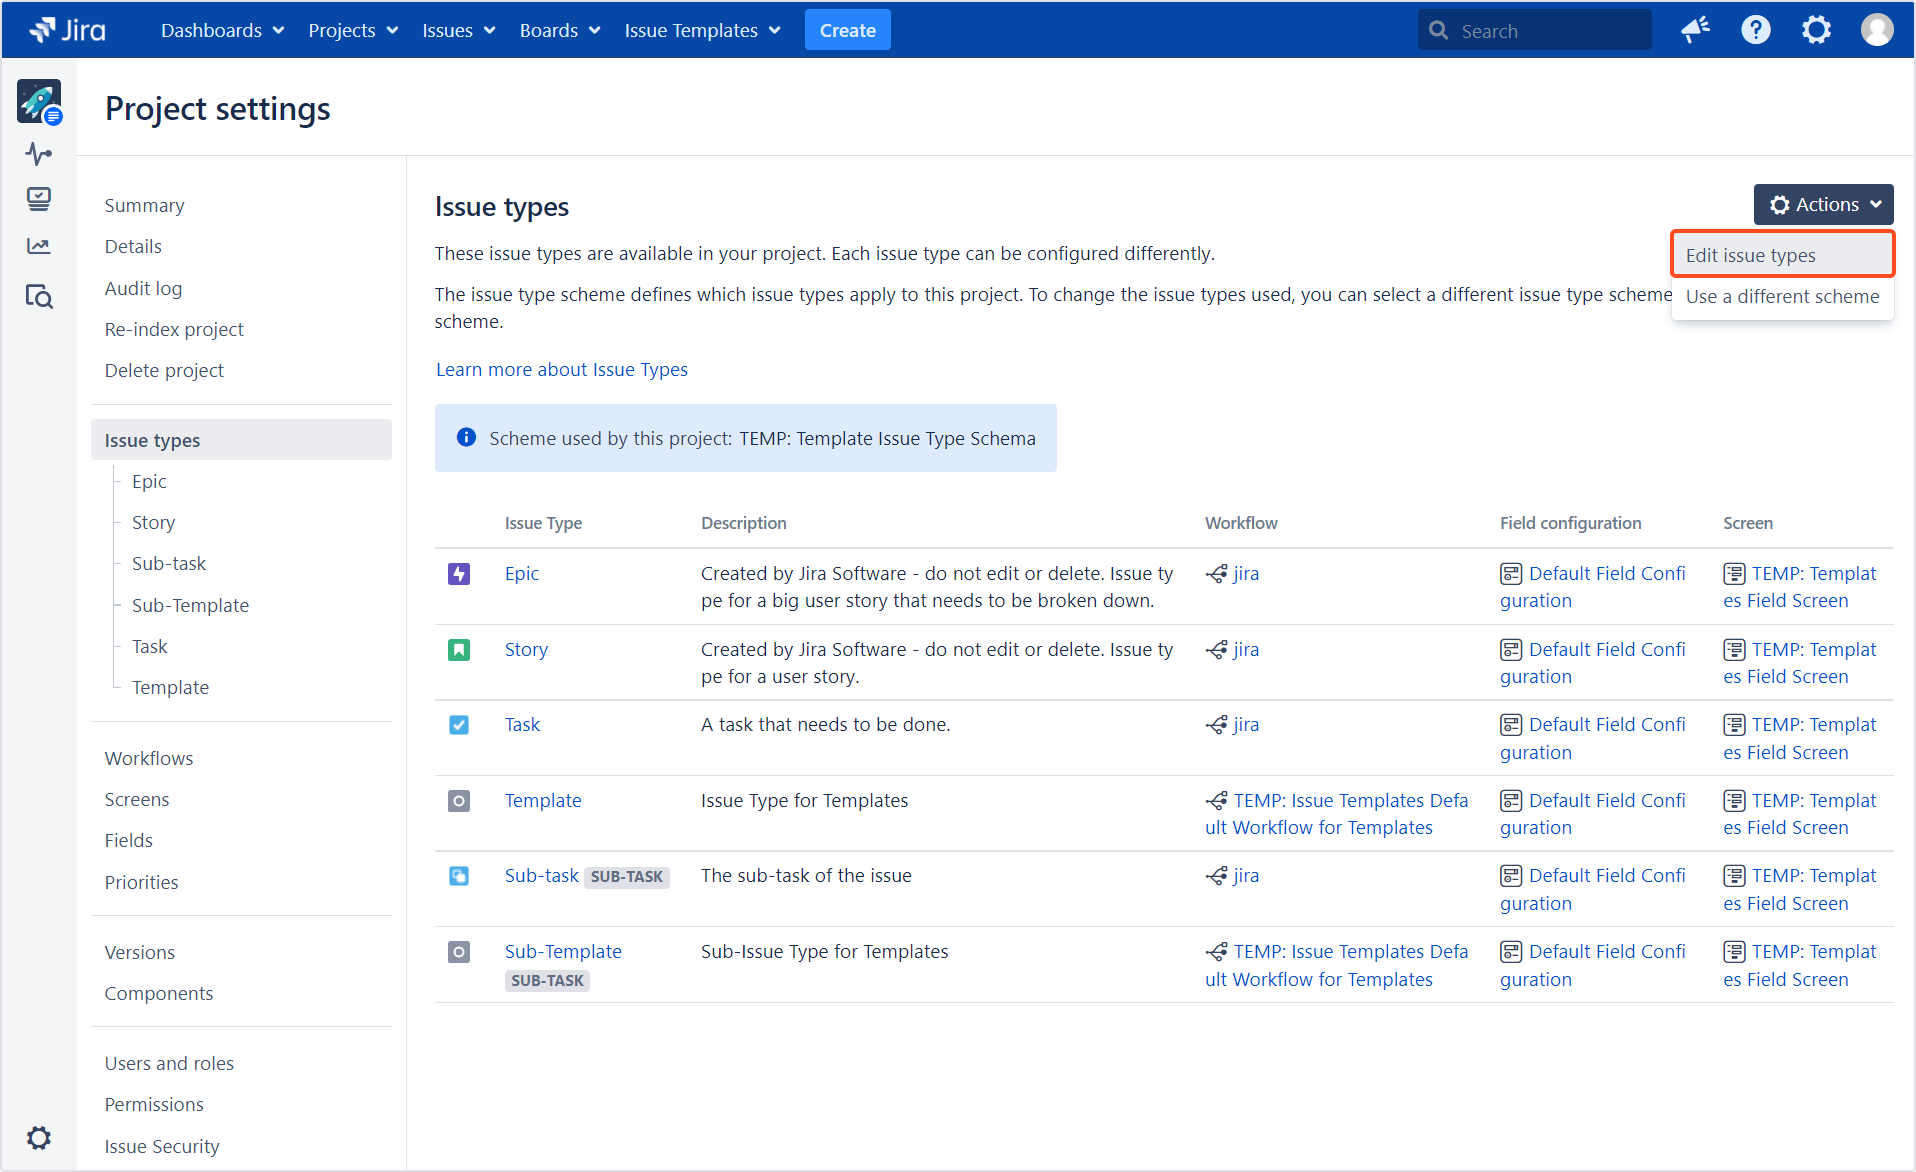
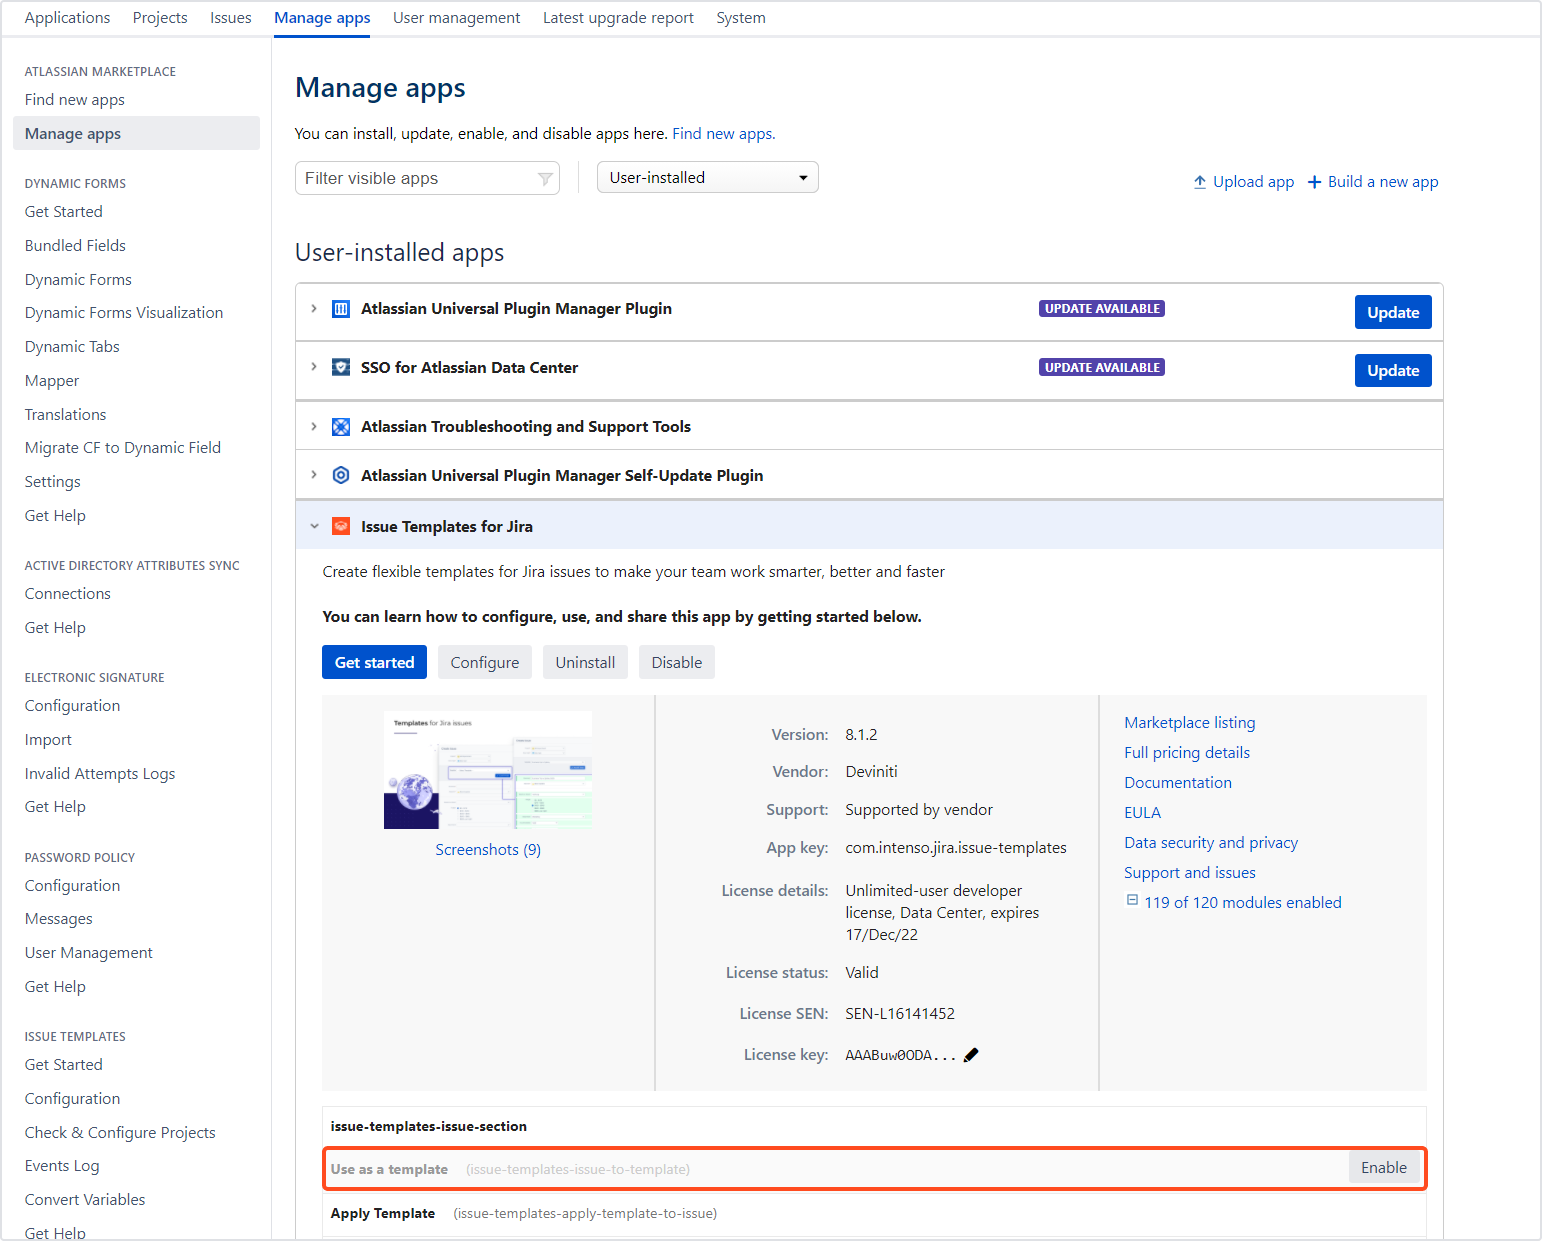
In older Issue Templates versions there was an additional necessary step to be taken in order to enable Use as a template. If you are still using one of the older versions, you can manually enable or disable this feature under Manage apps.
In the older app versions this functionality has very limited capabilities. We highly recommend using the latest version 8.3 where all the most useful settings are supported.
Steps
To enable Use as a template:
- Go to Administration > Manage apps.
- Expand Issue Templates for Jira.
- Open the modules enabled list.
- Select Use as a template (issue-templates-issue-to-template).
- Click Enable.
Result
Use as a template is enabled.
- Restarting Jira doesn’t affect this configuration. If you enable Use as a template and restart Jira, settings will be kept.
- App installation won’t change Use as a template settings. The feature will still be enabled.
If you can’t find the answer you need in our documentation, raise a support request.
