TestFLO – How to use test steps

Test steps are a key part of every test. They provide instructions that have to be followed for the test to be performed correctly. In order to write effective test steps, testers need to have appropriate skills but also use a test management tool that meets the requirements of their organization. TestFLO introduces the Steps custom field used to design and execute test steps. In this article, we explain the basics of this field.
Step by step
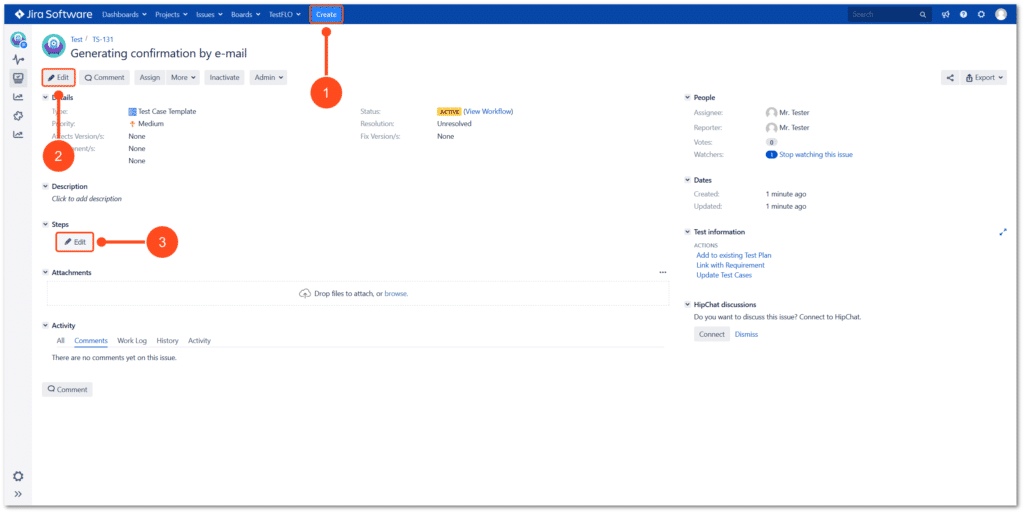
The first step to creating test steps in the Steps panel is switching into the edit mode. You can do that in three ways.
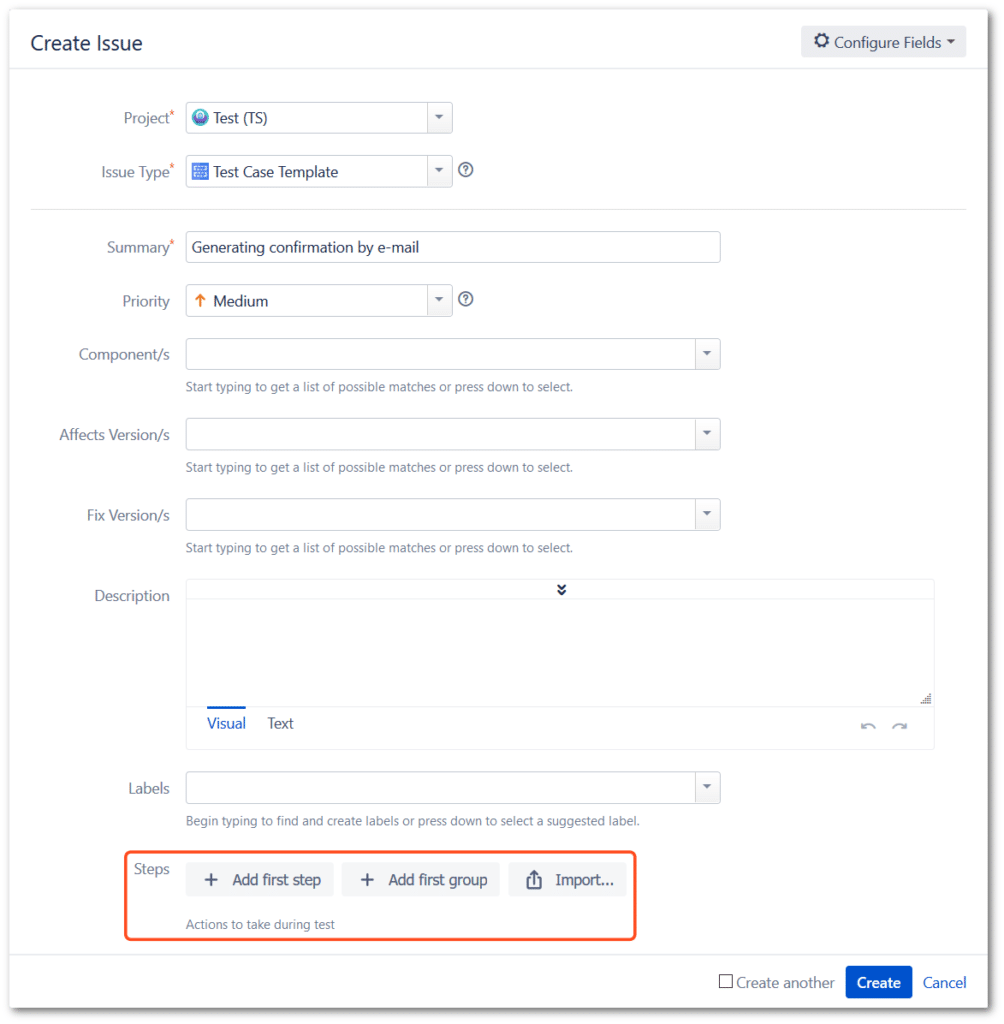
1. Edit on the ”Create Issue” dialog
After clicking “Create” on the Jira top navigation bar, the “Create Issue” dialog is displayed. You can edit Steps after selecting Test Case Template.
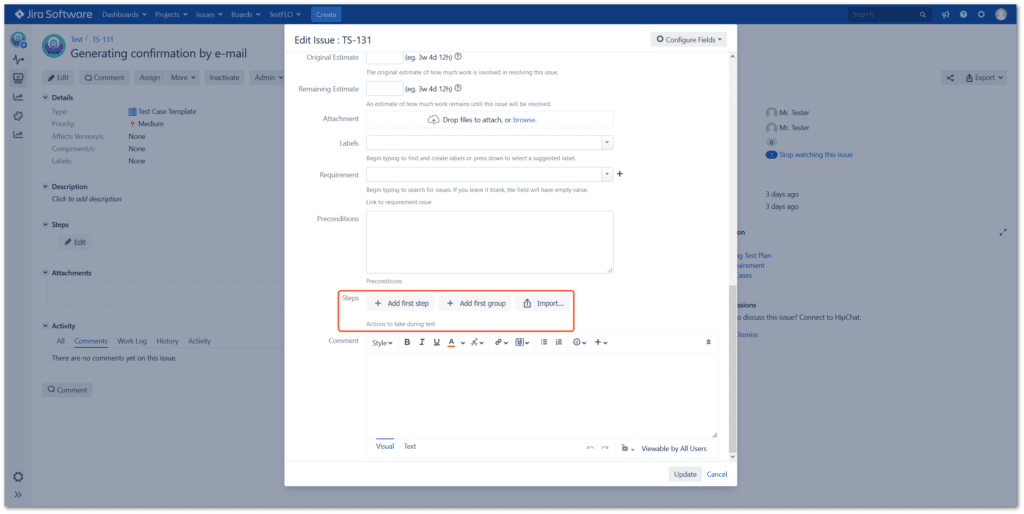
2. Edit on the “Edit Issue” dialog
You can use the Edit button on the created Test Case Template issue. After this operation, you can edit the steps.
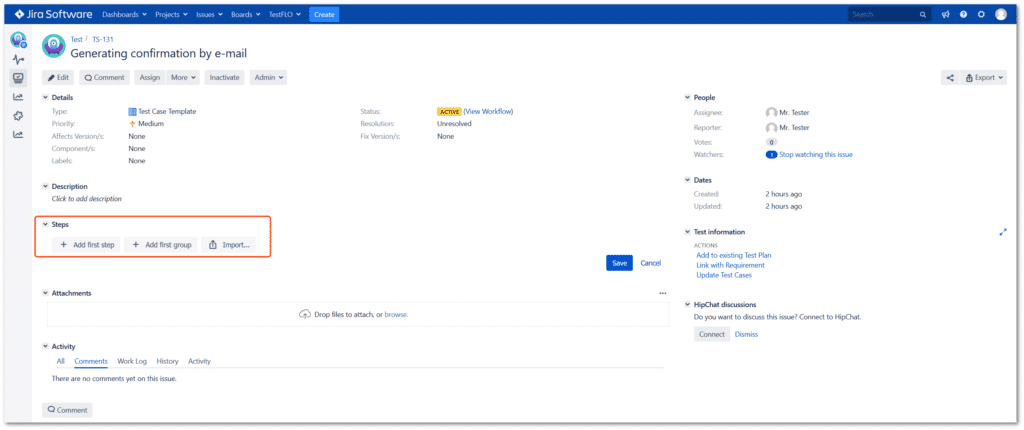
3. Edit mode in the Steps panel
You can also enter the step editing mode by clicking Edit on the Steps panel, which is located on the view of the created Test Case Template issue.
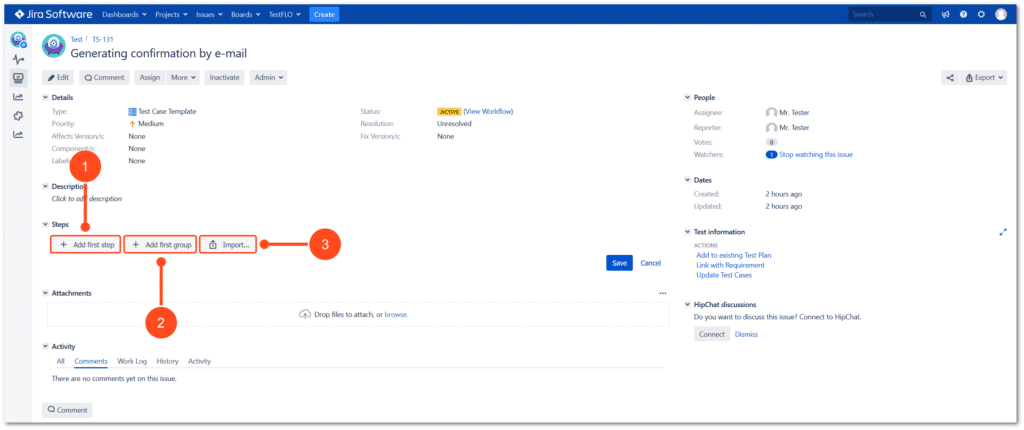
The next step in creating steps is adding them. If you managed to enter the edit mode, you can start designing your tests.
1. Add a step
After clicking Add first step it becomes possible to write the first step.
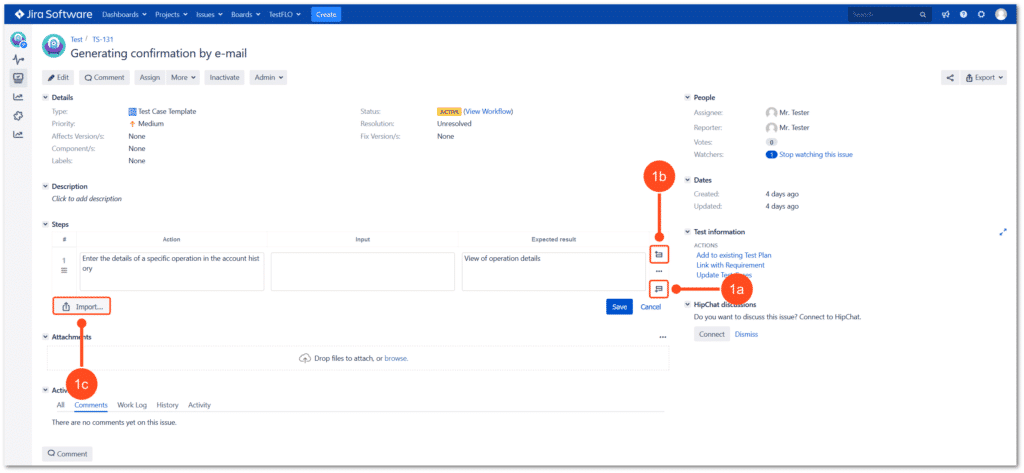
1a. Click Add step below to continue writing steps.
1b. If you forgot to add a step above, use Add step above.
1c. To add the steps stored in the CSV or JSON file, use the Import option.
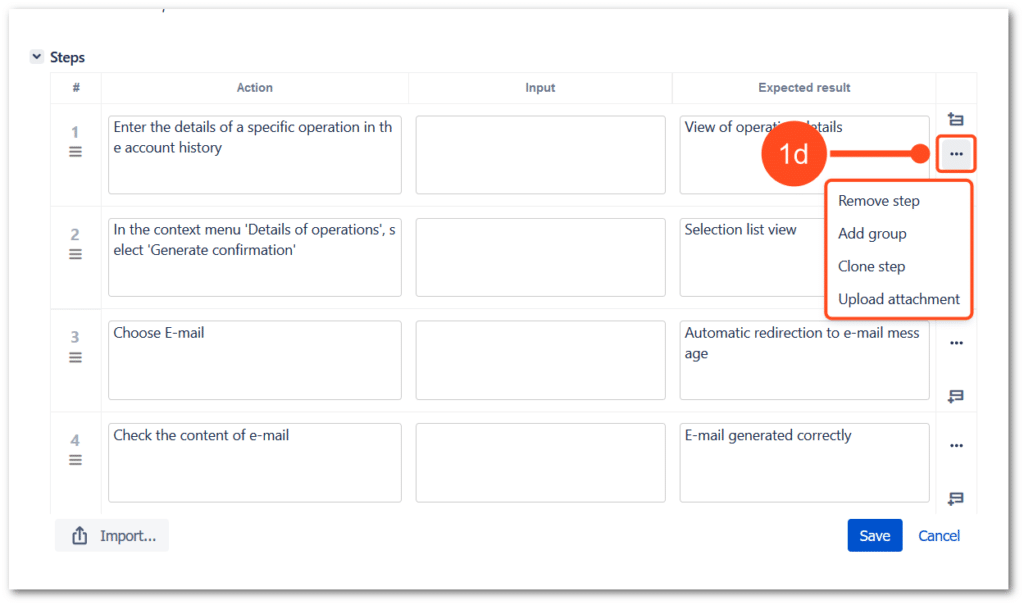
1d. Each step added allows you to:
- remove it
- add a group
- clone it
- upload an attachment.
2. Add the first group
If you would like to group test steps, start by adding a group using the Add first group button.
2a. Each group allows you to:
- delete it
- add another group
- add a step below
- add a step above (only available for the first group added)
Additionally, if we need to change the order of steps or groups, we can use the drag & drop feature.
After completing all the actions you planned to perform in the panel, click Save in the bottom right corner to save all changes and close the editing panel.
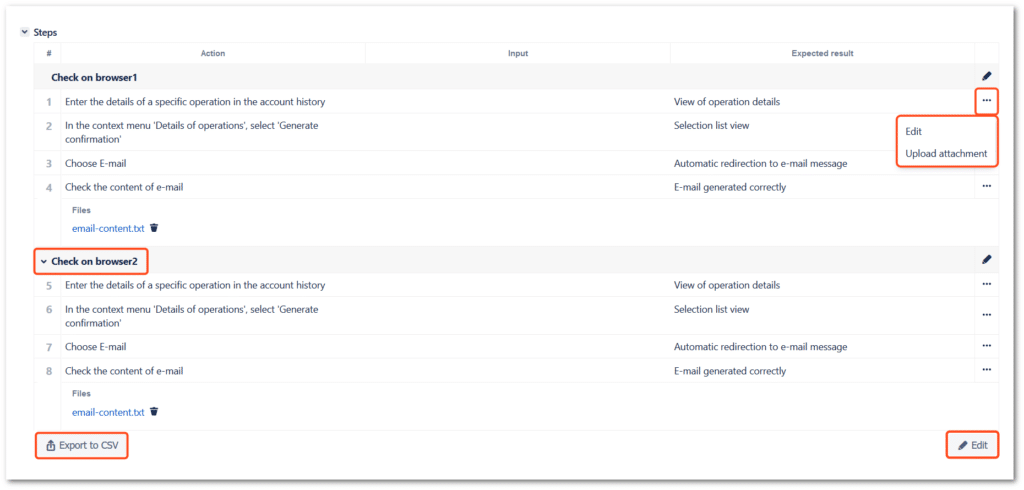
After saving, the view mode is displayed where you can:
- edit or add attachments to created steps,
- enter the edit mode,
- expand and collapse a group of steps by clicking on its name,
- export steps to a CSV file.
The above options are available in the Steps panel of the Test Case Template. In the Test Case, we have several additional options.
3.Steps execution
The Steps panel looks differently on Test Cases than when it appears on Test Case Templates. An additional column appears, which allows you to choose the status of the step.
Each step in the Test Case has a button that allows you to:
- edit itadd a comment
- add attachments
- create a defect
- link the defect.
What more can you get from Steps?
Steps is an intuitive and easy-to-use field (custom field) for designing and performing tests. However, you can make use of advanced functionalities based on this element.
The field configuration allows us to adapt it to the needs of a given project thanks to the ability to define:
- columns available in Steps.
- statuses of steps available for selection when executing them.
The Steps field can also be used to model workflow by:
- the validator and condition checking if the field has any steps.
- the condition checking if steps have valid statuses.
- the post function that sets statuses in steps of a defined status.
In addition, the field content can be searched in the JQL query in Issue Navigator, and the REST API will allow you to change the status of the step or edit their content.
Summary
Creating test steps in the TestFLO – Test Management for Jira app is not complicated and can facilitate the work at three stages – writing tests, performing them, and reviewing them. In addition, since we aim to create an application that meets the needs of our customers, we’ve added several options for customizing the Steps panel for your project. Thanks to this, it’s possible to choose the number and name of columns or modify steps’ statuses. Creating them is only the first step – it’s also important to apply the appropriate rules when writing them.
If you’d like to test TestFLO yourself, take a free 30-day trial from the Atlassian Marketplace. You can also read more on bringing test management process inside Jira on our blog:

