How to configure workflows in Jira

One of the essential features of Jira that stands behind its incredible success as a multi-purpose project management tool is workflow configuration. If your teams use Jira to coordinate work, manage tasks, collaborate, and update one another about the project’s progress, you can be sure that they’ve been using Jira workflows.
But are they making the most of what Jira has to offer in workflow configuration? Probably not.
The truth is that Jira offers extensive customization capabilities. Many teams have no idea that they could configure their workflows to match the unique way they work on tasks.
In this article, I show you how to configure workflows in Jira to help your teams take full advantage of this incredibly productive tool.
Configuring Jira – the basics
In general, Jira configurations can be challenging because configuring one thing usually means that we also need to configure other things.
Here’s an example:
Let’s say that your team has been using default Jira workflows for a while, but they’re not enough anymore. It means that it’s high time to customize your workflow. Once you get down to the task, however, you’ll realize that it’s not only workflows that you need to be customizing.
You’ll also have to address elements such as workflow schemes and transitions, issue screens and resolutions, issue configuration schemes, and many more. You probably didn’t have a clue these things existed before. And now you need to make sure that they work with your customized workflow. That can be very confusing if you don’t understand how all these elements fit together.
That’s where advice from a seasoned Jira expert can come in handy. Our consultants help organizations across many different industries to configure and optimize workflows for their teams using advanced settings and Jira apps.
Many project managers try to avoid that and encourage teams to work on the current workflow. When an organization invests in a new tool, it might be reluctant to take extra efforts in setting it up properly. And that might later cause problems, making it even more challenging to modify or adjust the tool to match the individual needs of the company.
Still, it’s worth to make the most of Jira when it comes to workflows – especially since the tool has so much to offer in this area.
Here’s a short guide to example Jira workflows for small, medium, and large projects.
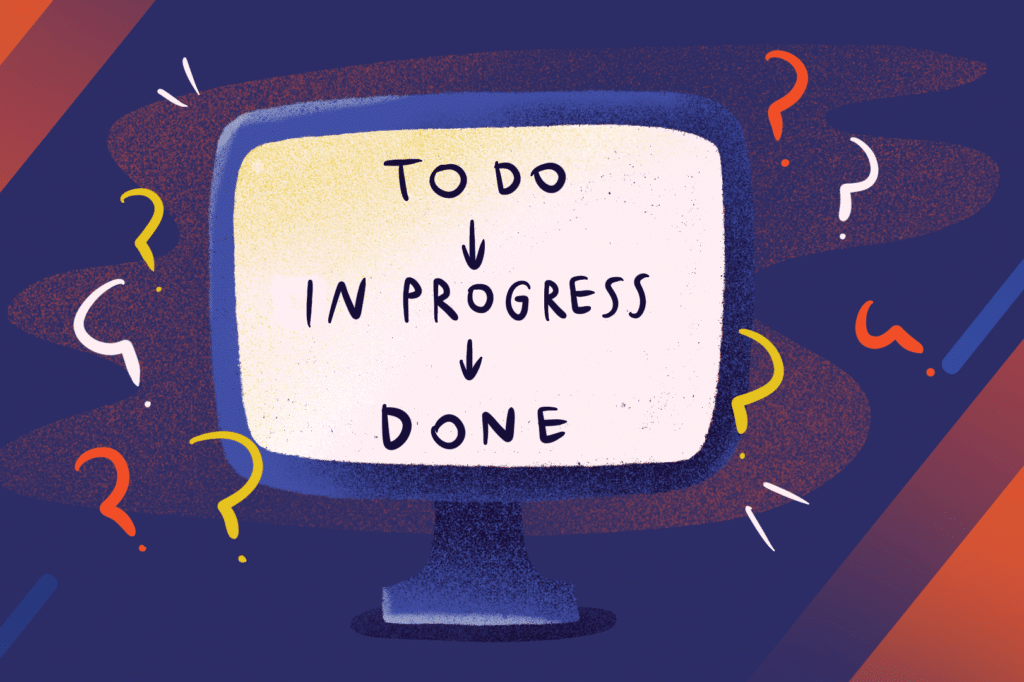
Jira workflow for simple projects and small teams
This simplified Jira workflow works best for small teams (think 1 or 2 people). It also helps to coordinate tasks when the project has only begun. For example, you can use it for investigation projects or experimenting with different approaches as a team.
The main idea behind this workflow is allowing the team to schedule tasks that don’t require any planning or testing. It’s perfect for projects with small objectives. It’s quick and straightforward, but it’s not really suitable for a regular project where planning and testing are part of the process.
Medium Jira workflow
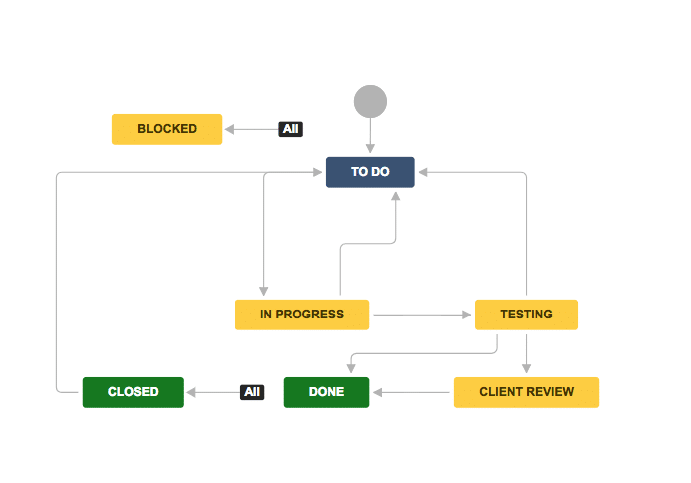
This workflow offers great support for teams that use Kanban boards to organize their work. The main idea behind this workflow is adding extra people and transitions – for example, for client reviews or tests.
For example, you can set the task’s status as Open when a team members needs to prepare. You can then rework the user story for developers to help them understand what work it represents and make sure that all assets are there, ready to be picked up by the development team.
Jira workflow for large projects
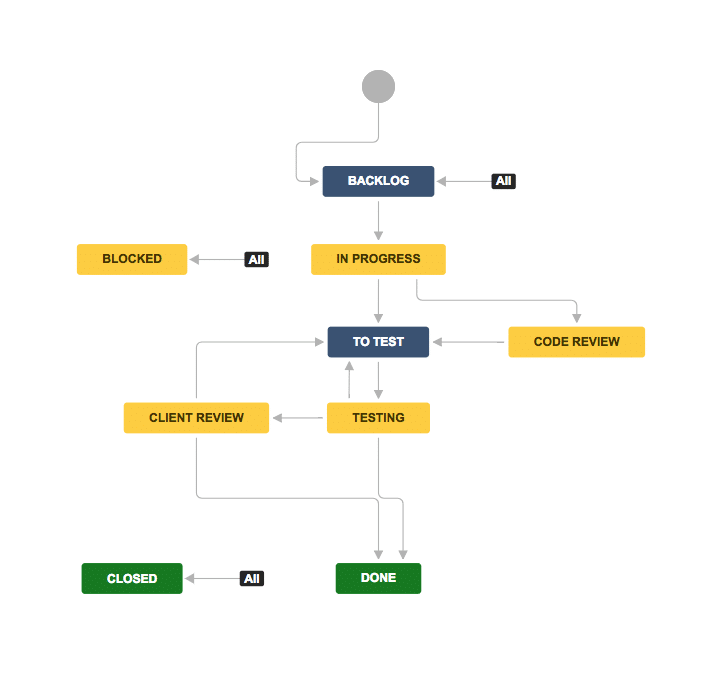
If your project lasts more than two months and requires the collaboration of people from different departments, this workflow is for you. Note that it requires a rigorous ticket flow, so make sure that your team is aware of that before implementing the workflow.
Teams can use this workflow when following Scrum, but also working on fixed projects. It helps to create a transparent timeline – and provides clear statuses displayed on a board. The workflow won’t allow your team to cut corners and take an issue to Done before it passes all the previous statuses.
The workflow allows creating a structured backlog and ensures that your team doesn’t make mistakes. You’ll also gain a better overview of the running sprint or the entire project. However, for the workflow to work, you need to follow the process in detail – and sometimes, that might mean that your team will need to take more steps than before to complete a task.
Set transition screens and required fields
Each transition in Jira contains several extra options for making different actions in the project management tool.
Triggers
This part comes in handy for developers who work with BitBucket and GitHub. By setting up the configuration right, you’ll enable the development team to focus on their tools and code without having to manually move the ticket to statuses like ‘In progress’ or ‘Code review.’
Validators
This is a powerful feature managers can use to take better control of their project. For example, you can set it in a way that if the time logged on a task equals 0, then it’s impossible to transition the issue to the next status. This handy customization can serve as a reminder for your team to input their logged hours first. It’s especially important if your team members aren’t used to doing that. That way, the customization can help you create a habit you’d like your team to follow.
Here’s another example:
Try setting the ‘Original estimate’ field located in the transition from ‘Backlog’ to ‘In progress.’ That way, you’ll make sure that team members add an estimate or story points to the issue before starting to work on it.
Post functions
If you forget to customize post functions together with your workflow, you risk that your team’s work becomes chaotic.
Whenever you create a new workflow, make sure that you set a flag and resolution for all your issues. Note that Jira has two ‘Done’ statuses. One is for the board itself, and it shows that an issue is done within a board. The other one is ‘Resolution: Done’ and it’s far more important because it means that an issue will appear as active until a resolution is applied to it. That’s why you need to add the following post function: ‘Update field: Resolution — Done.’ That way, all your issues will become ‘Done’ in all queries and filters.
The takeaway
Configuring and optimizing workflows in Jira is more complex, and it seems, but once you get it right, you can be sure that your team becomes more productive in their daily work.
Are you looking for Jira experts who could help you customize your workflow for optimal performance? Get in touch with our consultants; we help companies make the most of Jira workflows for software development and beyond.


